 [1]
[1]
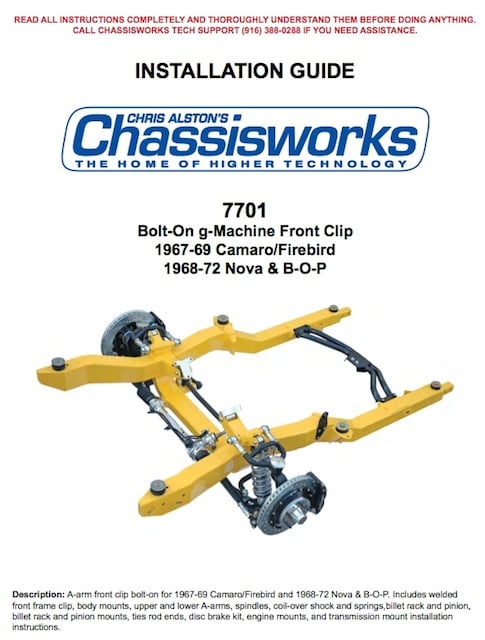
When it came time to work in earnest on our latest project car build, our 1969 Camaro aptly named Project Blank Slate [2], we knew that a chassis upgrade was in order. Finding a front clip was not difficult. Finding a front clip designed by a long time chassis expert with cutting edge technology and equipment led us to Chris Alston and his company. Chris Alston’s Chassisworks [3] offers several different packages for the classic musclecars that were designed with bolt-on front clips. Our goal with this task was to add a new clip and front suspension to our vintage vehicle while taking advantage of modern technology for performance on the street.
This was engineered to be a do-it-yourself bolt-on kit. If you take it to a shop and have them do it, you’re going to pay a lot more money. -Chris Alston Jr.

“This install is a cake walk,” so says Chris Alston, the creative genius behind Chris Alston’s Chassisworks [4]. If you don’t already know, Alston’s company has been in business for over thirty-five years creating, developing, and manufacturing different components for street and racecar chassis.
Approaching something like suspension overhaul makes a lot of weekend fabricators nervous. But that’s exactly what Alston says doesn’t need to happen. “The honest truth is, if you pay a shop to upgrade your car, it doubles the price. By doing it yourself you not only save the aggravation of repeatedly returning the car to the shop for follow-up repairs, but also you can cut the cost by 30 to 40 percent.
 [5]
[5]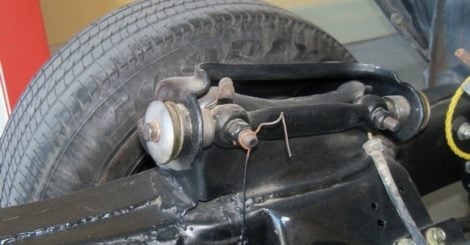 [6]
[6]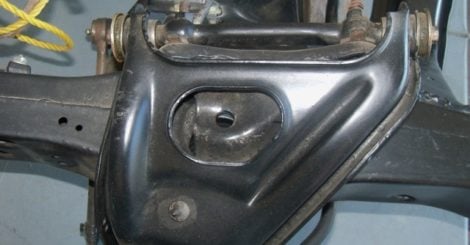 [7]
[7]
Our project car was in dire need of suspension help. The stock pressed steel A-arms, 45-year old anti-roll bars and front clip just weren't going to stand up to the punishment that we planned on dishing out. Chris Alston's Chassisworks provided the info that we needed to turn this sleeper into a real Pro Street g-Machine.
Alston explained the intent behind the Pro-Touring frames for musclecars, “In the old days people just wanted them to accelerate, but they had to be really fast and stop really good, and now people expect them to turn, too. It isn’t some brand new thing. We built cars like that in the late ’70s. It’s just that what has happened in the market is that the whole awareness of the musclecar is based entirely on the fact that as people get older, you want what was cool when you were in high school. The whole Pro Touring/G-machine market is the 100 percent natural progression of the aging of the marketplace.”
 [8]
[8]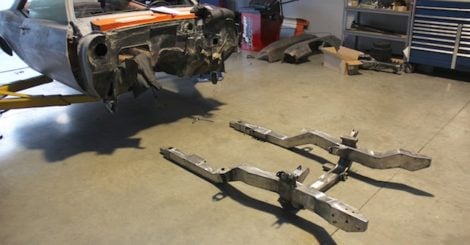 [9]
[9]
Alston's Bolt-on g-Machine front clip for 1967-69 Camaros and Firebirds and 1968-72 Nova or Buick/Olds/Pontiac are engineered to be far superior in every aspect to the factory front clips. Designed with modern technology, these suspension components involve engineering that was unthinkable when the Camaro was new.
What We’re Dealing With
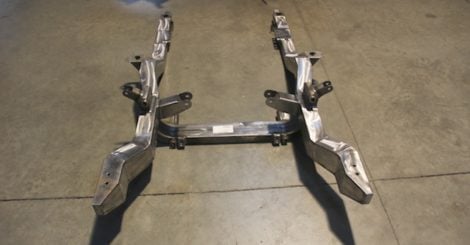
Okay, let’s say you are willing to try, on your own, a ’69 Camaro suspension overhaul with Chassisworks. Chris Alston’s Chassisworks Bolt-on g-Machine front clip (Part #7701) for 1967-69 Camaros and Firebirds [10] and 1968-72 Nova or Buick/Olds/Pontiac (B-O-P) counterparts, seems innocent enough.
 [11]
[11]
About Chris Alston
Alston started his career in the automotive aftermarket in 1973 and has owned a manufacturing company ever since. He has personally been involved in the construction of hundreds of vehicles produced in-house and delivered thousands of chassis kits over the years.
The drag race door slammer chassis kit was invented by Alston along with a large number of the industries current standard components. He wrote the first book on drag race door slammer chassis tuning.
Alston has been involved with the design and development of shock absorbers since 1979. VariShock is a Chassisworks brand designed and manufactured in-house. Chris Alston’s Chassisworks was one of the first companies to market bolt-on g-machine suspension clips, years before pro-touring even became popular.
As an author, Alston has written thousands of pages of tuning guides, product instructions, technical manuals and installation articles. He has spoken to thousands of customers at chassis seminars all over the country. Chris Alston is also a recognized leader in modern manufacturing methods and automation.
The package is an A-arm front clip bolt-on for the Gen 1 Camaros/Firebirds that includes the welded front clip, body mounts, upper and lower A-arms, spindles, coil-over shock and springs, billet rack and pinion with billet rack and pinion mounts, tie rod front ends, disc brake kit, engine mounts and transmission mount, with detailed installation instructions.
Why Alston’s Chassisworks?
Why should I or anyone else choose suspension components from Alston’s company? What makes their Camaro front frame worthwhile?
Alston can tell us why. “I decreed it was best!” he says with a laugh.
But all kidding aside, it’s more than that. In the ’70s, Alston developed the first door slammer chassis kits. In the process, Chassisworks became one of the most experienced chassis builders in the industry. The NHRA has awarded the company many Best Engineered awards, setting a standard that they continue to live up to.
According to Alston, Chassisworks has a very sophisticated $10 million dollar instrument that has aided them in their design process and has let them stay one step ahead. “We’re the only ones with a laser scanner,” Alston said. That scanner gives them a 100 percent digital scan of a ’69 Camaro from inside the car. That way they know exactly where things belong and are able to develop exacting coordinates.
While many others start with a stock frame, Alston’s front frame is 1-inch wider than stock. This compensates for the frame distortion that comes as a result of welding. If you’re still not convinced Alton is top of the line, consider this: Chassisworks took two high school students and gave them the frame, told them to upgrade the car. Four days later they finished and drove the car home.
 [12]
[12]Chassisworks provides a very complete set of instructions with their front clip kits.
What about the instructions? Any DIY install goes smoother with a set of good instructions. Instead of providing a set of blueprints that might intimidate the first-time builder, Chassisworks has developed a very comprehensive, complete and easy to understand instruction manual that weighs in at 104 pages.
Every step is documented with text and detailed photographs throughout the manual. “We’ve spent years making this as easy and thoroughly complete as possible,” says Alston.
“We’ve always had good instructions. If you buy our bolt-in rear suspensions, some of those are 30-35 pages long. Our bolt on front clip instructions are over 100. We have 113 in one and 136 in the other. Not because we think people are stupid – if we explain exactly how it’s supposed to go on the car, exactly how to align it, exactly what all the options are, then you’re going to have a much better chance of ending up with something you’re proud of.”
The instruction manual for the bolt-on front clip can be found here: Instruction Manual pages 1-35 [13], Instruction Manual pages 36-70 [14], Instruction Manual pages 71-104 [15].
 [16]
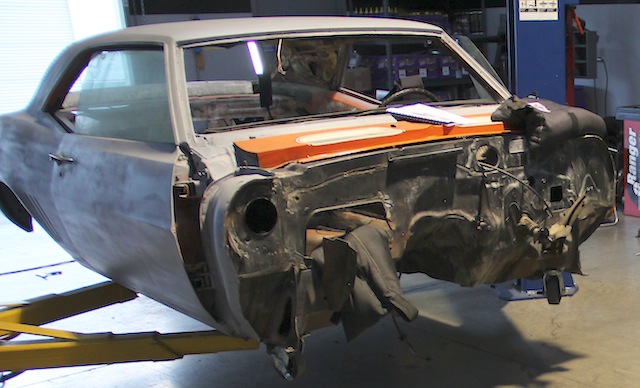
[16]We began by removing all the original components and the factory front clip. Because ours was a project car that someone else started but didn’t finish, we didn’t have to worry about many of the components. In very short order we were left with a bare firewall.
 [17]
[17]
What Comes In The Box?
- g-Machine Bolt-on Subframe (Part #7701)
- Camaro Body Bushings (available in Billet or Urethane)
- Subframe g-Connectors (Part #5601-20)
- g-Connector Center Support (Part #5601-32)
- Driveshaft Safety Loop (Part #TCP-DSL-01)
- Side Motor Mounts (available in LS, SB, BB or V6 style)
- Transmission Crossmember (Part #7951-5916F10002)
- g-Machine Headers (available for SB or BB)
- Rack & Pinion Steering (available in manual or power)
- Steering Column Components (for manual or power)
- Tie-Rods (Optional BumpSteer Tie-Rods available)
- Street Machine A-Arms or g-Machine A-Arms
- Billet Balljoint covers
- Screw-in Balljoints
- Anti-Roll Bar (Part #916155)
- g-Machine Sculpted Spindles (Part #916186)
- VariShock Coil-Over Shocks
- VariSprings
- g-Street Directional Vaned Rotors
Getting Started
According to Alston, it’s easiest to install the front suspension components and align the front end geometry before installing the front clip to the body. Who are we to argue that?
Alston’s Bolt-On g-Machine Front Clip for first generation Camaros and Firebirds takes advantage of modern computer design and manufacturing that was not available when these cars were manufactured.
Chassisworks prides itself on having computing power that exceeds anything imaginable when Detroit originally designed these chassis. Chassisworks has designed and manufactured every piece specifically for this purpose, as over 400 new parts were created during the design and manufacturing process.
The assembly begins by installing the upper and lower A-arms and spindles to the front clip frame. The large 3-inch by 4-inch subframe strengthens critical chassis stiffness from the crossmember through the firewall mounts. The crew at Alston is very proud of the strength of their bolt-on front clip. While it sounds pretty intricate, it’s much easier than it looks or sounds. If you can turn a wrench and follow the instructions, you can do this installation to perfection.
Once the A-arms and spindles are installed, the steering rack can be mounted to the frame and hooked up to the spindles. The steering rack is designed for easy installation and the clip’s frame, spindles and steering rack are manufactured with flat surfaces for ease in measuring. This plays a key role in the next step, front end alignment.
 [18]
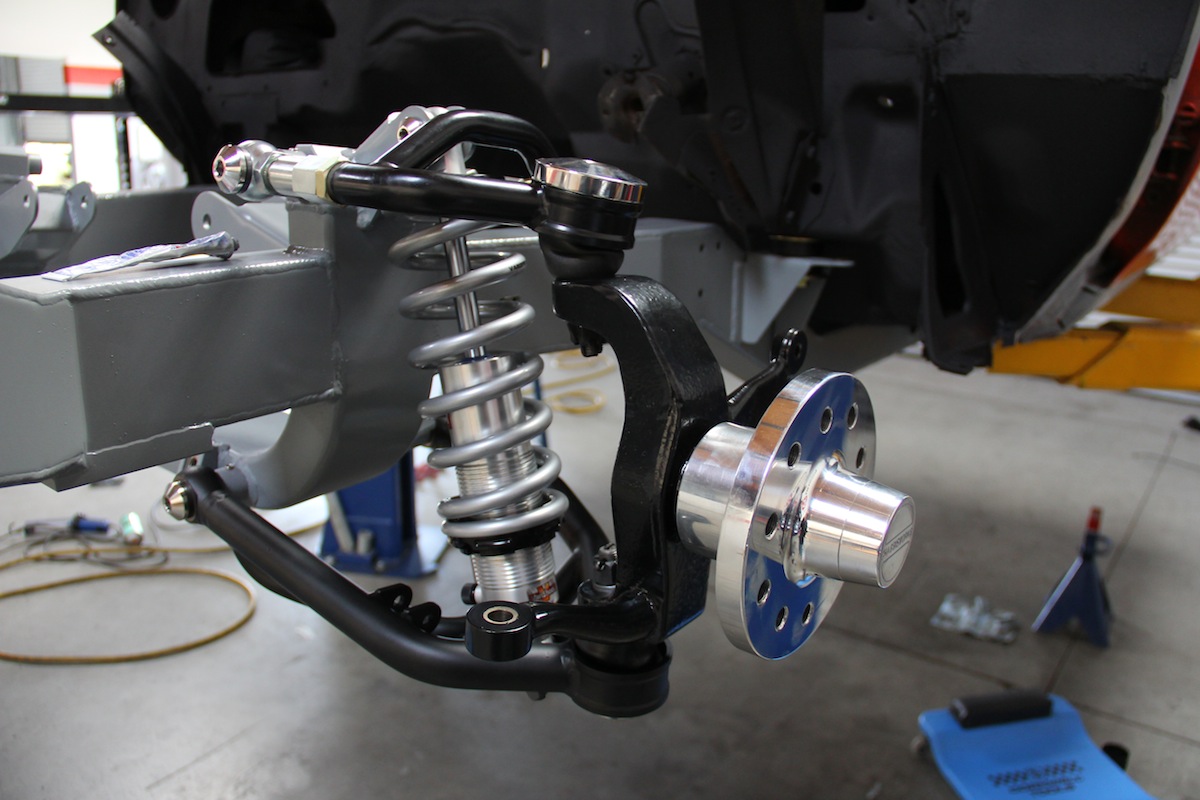
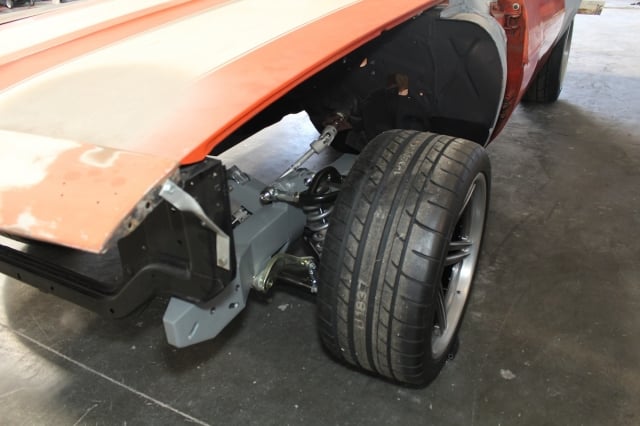
[18]The g-Machine spindle is taller than OEM spindles for increased camber gain during body roll which keeps tires in better contact with road surface. The spindle also has a two-inch-drop that lowers ride height and center of gravity to improve overall handling.
According to Alston, “By making our own billet rack-and-pinion assembly, we are able to offer perfect front-suspension geometry at the correct hub-to-hub width.” The rack and pinion unit is placed forward of the axle centerline which creates better oil pan clearance, rotates to eliminate sharp universal-joint angles and improve exhaust clearance. This is referred to as a front steer setup.
 [19]
[19]Alston’s lower A-arm increases load capacity and stability during braking and cornering. The lower A-arm’s length reduces track-width change and roll-center movement during suspension travel for smoother transitions entering and exiting turns.
Aligning the front end is also well explained and simplified by Chassisworks instruction manual. It’s so easy in fact, you’ll wonder why you’ve ever paid an alignment shop to square up your front end.
The precision measurements and suspension design eliminates an undesirable effect called bump steer. Bump steer is when your wheels steer themselves without input from the steering wheel. This undesirable steering is caused by the spindle moving up and down with the road surface and interacting with improper length or angle of your suspension and steering linkages. Alston says this kit has “virtually no bump steer in 6-inches of suspension travel.” This enables predictable handling regardless of the vehicle’s changing pitch or roll state.
 [20]
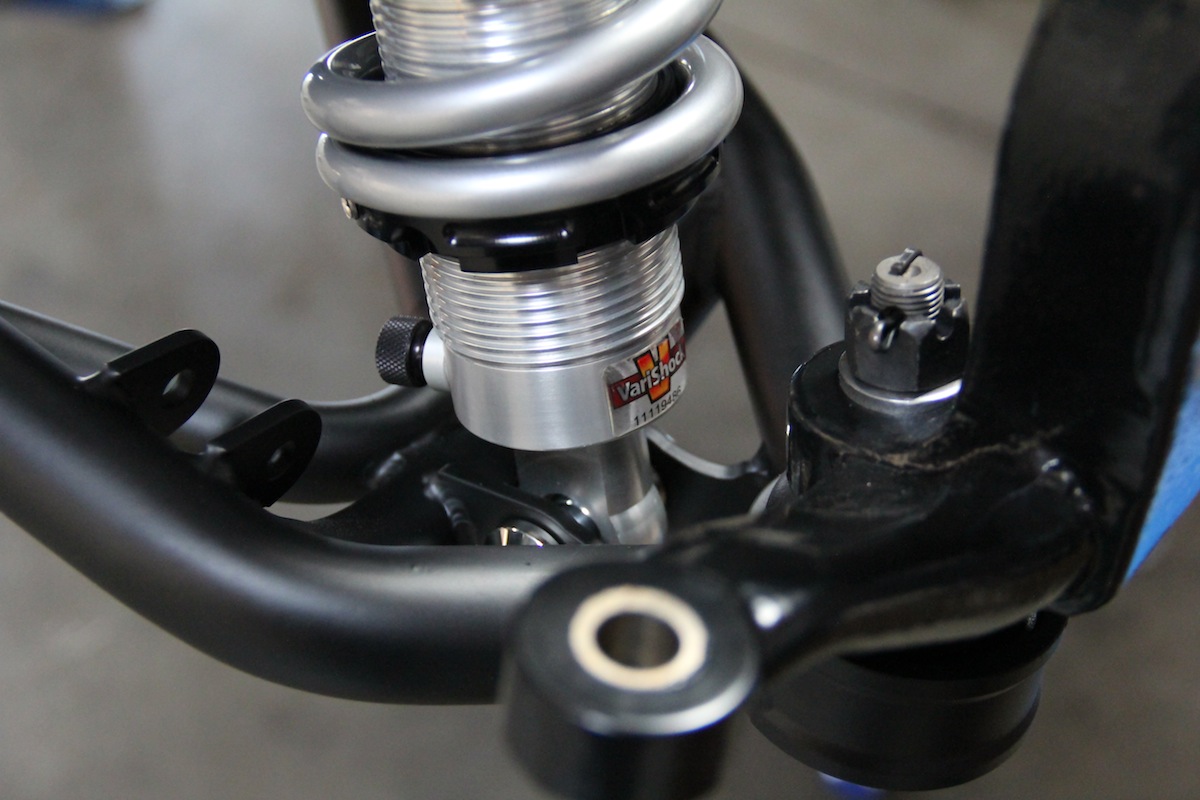
[20]Lower shock mount is located very close to the balljoint, increasing the shock-motion ratio and allowing use of lighter, lower-rate springs for better suspension control.
Advantages of Chris Alston Chassisworks g-Machine Front Clip:
- Broad lower A-arm increases load capacity and stability during braking and cornering.
- Lower A-arm length reduces track-width change and roll-center movement during suspension travel for smoother transitions entering and exiting turns.
- Lower shock mount is located very close to the balljoint, increasing the shock-motion ratio and allowing use of lighter, lower-rate springs for better suspension control without degrading ride quality.
- The g-Machine spindle is taller than OEM spindles and therefore increases camber gain during body roll, keeping tires in better contact with road surface.
- Two-inch-dropped spindle lowers ride height and center of gravity to improve overall handling.
- Short/long arm (SLA) suspension layout is a compact, low-profile suspension design that leaves plenty of room around the engine.
- Traditional hub-style spindle accepts up to 14-inch brakes and allows more wheel choices compared to Corvette-style spindles.
Rolling Along
Installing the anti-roll bar is a simple matter of a couple of clamps and two links that attach the anti-roll bar to the lower A-arm. Bushings keep the bar flexible and require a small amount of silicone grease, primarily to prevent noise as the anti-roll bar moves in the bushing.
 [21]
[21]Installing the shock and spring package is a snap. Stainless steel hardware is available as an option. Alston says this shock package has more travel than anything else on the market.
Shocks and springs are next on the agenda. As Alston has said, “One of the coolest things about this shock package is that it gives us more front end travel than anybody else.”
 [22]
[22]“If you buy a whole suspension from us, we don’t make in our factory the actual coil spring, and we don’t make the calipers, and that’s because Bill Wood of Wilwood and I go way back, and I don’t have much trouble with his stuff,” says Alston.
Following the Chassiswork’s instructions, a quick install of a rubber bumper on the shock shaft with a couple of spring seats and the spring itself is really all that is required. Stainless steel shock mounting studs are included in the kit.
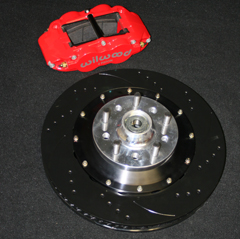
The Alston/Wilwood front brakes are installed after the shock and spring package is in place. The 11 3/4-inch rotors are directional with a “P” for passenger side and “D” for driver’s side. Special tech tip on these brakes: it’s recommended to test fit your wheels and verify at least a 1/4-inch clearance.
“For the longest time, we were the only company that made brakes that didn’t make your track width wider than stock, because we put a lot of engineering effort into it, or we made the spindle to go with them. That’s what you get when you buy from us. We’re extremely aware of the entire system and its configuration,” shared Alston.
 [23]
[23]
Major Brake Kit Components For Our Build
Front g-Street 14 Kit – (Part # 8323)
- 14-inch directional-vaned, slotted rotors
- Billet hats and hubs
- Caliper adapters
- Optional red powdercoated six-piston caliper
“Right now, if you buy a whole front suspension from us, we don’t make in our factory the actual coil spring, and we don’t make the calipers, and that’s because Bill Wood of Wilwood and I go way back, and I don’t have much trouble with his stuff.”The complete installation of the front and rear brake kit install can be read at the following link: Project Blank Slate: Our ’69 Camaro Gets Chassisworks/Wilwood Brakes [24].
Engine Mounts and Mid Plate
Adding the engine mounts and mid plate in preparation to receive the powerplant is one of the most enjoyable parts of the assembly. This signifies how close you are to being finished. There are two types of motor mounts available for this kit: motor plates or side engine mounts. Chassisworks motorplates are available for small-and big-block Chevy engines.
The side engine mounts, which was our pick, are stock-like mounts but with urethane bushings installed in the steel sleeves. Alston Chassisworks recommends torquing the mount spuds to 20 lbs/ft and using loctite. It is also recommended to install the engine first, then add the transmission after the engine installation is complete.
We had no problem installing our 750 horsepower naturally aspirated LS engine [25] then adding a T56-Magnum 6-speed transmission.
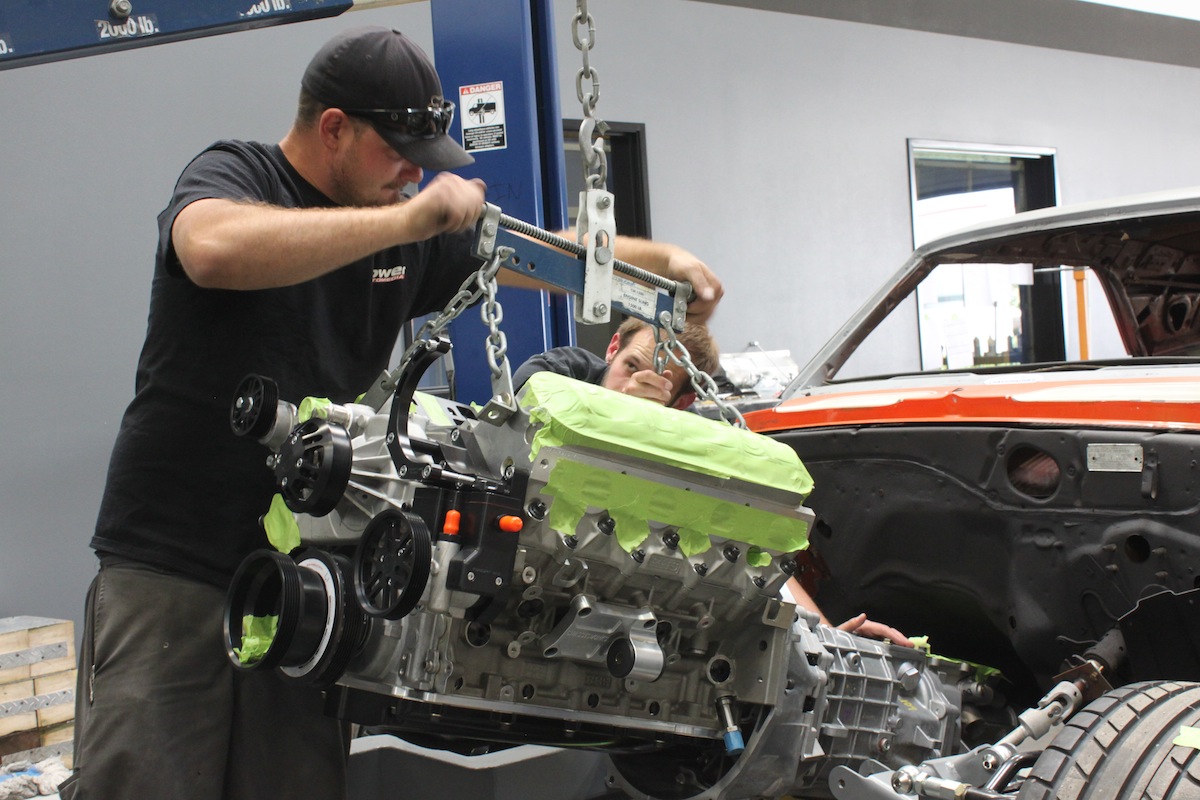 [26]
[26]We picked the side engine mounts which should have no problem with our engine/transmission/rear end combo.
R & R of The Front Clip
Now it was time to get to the nitty-gritty of this build. Removal and replacement of the front clip. Removing the stock front clip can be a handful, especially if you are doing it yourself. Go slow, double check everything and don’t allow yourself to get rushed.
The easiest way to begin is by removing the hood, engine and transmission, if these are still attached. Support the vehicle on jackstands on a level concrete floor. Another important safety measure to keep in mind is to put two jackstands under the rear axle. This will keep the vehicle from tilting backwards when the front clip is removed.
 [27]
[27]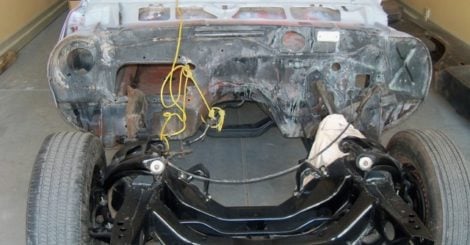 [28]
[28]
Our project car rolled into the shop without an engine or factory components. Removing the subframe was indeed a cakewalk.
Following the Chassisworks instruction for front clip removal is far better than trying to randomly remove components or using a Haynes or Chilton manual. Chassisworks has worked on finding the best way to remove and install these front clips where the possibility of damaging components is minimized.
Three people are needed at one point in the front clip removal. One person to operate the floor jack, one to steady the frame by holding on to the spindle in the wheel well and the third person that removed the frame bolts. Once the frame bolts are removed, the old front clip can be slid forward and cleared from the vehicle by pulling it out toward the front of the car.
Installing the Bolt-On Frame
Chassisworks has thought of everything to make this kit pretty much fool-proof. Installing the bolt-on g-Machine frame becomes a much more precise operation with the supplied frame alignment pins developed by Alston’s R & D crew. The alignment pins are used to align the front frame during installation. With the alignment correct, the frame bolts can be installed with the body mount stack-up oriented correctly. The body mount bolts must be installed but kept loose at this point to allow for mounting the transmission crossmember.
 [29]
[29]Our new engine had not arrived but we were eager to get the new subframe mounted. So we put the frame in position and bolted it to the chassis.
Before aligning the frame fully, the transmission crossmember is installed. The frame can become flexed when tightening to the body, and if the crossmember is not installed until after the frame is flexed, it may tweak the crossmember where it can’t be installed correctly later on. Tighten the transmission crossmember before bolting on the frame.
Aligning the frame is simply a matter of placing the alignment body pins in the firewall body mounts. Once the alignment pin is fully inside the body mount bracket, the body bushings can be tightened. A quick measurement from the frame to the rocker panel on each side will verify that the frame is aligned correctly. The difference between the two rocker arm measurements should be less than 1/4-inch.
Finishing Off the Installation by Installing the Factory Components
The front clip installation can be finished by reinstalling the factory components like brake cables, clutch linkage, bumper brackets and other like components that were removed earlier. Chassisworks includes a pretty slick steering shaft with the kit that not only helps mate the old steering components with the new rack and pinion steering box, it also provides a smoother feel with a vibration isolator type u-joint in the steering shaft.
 [30]
[30] [31]
[31]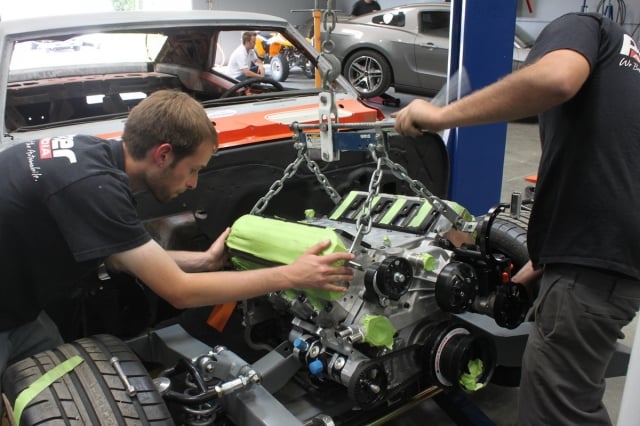 [32]
[32]
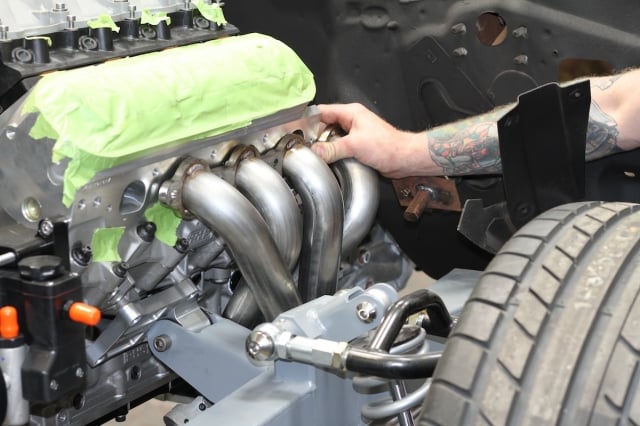
Our engine showed up as we were finishing connecting the front clip to the chassis. Like a bunch of kids at Christmas, we immediately took it out of the package and started bolting it in. This gave us a chance to test fit the headers and check for clearance.
With the steering assembly hooked up we were ready to wrap this install up by installing the splash fender flaps that Chassisworks includes to replace the factory rubber fender flaps that are usually deteriorated and worn beyond re-use.
Before we fire up and drive away, we must install the exhaust headers or risk losing hearing or worse. Alston’s instruction manual is very detailed in this section because this is where many good installs go south. It’s a smart move to test fit headers on the engine before installing them. Making changes before the engine is in the vehicle is much easier.
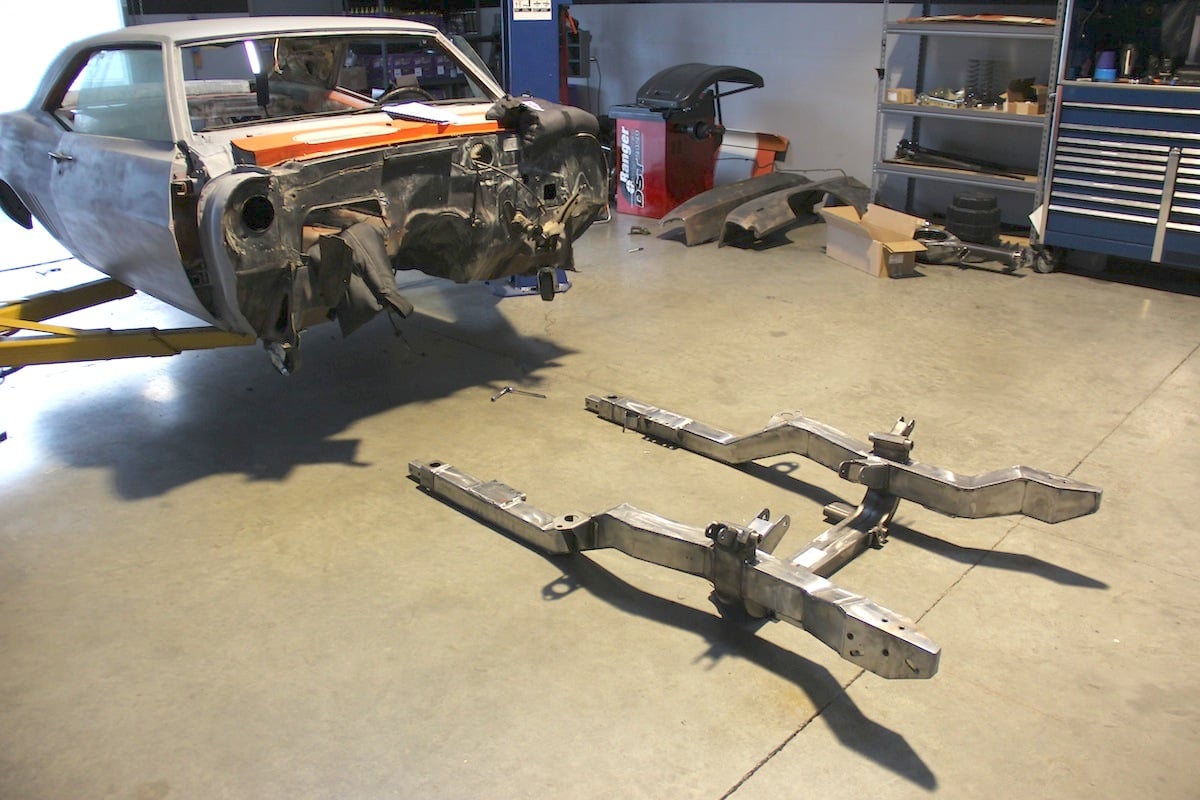
Installing the subframe connectors meant that we were close to being done. [33]
[33]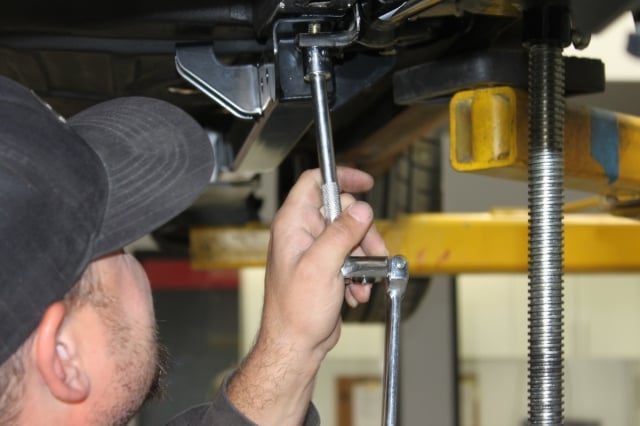 [34]
[34]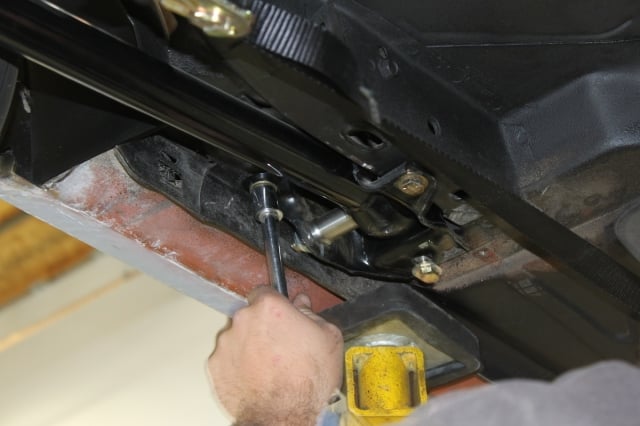 [35]
[35]
The last step of the installation is installing the subframe connectors for additional support. These are great additions, especially for a Pro-Touring or road racing car where the chassis will be subjected to a lot of flexing. The subframe connectors should be installed with the frame on jackstands and the vehicle at least 14-inches off the ground. The leaf springs should have no tension so the rear axle should be supported by a second pair of jackstands for the rearend housing.
 [36]
[36]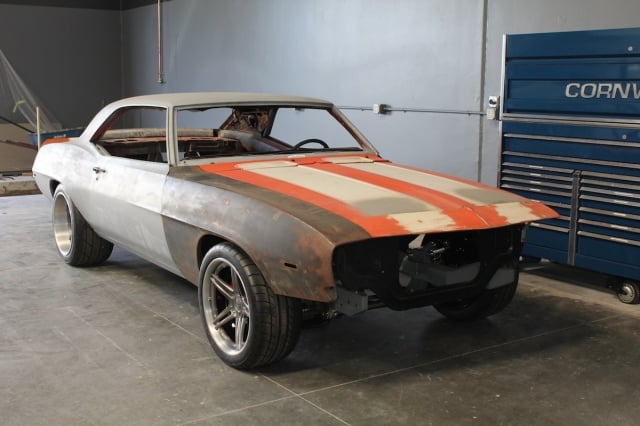 [37]
[37]
Our sleeper was already taking shape. The Bolt-on g-Machine front clip brought new life and modern technology into a vintage chassis. For a simple bolt-on installation, Chris Alston's Chassisworks front clip add allot to the finished product.
You will have to remove the front of the leaf springs to install the subframe connectors. Once the leaf springs have been removed from the front mounts, the subframe connectors are installed with supplied bolts to the frame and the chassis, and just like that you’re done. See, we told you this was a cakewalk. With our new parts all bolted up, our editorial crew really can’t wait to get out there and put this modern classic to the test – stay tuned.