 [1]We asked our friends at Cunningham Motorsports [2] in Murrieta, CA, to help us with an install. They specialize in late model GM and Ford performance and we knew we could call on them to find a customer with a 5th gen Camaro who wanted frame connectors and a driveshaft loop. Their customer, Rick Shapard of Menifee, CA, has a nice 2010 Camaro that has seen some time on the autocross course, so stiffening up his chassis was something that interested him. He said it handled well, but we’ll get some feedback from him once we get these parts installed and he hits the track again.
 [3]
[3]Shop Manager Mike Gallo of Cunningham Motorsports did the install on the 2010 Camaro belonging to Rick Shapard.
Moroso [4] had just the parts we needed, and their frame connectors for the 5th generation Camaro were the perfect fit for Rick’s car. And when we say perfect fit, we mean perfect fit. The install went very well and everything lined up great to the underside of this F-body. Attention to the installation instructions is imperative, get ahead of yourself and you’ll soon find out that you should take your time and work one side at a time.
We’ve all seen that guy who thinks he can get the job done quicker by jumping ahead, but as Cunningham’s manager Mike Gallo shows us, the install can go extremely well when you don’t rush yourself.
While this installation was done on a lift, it can be done on the ground with floor jacks and jack stands, with safety being the key factor. Always use the proper supports for any work that requires you to be under the car, that may seem like a given, but once in a while you hear a story about someone who took a chance, and lost.
 [5]
[5]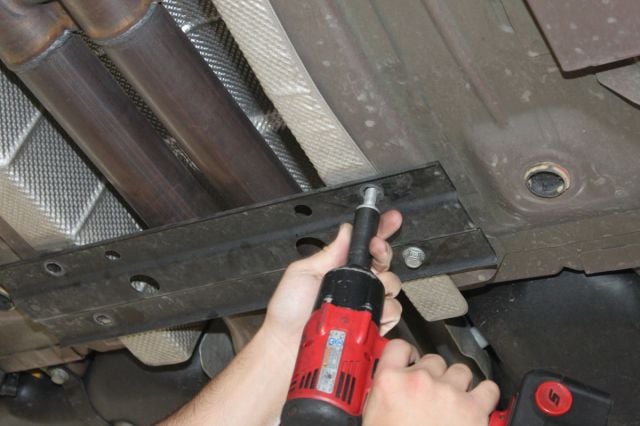 [6]
[6]
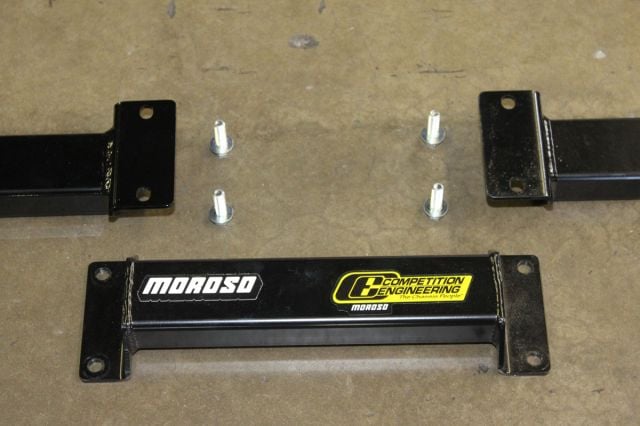
We installed the floor brace with the frame connectors, if your car is equipped with this factory brace, it and the bolts must come out first, and installing the brace is the last step in the process.
Part #78010 & Part #78000
- Ties IRS sub-frame to body
- Constructed out of 2-1/2″ x 1-1/2″ x .120 wall rectangular tubing
- Frame Connectors and Floor Brace triangulate Chassis side to side
- Legal for all classes of Drag Racing
 [7]
[7]
Frame Connectors and Floor Pan Brace
We installed Moroso’s frame connectors and floor brace for the 2010-up Camaro at the shop. While these frame connectors are a complete bolt in connector, you can always weld them in for added strength.
It’s very important that you follow all directions and instructions with frame connectors, and the most important thing to remember is that you DO NOT want to remove more than one rear sub-frame bolt at a time. It’s always best to leave the other bolts tight and remove one at a time to maintain the alignment of the sub-frame.
Regardless of whether you’re installing the floor brace or not, the factory brace needs to be removed first because you’ll be using the mounting points for the frame connectors. If you don’t remove this part first, you will find yourself in a bind in a hurry.
The first frame connector should be installed completely before you start on the other side. When you install each frame connector, you want to keep each bolt slightly loose until all bolts are threaded into the proper mounting locations before you tighten them all. Using anti-seize on the threads will keep them from galling during installation.
You might be tempted to use the rear sub-frame mount to lift the vehicle, but you'll soon find that you need to remove that bolt. The new sub-frame bolt needs to be tightened to 208 lb-ft, so get some traction on this one.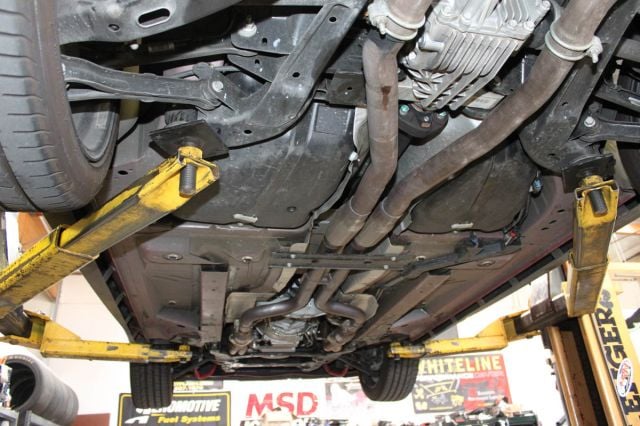 [8]
[8]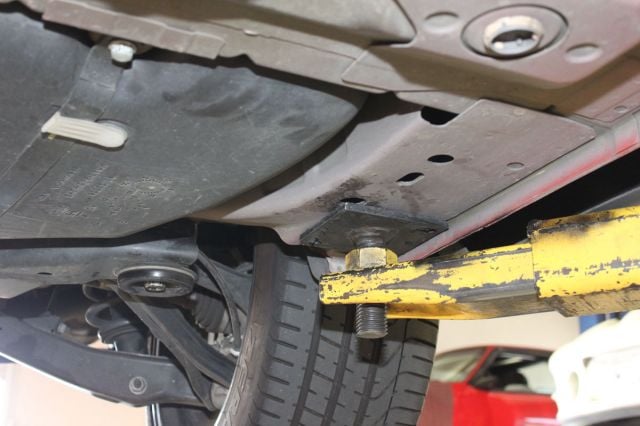 [9]
[9] [10]
[10]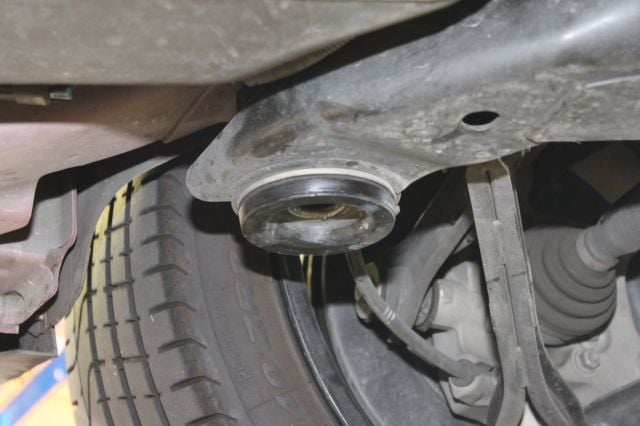 [11]
[11]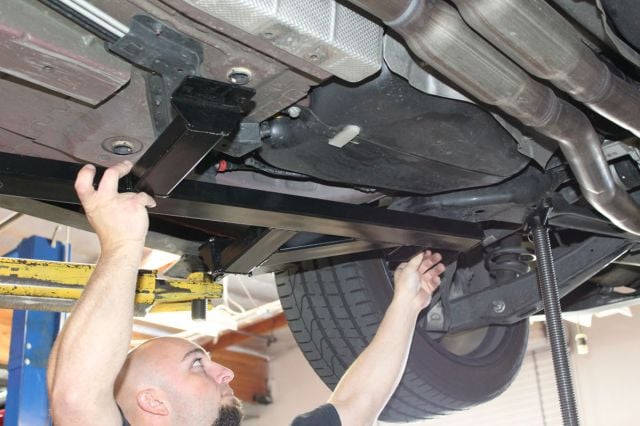 [12]
[12]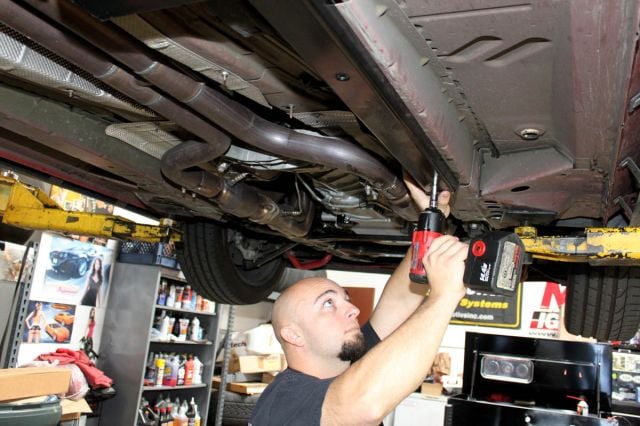 [13]
[13]
Starting with the front bolt on the rear sub-frame on one side, remove the bolt. It will be replaced with a longer bolt that comes in the kit, so it can be discarded. Place the frame connector in place and hold in place with the M16 x 130 bolt supplied, but don’t tighten it completely.
Insert the socket-head mounting bolts to hold frame connector in place, then install stock hardware back into place for the tunnel if you’re not installing the floor pan brace. Since we also installed the floor pan brace, we used the supplied hardware for securing the floor pan brace on the same side as the first frame connector.
To bolt in the outer side of the frame connector, you must use a nut plate that has to be inserted into an access hole in the floor pan. Hold this nut plate while you thread in the supplied bolt and tighten all bolts on that frame connector with the exception of the two bolts holding the floor brace. Leave those bolts threaded loosely until the opposite side frame connector is installed.
 [14]
[14]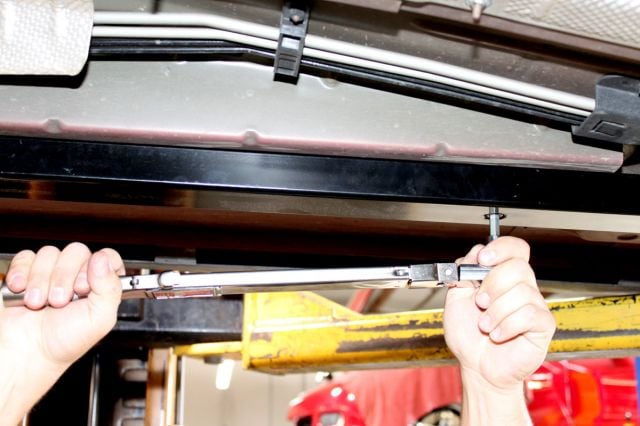 [15]
[15] [16]
[16]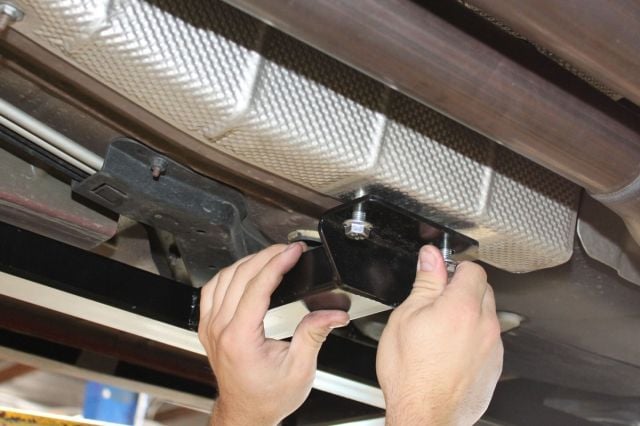 [17]
[17]
For the outrigger on the rear of the connector, there is a nut plate that needs to be slipped up inside the frame. It has a long tab welded onto it to facilitate installation. That bolt should be tightened to 75 lb-ft, and 40 lb-ft for the socket head bolts. The new bolts supplied for the tunnel go back in at 40 lb-ft, regardless of whether you have the brace or not.
This installation went extremely well and the connectors fit perfectly. While doing the install, it’s easy to get ahead of yourself and think you’ll save some time by removing the other rear sub-frame bolt but you should not do this. That bolt needs to be kept in place to keep your rear sub-frame aligned, and should only be removed or loosened after you tighten and torque the opposite side first.
We designed them to tie the IRS to the body but to still allow the IRS to work the way it’s supposed to work. -Thor Schroeder

Following all the steps for the first frame connector, the other side is installed in the same manner and all bolts are torqued to the specs provided with the kit. Using the frame connectors and the floor pan brace will triangulate the sub-frame with the chassis, so you get increased handling and stability, and like the driveshaft loop that we installed next, the connectors are legal for all classes of drag racing.
Thor Schroeder, National Sales and Marketing Manager at Moroso, said they had tested these frame connectors on several vehicles prior to production. He said, “We designed them to tie the IRS to the body but to still allow the IRS to work the way it’s supposed to work.” This gives the customer the added benefit of a stiffer chassis without sacrificing the functionality of the IRS itself, or the ride.
 [18]
[18]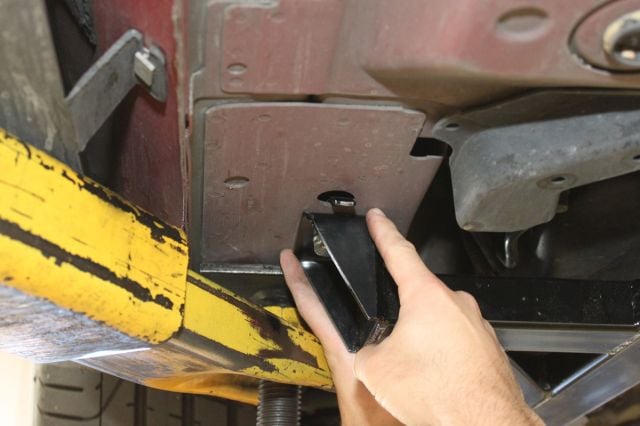 [19]
[19]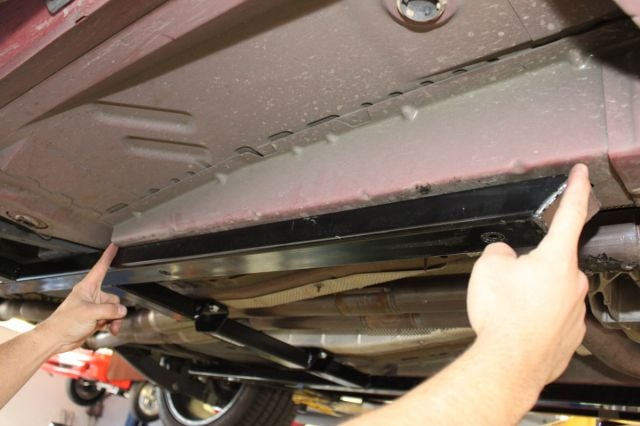 [20]
[20]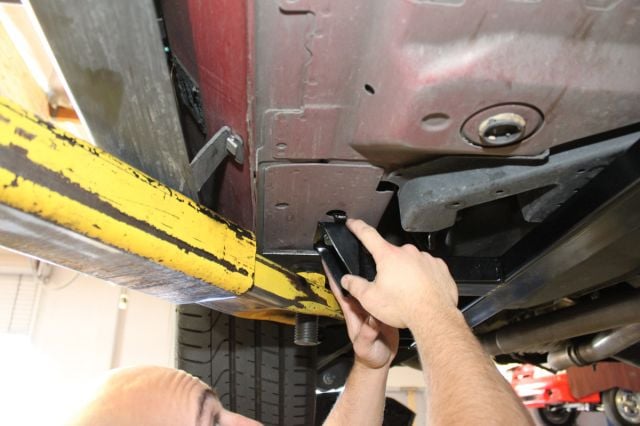 [21]
[21]
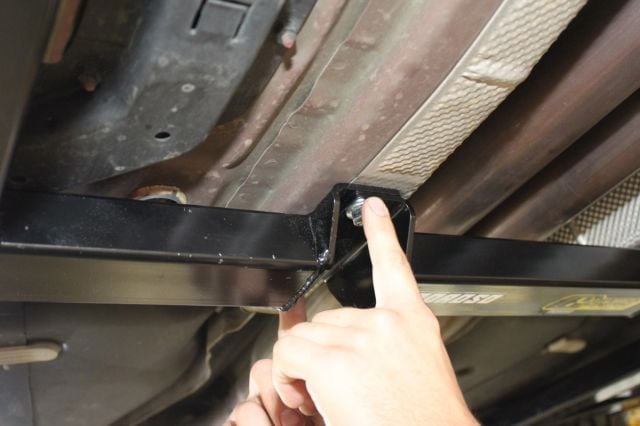
If you want to strengthen your frame connectors further, Mike points out the areas that he recommends welding your connectors, running a bead the length of the frame connector is best, he says.
Driveshaft Loop Installation
 [22]Sometimes the simplest of ideas are the most overlooked safety items that could have saved us hundreds, if not thousands of dollars had we thought about it beforehand. If you’ve ever seen a vehicle that lost it’s driveshaft during a run, it’s an almost certainty that some serious damage was done in the process.
There has even been videos on YouTube showing how a driveshaft can sometimes enter the cabin from ripping through the floor’s sheet metal after a failure. For this reason, NHRA requires a driveshaft loop in many classes.
You may think you don’t need one, and that’s the same thing that many drivers thought just before they lost a U-joint or had a driveshaft failure. We tend to get too complacent when we install power-adders to our cars, and never give our driveshaft a second thought. We’re here to help you with that second thought.
A driveshaft loop is not just to protect the vehicle from damage – it’s also to protect the occupants of the vehicle. At speed, the driveshaft becomes a projectile during a driveshaft failure. A driveshaft loop can help confine the driveshaft to a smaller area under the vehicle, and to keep it from causing further damage.
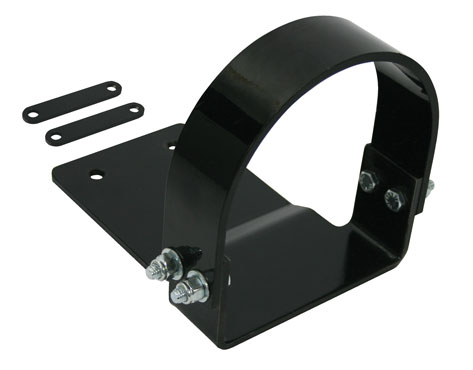
#62640 Man Trans, #62641 Auto Trans
- Bolt-on design allows easy installation with no modifications required
- Meets the requirements of all racing sanctioning bodies
- Will help contain the driveshaft in the event of a front U-joint failure
 [23]
[23]
In many racing applications, a driveshaft failure can occur when a U-joint breaks, or when the engine’s horsepower exceeds the limits of a factory driveshaft. Bolt-on power adders, like superchargers and turbo kits, are available for many popular vehicles and these kits can sometimes add upwards of 250+ horsepower.
When people install these bolt-on kits, quite often they take their cars to the track to see the improvements at work. Higher horsepower and drag racing exerts additional strain on a drivetrain, and sometimes the driveshaft can become the weakest link.
A driveshaft loop, like this one from Moroso, can be the safety net that protects the underside of your car, and it’s occupants in case your driveshaft suffers a failure. When a front u-joint fails, the drive shaft will continue to spin as long as the vehicle is moving, and there’s no telling what will happen as it bounces off the pavement and the underside of the vehicle.
There have been times when a car was catapulted like a pole vaulter because the front end of the driveshaft dug into the pavement. A driveshaft loop bolts to the car and helps to keep this from happening. With the thousands of dollars spent on power adders, a driveshaft loop is small price to pay for the safety it provides.
 [24]
[24]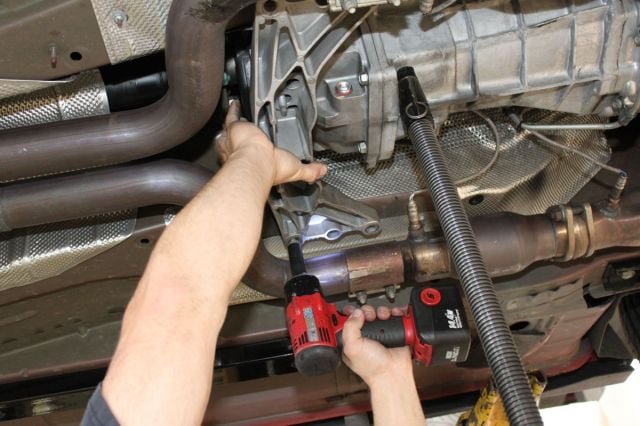 [25]
[25]
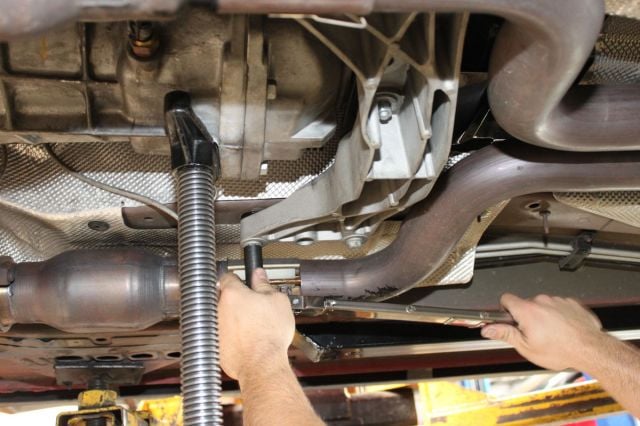
First things first: Support your transmission with a fixed stand, do not use a hydraulic jack to hold your trans in place.
Getting in the loop
Installing the driveshaft loop is a fairly simple project that can be done in a couple of hours if you have all of your tools ready to go. With this Moroso loop, you won’t even have to remove your driveshaft for this install, the installation can be done with only one part being removed and replaced: the transmission support crossmember. There is a kit available for either manual or automatic transmission, so be sure you order the correct one.
If you’re using a lift, be sure to have a support handy for the rear of the transmission. If working on the ground, be sure to use jack stands and a fixed support for the back of the trans. Do not rely on a hydraulic floor jack to support your transmission while you’re installing the loop! Have all parts ready to go, and you should be done rather quickly.
Slipping the loop over the driveshaft first will save you some hassle later, just let it hang there. To hold the support plate in place, you can loosely install the four bolts and nuts that attach the loop.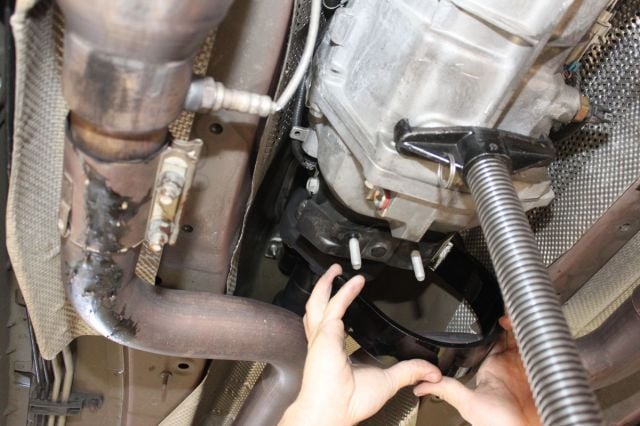 [26]
[26]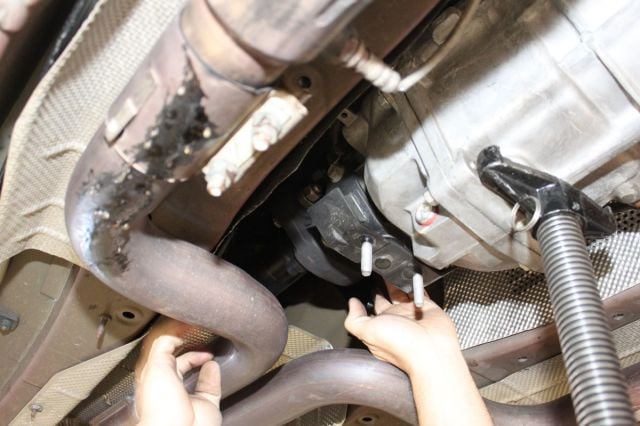 [27]
[27]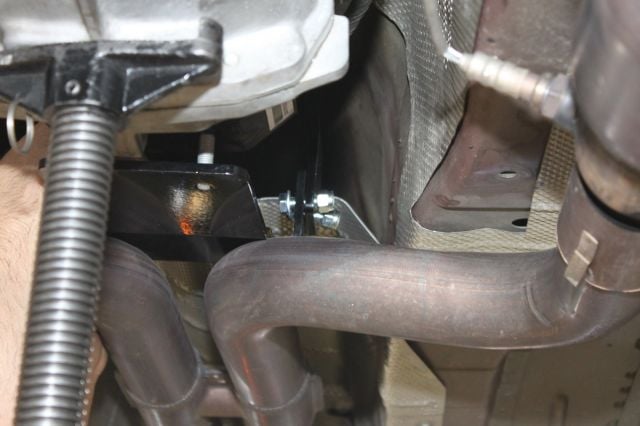 [28]
[28] [29]
[29]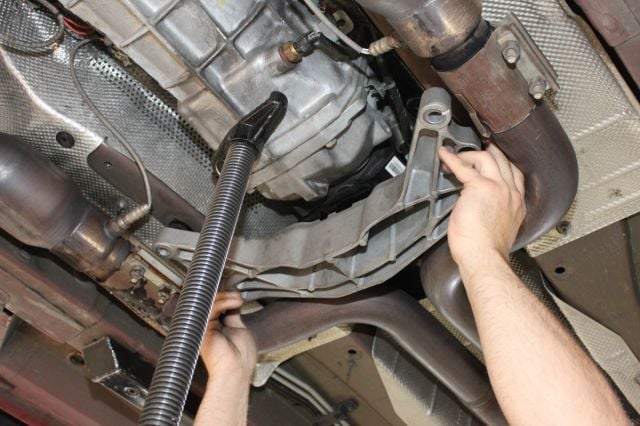 [30]
[30]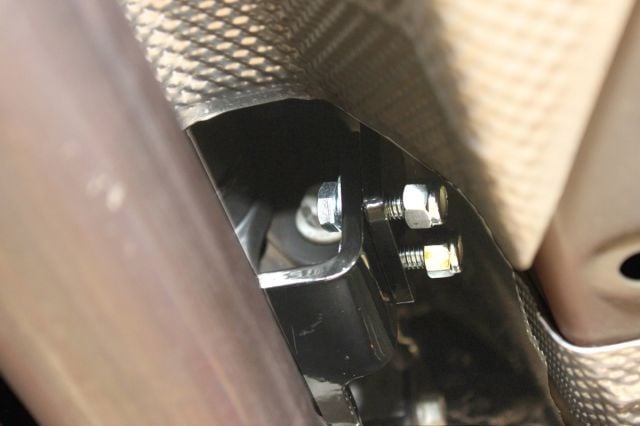 [31]
[31]
Other venues, such as SCCA, are looking at requiring a driveshaft loop for any high performance rear-wheel-drive vehicle. Some classes already require it. -Thor Schroeder
While supporting the rear of the transmission, remove the nuts on the trans mount, and then remove the bolts for the crossmember and set the crossmember aside. Place the loop over the driveshaft so that it is draped over the top of the driveshaft. Place the base plate from the kit over the trans mount bolts and let it hang there, it should stay in place, loosely.
Push one of the crossmember mounting bolts through the crossmember and place a 1/4″ spacer on the top side of the crossmember. These spacers are very important as they compensate for the thickness of the base plate on the trans mount. Keep the first crossmember bolt loose, then reinstall the remaining bolts and tighten. Now you can remove the trans support an reinstall the nuts for the trans mount, and tighten them.
Install the driveshaft loop hardware with the bolts facing out, away from the driveshaft, and tighten. The installation shouldn’t take you very long, and once you have double-checked to be sure you have tightened all nuts and bolts, then you’re done!
 [32]
[32]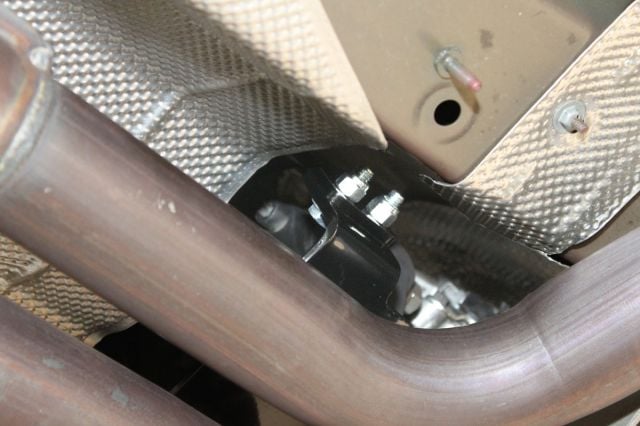 [33]
[33]
For those who are drag racing and running below 11.49, you need to run a driveshaft loop to meet NHRA requirements; if you’re running under 14 seconds with slicks, you will need a loop. The rule also states that the loop must be within 6 inches of the U-joint. Schroeder tells us, “Other venues, such as SCCA, are looking at requiring a driveshaft loop for any high performance rear-wheel-drive vehicle. Some classes already require it.”
In Conclusion…
Rick has yet to take his Camaro to an autocross to see how it really performs, but we did ask him what he thought about it so far. “It was immediate,” Rick told us, “it’s like night and day. It stiffens up my car so much that I feel like I upgraded my suspension, too.” He does have an event coming up where he can throw it around some cones, and he’s eager to get back to us and let us know how well it performs. We’ll update this article with the new information when we hear back from him.
Chassis stiffening is something that almost any enthusiast would want to take advantage of, and Moroso’s frame connectors for new Camaros are a great way to do just that. We had them installed in no time, and didn’t have to do any crazy modifications to get everything to work together. As for the driveshaft loop, we know that sometimes safety equipment is the furthest thing from your mind, but that doesn’t mean that it’s not important. Hopefully we showed you just how easy it can be to get both more performance and safety from your chassis.