 [1]
[1]
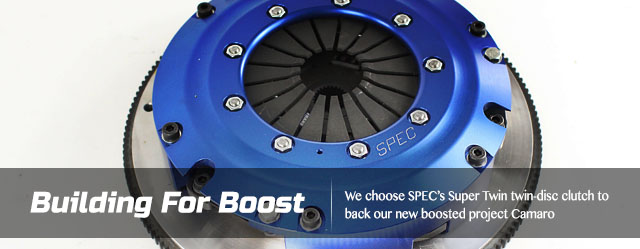
It’s not uncommon these days to find 1,000-horsepower machines roaming the streets, happily idling away due to an exponential increase in current technology; namely injector design, power adder technology, and engine architecture. In order to keep up with the substantial increases in power, SPEC Clutch [2] has had to innovate non-stop to keep pace with the ever increasing demands of today’s power plants and drivetrains.
It used to be a clutch that could keep up with a 1,000-horsepower mill was not a clutch that you could realistically live with on the street all day every day—even if you never skip leg day at the gym. Nothing is scarier than driving a car with a heavy clutch and a rowdy mill through traffic when your calf cramps and you start praying that you don’t have to push the clutch in anytime soon.
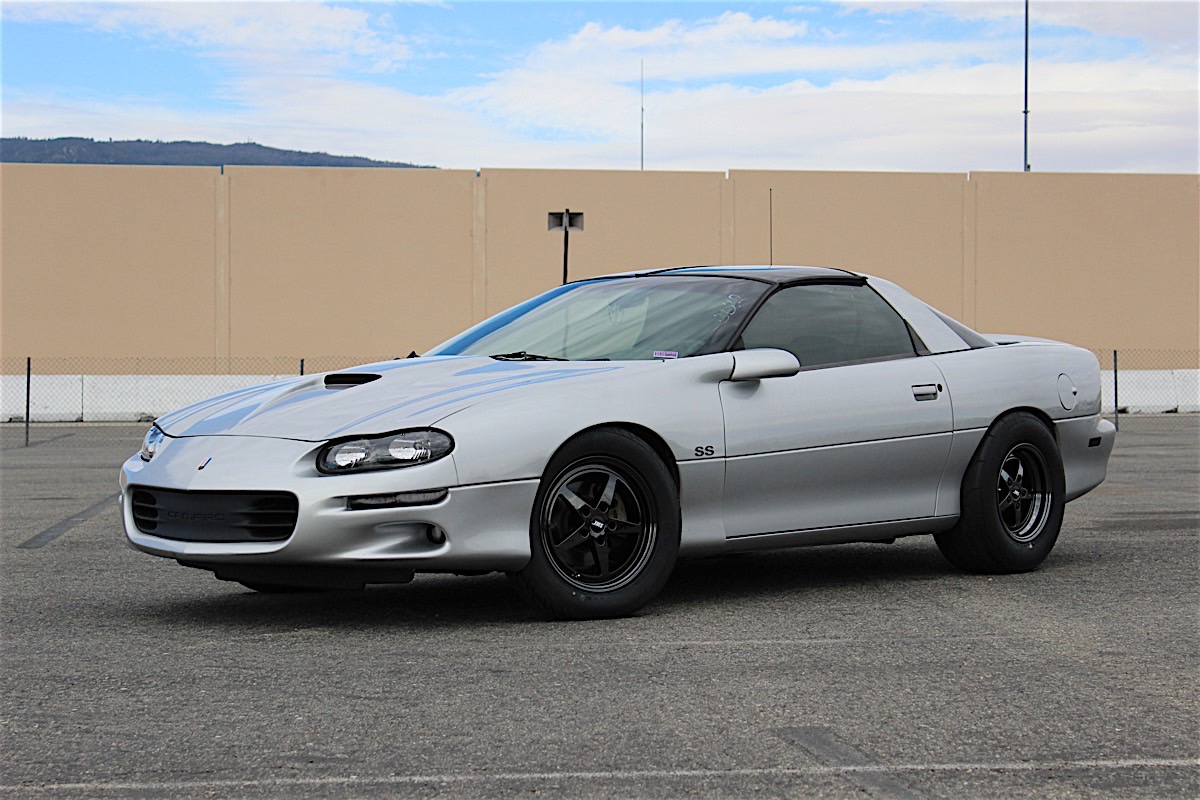
We’ve been there and didn’t want to revisit that anytime soon. So when we were considering the needs of our new project Camaro, we knew we needed something that could handle a lot of power since it will be getting boost shortly, but we also needed something that we could realistically live with on the street. While the car may not be a daily, it will see regular use at the track and around town.
 [3]
[3]
You may remember that while we were testing our new drag wheels and tires, from JMS Chip [4] and Mickey Thompson [5] respectively, that our clutch was starting to show signs that it was getting ready to give up the ghost. Since we are headed for exponentially more power with the car, we knew that it was the perfect time to step up to something that could handle north of 1,000 rear-wheel horsepower but still be streetable. And yes you heard that right, the Camaro could eventually see more than 1,000 RWHP, so stay tuned.
While It may sound like a tall order, SPEC Clutch had just what we needed with their Super Twin twin-disc clutch. And, according to David Norton, owner of SPEC Clutch, the Super Twin in P-Trim could handle what we were looking to throw at it, and then some, all while retaining almost stock-like feel and operation. Too good to be true? We decided to find out for ourselves.
Design and Operation
When it comes to clutch design, the days of single disc clutches are quickly fading away. In fact, many high-horsepower vehicles are actually leaving the factory with a twin-disc clutch these days. Sure, single discs can be just fine with moderate amounts of power, but when you start asking them to handle 700+ RWHP, the clamping loads that are required to couple that power are beginning to get out of hand.
 [6]
[6]
The result is a pressure plate that it is far more heavily sprung, leading to increased clutch pedal efforts and changes in engagement points. As we mentioned, this is fine to an extent. But when you start pushing into big-number territory, it starts to get a little unrealistic if you are thinking of using the car on the street, or for frequent trips to and from the track.
More discs mean more surface area, and more surface area not only provides a higher capacity, but also adds progressiveness to the engagement and, thus, a more streetable unit.”

With increased clamping loads and high horsepower levels comes the need for materials that are capable of handling the increase in power as well. This frequently necessitates the use of semi-metallic, cerametallic or even carbon materials that can keep up with your power goals. And while the disc material may be capable of keeping itself together, the engagement with those types of materials and increased clamping loads can make for a clutch that is much less than street-friendly.
More aggressive materials can often lead to harsh engagement, chatter, and general unhappiness when it comes to street driving. Combine that with the higher clamping loads of a stiffer pressure plate and you have a recipe for hating your combo on the street. It might be able to handle the horsepower but you’ll regret the day you chose it.
“A consumer benefits from a multi-disc clutch when the capacity of a single becomes insufficient or when drivability of a sufficient single disc unit has deteriorated to the point that the car is no longer fun to drive. The benefits are two-fold: higher capacity and better drivability,” Norton explained. “Multiple disc systems can hold more torque in the same amount of bellhousing space than their original equipment single- or twin-disc counterparts. More discs mea n more surface area, and more surface area not only provides a higher capacity, but also adds progressiveness to the engagement and, thus, a more streetable unit.”
 [7]
[7]
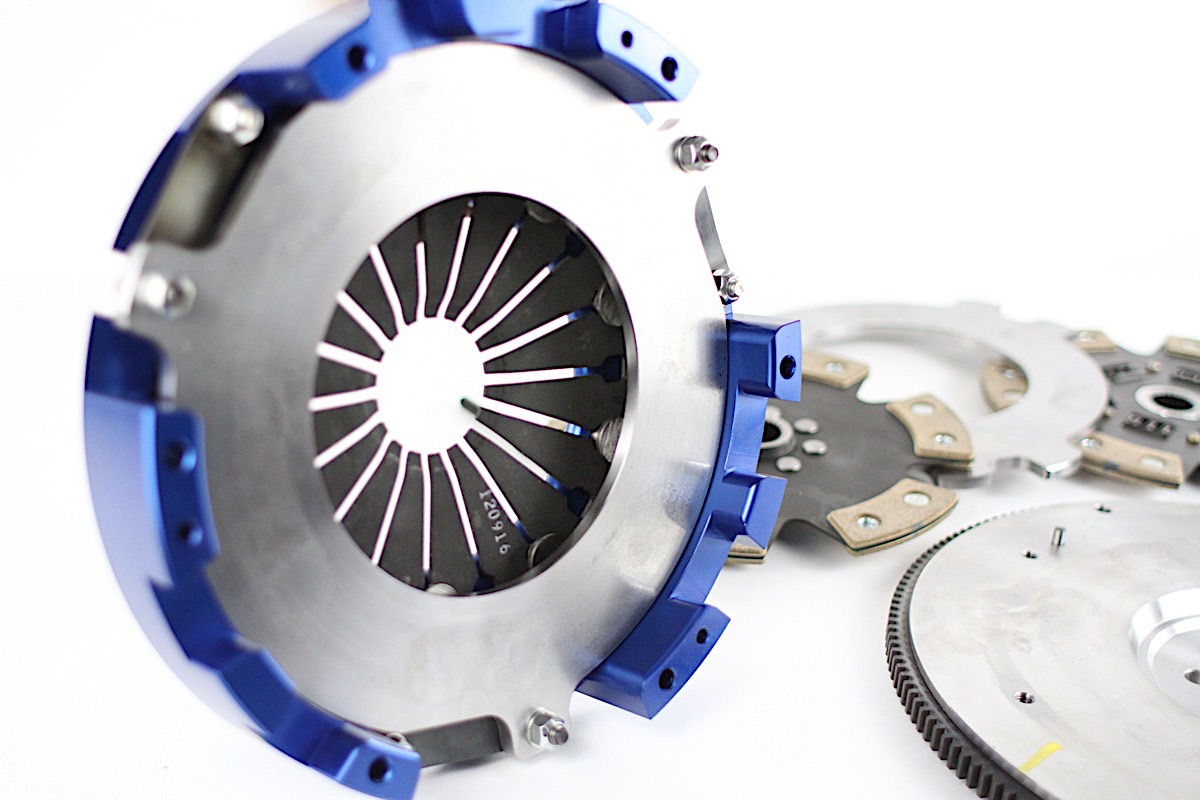
After listening to our concerns, Norton recommended their Super Twin twin-disc clutch. They come in several different trim levels and are more than capable of handling up to 1,795 lb-ft of torque in the highest E-Trim level. However, since the pressures and materials are getting fairly aggressive at this level, Norton recommended that we go with something a few trim levels less aggressive. This allowed us to retain a friction material that was better suited for street use and will ensure that living with the clutch on the daily will be no problem. It will also be more than capable of handling our power goals with a 1,395 lb-ft of torque peak capacity.
Unlike a single-disc clutch, a twin-disc clutch has much greater holding power without the need for more tension from the pressure plate. This is due to the vast increase in surface area that a twin-disc affords. Think of it this way: If you interlace the pages of two books, at first, with just a few pages interlaced, the books are easy to pull apart. However, after you have interlaced many pages, the two books become very hard to separate—if possible at all. This all is due to the increase in surface area contact. The same principle is applied to a twin disc clutch. (If you’re still confused, see this video [8])
“A multi-disc can drastically increase effective surface area, which in turn adds capacity and progressiveness to the engagement,” Norton told us. “The Super Twin can achieve a higher capacity with equal or better drivability. All other specifications equal, a twin-disc will double torque capacity.”
 [9]
[9]
Since there is so much more surface area, the clamping forces don’t need to be nearly as high to ensure the clutch doesn’t slip under heavy loads. This allows the Super Twin to retain a near-stock level of clutch pedal effort and engagement points while at the same time allowing it to take massive amounts of power. It will also save us from harsh engagement since it uses a semi-metallic construction, giving us smooth operation no matter what.
Our kit came with the standard steel flywheel but there is a lightweight aluminum upgrade available. Since we will be using the car primarily for drag racing, this suited us just fine as the heavier flywheel will actually act as a torque reservoir of sorts, giving us more torque off the line due to the increase in the flywheel’s inertia when compared to a lighter weight flywheel. But, if you are going to use the car extensively for road racing, autocross, or even drifting you may want to consider upgrading to the aluminum version.
The SPECs
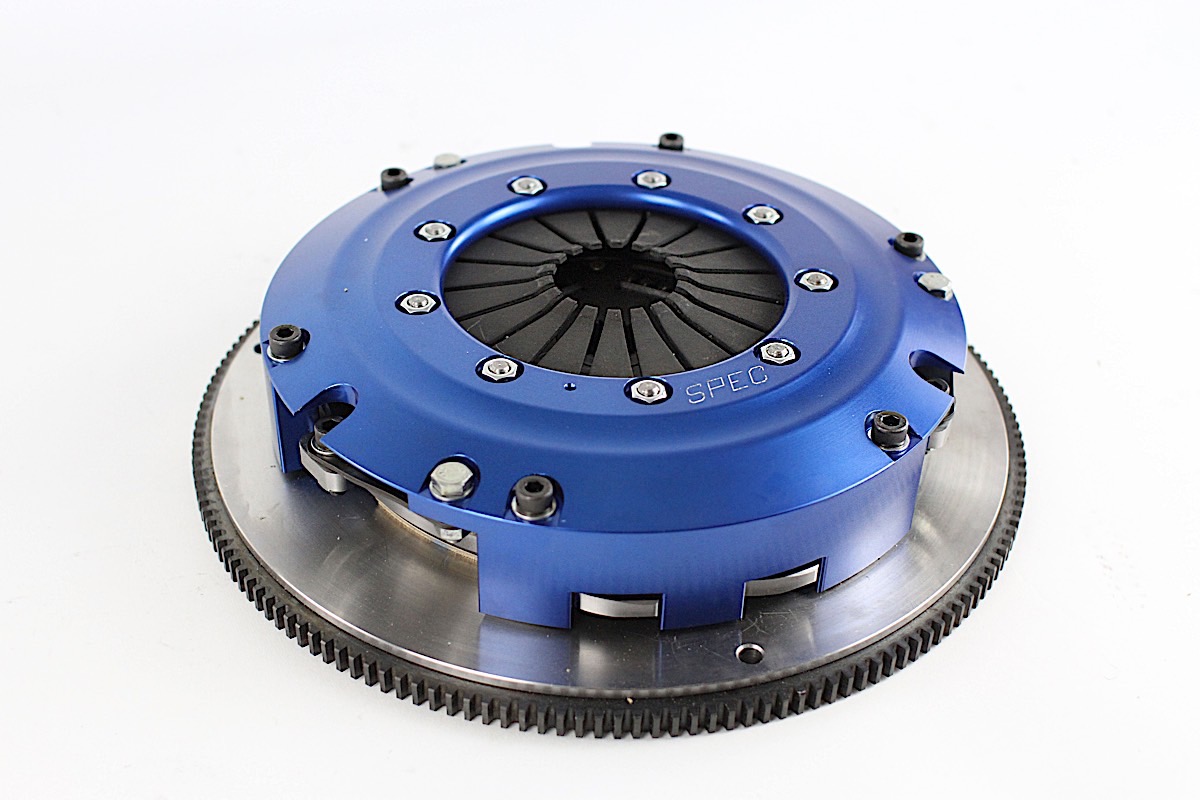
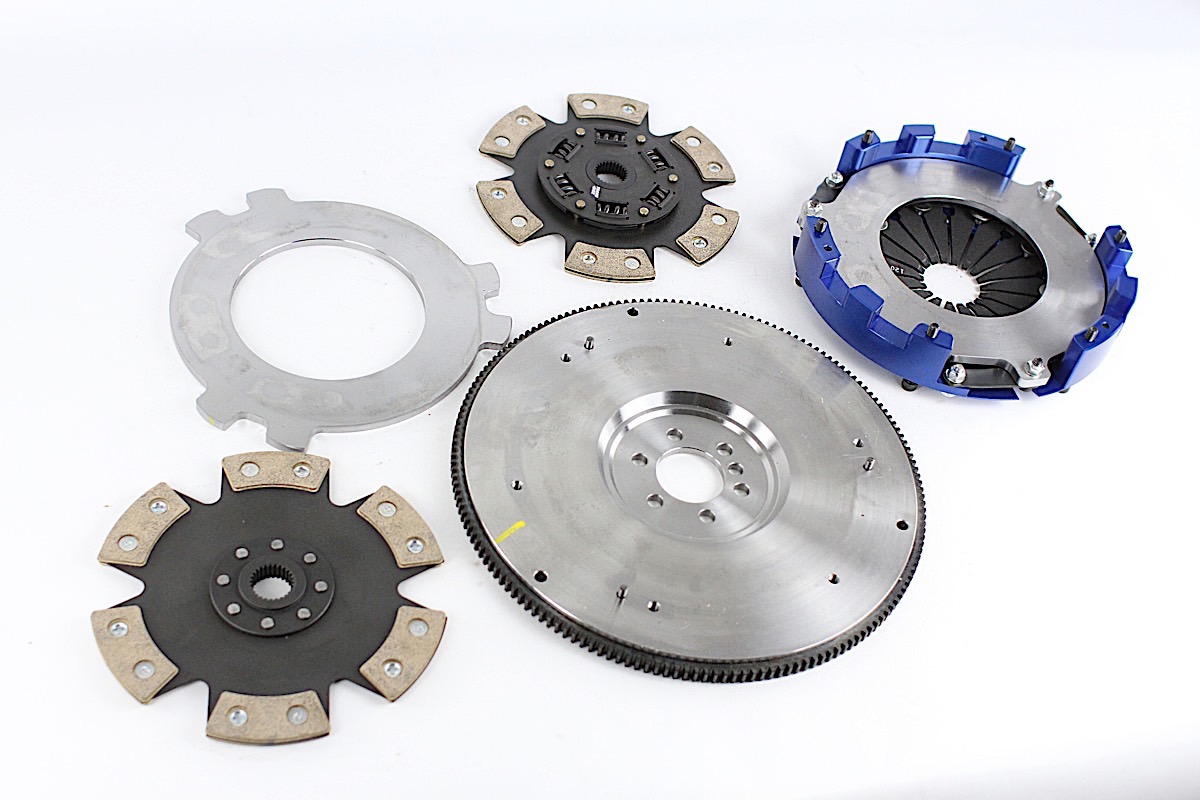
SPEC Super Twin Clutch Kit P-Trim
- PN SC09PT for 98-02 Chevrolet Camaro
- P-Trim rated to 1,395 lb-ft of torque at the flywheel
- Intended use: Street, Drag, Drift, Road Race
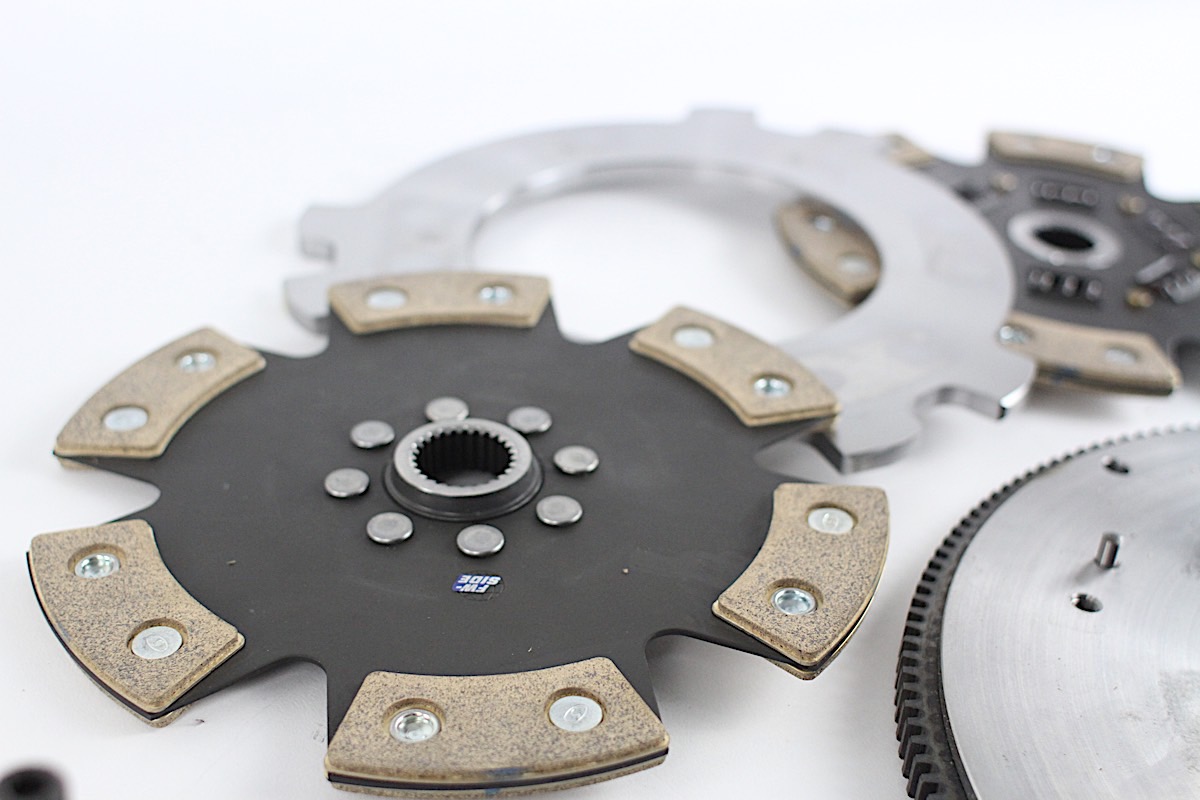
- Full-faced carbon graphite discs
- Available ratings up to 1,795 lb-ft (E-Trim)
- MSRP $1,599
What’s more, the Super Twin uses all-billet construction making it almost a shame to hide this piece between the engine and transmission. It also will ensure that the clutch operates smoothly and quietly for the extent of its considerable lifespan. And, in case we ever do see the day where we’ve used up our Super Twin, the clutch is completely rebuildable. This also makes it nice if you want to up- or down-grade the clutch at any point. No matter your application, you can rebuild the clutch to suit your needs, making it quite possibly the last clutch you will ever need.
The Super Twin uses a 240 mm friction surface across the entire line. The differences in torque ratings comes from the different disc material used in each progressive step. For example, moving up to the ST trim from our P trim would see the used of stage 3+ full-faced carbon graphite discs–as opposed to the P trim’s puck design. The E trim, which is SPEC’s most aggressive Super Twin clutch, uses twin sintered iron discs. The increased friction coefficient allows for the additional torque capacity. Had we stepped down to the SS trim, which is capable of holding up to 900 lb-ft of torque, we would have had a choice between a stage 2+ hybrid disc or SPEC’s custom Enduro organic friction material.
The pressure plate itself is all-billet as well, making for the best possible machine tolerances, rotational integrity lift characteristics and load. The pressure ring is constructed of 1050 high-carbon steel, but the clamping loads are a trade secret–SPEC’s special sauce if you will.
 [10]
[10]
“The Super Twin is an all-billet, purpose built twin designed to be versatile enough to be the only clutch an end-user with high power needs to purchase,” Norton said. “They are infinitely rebuildable, upgradeable and even downgradable. Super Twins have a lot of torque capacity, even with street materials, so aggressive drivability is not a necessary byproduct of having a ton of power.”
The entirety of the clutch hat is made from either aircraft grade aluminum or high carbon billet steel milled to an industry leading .001 inch tolerance ensuring that each and every clutch is perfectly balanced before it leaves SPEC’s facilities and makes for an easy bolt in process that doesn’t require shimming. The clutch hubs are also still sprung to retain smooth engagement and good driveability.
 [11]
[11]
“Our PT compound is very manageable for a metallic based mix and offers a high coefficient with low surface wear and nice progressiveness in a twin configuration,” David explained.
Installation
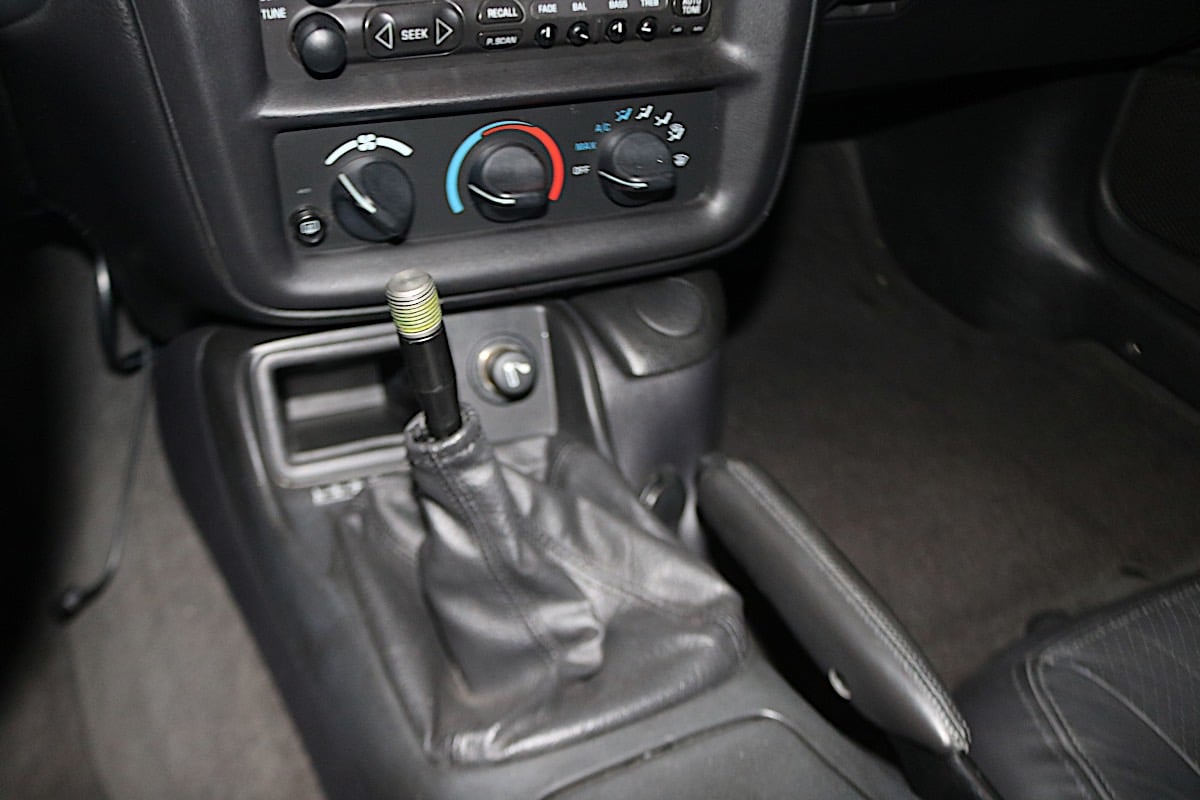
For our installation, we started by removing the center console along with the shifter. While all of this may not be necessary, it will make your life a lot easier when you go to unbolt the transmission from the bellhousing. The process is straight-forward and requires you to remove the shift knob by simply unscrewing it and then removing six bolts that free the center console from the body. Once these are out, and the hand brake is up, the console simply comes up and out of the way.
 [12]
[12]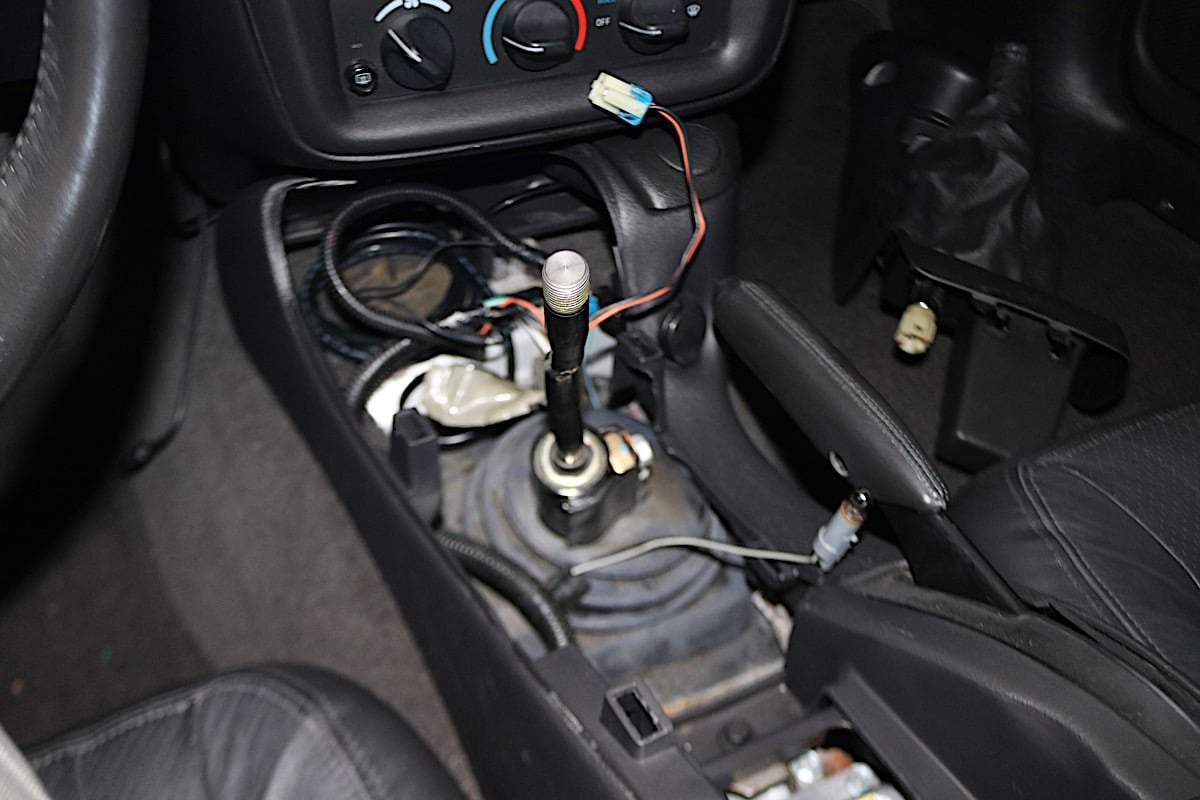 [13]
[13] [14]
[14]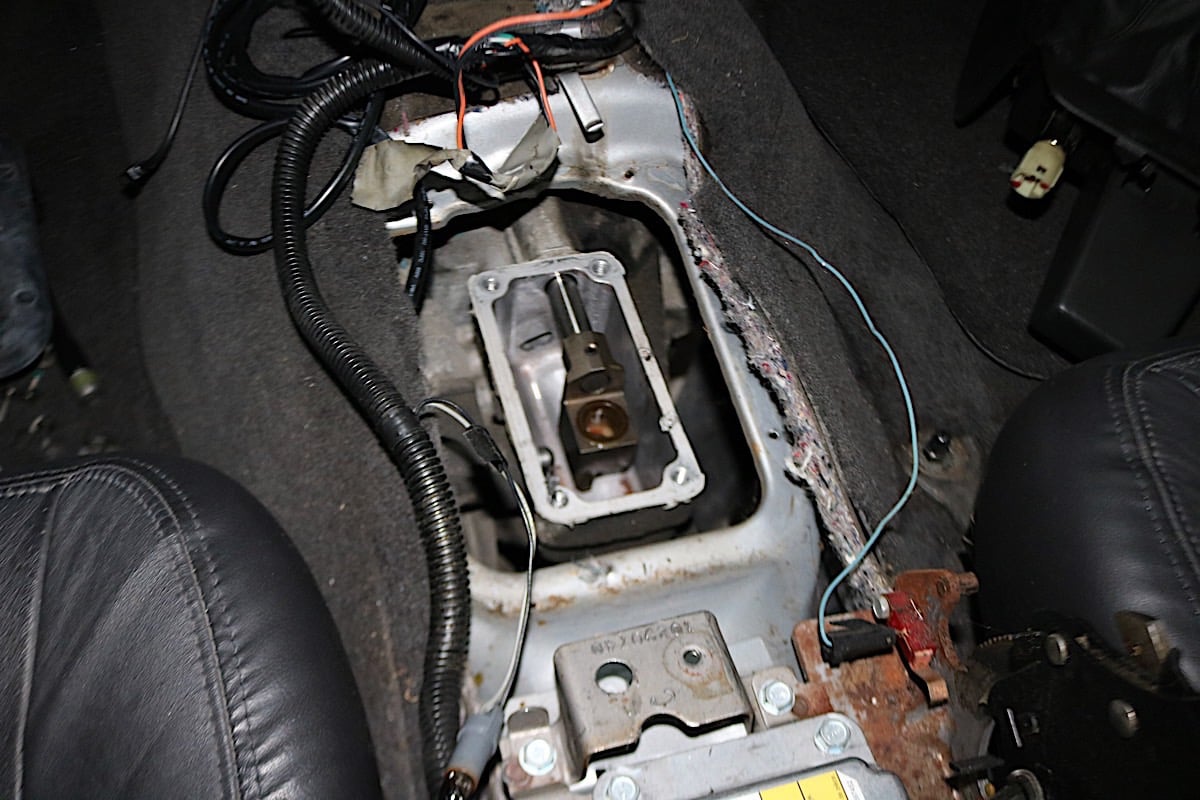 [15]
[15]
While not entirely necessary, we removed the center console from the vehicle to make reaching the top transmission bolts easier to access later on in the removal.
Once the shifter is out of the way, make sure you cover the hole for the shifter rails with a rag so nothing falls into the transmission. At this point, we moved under the car to remove the driveshaft. Once the driveshaft is out of the way, it’s time to remove the transmission crossmember and torque arm mount. The exhaust hanger for the Y-pipe may also need to be removed and it is bolted to the transmission with three bolts that attach it to the transmission. These were removed next.
 [16]
[16]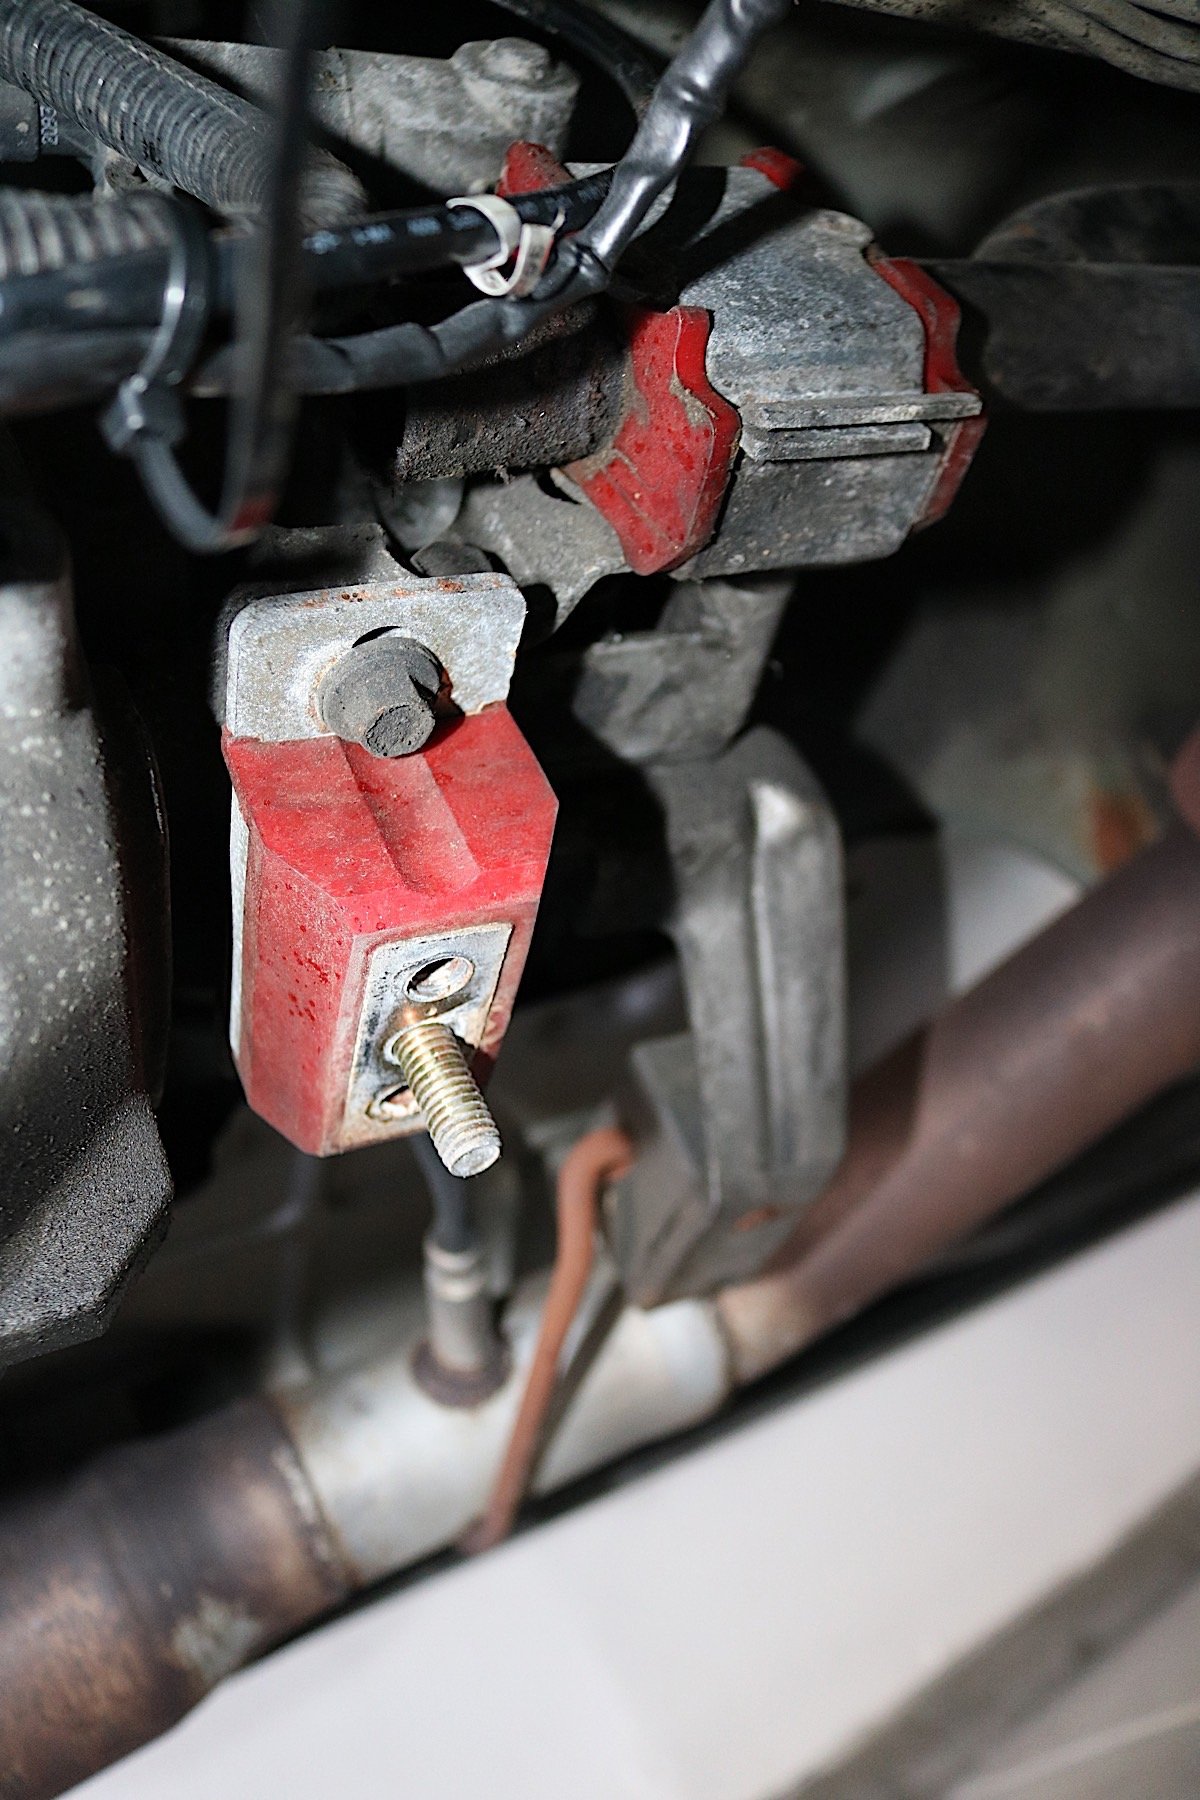 [17]
[17]
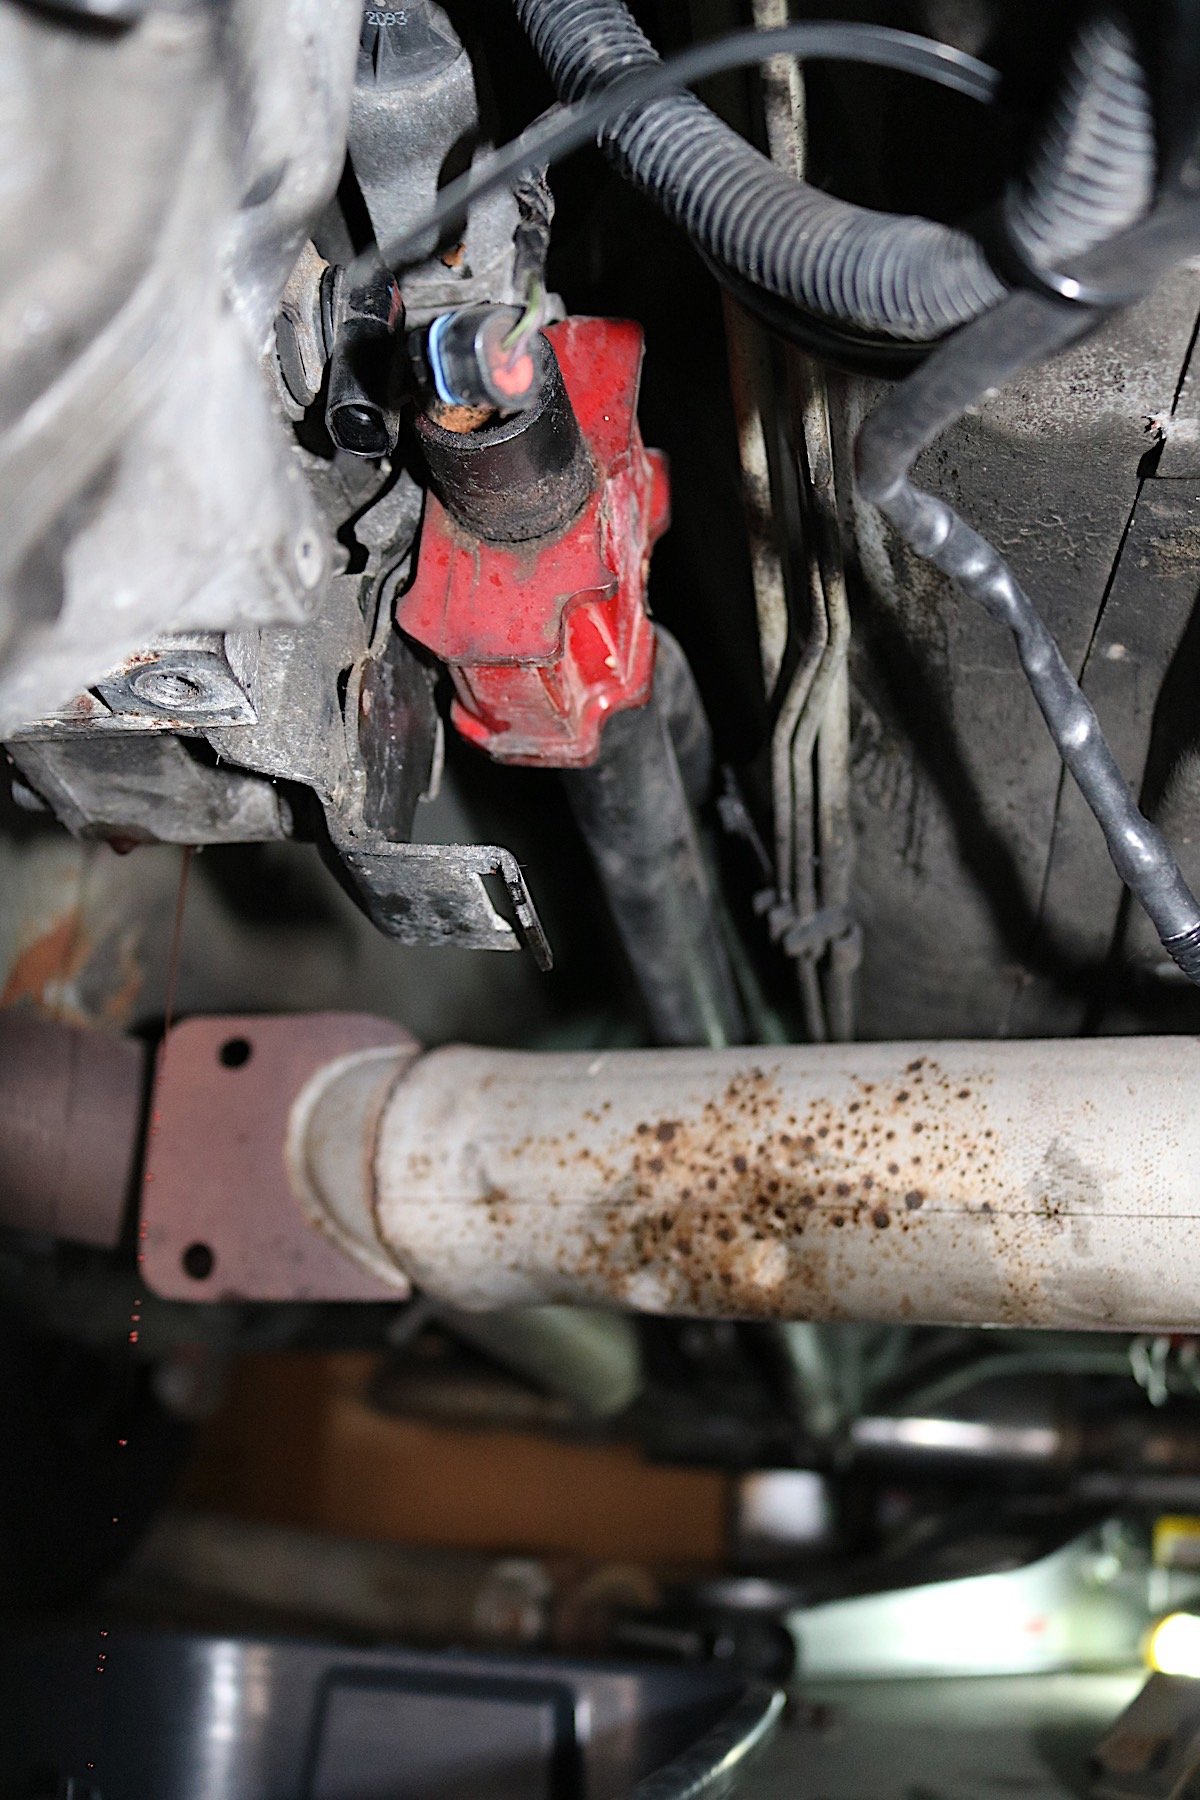
Here you can see the torque arm mount that needs to be disconnected before the transmission can be removed from the car. Getting the arm bolted back up can be a pain but with some persistence it will go back together.
With the trans crossmember, torque arm mount, and exhaust hangers out of the way, we turned our attention to the clutch line attaching the slave cylinder to the clutch master cylinder. The line uses a quick disconnect and they do make a specialty tool for disconnecting it. However, two screw drivers work arguably just as well, and that is the route we decided to take. With a screwdriver on each side of the cream-colored collar, we simply depressed the collar several times. Wiggle the line and it should eventually pop free. We got ours to break free on the second try.
 [18]
[18]Here you can see the collar on the clutch line disconnect that need to be depressed in order to release the line.
Next, we made sure all of the electrical connections to the transmission were free and that our wiring harness was free of the loom holders. Once we were sure nothing was holding the transmission to the car, other than the transmission to bellhousing bolts, we were ready to drop the gearbox.
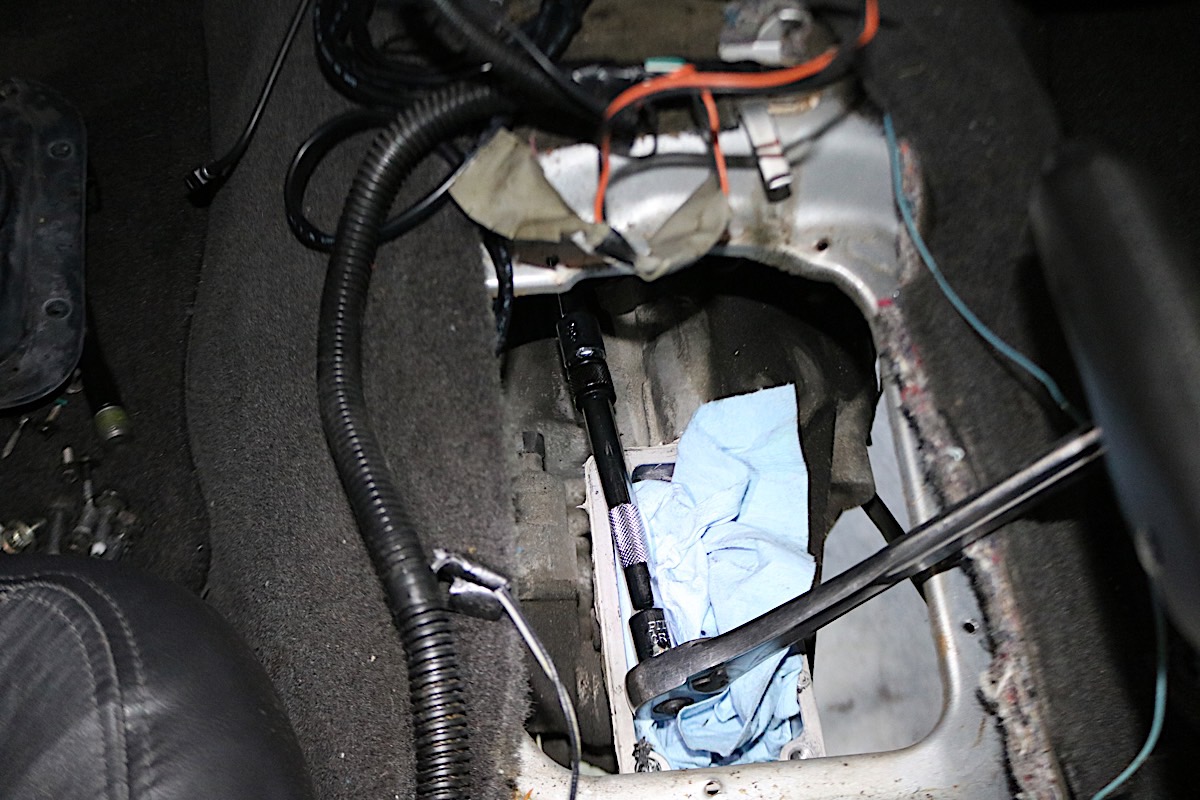
There are several ways to go about removing the eight bolts that hold the transmission to the bellhousing. Some use universals and long extensions, attempting to reach the bolts from the rear of the transmission. We, however, decided to go an easier route—and that’s the reason we removed the shifter. Six of the eight bolts come out easily from under the car, but the two top bolts can be difficult. We, however, believe in the old adage,“work smarter not harder.” With two extensions and our socket, we created an extension that we could then get our ratchet on from inside the car through the shifter hole. This made removing the two last bolts a breeze.
 [19]
[19]We accessed the final two transmission bolts from inside the car with some long extensions.
With nothing holding the transmission in, we placed a jack under the transmission and carefully rocked it until it was free. We then lowered it and moved it out of the way. With the transmission out of the car, we could now easily access the eight bellhousing bolts. After removing them, the clutch was removed after loosening the six bolts that secure it to the flywheel.
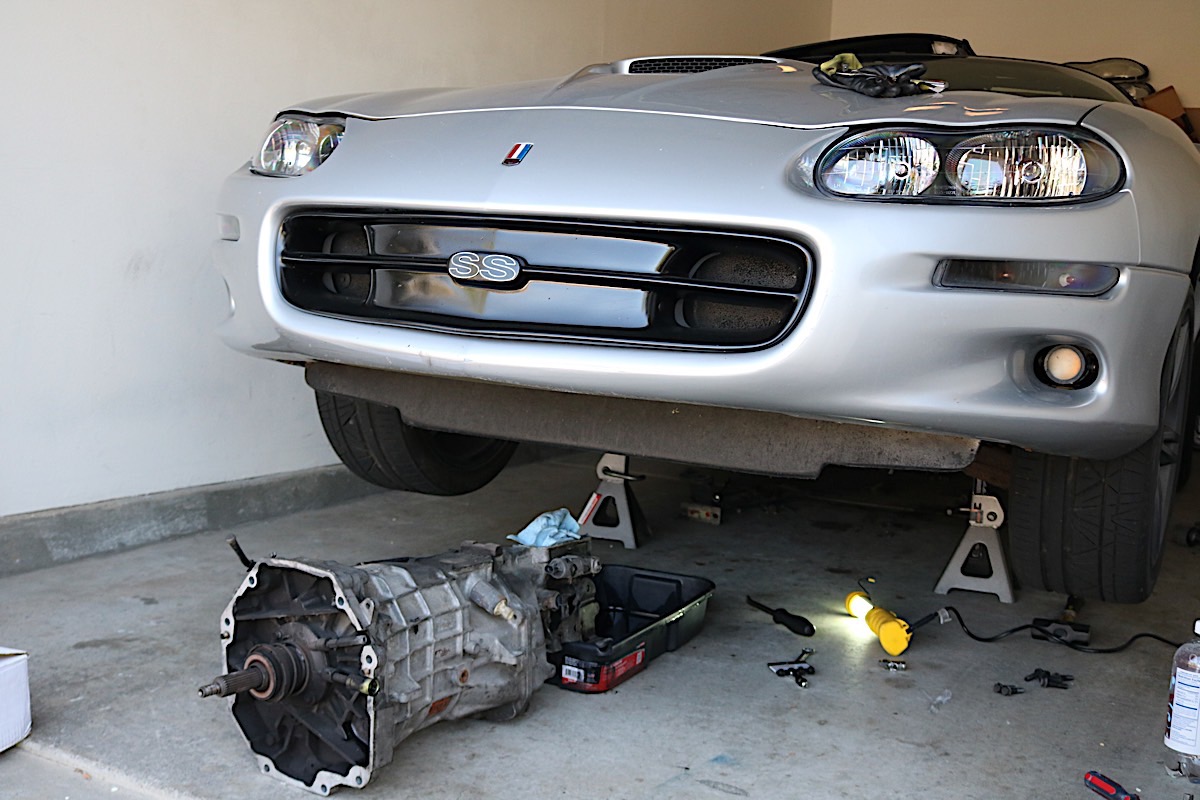 [20]
[20]The transmission right after it was dropped and pulled from under the car.
 [21]
[21]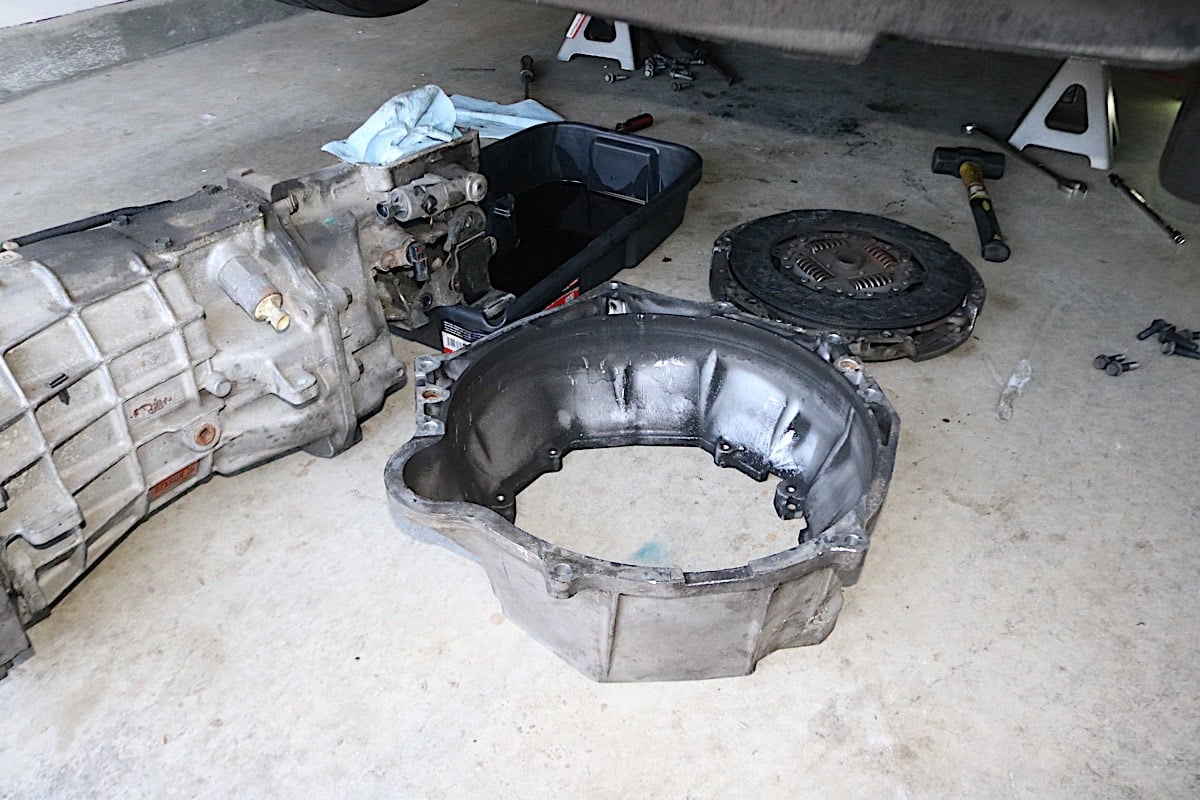 [22]
[22]
After removing the transmission, the bellhousing and clutch assembly were next.
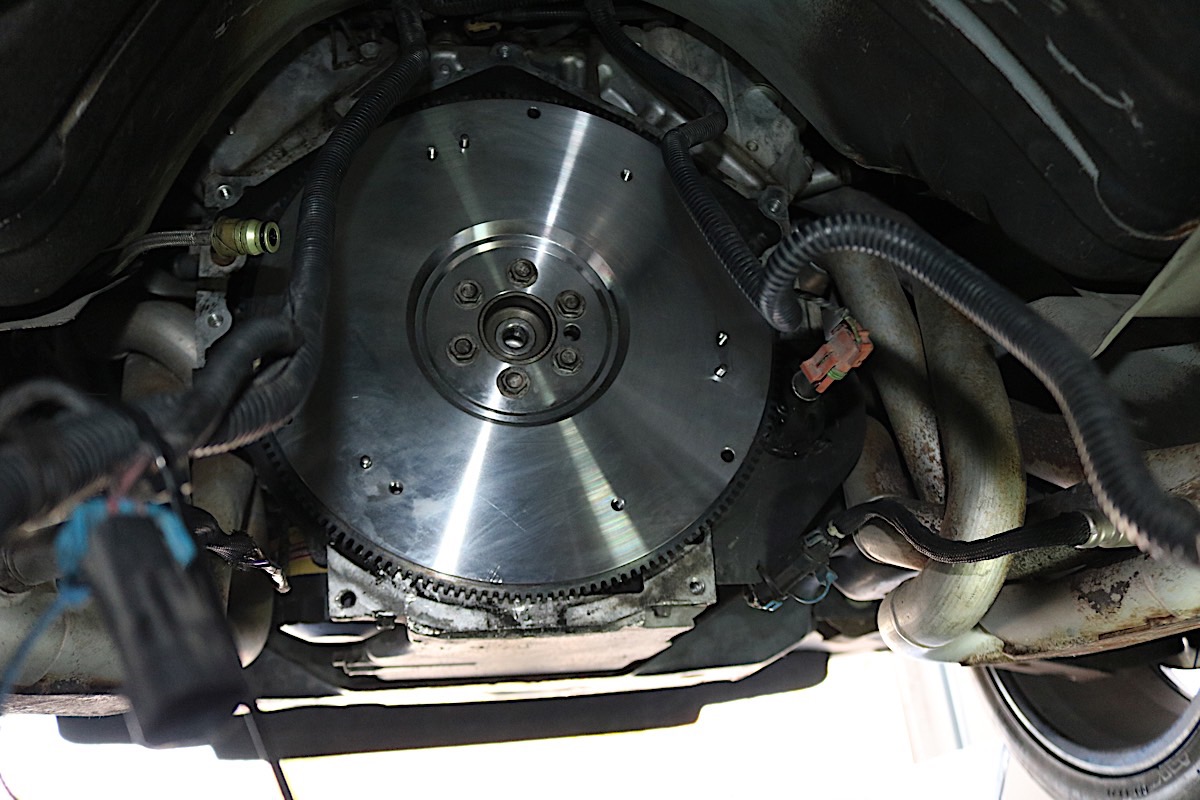
While there was plenty of material left on our stock clutch disc—shocking since it is the stock clutch and has 107,000 miles on it—the hot spotting that can be seen on the flywheel showed us that the clutch was having a hard time keeping up with the added traction from our drag radials. Next, the flywheel was removed using a flywheel-holding tool and a breaker bar.
 [23]
[23]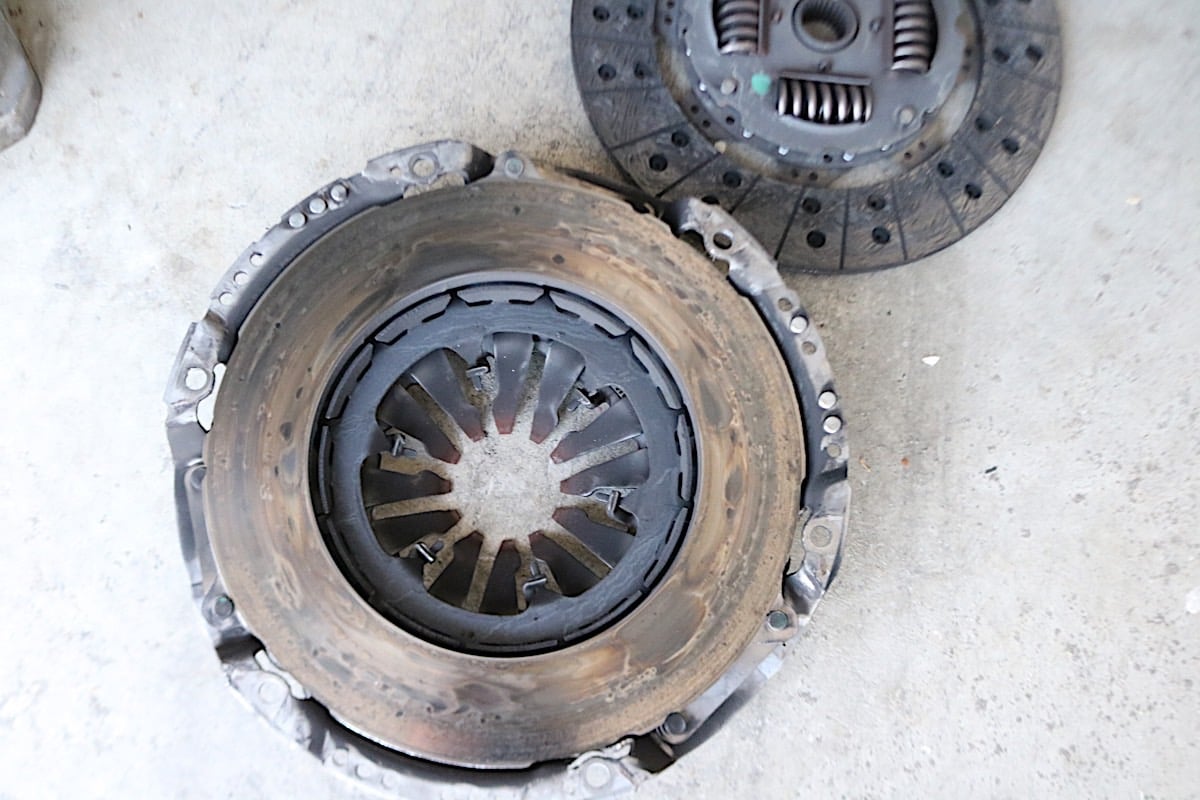 [24]
[24]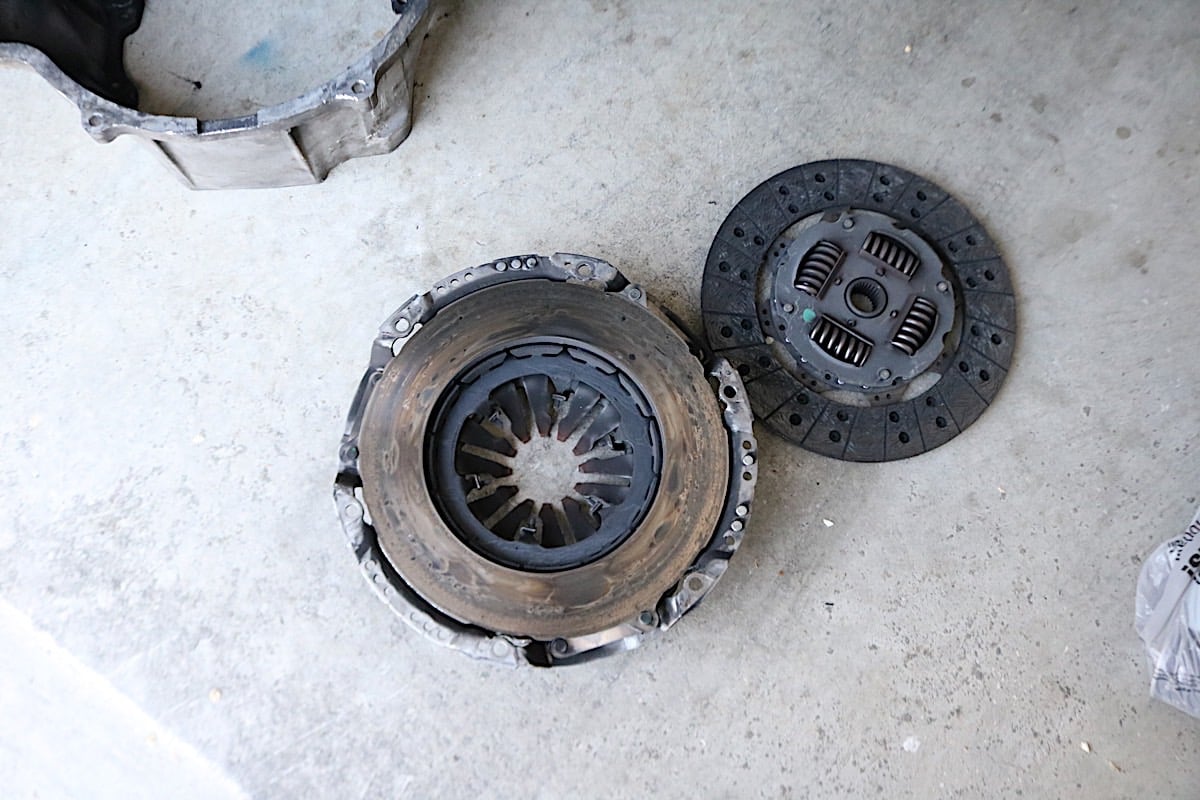 [25]
[25]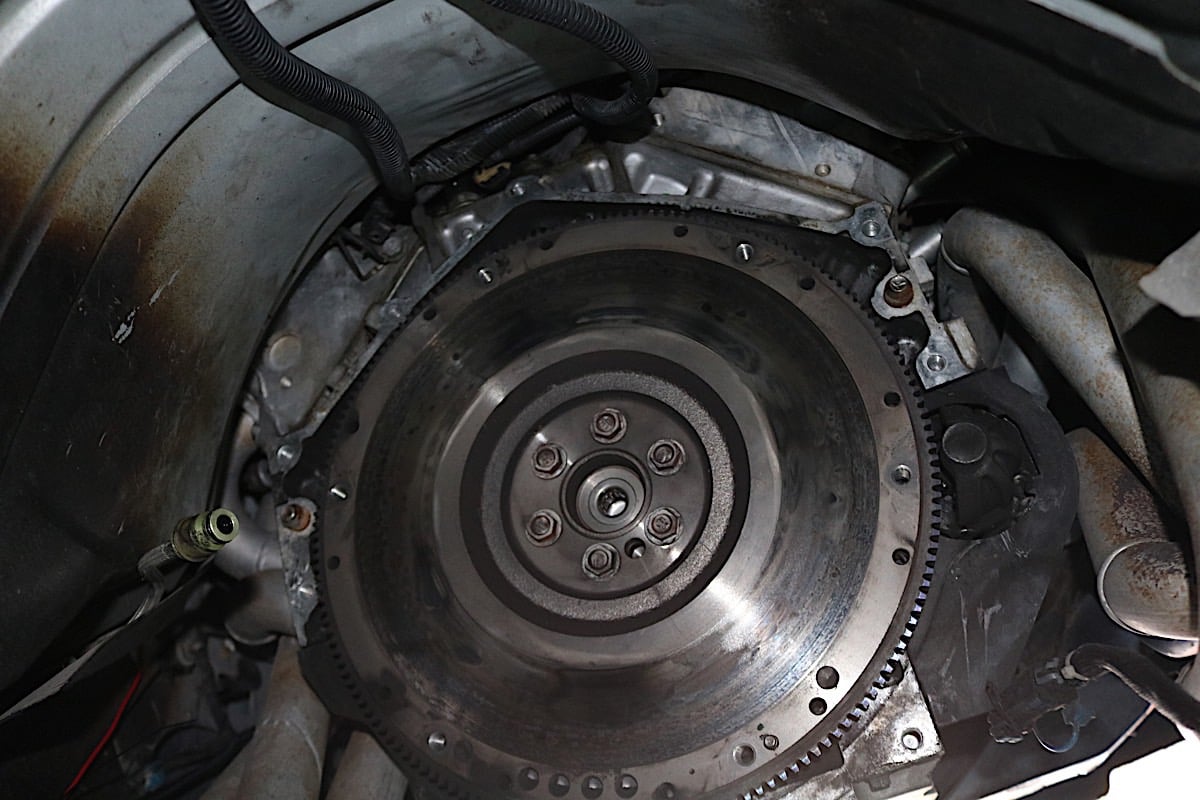 [26]
[26]
Here you can see that while we had plenty of clutch material, the hot spotting on our flywheel and pressure plate indicate that the stock clutch was probably straining under the pressure of our newly found traction.
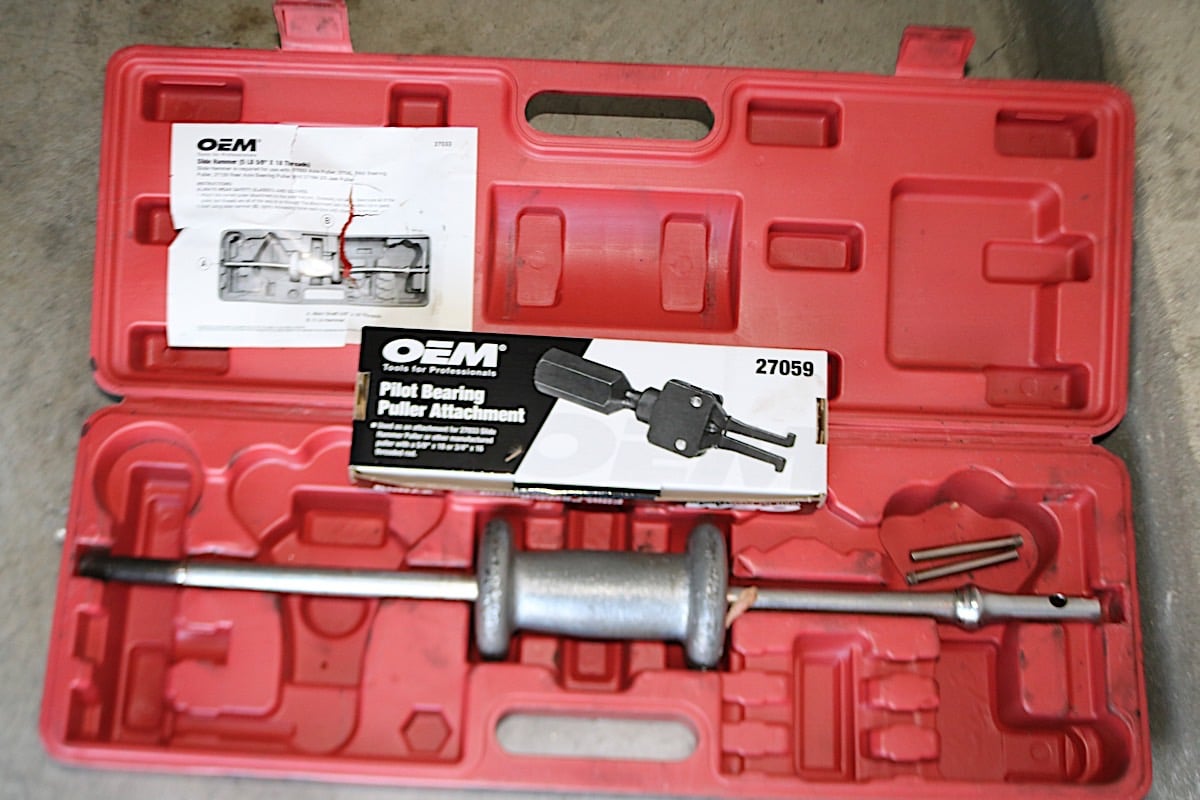
Our last order of business was to remove the old pilot bearing. For this, we used a trick that we found over on LS1tech.com [27]. We rented both a pilot bearing removal tool and a slide hammer from our local auto parts store. However, the pilot bearing tool is too large for the pilot bearing, so we had to get tricky. In order to get the tool into place, we punched out one of the pins that holds the arm to the tool. Then, with the tool partially disassembled, we put the jaws of the tool into the bearing, which will now fit since they can go in one at a time. Once both jaws were in place, we reassembled the tool by putting the pin back in place. Once we had the tool ready to go, we attached the slide hammer and gave it six good whacks, and then it popped free. To install the new bearing, we greased the outside of the bearing and then used a socket the size of the bearing to pound it home with a five-pound sledge.
 [28]
[28]
 [29]
[29]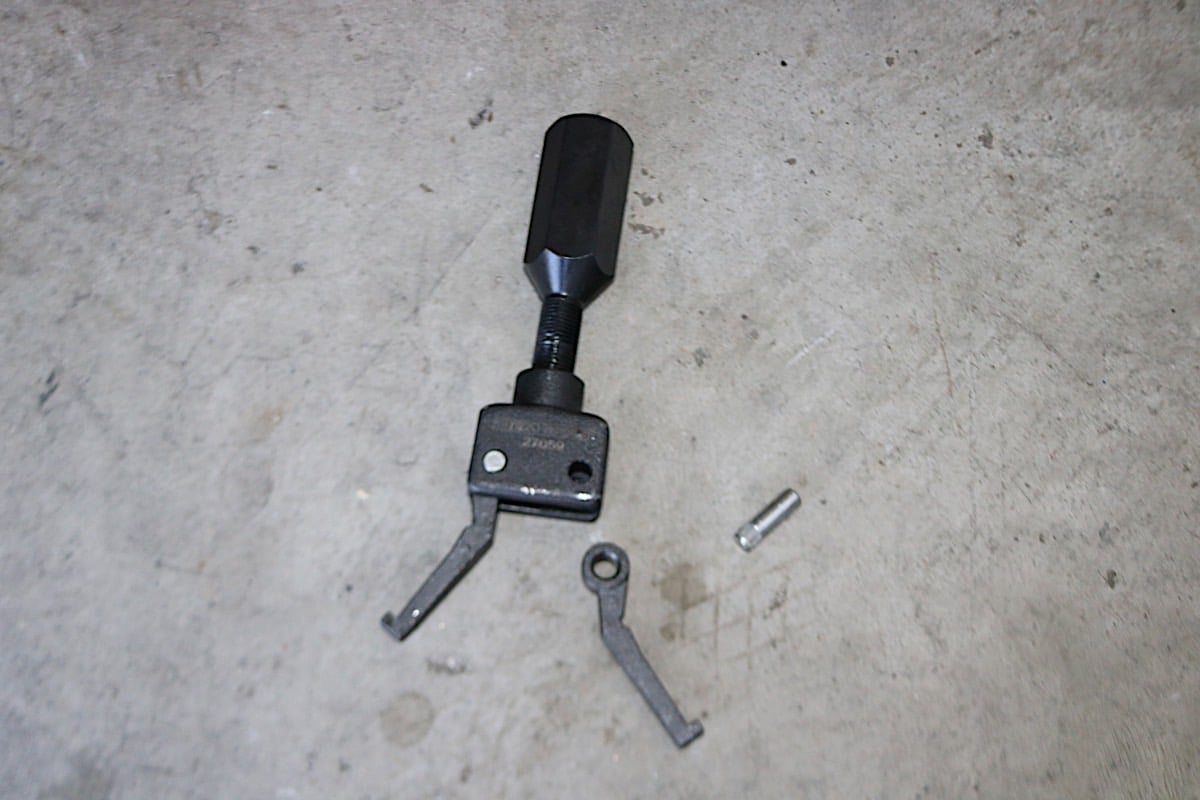 [30]
[30]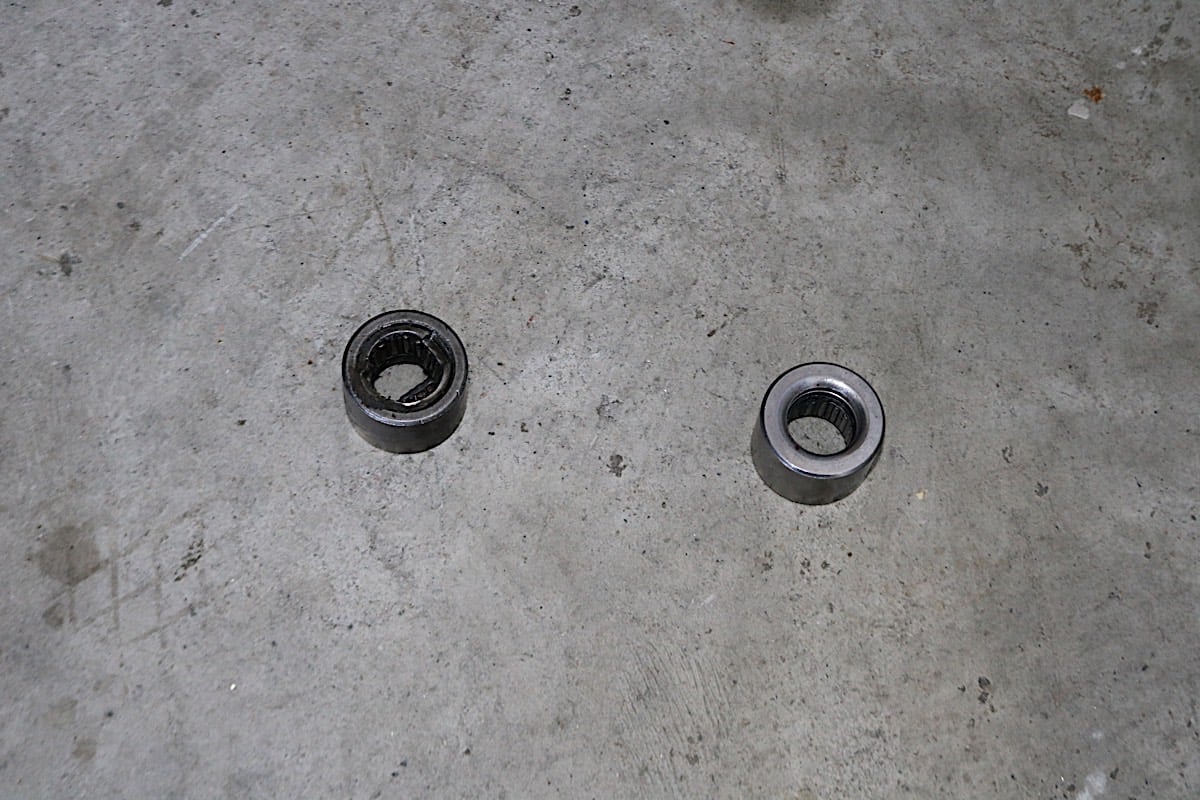 [31]
[31]
Here you can see the tools we used to remove the pilot bearing. After pushing the pin out of the tool, you can then insert the arms one at a time into the pilot bearing, otherwise there wouldn't be enough room for both arms to fit through the opening simultaneously. Once both arms were in place, we reinstalled the arm and pin to the tool. With the tool firmly locked behind the pilot bearing, we threaded on the slide hammer and pulled the old bearing.
With our stock clutch and flywheel out of the car and the new pilot bearing in, we were ready for some new SPEC hardware. The first thing to go in was obviously the new flywheel. We cleaned it with brake cleaner before it went it, but be sure that you don’t wipe off the yellow alignment mark. You will need to line these marks up with the clutch to make sure it is balanced when in operation.
 [32]
[32]While you may not be able to see it in this picture, the yellow alignment mark is still there. Be sure not to wipe it off when you are cleaning the flywheel before installing the clutch.
Red Loctite is used on all bolts including both the flywheel to crank bolts and the pressure plate to flywheel bolts. The flywheel was then torque to the factory torque spec of 74 lb-ft of torque. You want to make sure you come up to that 74 lb-ft in stages. First we tightened to 15 lb-ft on the first pass, then to 37 lb-ft on the second with the final 74 lb-ft on the last pass.
 [33]
[33]Here you can see the alignment tool and the spacing of the fingers around it. Our thumb ended up being the perfect guide to whether it was perfectly centered.
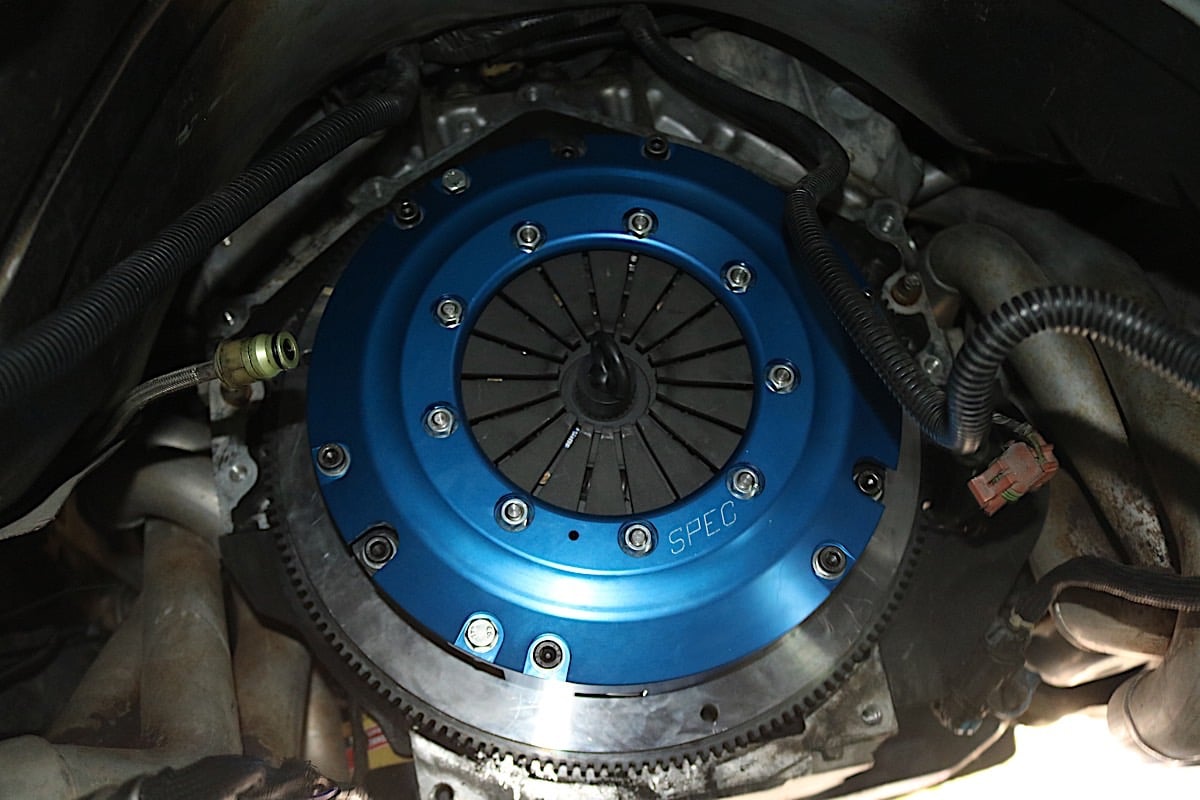
With the flywheel in place and cleaned, we prepared the clutch to go in by cleaning all the surfaces on it with brake cleaner as well—again being sure not to wipe off the alignment marks. A twin disc can be a bit of a pain to hold in place while lining it up with the dowels on the flywheel. In this situation, a second pair of hands really helps. With the clutch sitting on the dowels and our bolts started we inserted the alignment tool to get everything squared up before we torqued the pressure plate to spec. Even with the alignment tool in, there is still room for movement, so we used a thumb as reference for the alignment. Ours ended up with about a thumbs-length of distance from the alignment tool to the pressure plate fingers. This allowed us to see that we had perfect alignment on the clutch discs.
With the alignment tool still in place, we torqued the race-grade hardware to 30 lb-ft of torque in a criss crossing pattern. Once torqued down, the alignment tool still slid in and out freely so we knew we were all lined up. From there, it was simply a matter of reversing the process and bleeding the clutch.
 [34]
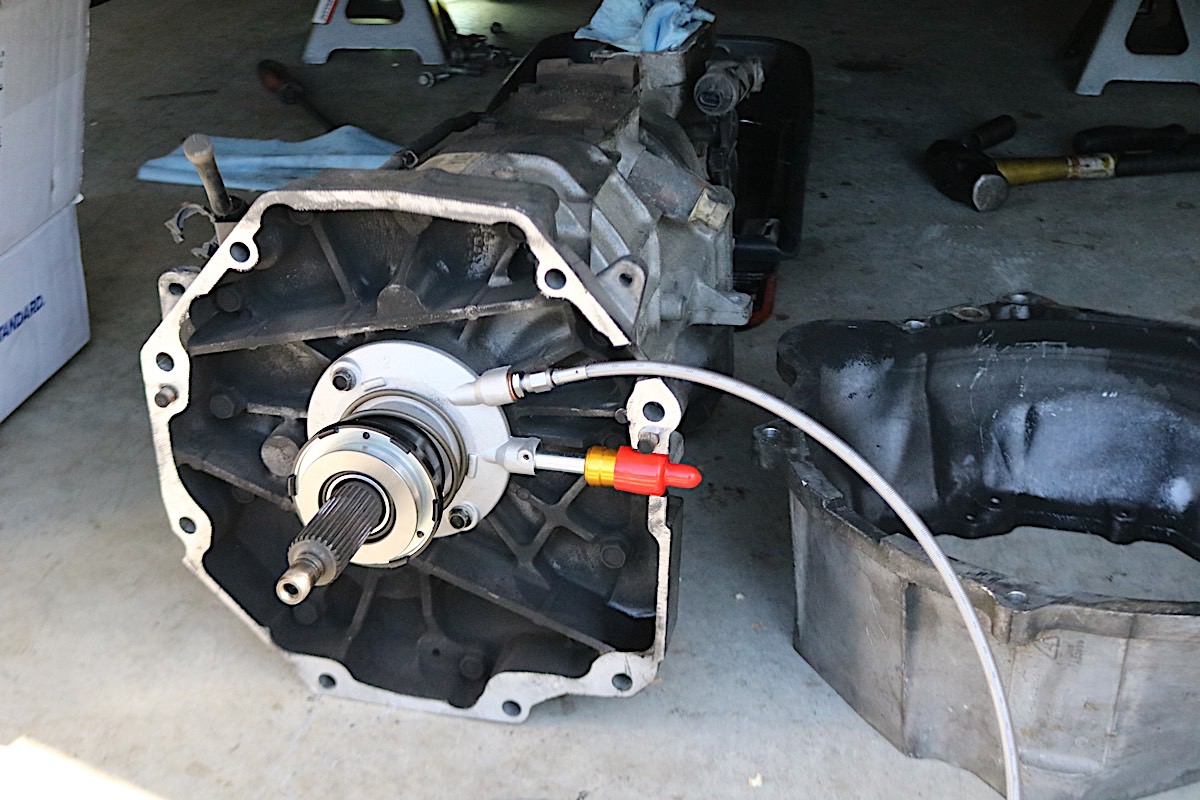
[34]Here we’ve replaced the slave cylinder and added our Tick Remote Speed Bleeder to allow us to easily bleed the clutch later.
 [35]
[35]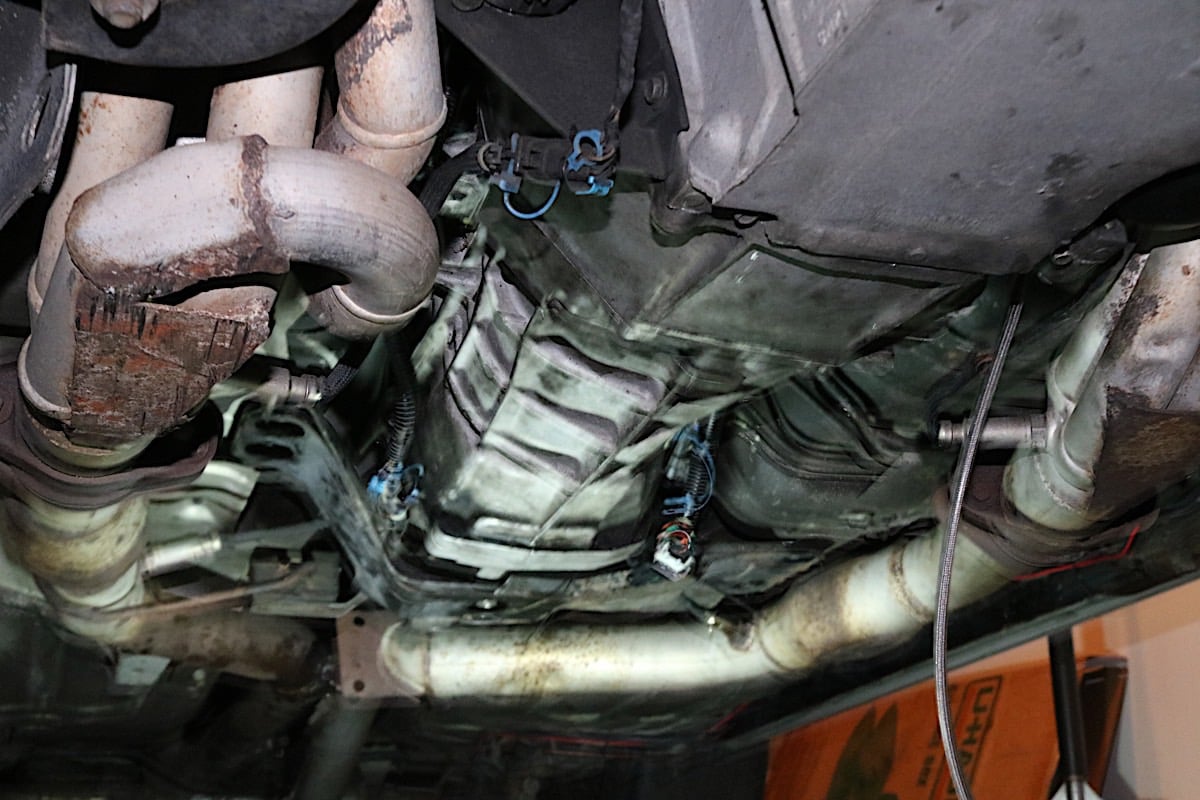 [36]
[36]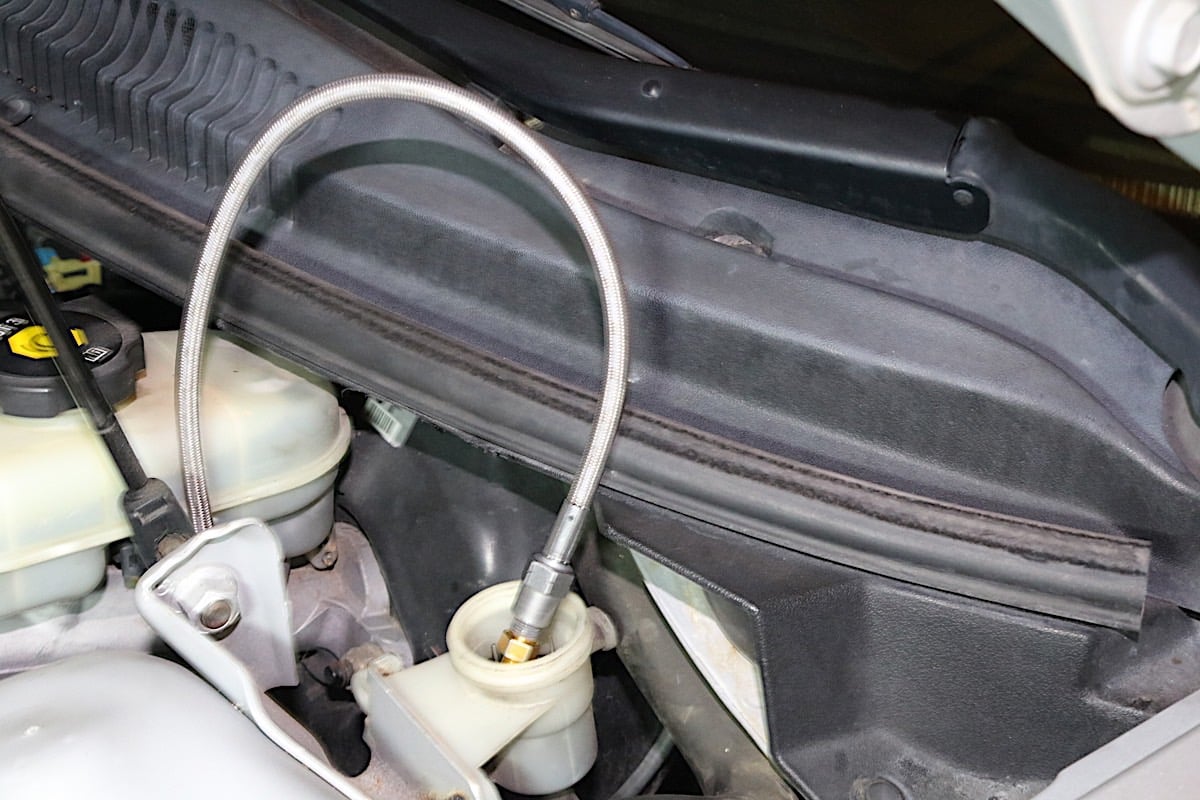 [37]
[37]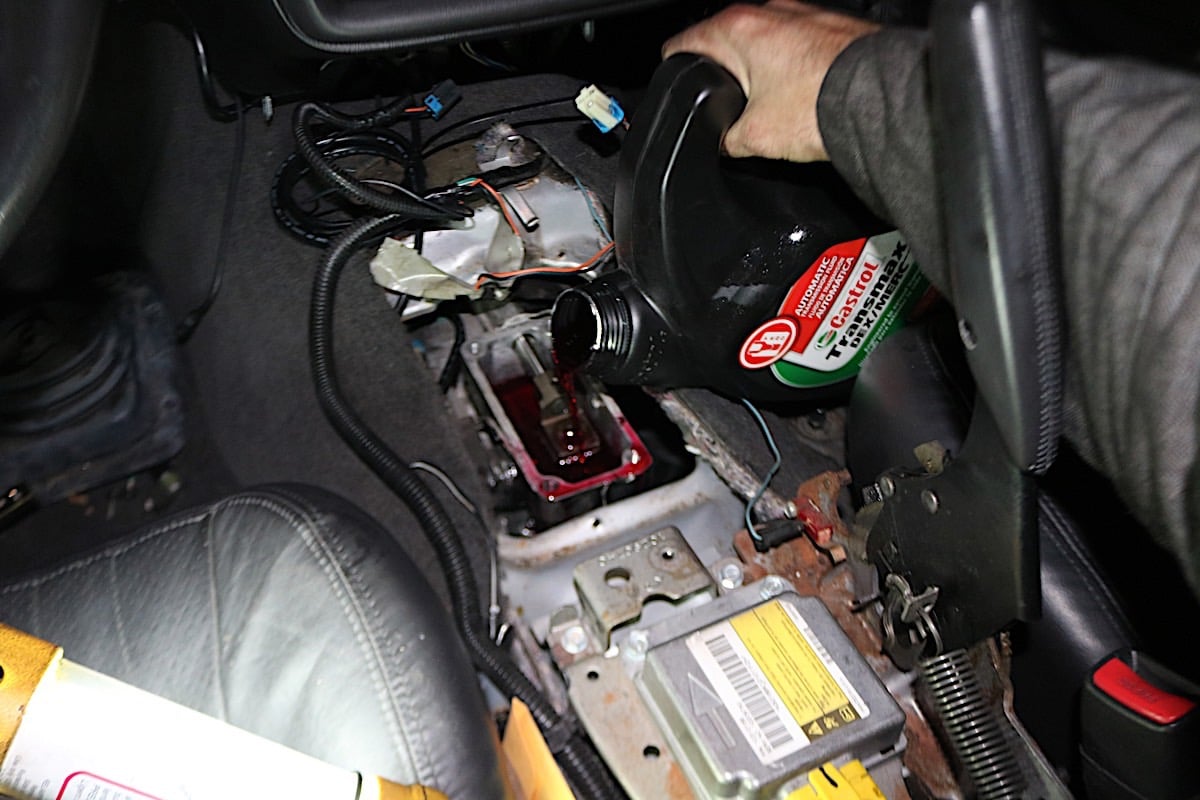 [38]
[38]
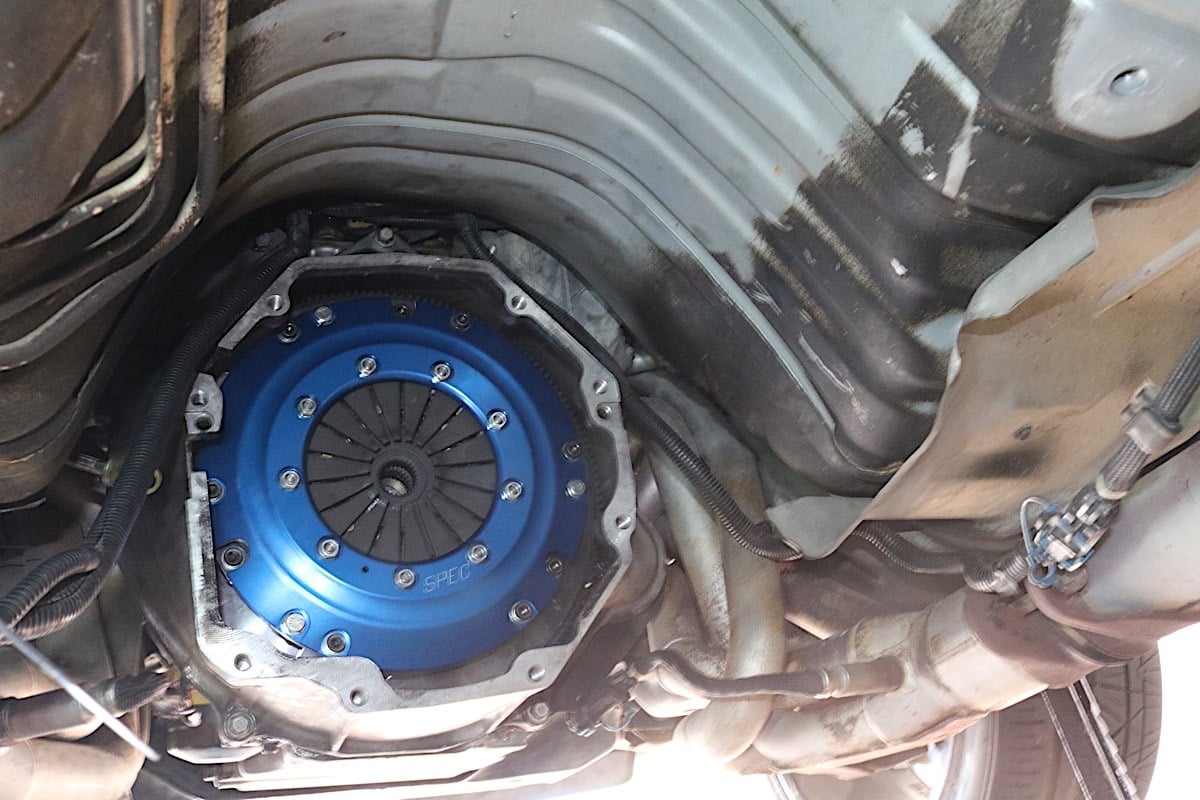
With the clutch finally back in place and torqued down, we reinstalled the bellhousing and remounted the transmission. Be sure to crack open the bleeder on the slave cylinder so it doesn't prevent the transmission from sliding into place. Finally the length of the remote bleeder made it possible to recirculate back into the master cylinder reservoir making this truly a one-man operation. With the shifter off, you can refill the transmission, if needed, through shifter opening in the top of the transmission, making it much easier.
While we were at it, we replaced our slave cylinder and installed a Tick Remote Speed Bleeder [39] to make bleeding the clutch as simple as possible. Once everything was back together, bleeding the clutch was a breeze.
Final Impressions
With the clutch finally in the car, we were ready to put some break-in miles on it. SPEC recommends at least 500 city miles. Basically, they want the clutch to be cycled as many times as possible in order for it to seat. Naturally, the first time we let it out it was grabby as any new clutch is going to be but it engaged smoothly.
What we were impressed by the most was how effortless the clutch pedal felt for such a stout clutch. Even though the pressure plate fingers will break in and the pedal effort will lighten up some, the engagement points and pedal effort were virtually stock. At this point, we have around 300 miles of our 500 mile break in period on the clutch and we are happy to report that it operates flawlessly. For a clutch that can handle 1,400 lb-ft of torque, we are amazed at just how civil the clutch really is and it will likely only become better as we get it fully broken in.
 [40]
[40]
Living with the clutch on a daily basis is a no brainer—though we are still getting used to it. However, we feel that it is a perfect combination of aggressive and civilized and will allow us to drive to and from the track without any problem.
Now that we have a clutch that can support our future power needs, we are ready to move forward with our project Camaro. Stay tuned as we add E85 and boost to the project.