 [1]Back in part one [2], we went over the traction modifications we’d made to SSleeper, including our Driven [3] lubricants, Spohn [4] rear suspension package, KW [5] Variant 3 coilover kit, and a Belltech [6] rear sway bar. We made pretty quick work of it with just three days’ time devoted to removal and installation.
Riding the Trail into the Sunset
 [7]Here we are at part two, where we’ll dive right in. This time, we’re focusing on power modifications to the Trailblazer; specifically, we’re going to address the exhaust, intake, and ignition coils. Luckily, we have some great parts from our friends at Granatelli [8], whose coil-near-plug parts will deliver a more powerful and consistent charge; AIRAID [9], whose intake system will make better use of the engine bay to channel cool air to the engine; and CORSA Performance [10], whose aggressive exhaust kit will get our SSleeper to breathe easier and more efficiently, all while sounding lean and mean.
 [11]
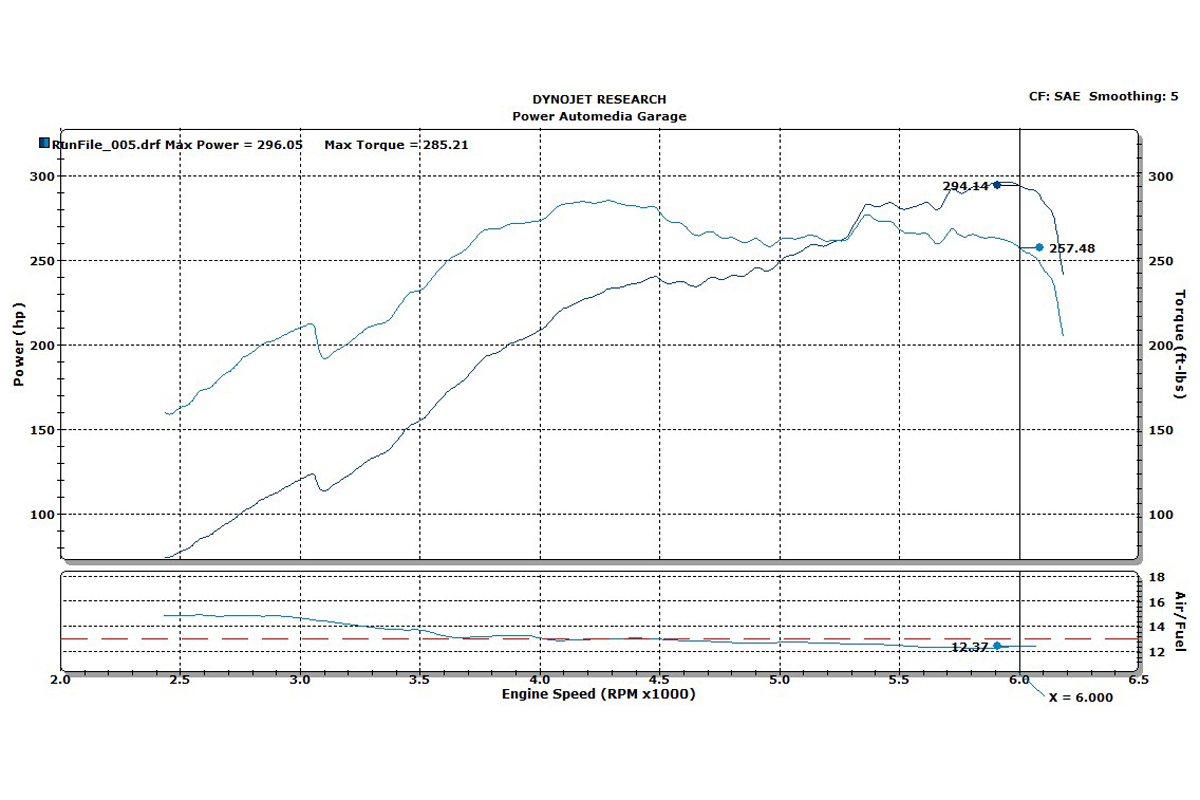
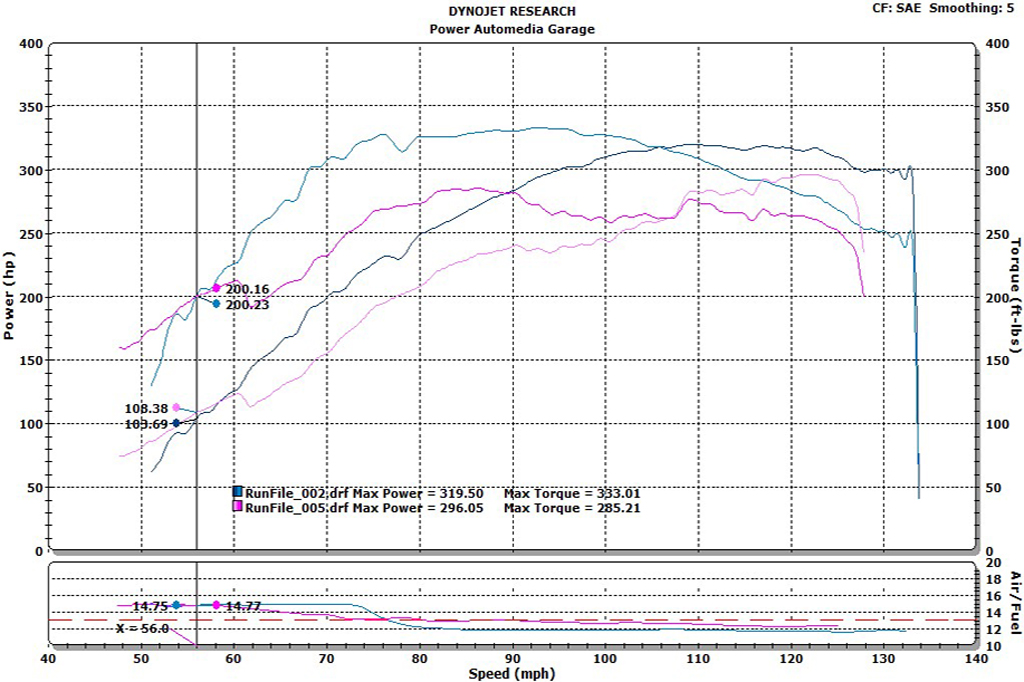
[11]The baseline run showed us 296.1 hp and 285.2 lb-ft. of torque.
Let’s take a quick moment first to recognize where we’re coming from. The killer LS2 and four-speed automatic made for an excellent pair, but what could the dyno tell us about its stock performance? The answer was less than exciting.
On its baseline run, the car made 296.1 hp and 285.2 lb.-ft. of torque at the wheels on the DynoJet [12]. We had to get those numbers up, and staring at the dyno monitor wasn’t going to get us anywhere. We got the Trailblazer unhitched and rolled it over to the lift to start our work on the exhaust.
Day 1: An Exhausting Removal
 [13]
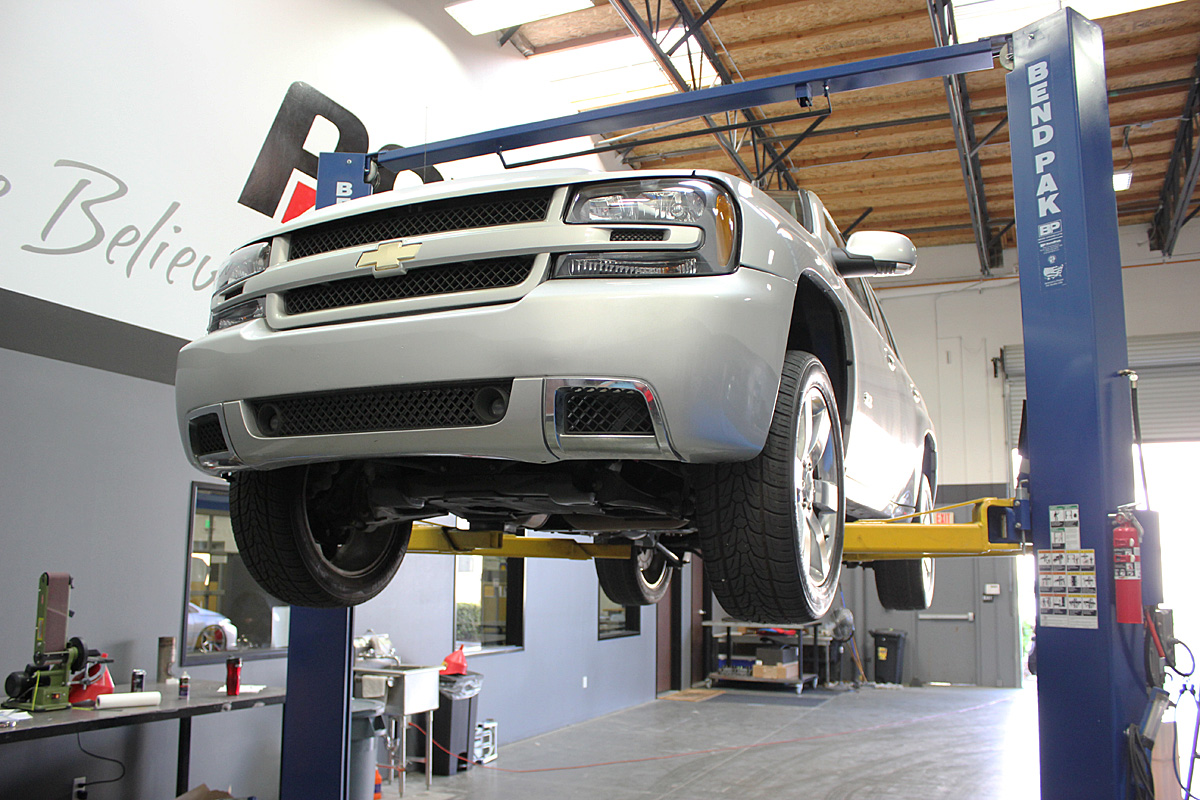
[13]We’ve got a long day ahead of us…
Exhaust Disassembly
With SSleeper slumbering on our two-post lift, we had all of day one to get the stock exhaust off of the vehicle. It’s worth noting that the owner had previously welded in an aftermarket muffler. We’d be removing the muffler later.
 [14]
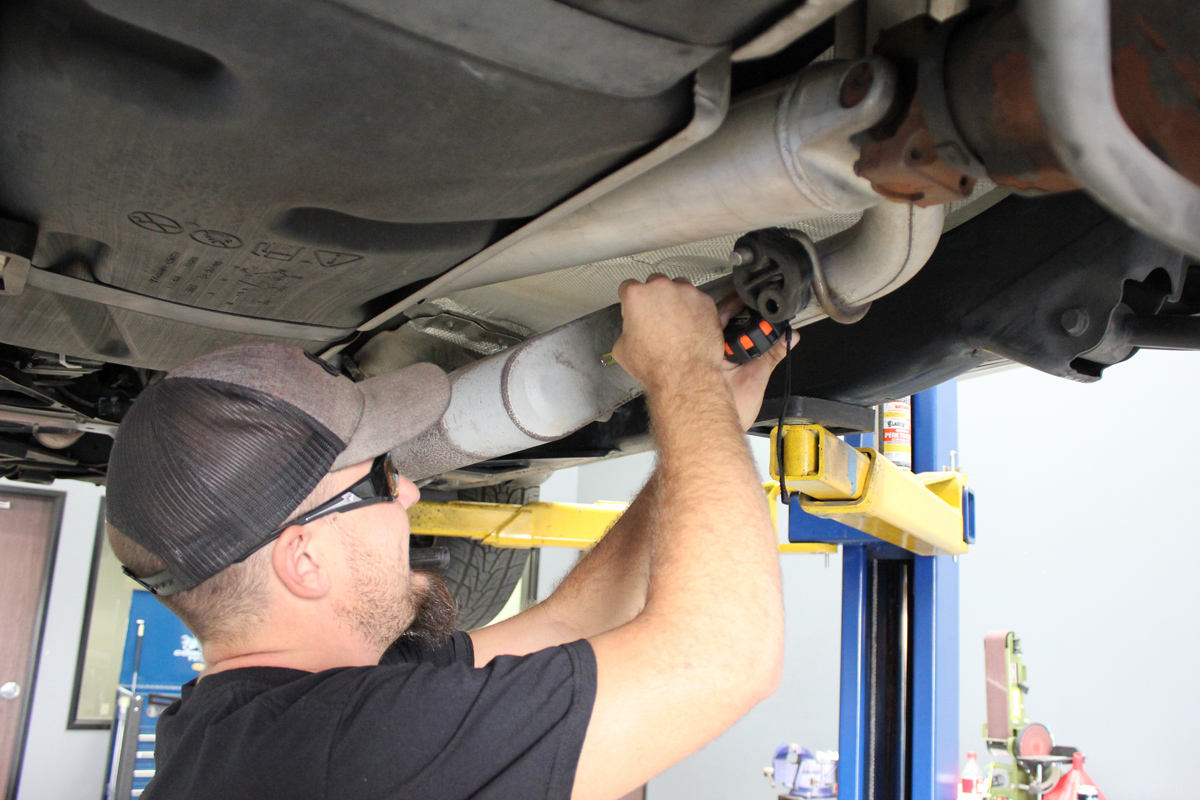
[14]Because we will have to remove the exhaust in two pieces, we have to properly mark where the cut will be made. As per the instructions, Dean makes the mark at 4.25″ from the rear face of the muffler.
First up, we dislocated everything from the intermediate pipe back toward the tailpipe. Hanging loose, the exhaust was then marked at 4.25″ from the rear face of the large center muffler. This was where we would be making our cut, as the exhaust would have to be removed in two pieces.
After doing so, we removed the hanger from the rubber grommet nearest to the cut, and then the next hanger on the tailpipe as we worked our way toward the rear. Reaching the rearmost hanger, we found we had to slide the tailpipe forward to get it to break free.
Now that the three hangers had been detached, we pulled the tailpipe out by pulling toward the rear of the car, twisting the tailpipe every so often to avoid snagging on heat shields and hangers. Supported on jack stands and carefully monitored, the rest of the exhaust would soon be removed as we returned to the front, where we unscrewed the 15mm nuts at the flange after the flex coupler.
 [15]
[15] [16]
[16]
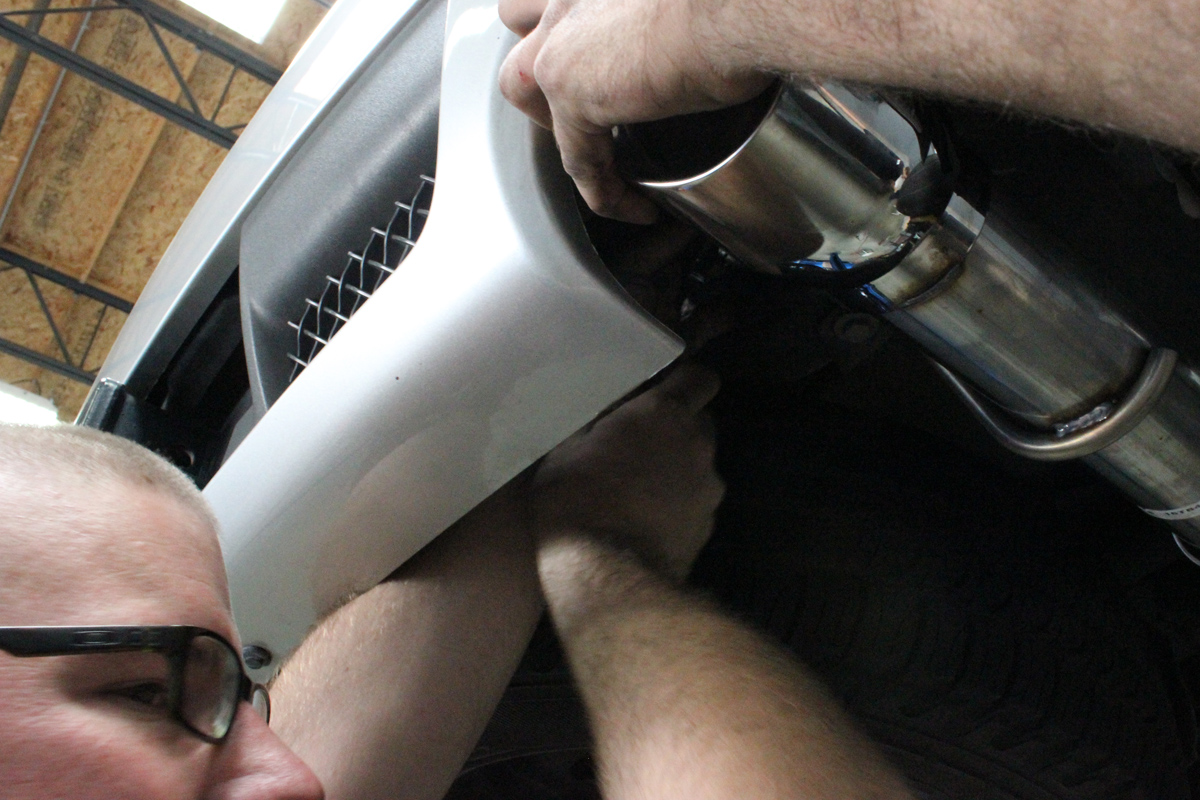
Dean makes the cut using a Sawzall, while Sean holds onto the pipe from the front; later, he removes the tailpipe.
We removed the final hanger from its grommet and carefully pulled everything toward the rear to remove it. So went the stock system. With any luck, the installation would go just as smoothly. Now it was time to remove the exhaust manifolds.
Exhaust Manifold Removal
 [17]
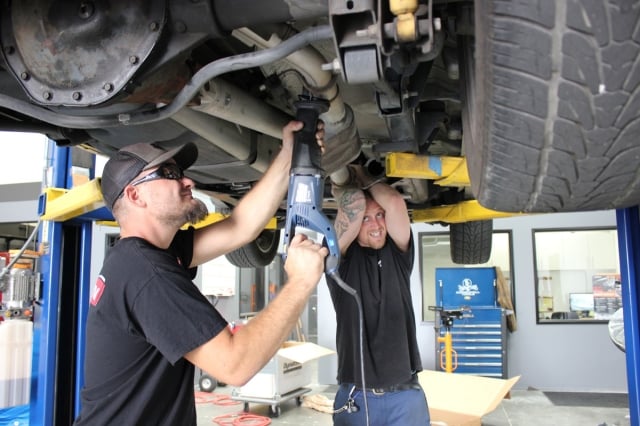
[17]Sean gets at things on top of the Trailblazer while Dean is there to catch everything down below.
We began by detaching the ground cable from the negative battery terminal to prevent arcing when removing the starter. We also removed the wheels and tires, affording us more space and a better view of the operation.
Dean attacks the nuts holding the Y-pipe to the car.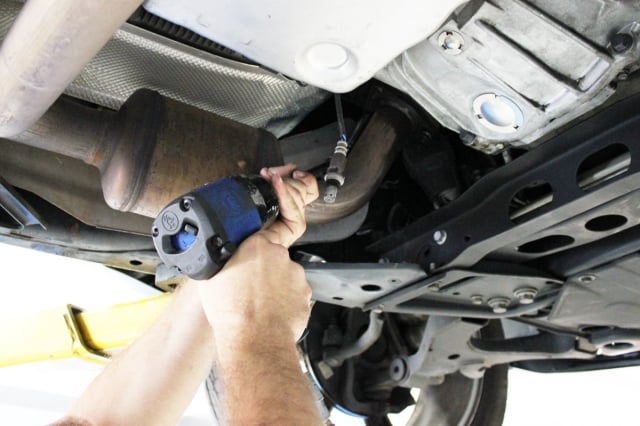 [18]
[18]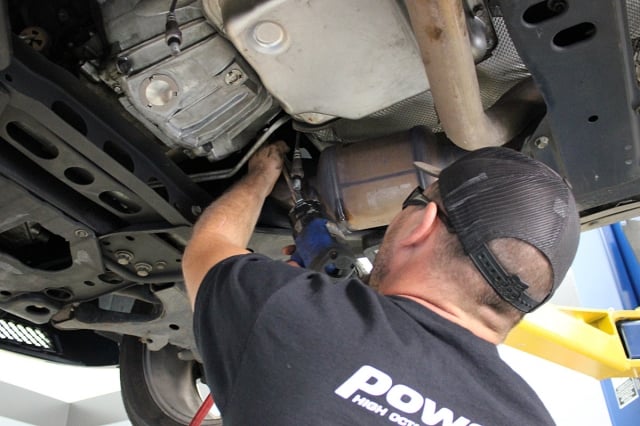 [19]
[19]
After that, we removed the inner fender panels from both sides of the Trailblazer, and then went under the hood to get at the bolt holding the oil dip stick tube bracket. We went about unplugging everything from the spark plugs to the coolant temperature sensor, and threw the factory parts in the scrap heap.
 [20]
[20]Dean gingerly removes the Y-pipe.
We redirected our attention to the undercarriage, disconnecting the O₂ sensors from front to rear, making marks to recall where to replace them once the time came. All the while, we were careful not to get the grime from our hands onto the surface of the sensors.
Getting rid of the cast manifolds and the muffler inlet was somewhat tricky, requiring the removal of the rear transmission mount, crossmember, and driveshaft. Dean set the transmission on a jack stand, while Cody went around removing the O₂ sensor wiring and harness, nuts, and bolts holding up the crossmember.
 [21]
[21]Dean grabs the free-hanging left-side exhaust manifold prior to its complete removal.
Afterwards, we took out the front rubber muffler hanger and the three nuts on the side down tubes, both left and right sides, to detach the y-pipe. The four remaining O₂ sensors were unscrewed and set aside for later.
We moved along to the exhaust manifold and removed its six bolts. By going through the fender well, we found things were much easier to tackle, and soon had the manifold removed in no time. And just like that, voilà! The entirety of the stock exhaust system had been uninstalled.
Day 2: In With The New
Exhaust Installation
 [22]
[22]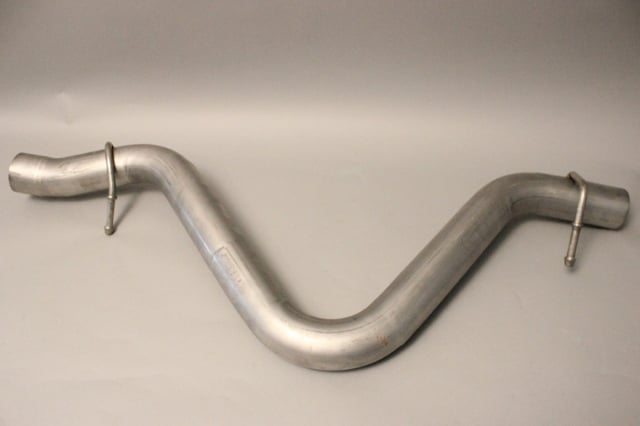 [23]
[23]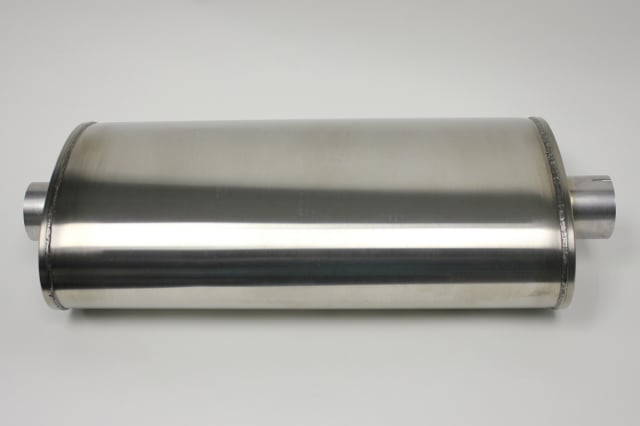 [24]
[24]
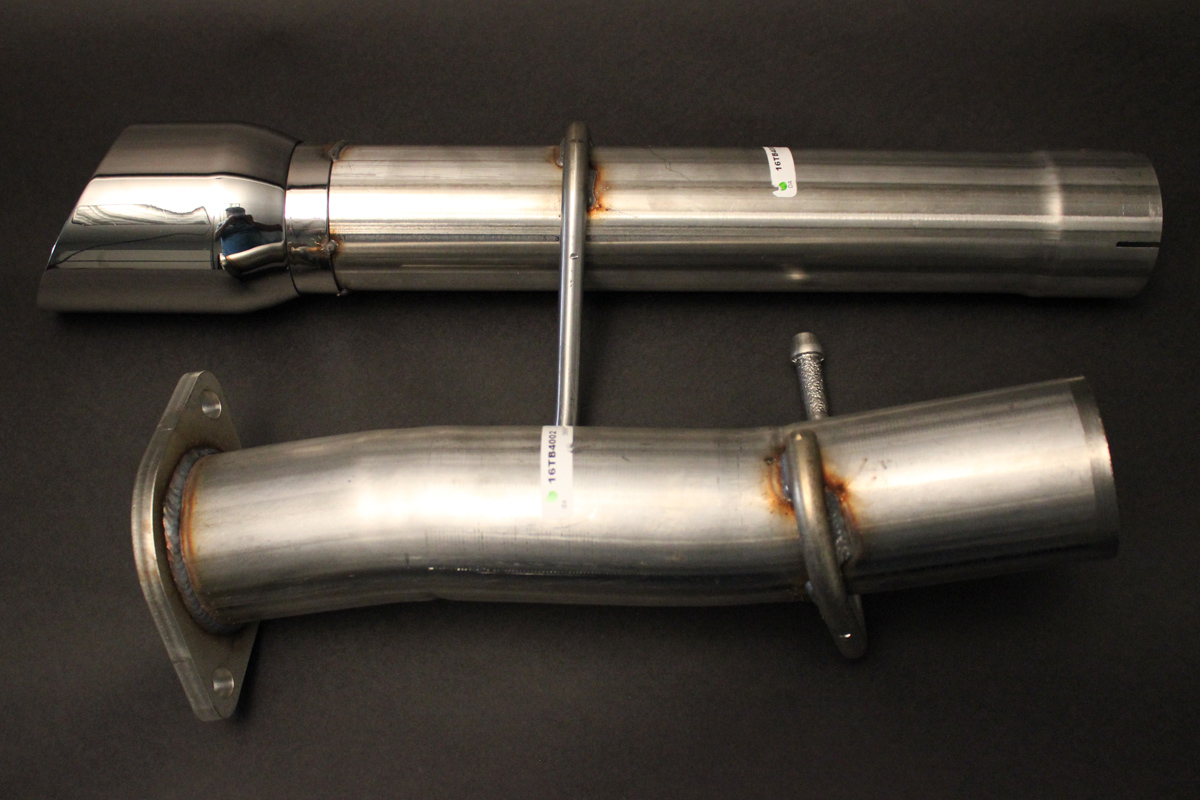
We started assembly by installing a set of longtube aftermarket headers. Now we were ready to get the rest of our upgraded exhaust installed. Before getting started, we took a look over the new parts that would be going in. CORSA’s Sport 3.0″ Cat-back, Single Rear Exit Kit (p/n 14256 [25]) came packed with all the necessities including the muffler, intermediate pipe, tailpipe assembly, tip tube, clamps, and anti-seize compound.
 [26]
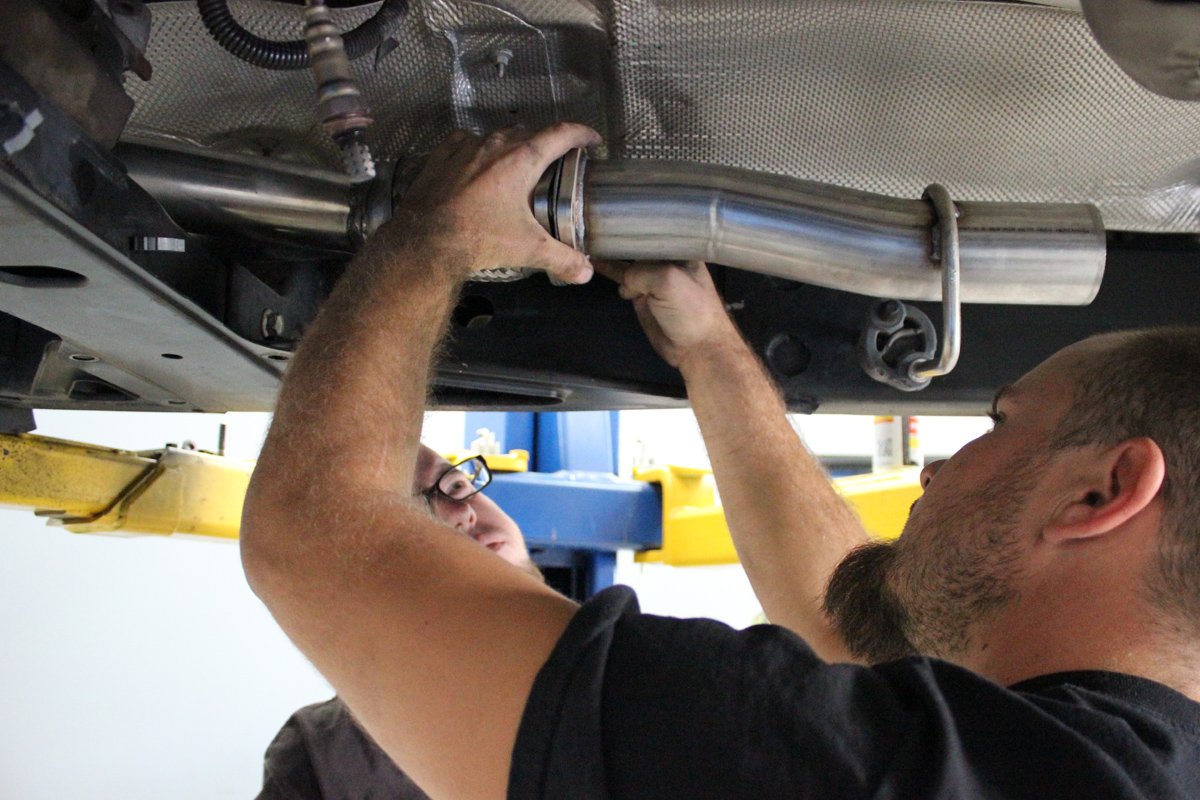
[26]Deans mates the CORSA intermediate tube to the replacement headers.
Everyone likes a performance exhaust kit on their racer, but CORSA’s products show that extra edge with their patented, “drone-busting” Reflective Sound Cancellation (RSC) technology, which goes a long way toward making the driving experience not only more sporty and fast, but also quiet and comfortable.
“RSC works by capturing those specific droning sound waves, reversing them 180 degrees and, by way of collision, effectively cancels out that sound wave,” explained CORSA’s Brent Noward. “What is left is an aggressive exhaust note on the outside and a drone-free cruising experience on the inside.”
 [27]
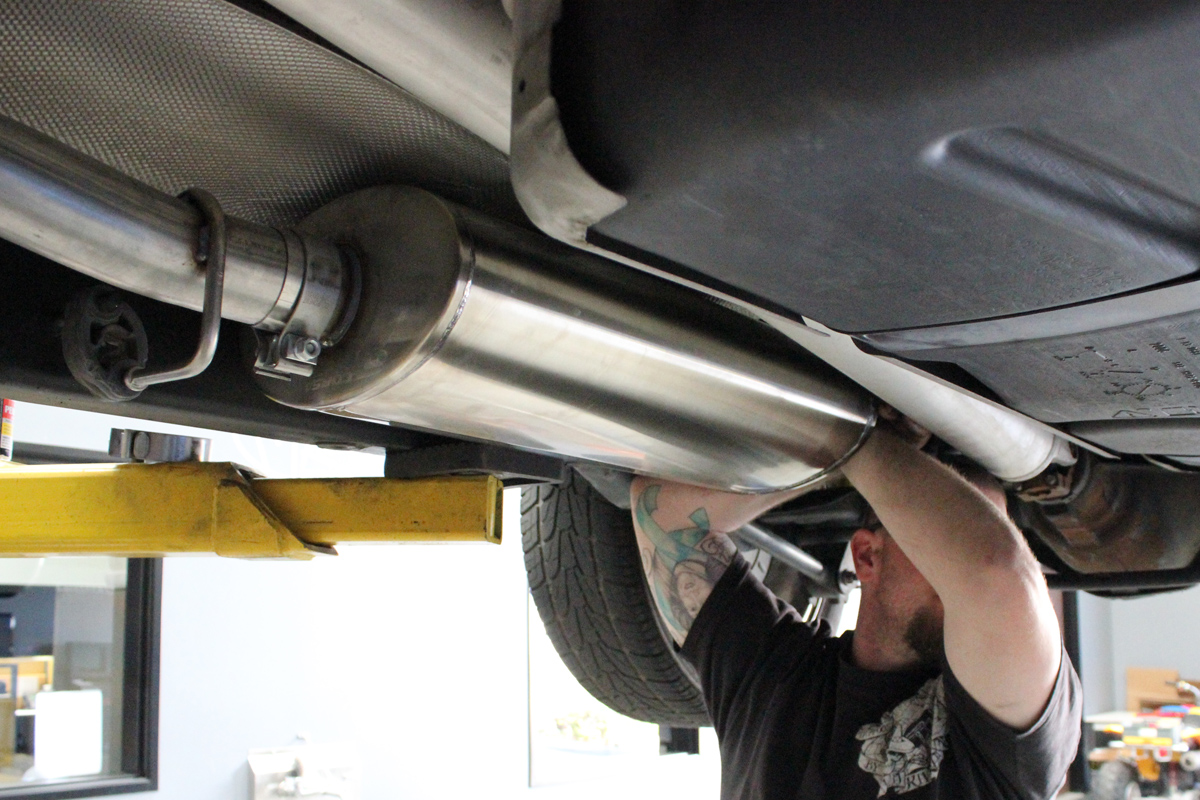
[27]Dean checks the spacing between the muffler and crossmember.
What’s more, we wouldn’t have to do any welding with the kit, making the job that much less risky and tedious. Rather, all we needed were some socket wrenches and some energy drinks to keep us going.
We first applied the anti-sieze lubricant to the threads of the clamps and flange bolts. Next, we grabbed the intermediate pipe and situated its flange over the factory studs, and thereafter fit the hanger into the rubber grommet. Tightening the flange nuts finished this step, and we were ready to move on.
Muffler in hand, we slid one of the three clamps over the expanded end of the muffler, keeping both the nut on the clamp and the weep hole of the muffler facing down. Inserting the tailpipe assembly required us to have the bend pointing down and shimmy the tailpipe along, rotating the part counter-clockwise to reach the muffler.
Once we had that done, we hung the tailpipe’s rearmost hanger into the grommet in front of the rear bumper and pressed on. We took a second clamp and had it situated nut-down on the expanded end of the tailpipe, then rigged the tailpipe up into the grommet closest to the clamp.
 [28]
[28]The guys hold up the tailpipe and hang the final grommet.
Next, we made a half-inch space between the crossmember and muffler to make sure that neither would be touching each other when the time came to tighten up the clamps. We only tightened them to the point of snugness, so as to make sure the tip was in proper alignment before moving ahead.
With the tip secured, we tightened the clamps on the muffler and tailpipe as hard as we could. As per the instructions, we measured a 1/4″ space between the brace and muffler, and voila! Half of our exhaust system was finished. Time for a break.
Day 3: Bolts, Bolts, and More Bolts
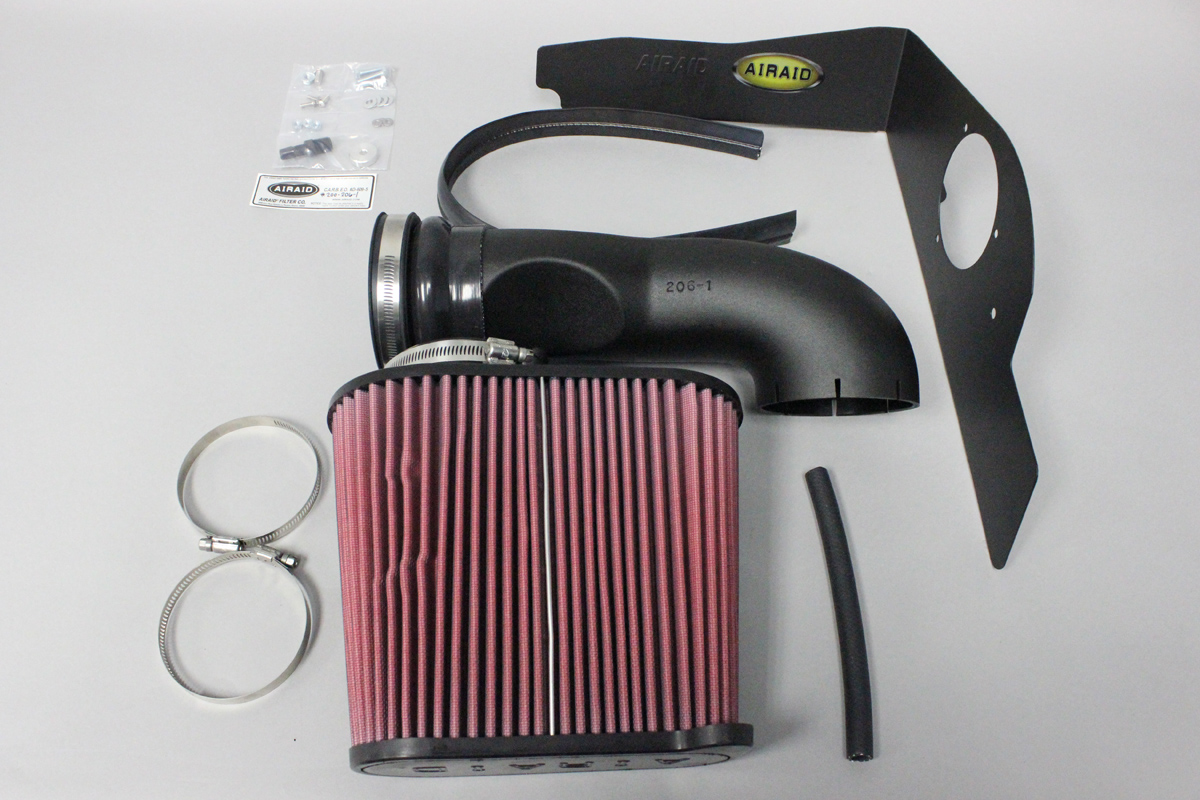 [29]
[29]
Competent and efficient as the stock intake was, we were sure AIRAID [9] could do the job better with their Air Intake Kit (p/n 200-206-1 [30]), which showed a sizable boosts of up to 18 horsepower and 27 ft.-lbs. of torque. Trent McGee was on hand to explain the kit’s benefits a little better, “What our filters do is target the most restrictive parts of the system to get more air to the motor.”
“The hood will fit flush against the airbox, which is also larger to accommodate a larger filter. A larger filter means larger surface area, and therefore everything’s a lot more free-flowing and evenly spread. We also remove resonators from our systems, making them more aggressive-sounding and helping move the airflow much faster.”
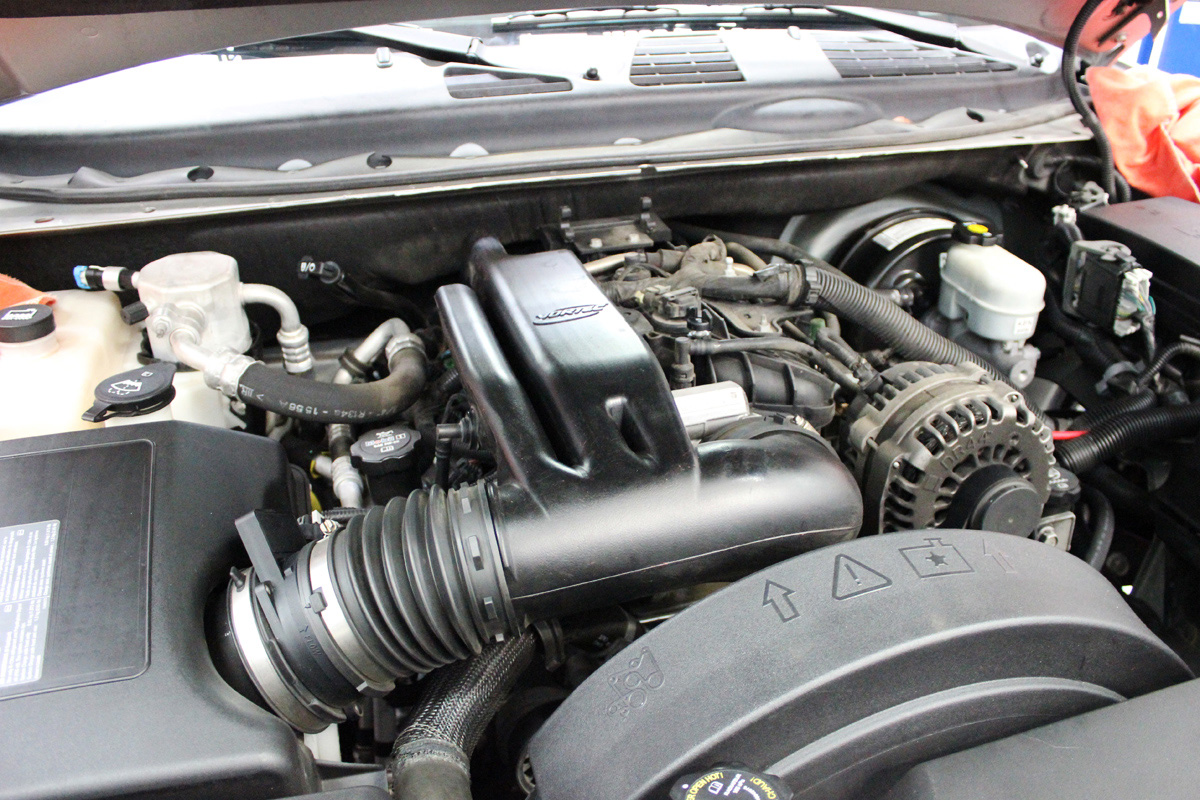 [31]
[31]The stock intake was pretty good, but not good enough. AIRAID’s cold air intake would do a far better job.
Included in the kit was the filter, intake tube, MAF panel, silicone hump hose, coupler with a #68 clamp, and all the necessary hardware.The first step told us to make sure the negative battery cable was disconnected. We then loosened the hose clamps on both ends of the factory intake tube using a flat-blade screwdriver.
Next up, we slid the factory breather hose off of the metal tube on the engine, followed by loosening of the clamp holding the MAF sensor to the factory airbox lid. We removed the complete factory intake and breather tube, as well as the MAF sensor from the lid and set it aside.
We then used the screwdriver again to softly wedge open the plastic retaining clip and OEM side cover. We unscrewed the four mounting screws on the lid to get at the filter and resonator.
The next step required inserting the panel onto the airbox’s base, which we cinched down with the provided hex bolts and 1/4″ flat washers. No sweat so far. After that, a button head bolt was placed in the OEM side cover to give the MAF panel further rigidity.
 [32]
[32]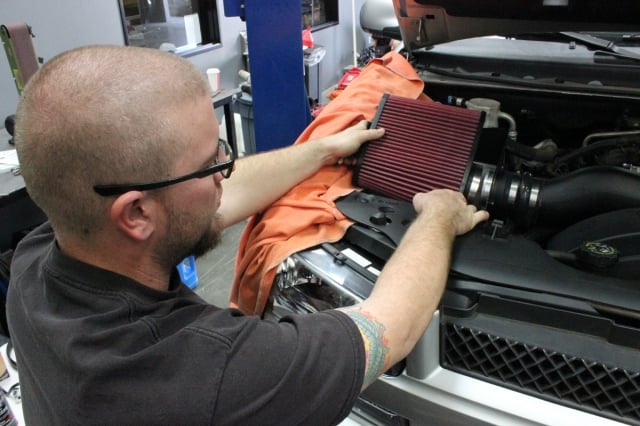 [33]
[33]
Over halfway done now, we mounted the MAF sensor onto the panel, making sure to have the “flow” arrow on top. The silicone hump hose and two hose clamps slid onto the MAF sensor while the coupler and another hose clamp were affixed to the throttle body.
Finally, the pieces were starting to come together as we inserted the supplied 1/4″ NPT x 3/8″ barbed fitting onto the AIRAID intake tube. The tube then went into its proper place, which we made sure went in through the hump hose first.
The second-to-last step involved sticking one end of the breather hose onto the barbed fitting, with the other end connecting to the engine. Finally, we had nothing left to do but attach the filter and weather strip, and our new cold air intake was in business.
After checking to ensure everything was tightened and clear of debris, we reconnected the negative battery cable and prepared to start Phase 2: the ignition coils.
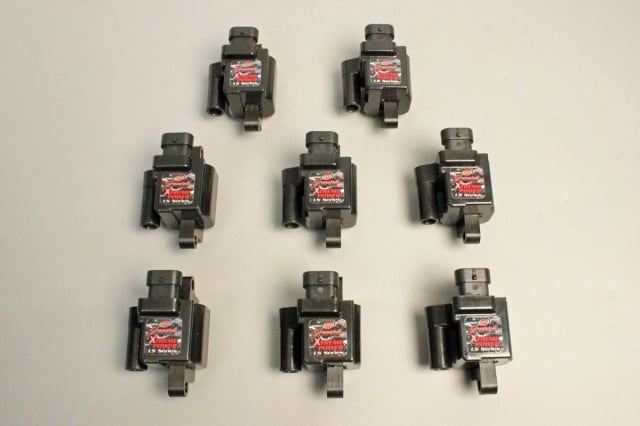
For this portion of the project, the folks at Granatelli [8] provided us with their awesome Coil-Near-Plug Connection Kit with High Performance Coils (p/n 28-1629KIT [34]). We’ve been fans of the company for such a long time, having used their products on sister projects like our pride and joy, BlownZ [35]; heck, even Joe Granatelli himself once owned a Trailblazer SS [36], so we know these coils are going to rock our socks.
We talked with owner JR Granatelli to discover why these coils are superior to their stock counterpart. “In the case of GM, the stock setup generates 40,000 volts per coil. Ours generate 80,000 volts, using a thinner strand of wire for double the wraparound,” explained Granatelli.
“What this gets you is more contact surface, at less resistance–theirs, which is .710 ohms, versus ours, which is .390 ohms. This results in better spark energy and better dwell. Testing on the kit showed we were able to boost horsepower by up to nineteen, and torque by up to nine pound-feet [on a naturally-aspirated vehicle].”
 [37]
[37] [38]
[38]
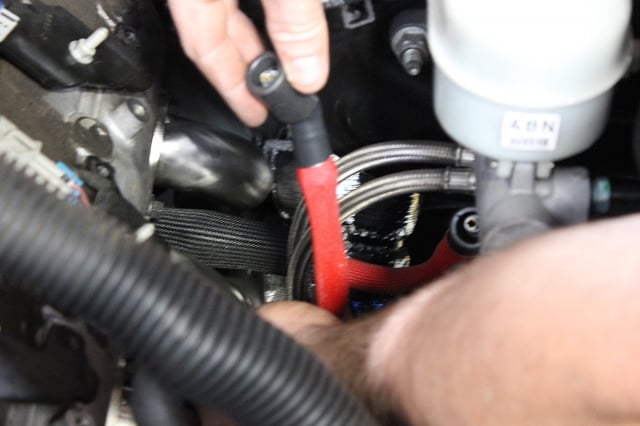
Grease and grime are the only inconveniences attached to this installation, as the time is spent quickly just doing a simple swap: unplug the wires, unbolt the coils, and apply the new ones in reverse order. It’s just a tad dirty having to reach down that far into the engine bay.
Everything looks better, and performs better as well. That’s because the company’s design increases the power to the spark plug up to 400%, while also delivering that charge consistently thanks to the patented protector ring.
 [39]
[39]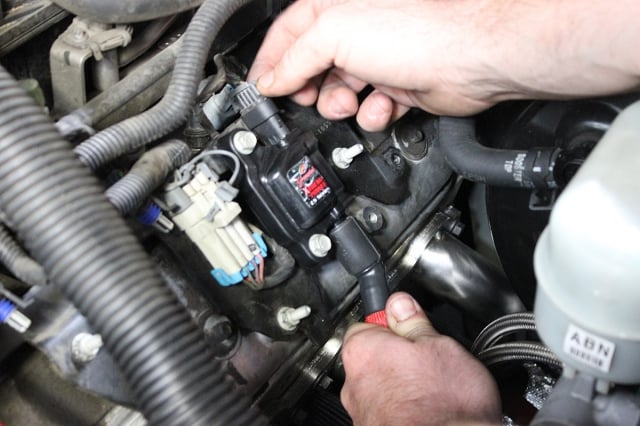 [40]
[40]
With a better spark, more reliable construction, and the capability of handling temperatures close to 500° F, the Granatelli coils are a welcome addition to Project SSleeper.
High-temperature silicone boots, combined with the fiberglass-reinforced braid, make the coils and wires incredibly resistant, capable of handling temperatures up to 500° F (Granatelli even offers 1200° F units if needed).
All in all, this was a solid addition to SSleeper and one that’s going to go a long way in terms of longevity and performance. But before we close this chapter on the Trailblazer’s improvements, we took the SS to Cunningham Motorsports [41] to have the computer tuned for our upgrades.
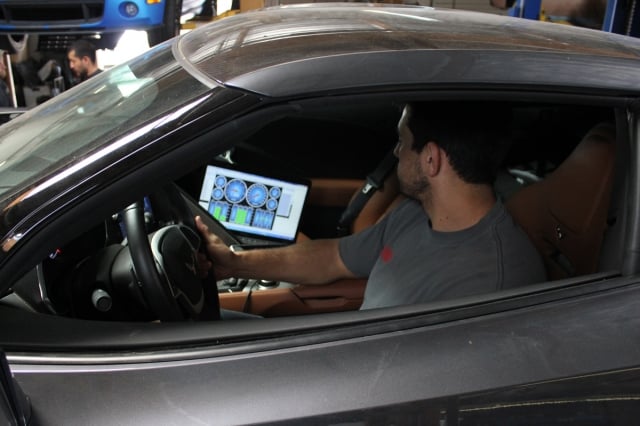
The tuning overhaul was performed by Ryne Cunningham of Cunningham Motorsports to have the performance edge brought up a few notches. Cunningham’s standard operating procedure makes use of HP Tuners [42]‘ VCM Suite software, which the man swears by for all of his vehicles: “My customers’ late-model GM and Ford vehicles all receive the HP treatment. It’s reliable, user-friendly, and when paired with our load-carrying in-house dyno, the results you see in the shop are the same results you see in the street.”
 [43]
[43]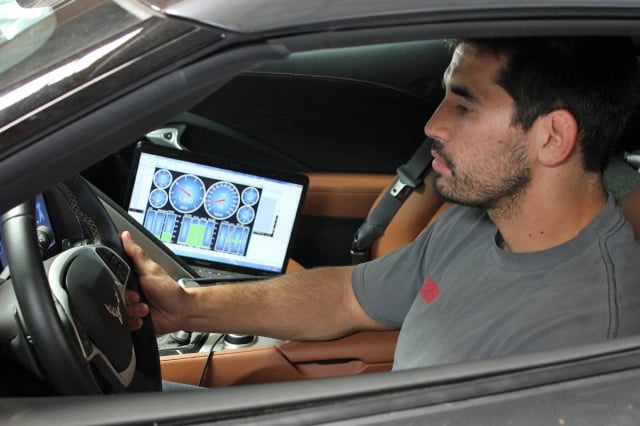 [44]
[44]
Cunningham is seen here dyno-testing a C7 while he runs the tried and true HP Tuner VCM Suite software program on the laptop next to him.
“The Trailblazer SS is a little different from the typical Corvette or Camaro that I work on, but with the HP Tuners’ software, I have the right tool for the job,” said Cunningham. “In the case of SSleeper, I did a simple timing and air-fuel optimization job, and also removed any O2 codes that might flare up over using aftermarket exhaust.”
The Moment of Truth
With the SS back home and with bated breath, we handed the keys to shop manager Sean. He took his seat at the helm and put our beloved silver SS through a couple of runs, as we stood with fingers crossed.
 [45]
[45]At its best stock day, the SS gave us 296.05hp and 285.21 lb-ft. of torque. Now, after all the modifications, the Trailblazer was putting power to the pavement with 319.50 hp and 330.01 lb-ft. of torque.
Success! With the right combination of bolt-on performance parts, a dash of elbow grease, and caffeine, we turned our otherwise standard SUV into a powerhouse capable of producing 319.5 hp and 333.0 lb.-ft. of torque at the rear wheels, for a stunning gain of 22.4 hp and 47.8 lb.-ft. of torque over stock.
Driving the Trailblazer around town proved just what an excellent vehicle we were now dealing with. Swift acceleration and access to more horsepower at a climbing speed demonstrated that everything was working in concert to give SSleeper the kind of agility, launch, and prowess that we had always wanted.
 [46]
[46]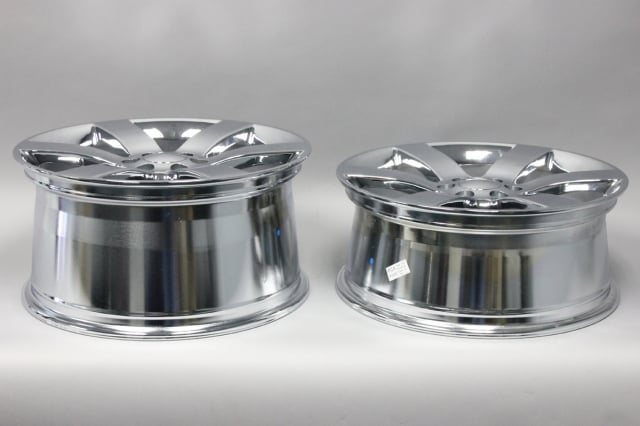 [47]
[47]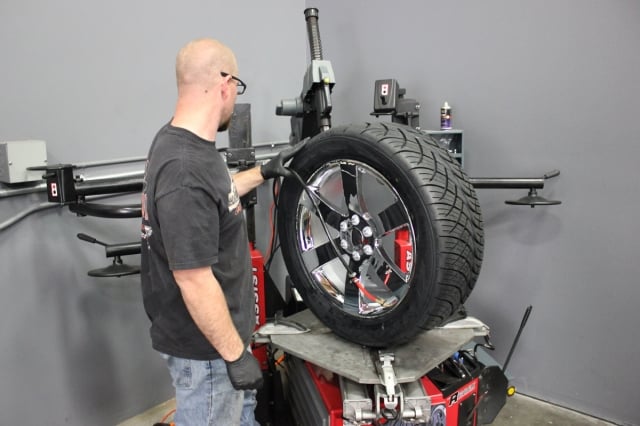 [48]
[48]
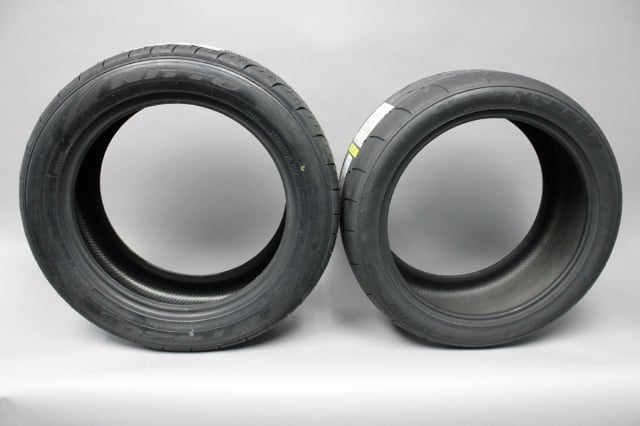
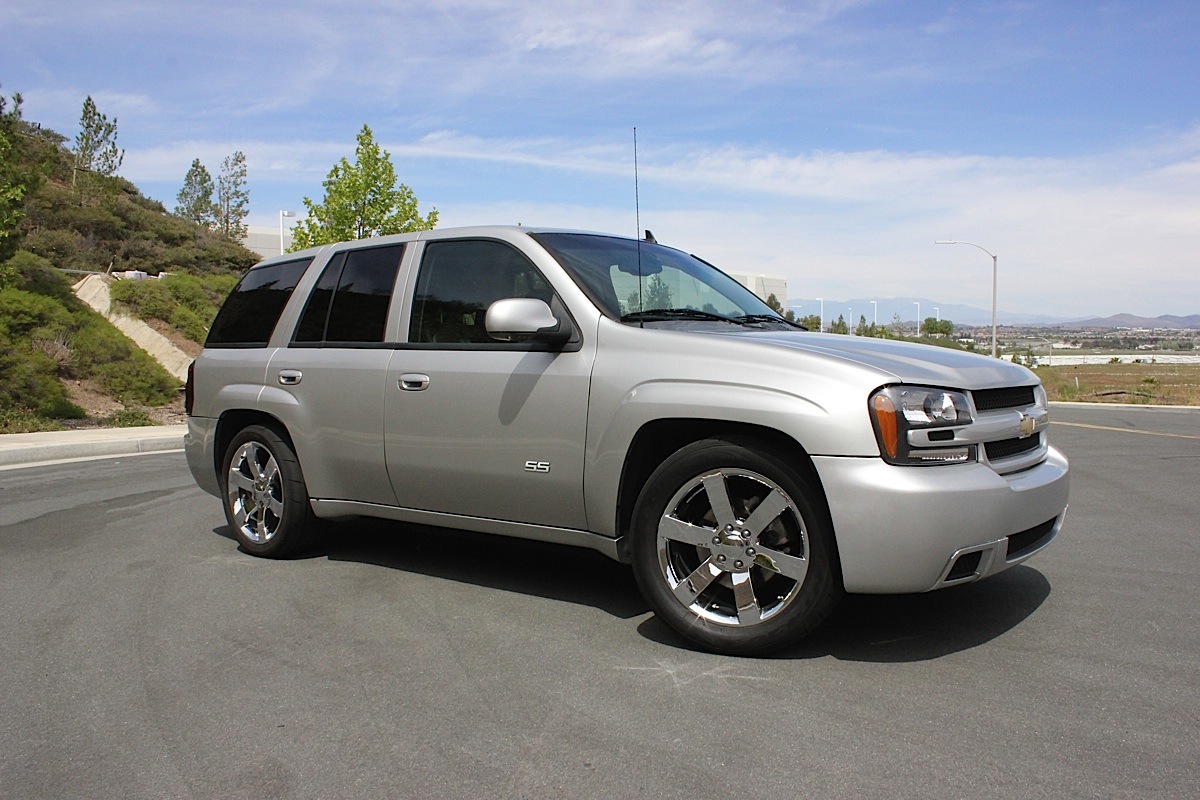
A new set of Factory Reproduction chrome wheels and Nitto NT420S front and NT05R rear tires would serve as a great replacement to the factory setup.
Our ground traction was ramped up by a new set of rims and tires, courtesy of Factory Reproductions [49] and Nitto Tire [50], respectively. The decadent chrome wheels gave off a wonderful shimmer everywhere we went, and paired well with the front NT420S and rear NT05R tires, which would give us great grip whether cruising the streets or running down the drag strip, all while remaining durable and DOT-approved.
 [51]The sound was terrific as well. CORSA’s mufflers were able to disguise the bulging muscle lurking just under the hood, while also channeling its massive roar clear and wide as we floored the gas pedal. It made for some fun times in the backroads of our humble hometown of Murrieta.
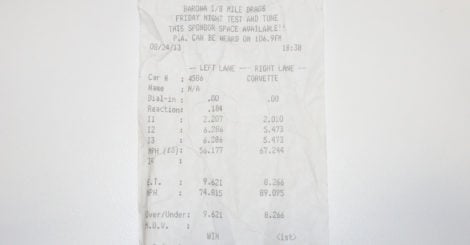
A trip to the Irwindale Drag Strip bore out our hopes too. As you can see in the pictures below, the modifications had made a significant difference in the way SSleeper performed. In all, we were able to shave off .770 seconds, while our finishing speed was increased by 5.695 miles per hour.
 [52]
[52] [53]
[53]
At left, a base run made in the Trailblazer had us doing 9.62 seconds @ 74.815 mph. At right, a couple of runs post-modification had us doing a best of 8.85 seconds @ 80.510 mph.
 [54]
[54]