Pony Wars is in full swing, and if you’ve been following along up to this point, you know that the Camaro won the $5,000 portion of our testing – albeit by the narrowest of margins. Coming into our $15,000 build, the Camaro is leading by a single point after winning the dyno and drag strip portions of our initial testing. That left the Camaro ahead five points to four.
And while our efforts were enough to win us the first portion of our testing, we know how well the Coyote responds to boost and it would be a massive miscalculation to not take it seriously at this point. However, we also know that parts for the Mustang are relatively expensive compared to the Camaro and that’s where we will capitalize in this portion of our build.
Unlike the Coyote, camshaft and cylinder head swaps fall well within our budget and that should give us some serious advantages. And while that may be true, our largest hurdle in this segment of our build is definitely going to be the fuel system. If you’ve looked into the Gen V LT at all, you know that fuel system components are still being developed by aftermarket companies and the ones that are available are fairly spendy.
Normally, we would overcome this hurdle with methanol injection to stretch the fuel system a bit further. Unfortunately for us, water/meth was explicitly banned from our competition so we had to get a little innovative to ensure that our Camaro had enough go-juice to send the Mustang to the glue factory for good.
#Goals
Our strategy to take home the Pony Wars crown is simple: Rinse and repeat. Last time we focused on adding more power to the Camaro in order to win the drag strip and dyno portions of testing. And in that, we succeeded. Coming off that success, we plan to simply replicate it.
If you look at the points available at this stage in our competition, we simply just need to repeat what we did in our first section to walk away the overall winner. This means we will be focusing on power production and the supporting mods that will allow us to put that power to the ground. This means a full engine build, D-1X ProCharger, supporting drivetrain mods, and some suspension work to get it all hooked up. On top of that, we know we need more tire and we’ll get to that thanks to the guys from Weld and Mickey Thompson.
Considering how much budget it takes to internally modify a Coyote, we think that’s where our plan will really shine. Heads, cam, and a fully forged short-block are all in the cards for the Camaro and that is one massive advantage that Team Mustang lacks. However, as we mentioned previously, the fuel system will be the ultimate deciding factor here since the Mustang uses simple port injection and is thus much cheaper to upgrade to support its power.
Also, our planned suspension mods will help out at the road course as well since they will eliminate the dinky flexible stamped steel link that the Camaro left the General’s factory with and thus should be a two-edged sword to maximize our spend in that regard. So, without further ado, let’s get down to the wrenching.
Give Me Fuel
The first, and arguably most vital part of our build is the fuel system. Unfortunately, when it comes to direct-injection, there aren’t a lot of “cheap” alternatives to keep our brute fed. To keep costs down, we went with a tried and true method of feeding our ponies. We turned to the guys over at Pace Performance to fully upgrade our fuel system to LT4 specifications.
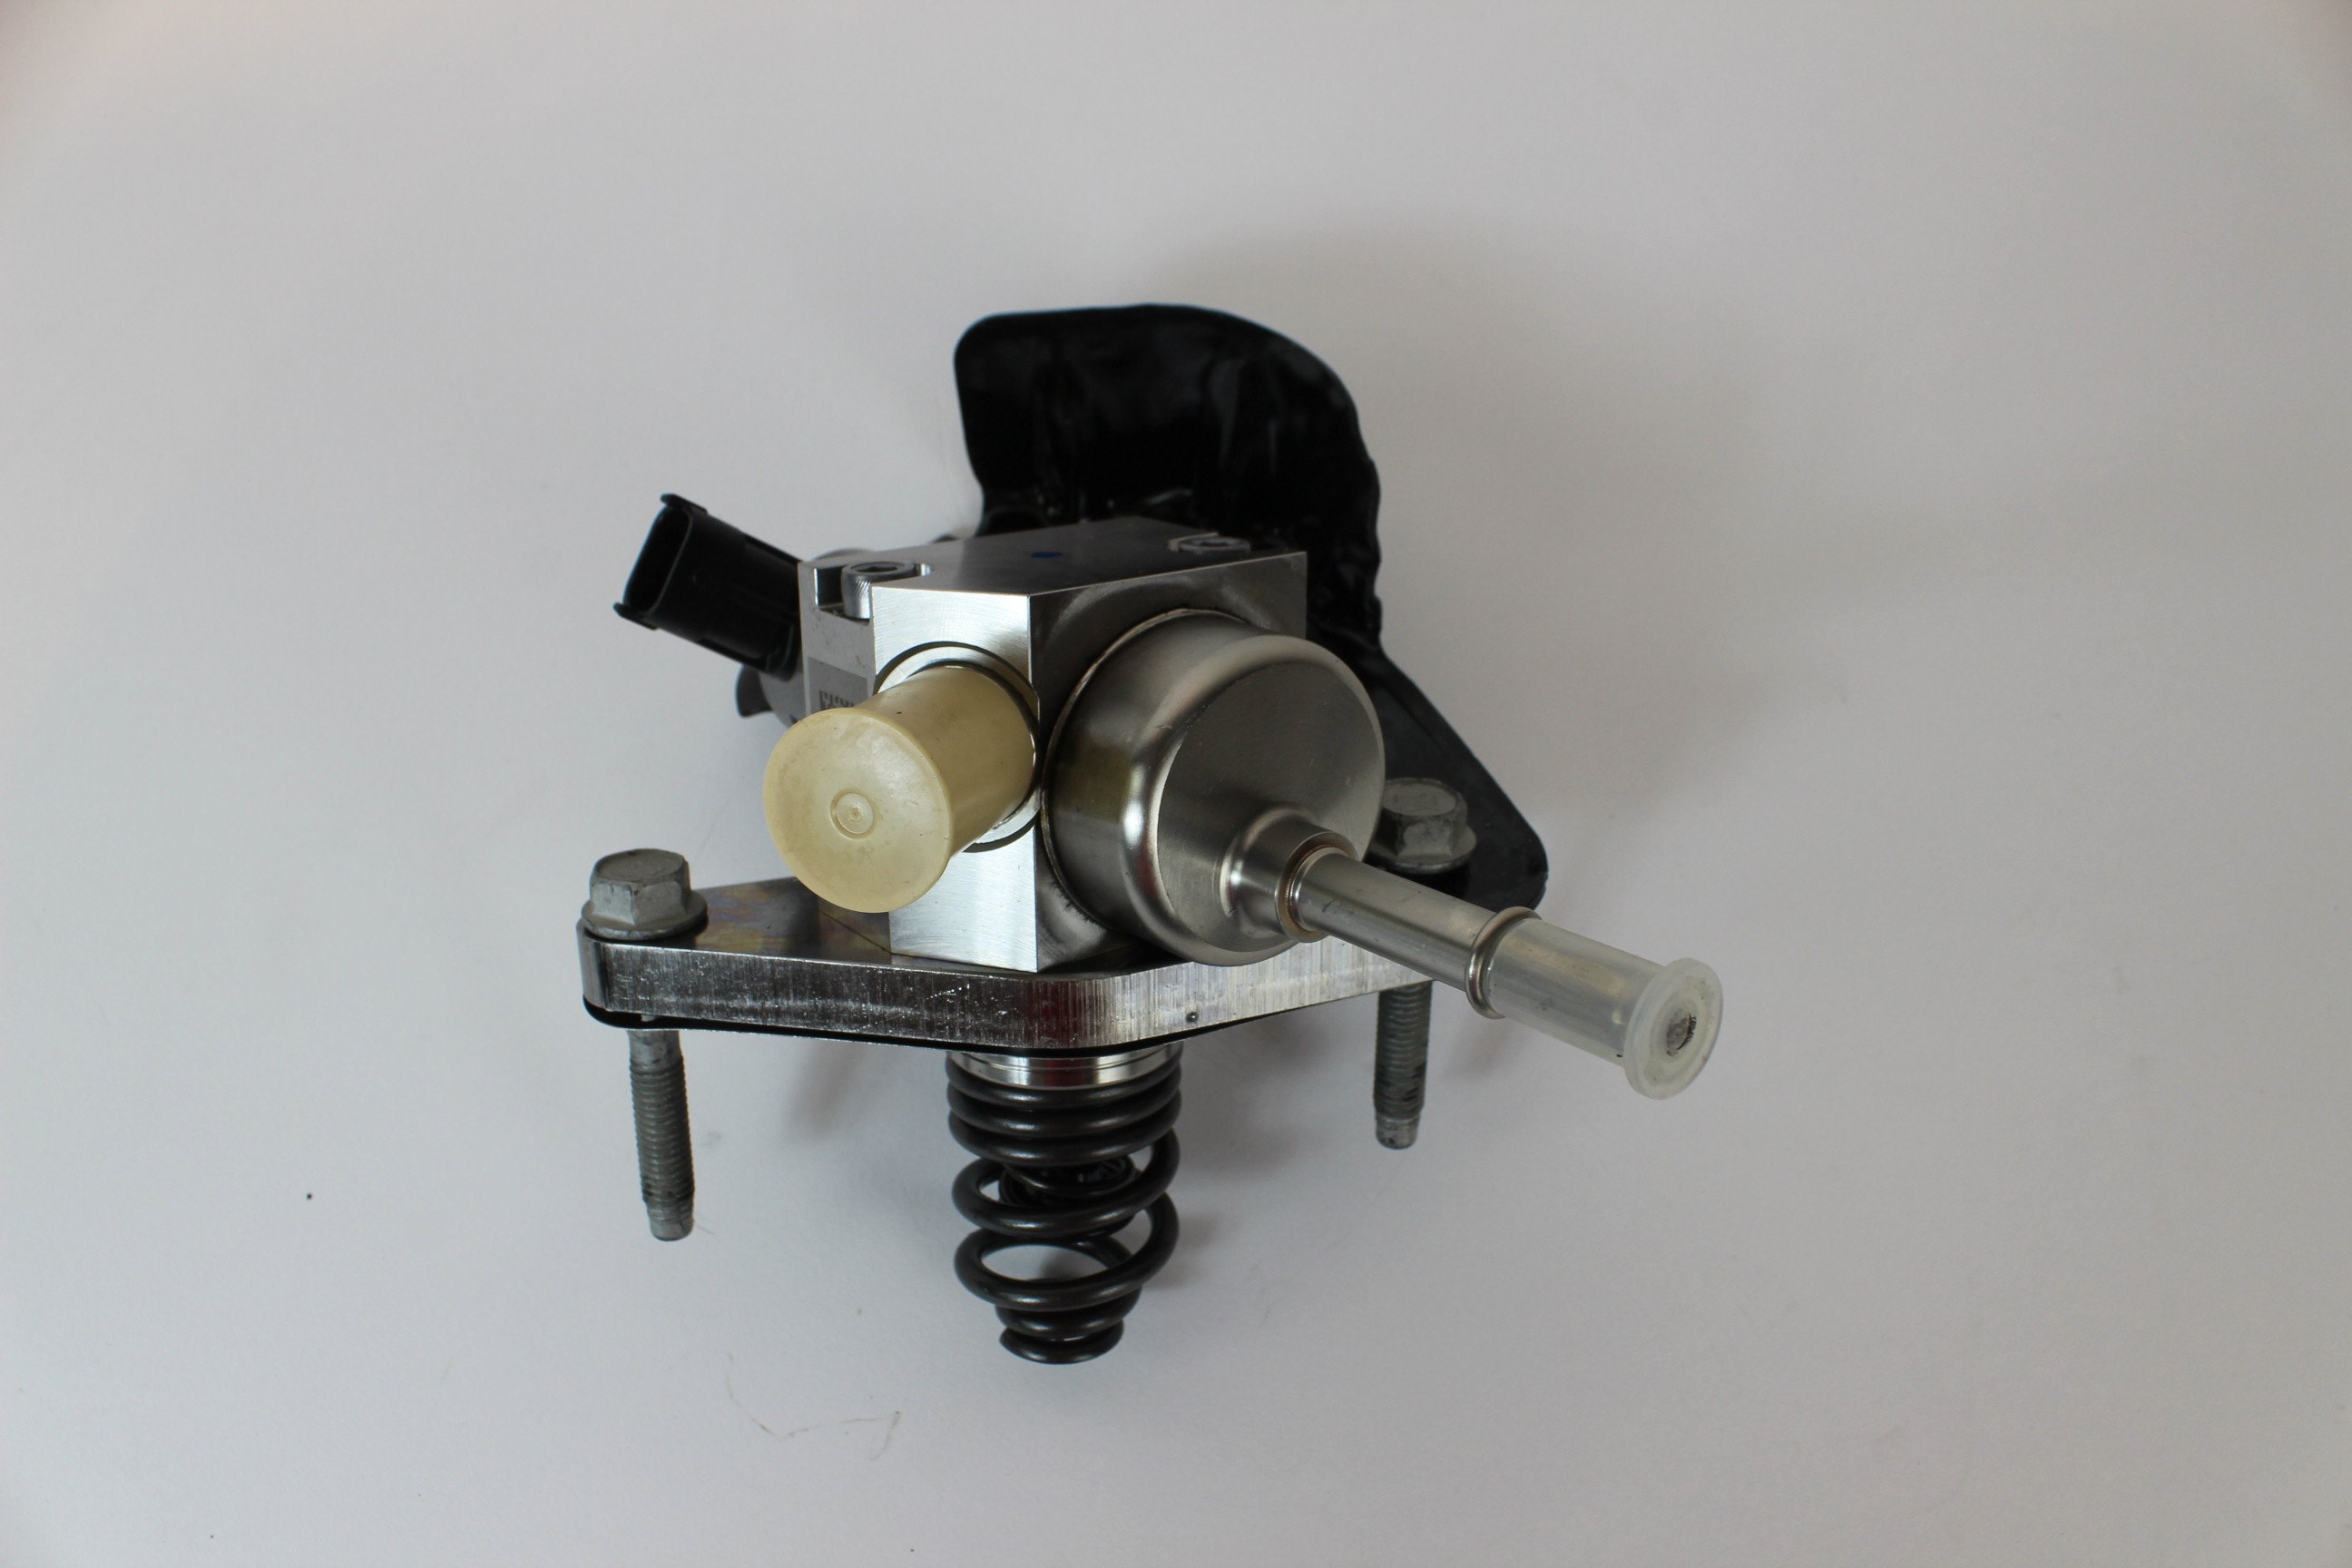
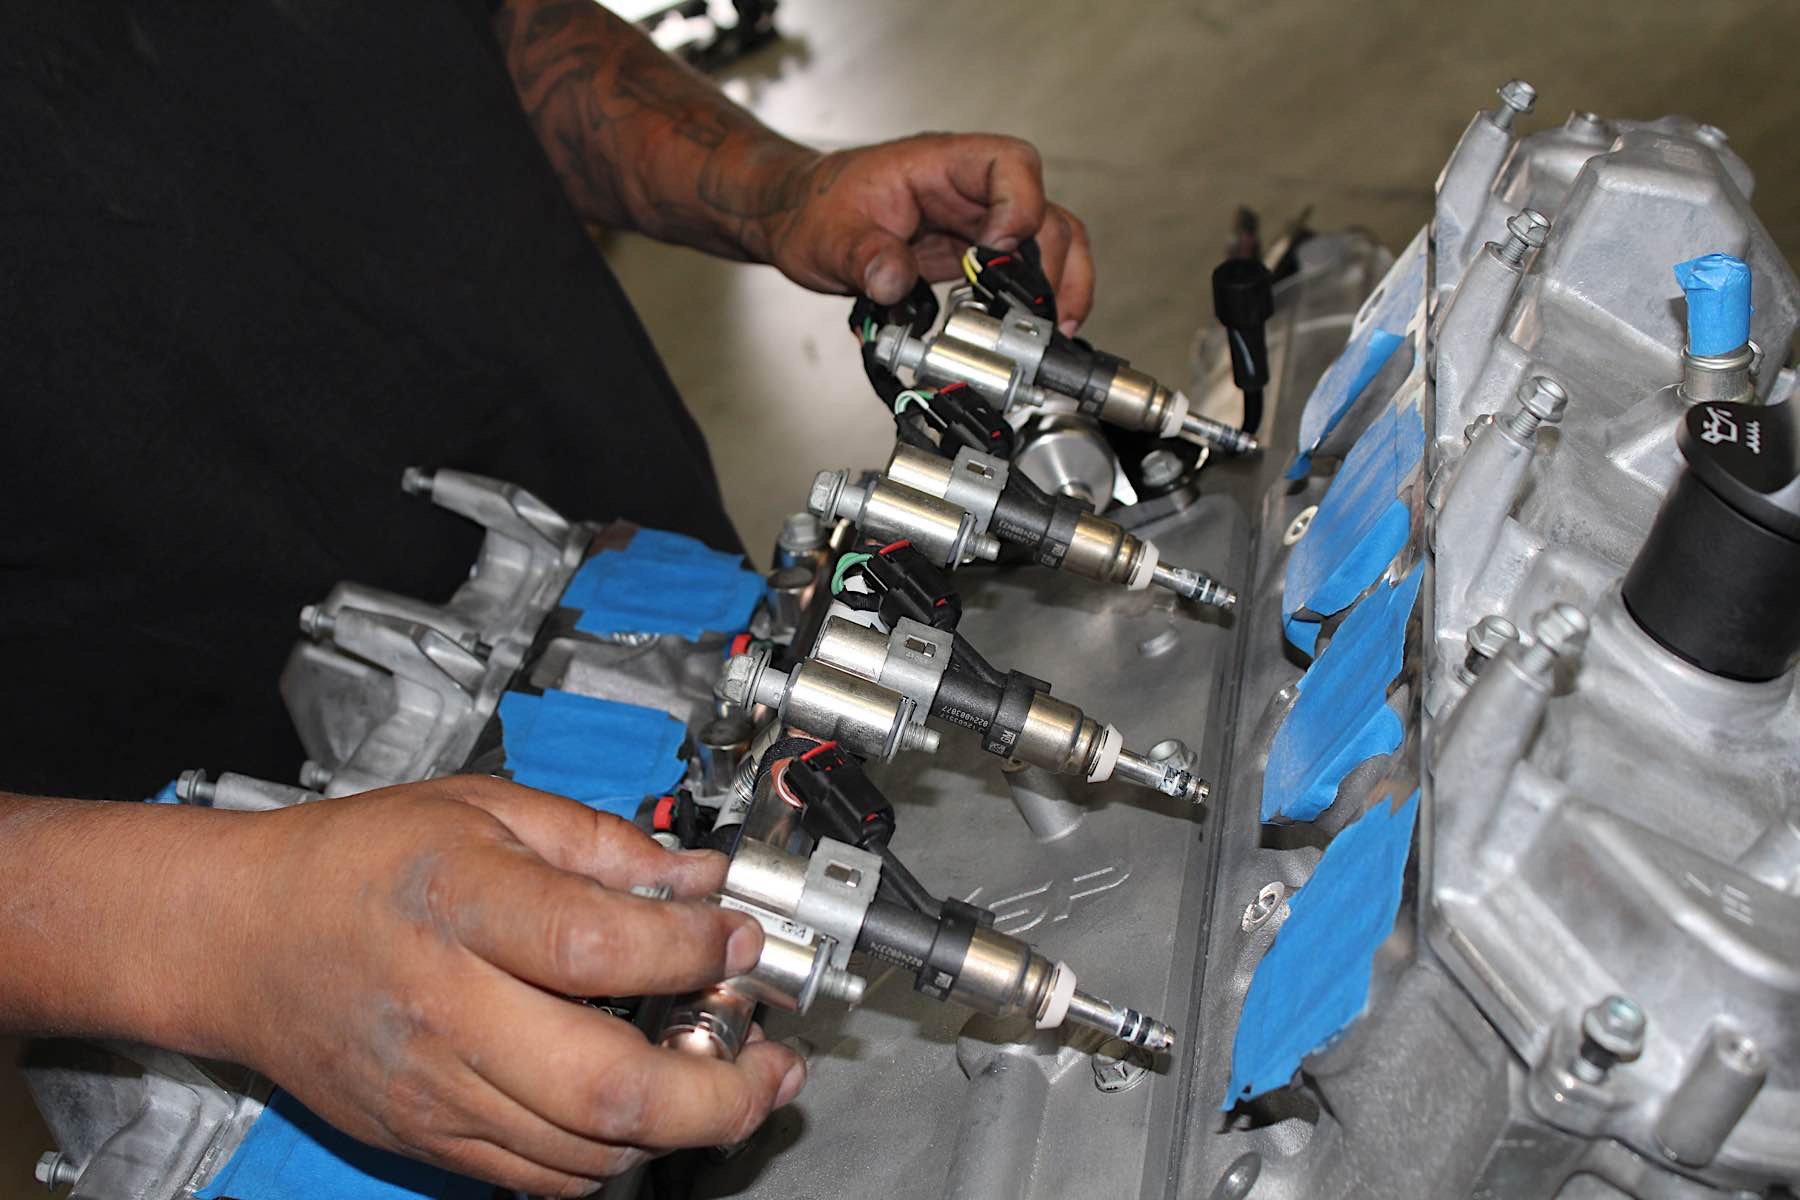
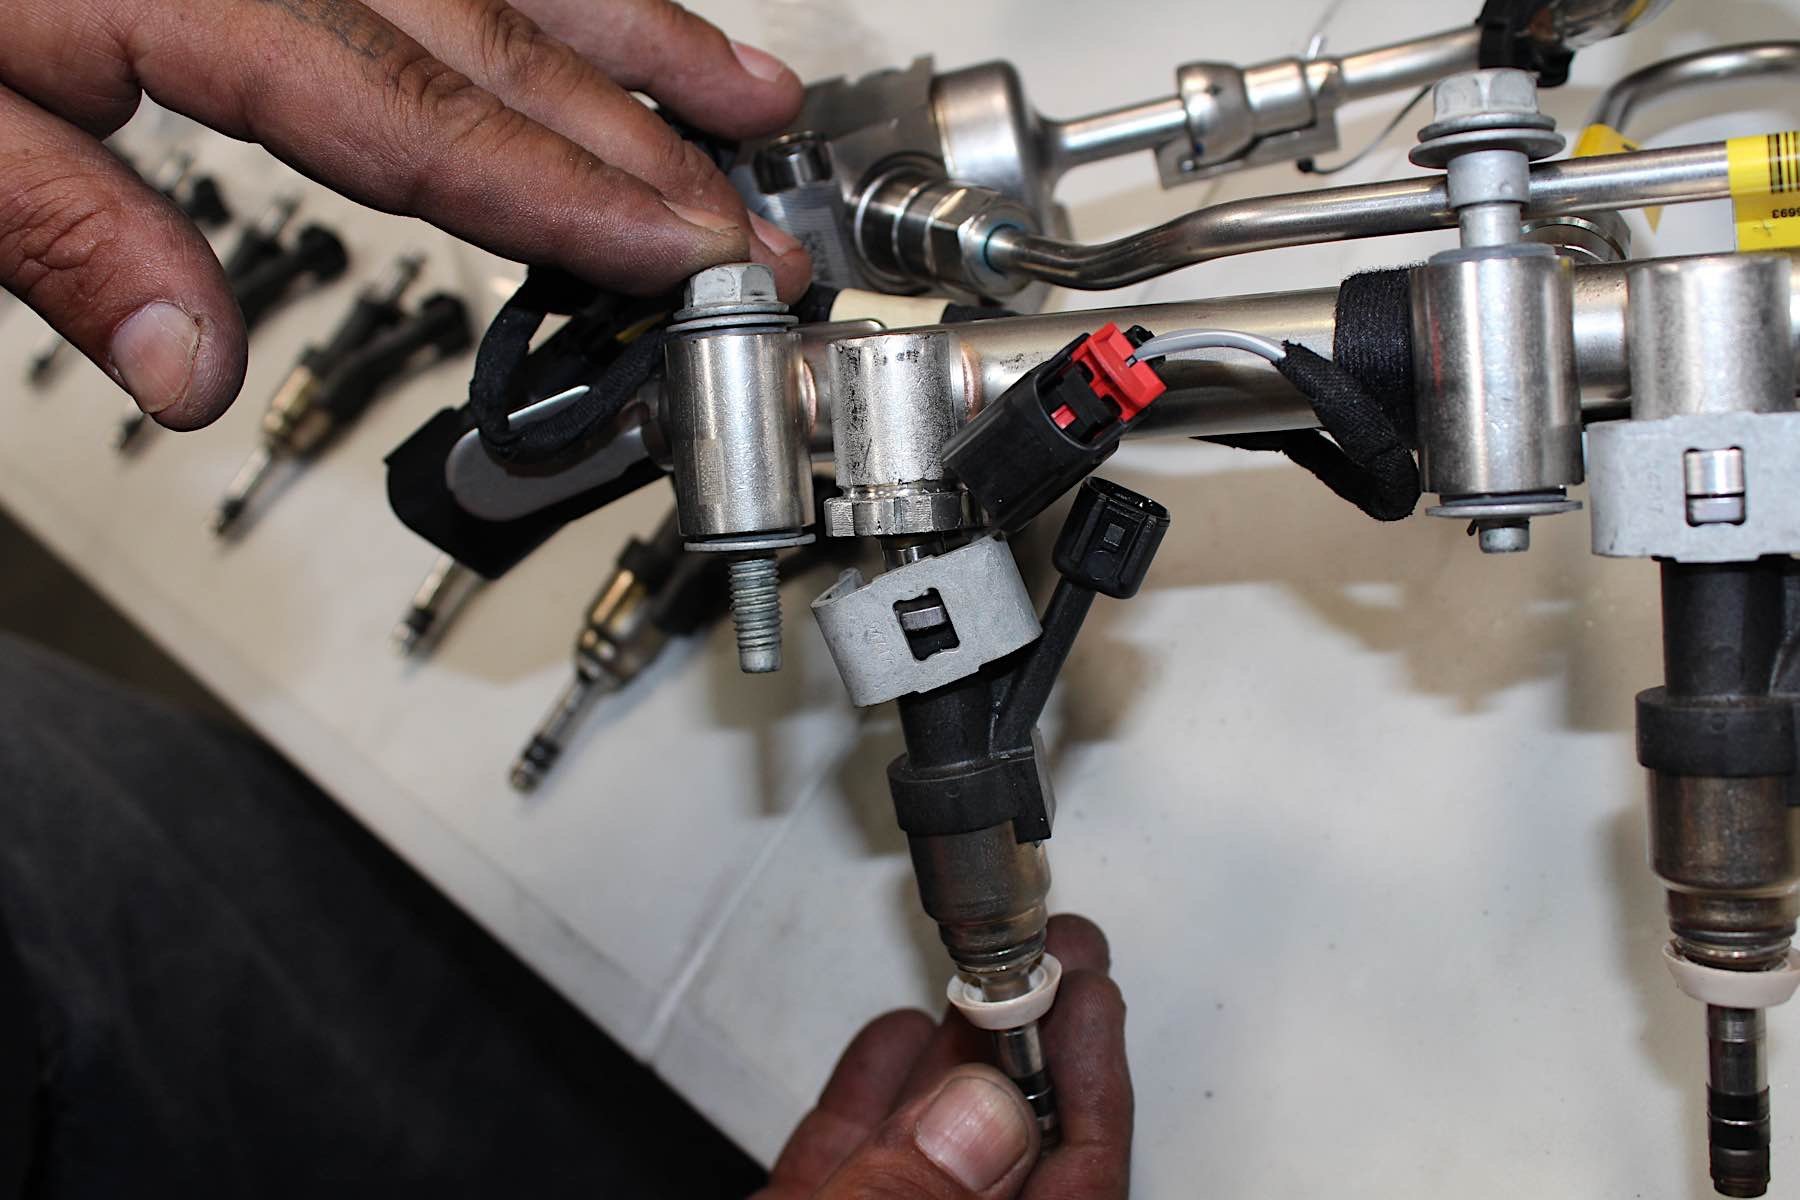
“The LT1 injector is rated at 121.1 lbs/hr and the LT4 is rated at 140.7 lb/hr,” stated expert calibrator and Gen V builder Howard Tanner at Redline Motorsports. “Besides the actually total flow rate, the injectors are also uniquely wired. The DI injectors are also referred to as a ‘peak and hold’ injector. Because of the large pressures these injectors work at and the very short window of time that have to fire; high amperage is needed to open the injector very quickly and precisely. Once the injector is open it does not require as much amperage to hold it. Then the fuel control module tapers this amperage down for the closing. The LT1 and LT4 have two distinct characteristics between them. The high pressure pumps are positive displacement pumps. This means they produce a fixed volume of fuel as the piston in the pump travels. The LT1 pumps are rated at 1.2 cc’s and the LT4 pump is rated at 1.6. Hence the high capacity capability. The high pressure pump is fed from a low pressure pump in the tank.”
Since the LT4 is already under positive atmospheric conditions, the fuel system it utilizes is beefed up from the factory and is vastly superior to the LT1’s. The system has been known to support just north of 800 rear-wheel horsepower, which is our ultimate goal for the Camaro anyway. However, this will entail pushing it to the ragged edge of its limits. Since we have a budget to stick to, it was the smartest choice available and we think it will be enough to put the Mustang down for good.
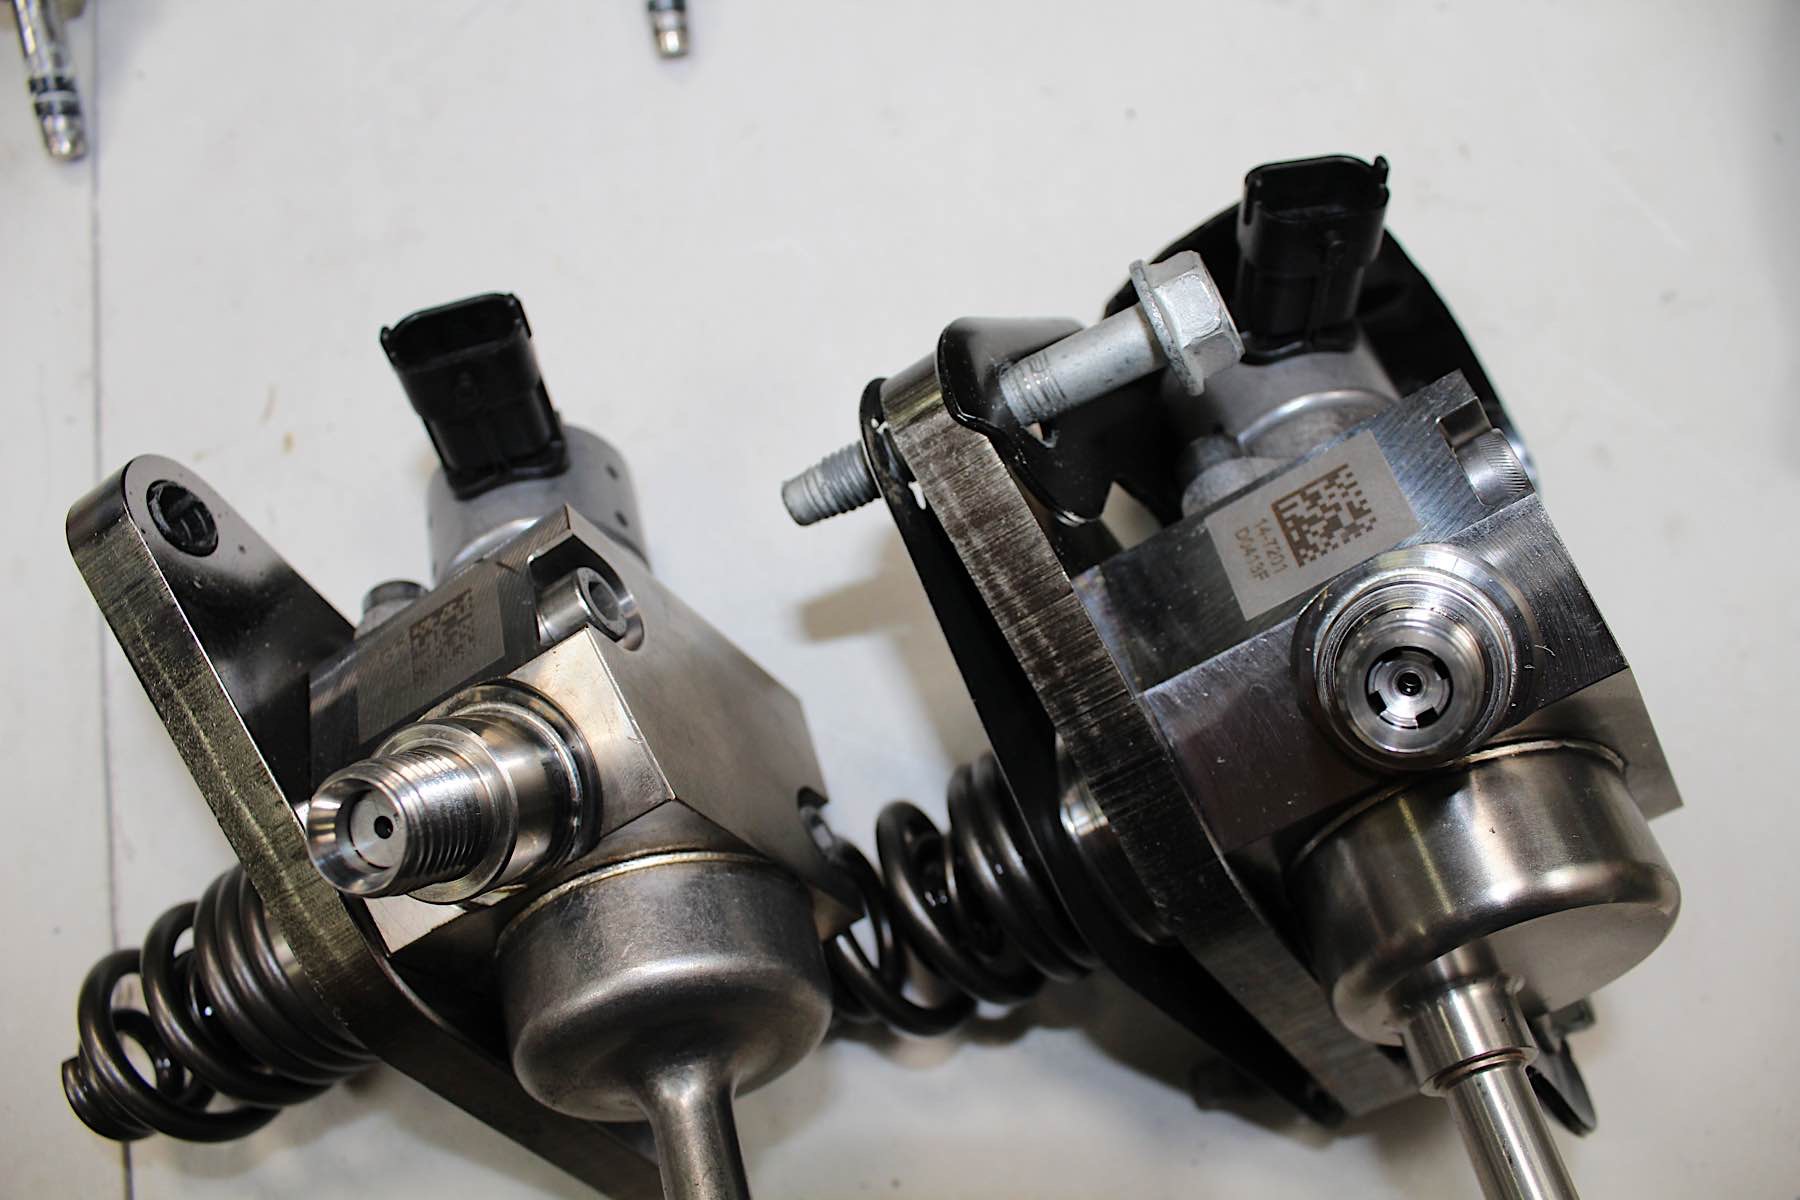
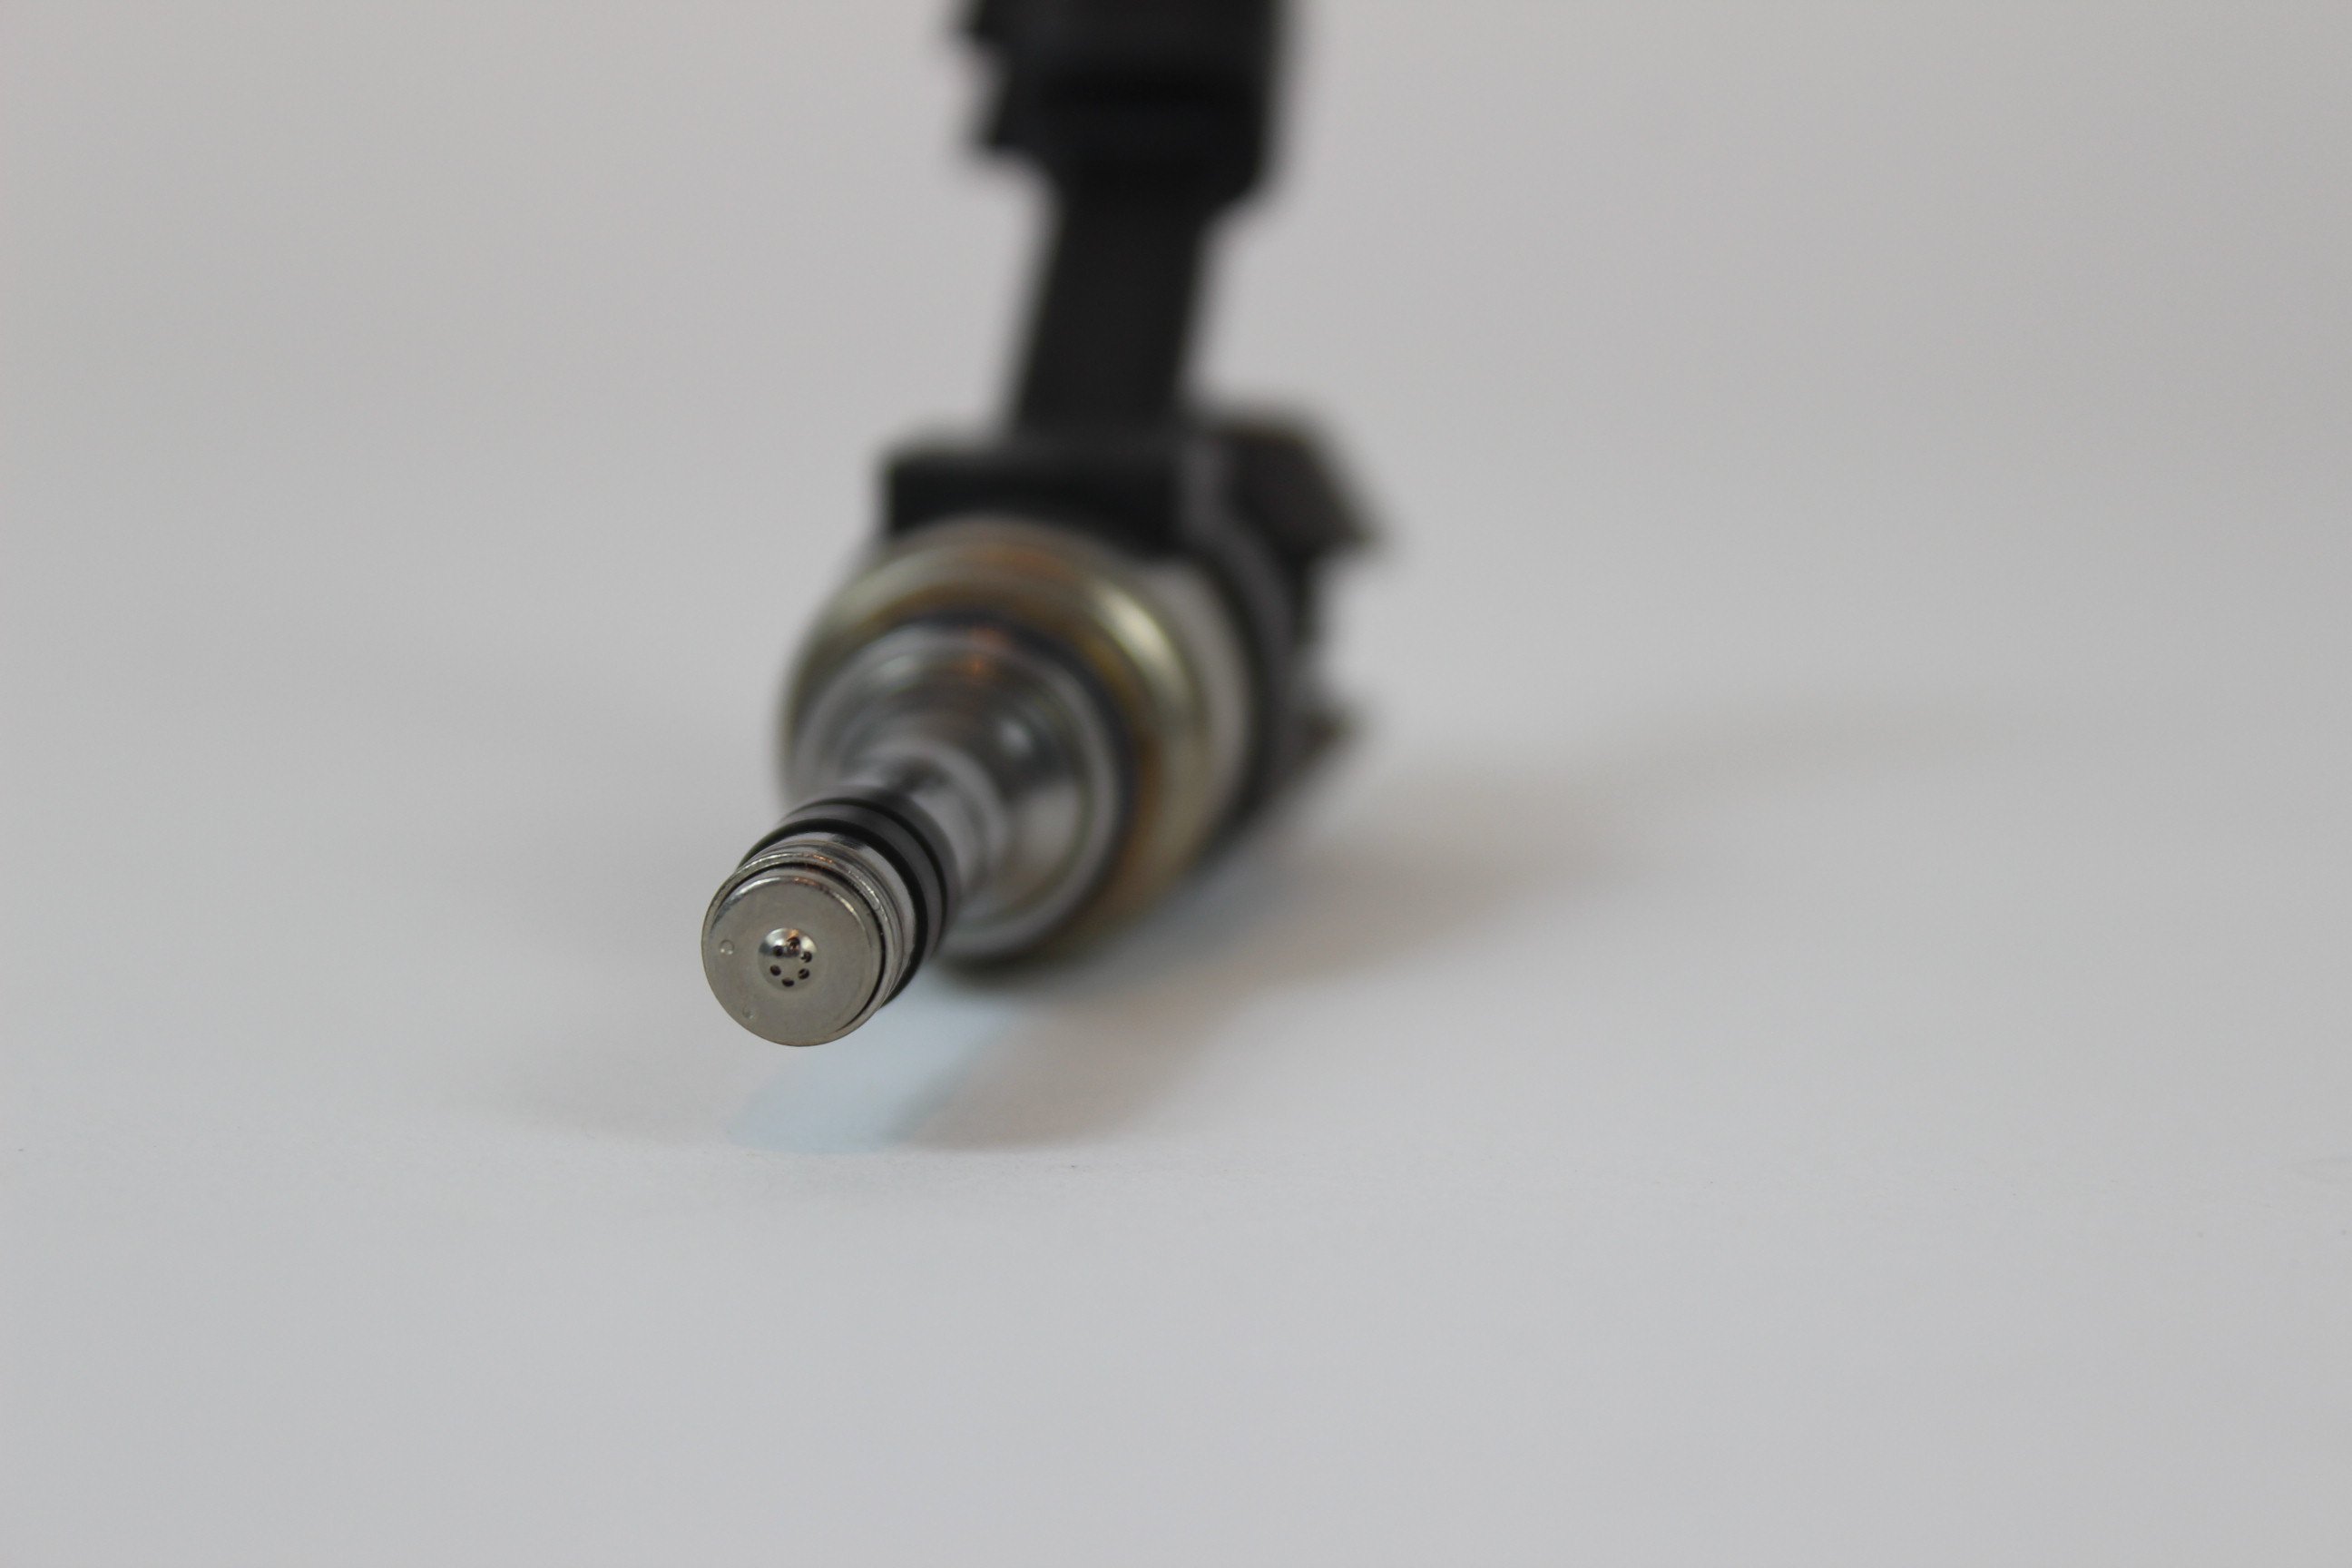
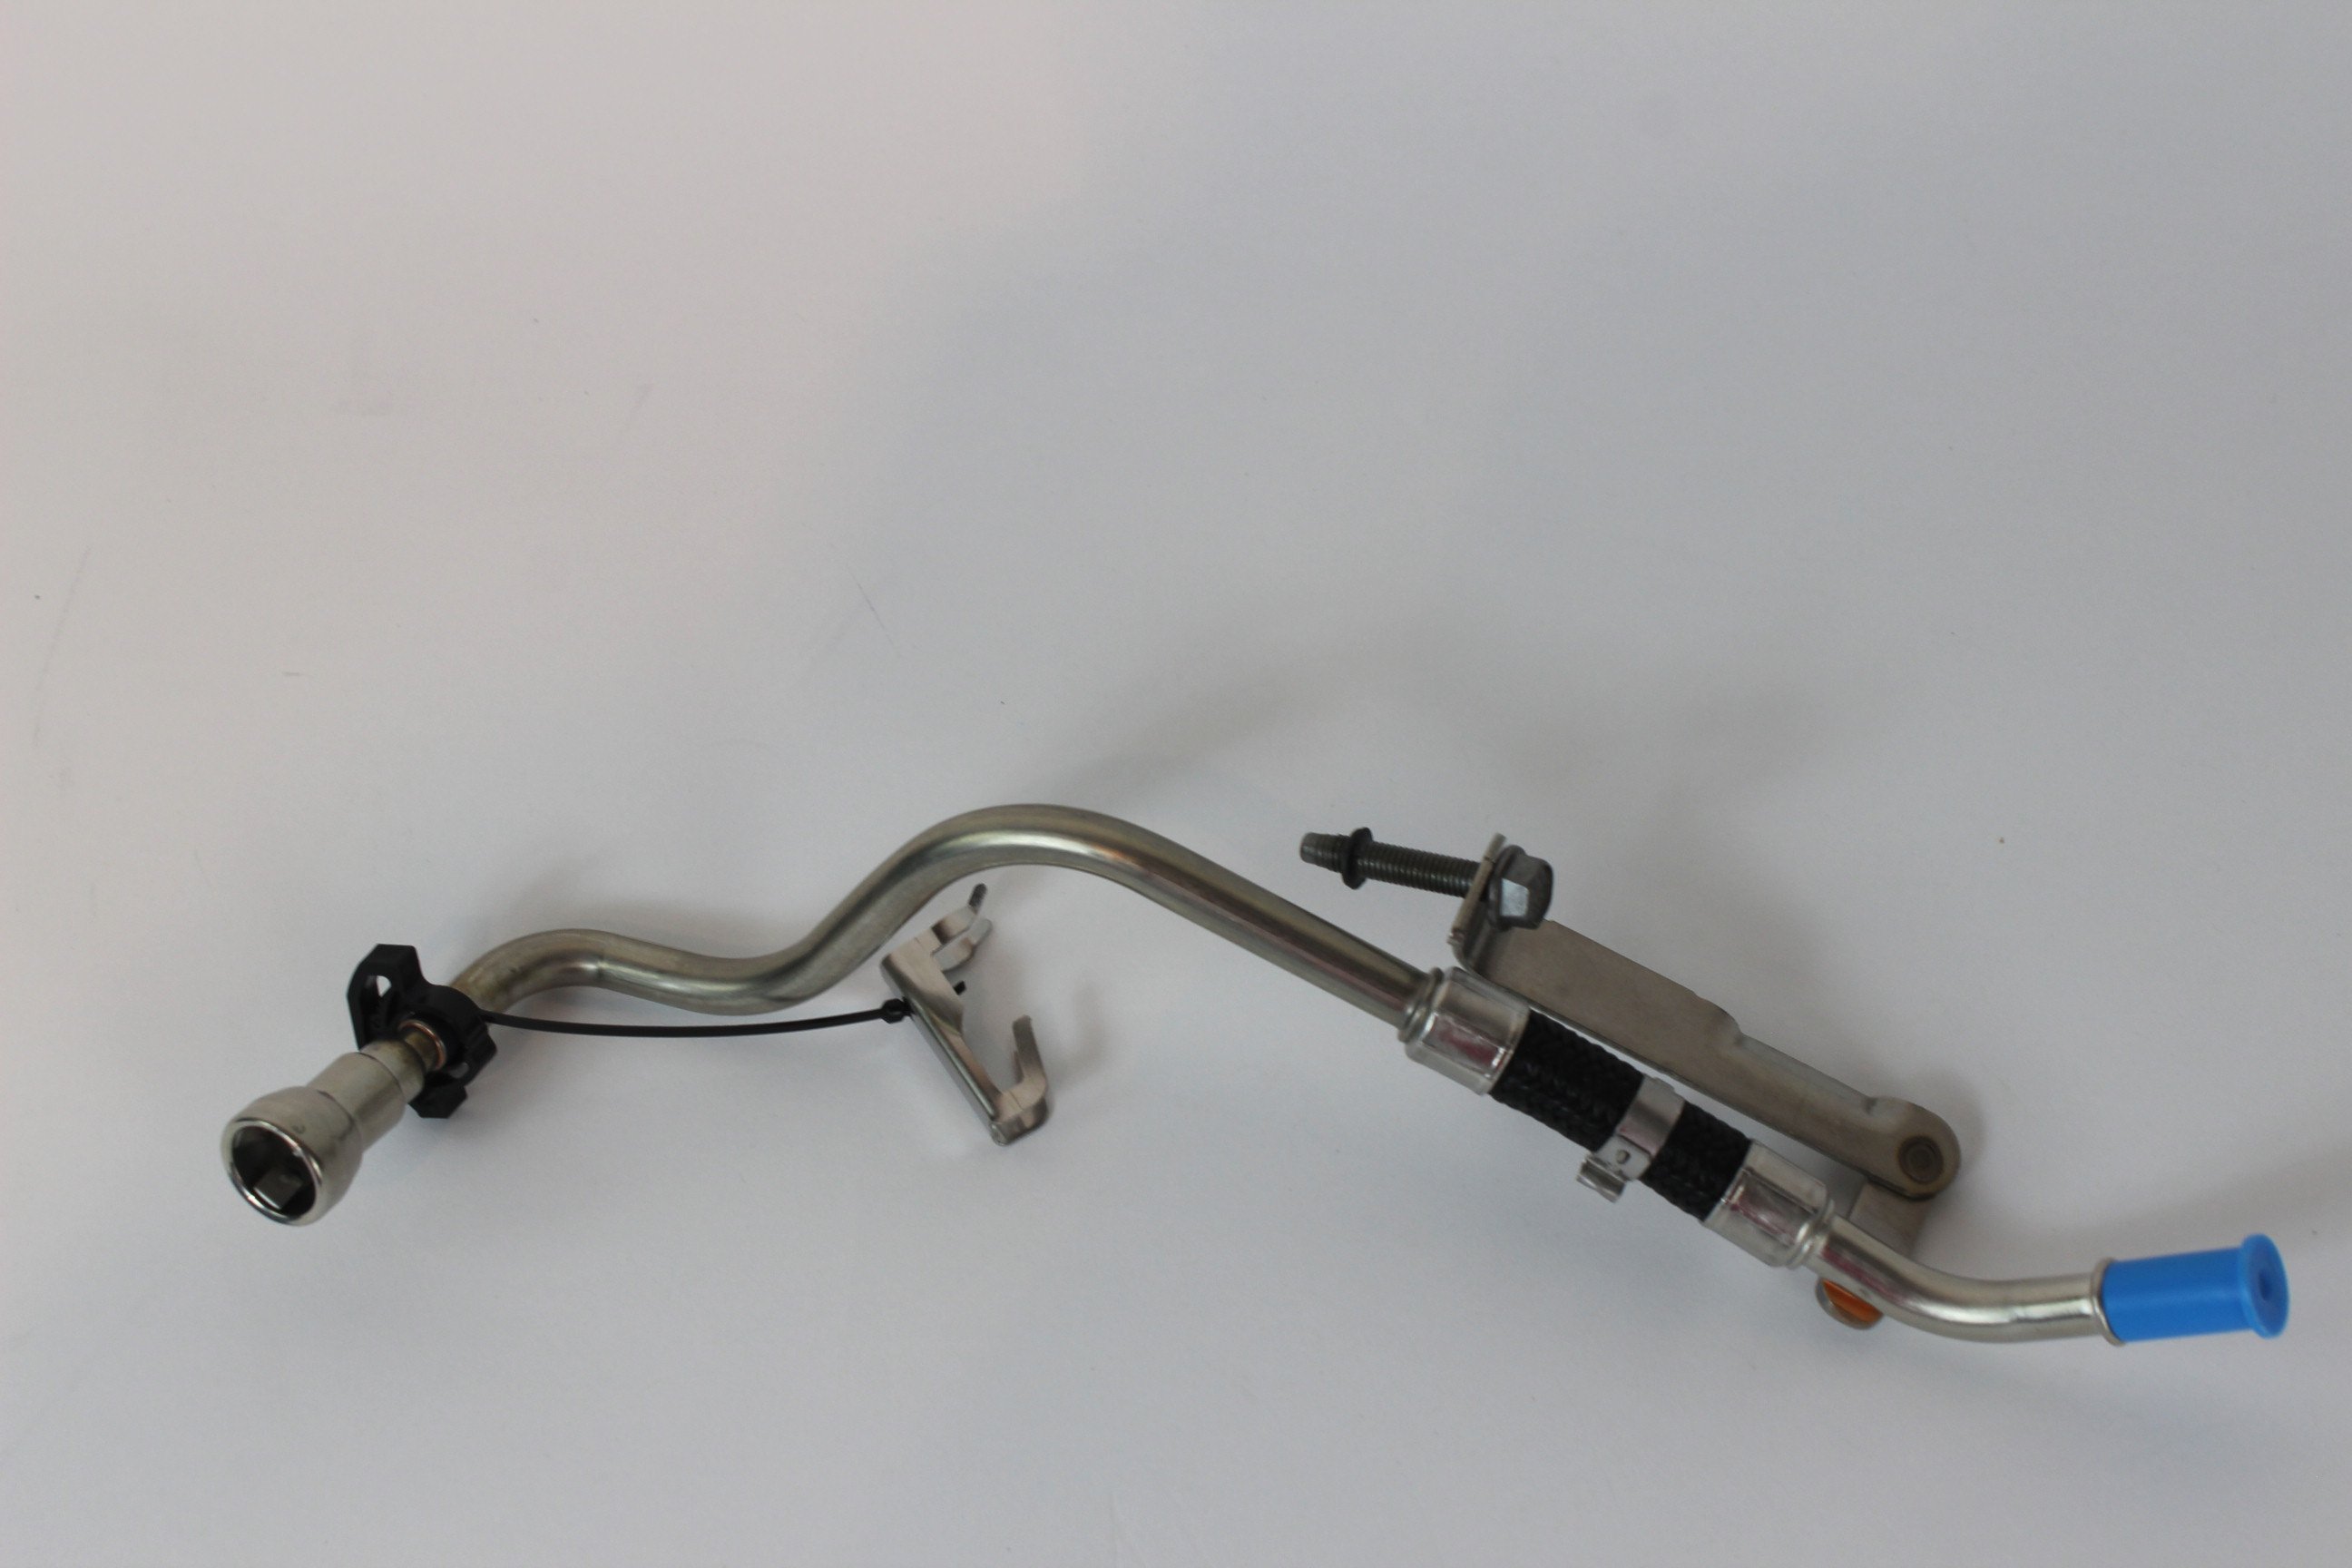
Our stock pump on the left versus our new LT4 pump on the right.
[Editor’s Note: We wound up adding a ZL1 in-tank pump during dyno testing and shifting some things around in our budget as added insurance.]
“The low pressure pump has a big effect on the high pressure pump and subsequent final fuel delivery,” Tanner added. “The high pressure pump is highly dependent on being fed the pressure needed. A drop off of 10-15 psi in the low pressure pump gets exponentially worse for the high pressure pumps output. If you can keep the low pressure pump holding strong; the LT4 pump and injectors will surprise you…”
Combined with the added lift on the fuel pump lobe from our COMP Cams camshaft, the fuel system should stretch quite a ways. We’d be more comfortable if we were allowed to run water/meth, but at this point, we’re starting to sound like a broken record, so we’ll move on.
A Little Motivation
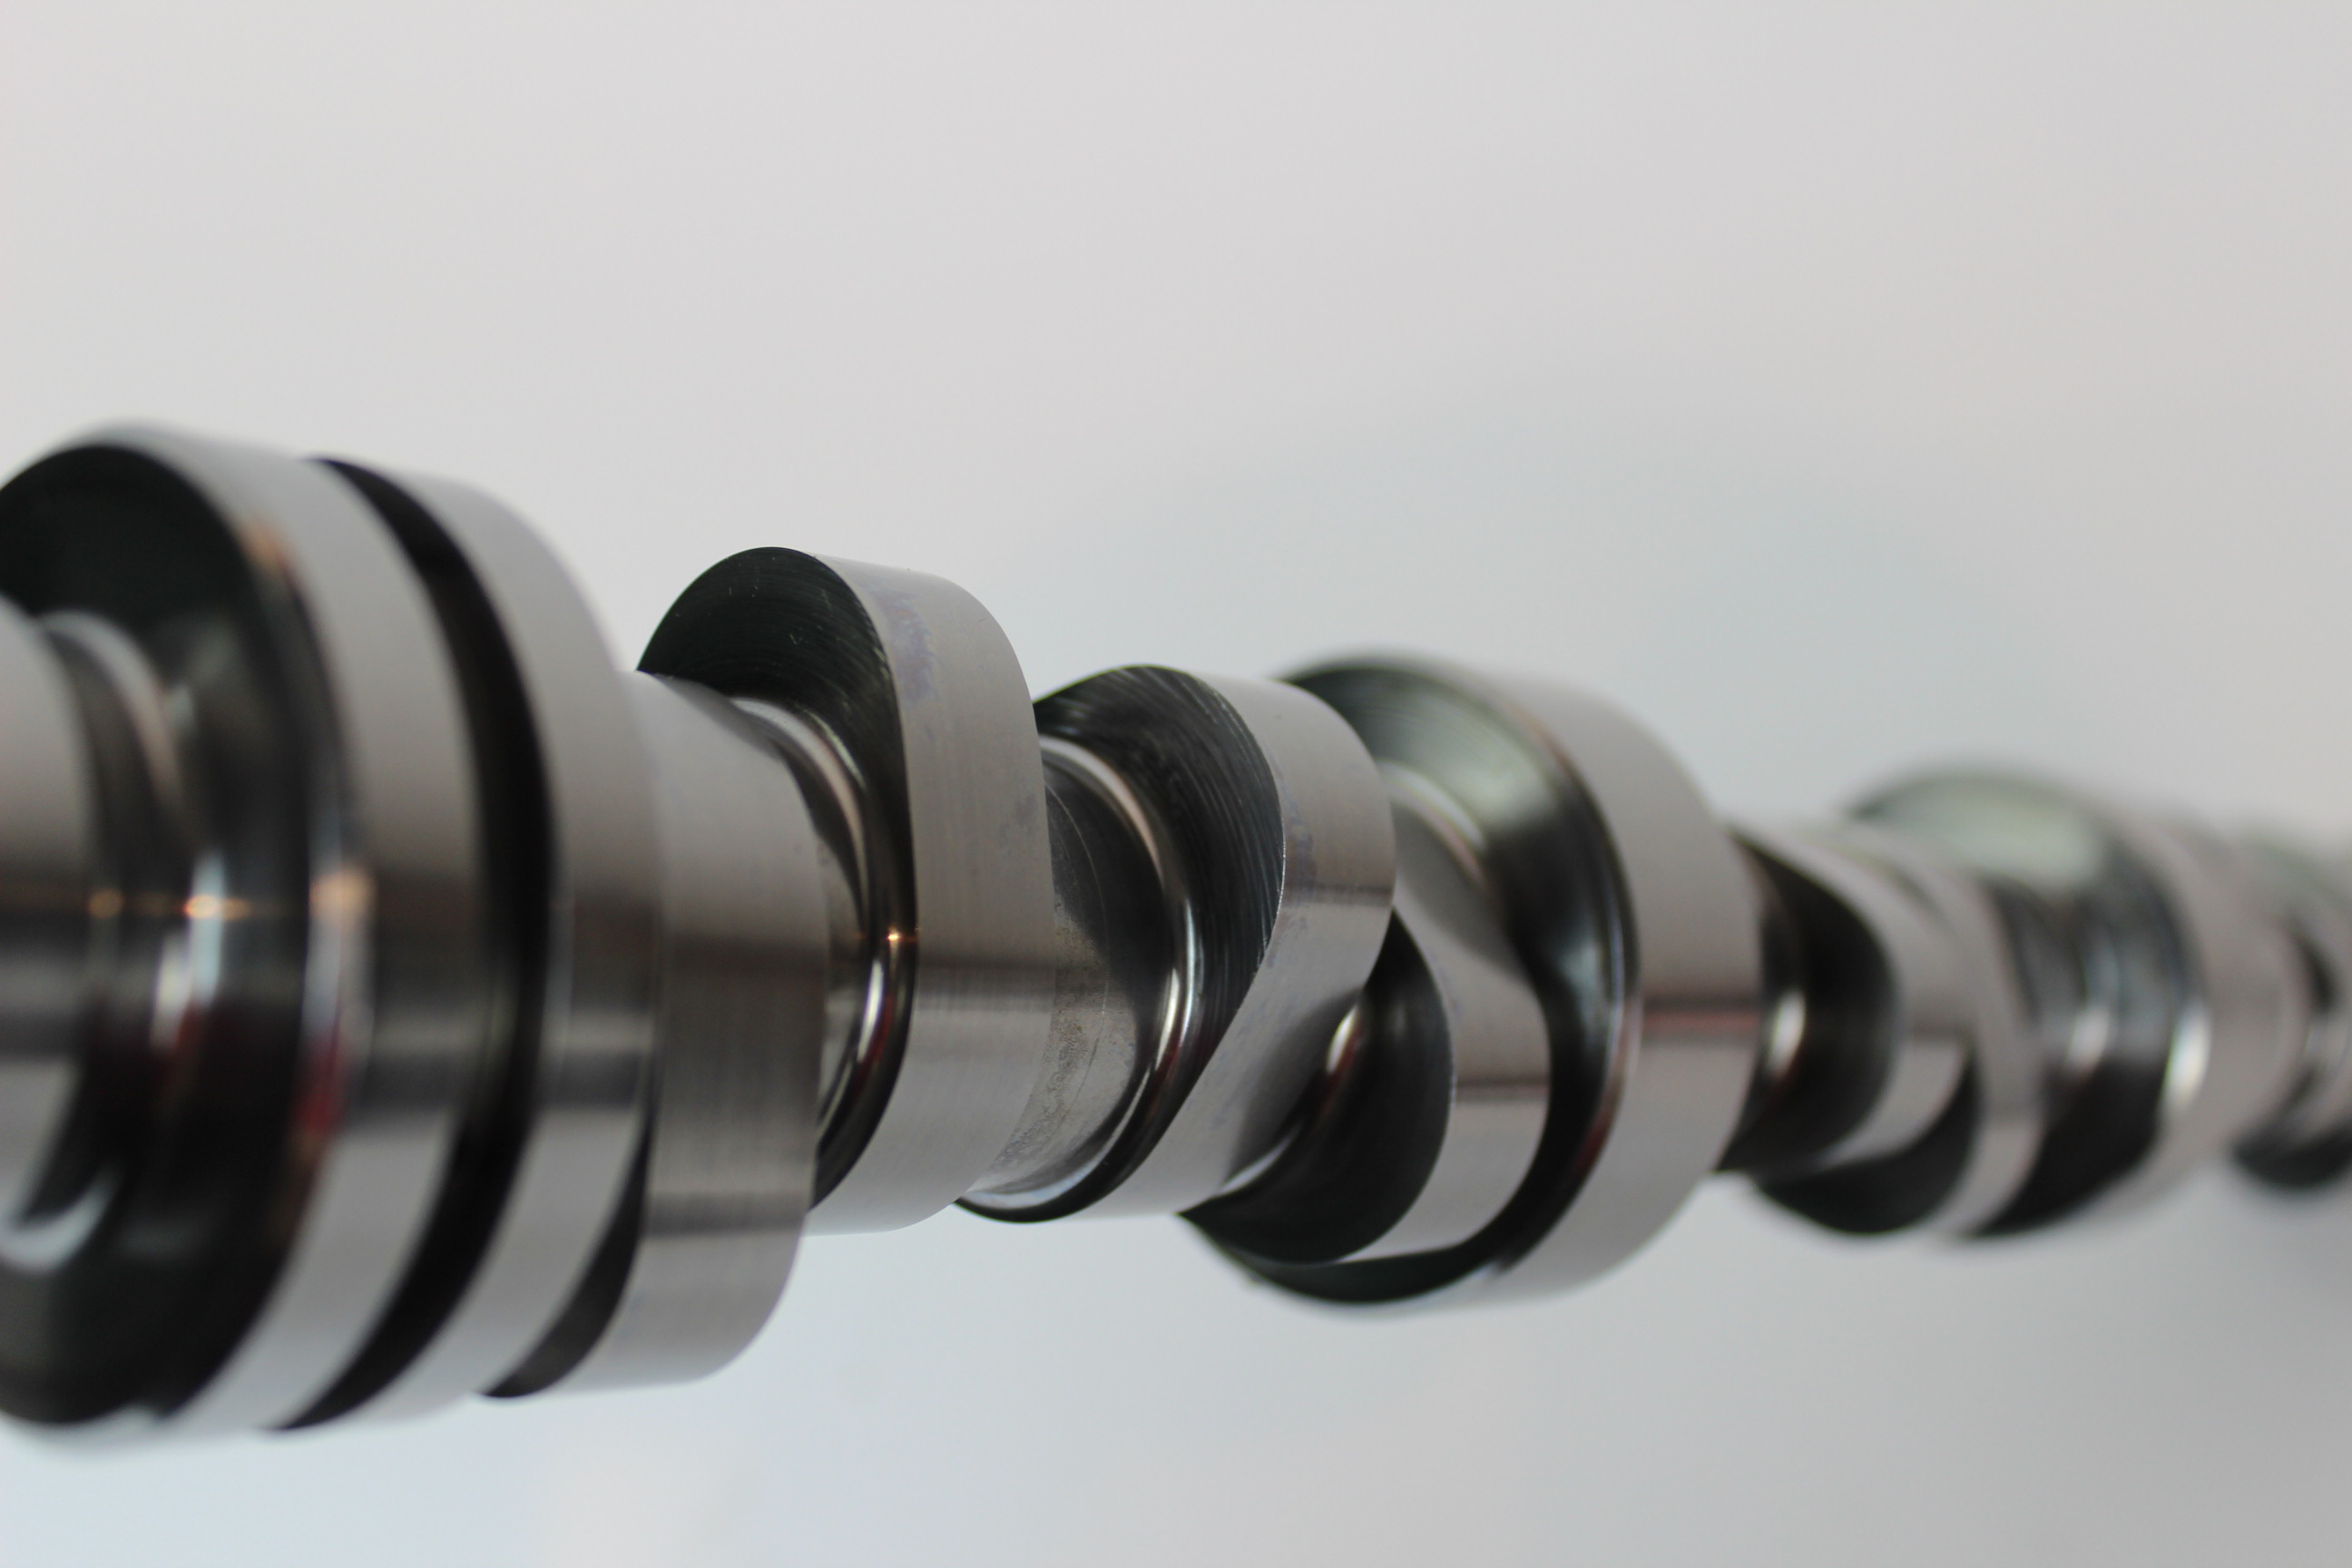
And speaking of the bumpstick in our mill, for that we turned to the guys at COMP Cams. With decades of experience, they were well suited to make the right recommendation for our grind. We knew that we would be going with a freer breathing set of cylinder heads and a D-1X ProCharger, so with those specs in hand, Billy Godbold, cam wizard (aka Valvetrain Engineering Group Manager) over at COMP, suggested a camshaft that would maximize our combination’s ability to make power.
“The LT1 sets a new bar in terms of combustion efficiency. When we ran this [LT1] head modified for port injection versus a standard LS3 head and RHS LS7 head on a dyno engine with the same cams specs (but a special core to flip the intake and exhaust). We were amazed at how much the BSFC (Brake Specific Fuel Consumption) improved. The LT1 head can make more power with less fuel and air by improving the burn efficiency, releasing more energy per droplet of fuel). However, while the canted valve is new with this engine, the airflow characteristics are very close to something like LS7 flow with an LS3 cross section. The same profiles that were developed with these engines in mind are great with the LT1 engine and head. The one difference in terms of cam specs would be that the higher velocity port does not require quite as much overlap to make the same (or more) power. The cores are quite unique with the swapped intake and exhaust valve location along with the added DI pump lobe, but the general profiles are very much in line with the LS7 and the durations are just a touch less.”
He recommended a cam that specs out at 224/236 degrees of duration and .630-inch of lift on the intake and exhaust respectively (PN 224-000-13). This is all ground on a 114 lobe separation angle to make sure we’re making the most of the boost we will be cramming down our LT1’s throat. On top of everything, our new camshaft comes with a larger fuel lobe that will help stretch our fuel system’s limits by over 32 percent with a 7.5mm (lift) tri-lobe design, making it a key piece to keeping our mill fat and happy.
“The LT1 definitely requires careful tuning, especially with the larger camshafts,” Billy continued. “The OEM DI injection phasing is related to the intake valve events, so as you change duration and the cam sweep, you also have to carefully calibrate the injection timing. Also, with the largest DI lobes, there may need to be subtle changes on the pump valve timing for large 3-lobe changes and drastic modifications to this timing on any 4-lobe DI pump custom camshaft.”
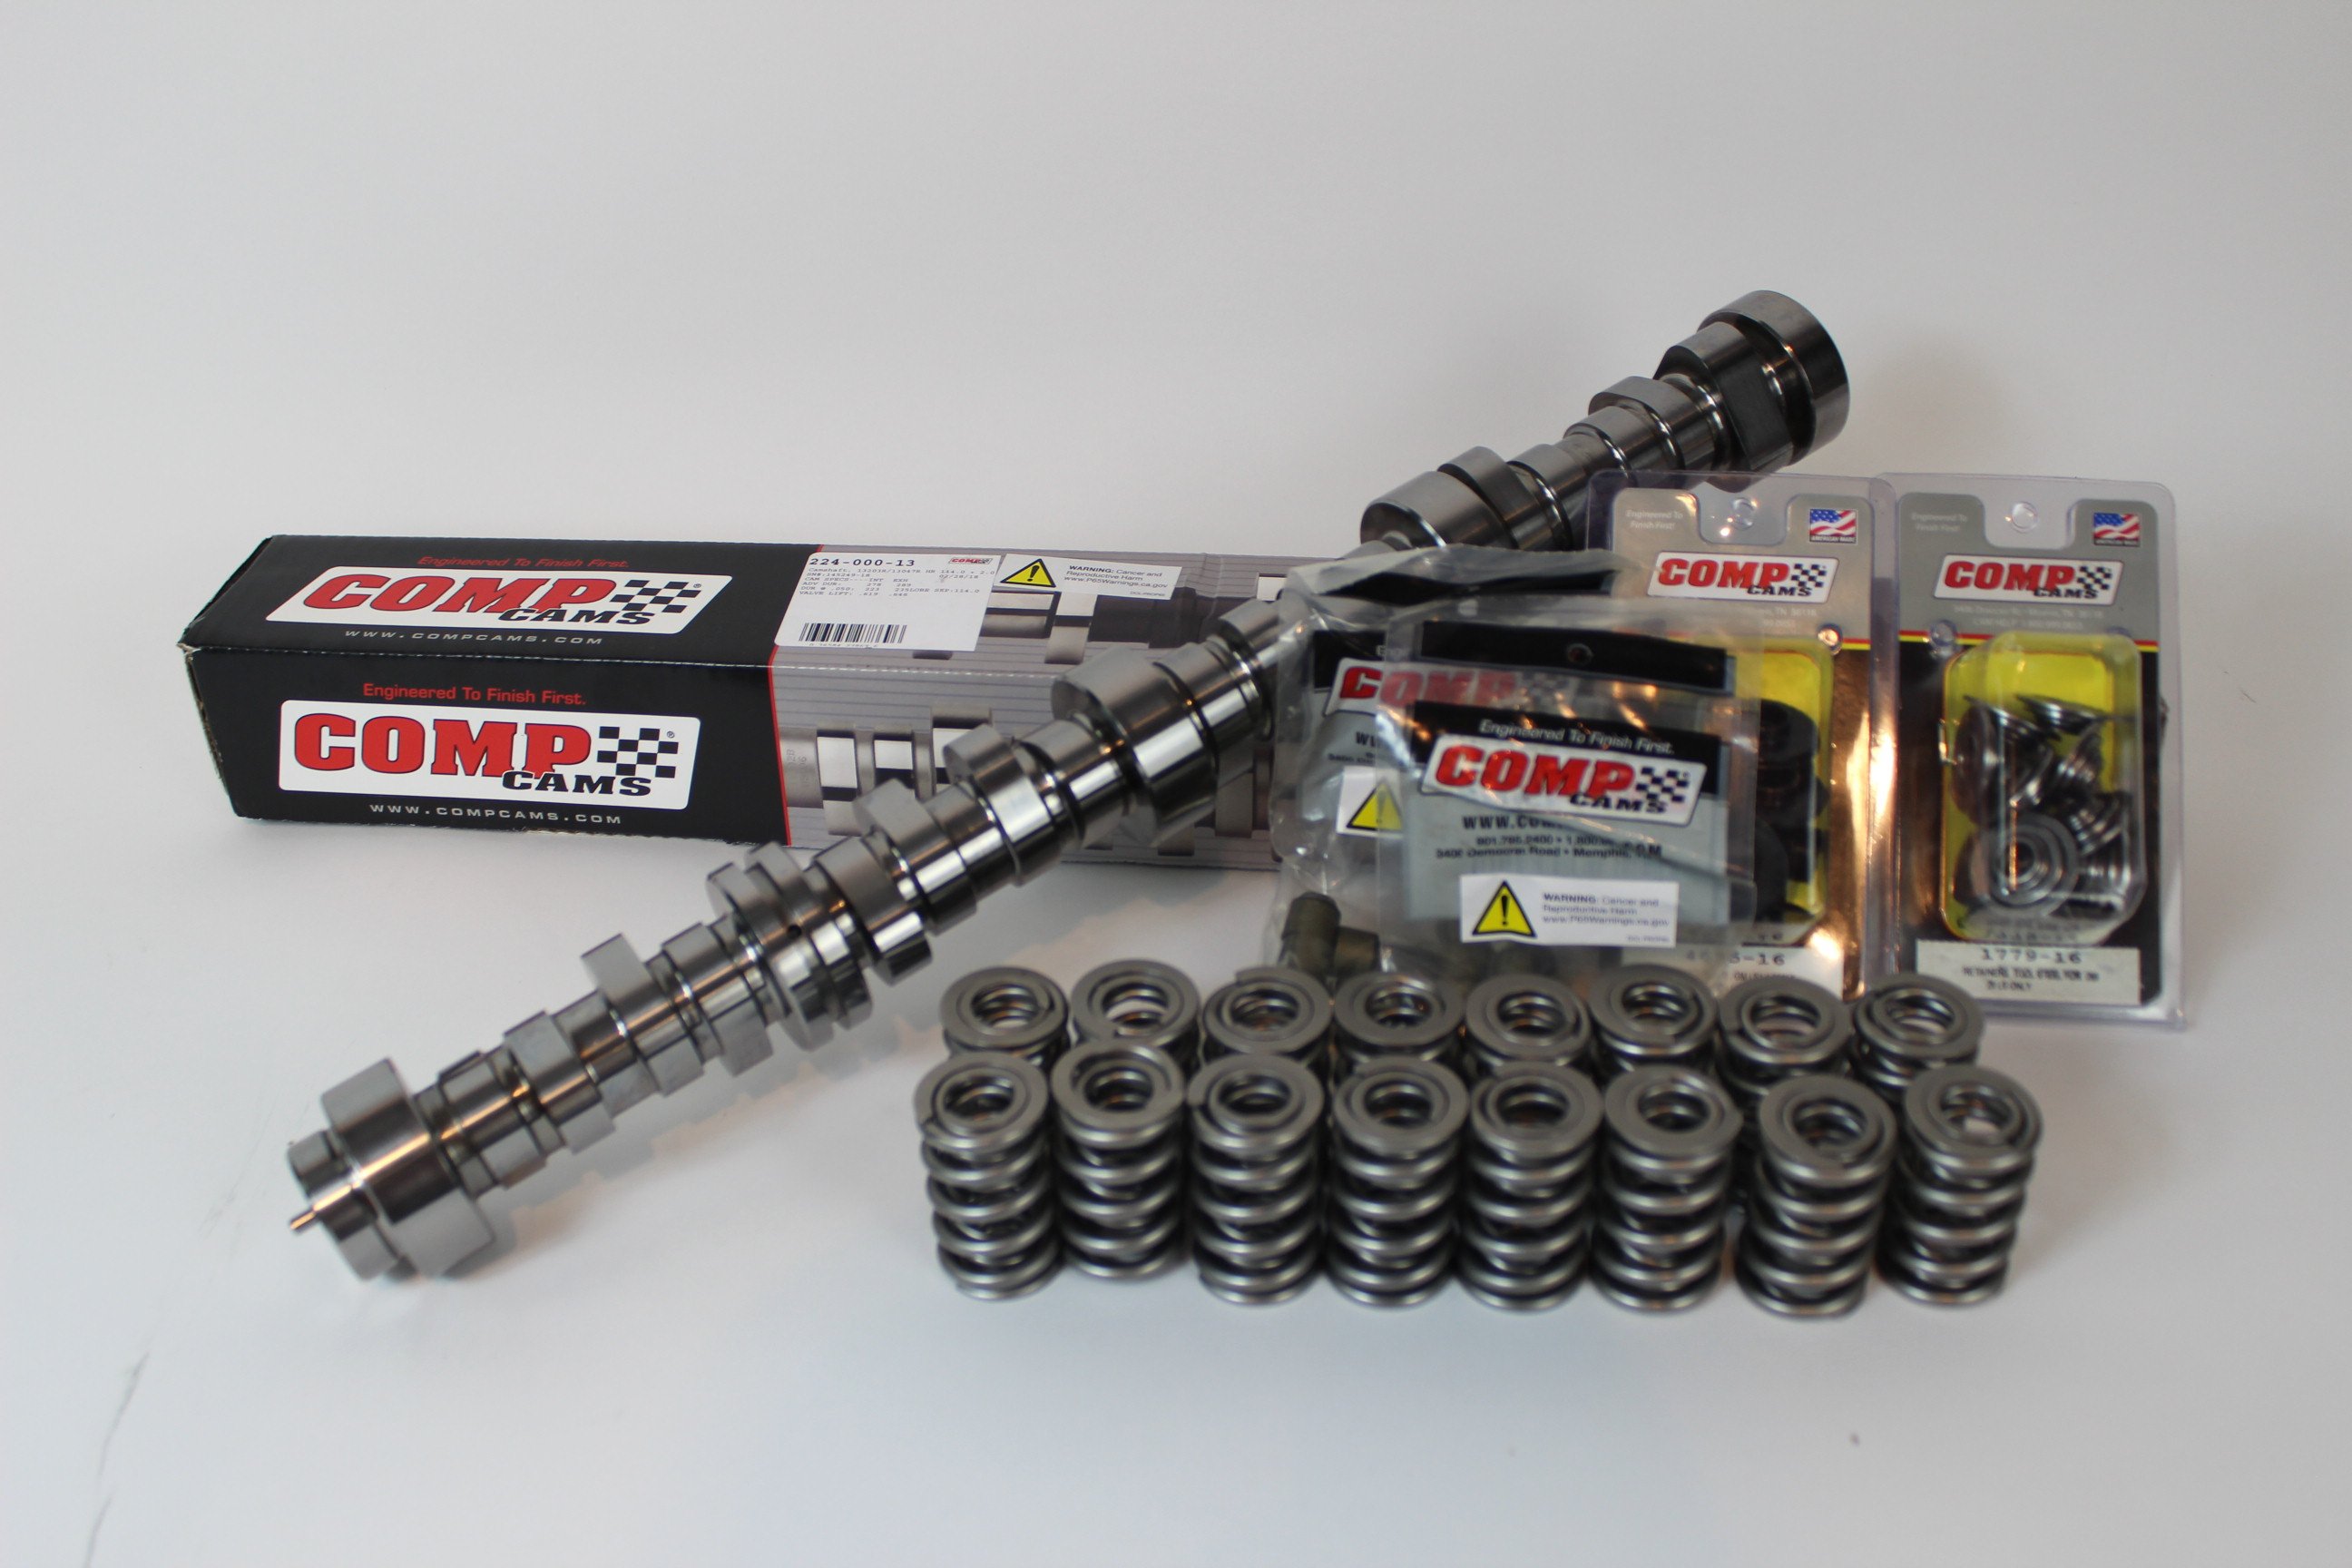
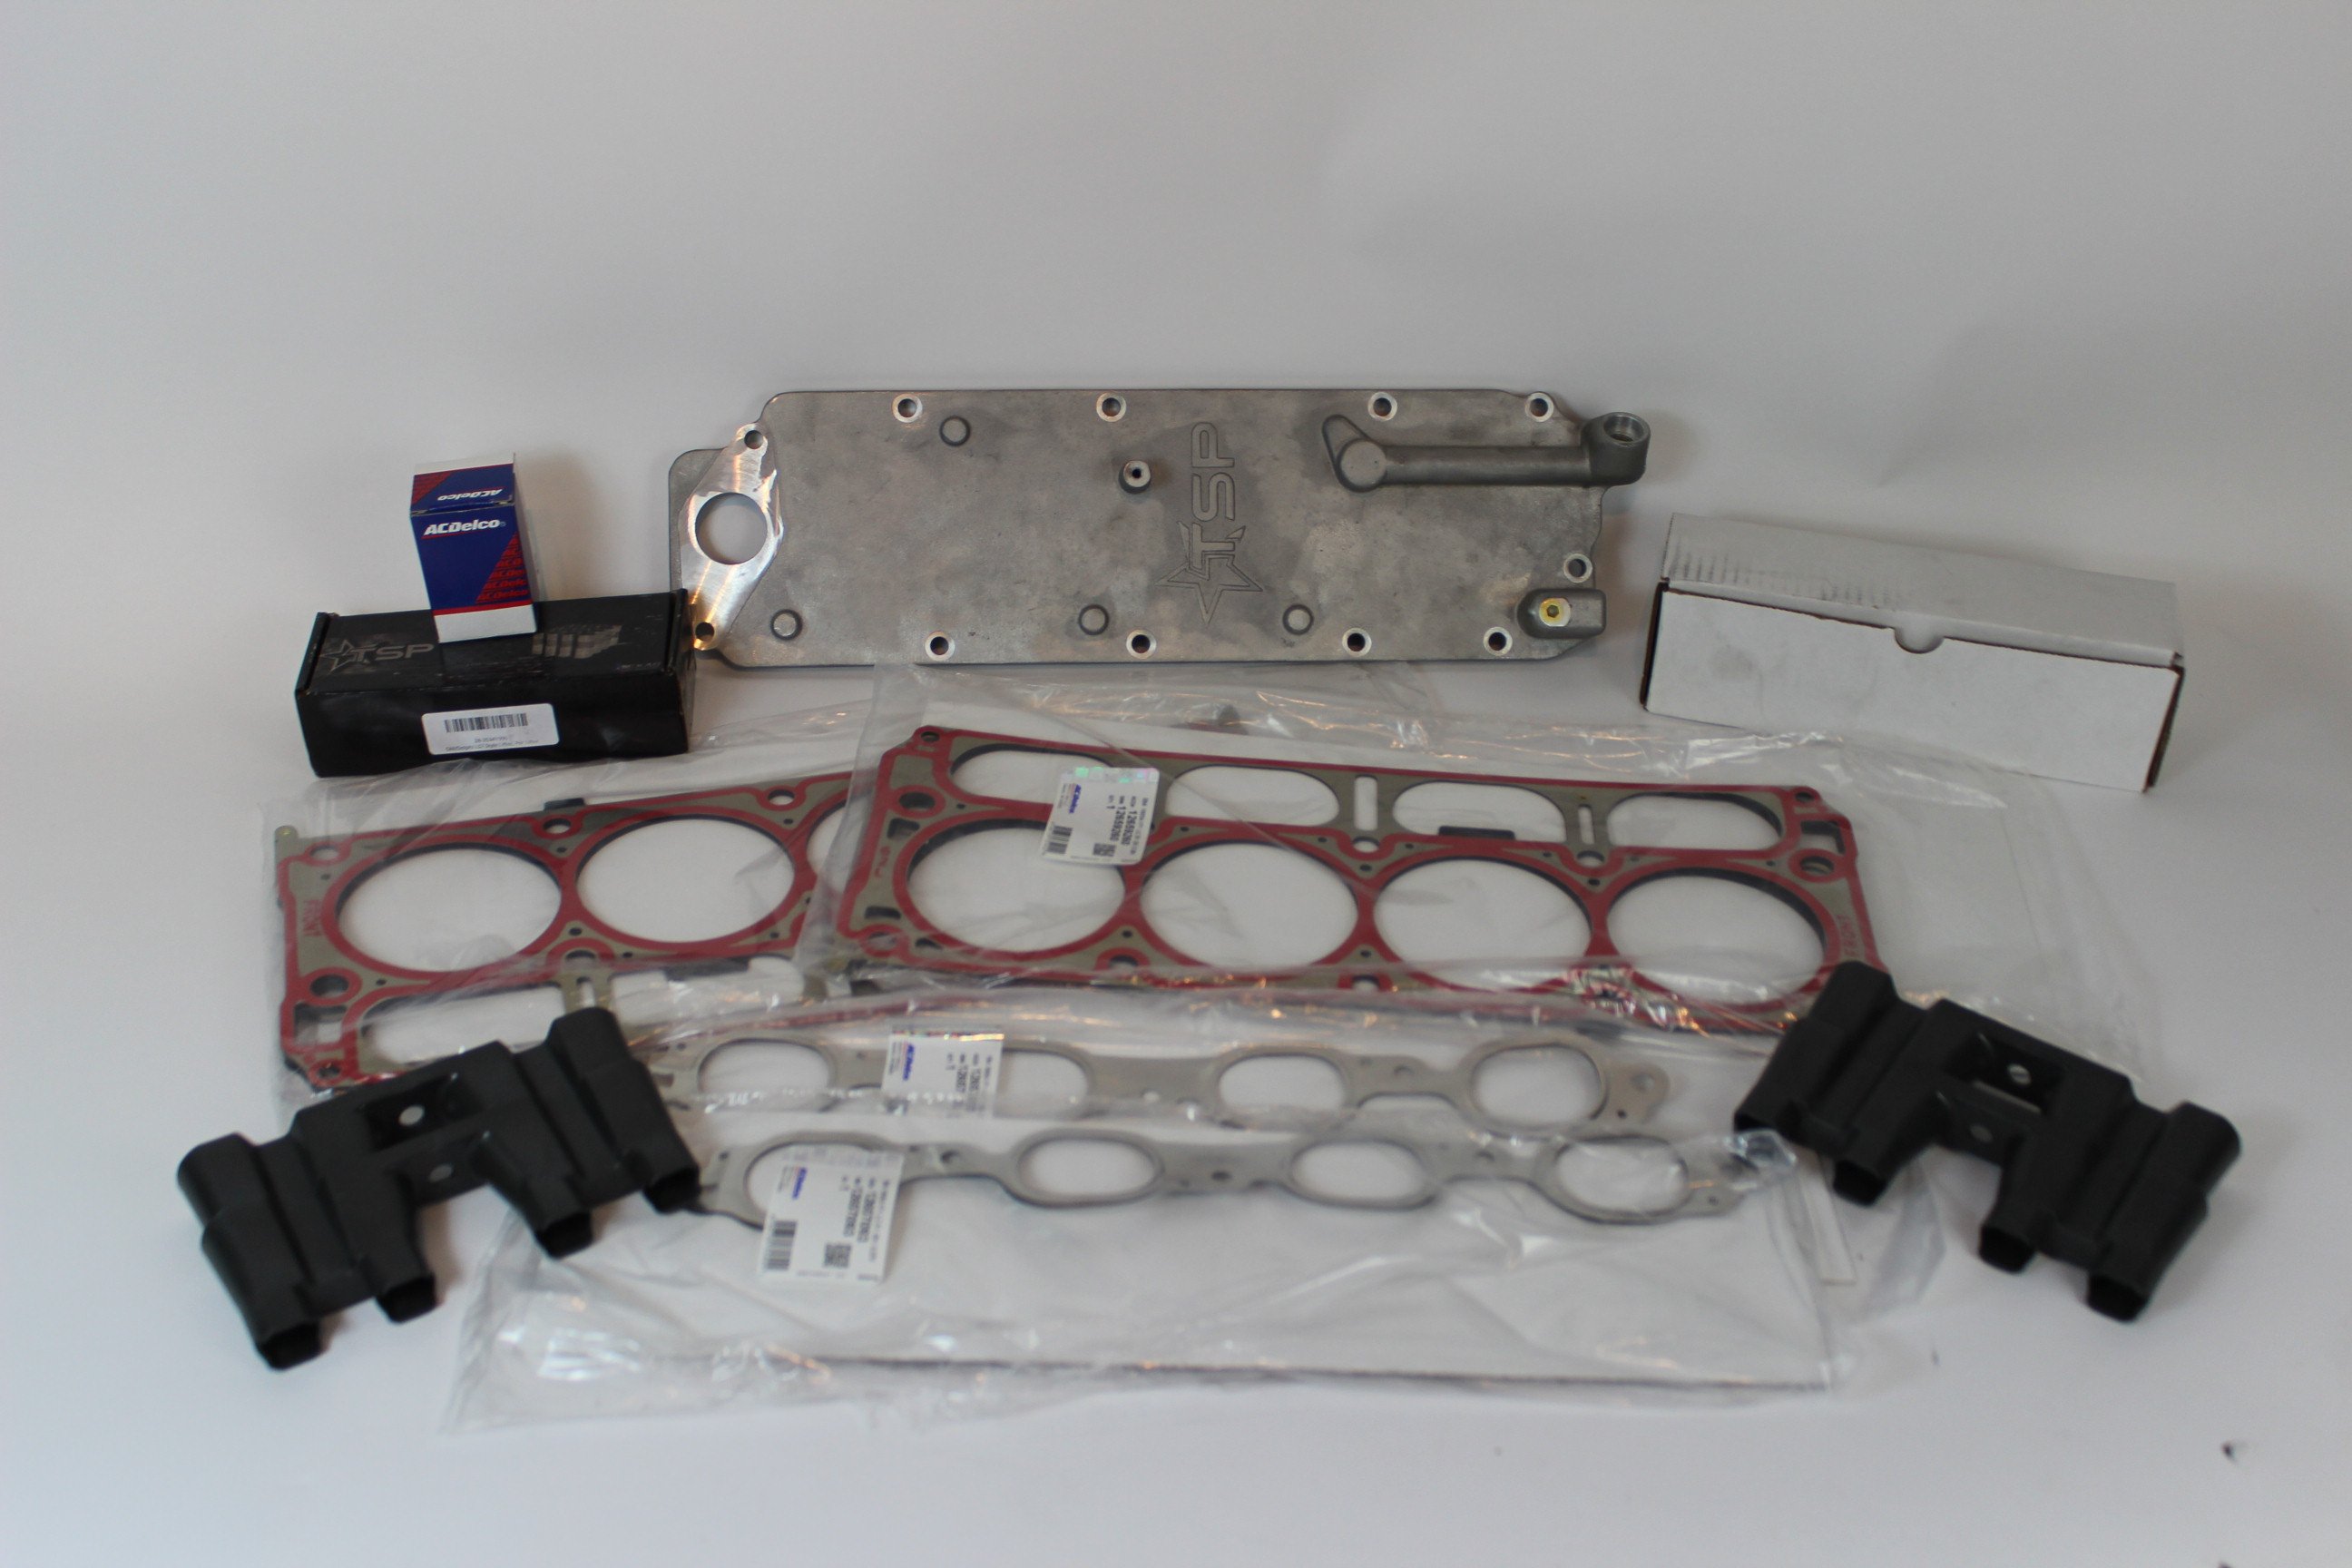
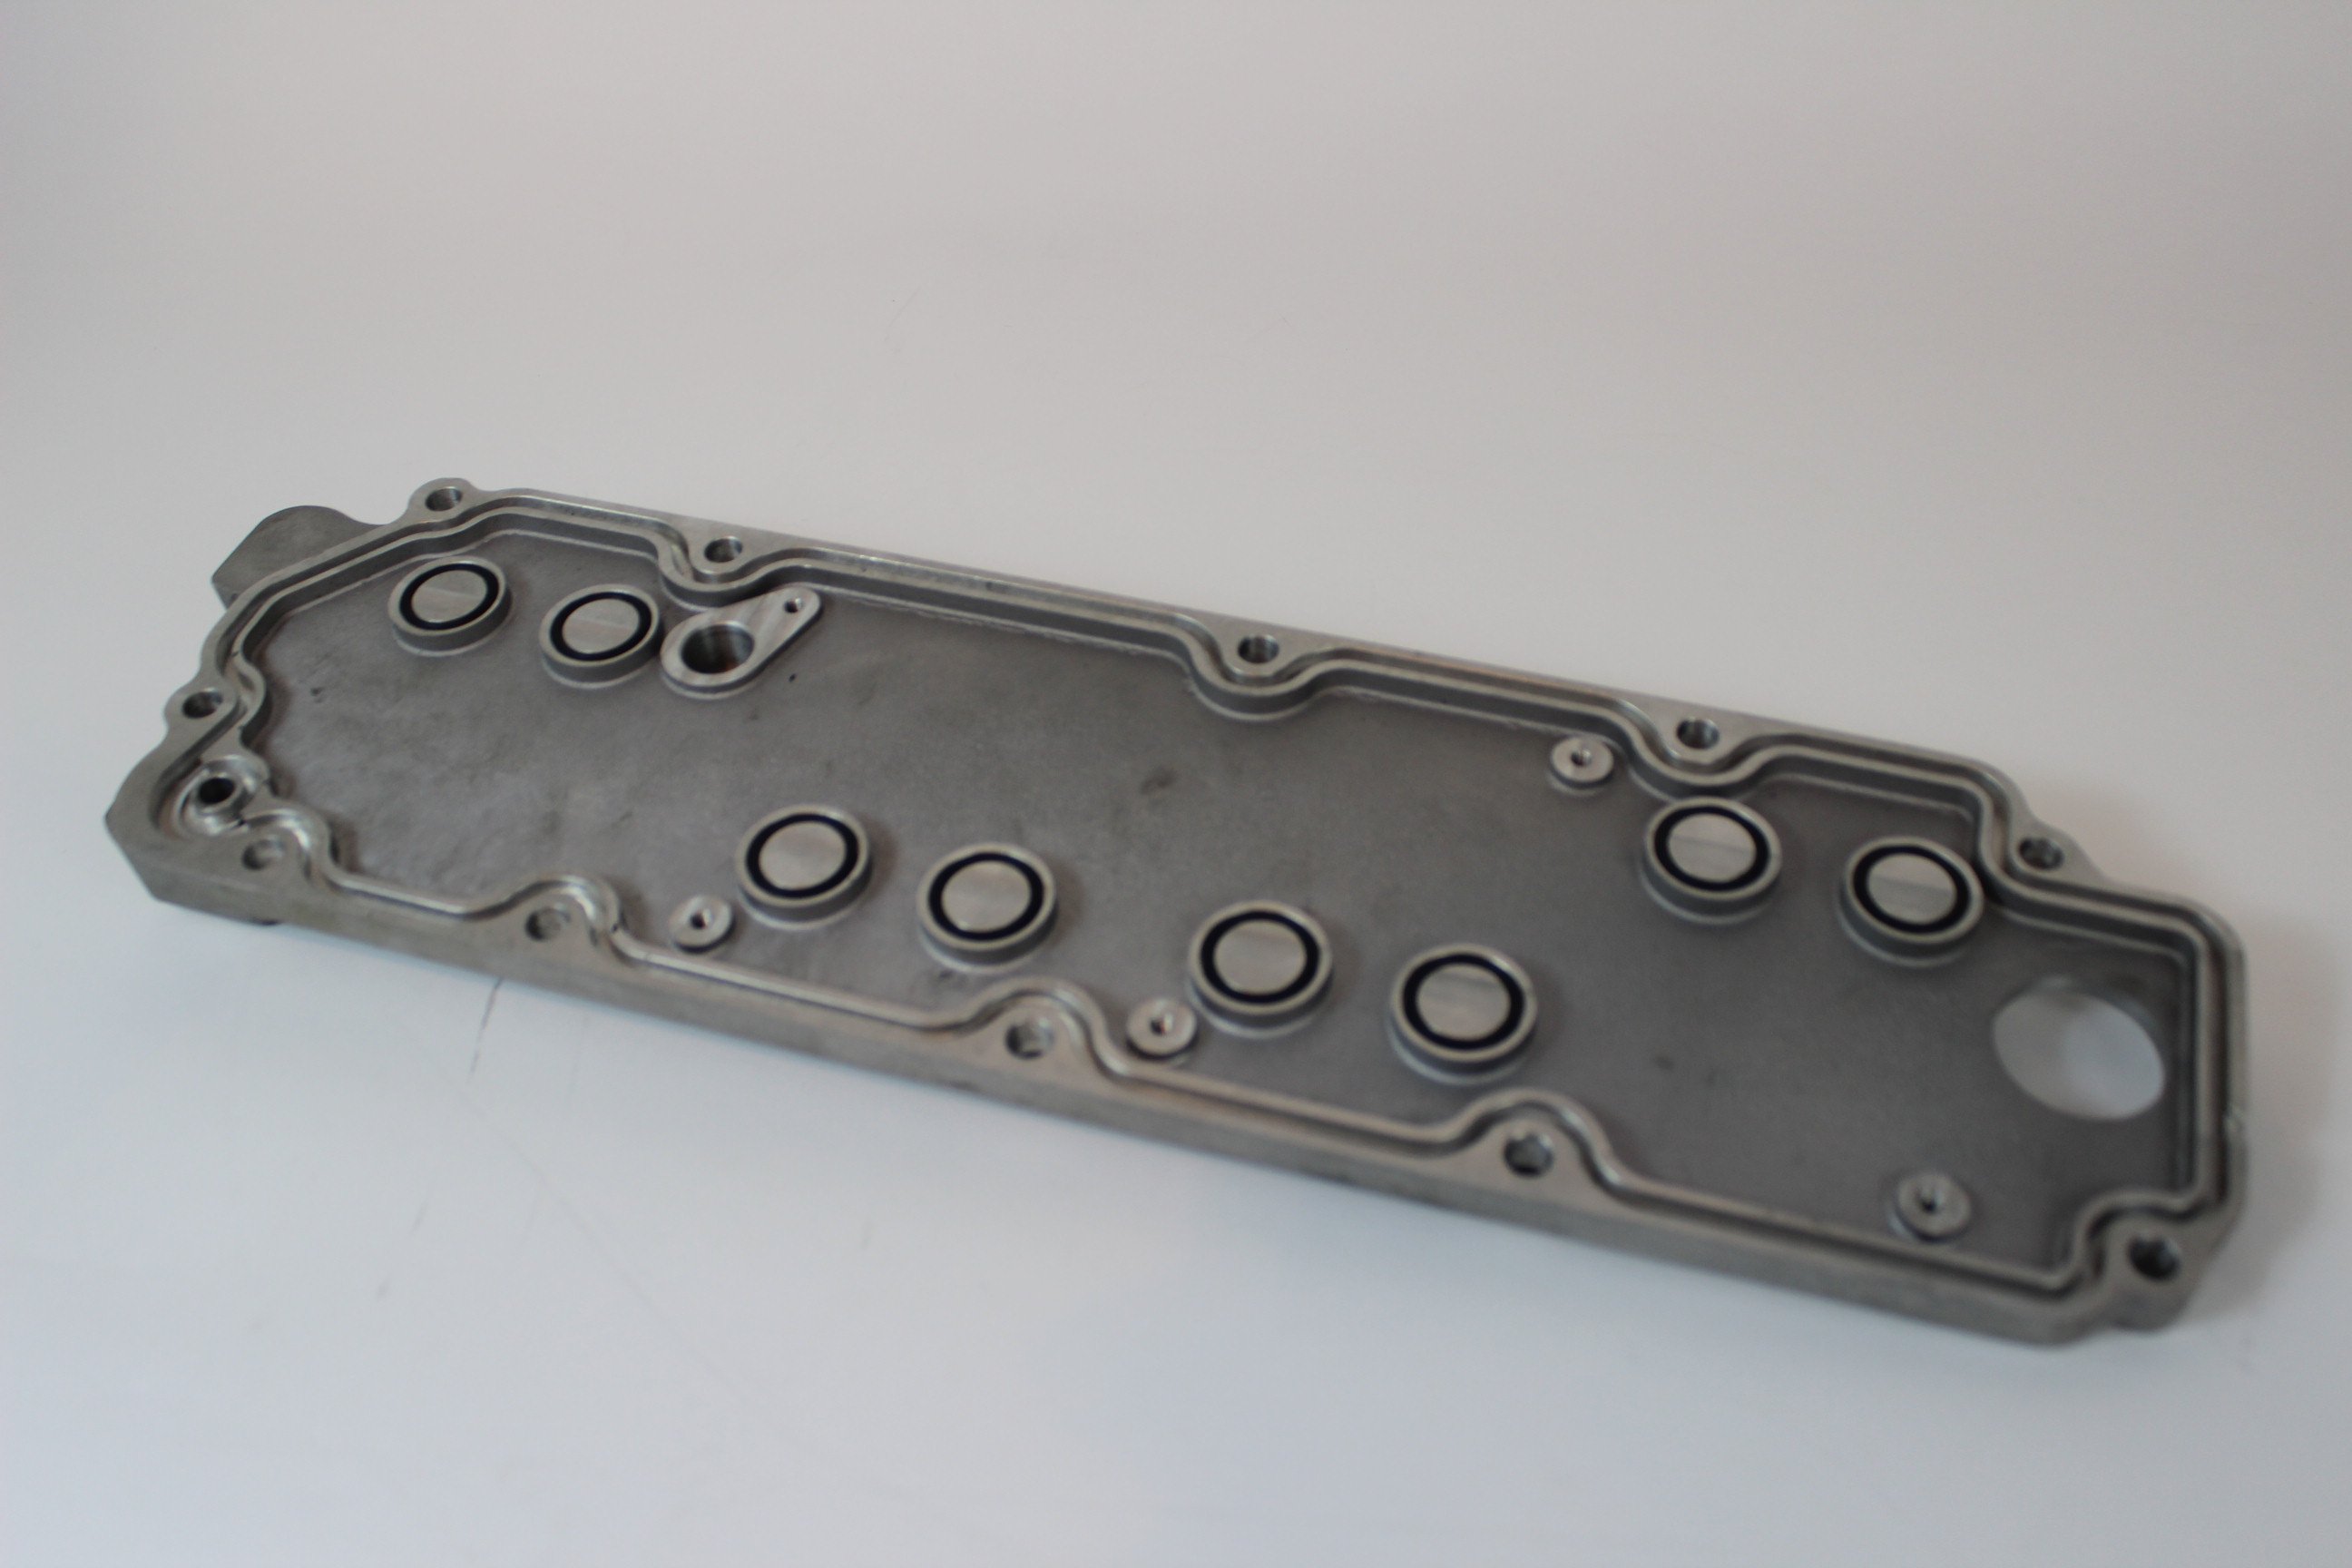
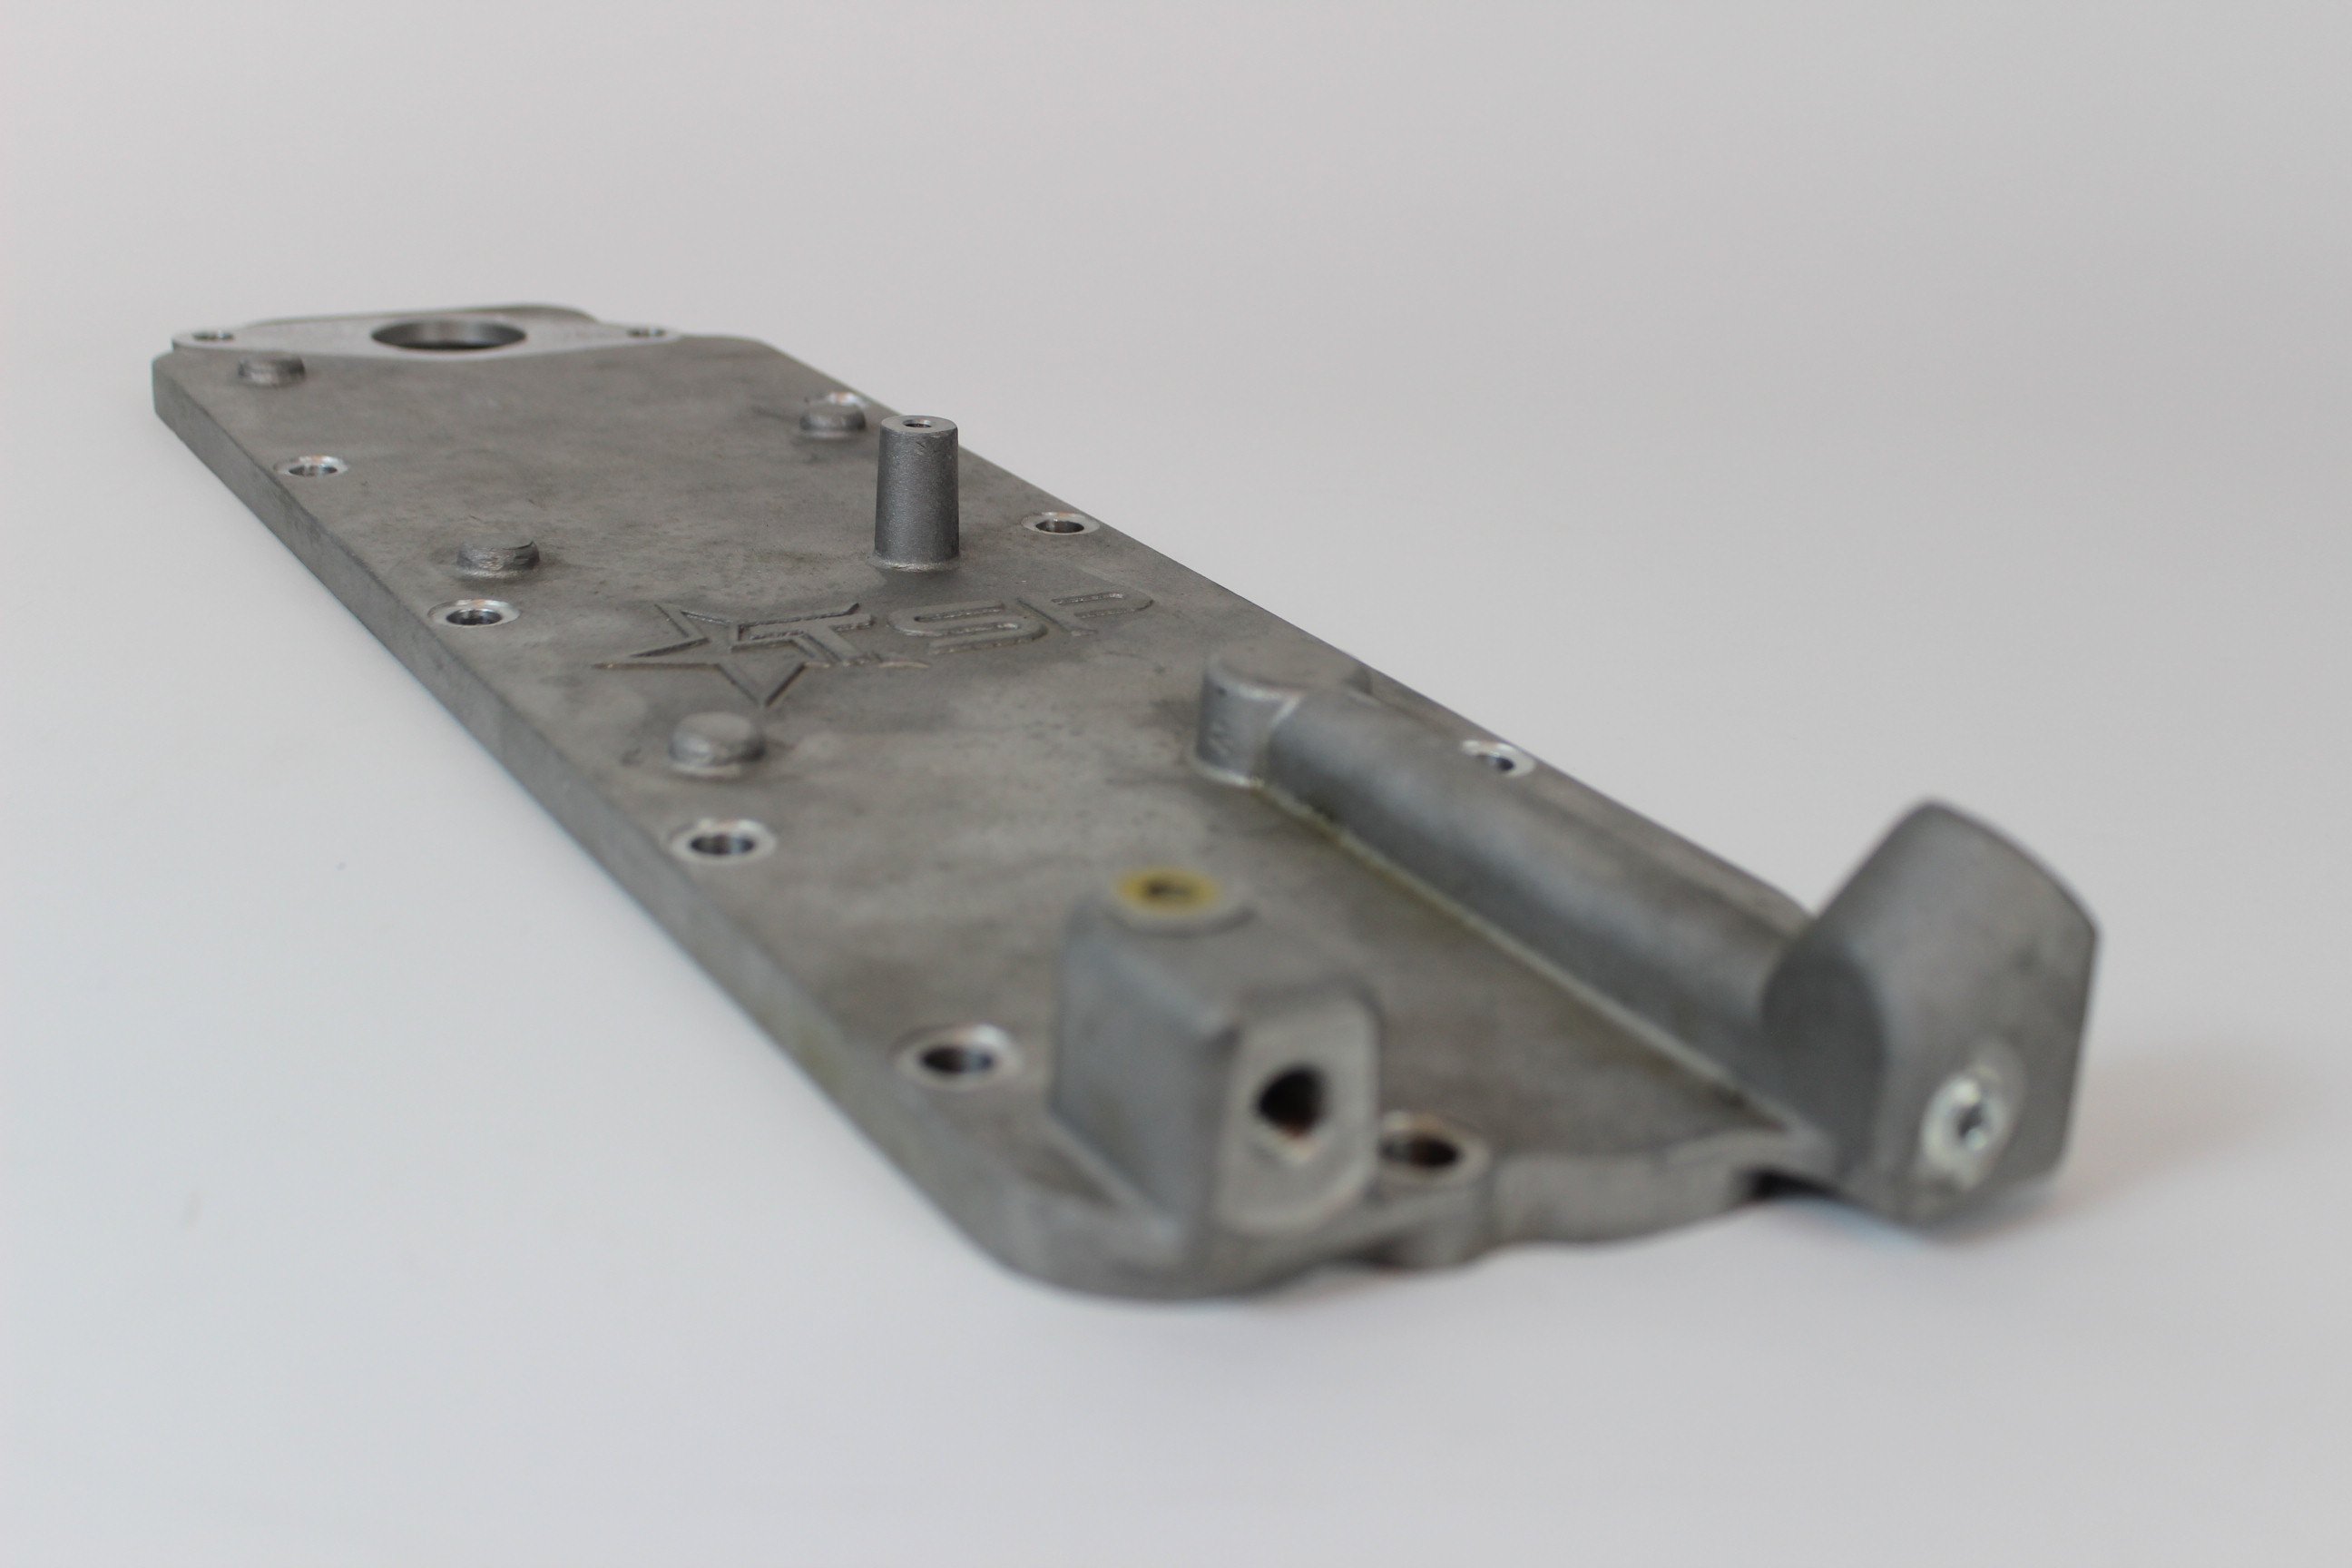
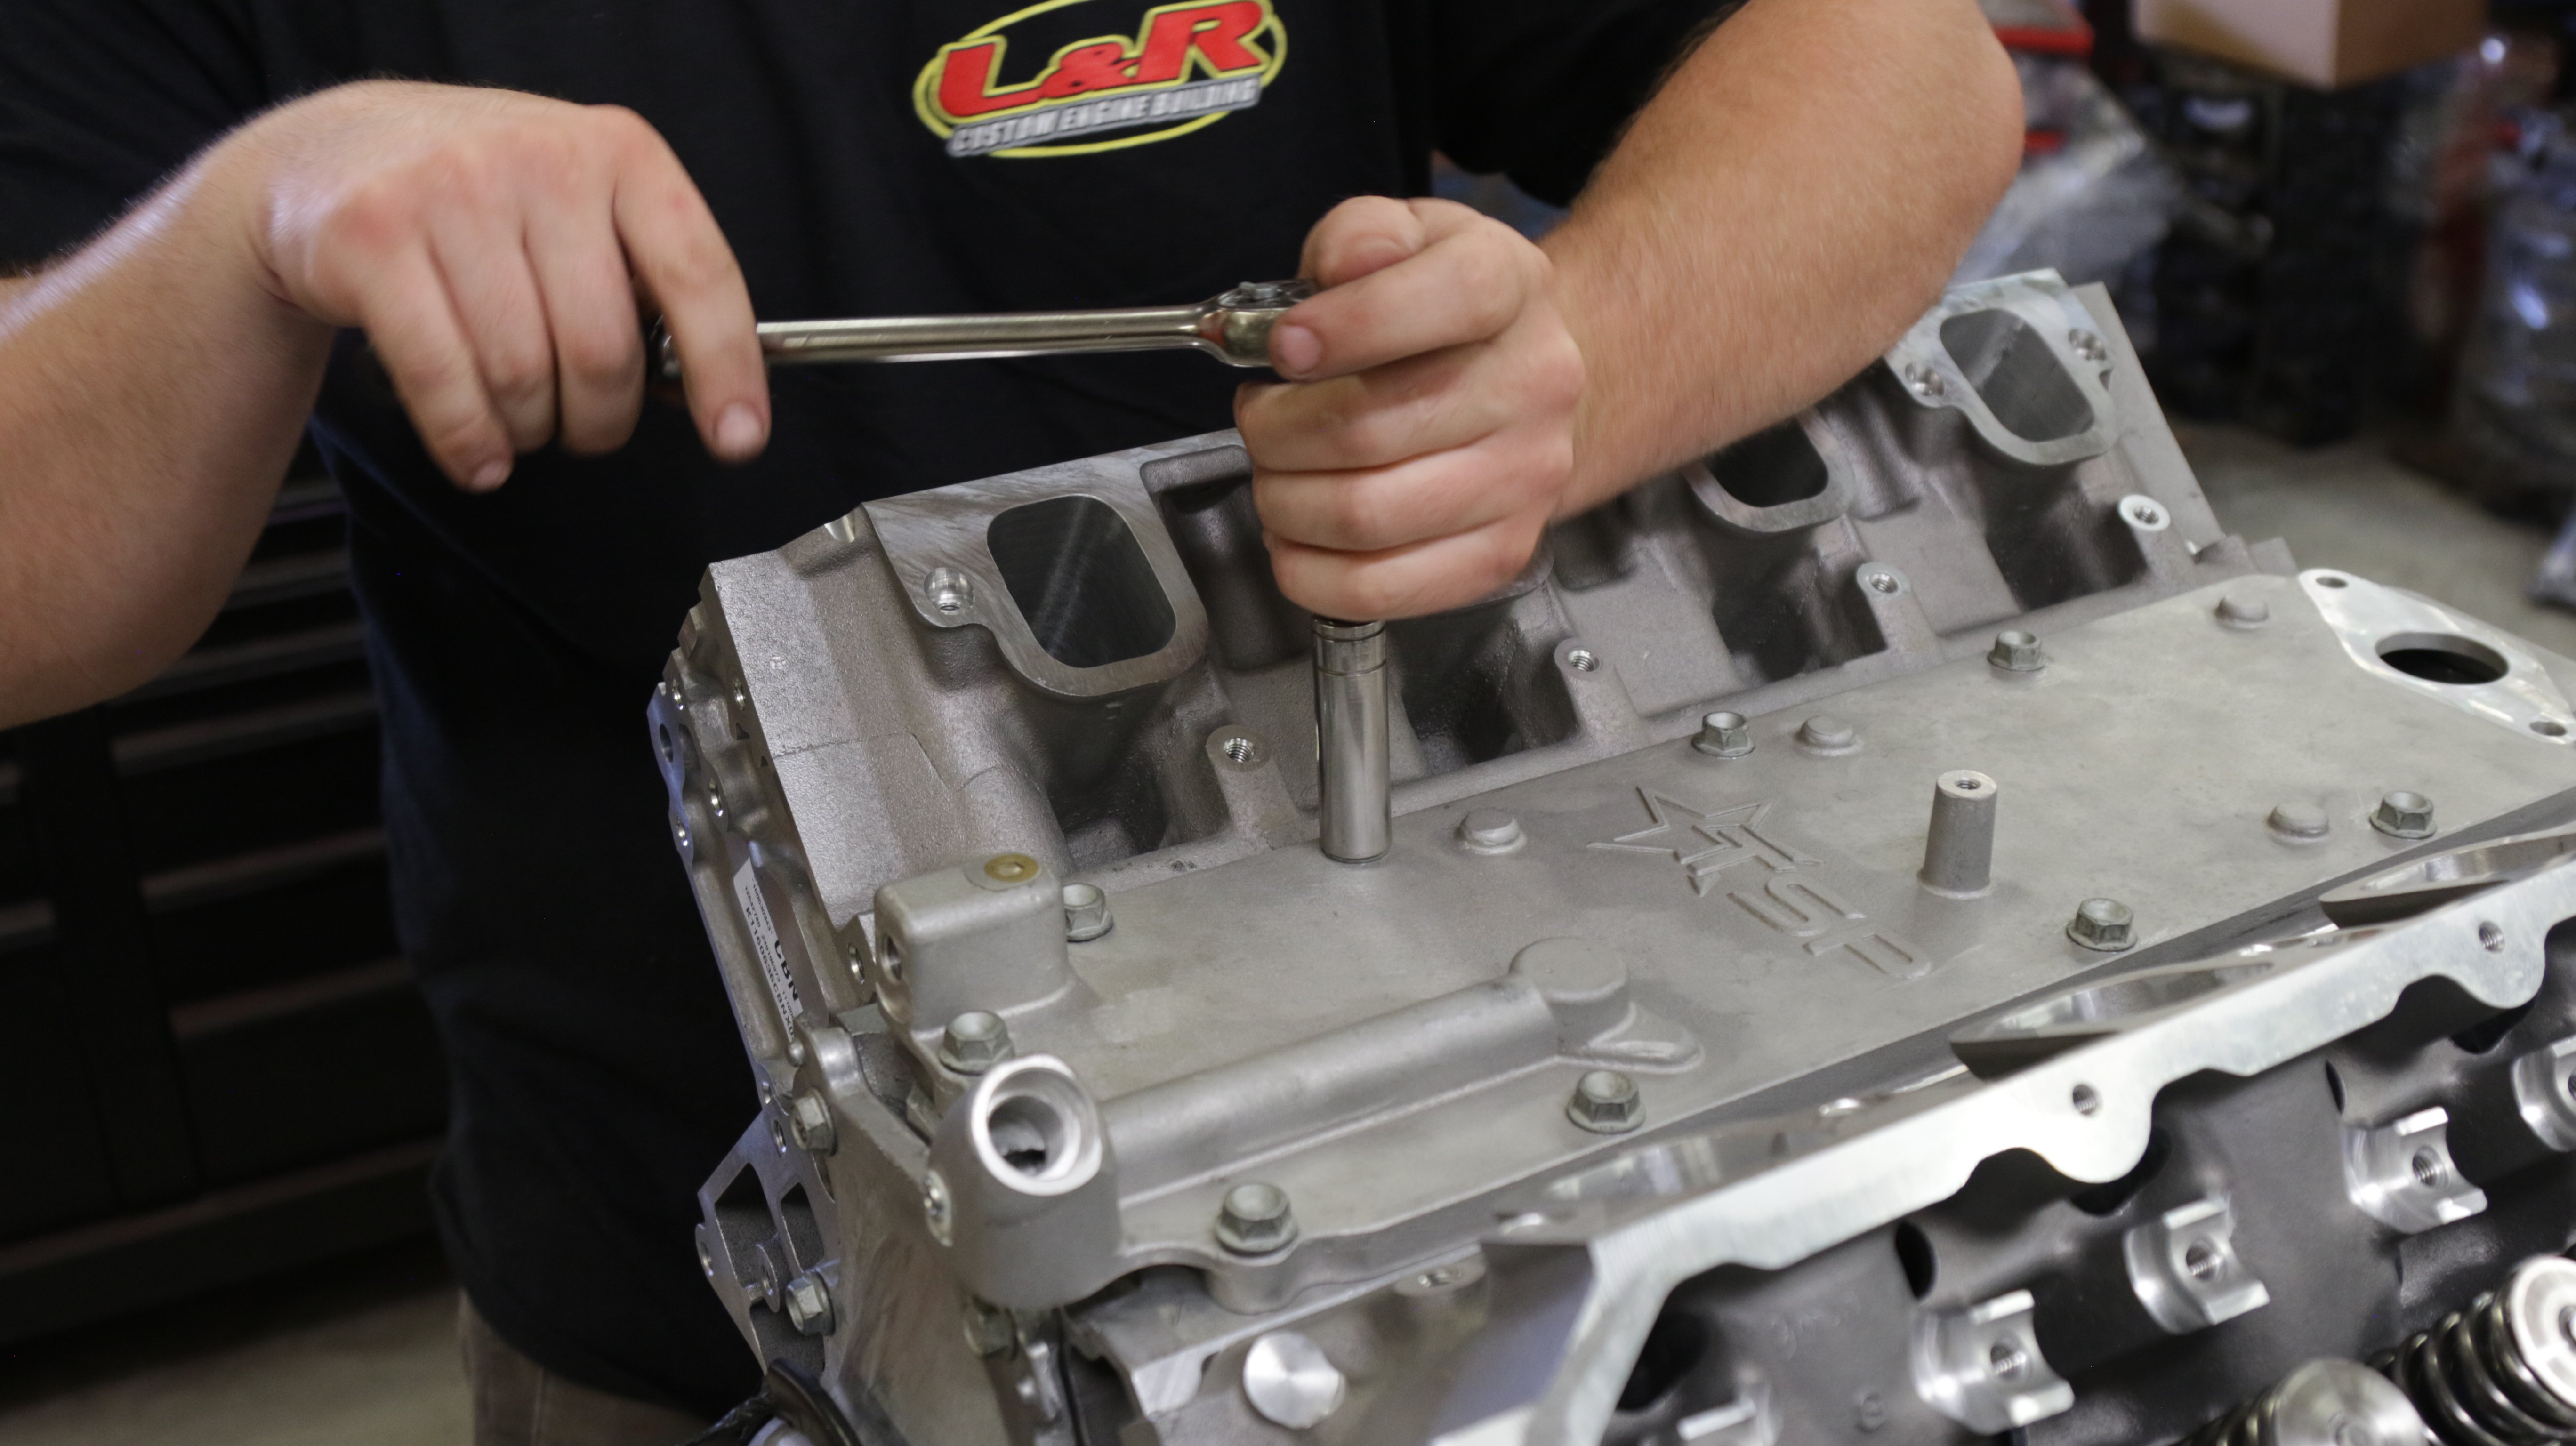
However, one thing to note here is that the factory Active Fuel Management (AFM) lifters are not designed to take that kind of lift and require that they are swapped with a non-AFM lifter. Knowing that we hit up the guys over at Texas-Speed and Performance for one of their AFM delete kits (25-LT1DODDEL-KIT). Our kit came with a brand new valley plate that blocks the oil passages that typically control the system and 16 LS7-style lifters in order to handle the additional lift and duration.
Forged In Battle
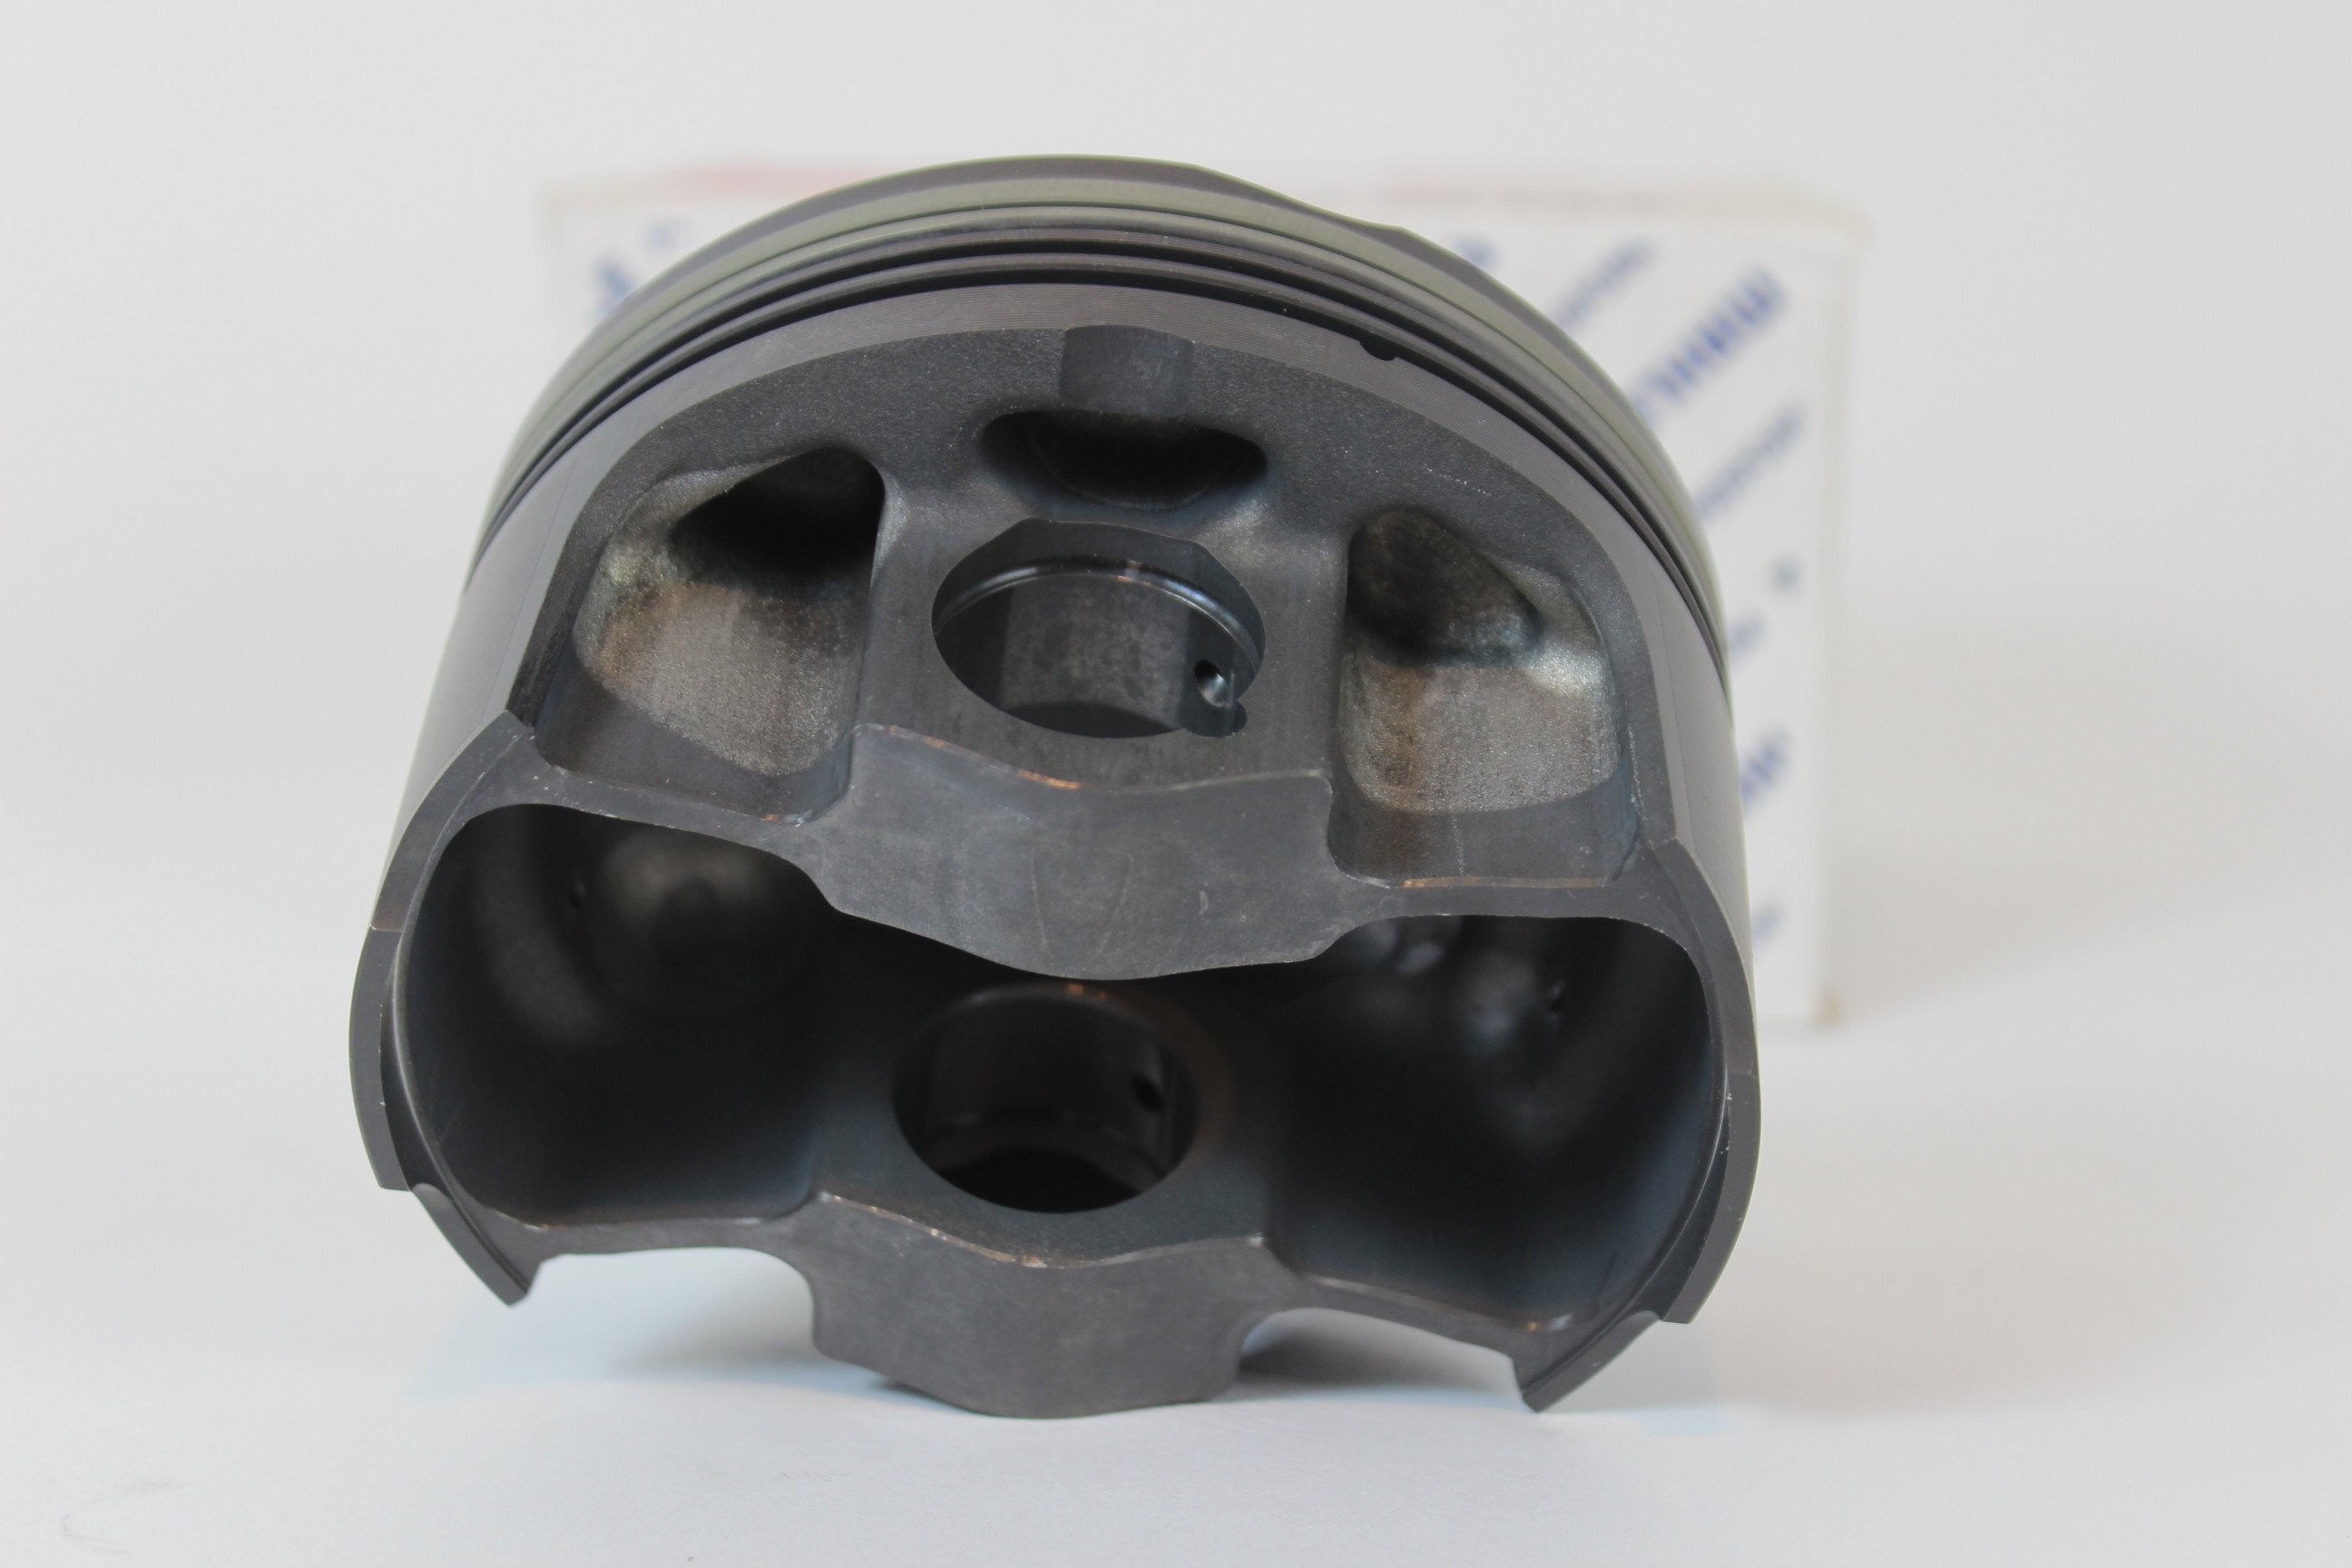
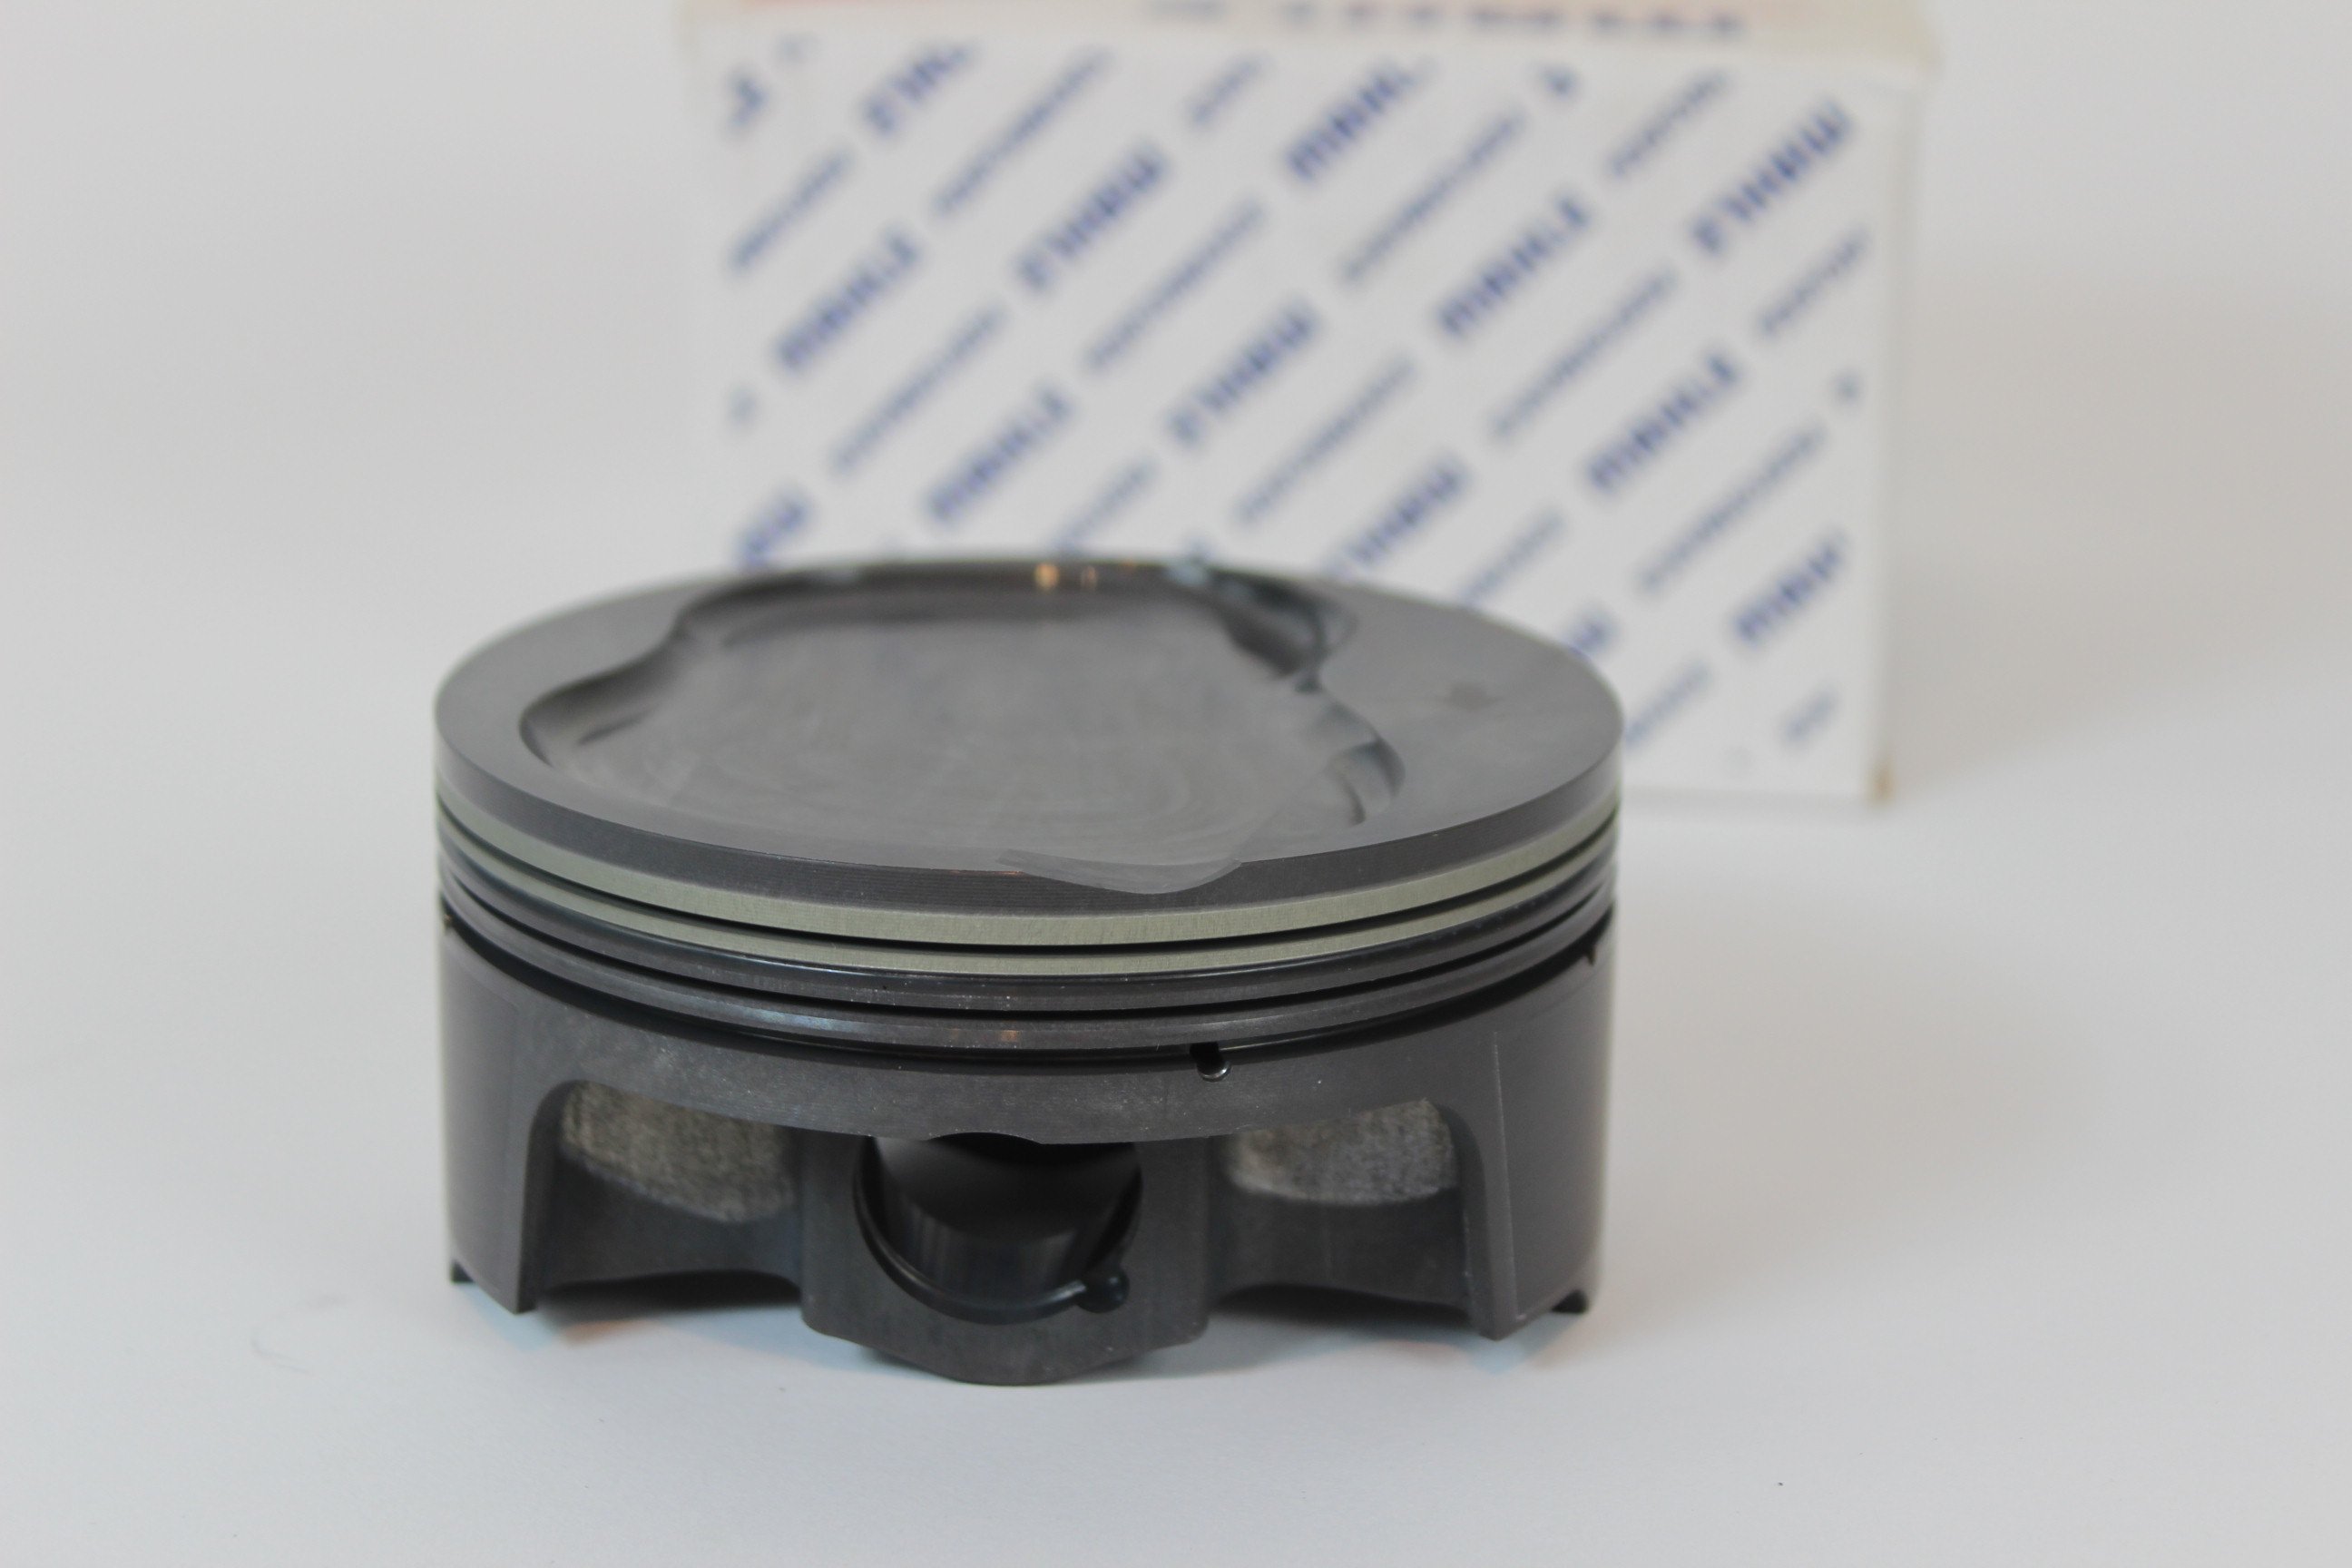
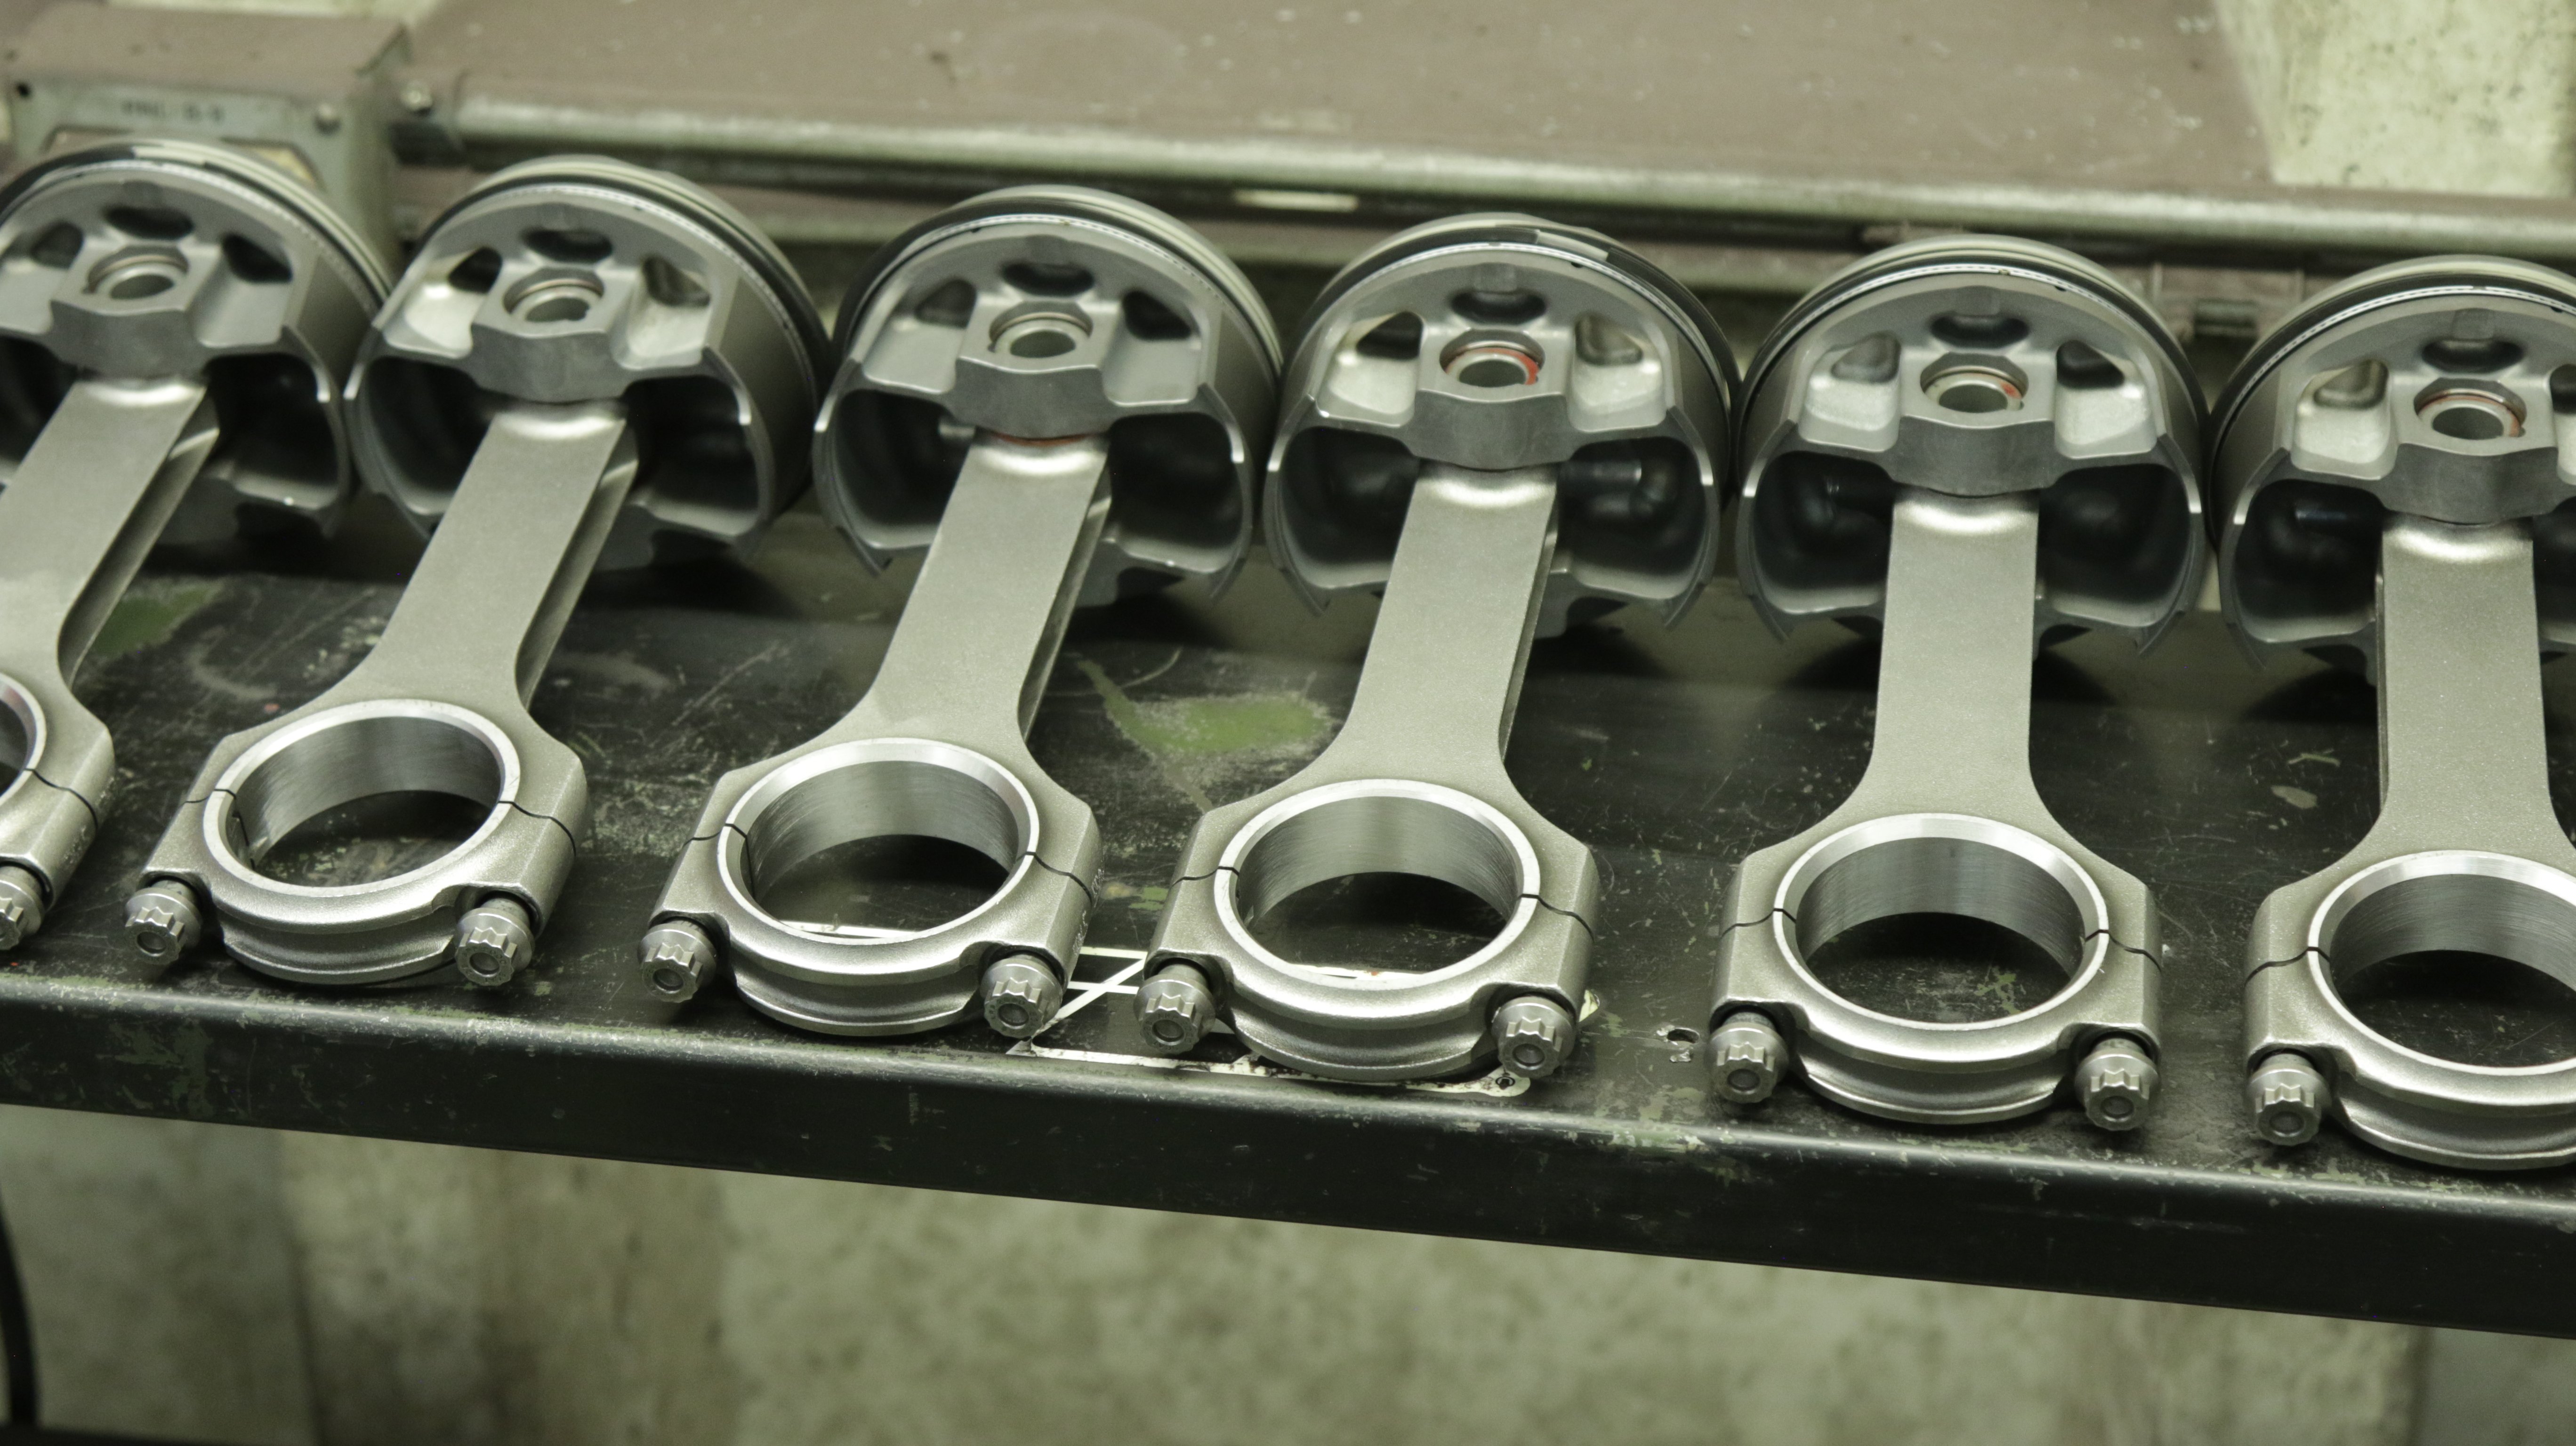
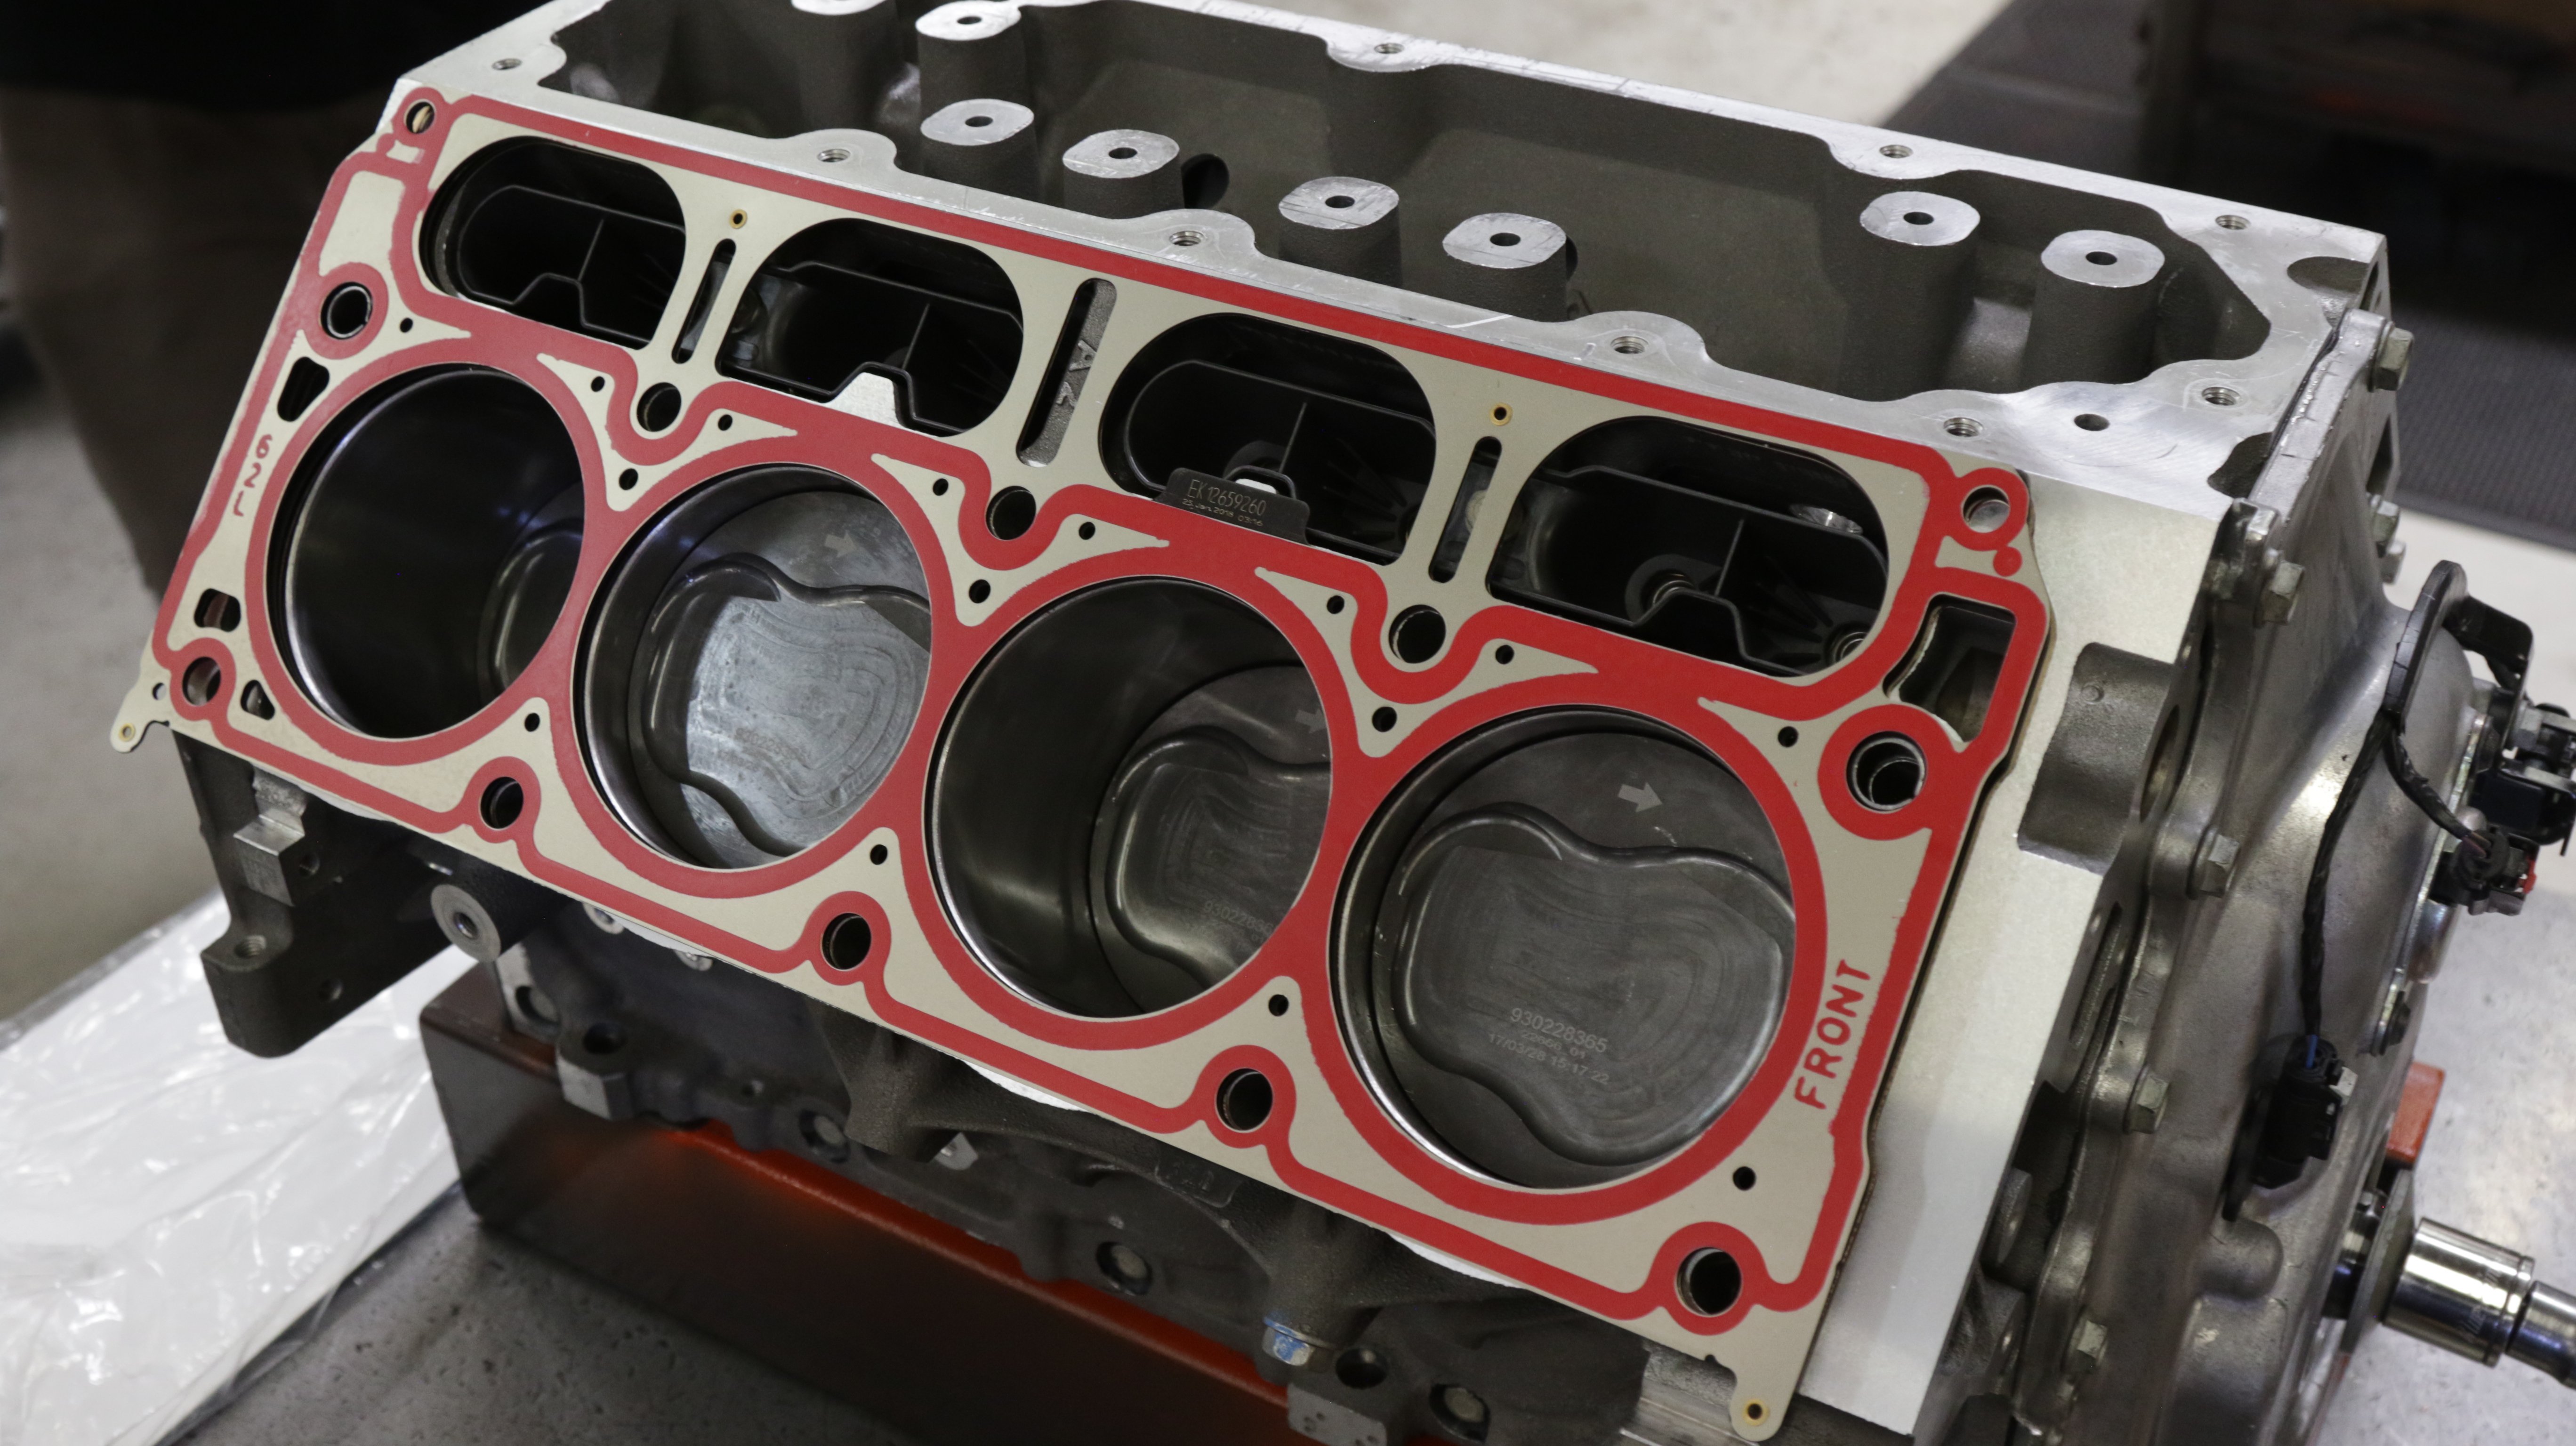
Since we knew that we would be throwing a lot of boost the Camaro’s way, we started to think about the stock short-block. While it comes with a forged crank and forged powdered metal rods from the factory, the hyperutectic pistons are what had us worried. While plenty of people have made awesome power on a factory short-block, we weren’t willing to take that risk, and since we had plenty of budget to do it, we decided to go with a set of PowerPak forged pistons from MAHLE (PN 930228365).
“We have strong coverage for the GM LT engines ranging from forged replacement (with .927-inch rod) to 427 ci combinations available for either NA or boosted applications,” stated Trey McFarland, Sales & Marketing Manager at MAHLE Motorsports. “Based on builder and customer feedback the lowest compression ratio LT piston we offer is a 10.0:1 and that’s for a boosted application. The highest compression ratio offered is 12.4:1. Most the applications can be used for either a nice ‘streetable’ (a relative term these days) combination as well as a high output E85 application.”
The forged slugs are constructed of 2618 aluminum and feature a -16cc dish that will lower our LT1’s compression ratio to 10:1, allowing us to safely run more boost. In addition to the extra strength, the PowerPak pistons utilize a Grafal coating on the piston skirts to help reduce friction, prevent scuffing and add horsepower. The entire piston has a phosphate coating to reduce direct metal-to-metal contact when a lack of lubrication is present such as during cold-start (the pin bores and ring grooves are of particular concern). The top ring land is also hard anodized to help prevent microwelding, which is especially important in a boosted application such as this and a great feature that you typically don’t find in pistons in this price range, making them perfect for our build.
“Something to note; the LT rods use an odd .943-inch (23.95mm) pin diameter. At this early stage in the LT life cycle the typical LT build includes a connecting rod upgrade. The Aftermarket manufacturers are not yet stocking rods for the .943-inch pin, so everyone is using a 6.125-inch long rods with a .927-inch pin bores. All the shelf stocked LT parts are currently configured for these rods,” McFarland added.
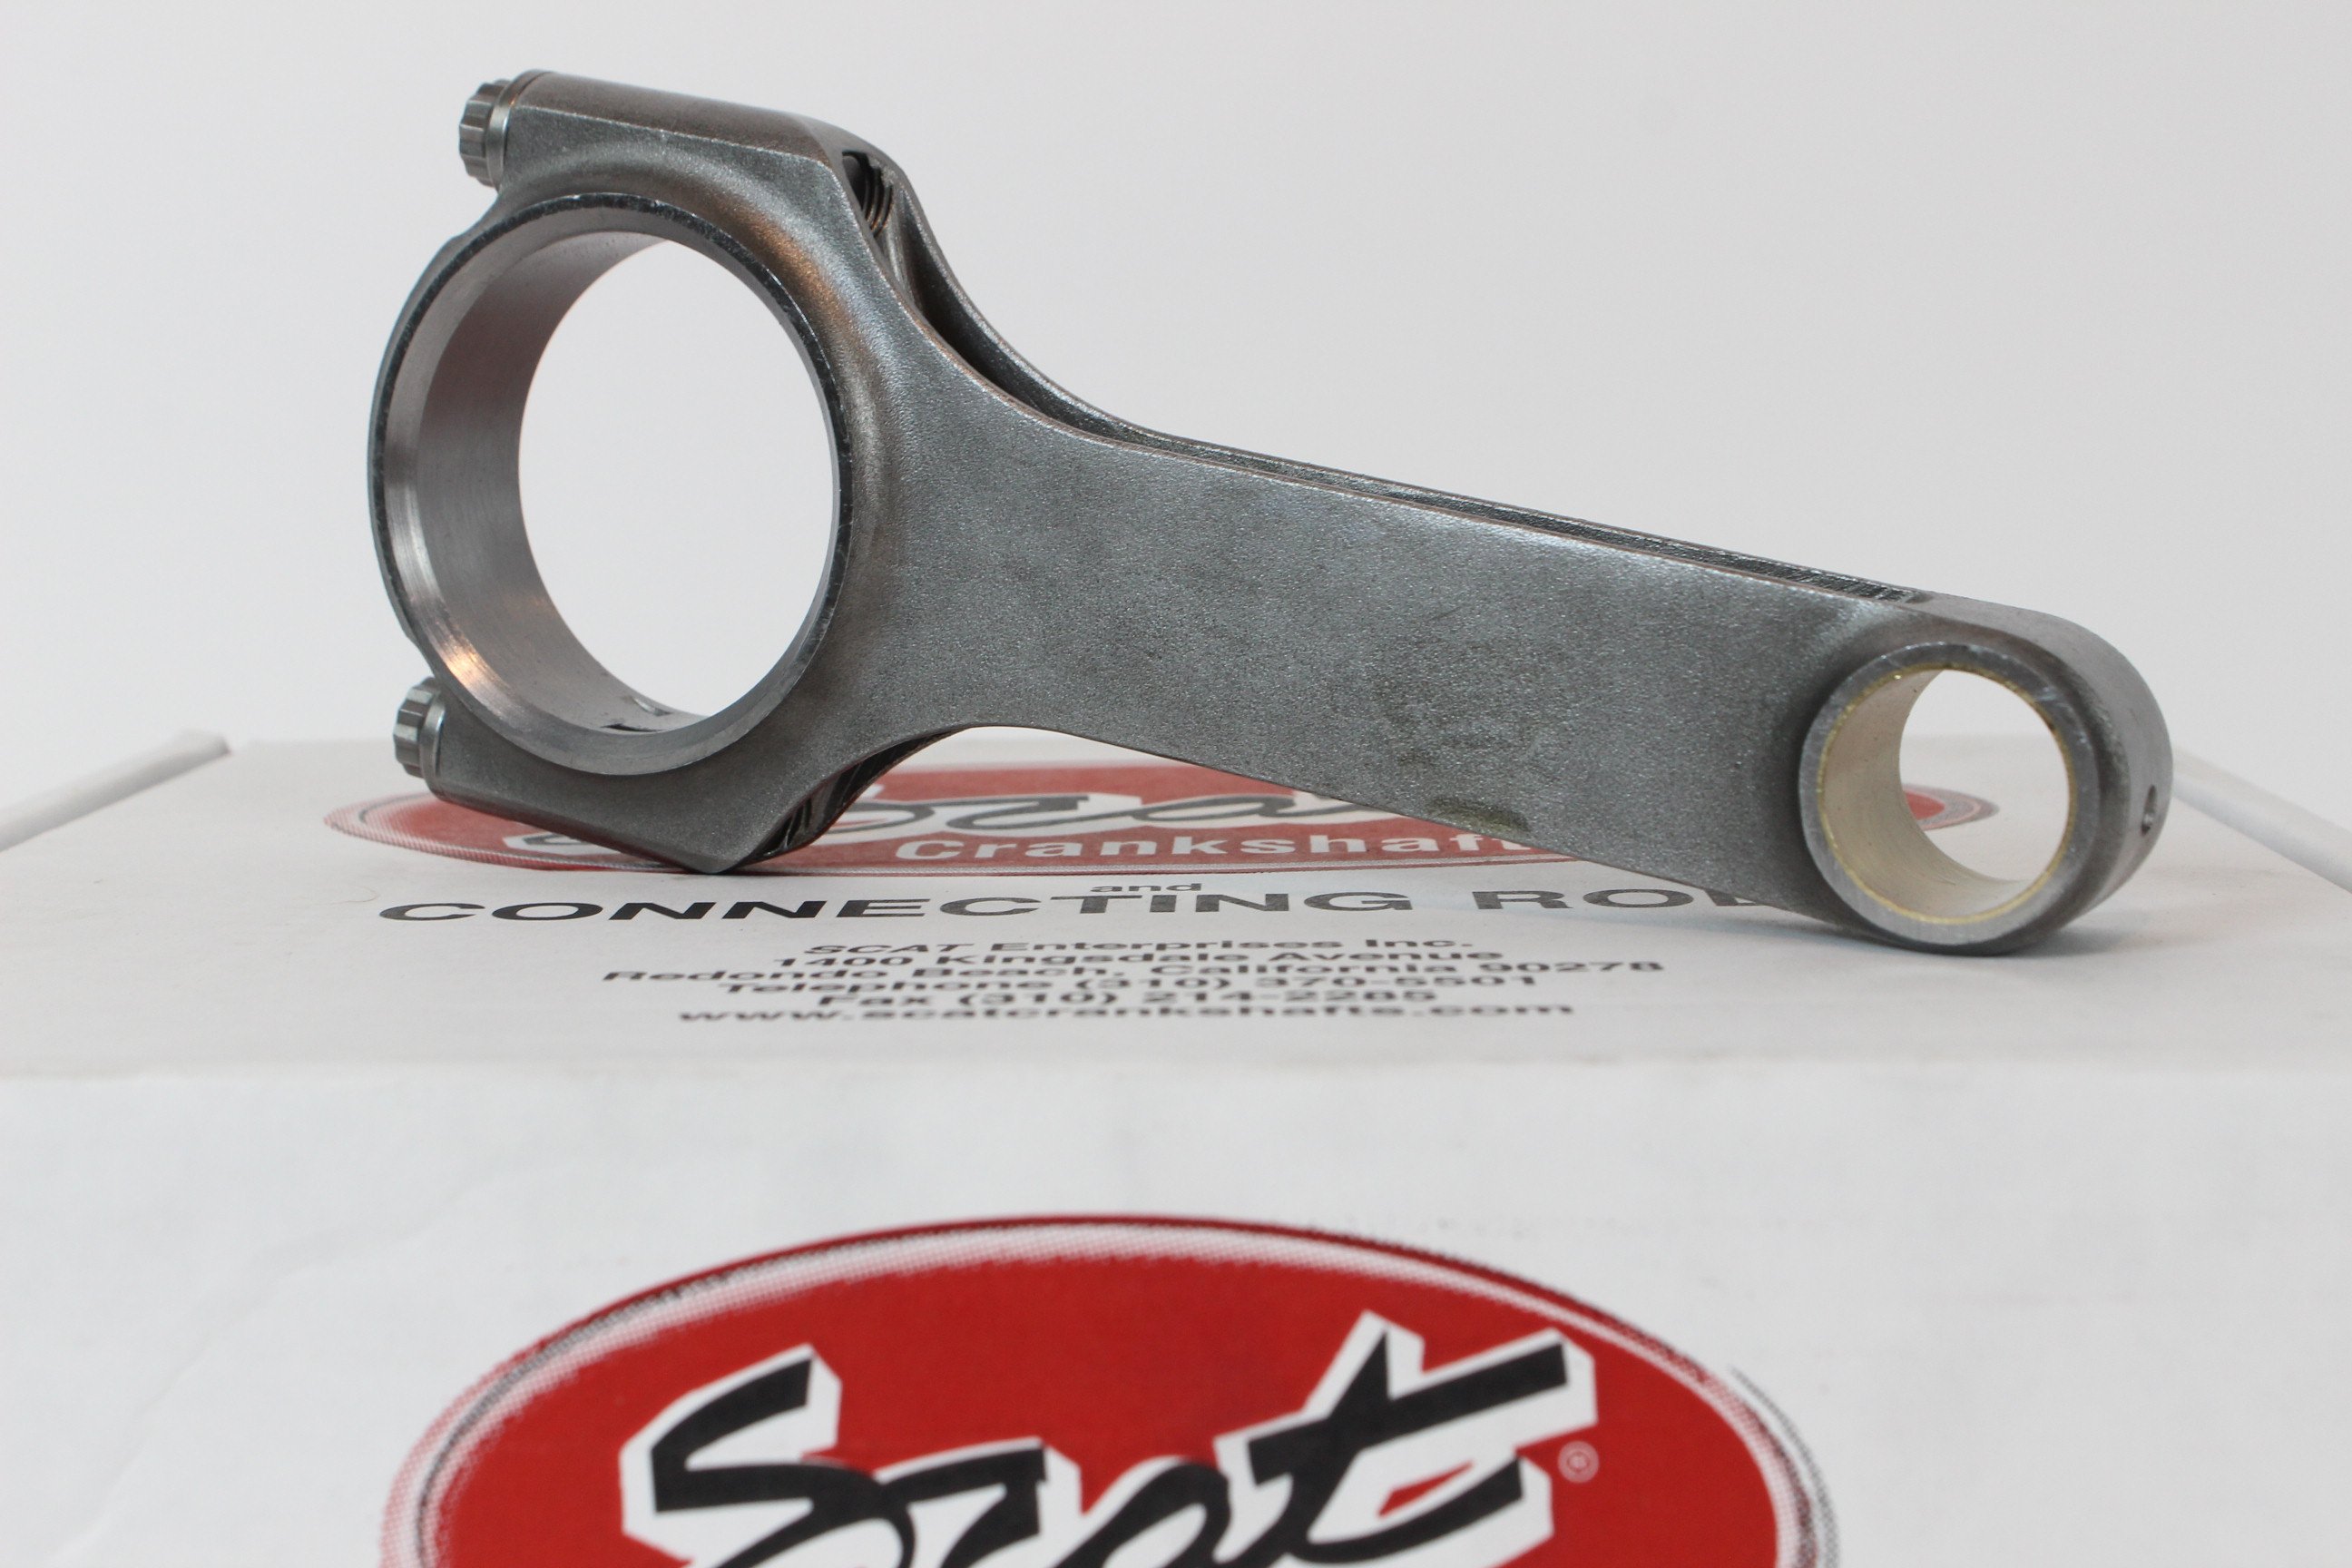
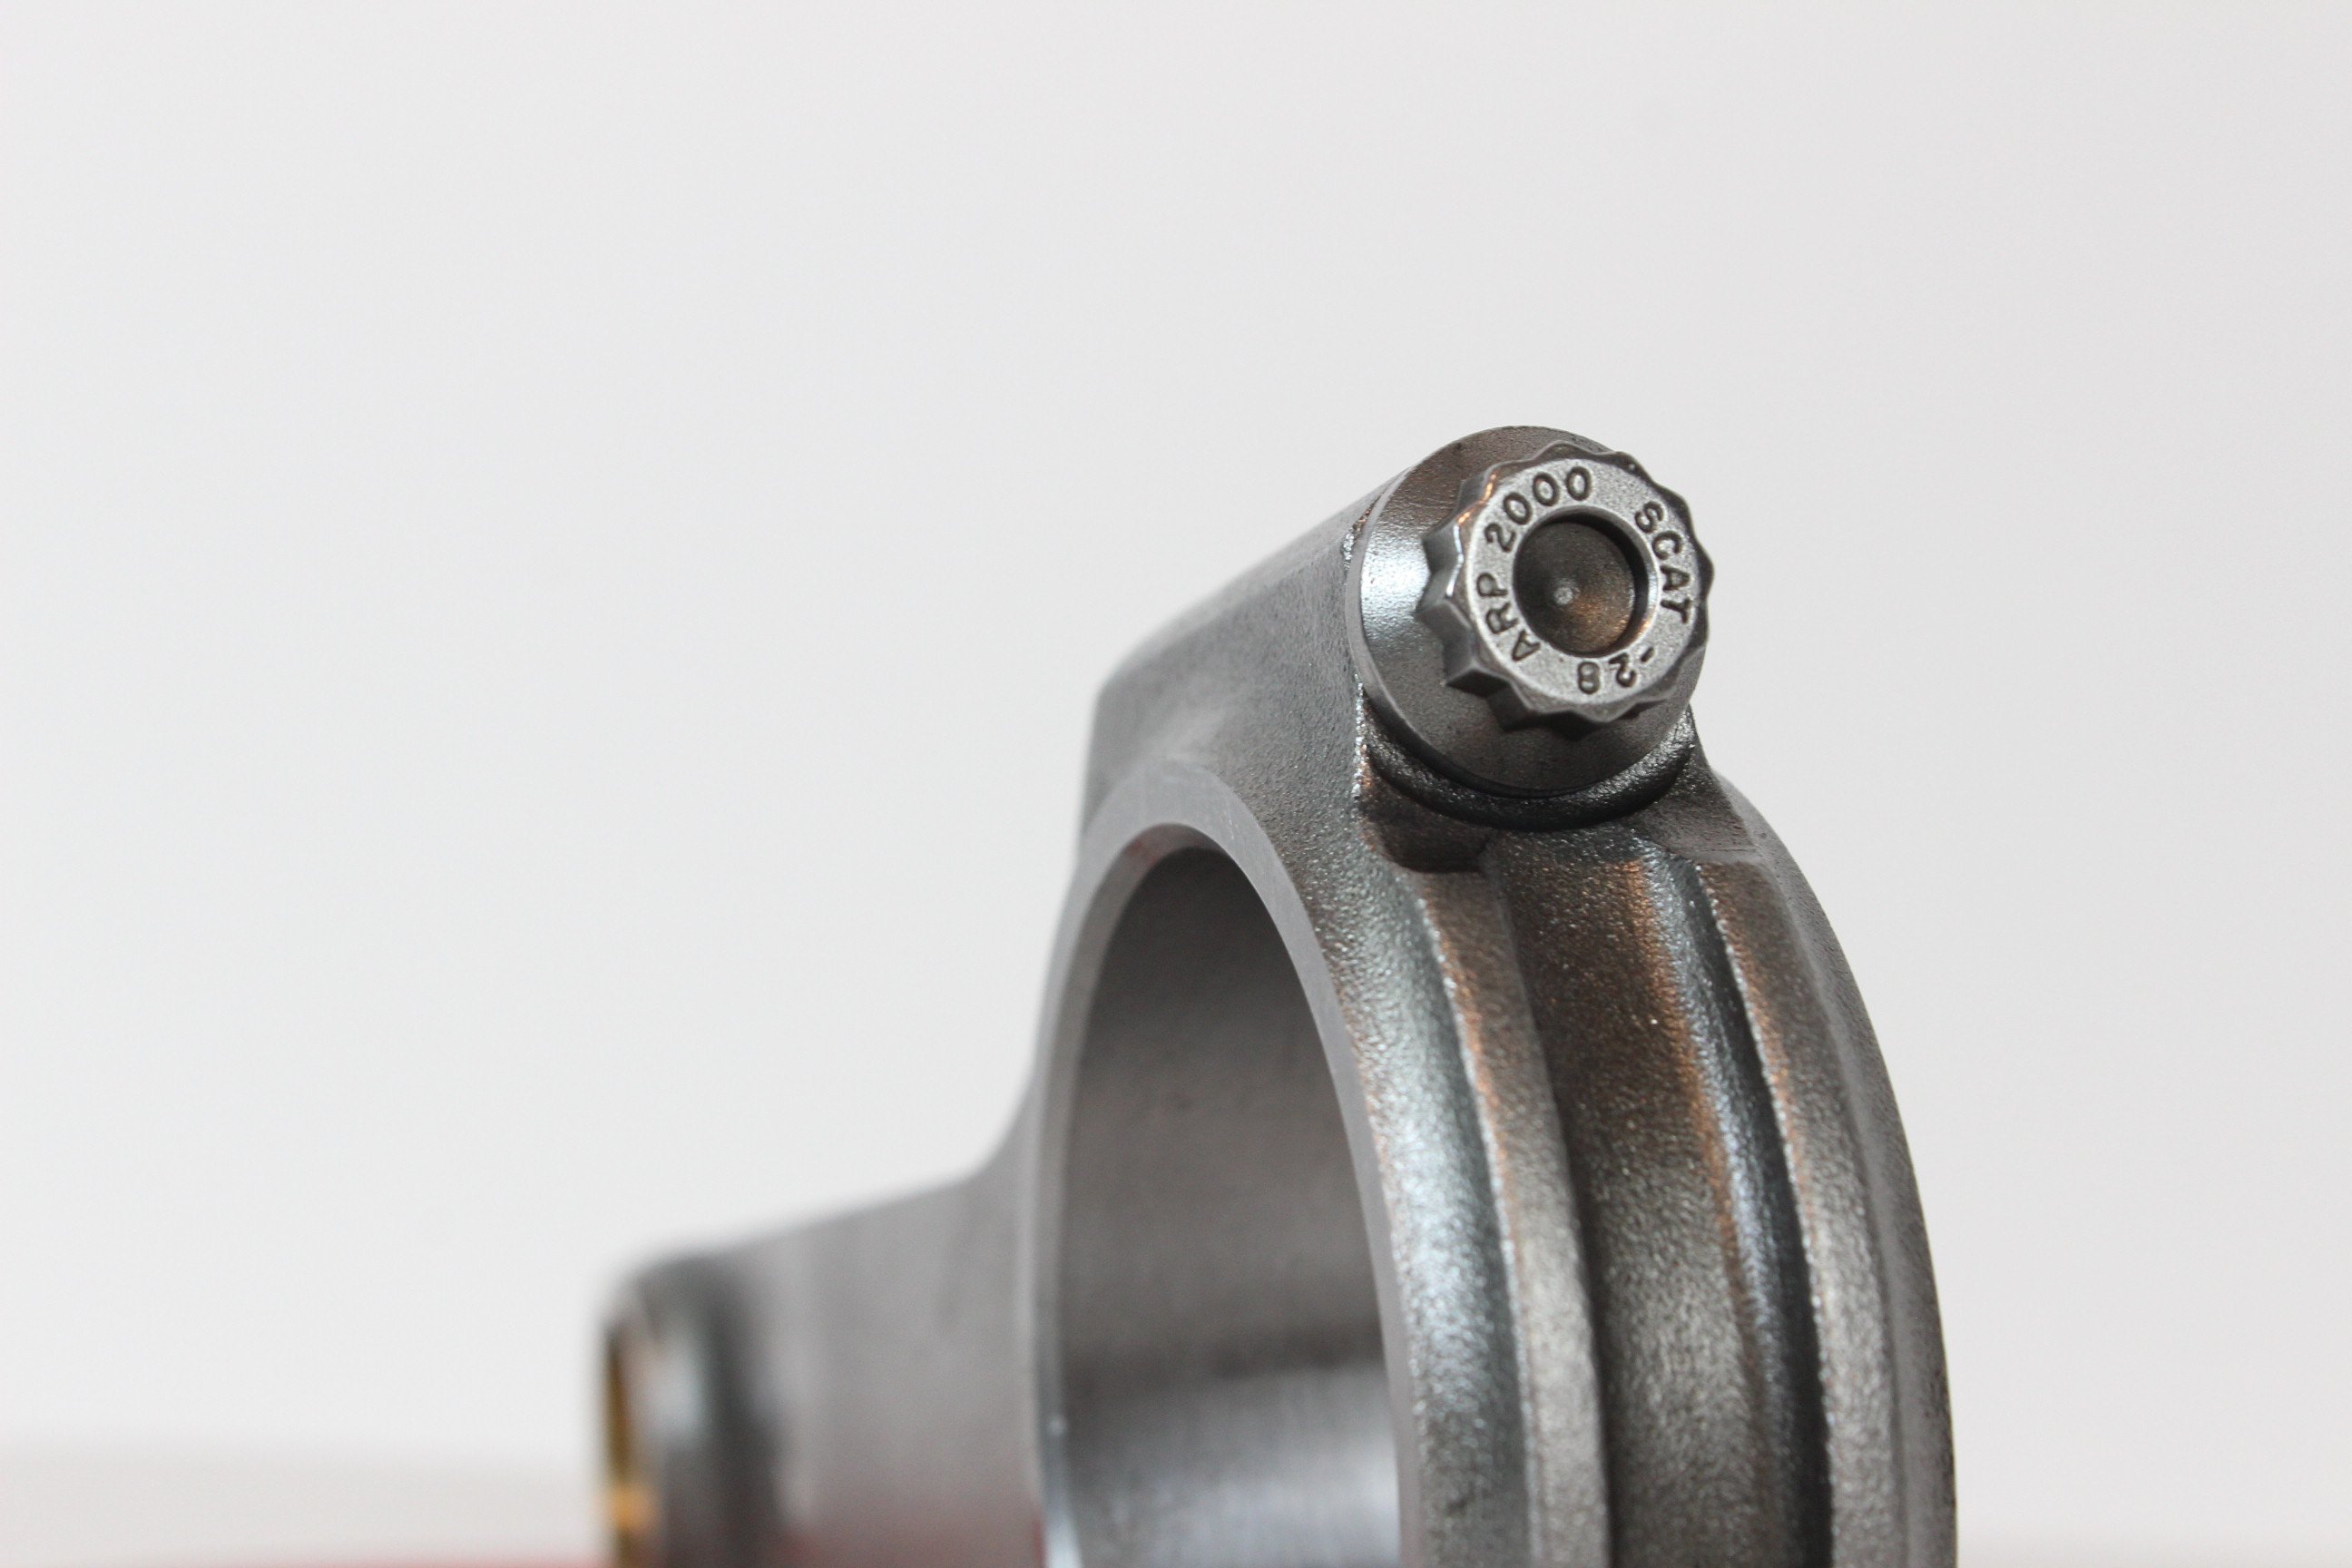
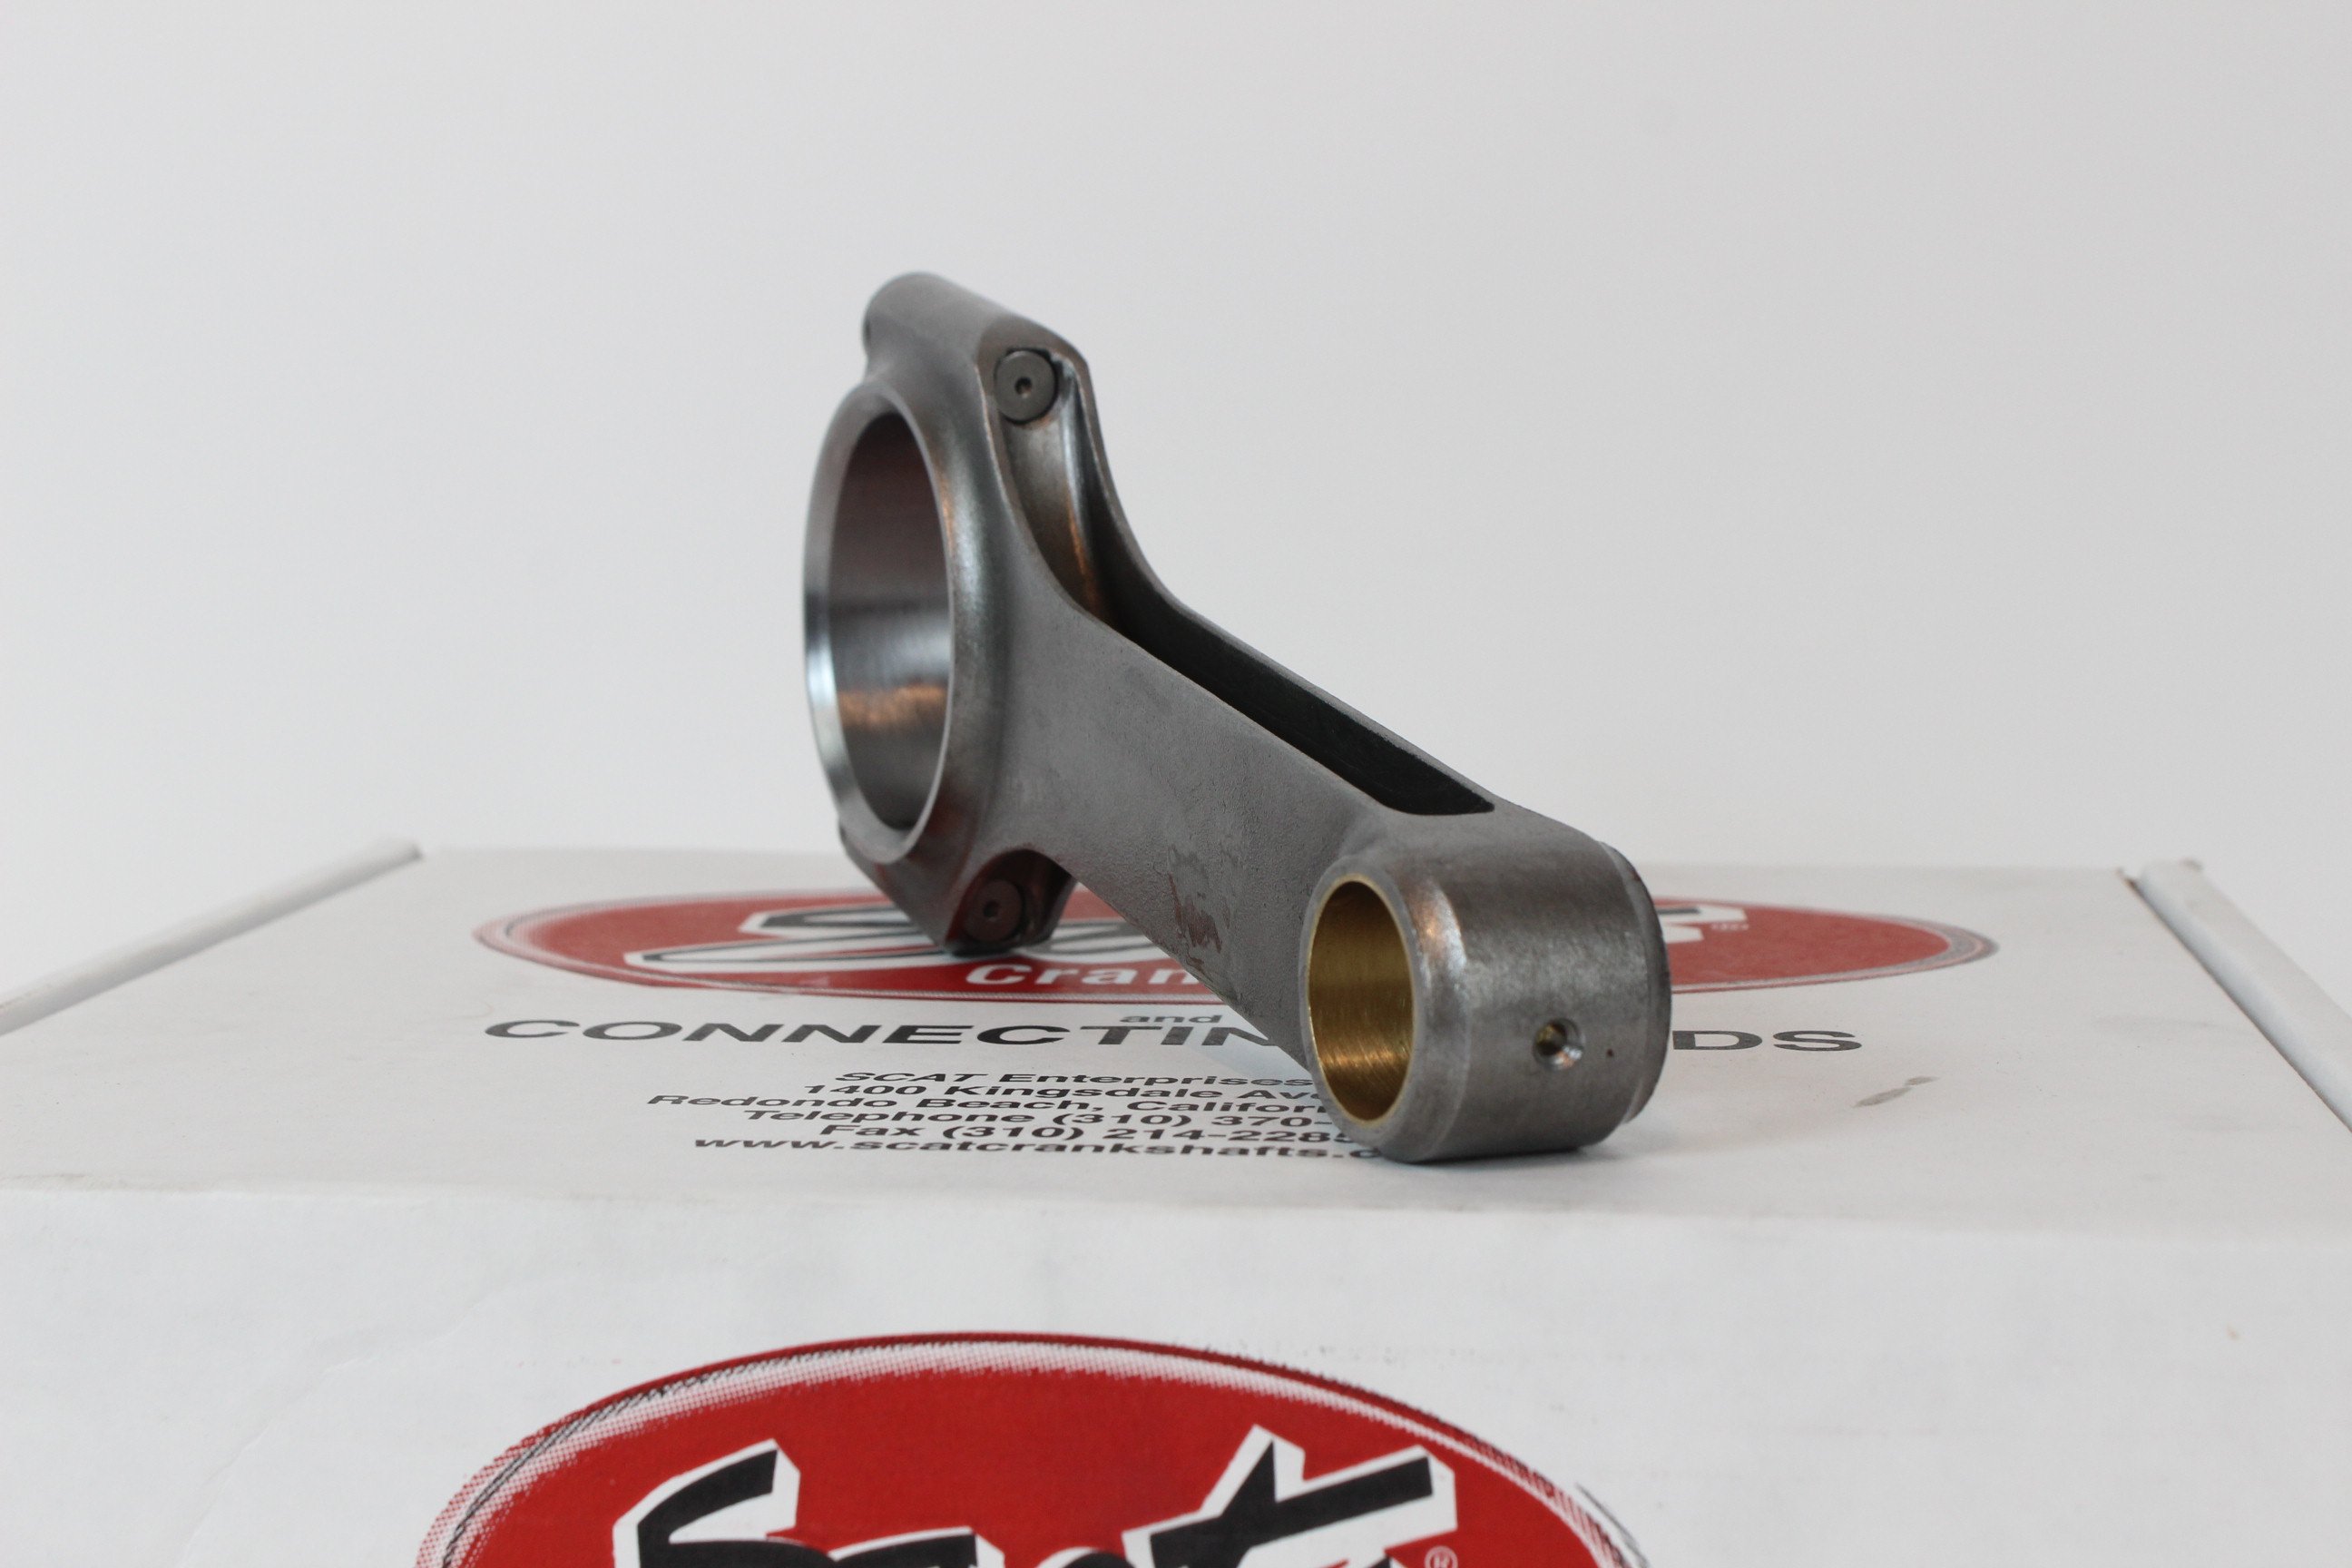
Even if this was not the case, frankly, we would still opt for a set of affordable forged connecting rods since we were tearing into our short-block anyways. For those, we hit up the guys over at SCAT who sent us a set of their H-Beam connecting rods in a 6.125-inch length (PN 2-350-6125-2100). Made from forged 4340 steel, and capped off with ARP 2000 rod bolts, the rods should be a great addition to our – or any – short-block and will make sure that we make safe power all the way up to 1,200 horsepower if we so choose.
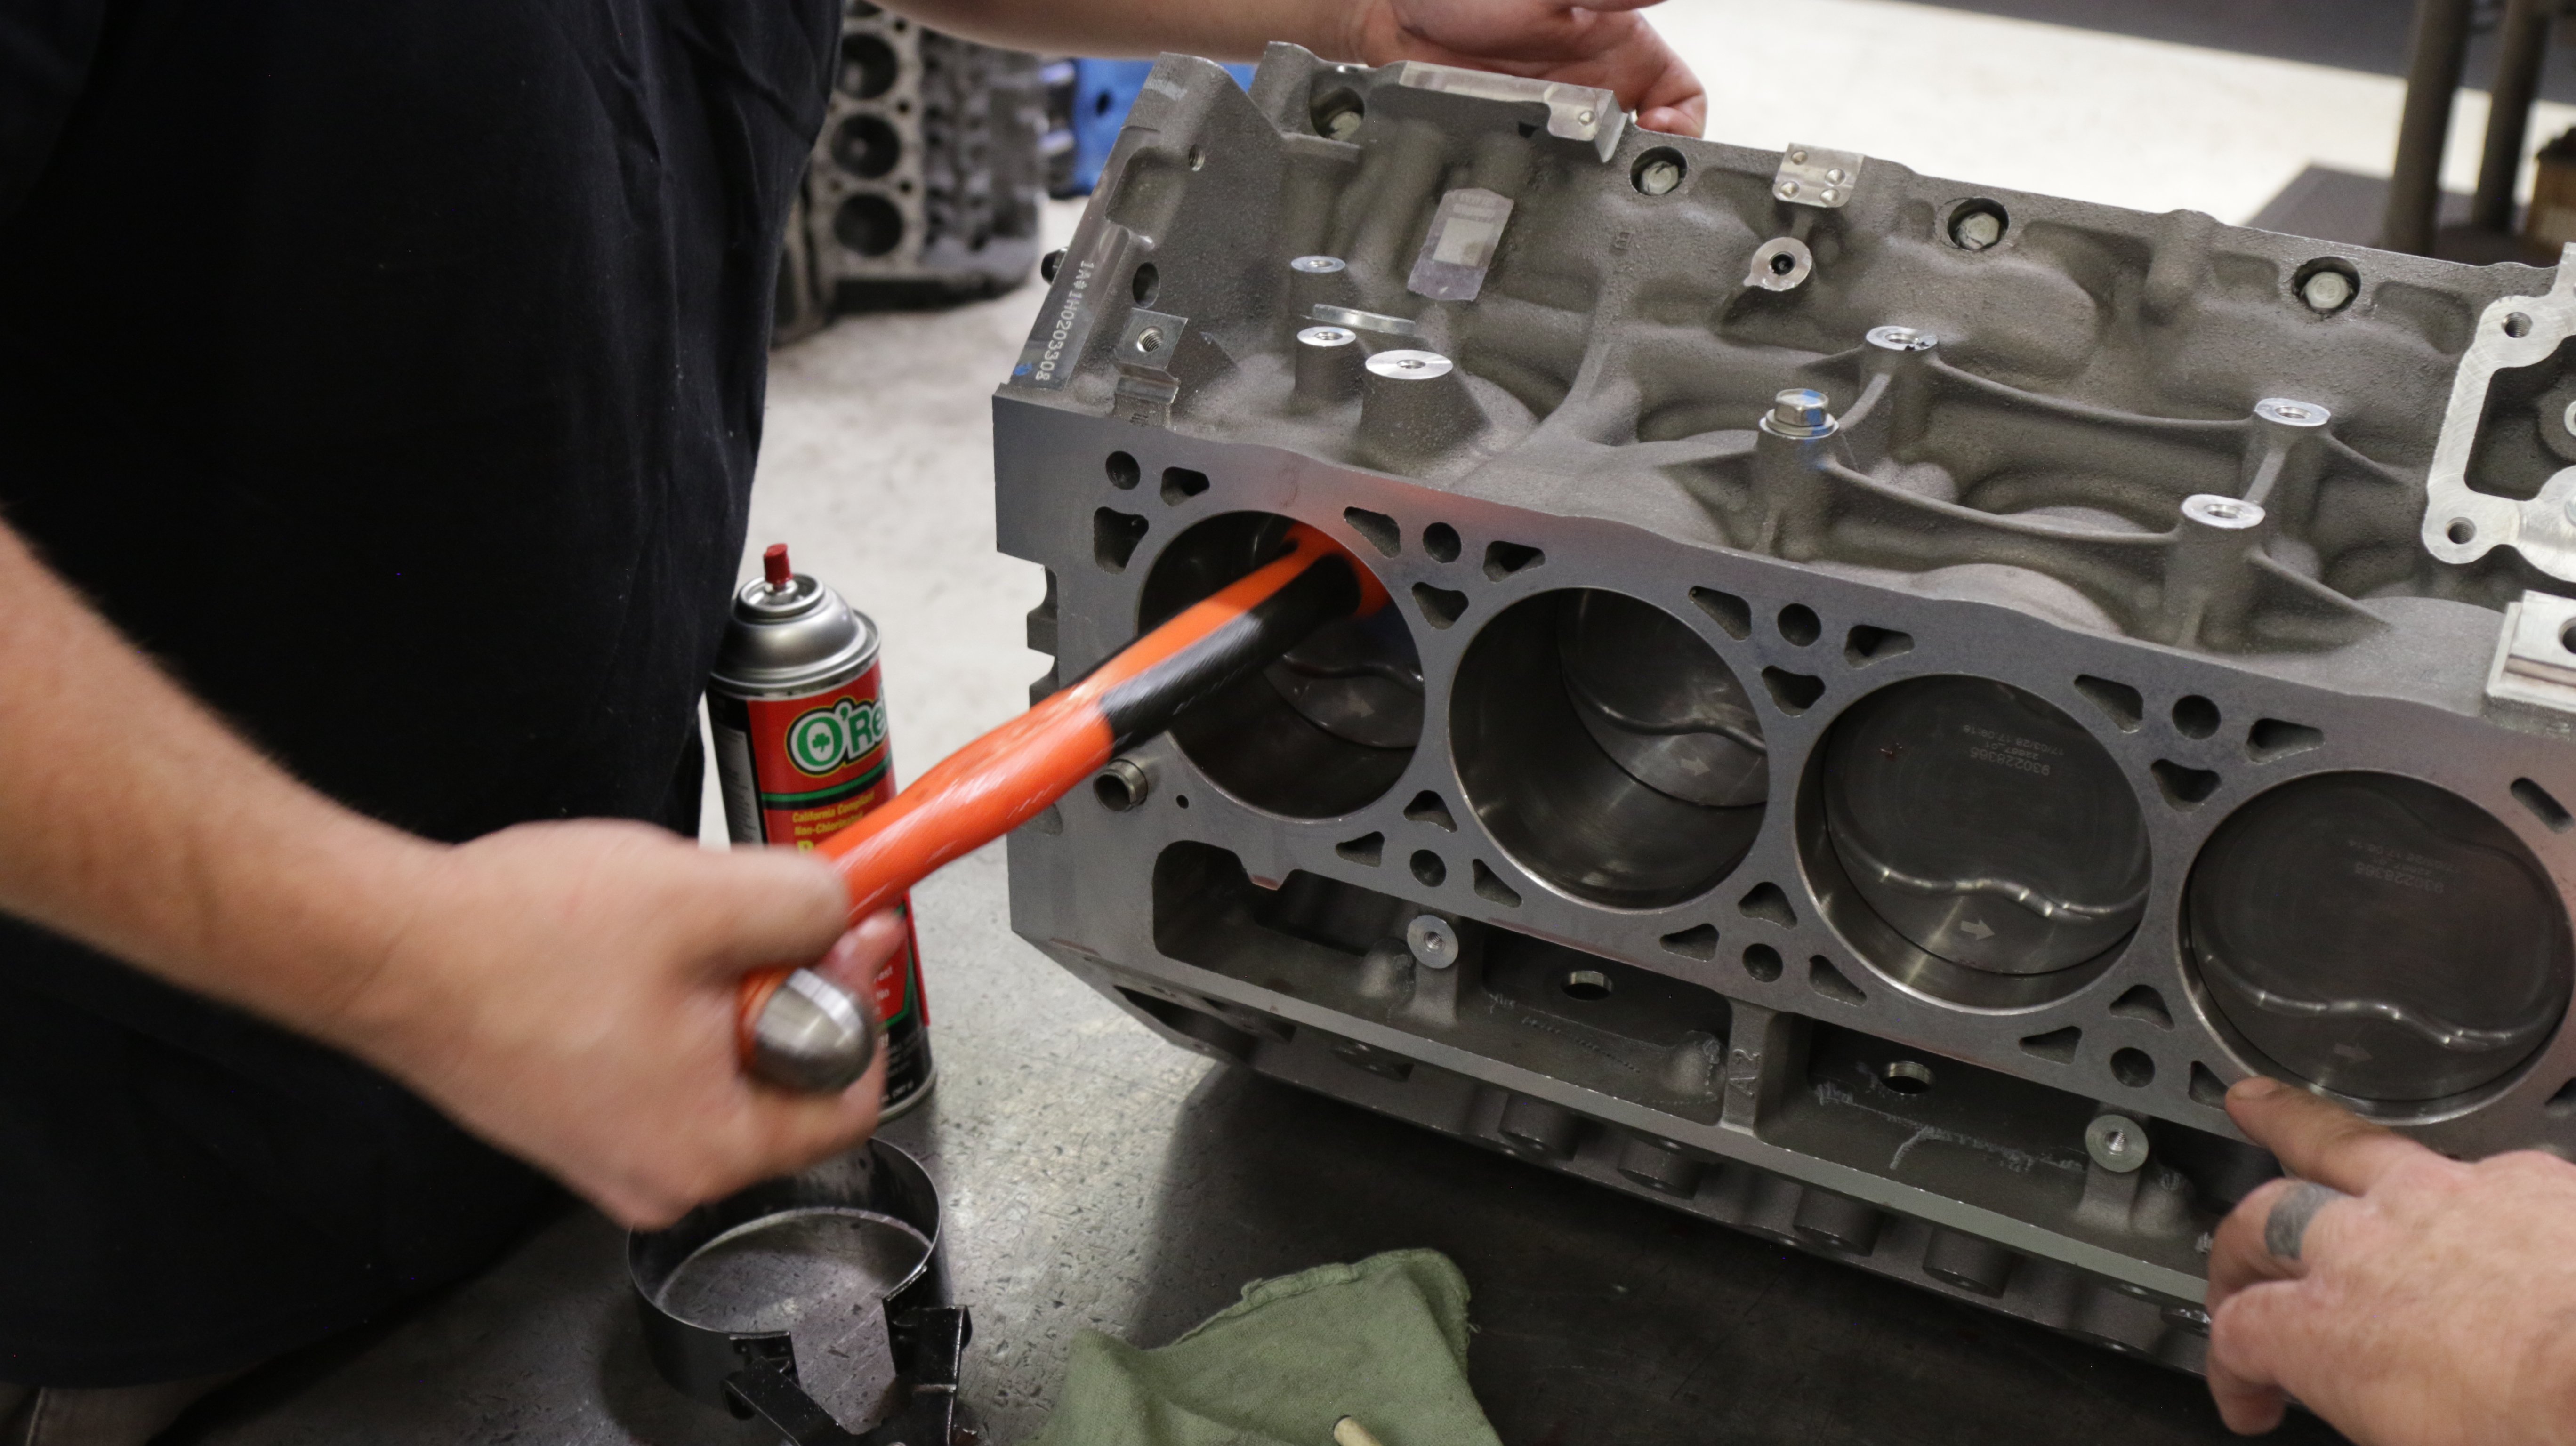
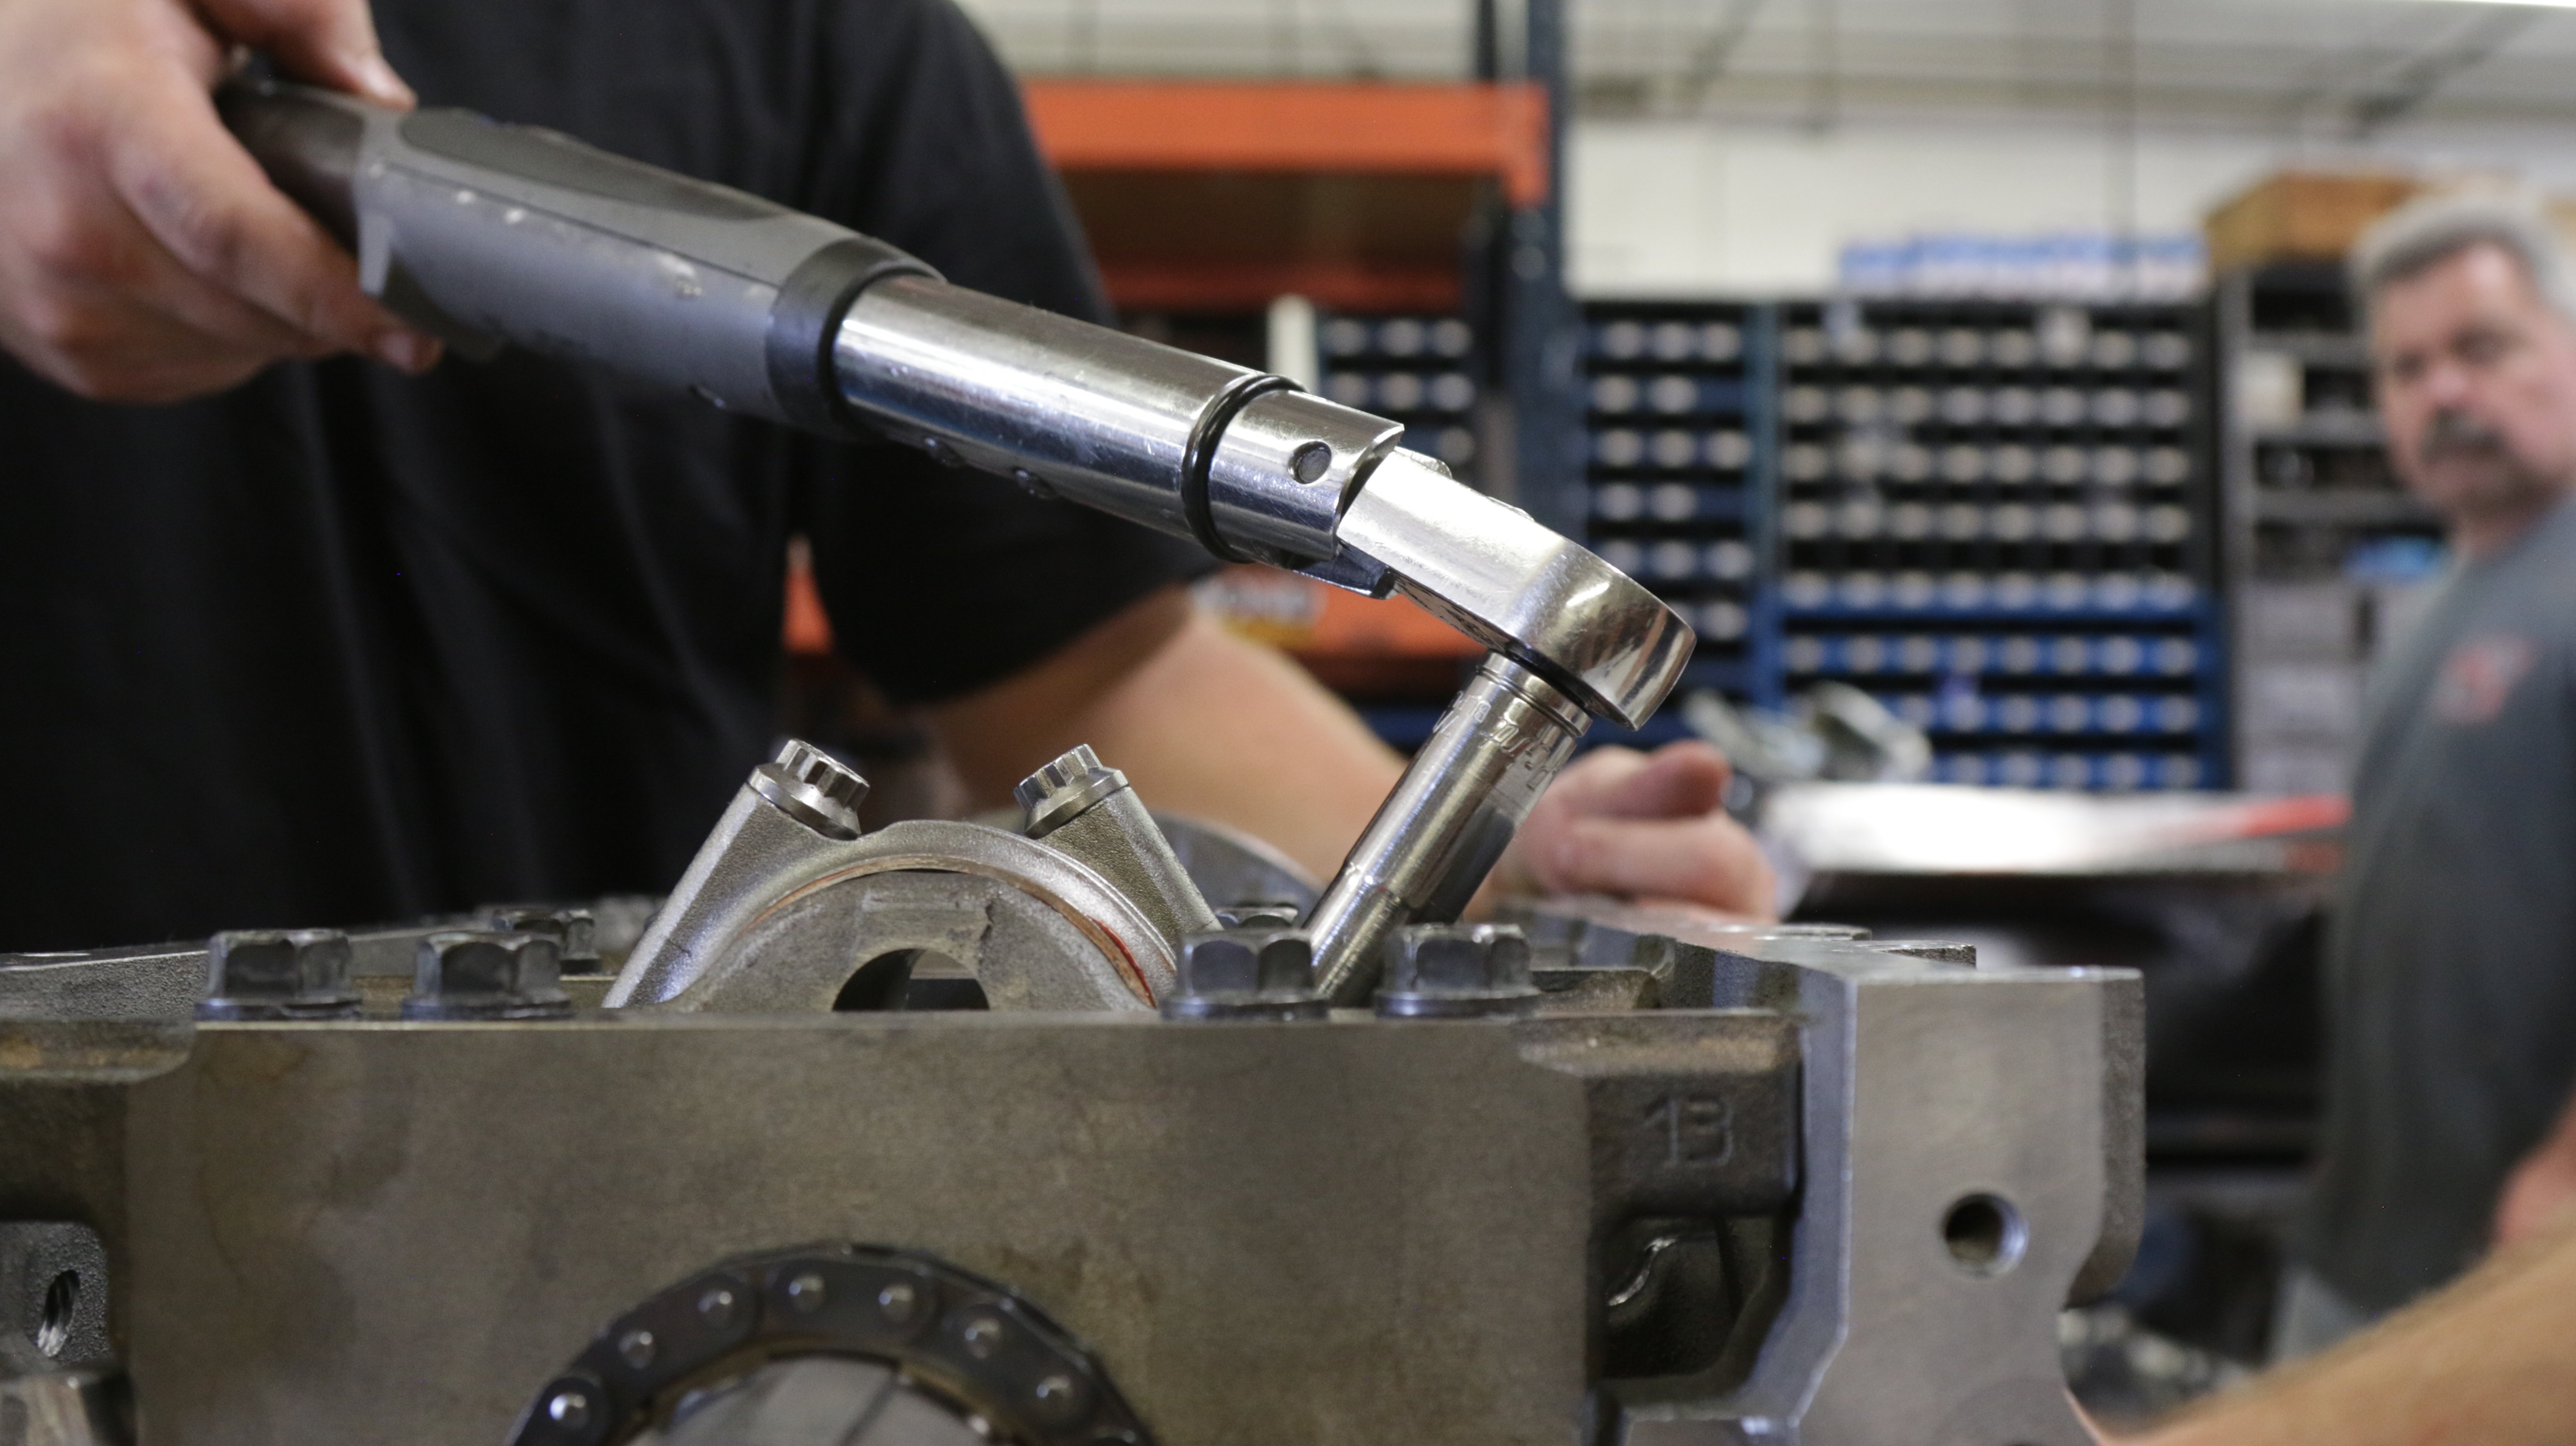
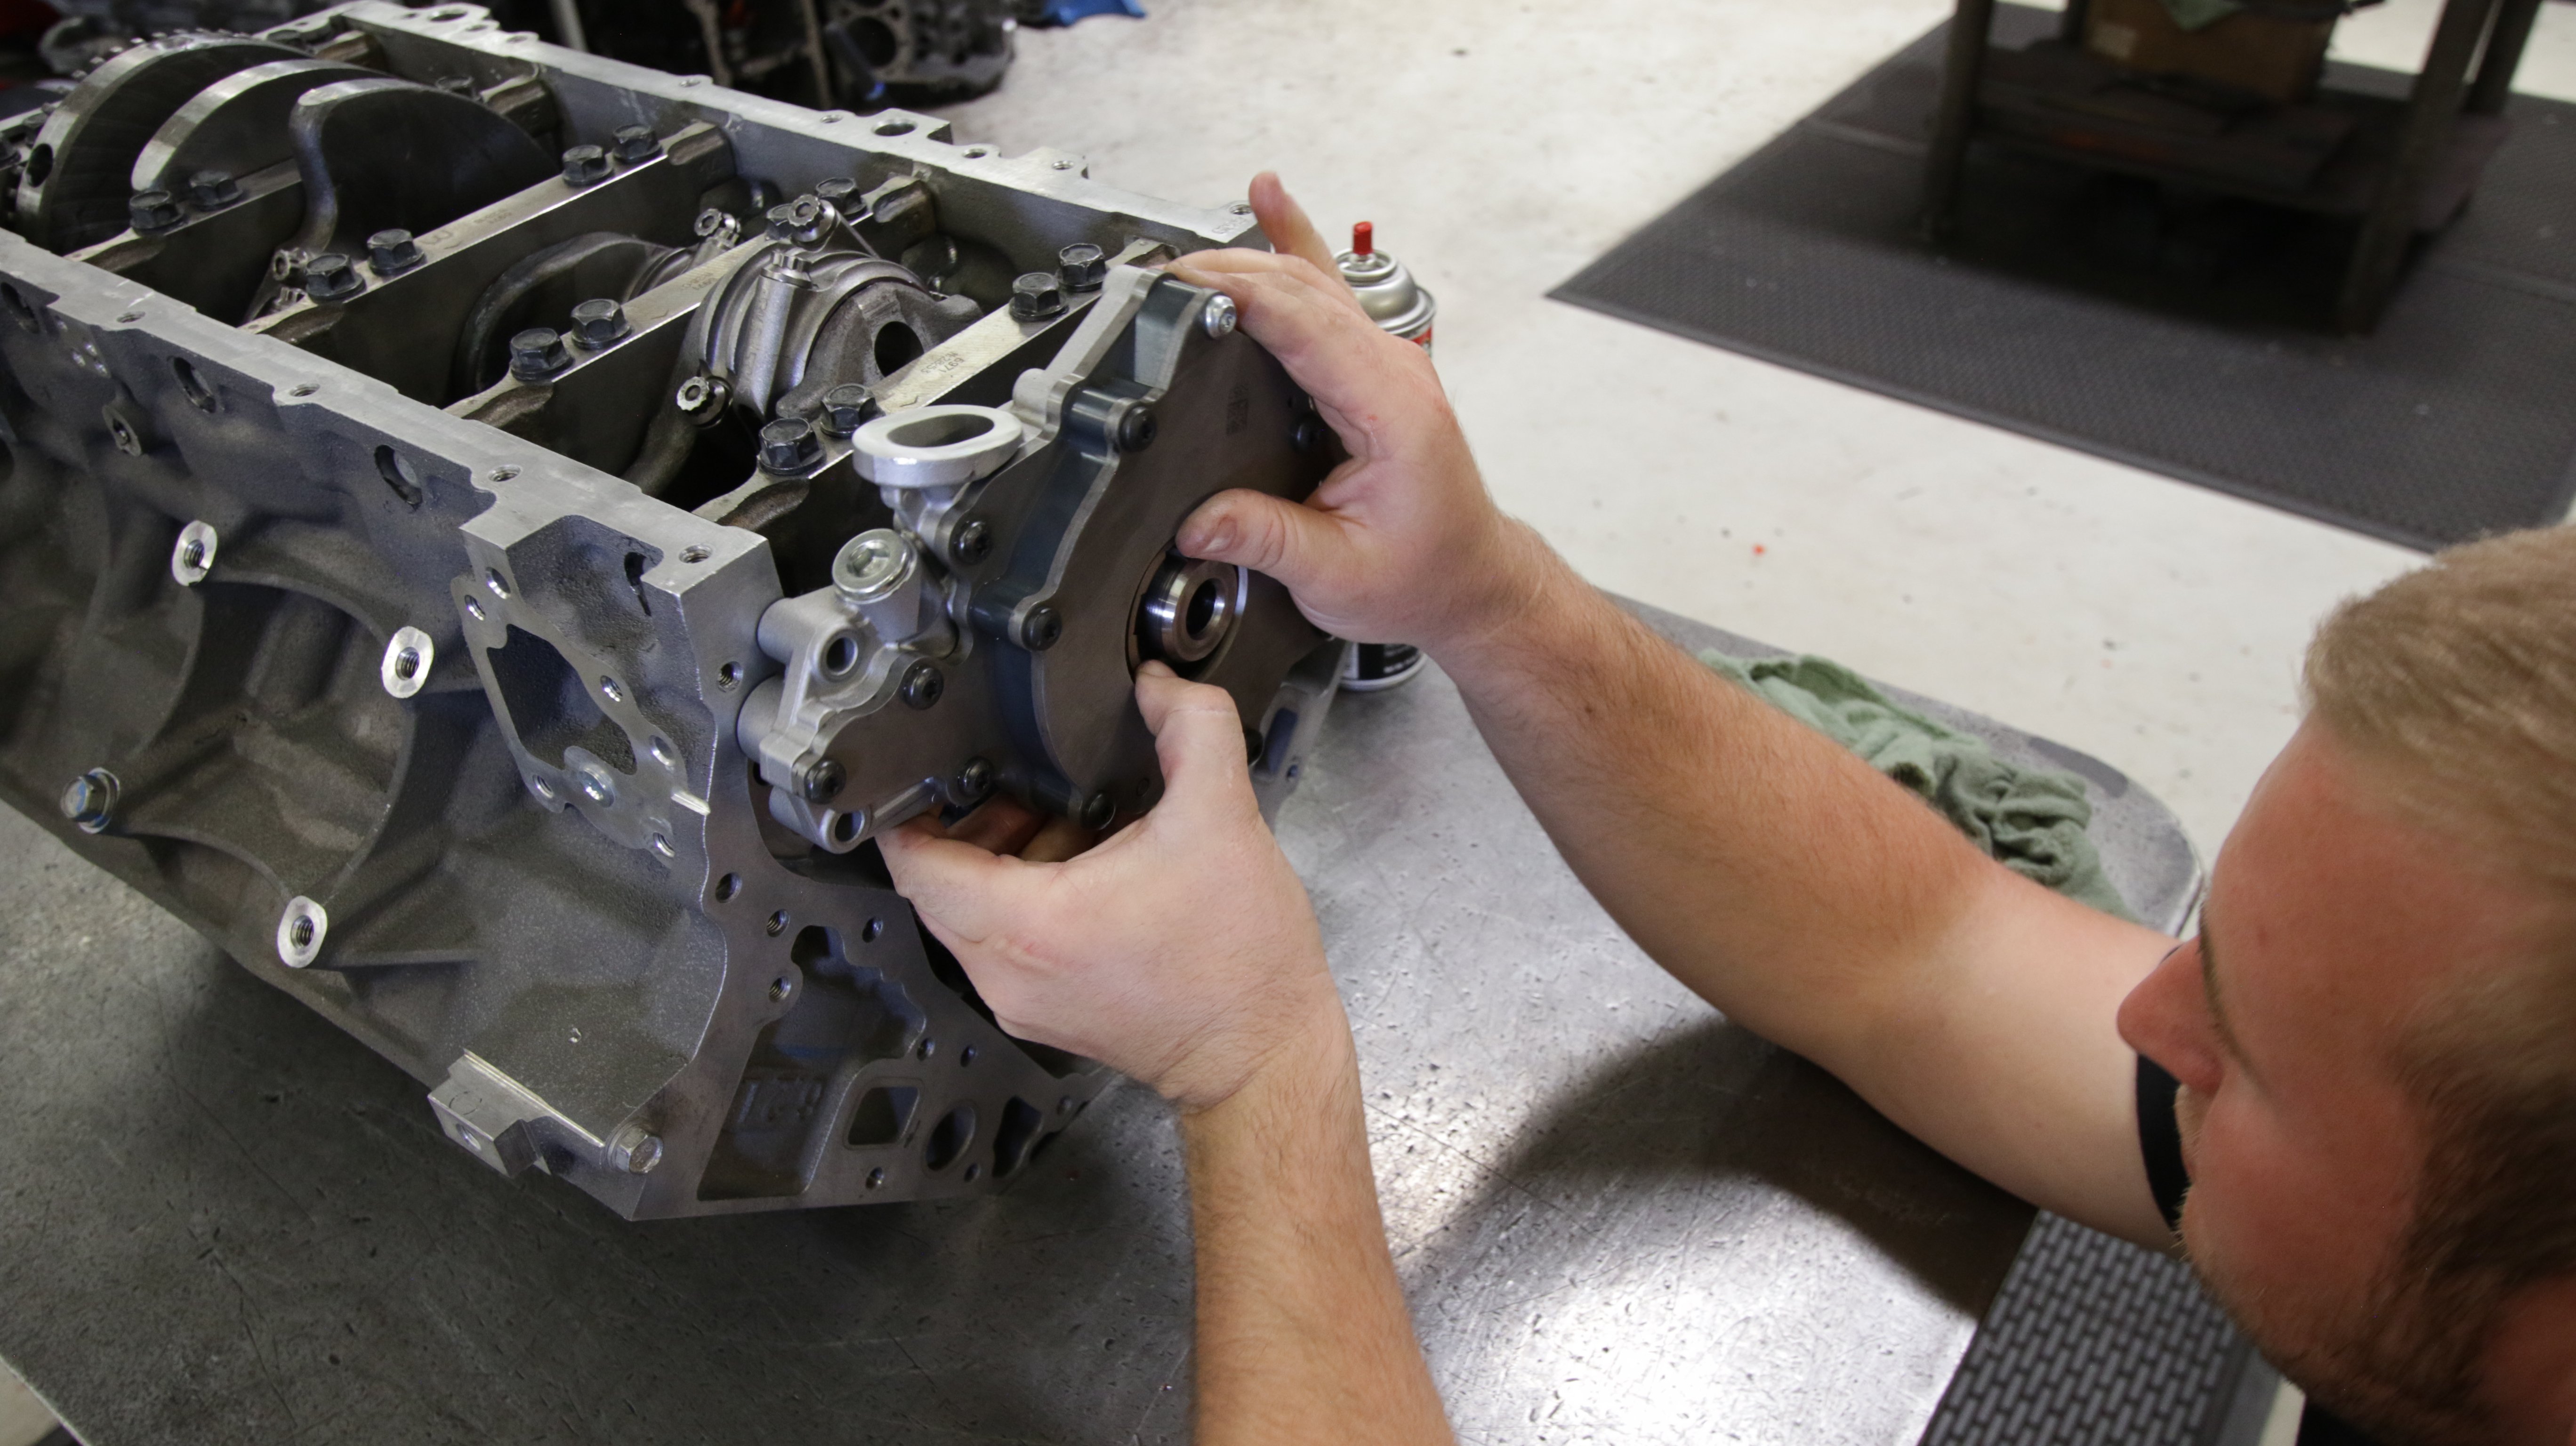
Since the stock crank was already forged, there was no sense in replacing it, so we packed up our rotating assembly and headed over to L&R Engine out of Santa Fe Springs, California for balancing and some minor machine work. Derek had our short-block balanced and bolted back together in no time. All of our piston rings, bearings, and gaskets were all provided by the guys over at Mahle.
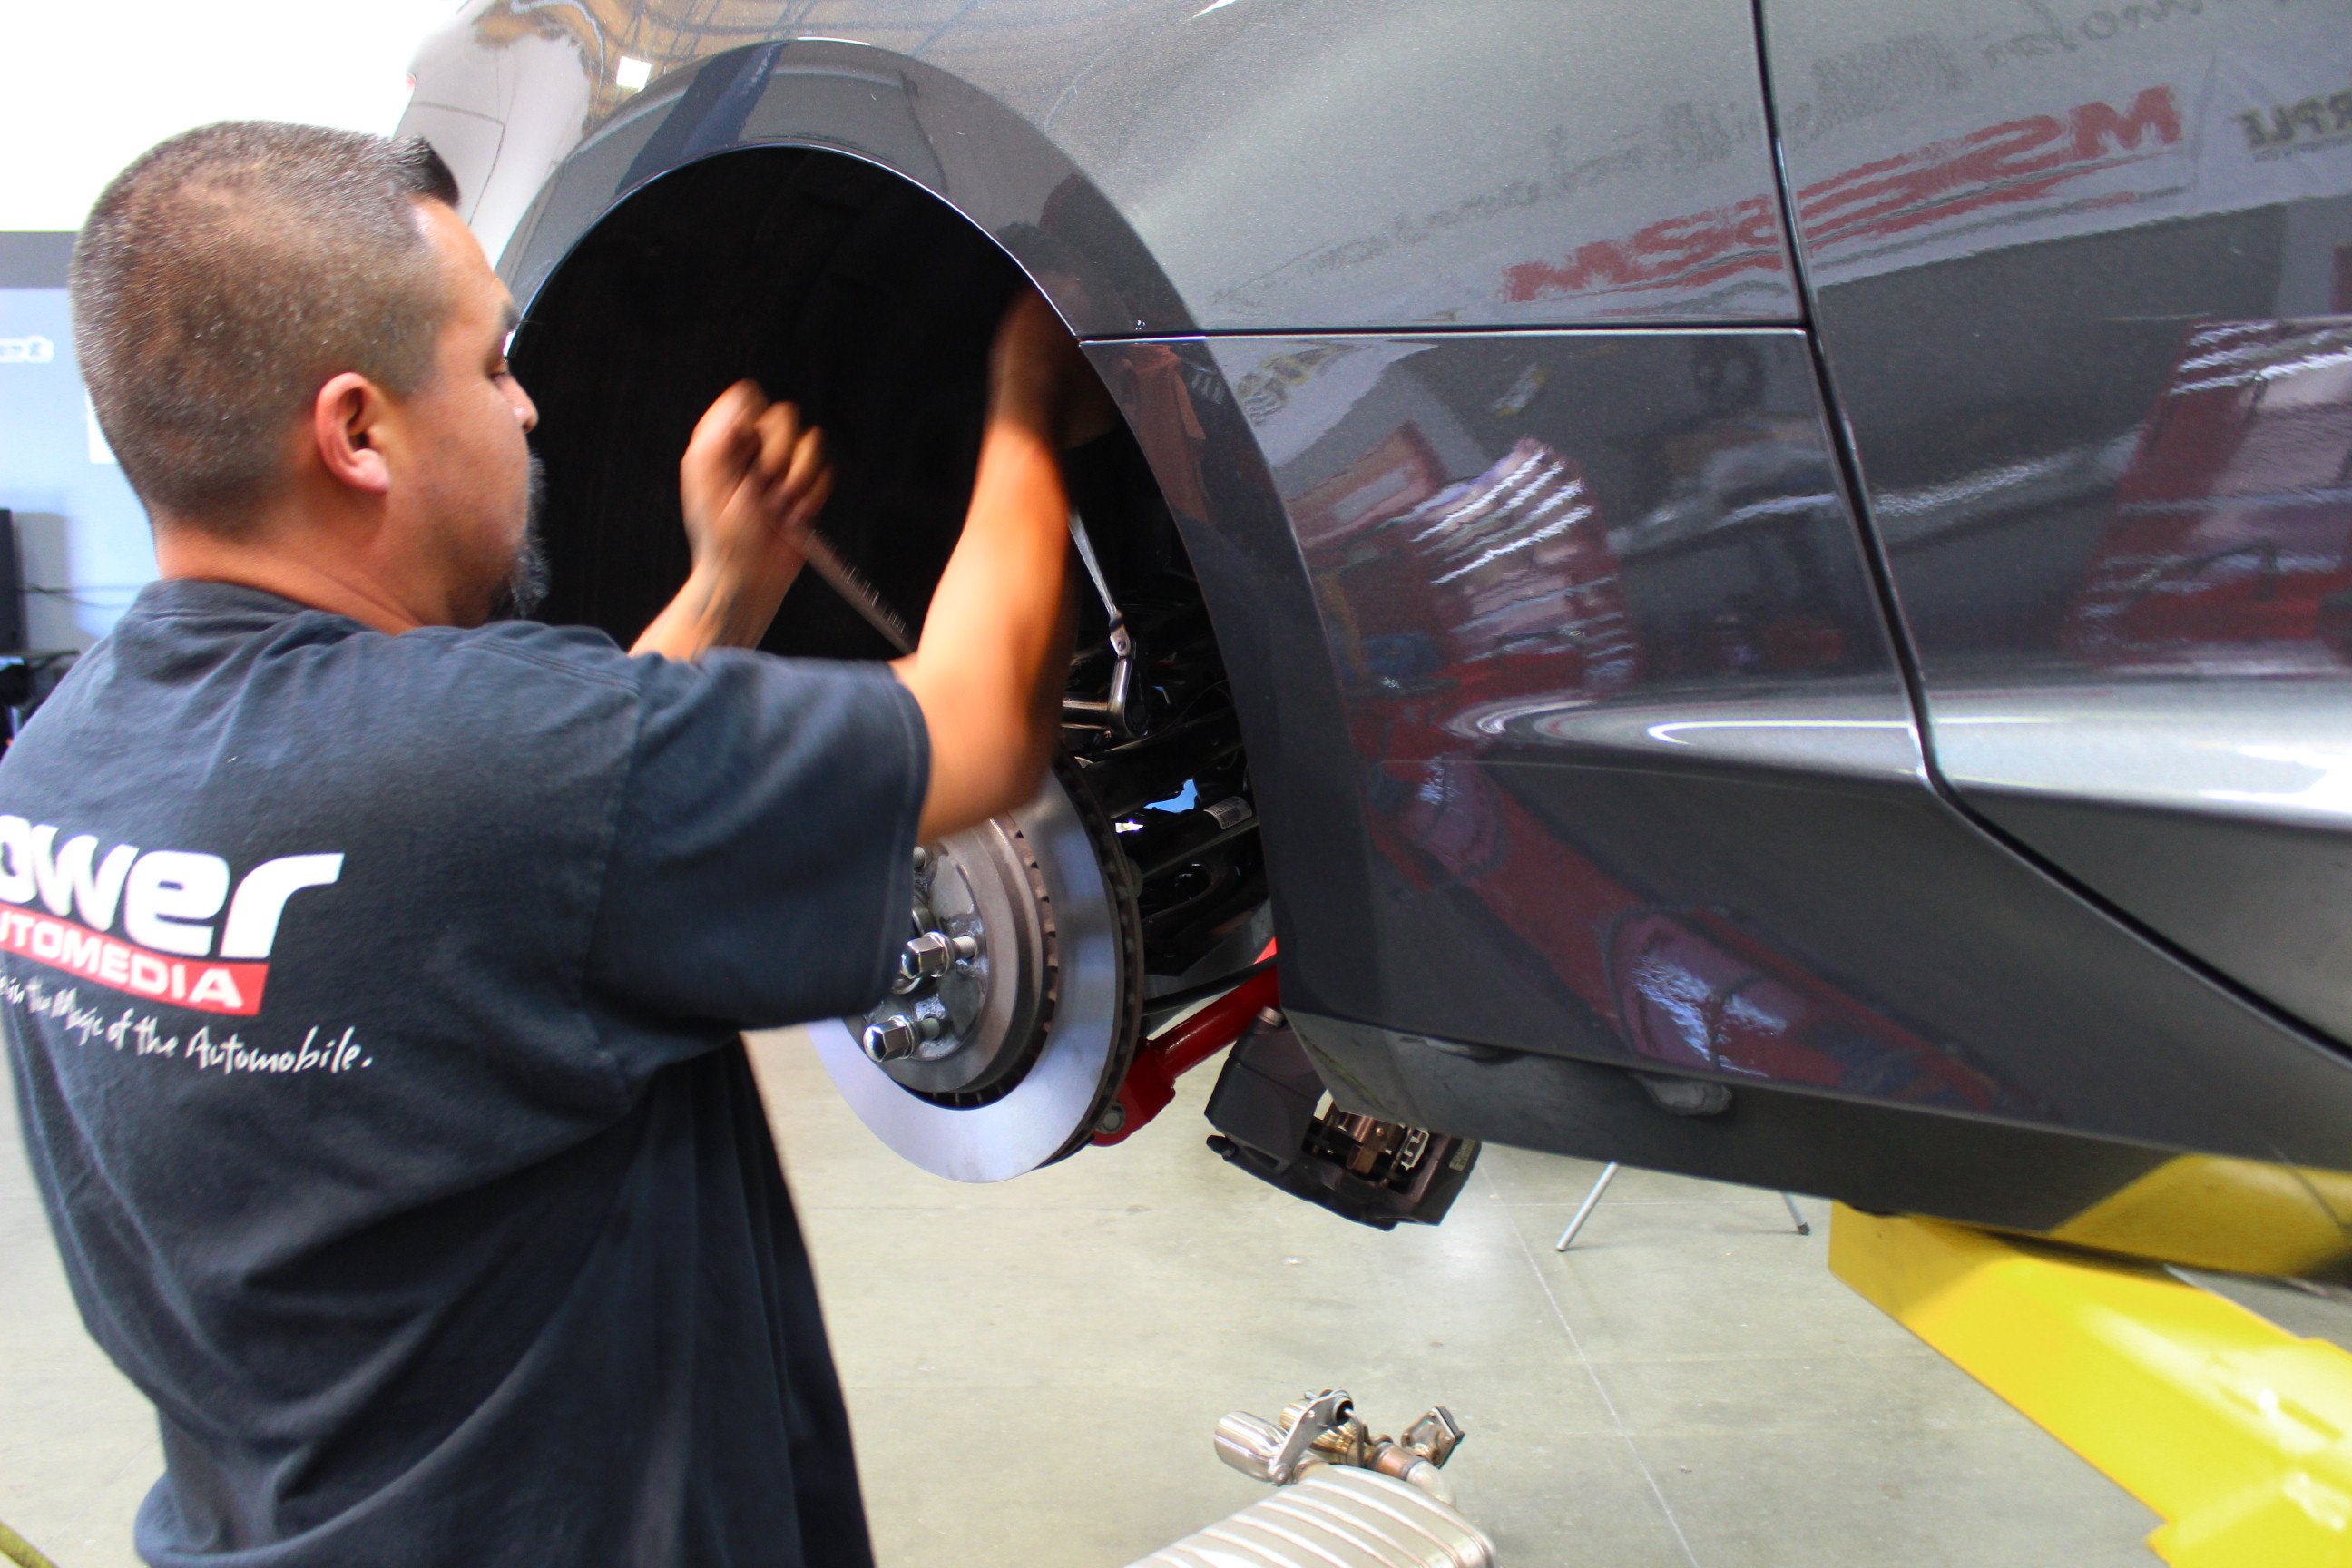
Hot-Headed
To keep pace with the Coyote, we knew we needed a better flowing head coming into the boosted portion of our competition. For that, we turned to one of the best cylinder head manufacturers in the business, Texas-Speed and Performance (TSP). We told them of our budget concerns, and in turn, TSP CEO Jason Mangum recommended we go with the Gen V LT head porting program instead of a set of new castings (PN 199-LT1GMPORTING).
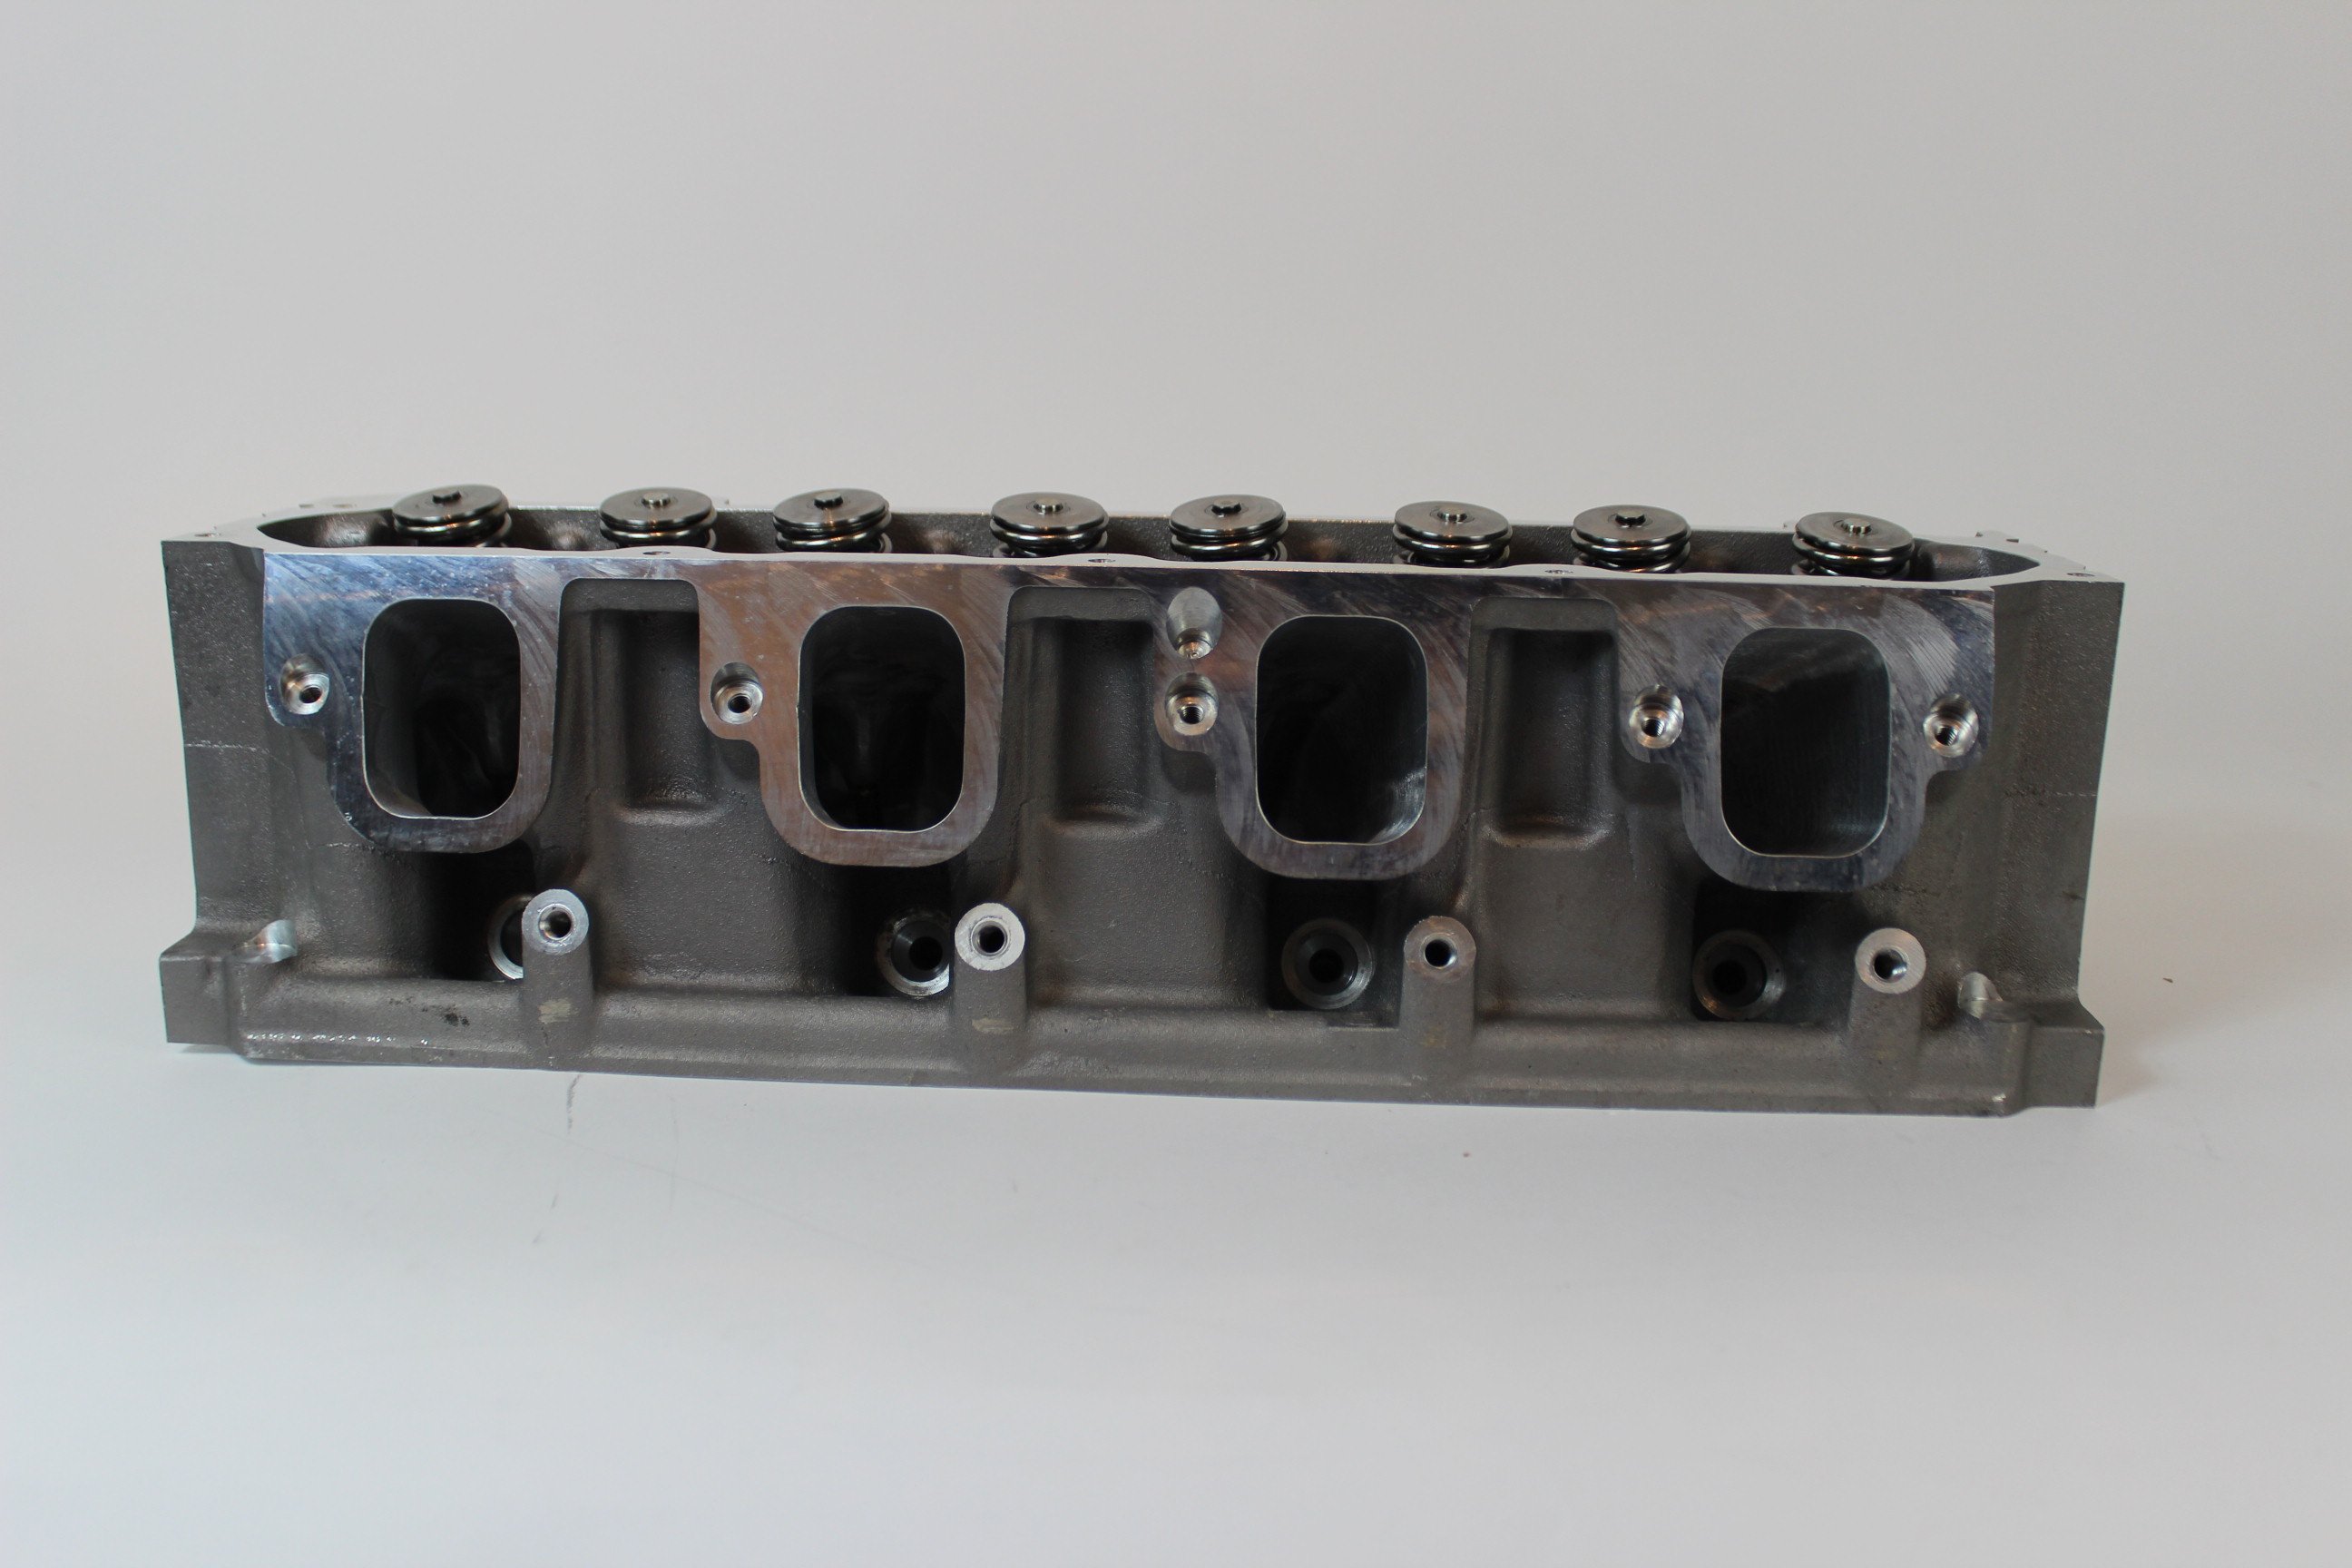
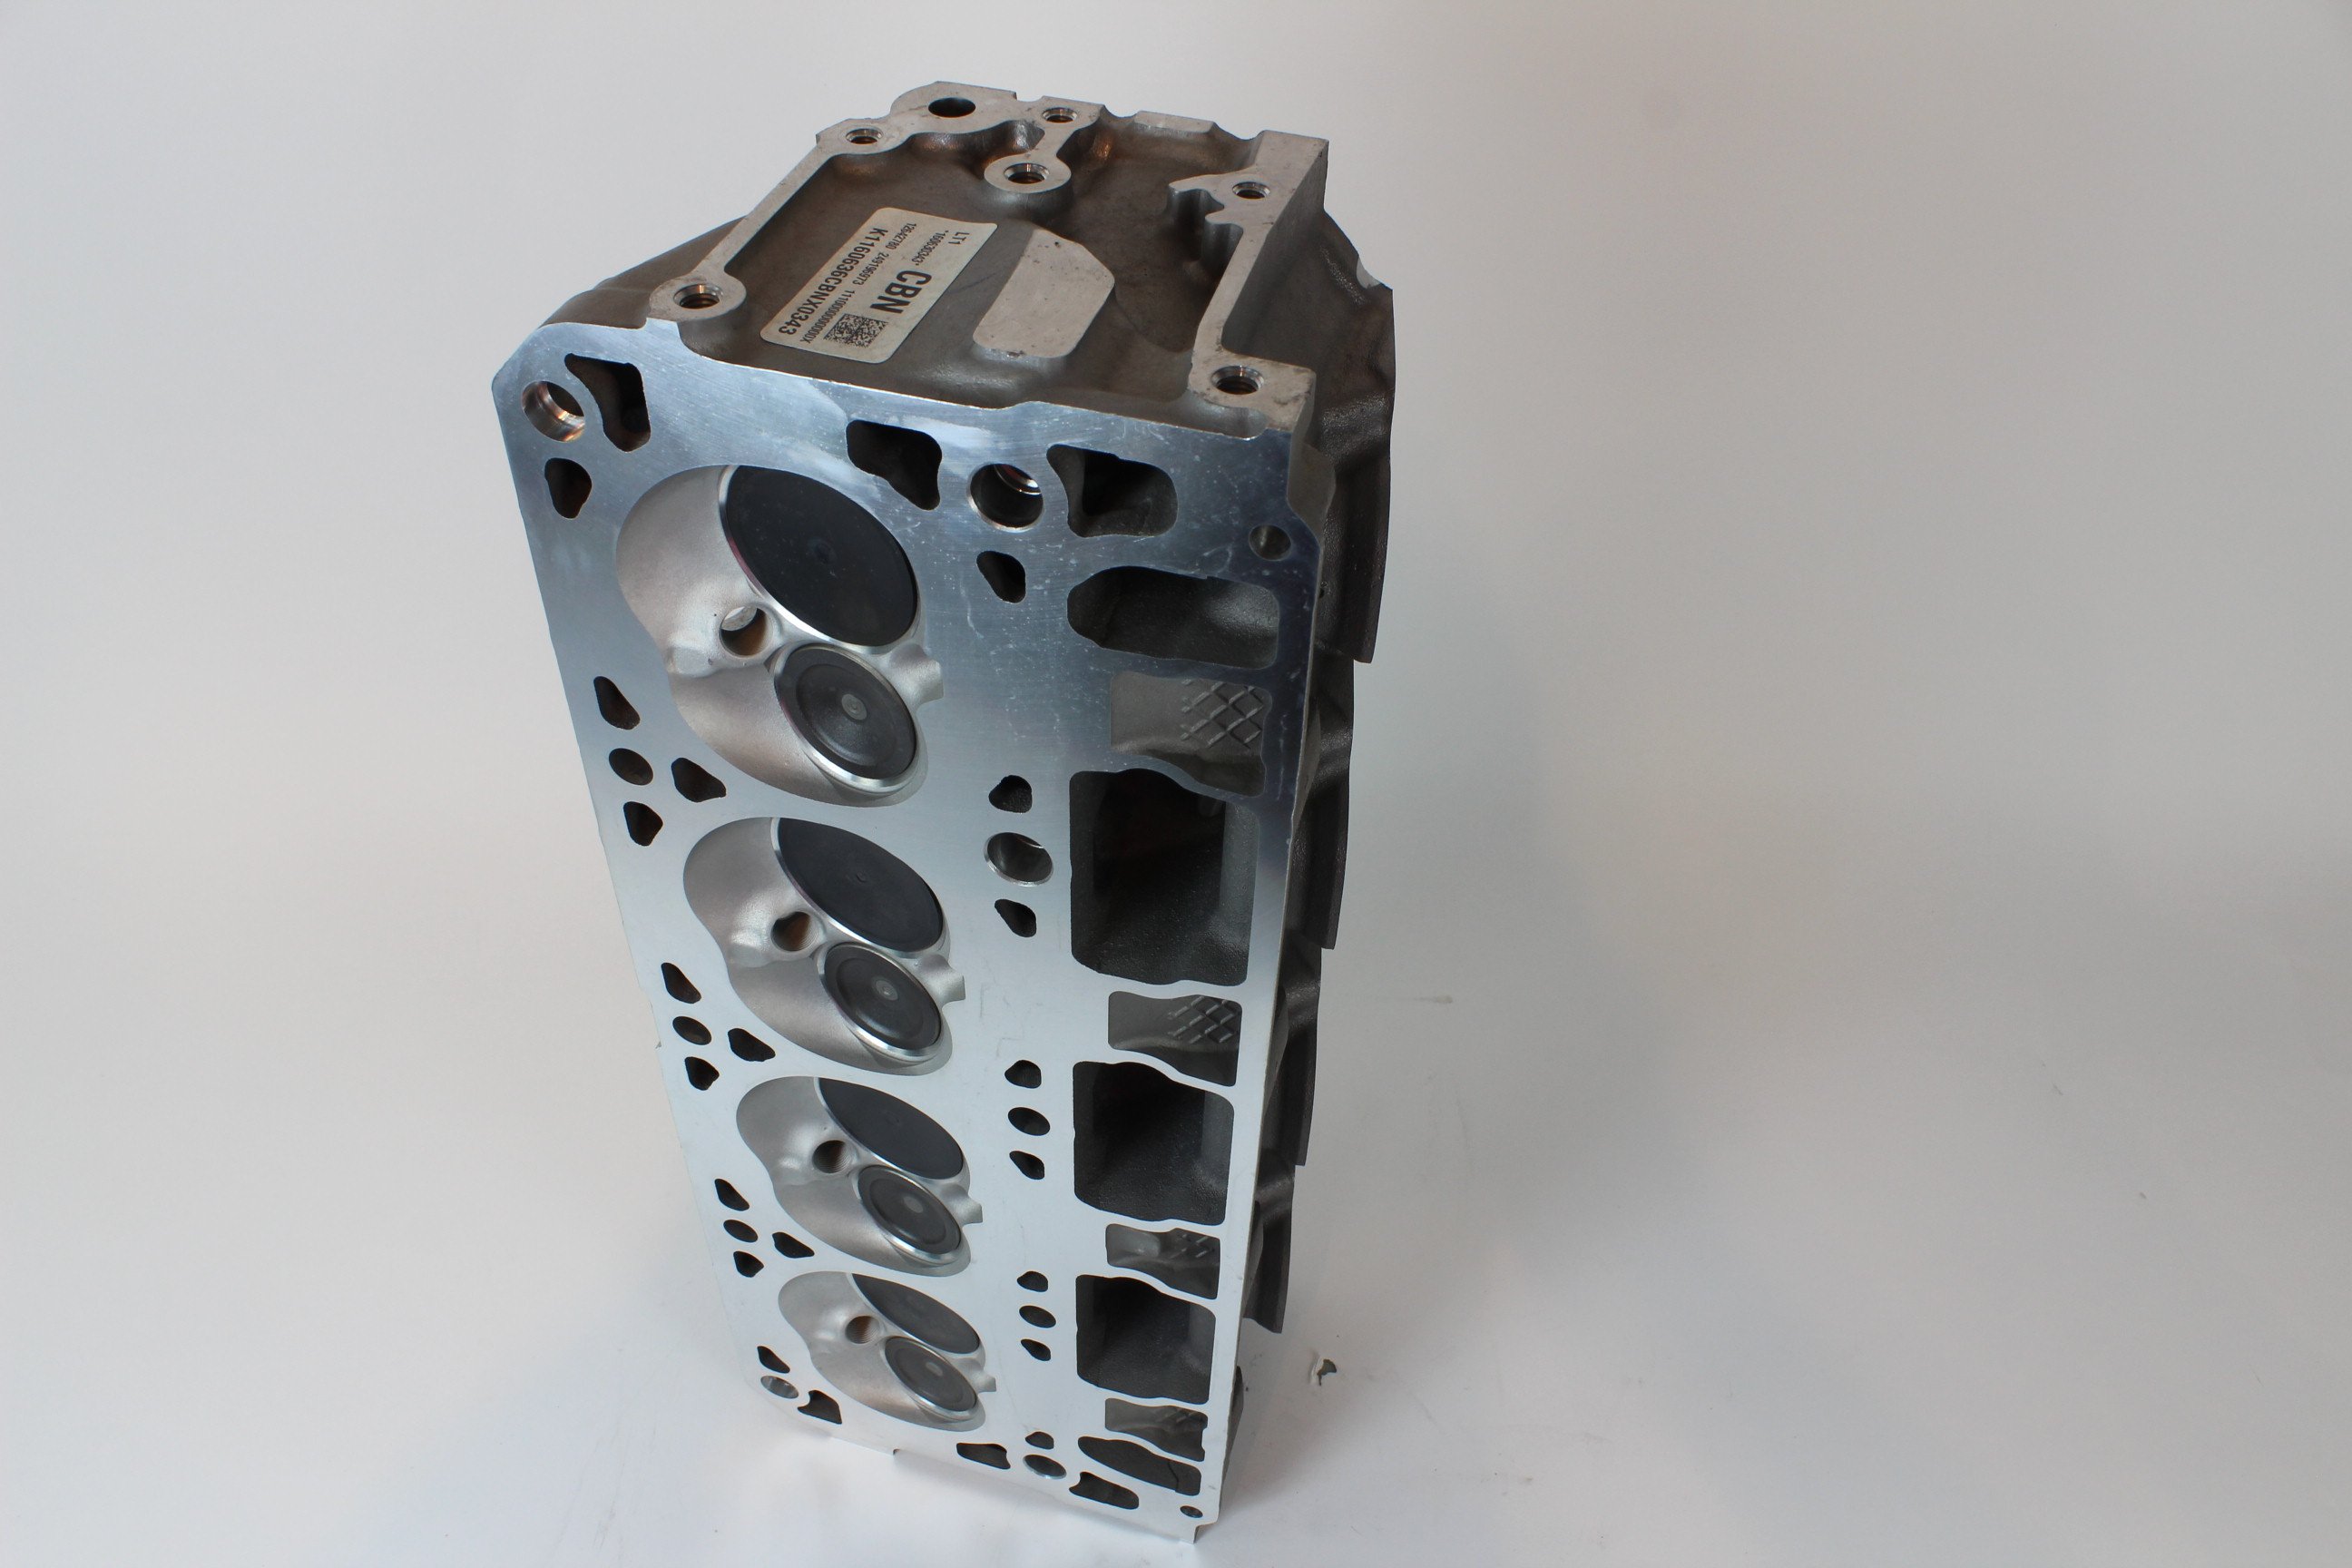
Not only will TSP’s head porting program get our stock castings flowing just as well as any purpose-cast option, it will save us quite a bit on our budget in the long run. At just $900 for the program, it was a worthwhile investment on our part and will allow our LT1 to gulp down as much pressurized atmosphere as possible. Between the CNC porting and valve job, these heads boast 345/226cfm of flow at .600-inch lift. Amazingly, their potential doesn’t stop there and keeps climbing up to .700-inch lift (364/230cfm).
In addition to the CNC work on the intake and exhaust ports, TSP also performs a competition 5-angle valve job on the heads ensuring they will flow and seal as well as possible. They also will mill the heads to your specifications, but since we are throwing boost at our mill, we opted to leave them in the factory 59cc chamber configuration.
To secure our new higher-flowing cylinder heads to our refreshed and upgraded short-block we opted for a set of ARP Pro Series bolts (PN 234-3710). Cold forged from ARP2000 material, the bolts are rated to a substantial 190,000 psi – which should be plenty for our new boosted combination. With the engine completely back together, it was time to get it in the car and slap a little boost on it.

Under Pressure
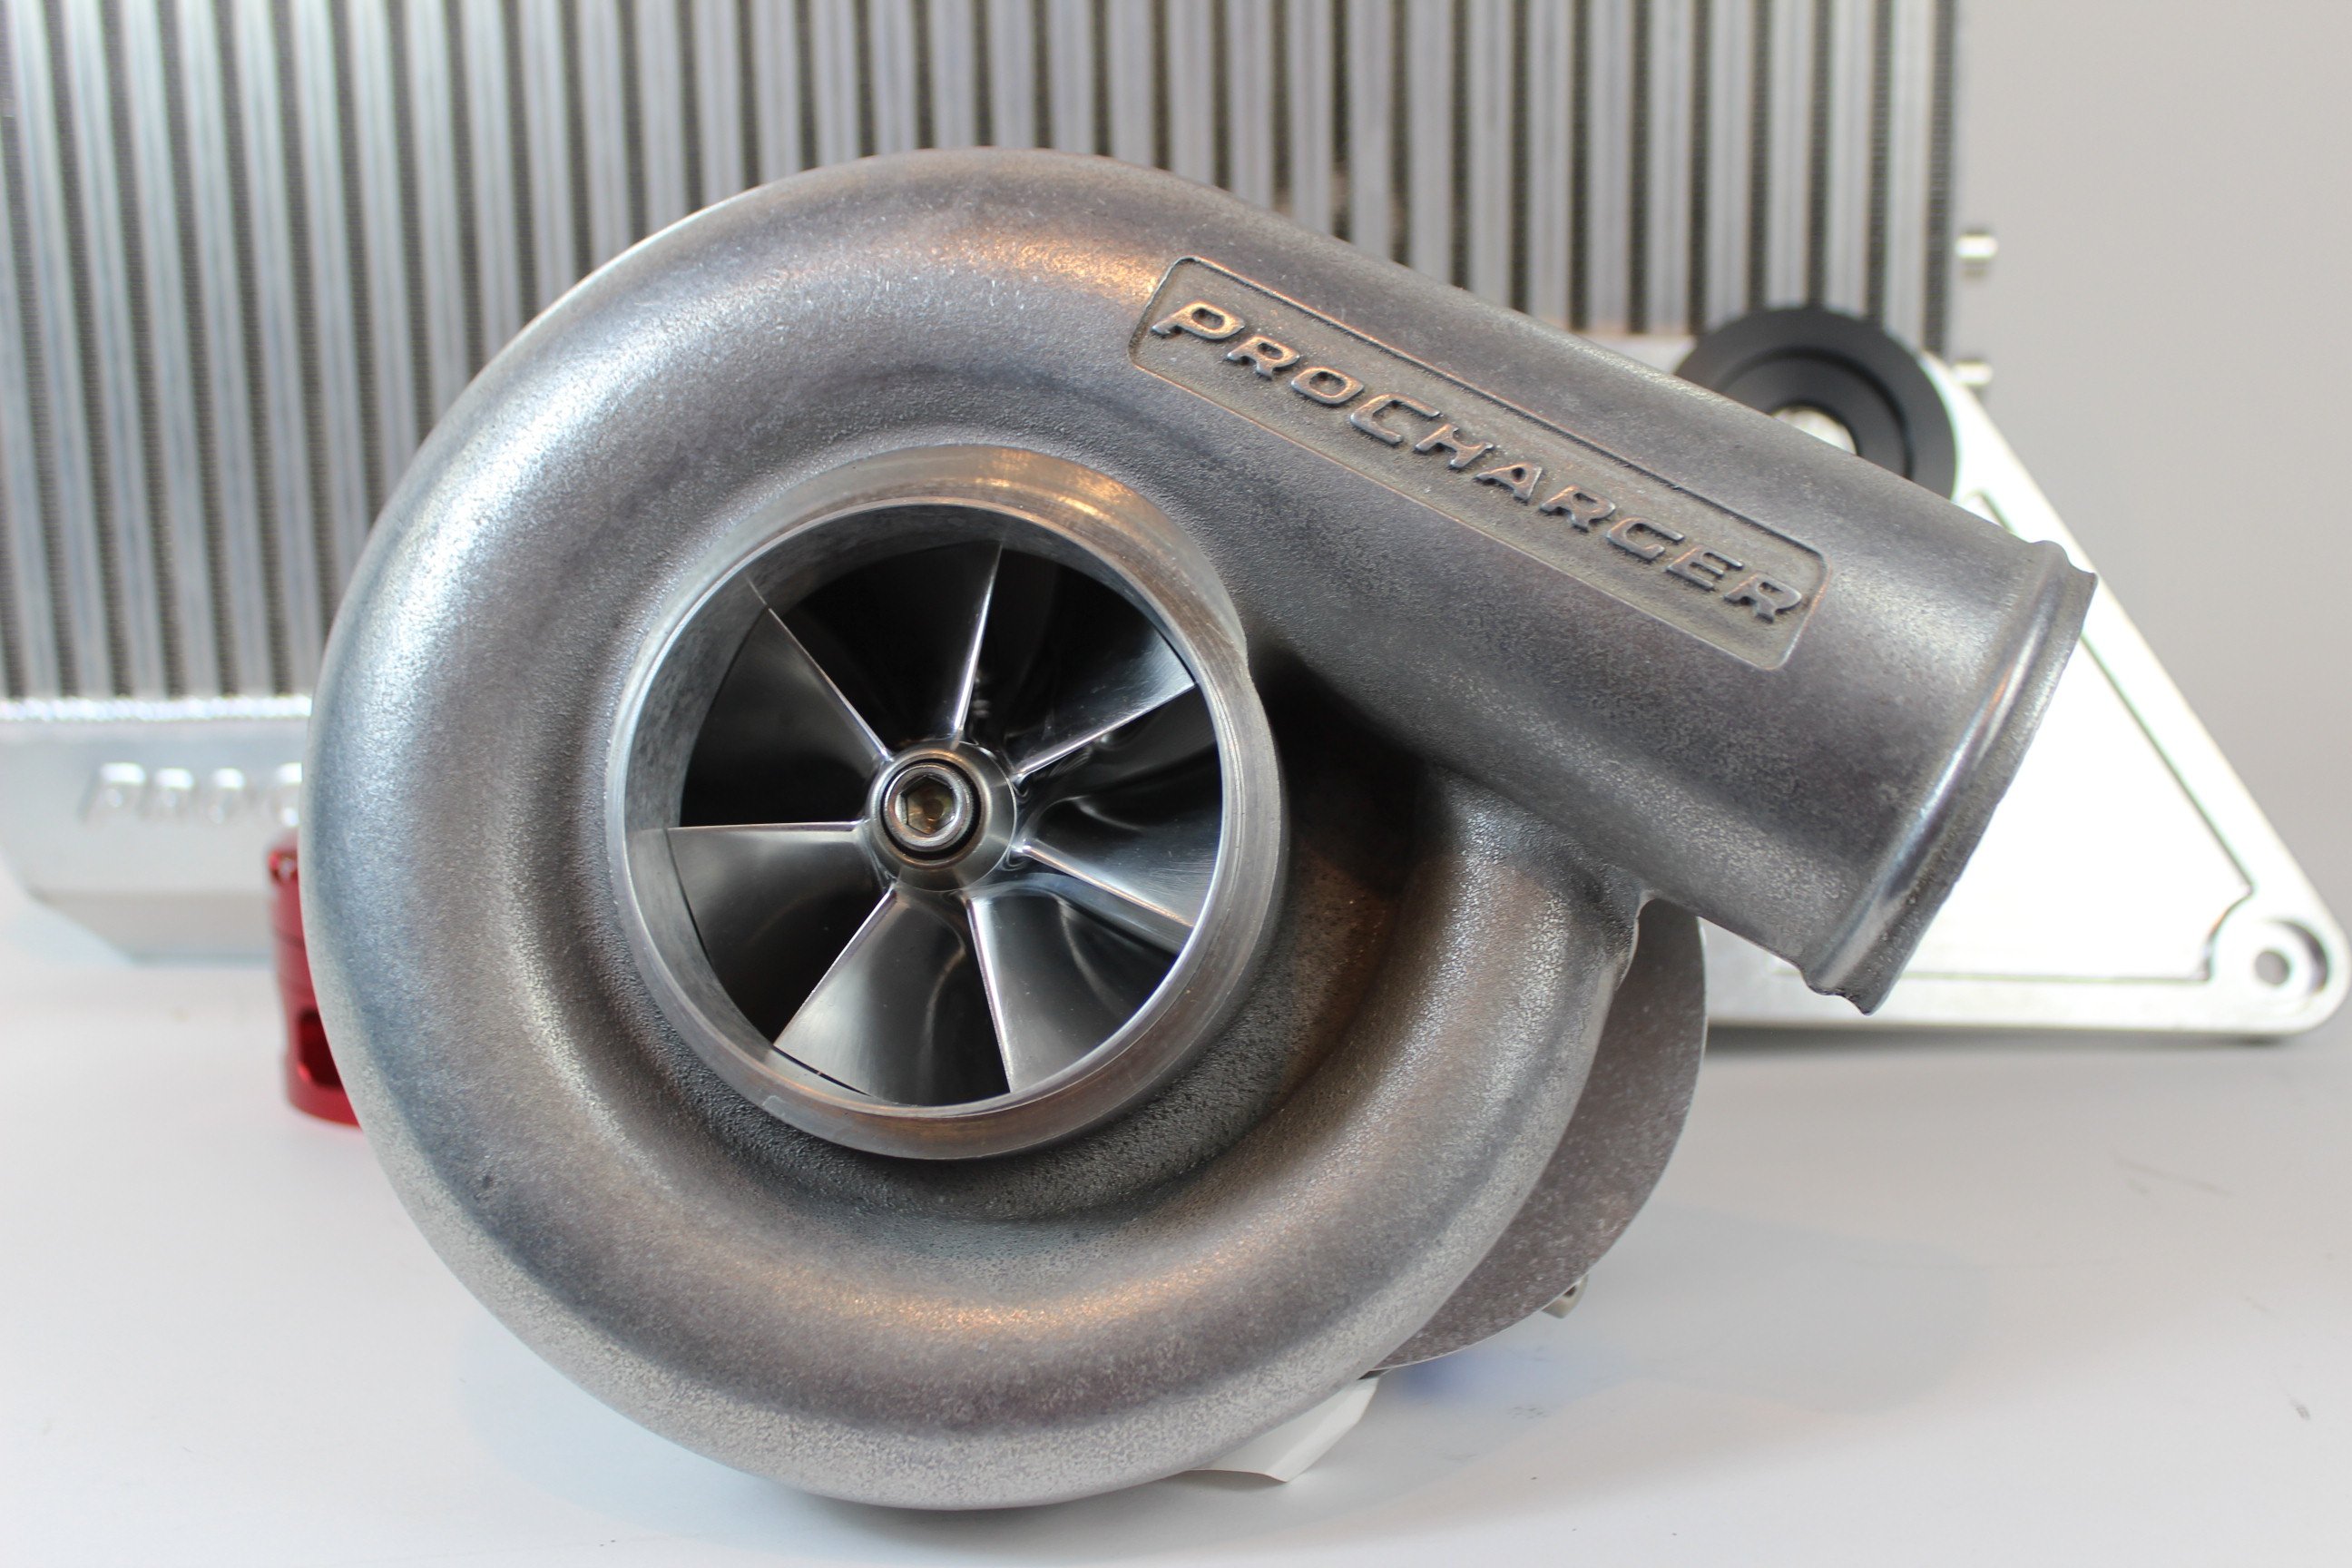
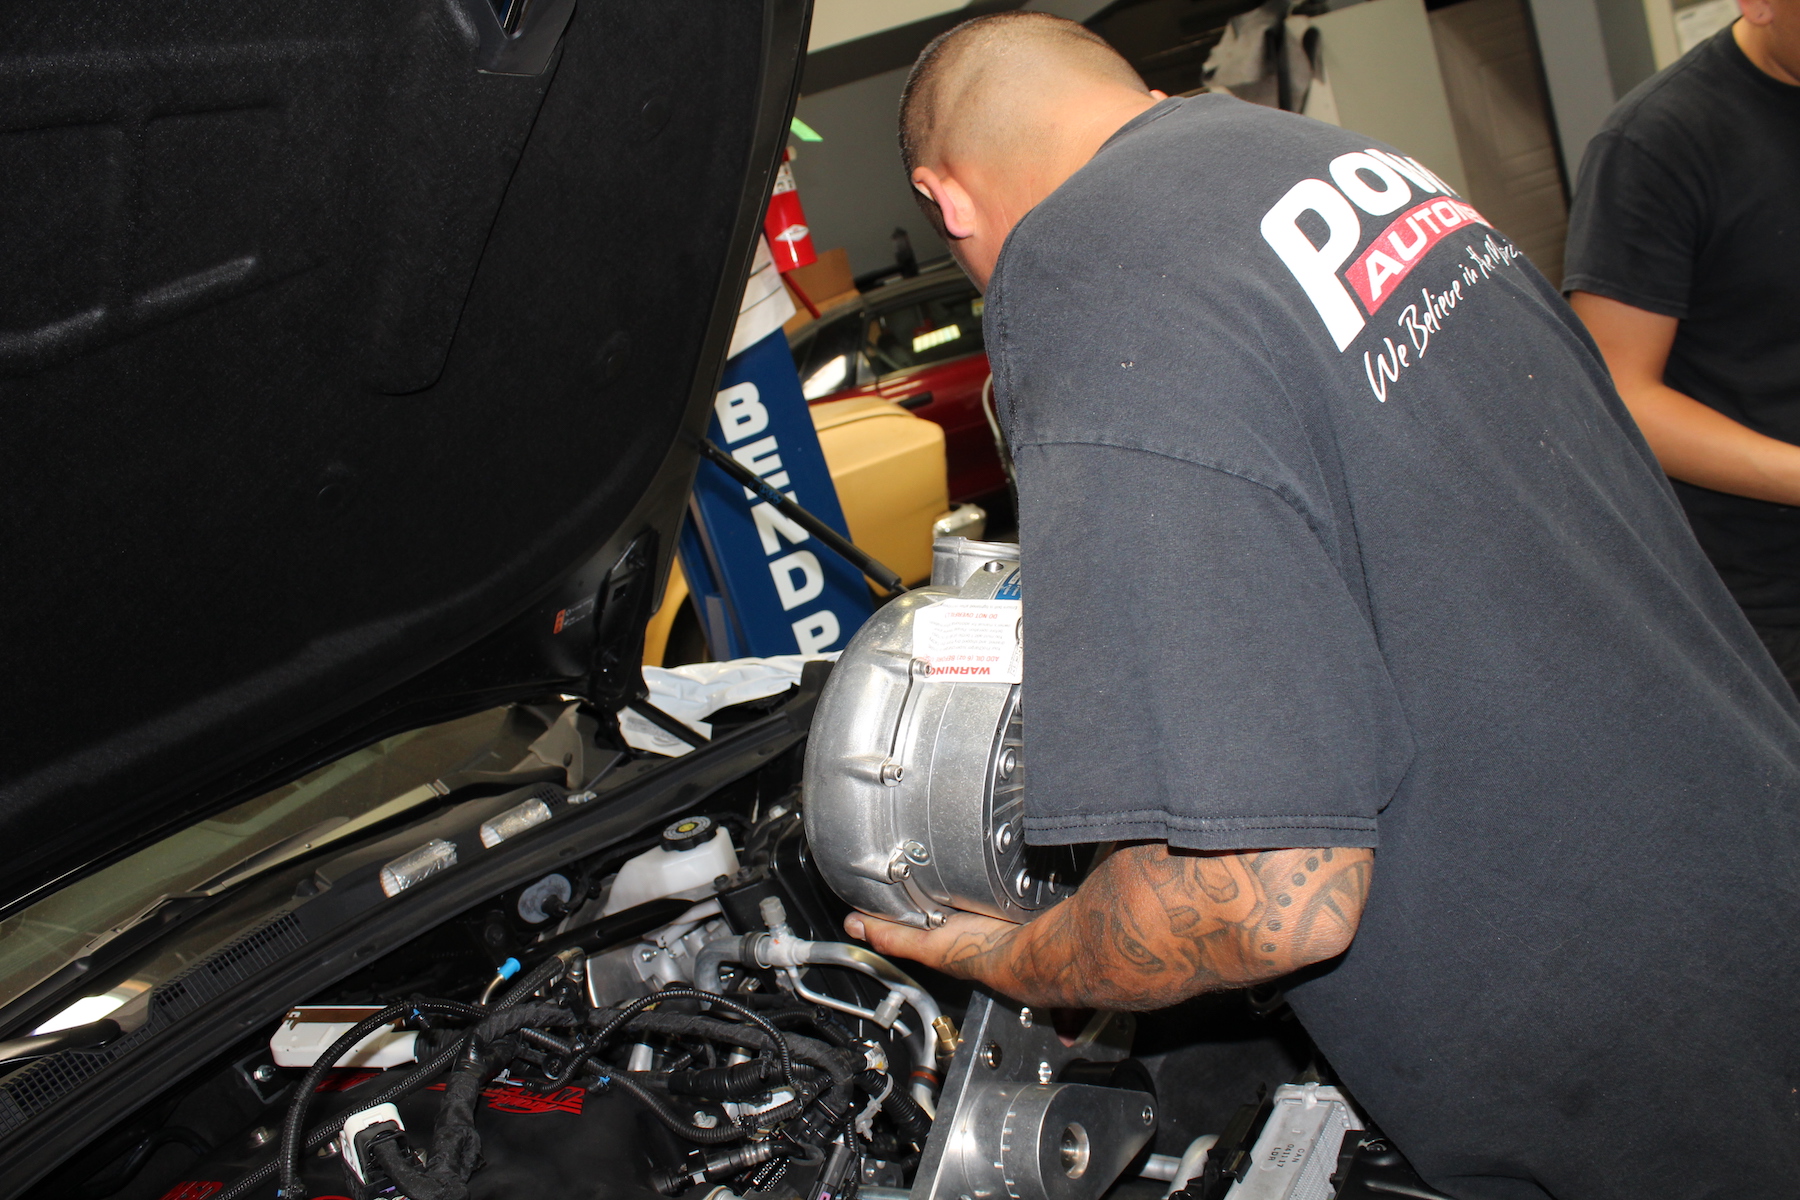
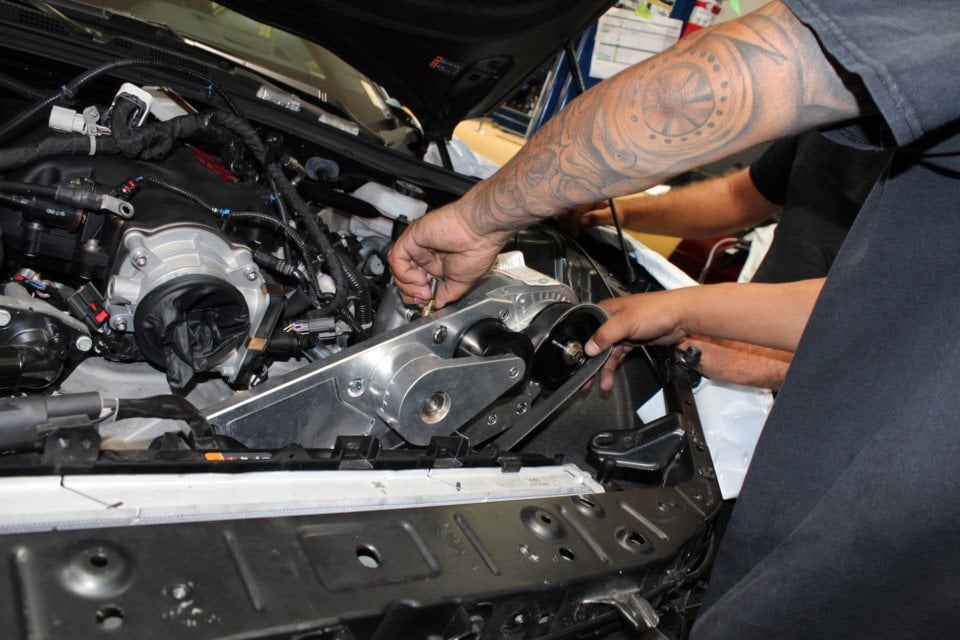
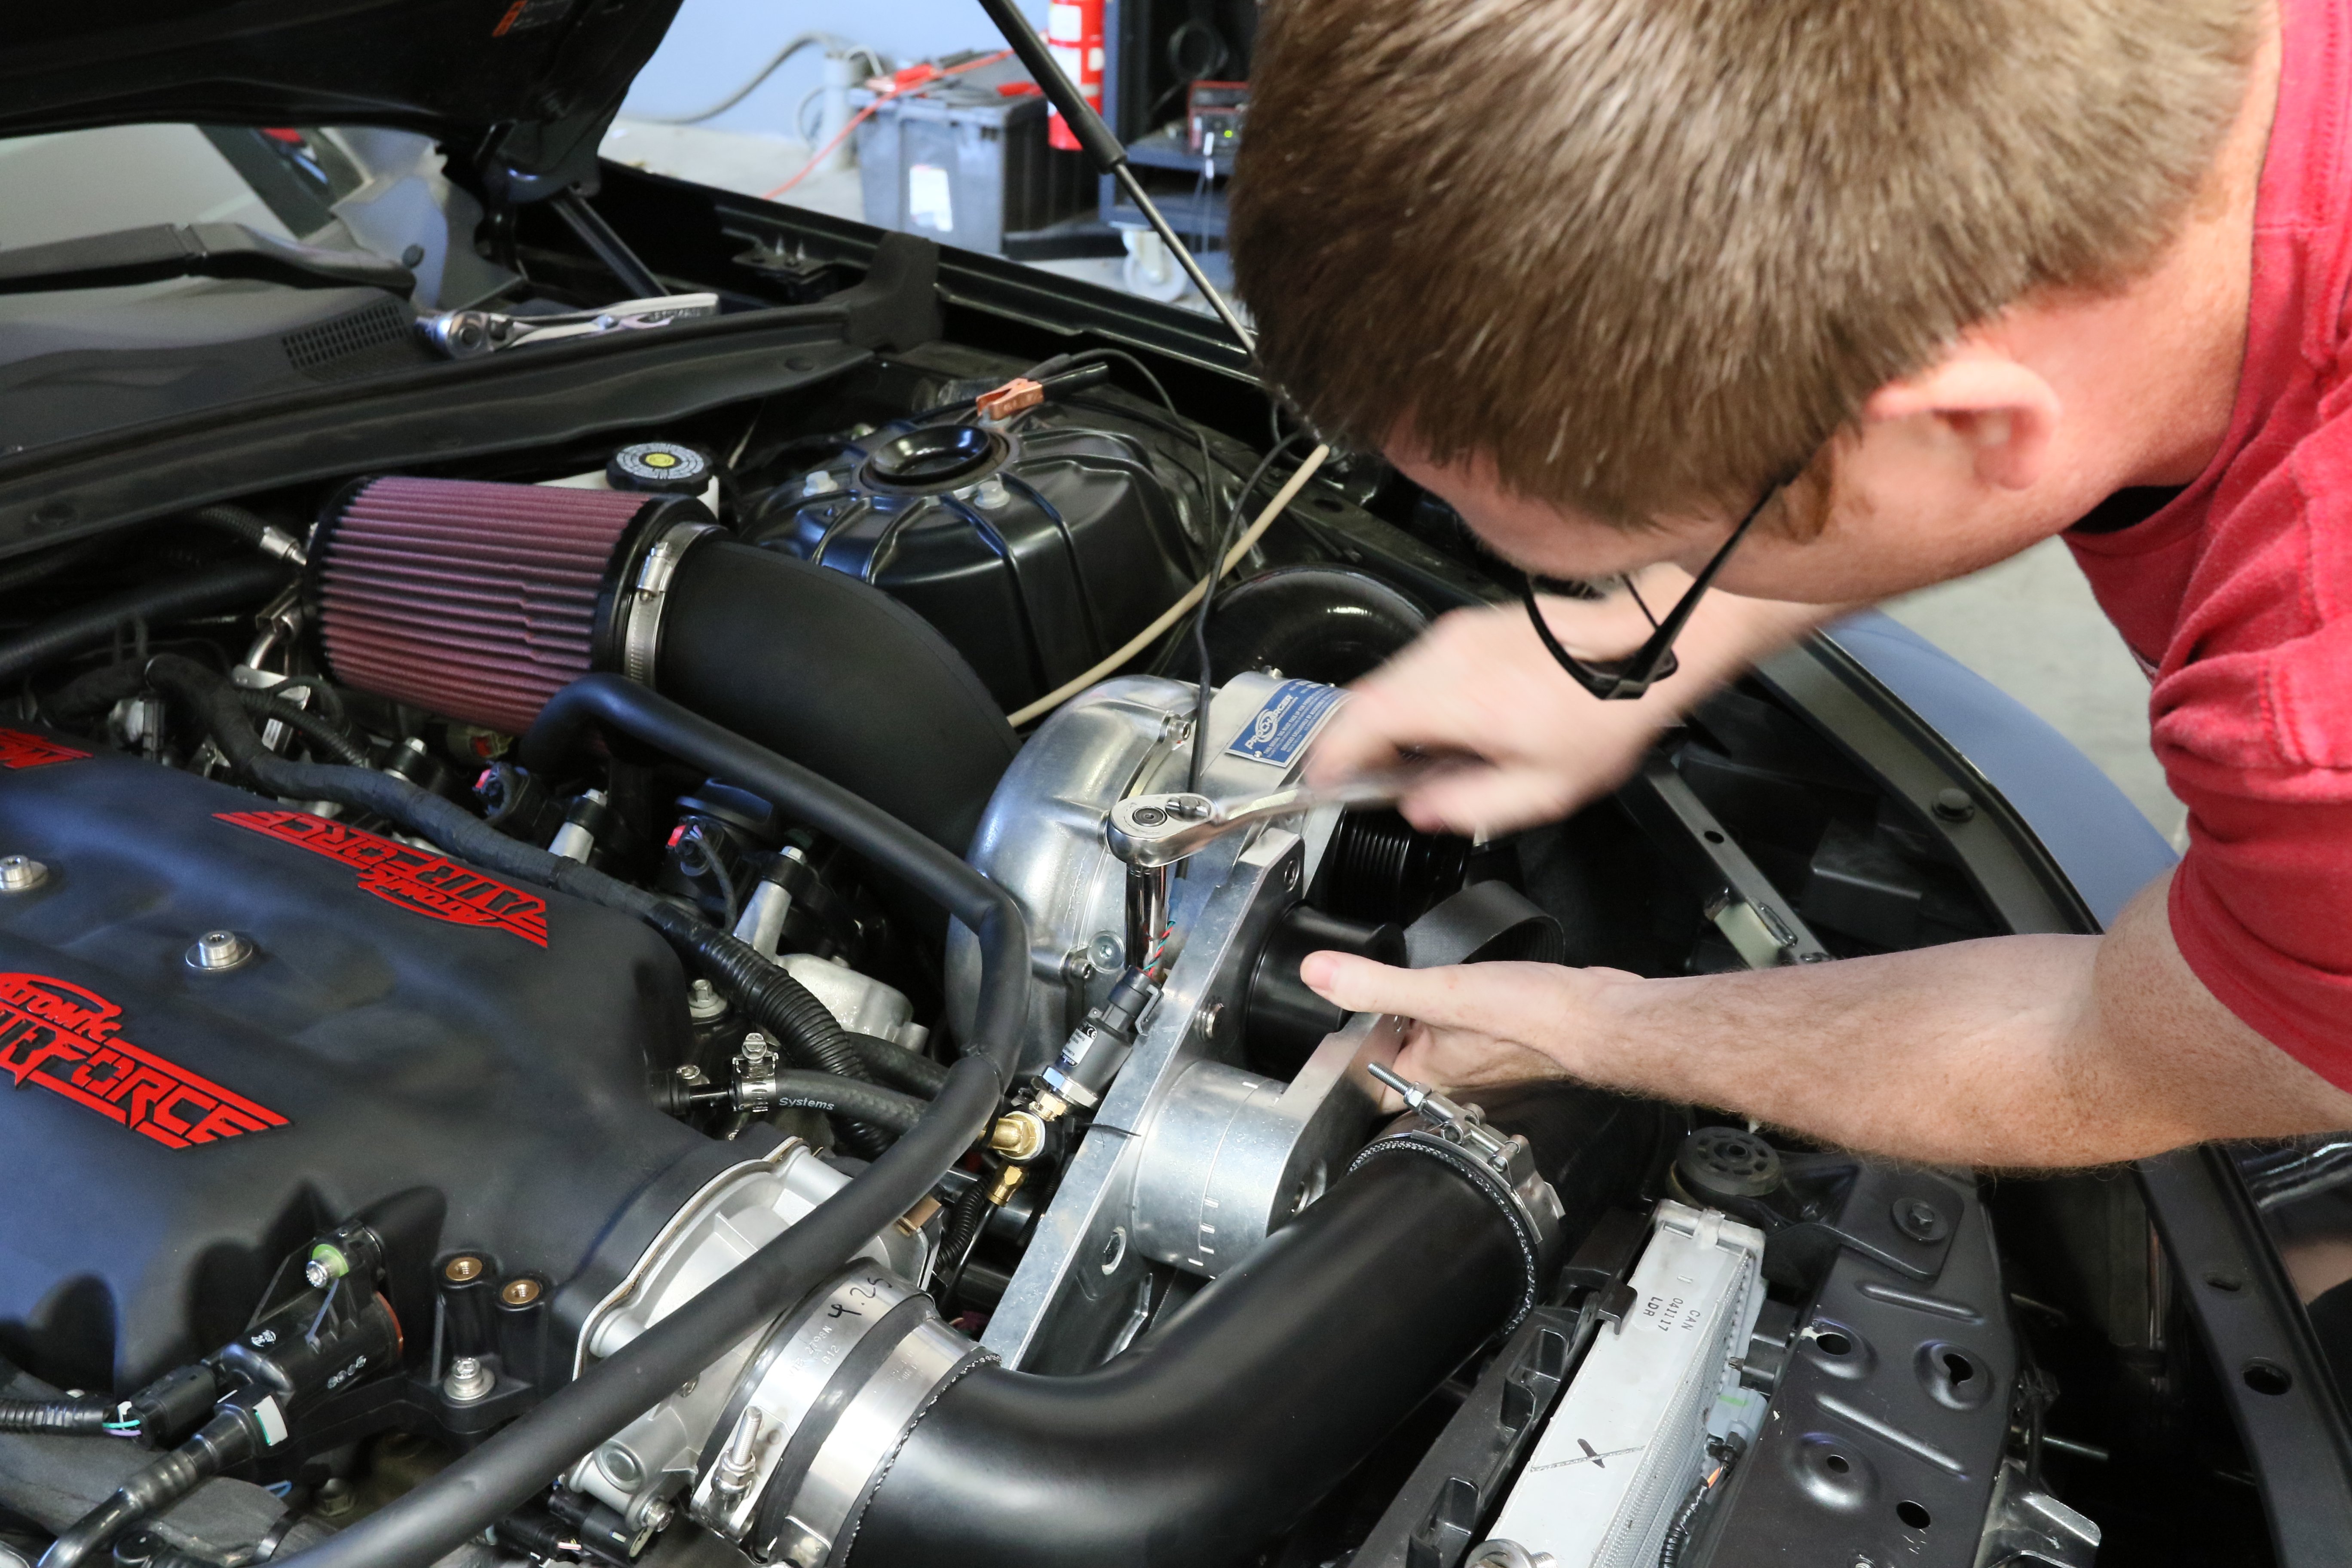
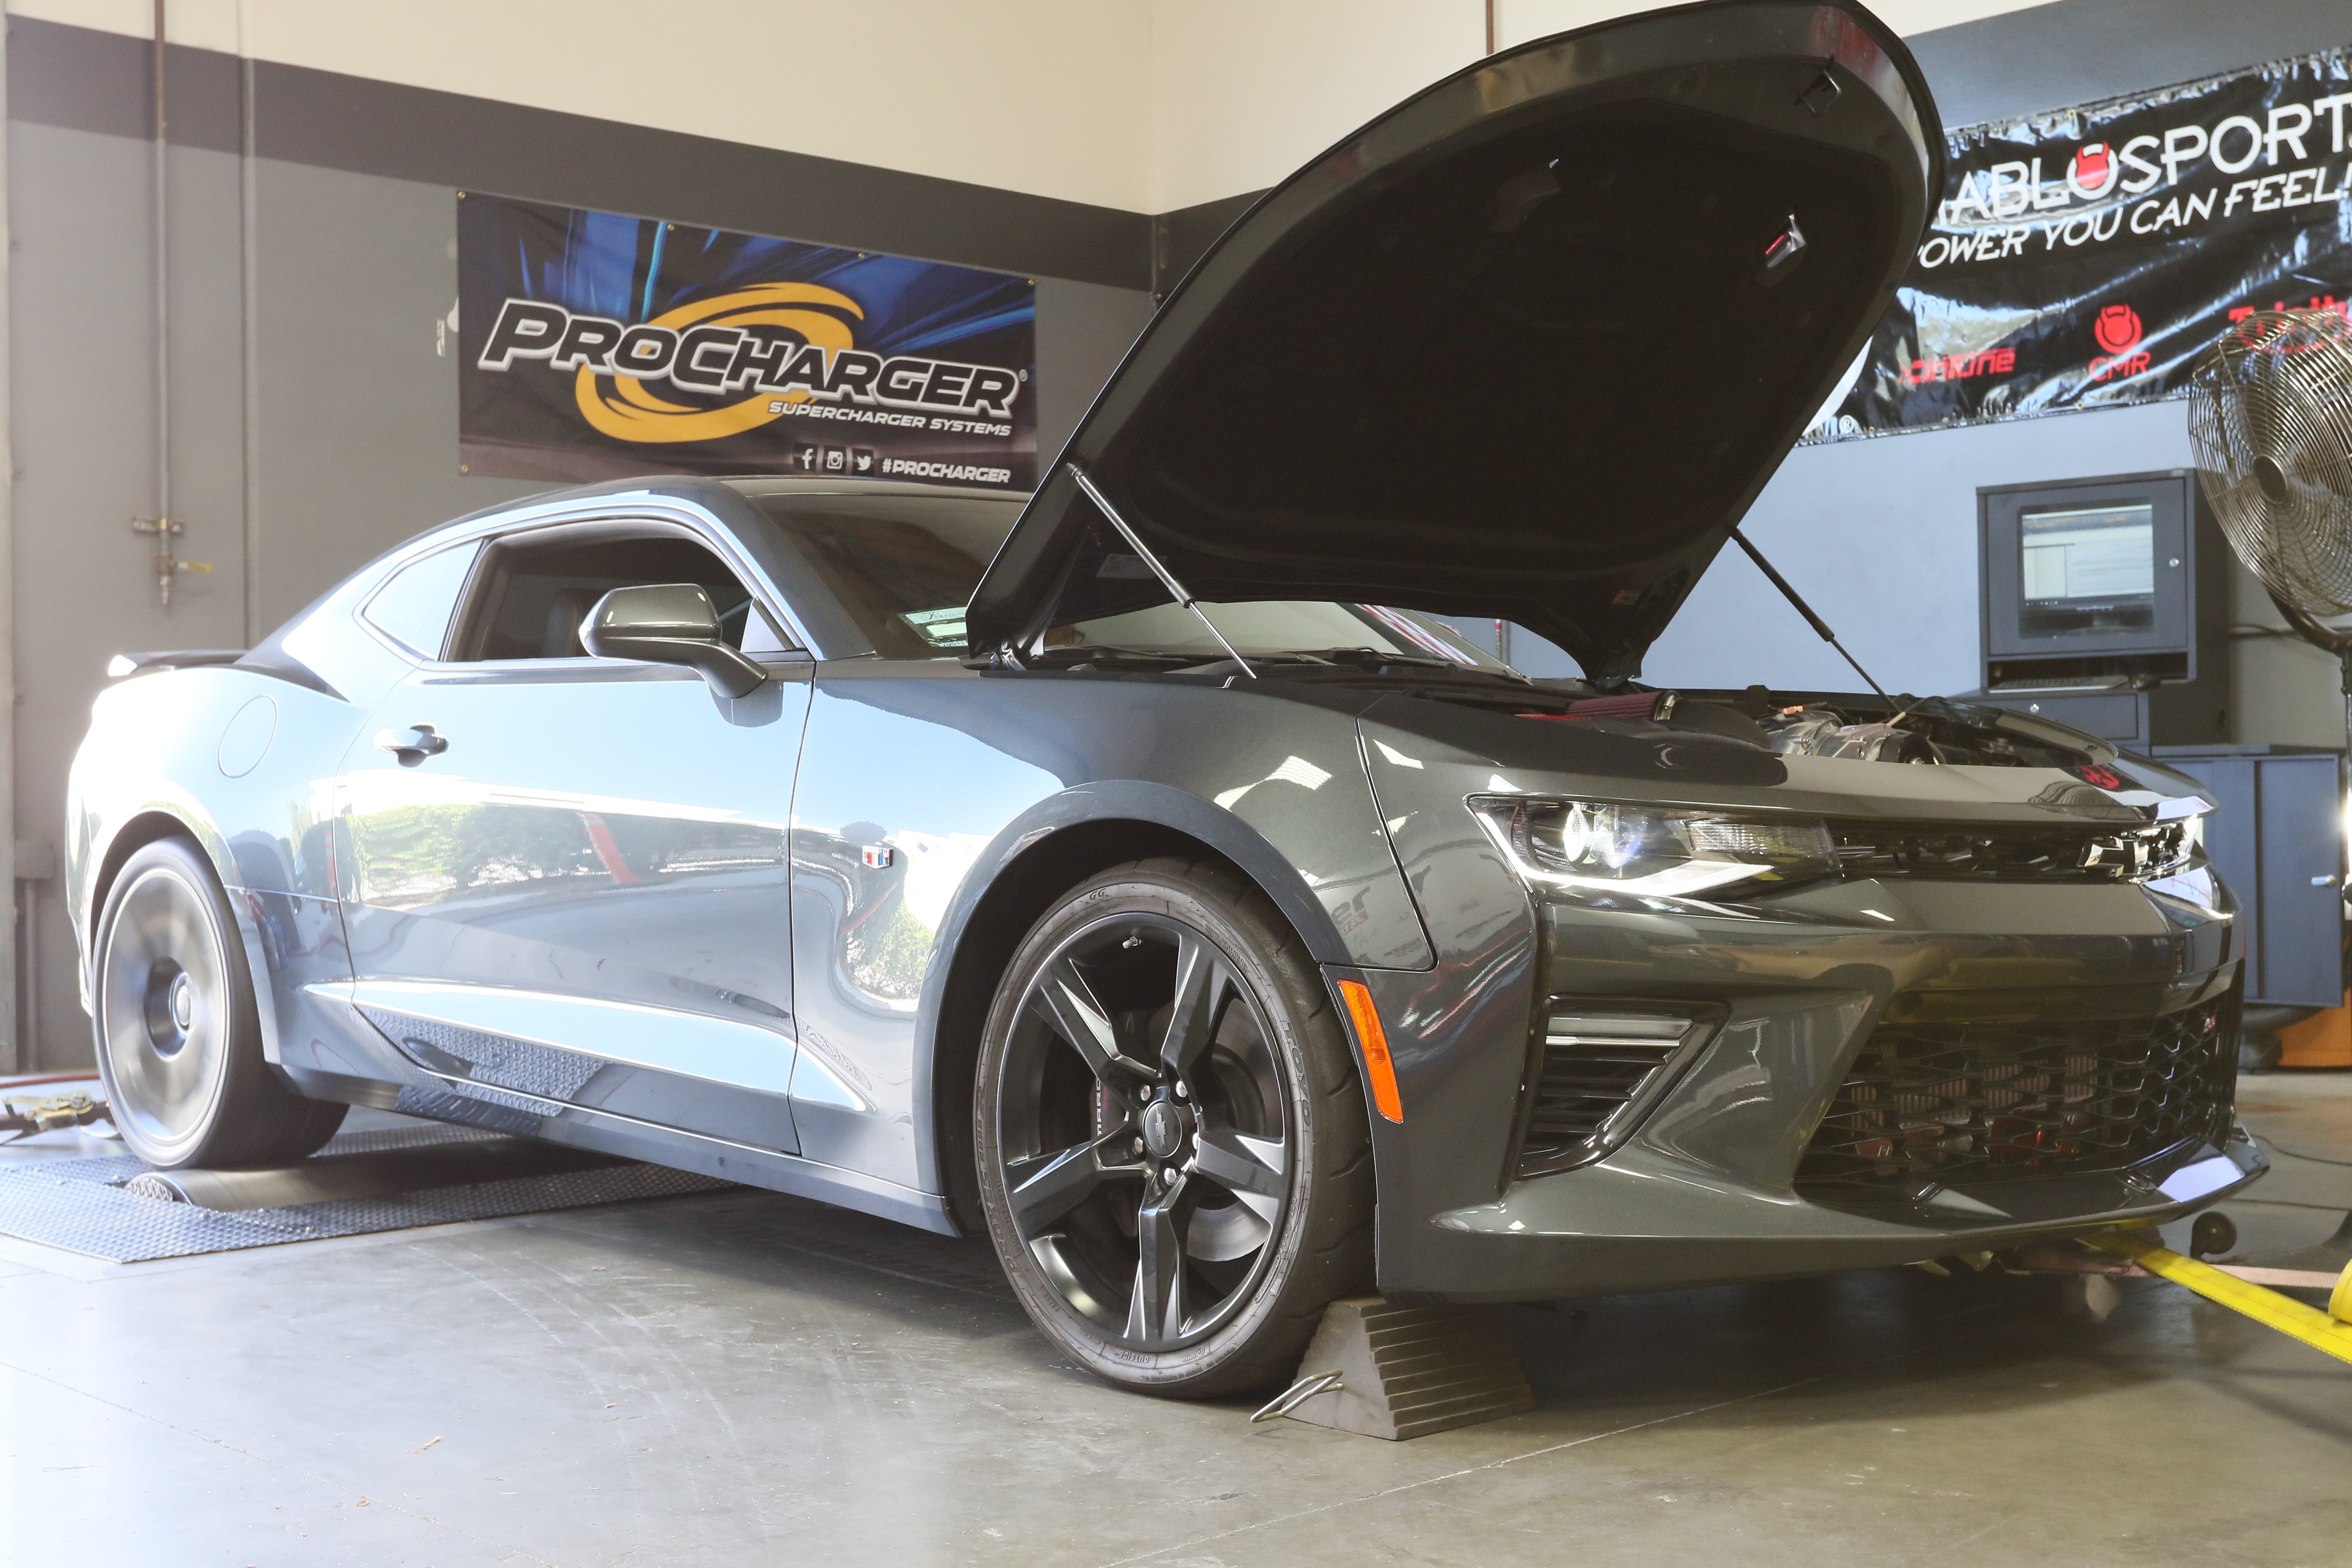
To top the whole package off, both teams opted for ProCharger’s latest X-Series technology, specifically the D-1X head unit. You may already be familiar with ProCharger’s D-1SC-1 and P-1SC-1 head units, as they’ve been battled tested over the course of many years, but last year they took the wraps off the P-1X and D-1X head unit, taking its centrifugal-style superchargers into the next generation.
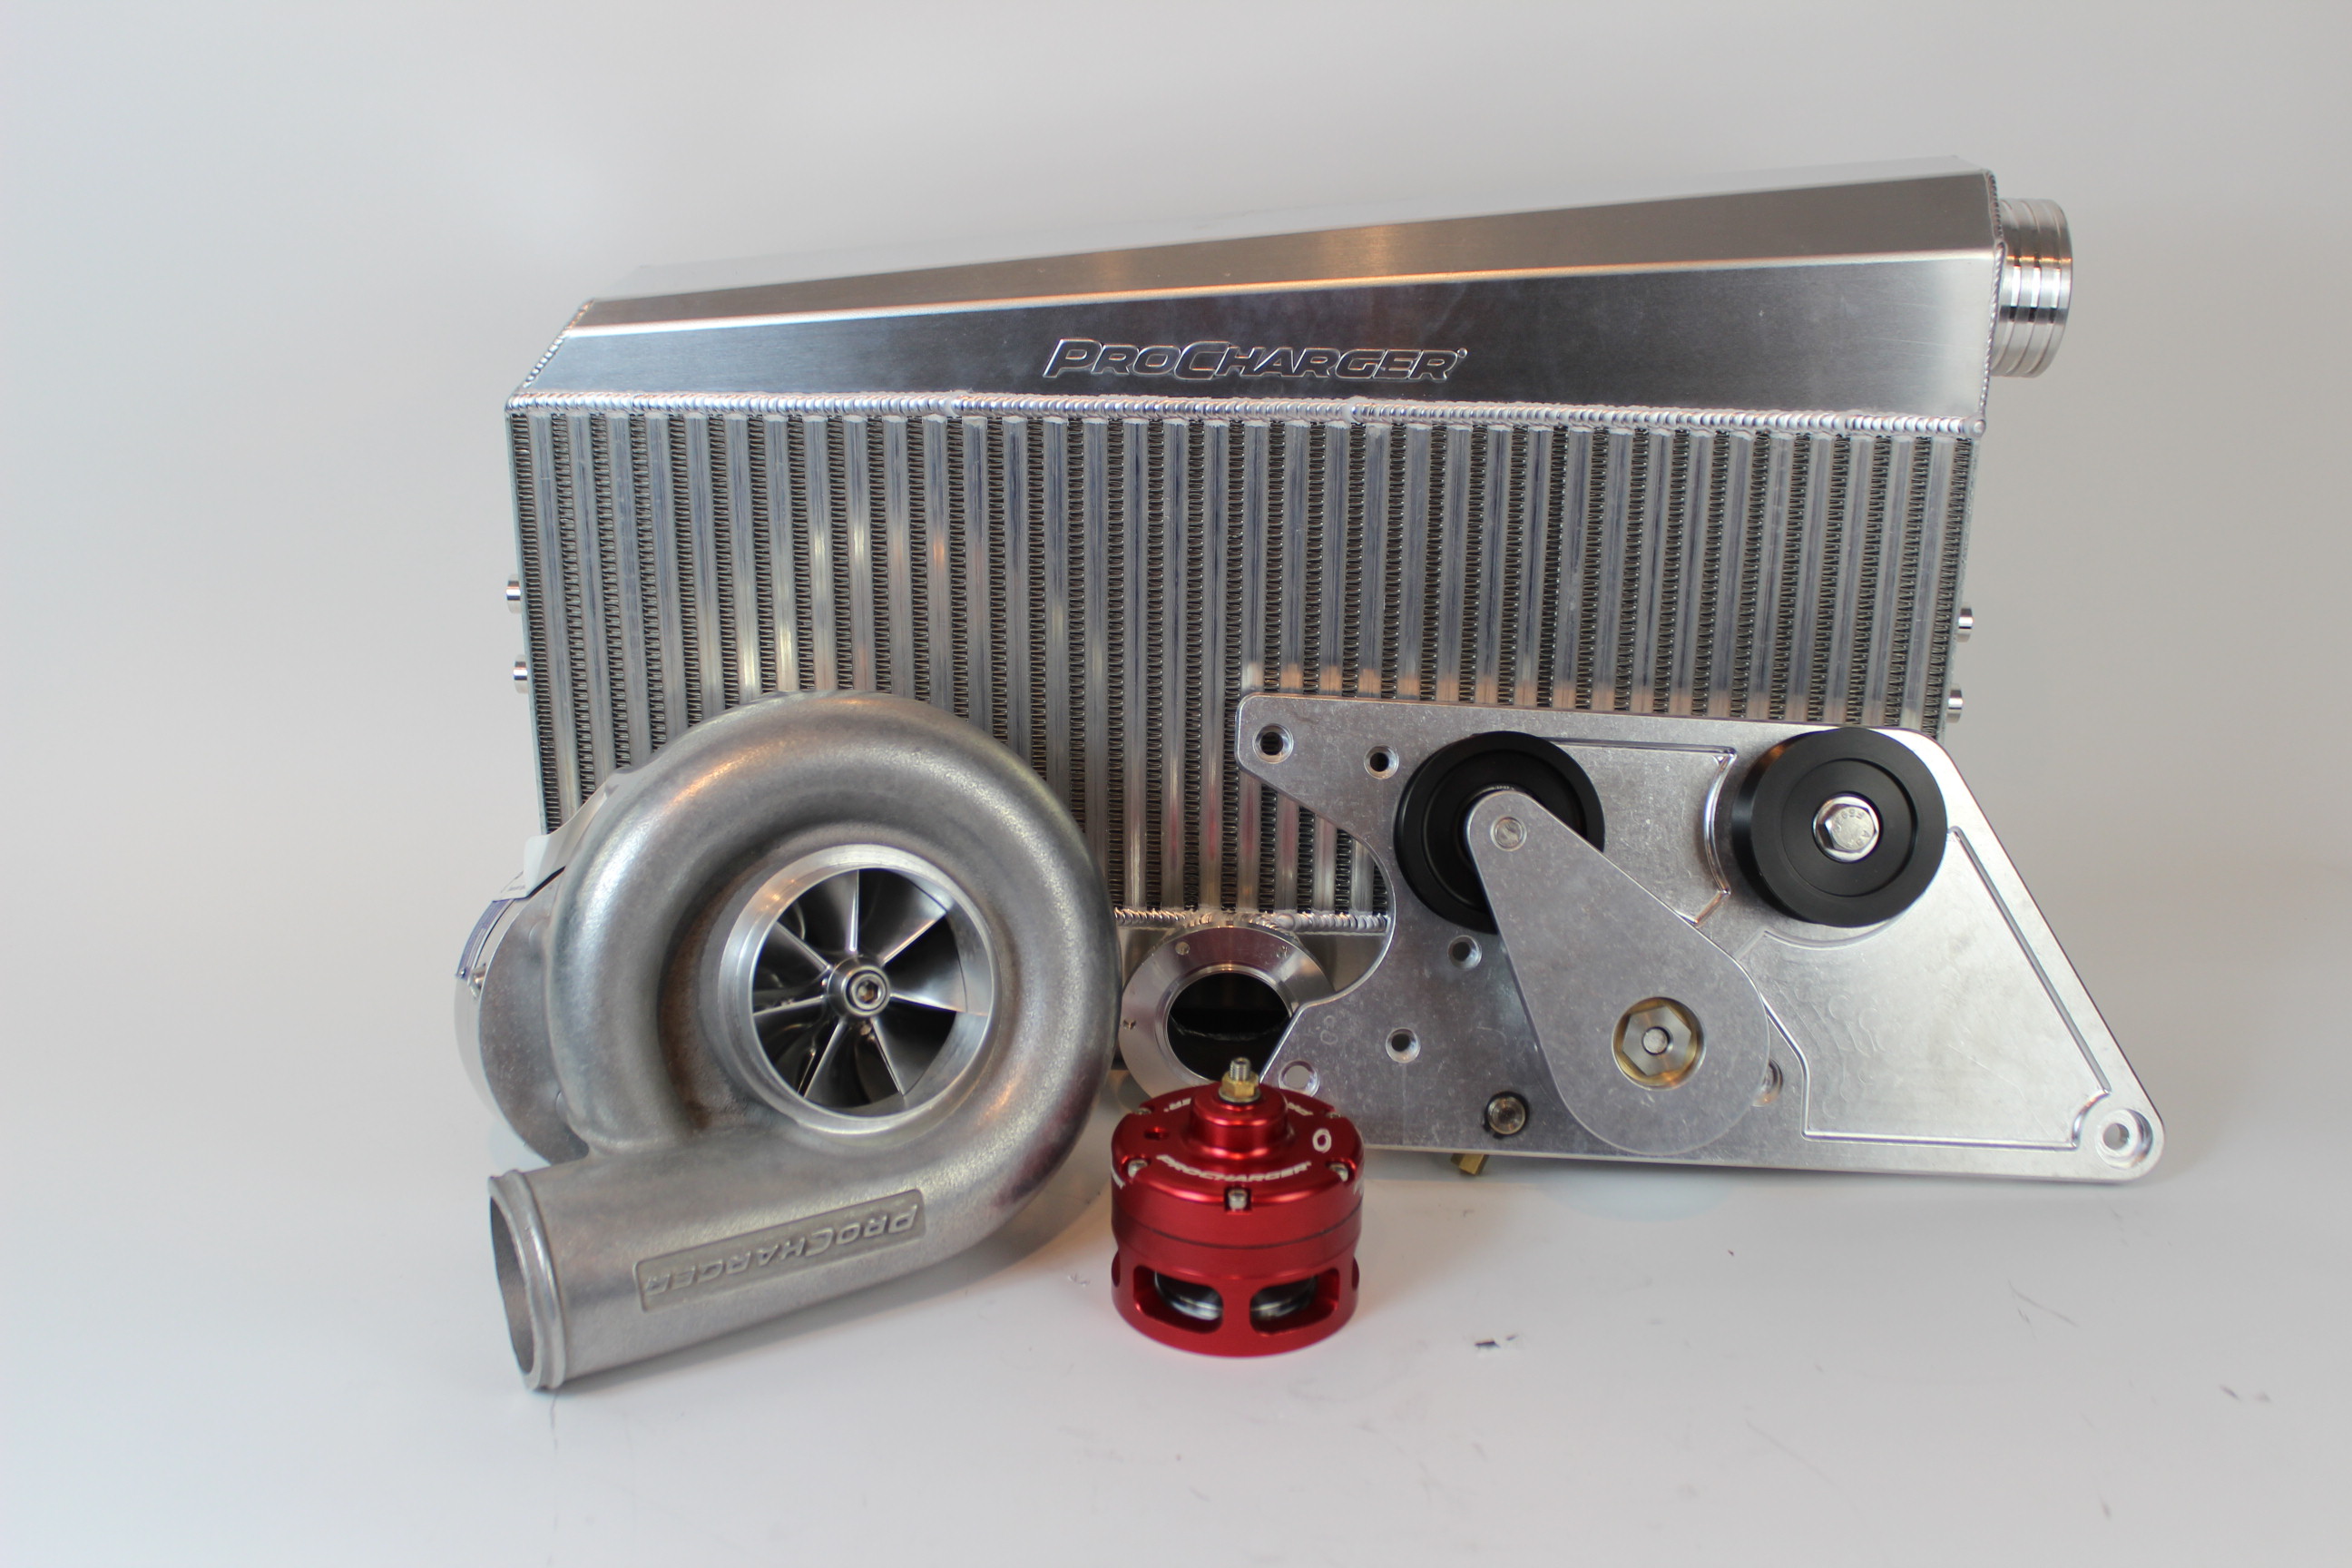
“The biggest difference between the [previous generation and the P-1X/D-1X] blowers is higher efficiencies due to newer impeller design. This means the power ceiling has been moved up as well as less drive power to spin,” stated Walt Sipp of ProCharger. “These are made to bolt on and work as well on a 100% stock car or a highly modified one. The D-1X was made to work on engine combinations from mild to 1,000hp. At the power level of the Camaro, it is right in the sweet spot of where it wants to be.”
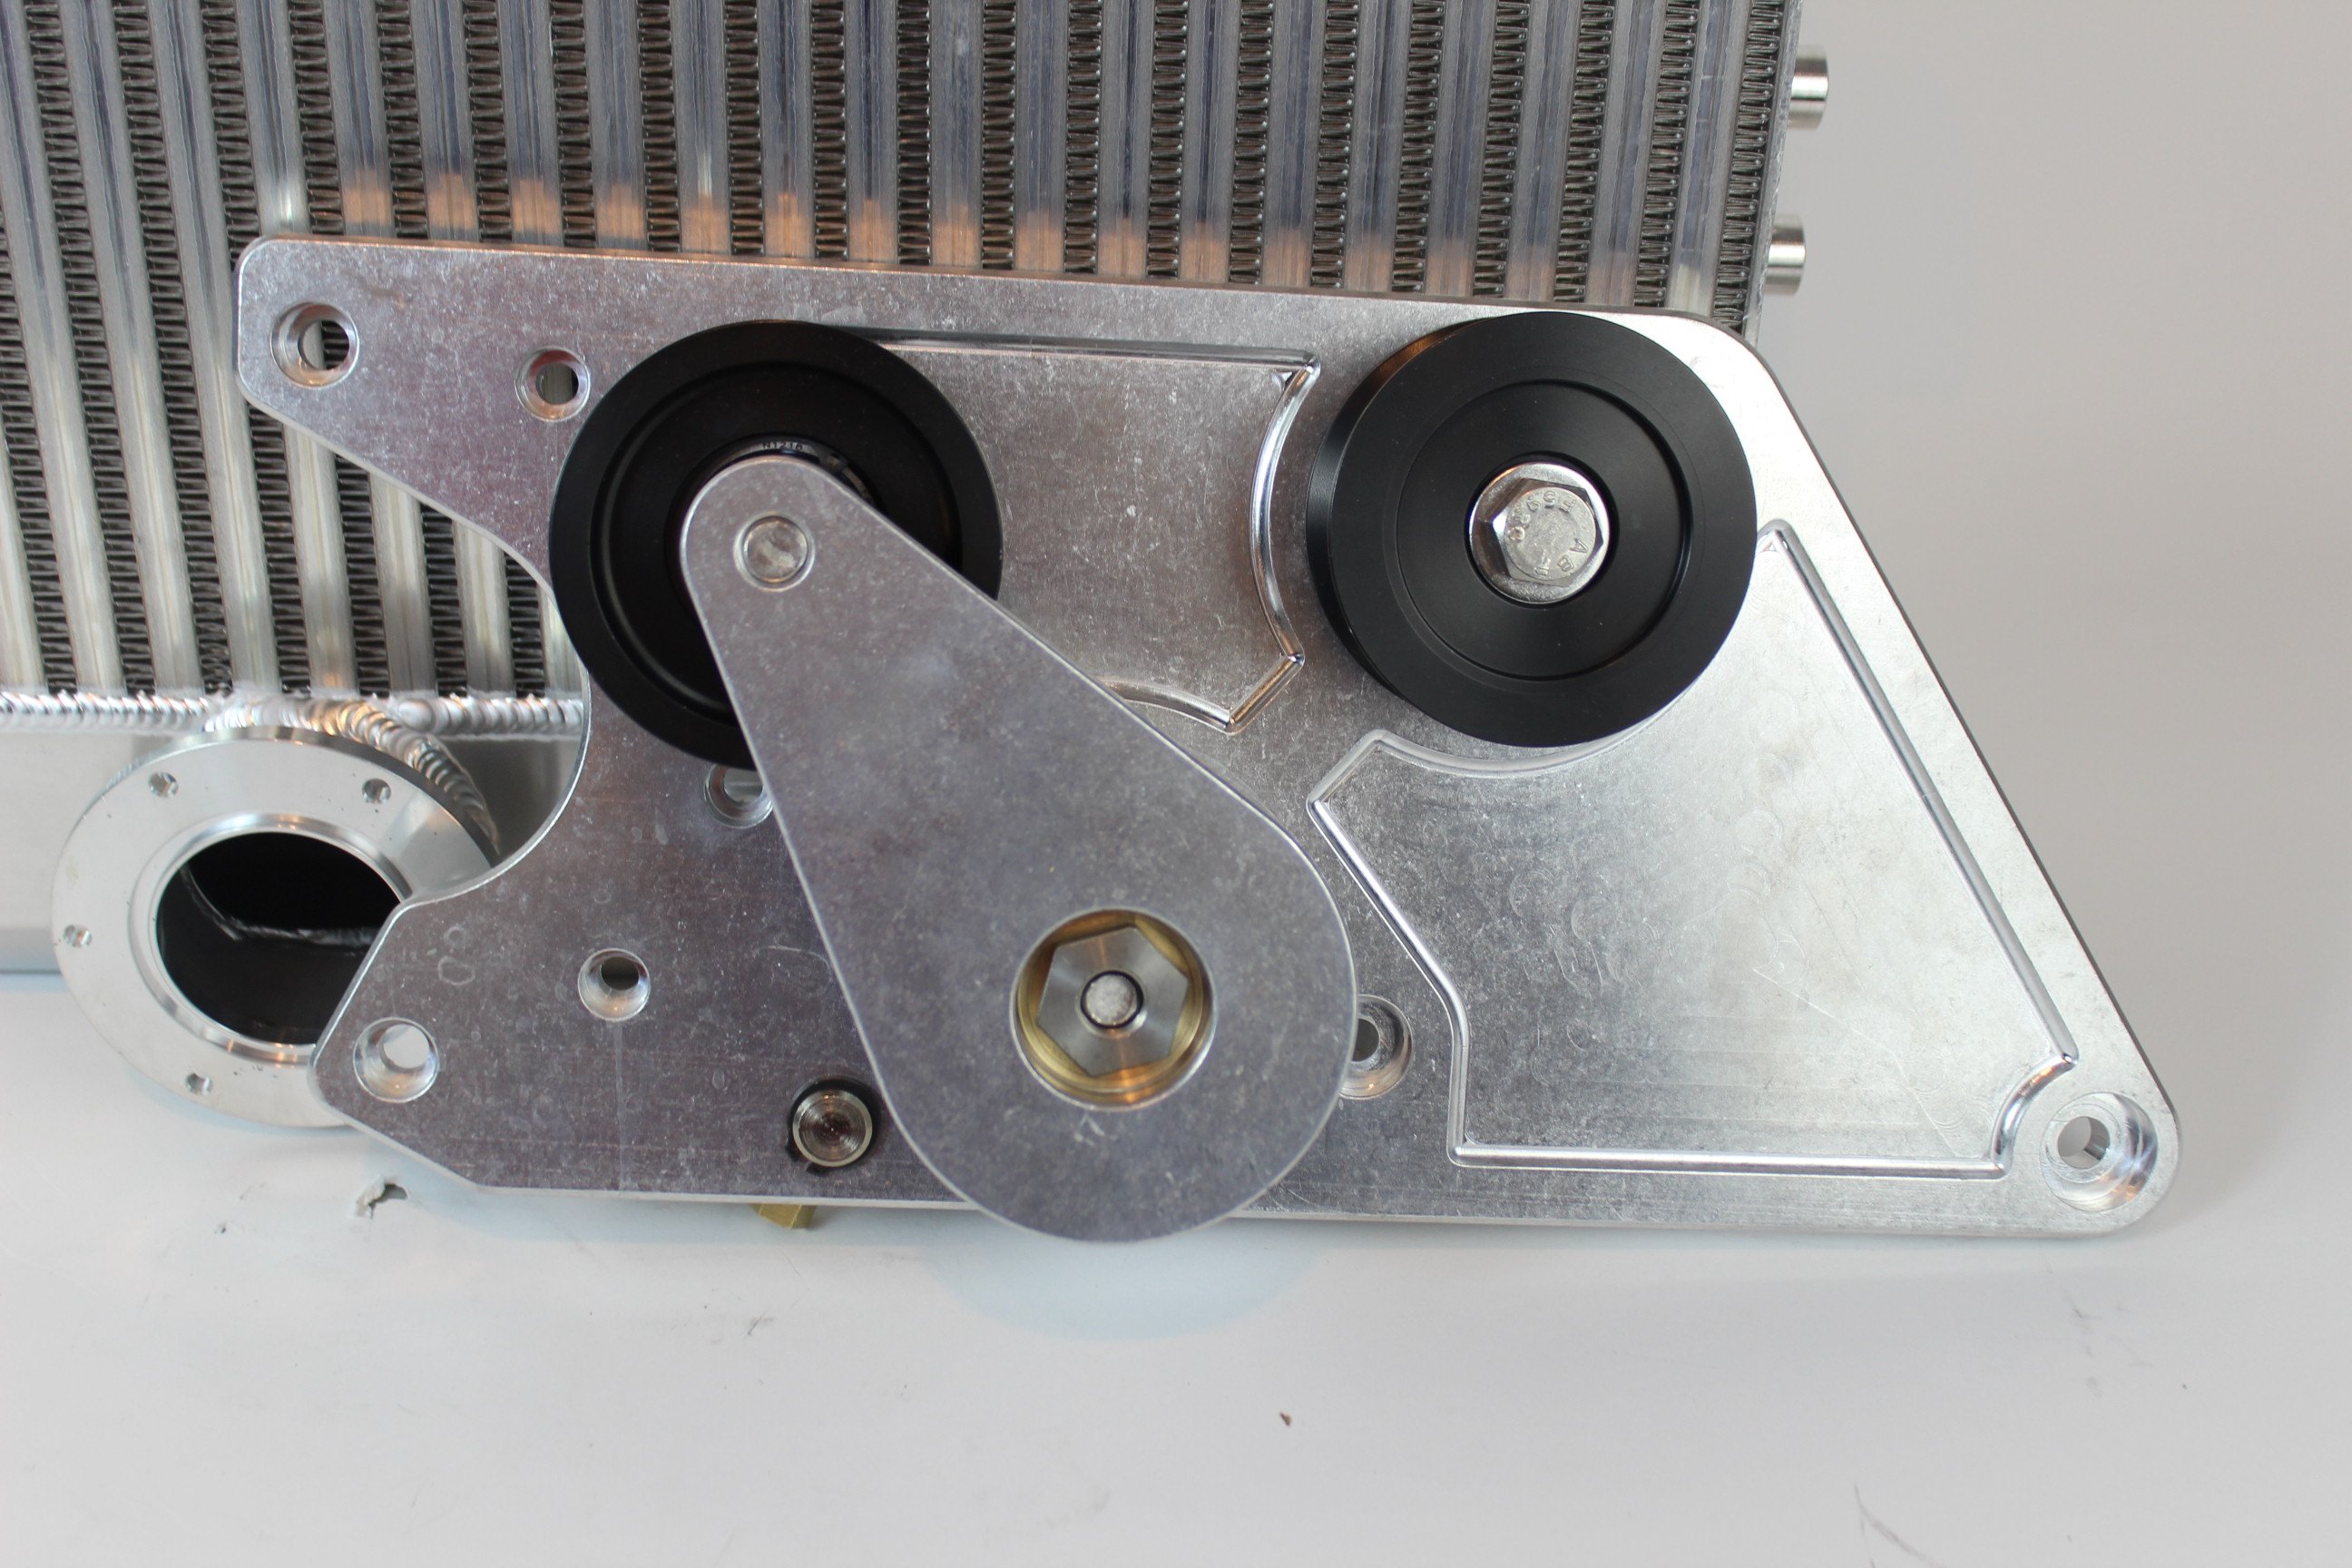
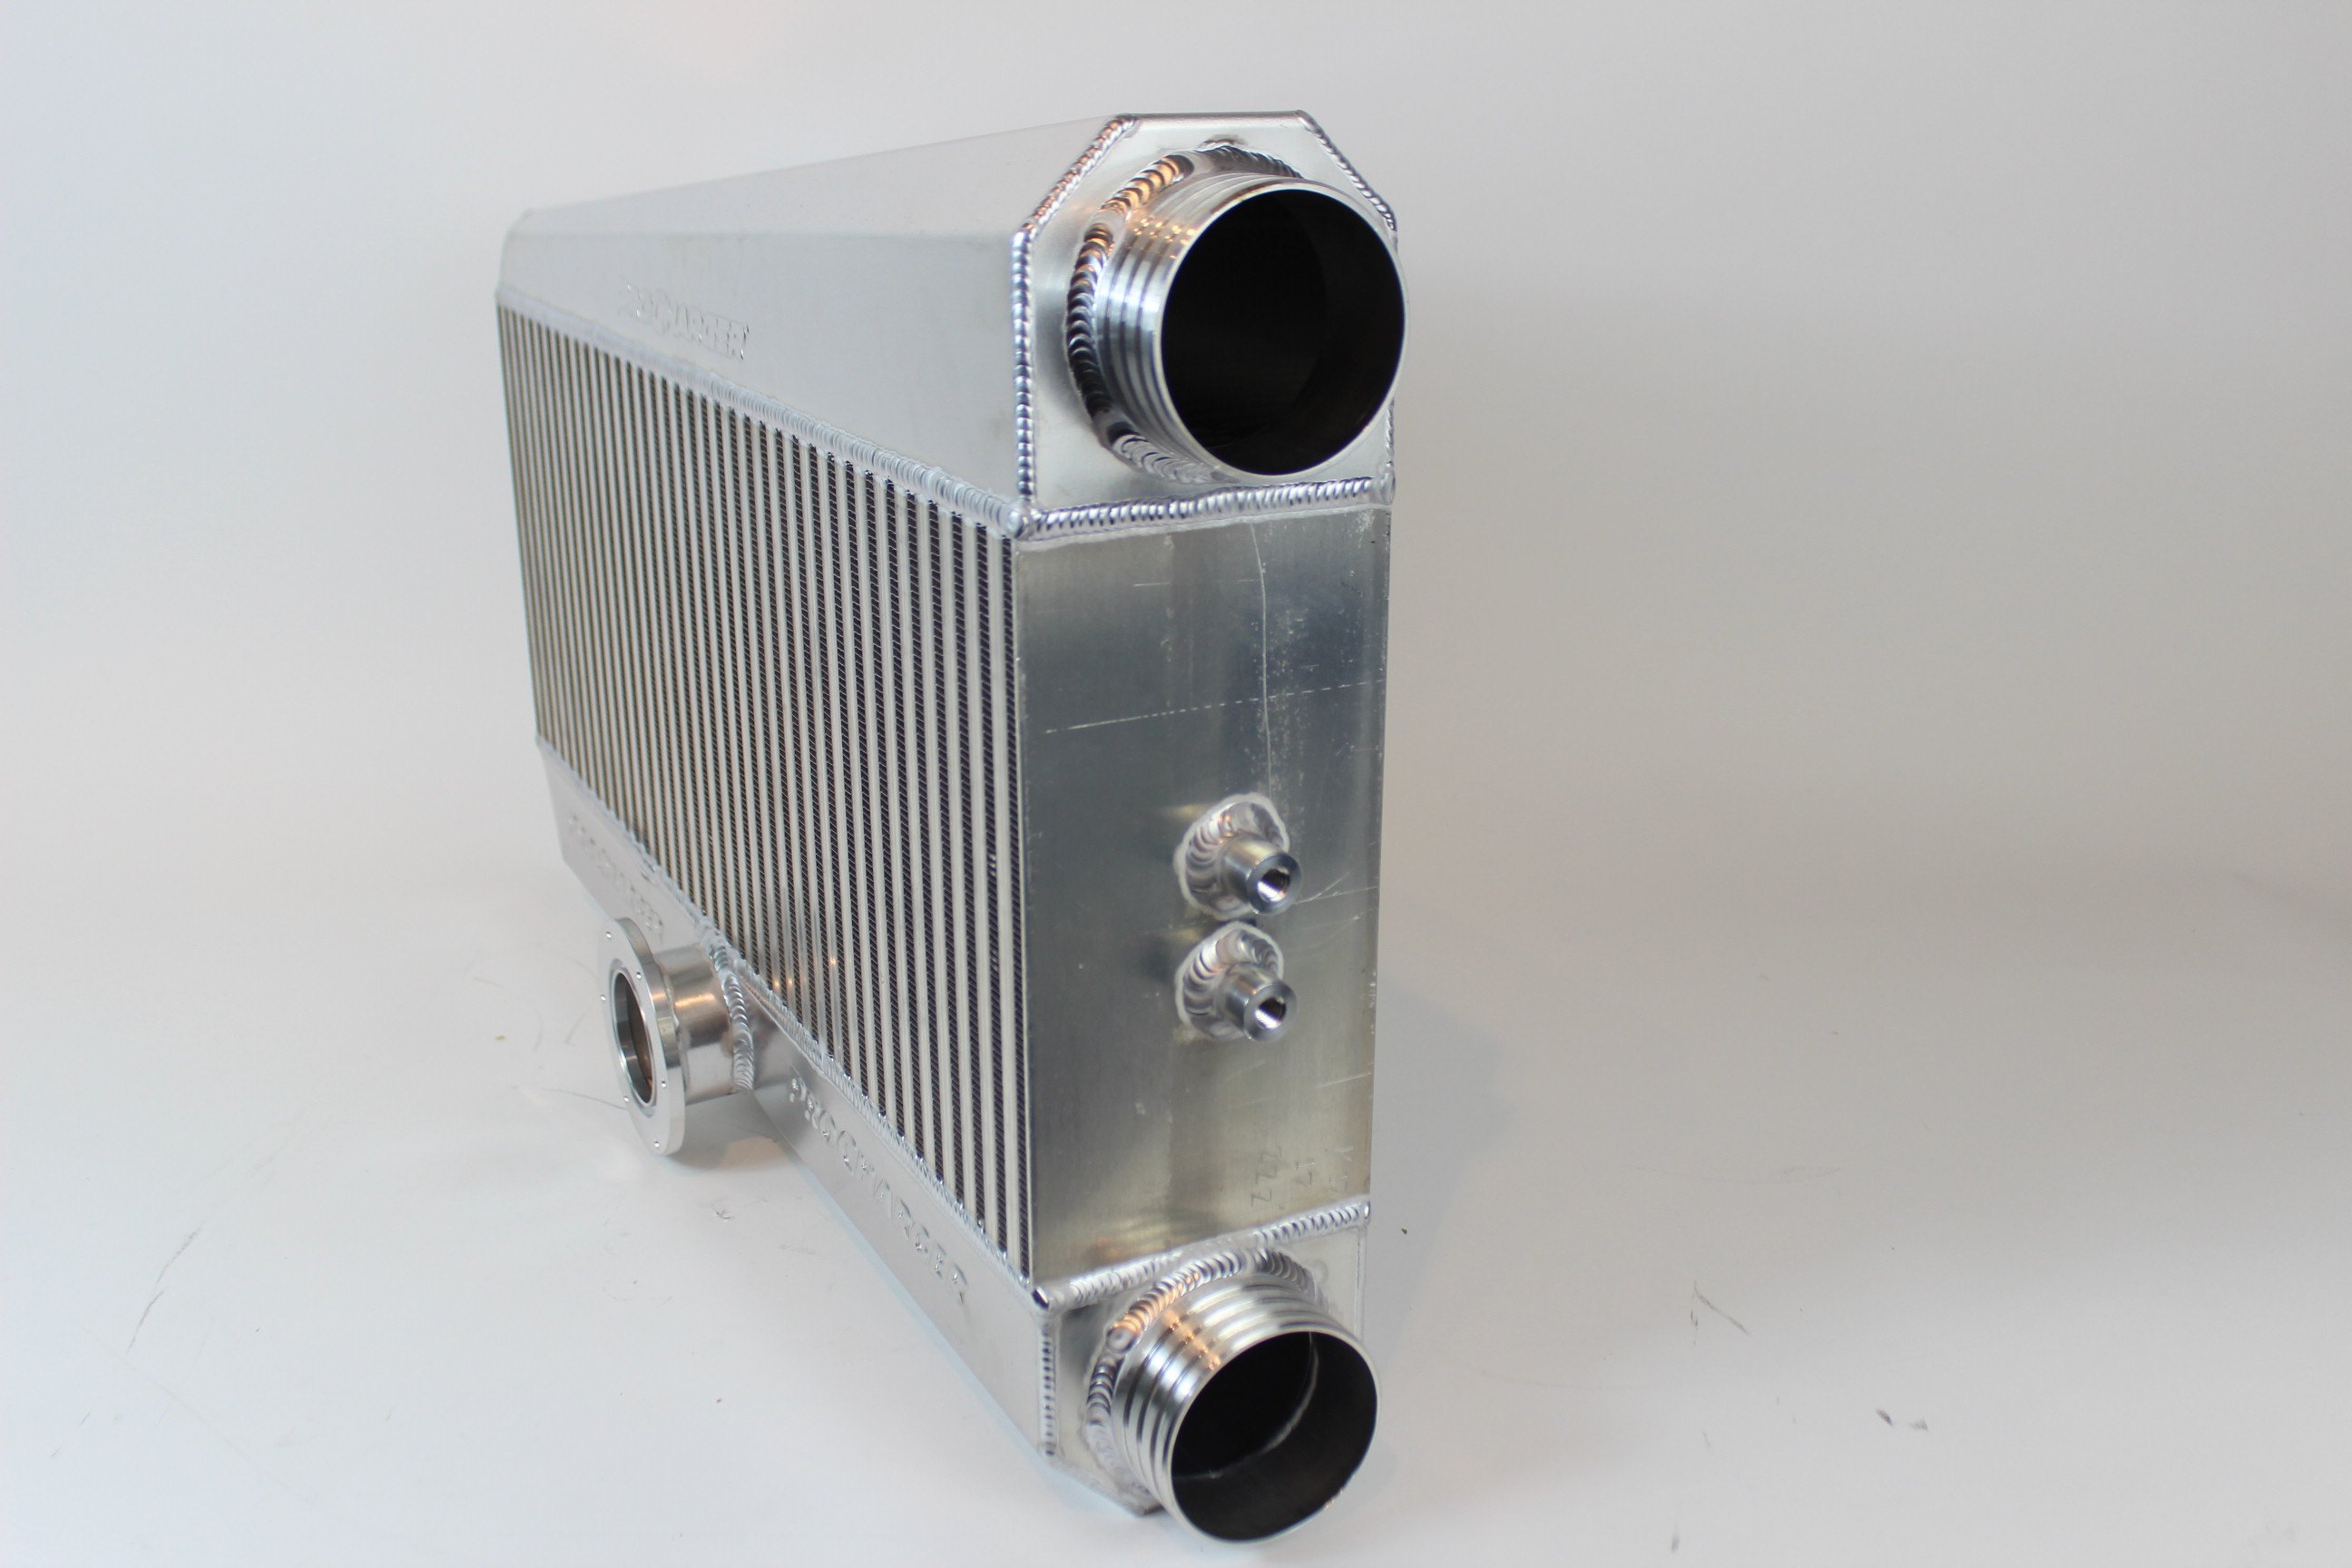
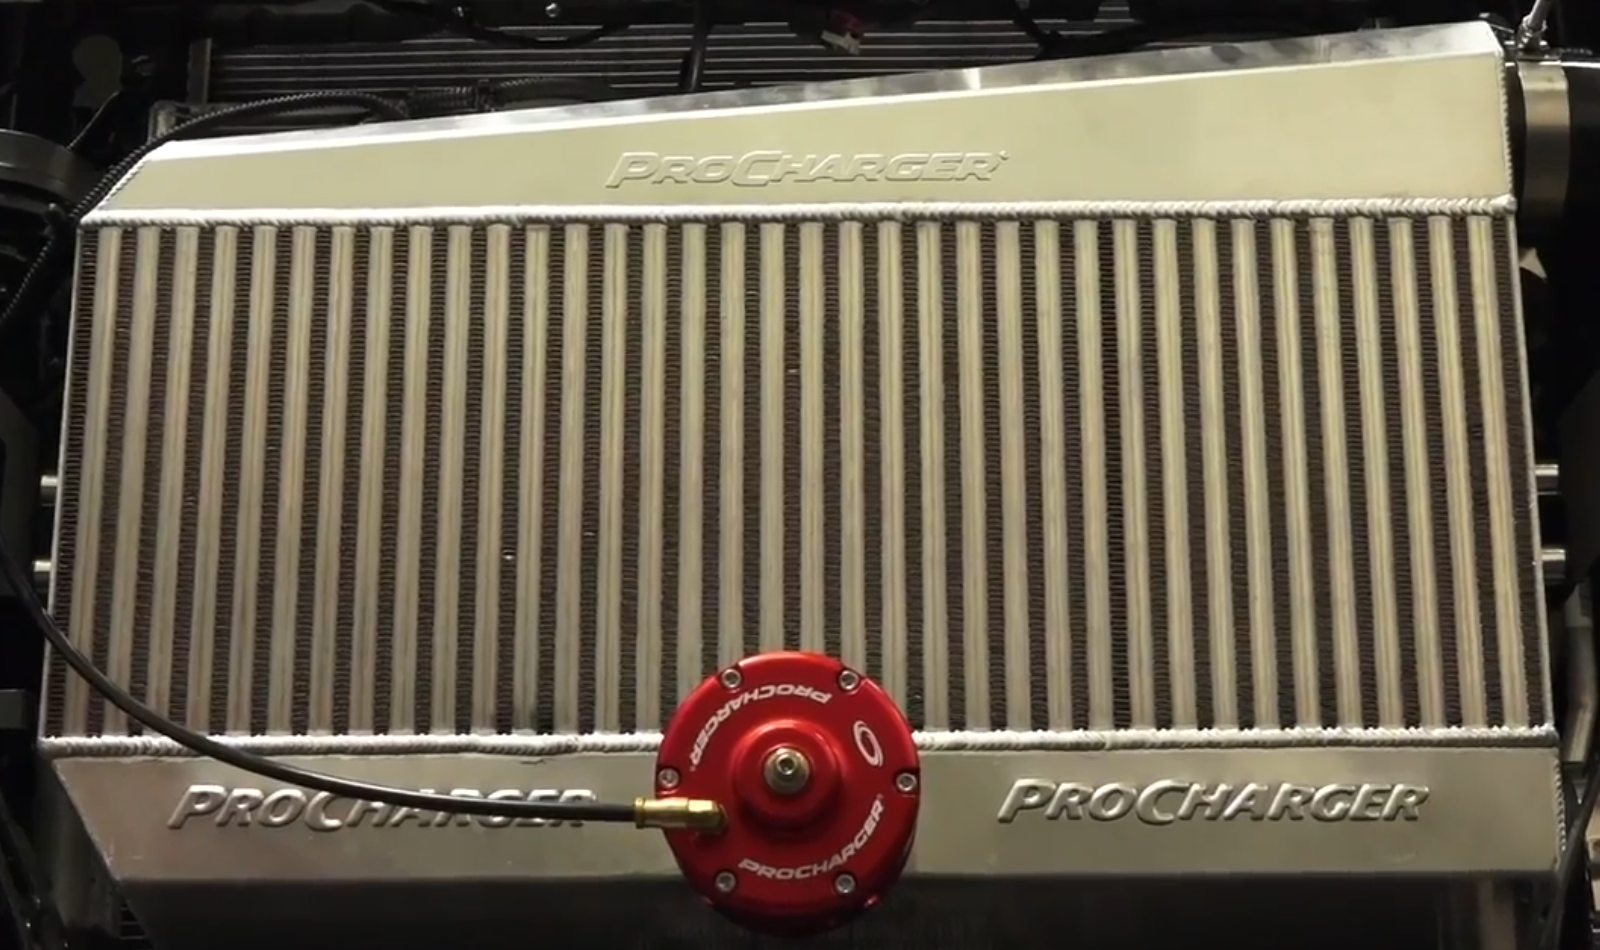
According to ProCharger, the X-series head units are worth up to 15-20 horsepower more than their previous-generation counterparts and flow 75-100 cfm more – meaning the P-1X can support up to 875 horsepower while the D-1X can support up to 1,000. This bump in capabilities is due to not only improvements to the gear set driving the supercharger’s impeller, but also improvements to the impeller’s aerodynamics, leading to efficiency increases across the board. Since we were looking to clear the 800 rwhp mark, the D-1X was the perfect selection for our power production goals. We combined our D-1X with ProCharger’s tuner kit and upgraded our intercooler to a Stage II piece that will also be capable of supporting 1,000+ horsepower, thanks to its substantial 3.5-inch thick (24 x 15.25), bar and plate style core. This includes the upgrade to the ever popular “Big Red Race Valve.”

With up to 15 psi on the horizon, the D-1X combined with the upgraded intercooler, our forged short-block, and our newly improved fuel system had us well on our way to producing Mustang-crushing power. However, now that we will have pavement-pounding power on tap – or rather, much much more – we need drivetrain components that can handle the kind of power we will be producing. That’s why we turned to our drivetrain next.

Driven
With the powerplant taken care of – and by “taken care of” we mean well on its way to making 800+ horsepower – we turned our attention to the drivetrain of our SS. While the sixth-gen Camaro packs a capable drivetrain from the factory, the components were just not designed with the kind of grunt we were looking to throw at them in mind. Sure we could have gone with ZL1 parts, but obviously, those are rated to match the 650 hp/650 lb-ft of torque ratings the LT4 is making, and that’s at the crank.
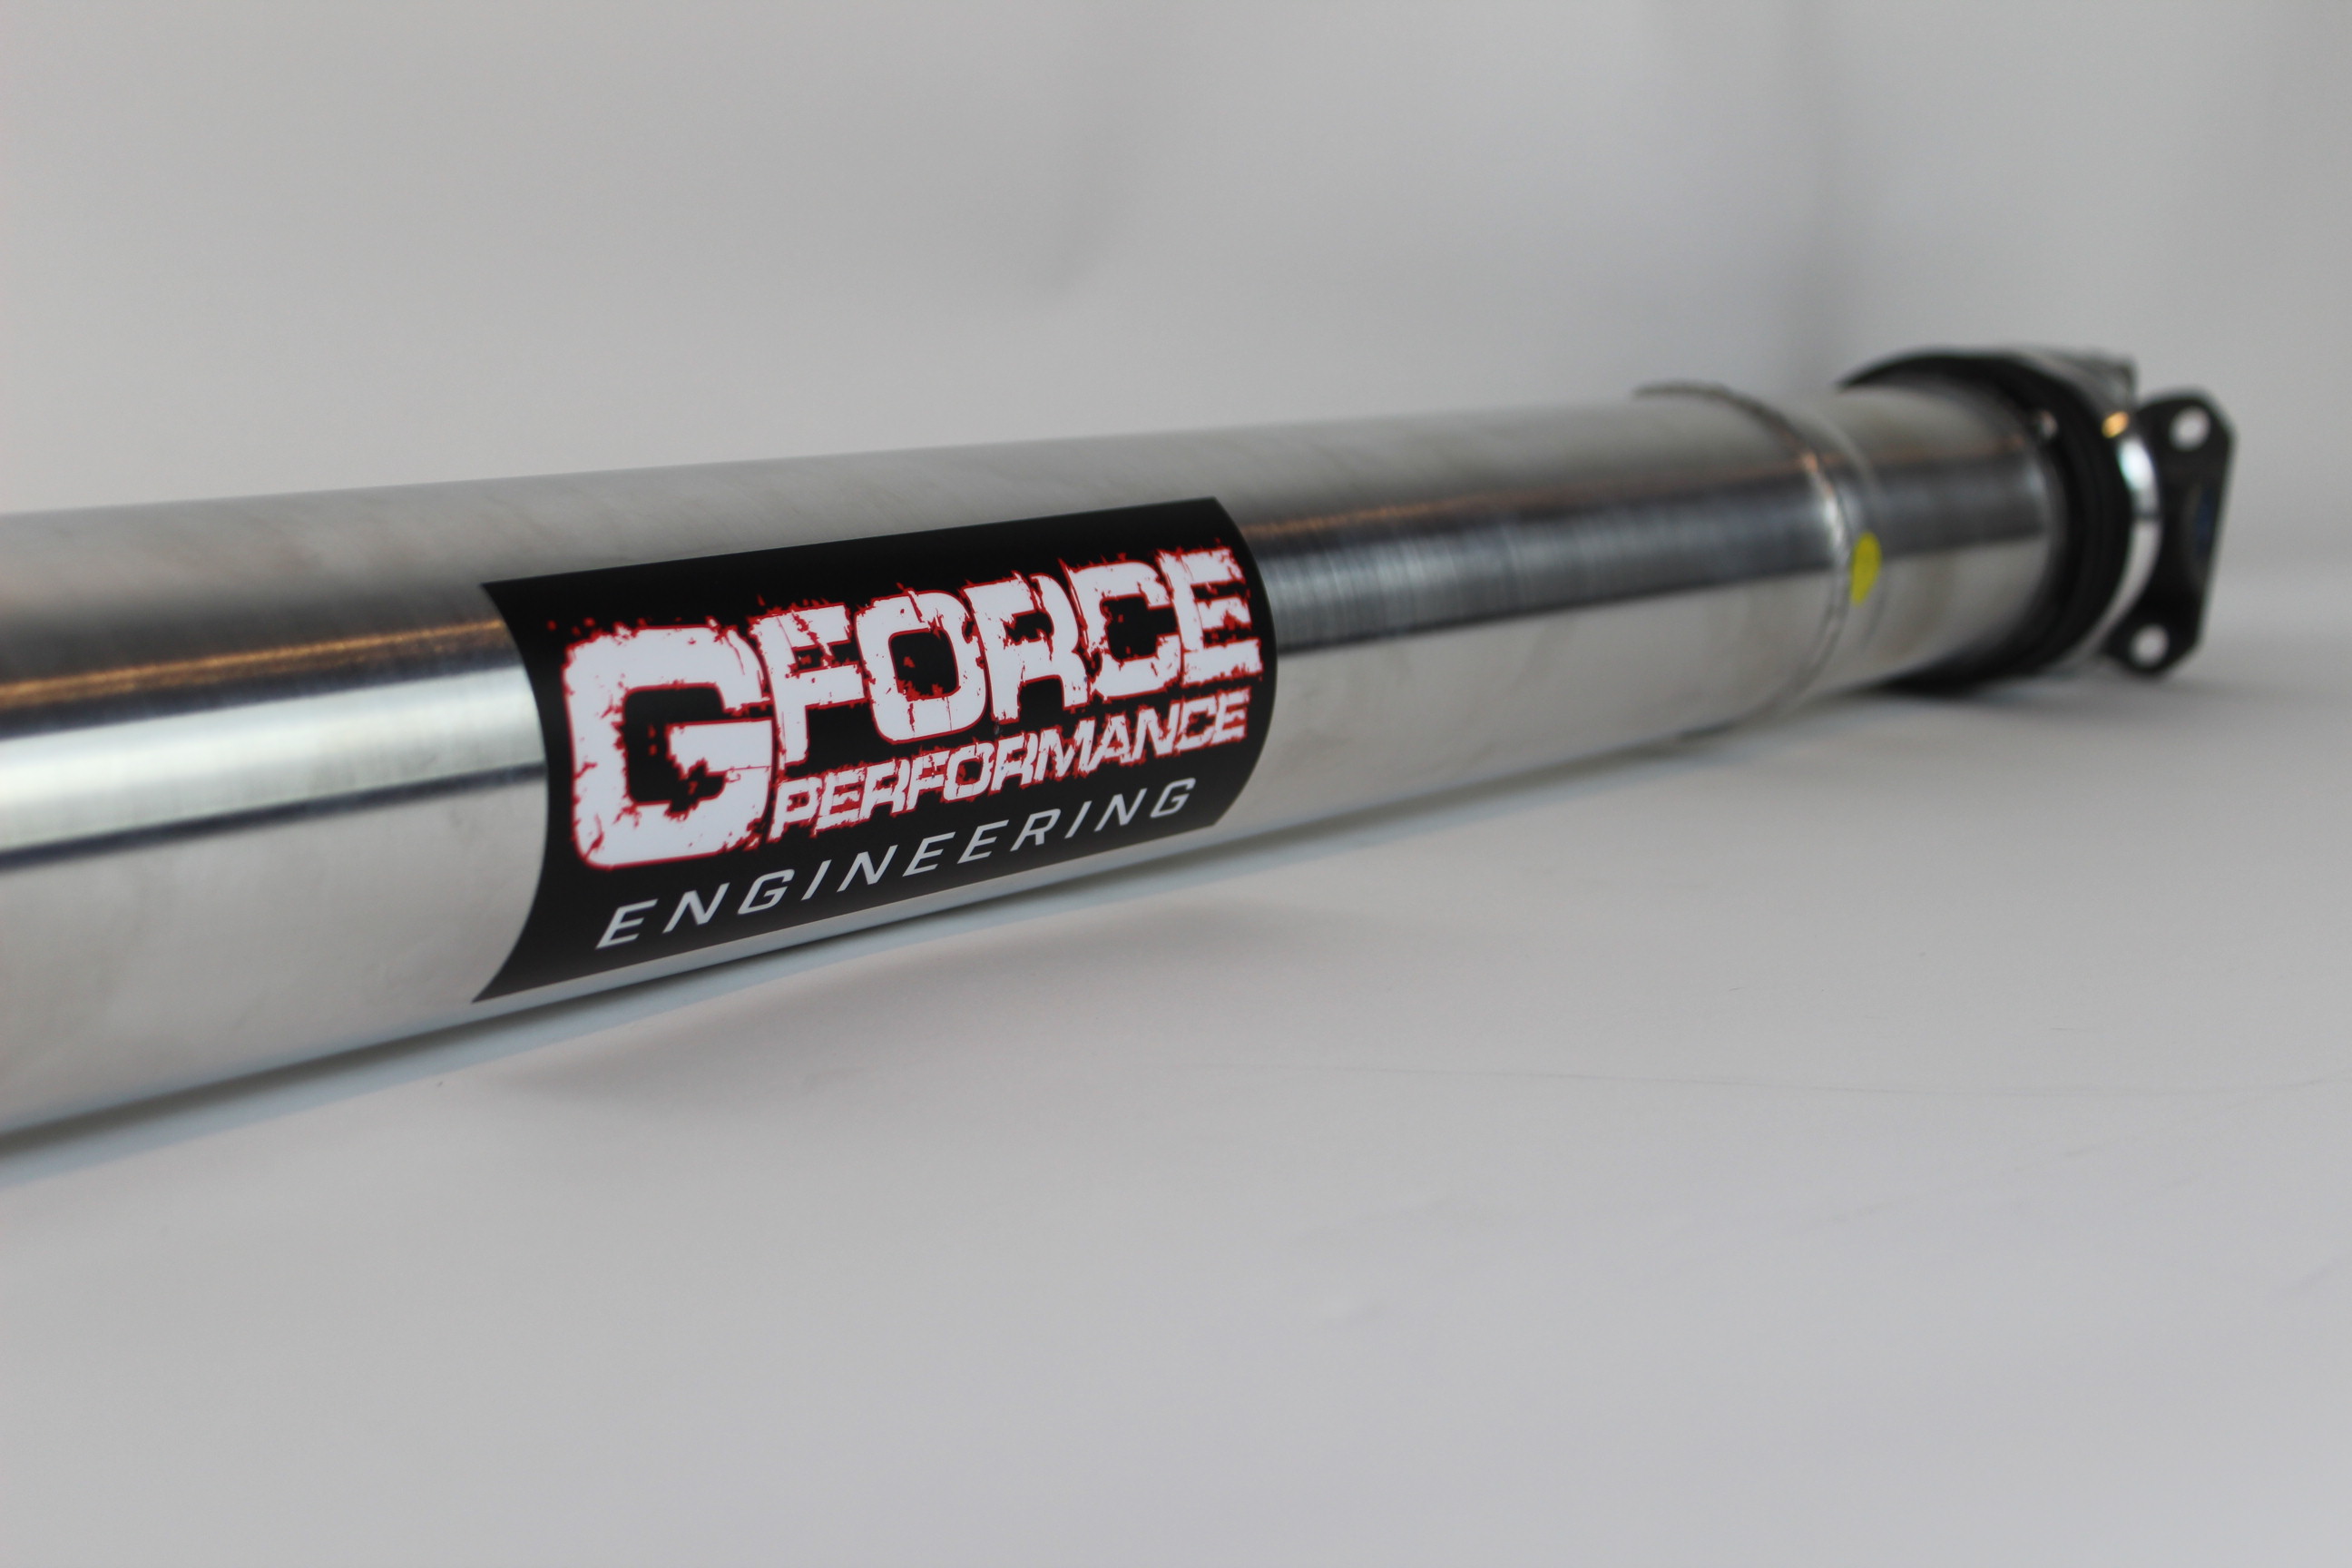
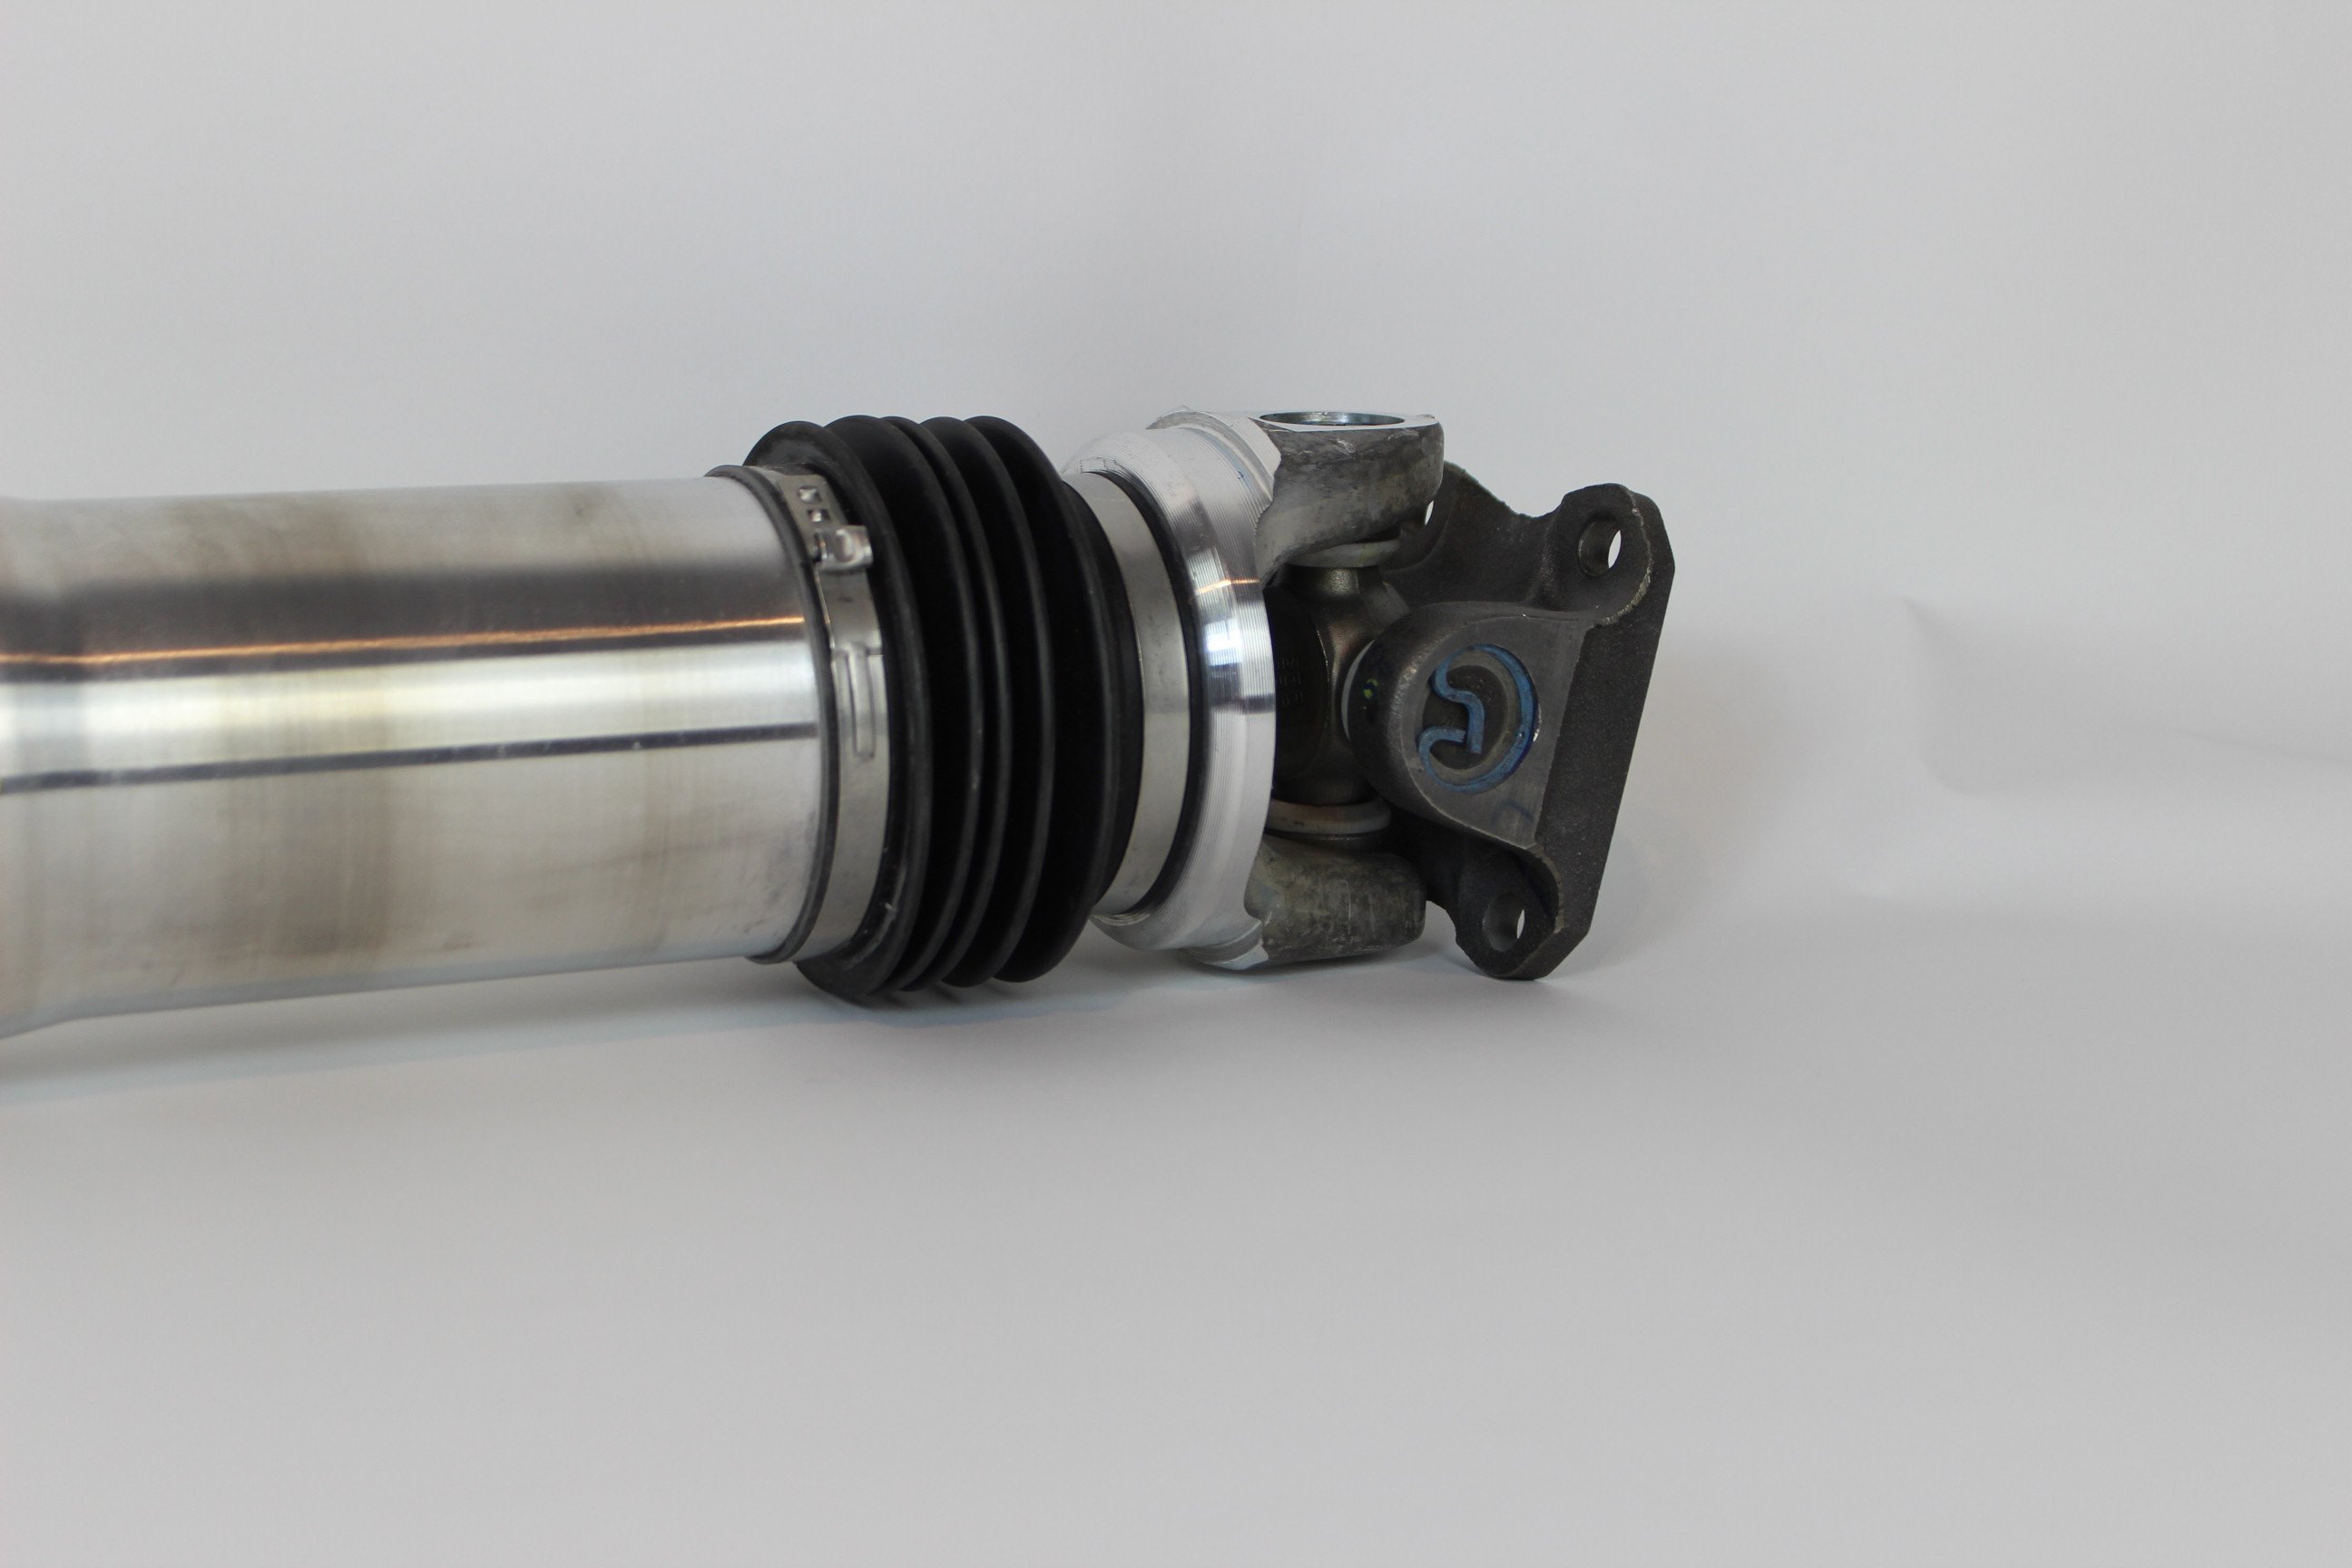
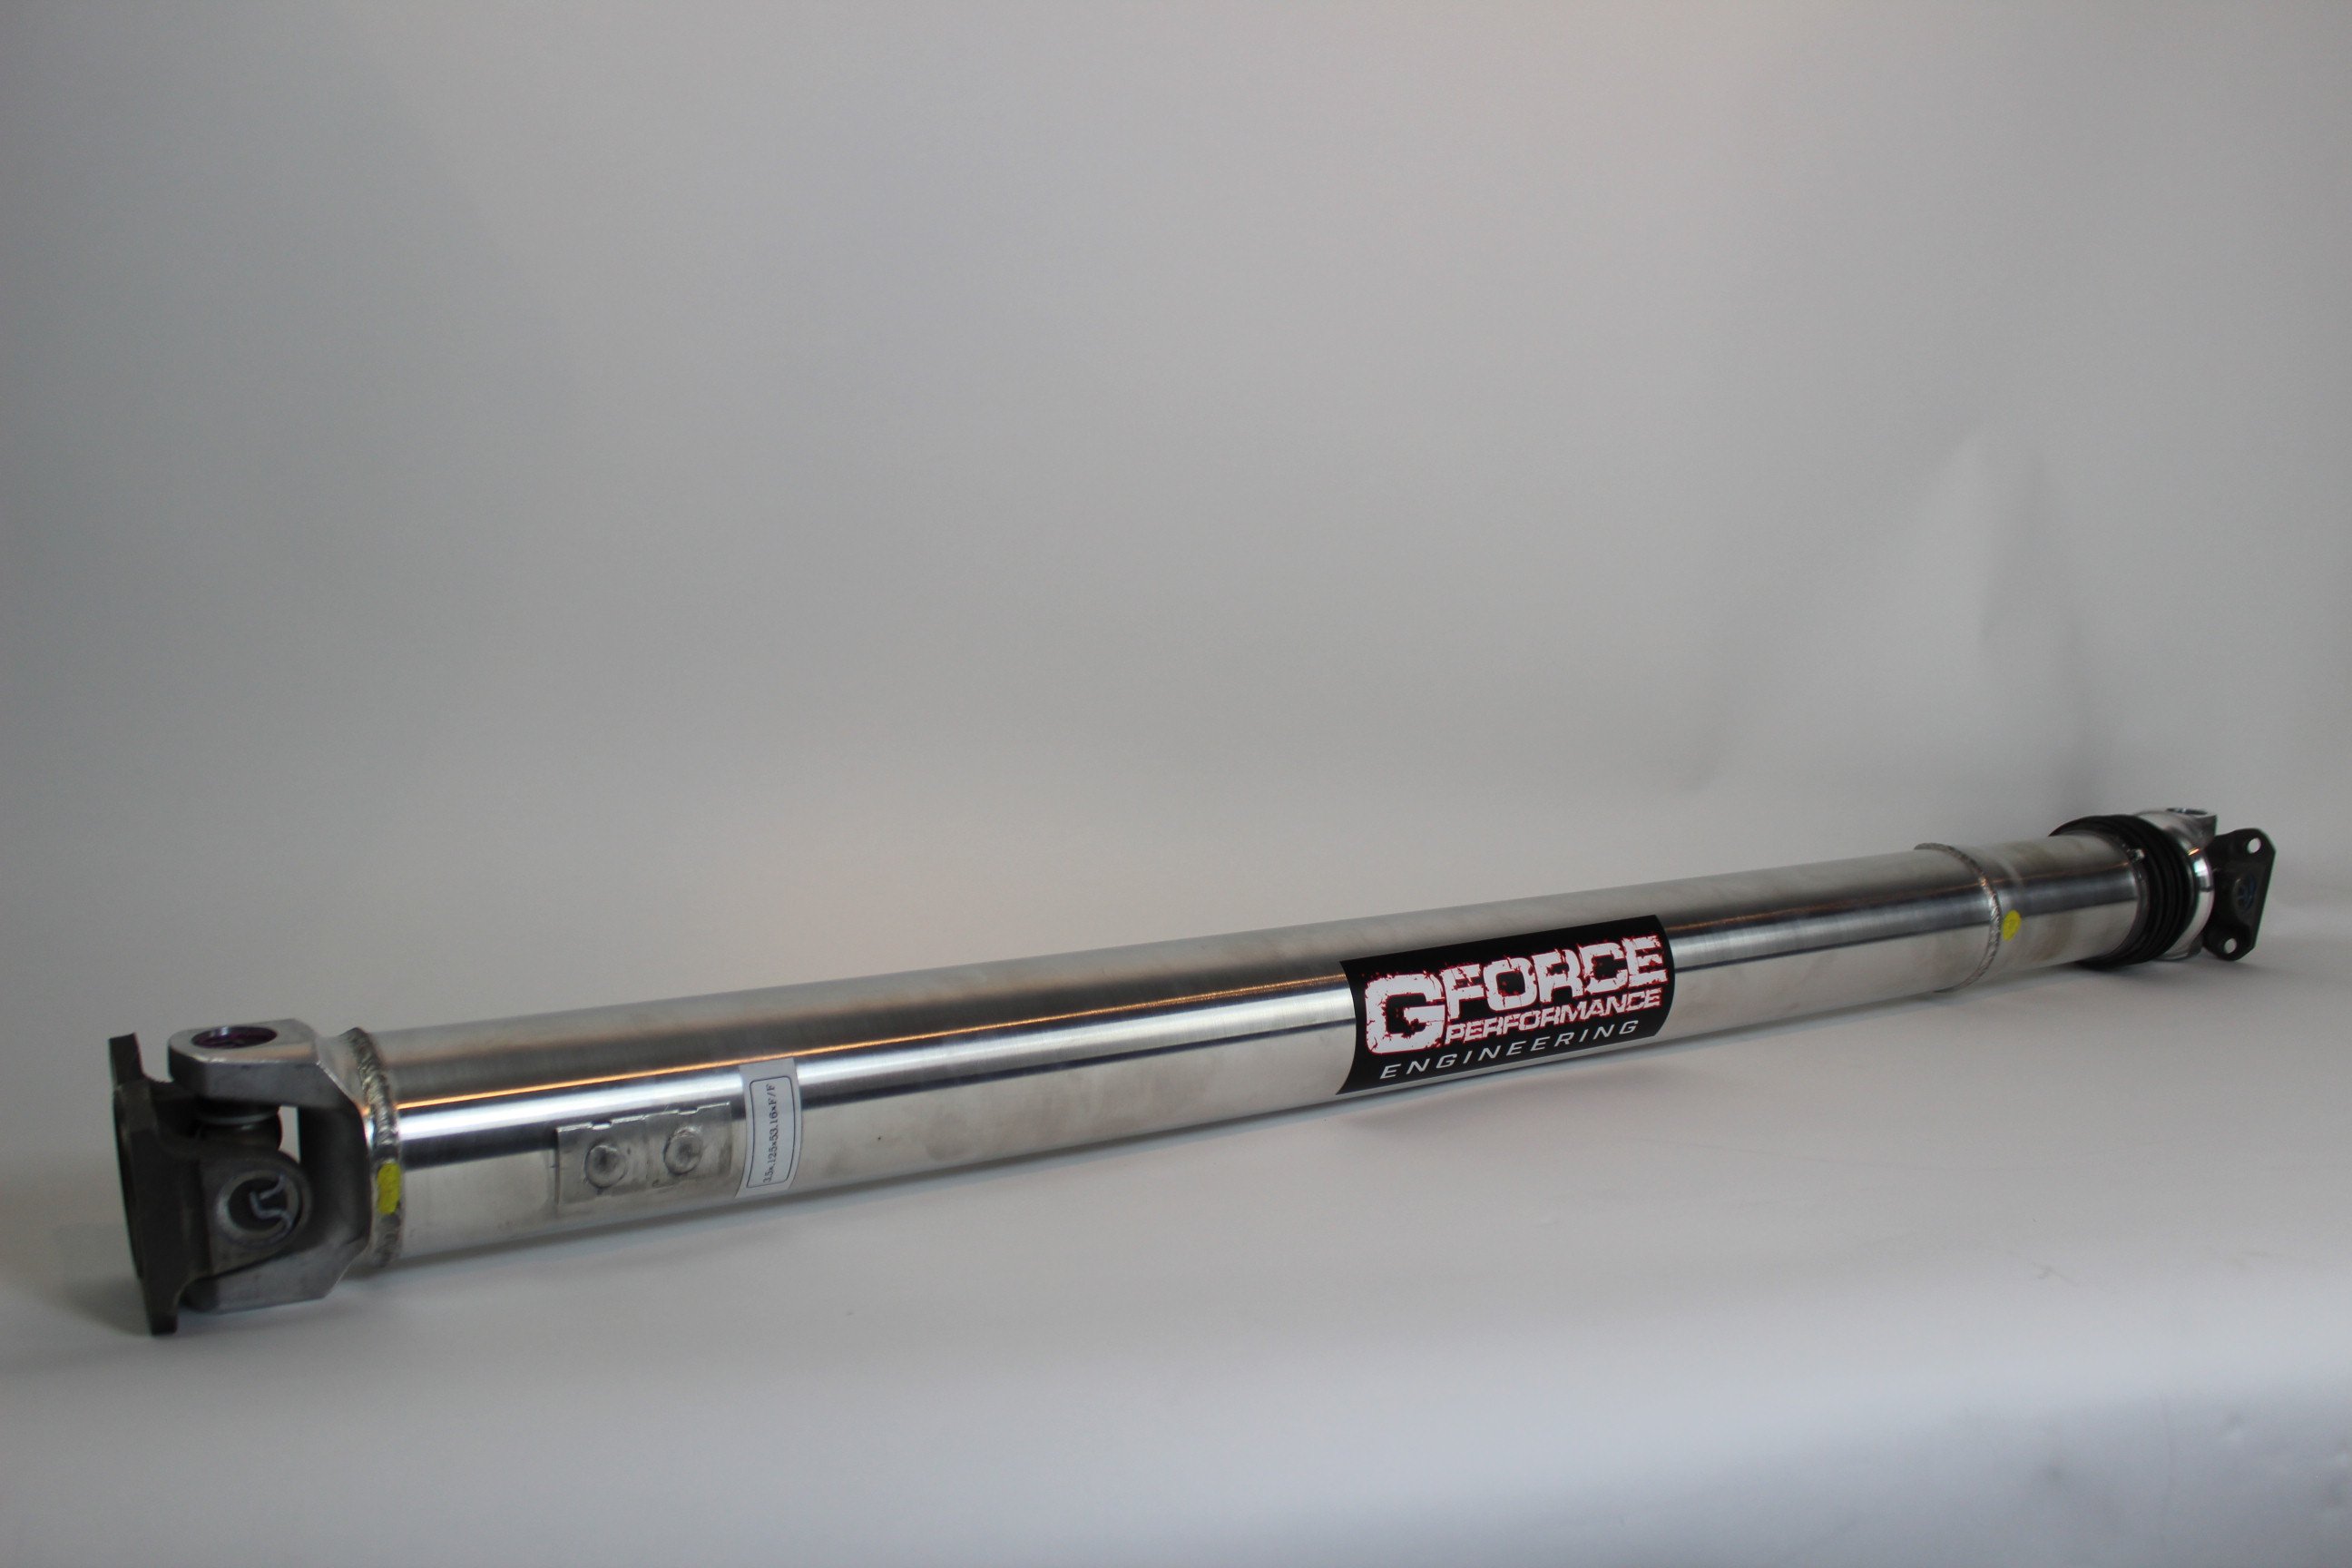
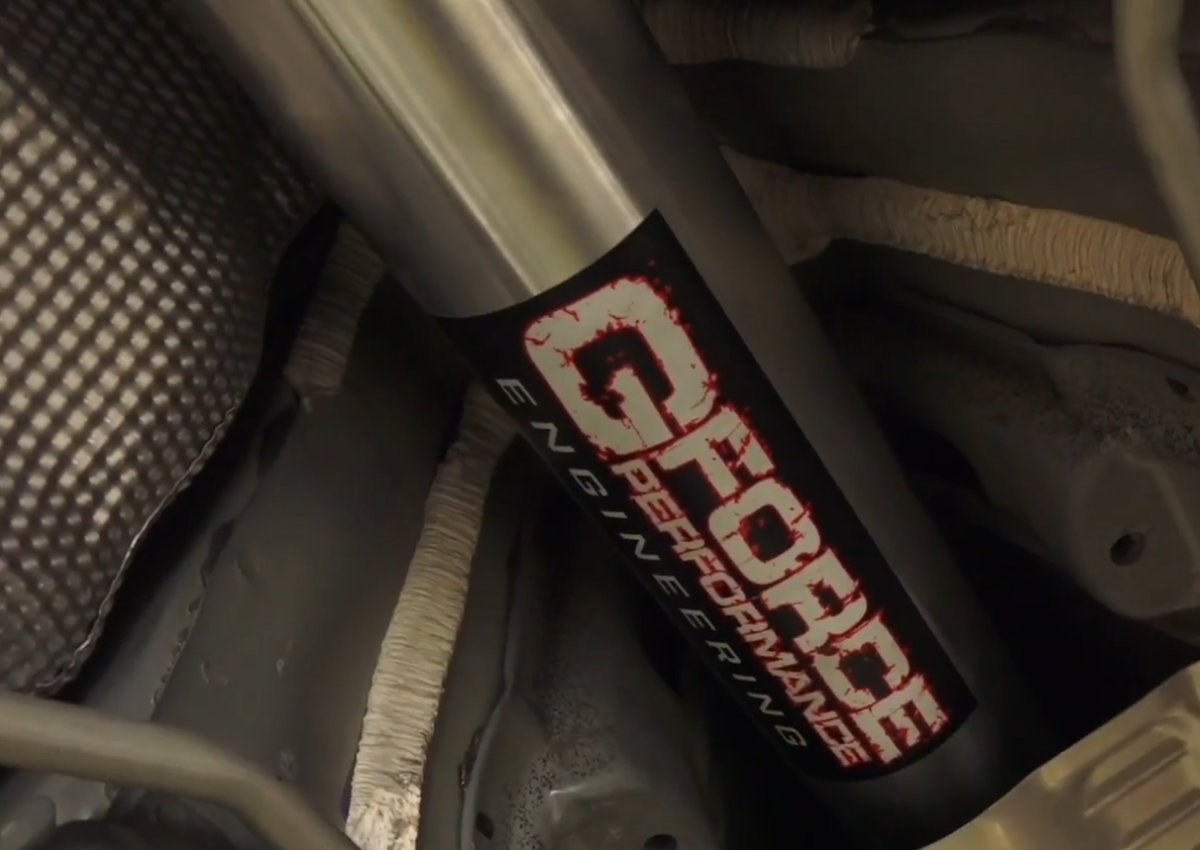
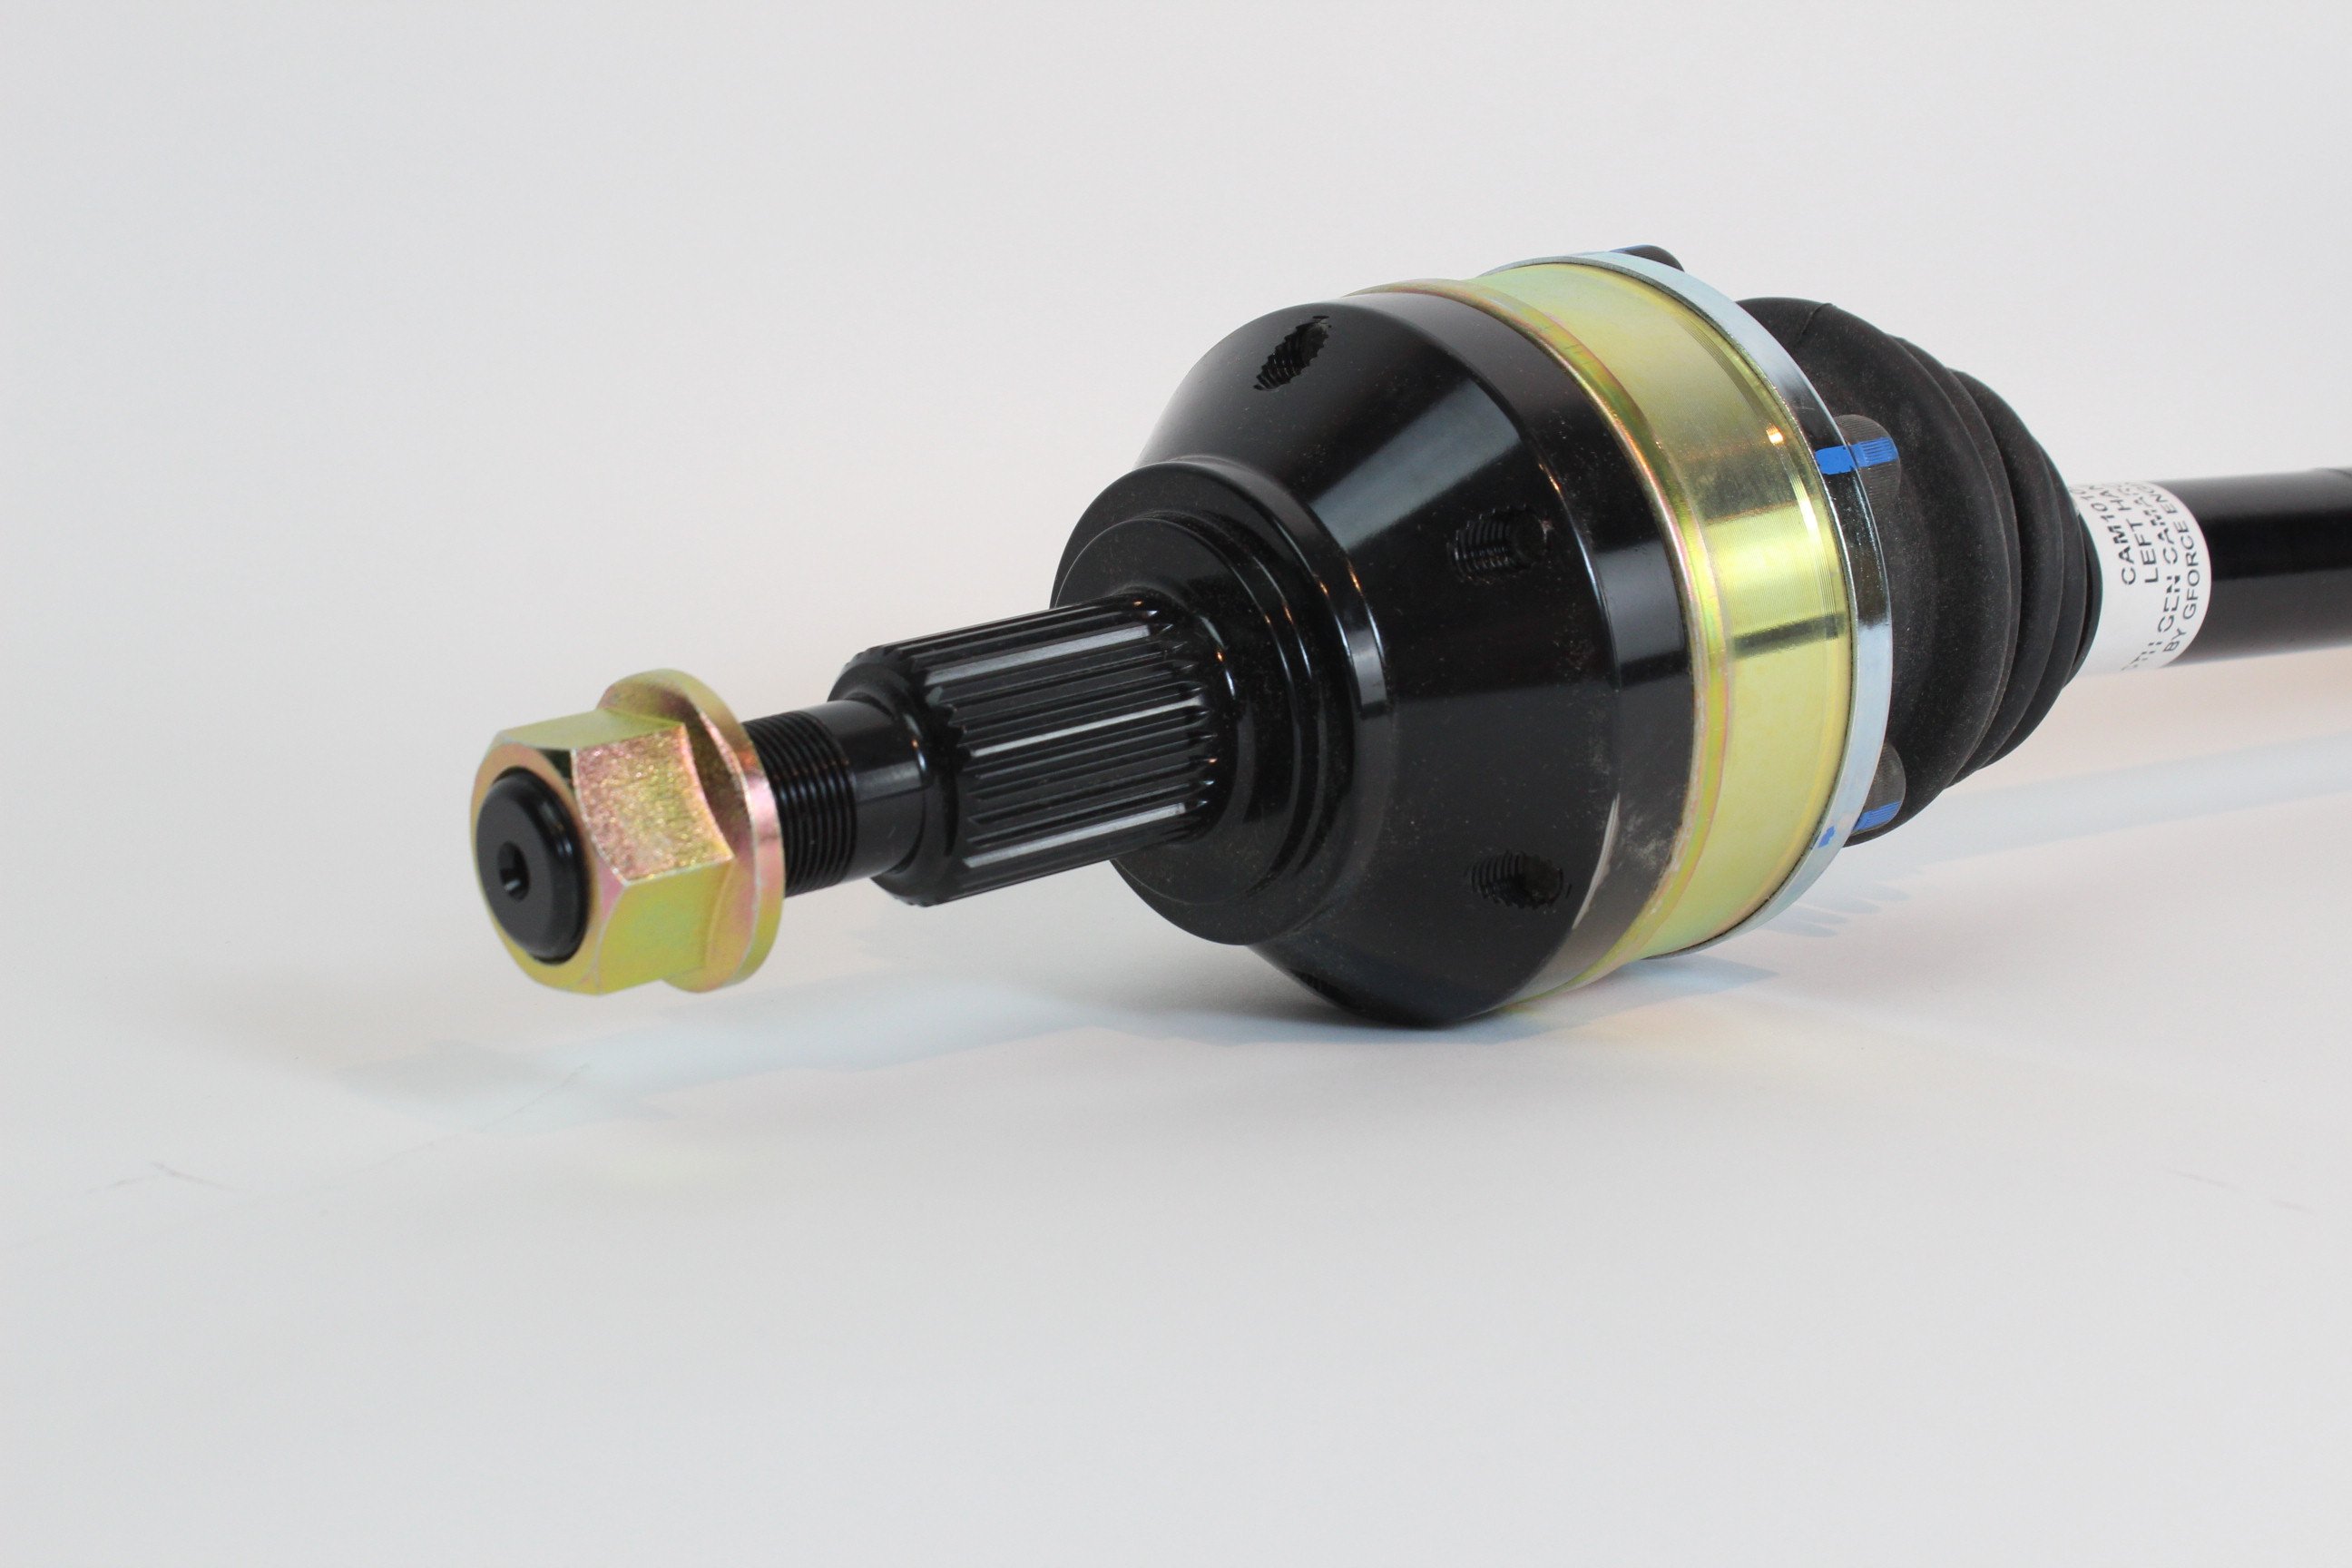
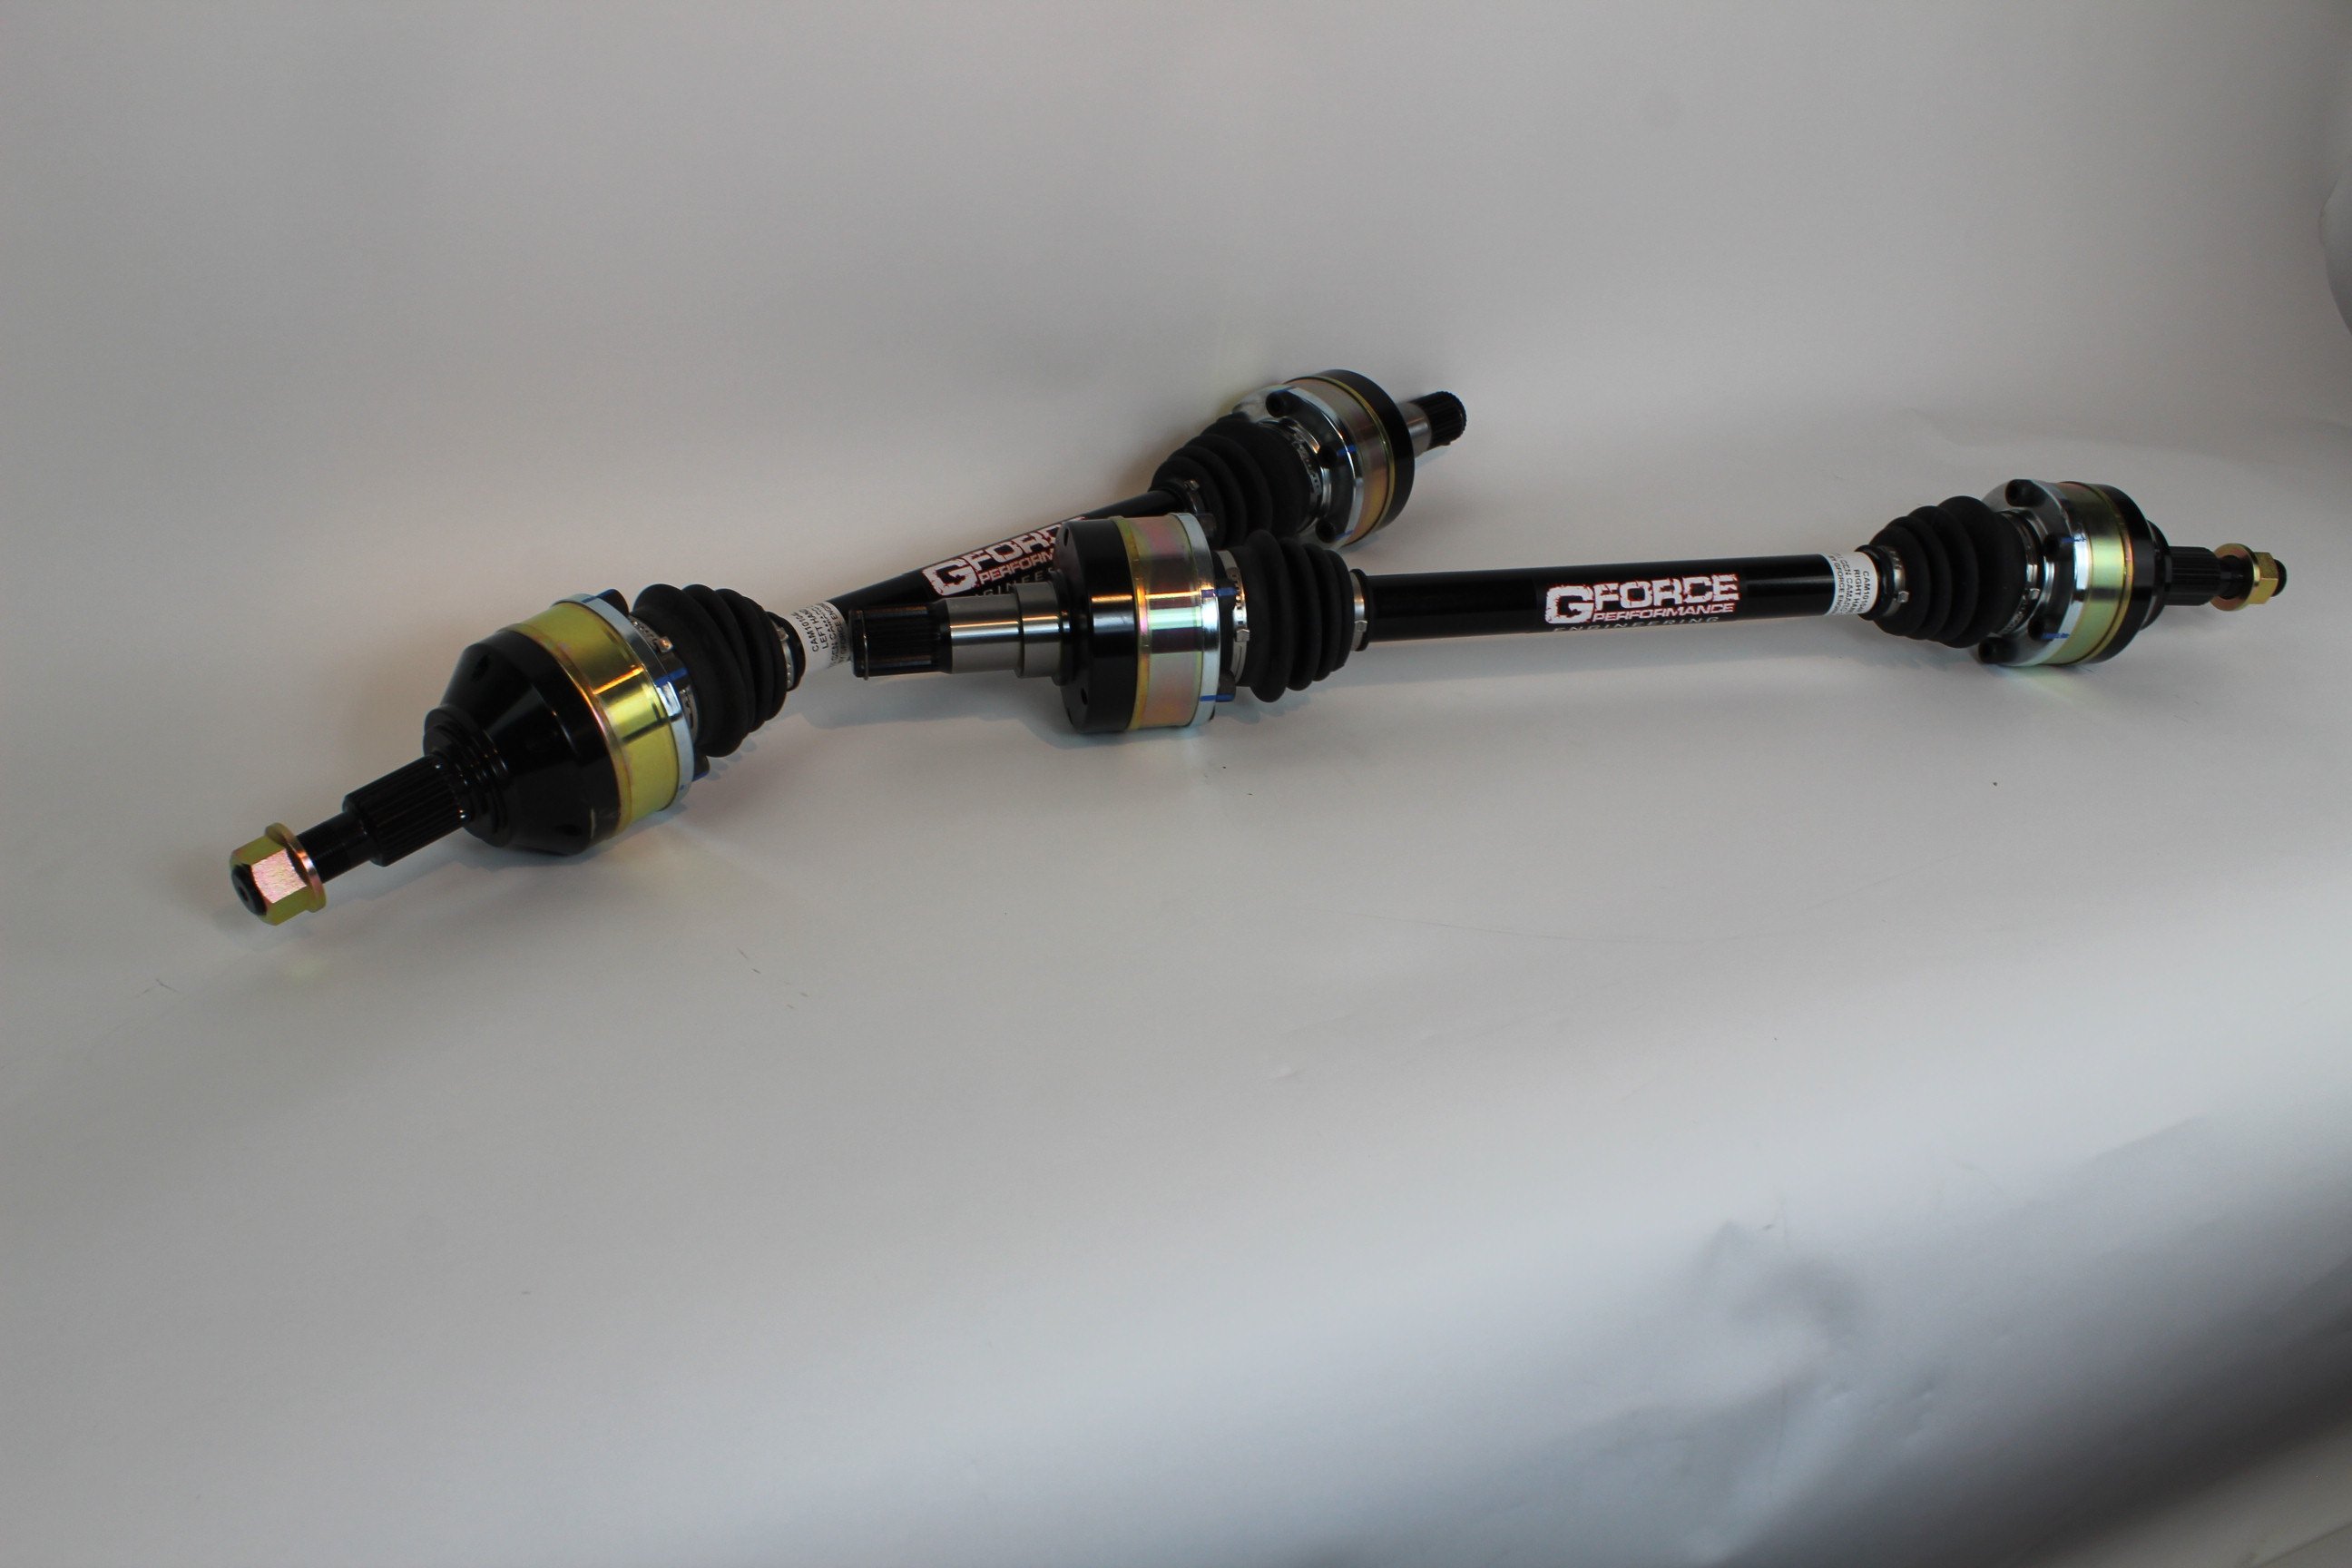
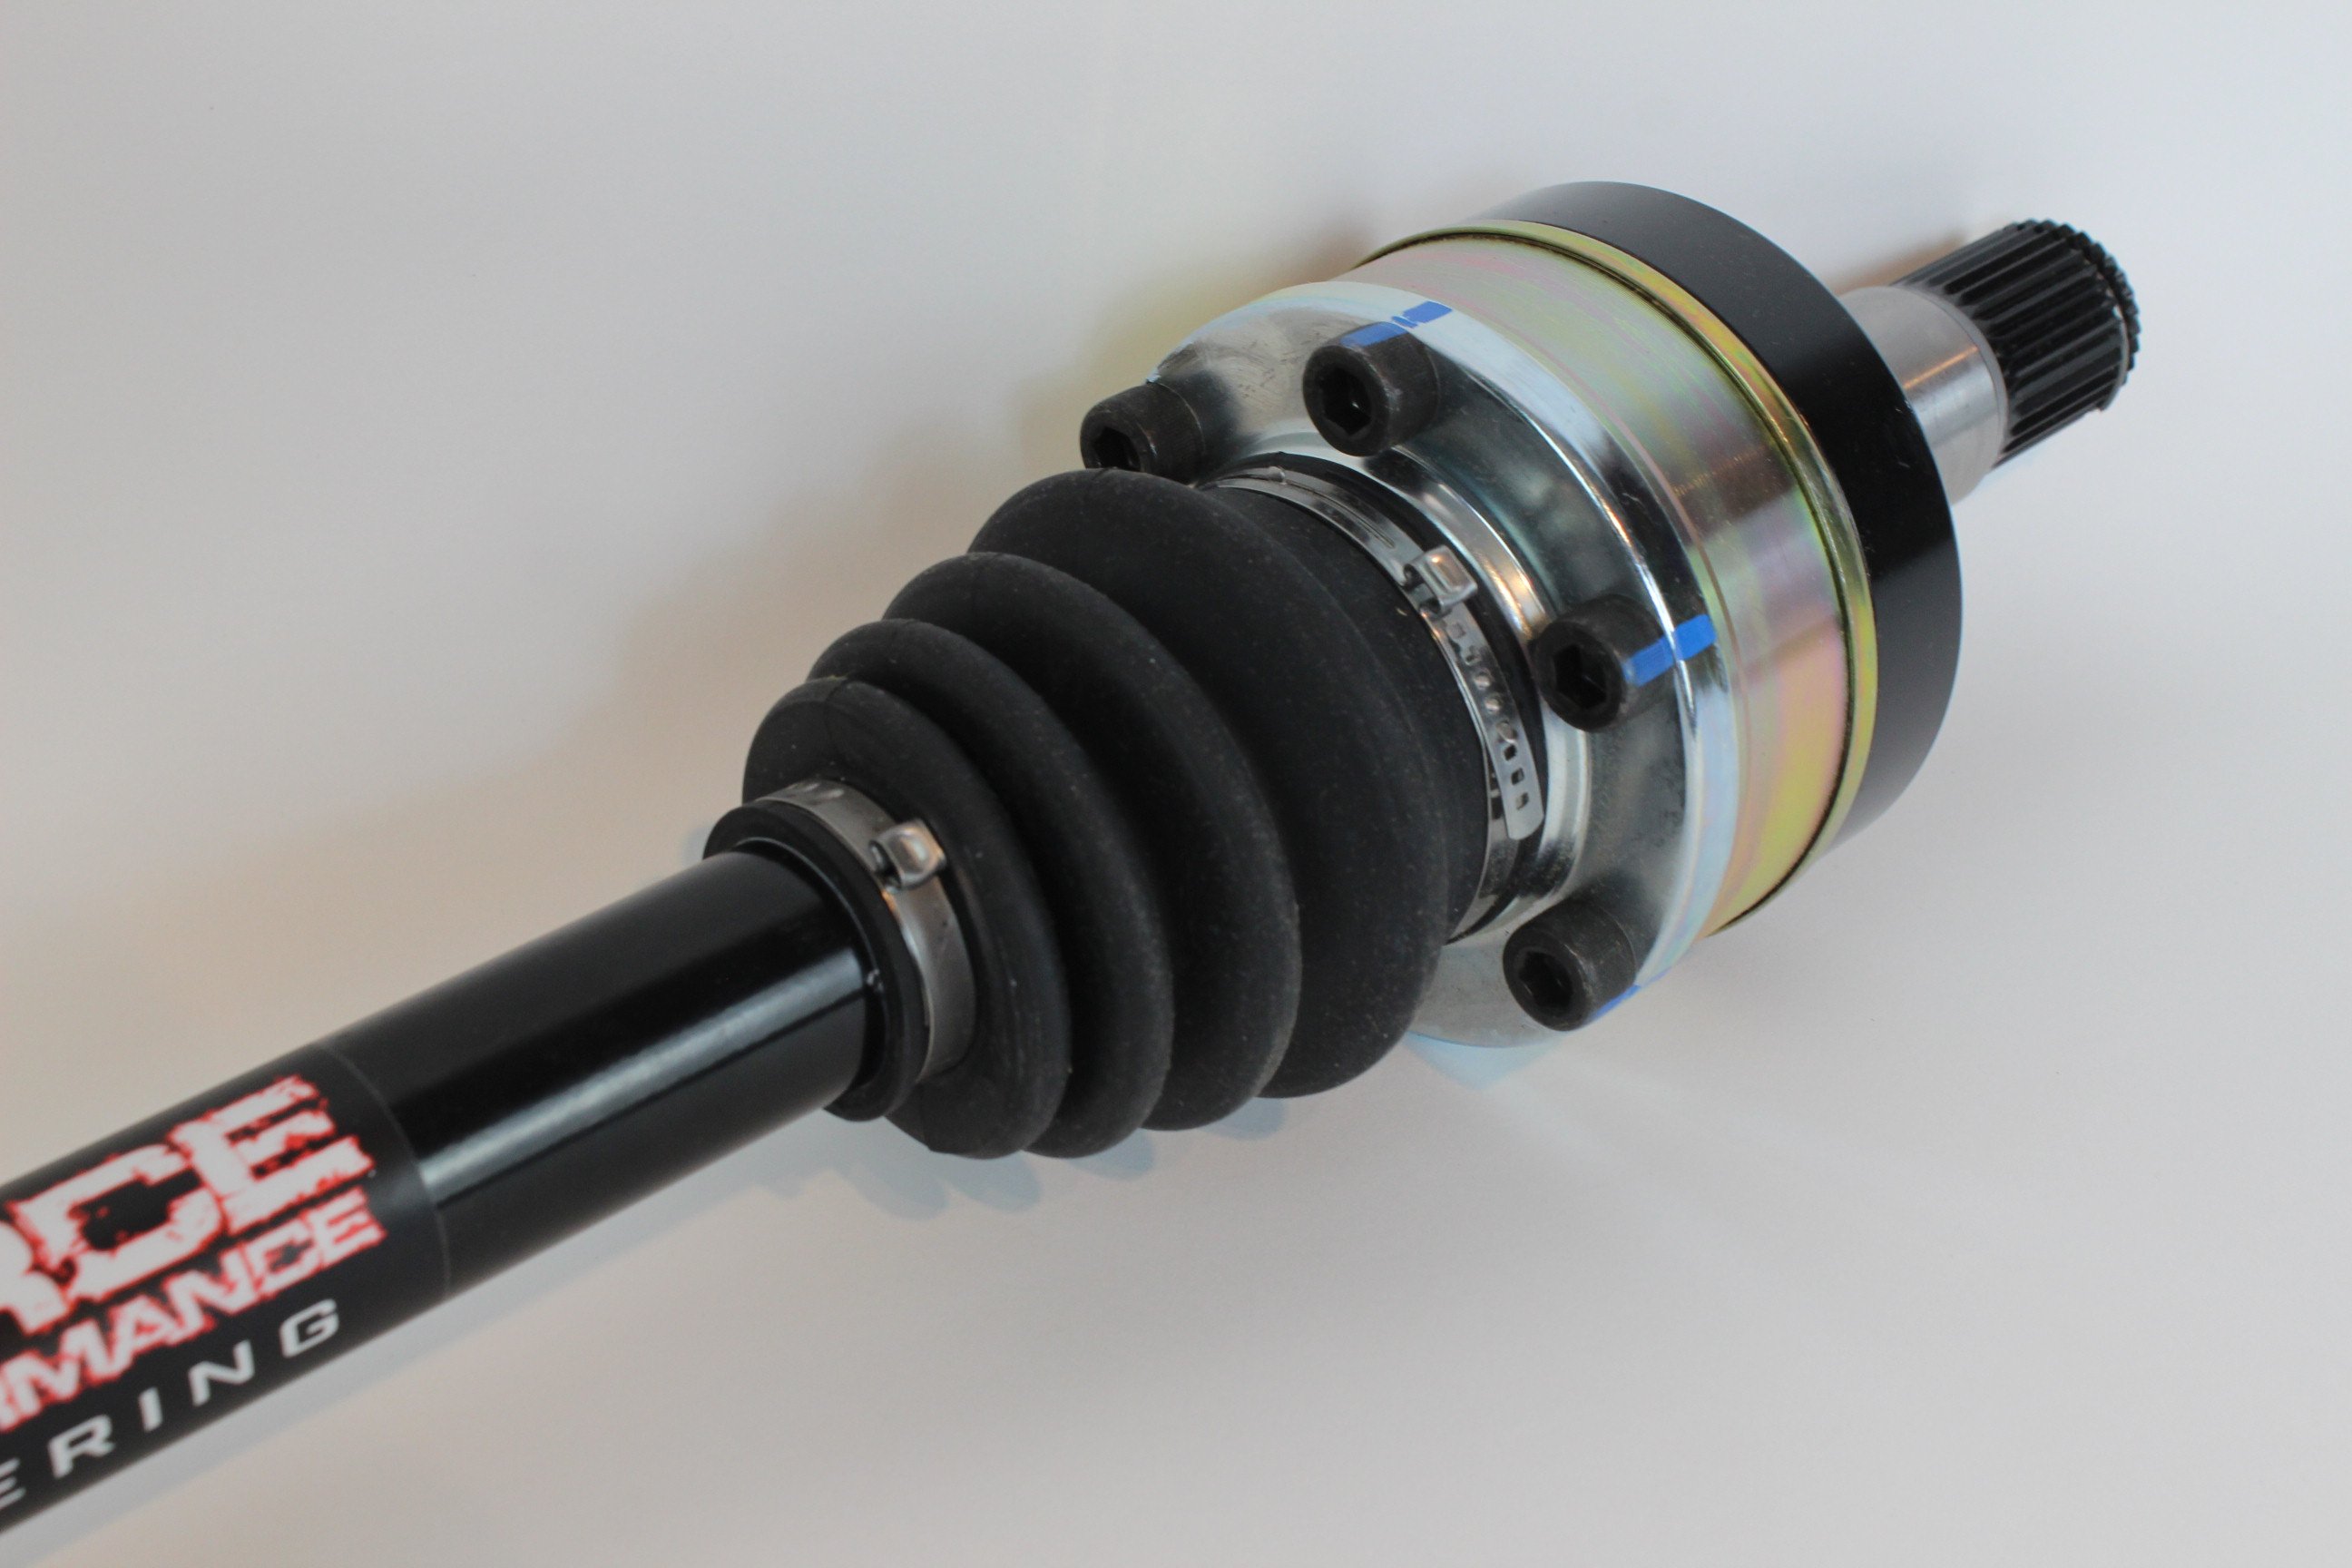
With so much power likely to be on tap, we knew we had to do something substantial and we didn’t want to have to do it a second time. That’s why we turned to GForce Engineering for one of their venerable driveline packages (PN CAM10700A). This gives us a brand new, much stronger, aluminum driveshaft and beefed up Outlaw axles rated to handle up to 1,500 horsepower.
Jesse Powell, the owner of GForce Engineering tells us that it’s not just about the strength of the material being used to construct the axle. Far more dynamic factors go into building a capable half-shaft.
“We have done extensive research and testing to determine which alloys will hold up best and perform in a desired manner on a car under load,” Powell explained. “For example, we have had several people ask us to make axles from titanium. Makes sense right? It’s stronger than hell and light. Truth is it’s awful for a choice in axle material. It’s strong, but it’s brittle. It will shatter like glass under a car. So we have to use an alloy that is as strong as possible, but that will flex and move without breaking.”
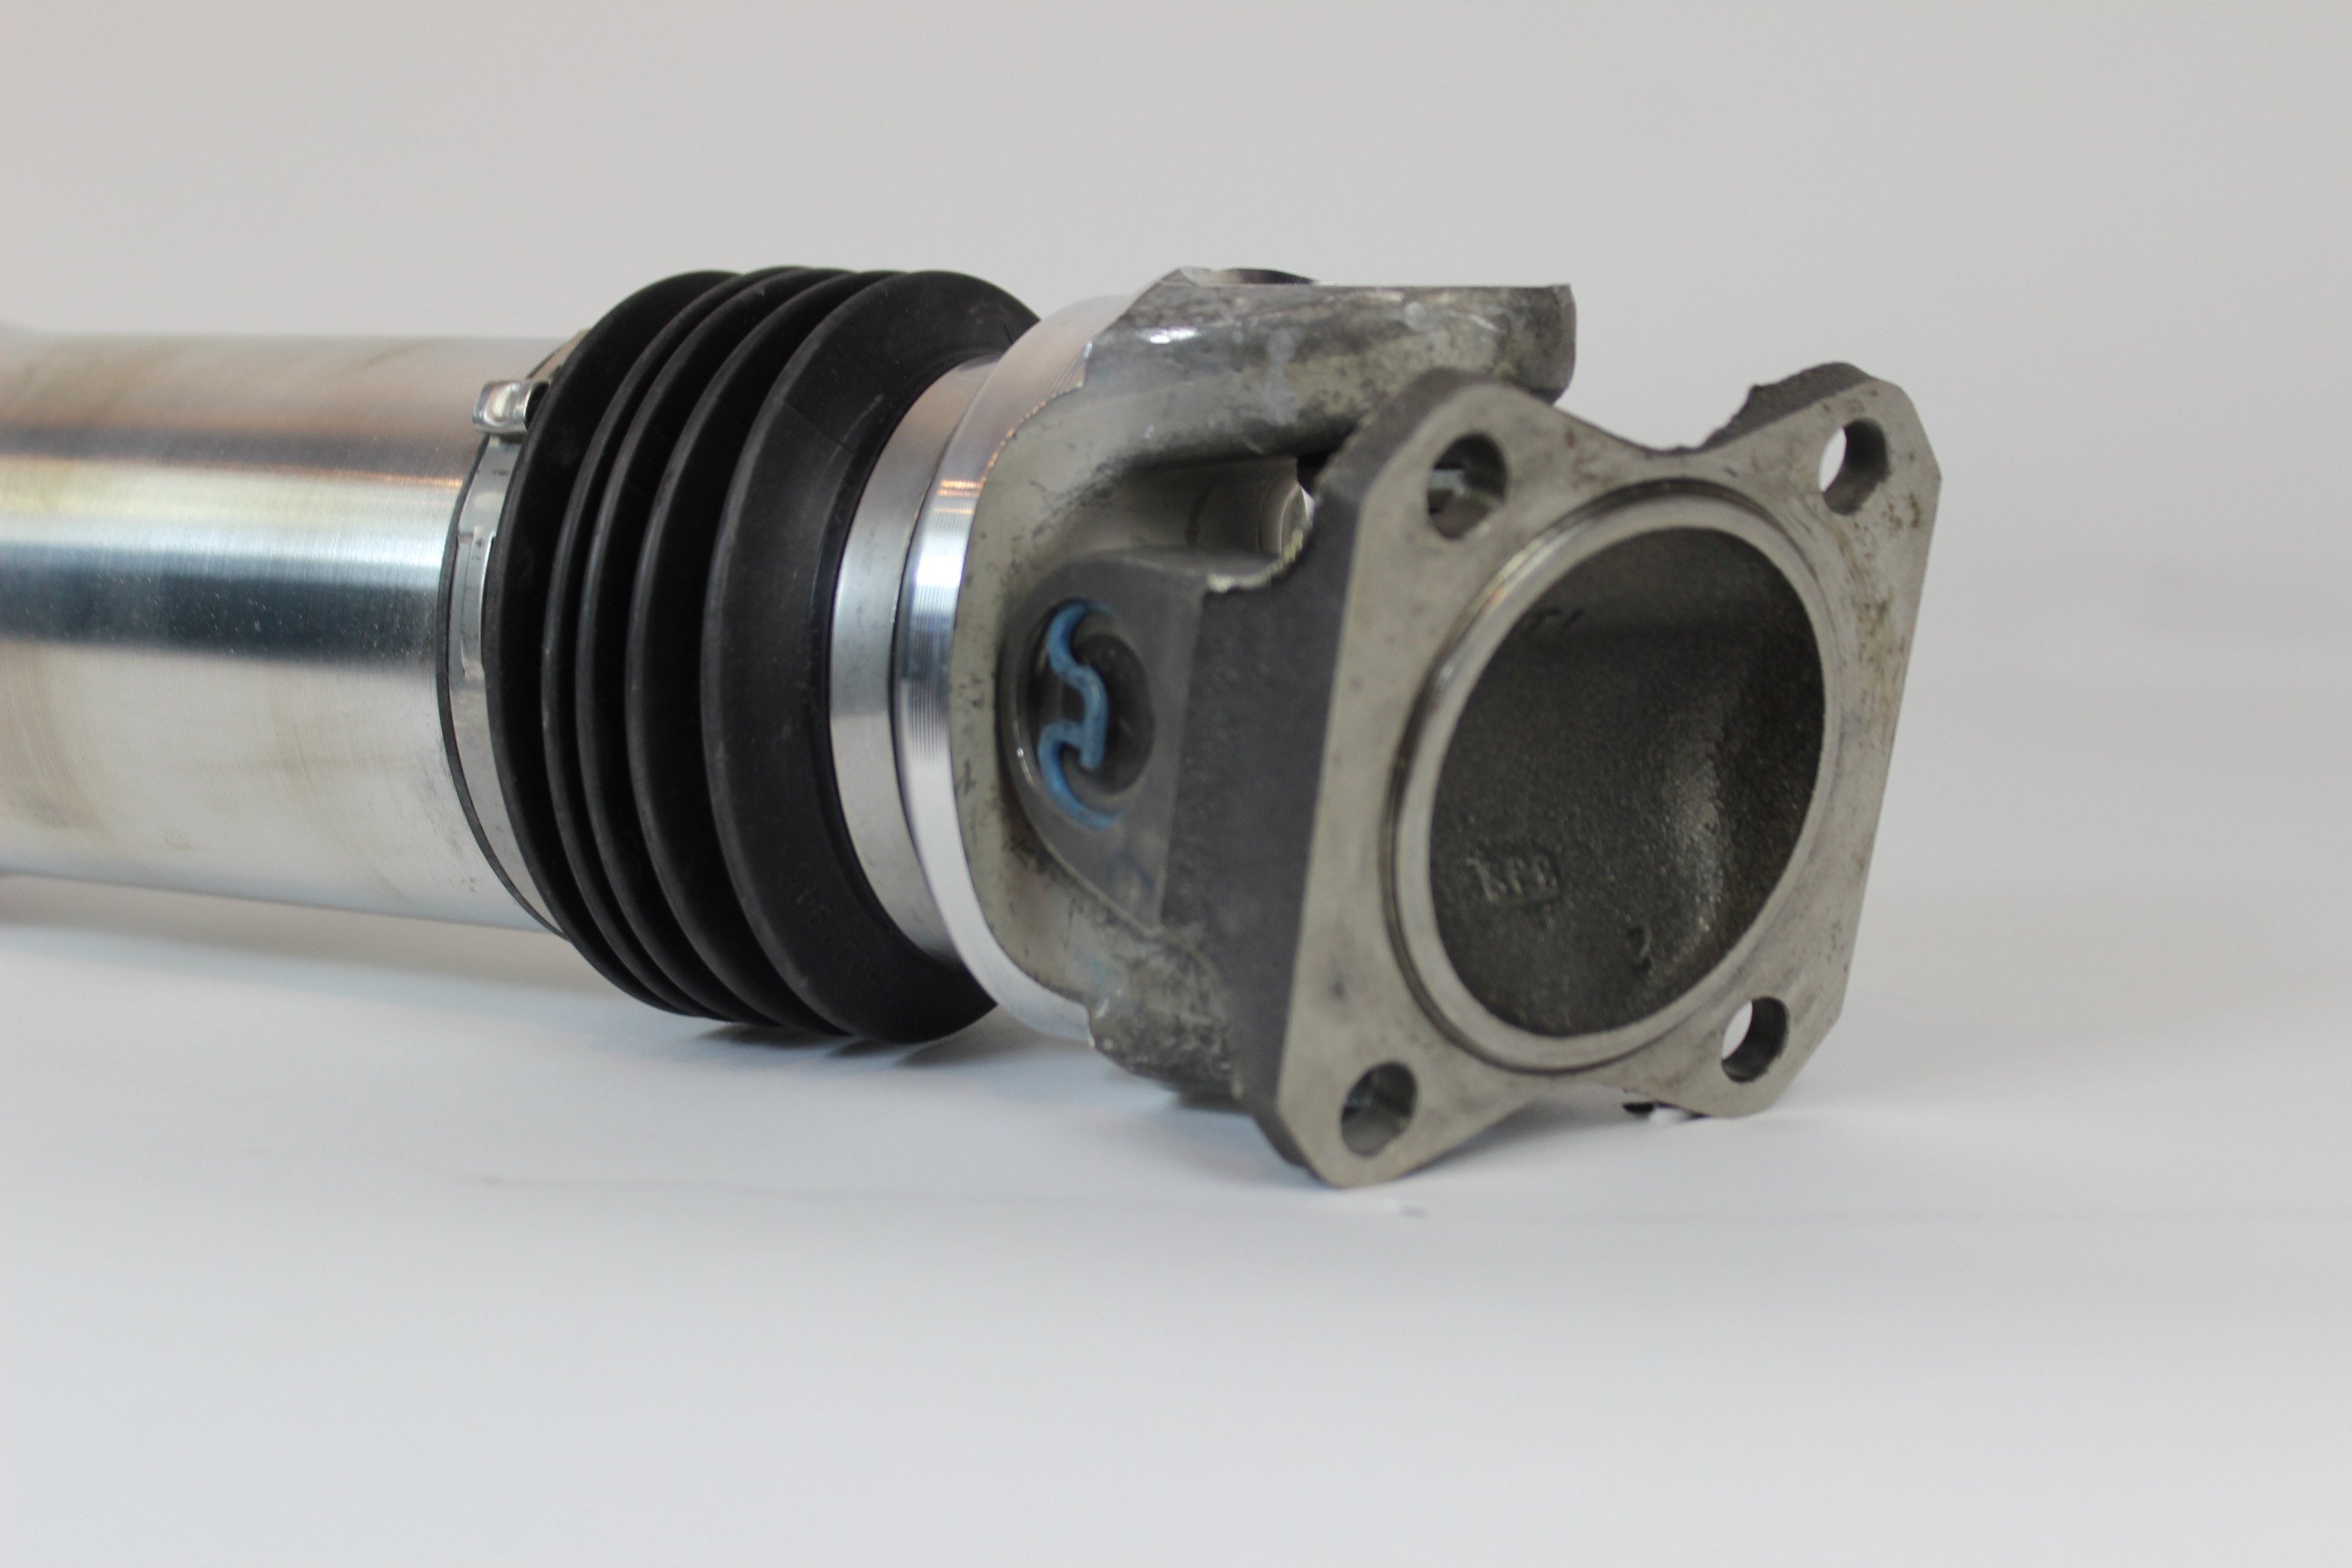
While we are planning on making some steam, the 1,500-horsepower rating of the Outlaw half-shafts almost doubles our projections for what the car will make. On top of it all, GForce provides a lifetime warranty on its components, not only demonstrating just how confident they are in the strength of the parts but ensuring us a lifetime of hassle-free operation. The aluminum driveshaft ditches the bulky joints in favor of a splined slip joint that is not only stronger but lighter as well. The half-shafts use a machined aerospace-grade billet alloy for both the CV joints and axle bar making them much stronger than the stockers. One-piece CNC machined billet steel inner and outer stubs are also used making these axles some of the toughest in the business.
“If you compare the GForce Outlaw axles to a factory set, you can see how much larger our axle bar is,” Powell told us. “Greater diameter equals greater torsional strength. Same with our CV’s. If you were to open up a factory CV, you will see how small the internal components are compared to ours. Another key part of our strength comes from the stub axles. You will notice that both the inner and outer stubs are CNC-machined from a single piece of billet steel, making them as strong as absolutely possible. You are limited by real estate when it comes to a stub axle. How big is the wheel hub in the knuckle? How big are the spider gears in the diff? We can only make these stubs as big as these components, so we have to make them as strong as possible. That’s why we choose the right material and match it with the strongest possible process.”

Since our ATI torque converter was already stuffed in our 8L90 and would loosen up somewhat with the new power, we decided it best to leave it be and button up our drivetrain.
Spinning Ain’t Winning
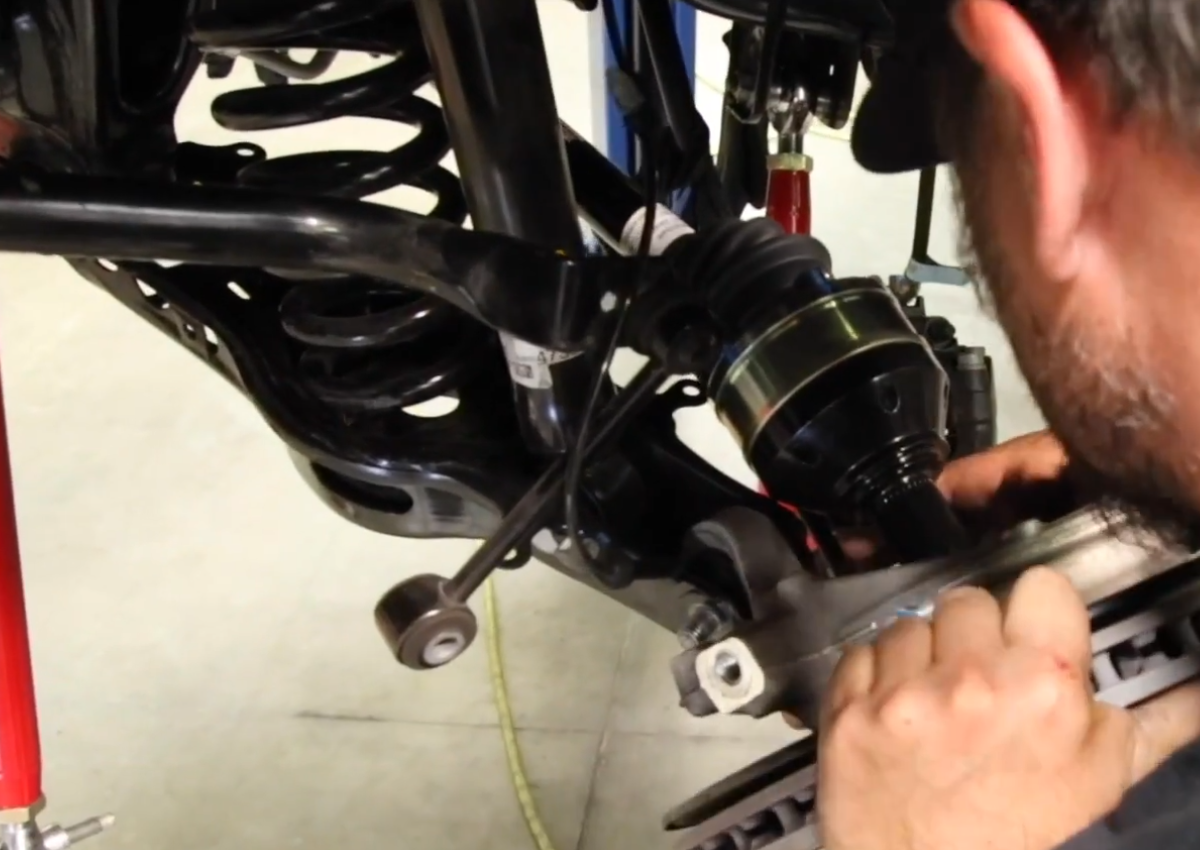
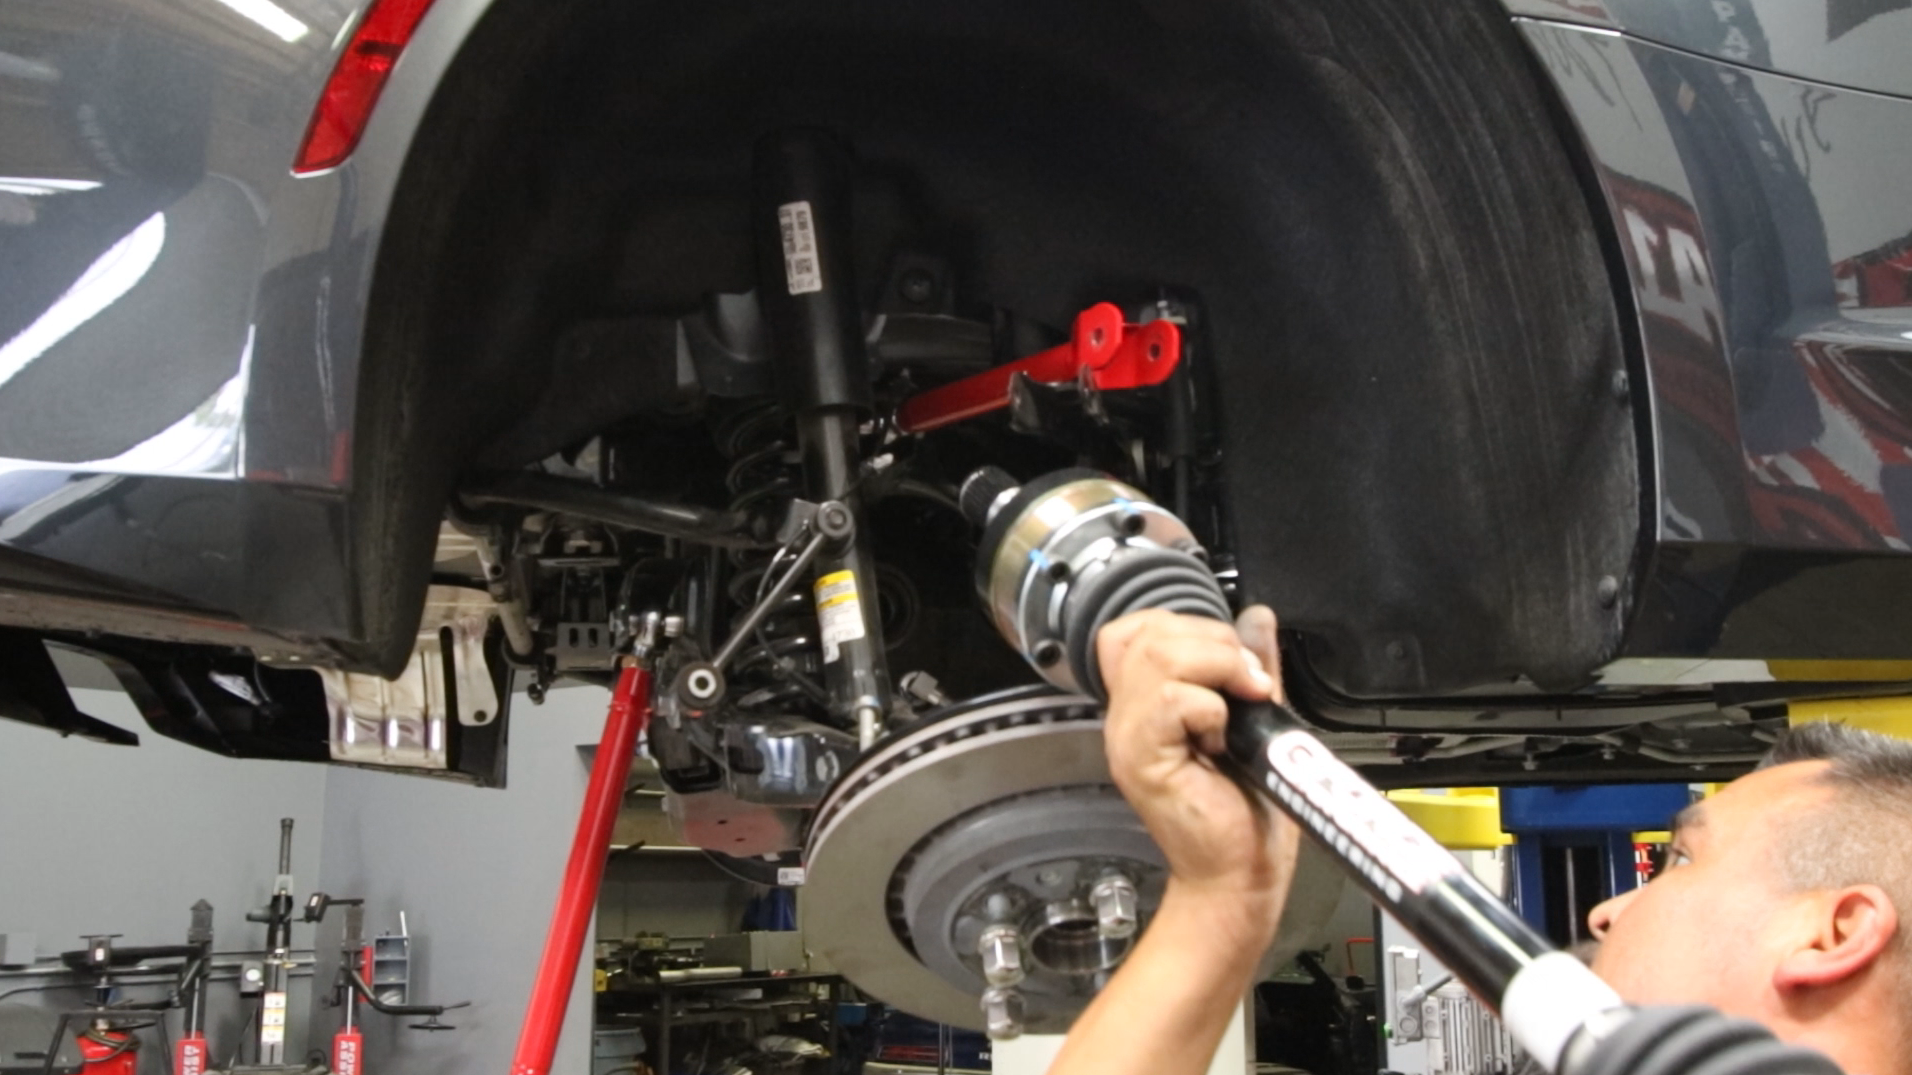
With our powertrain sorted, it was time to turn our attention to the underpinnings of our sixth-gen. Now that we were sure the rest of the drivetrain could handle what our bullet was making, it was time to make sure that the suspension could get all that grunt to the ground.
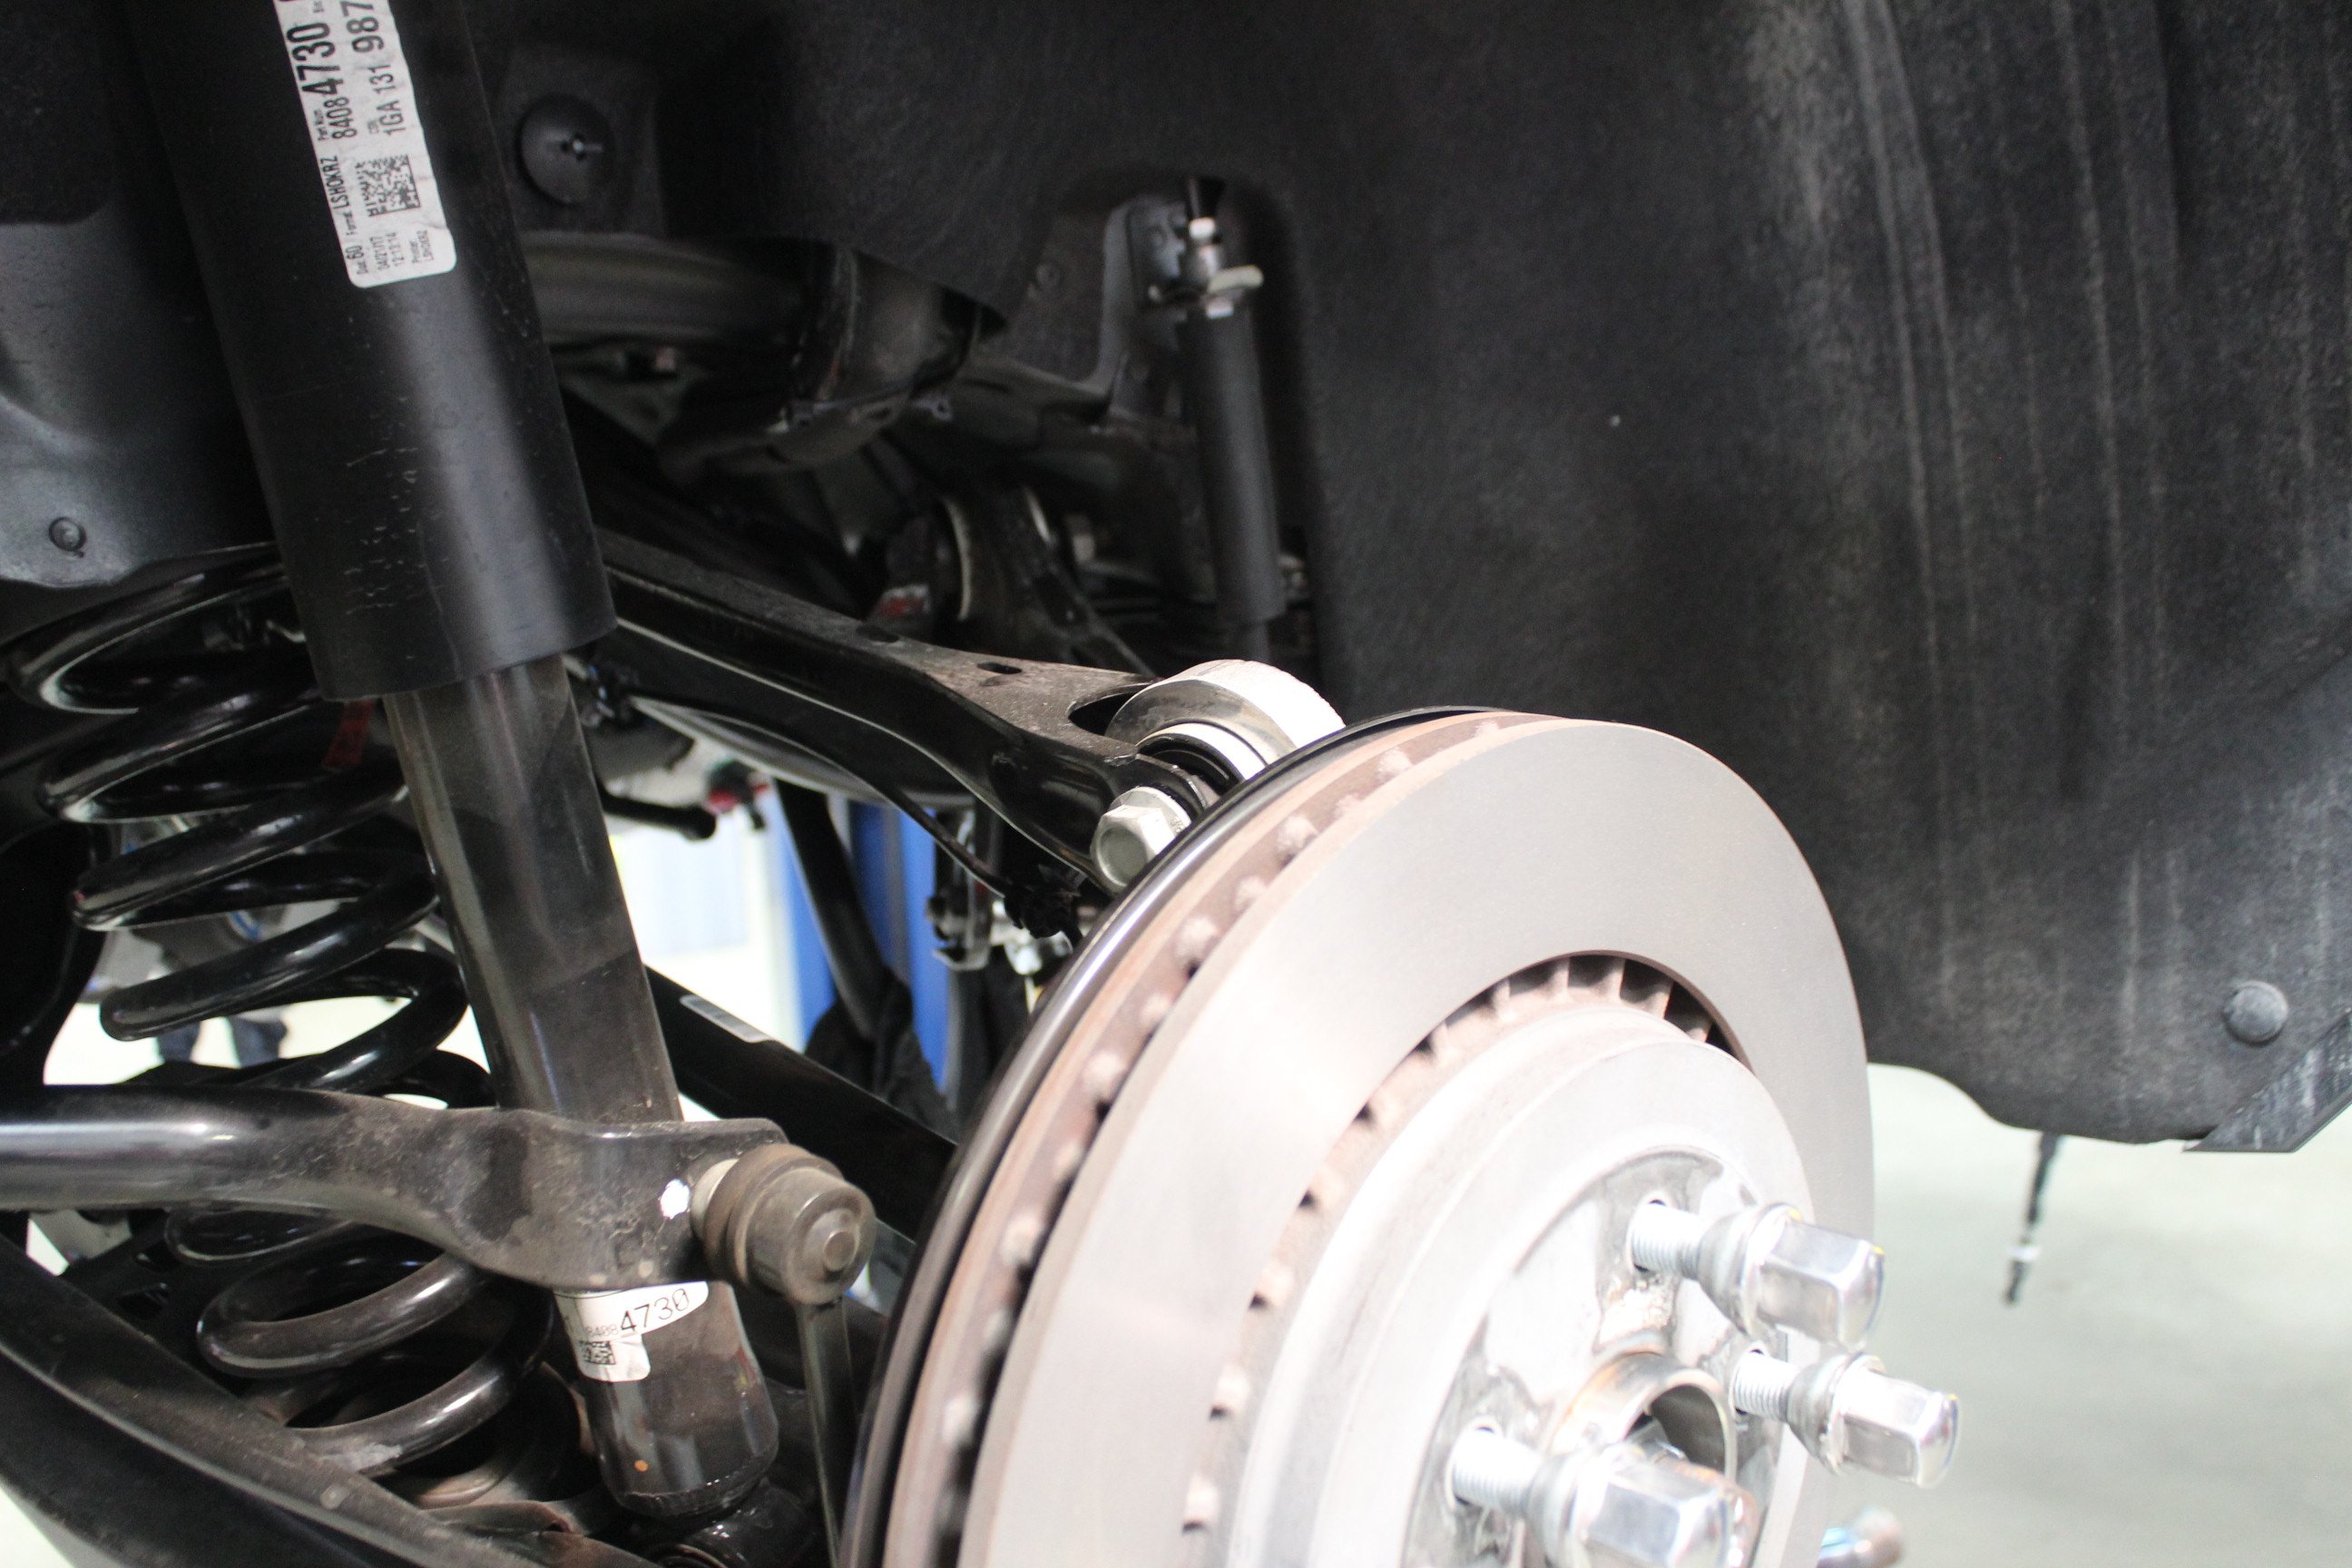
Again, the stock suspension is well sorted from the factory and is very capable of handling the 455 horsepower it left the factory with, doubling that output meant that it was no longer up to the task. And, if you’ve ever checked out the stock suspension on a 2016+ Camaro, you’ll notice that the stamped steel control arms appear as if they’d deflect if you simply looked at them the wrong way. We knew we had to ditch them and we knew just who to turn to sure up our rear end: BMR.
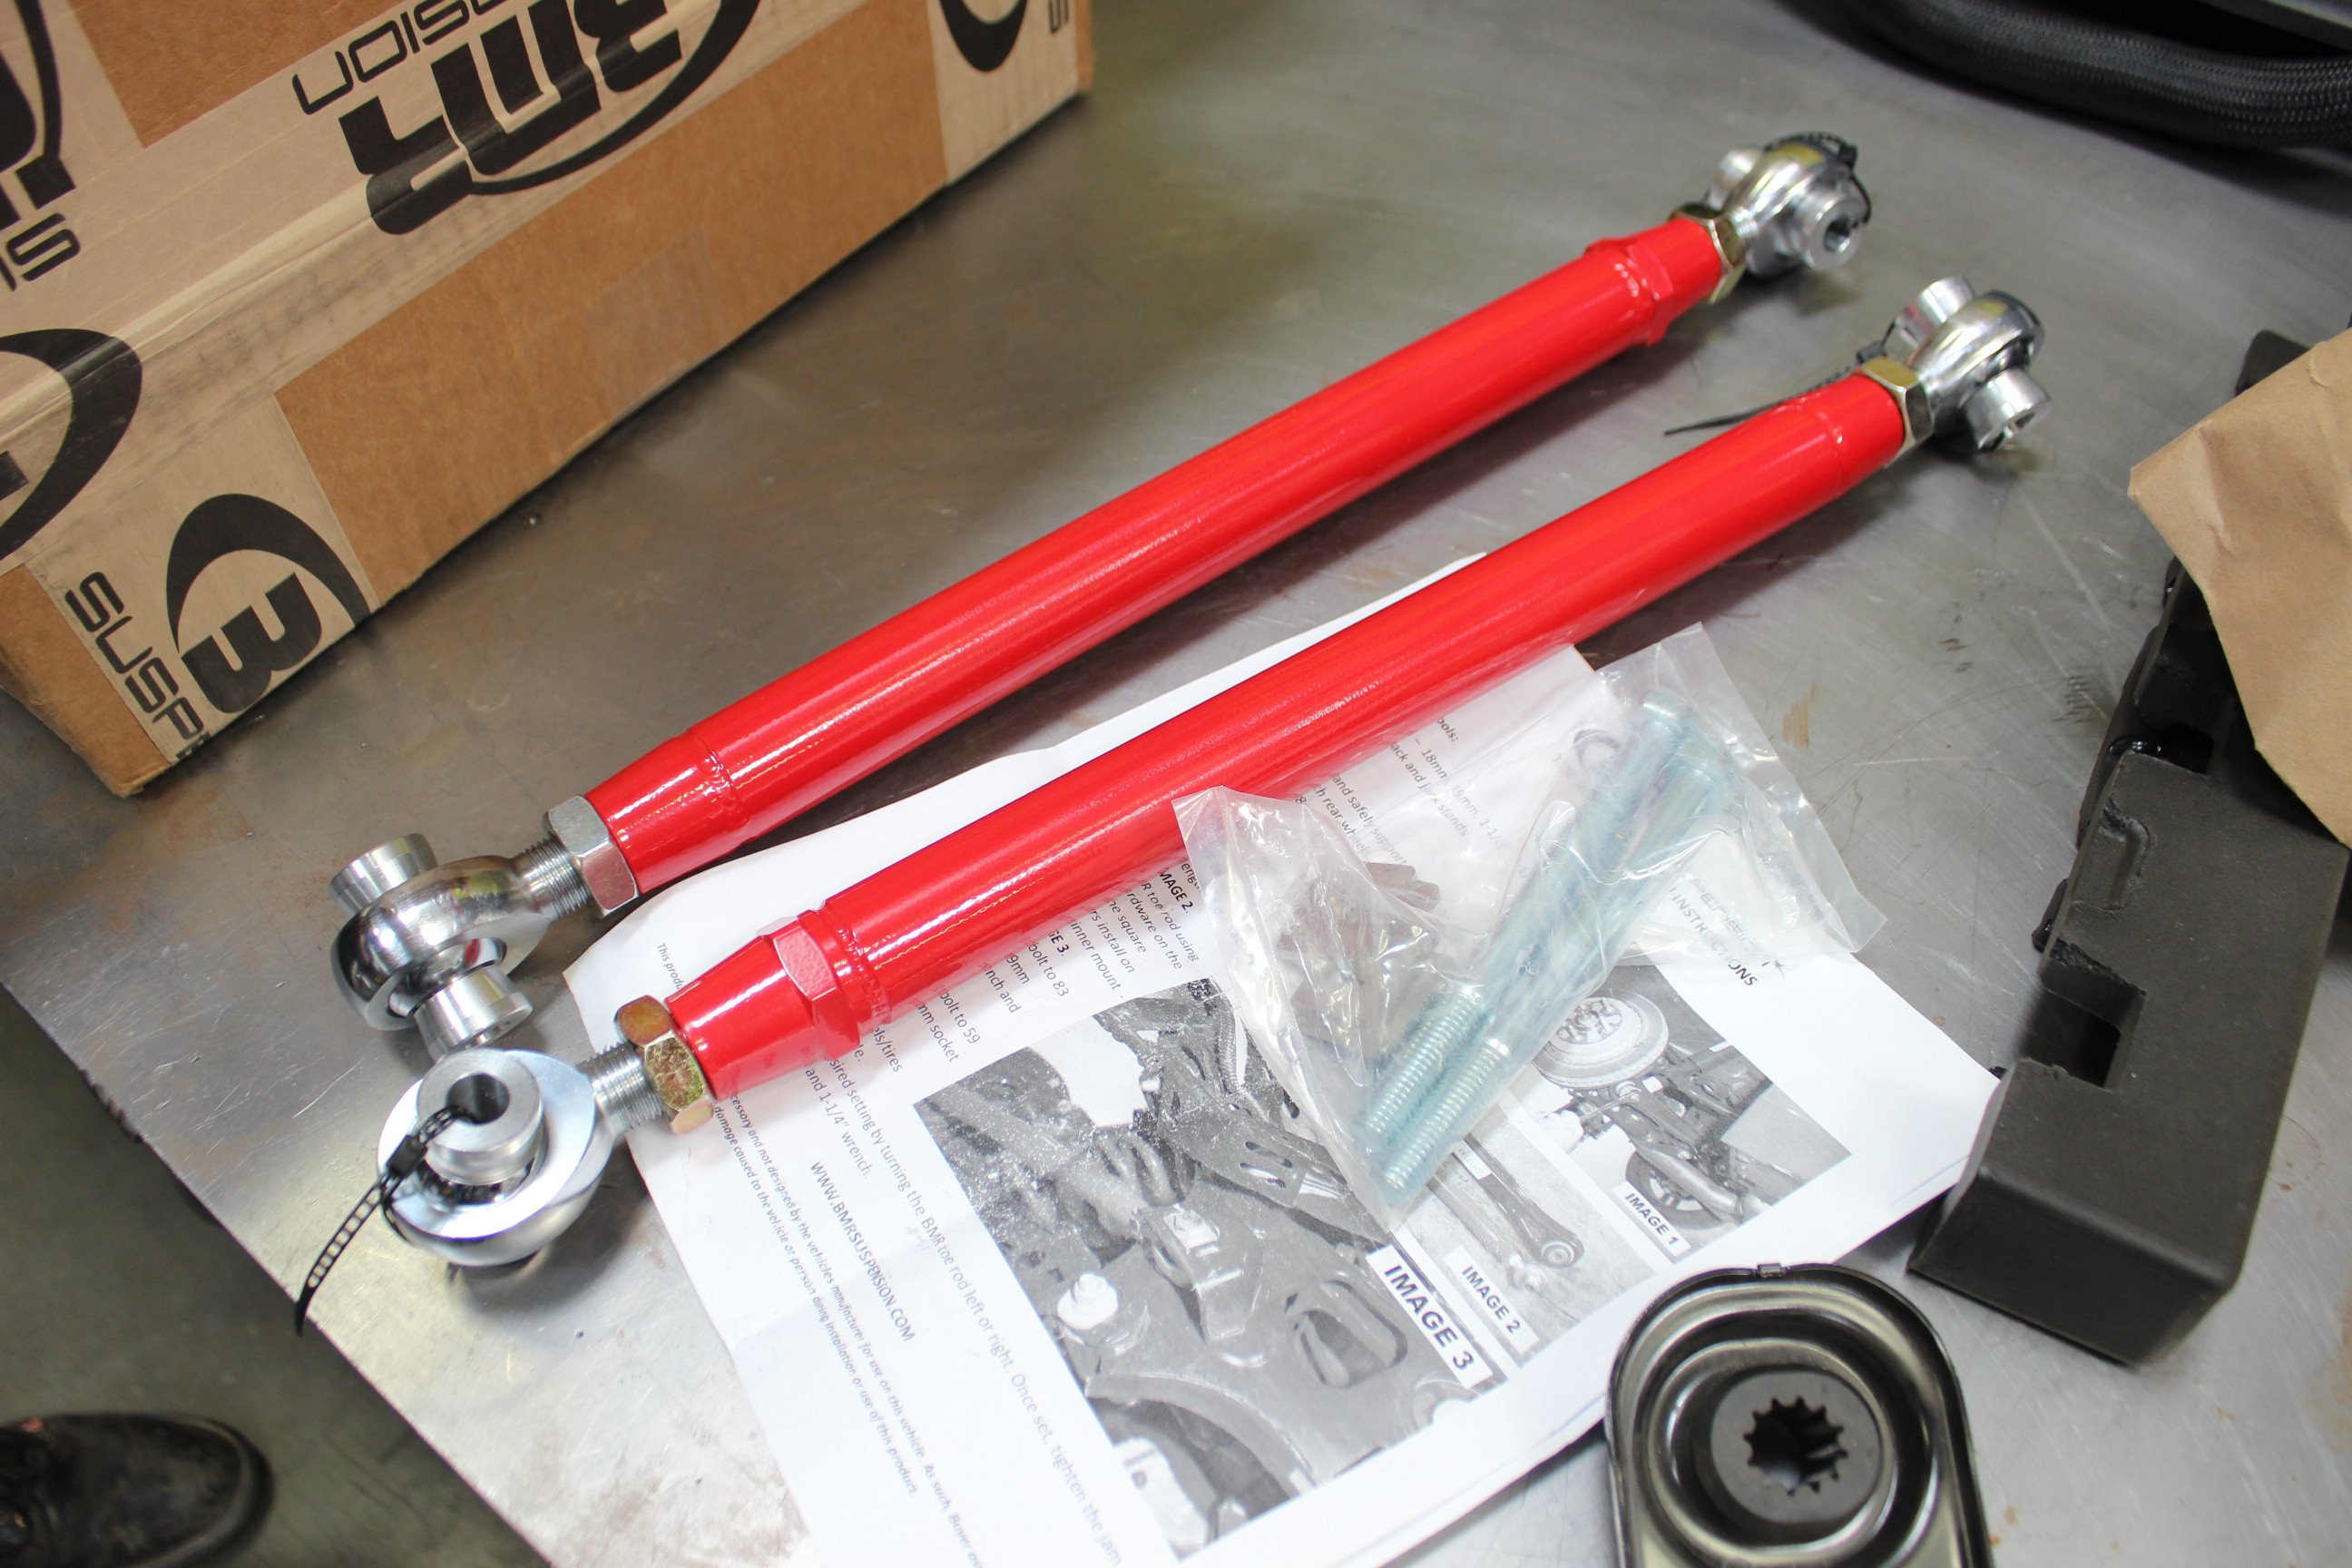
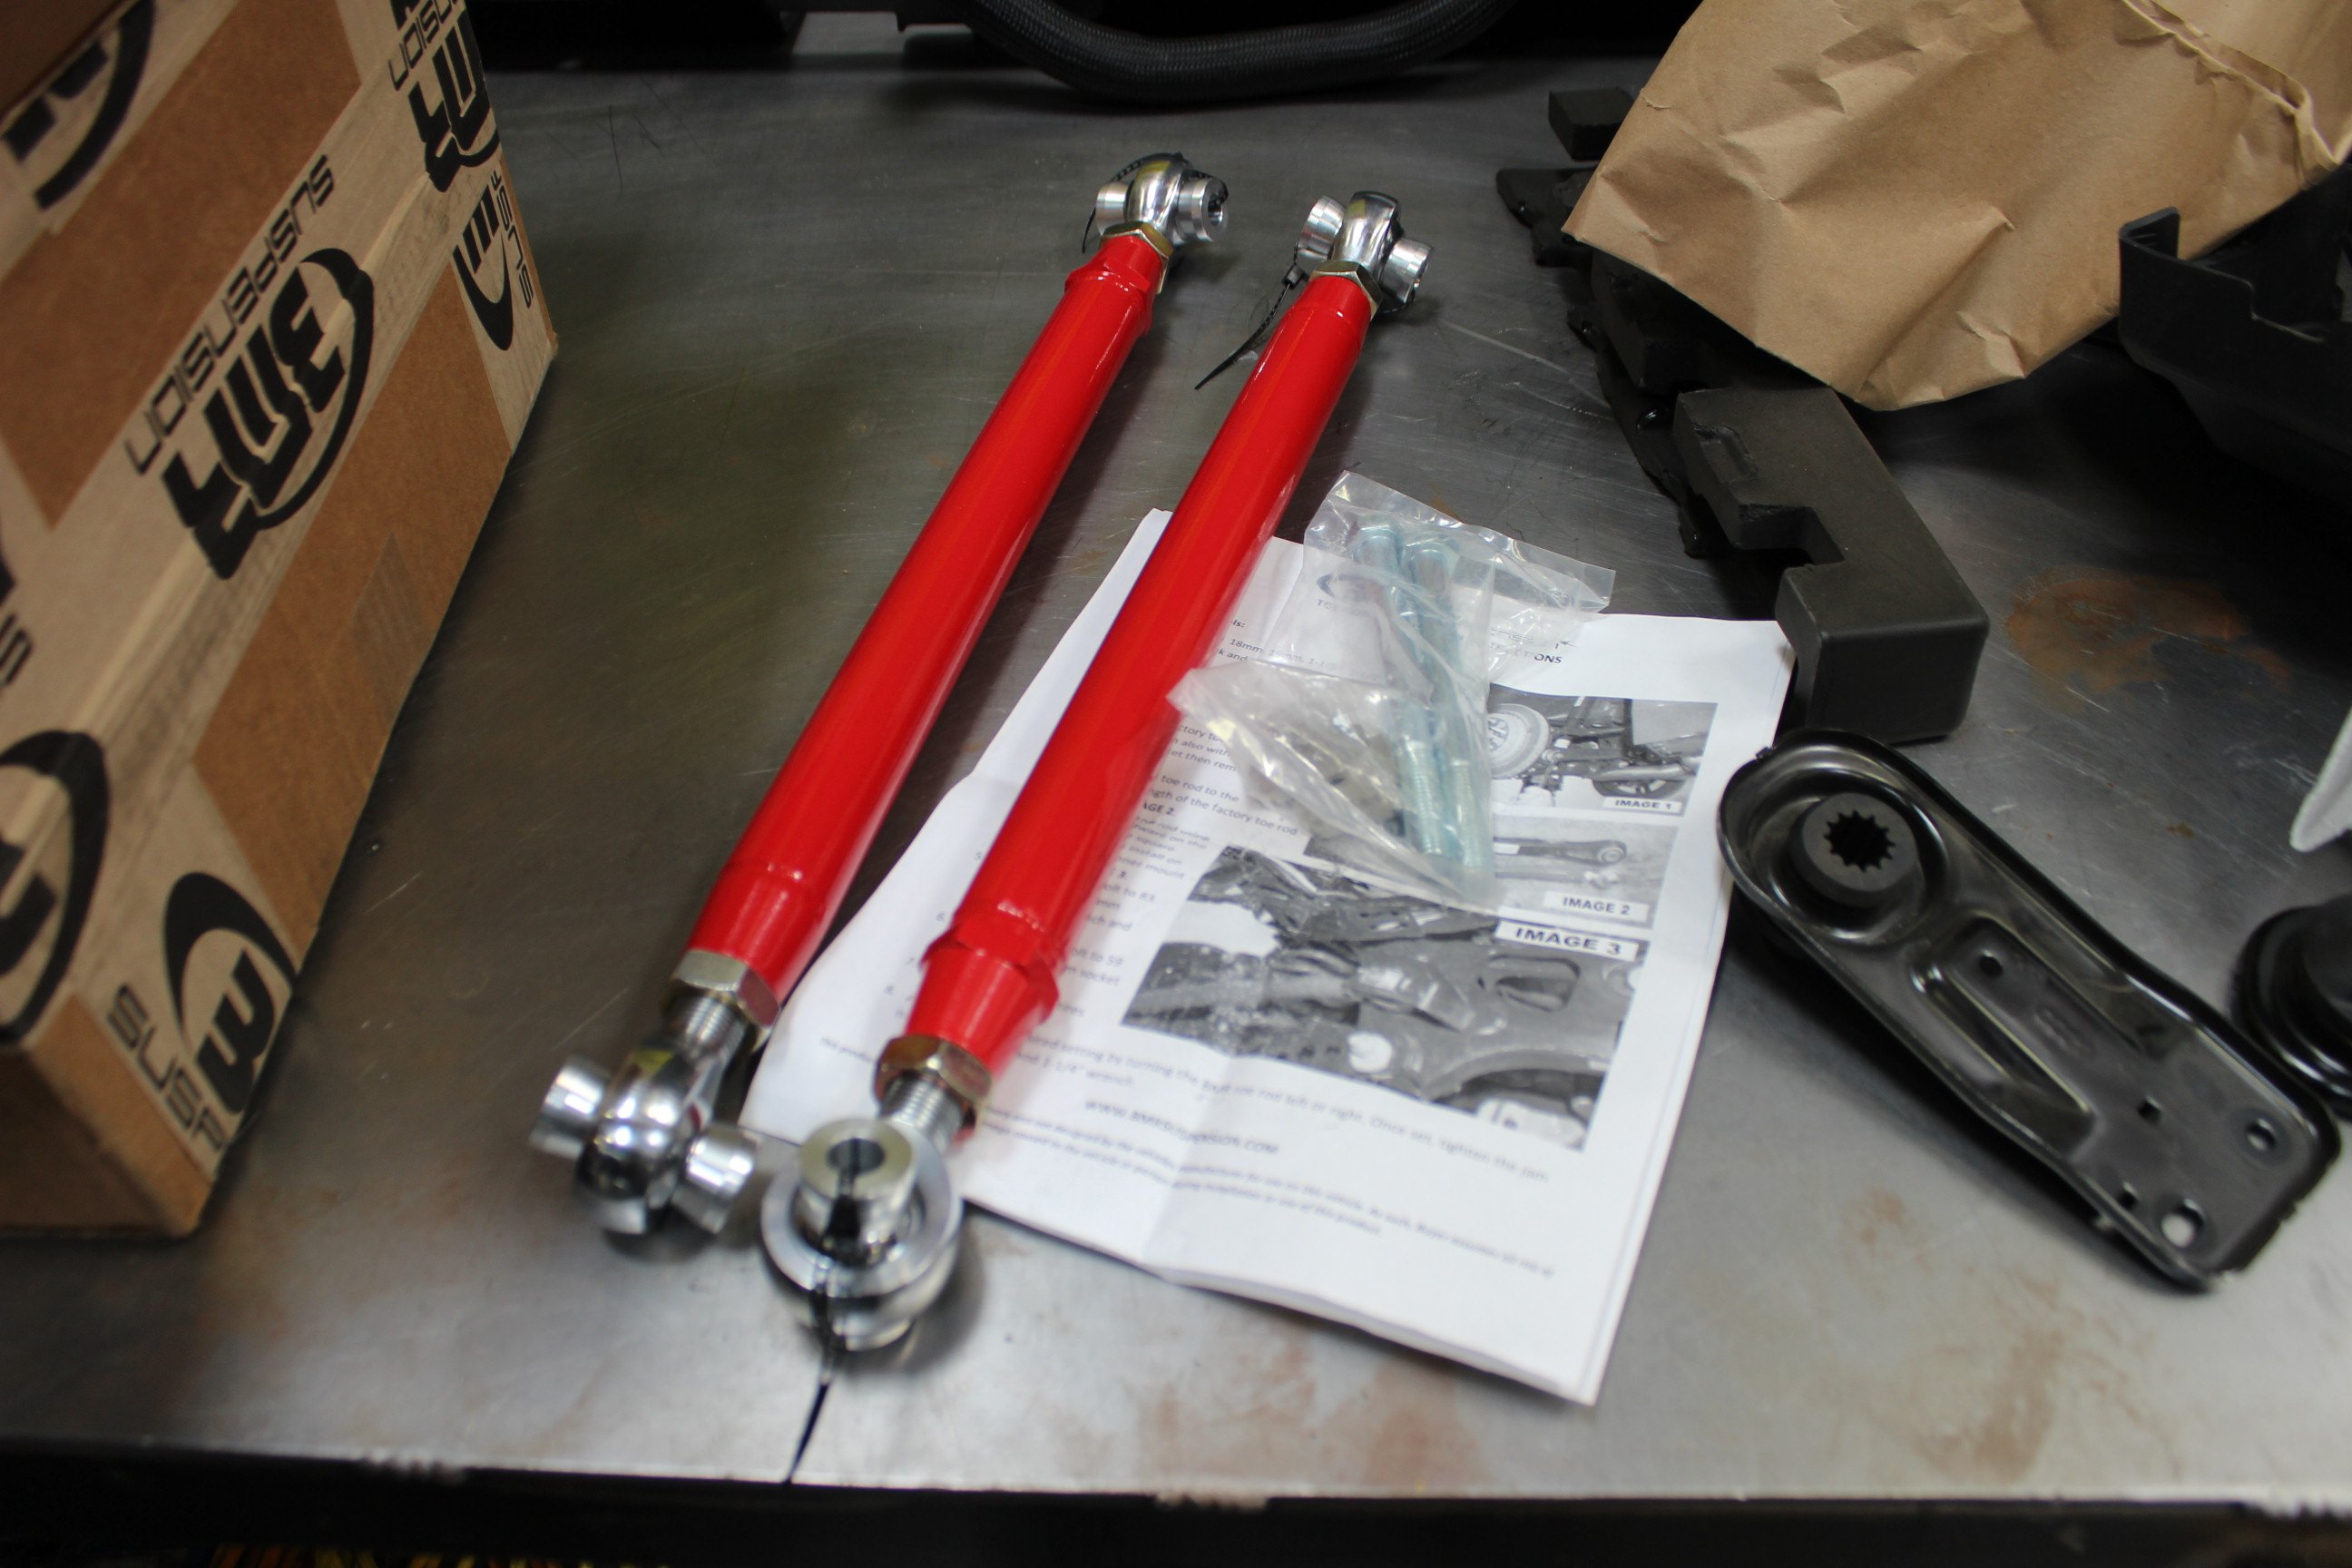
And though we would love to have replaced all of the weak links at the rear, we have a budget to stick to. That’s why we decided to go with a set of tubular lower trailing arms and double-adjustable toes rods (PN TCA060 and TR007 respectively). Not only will they take a lot of deflection out of our car’s suspension they will give us the ability to make adjustments and dial in it in for both the drag strip and road course. As far as bang-for-the-buck modifications go, these are hard to beat.
Read More: BMR Makes the Connection on Our Camaro
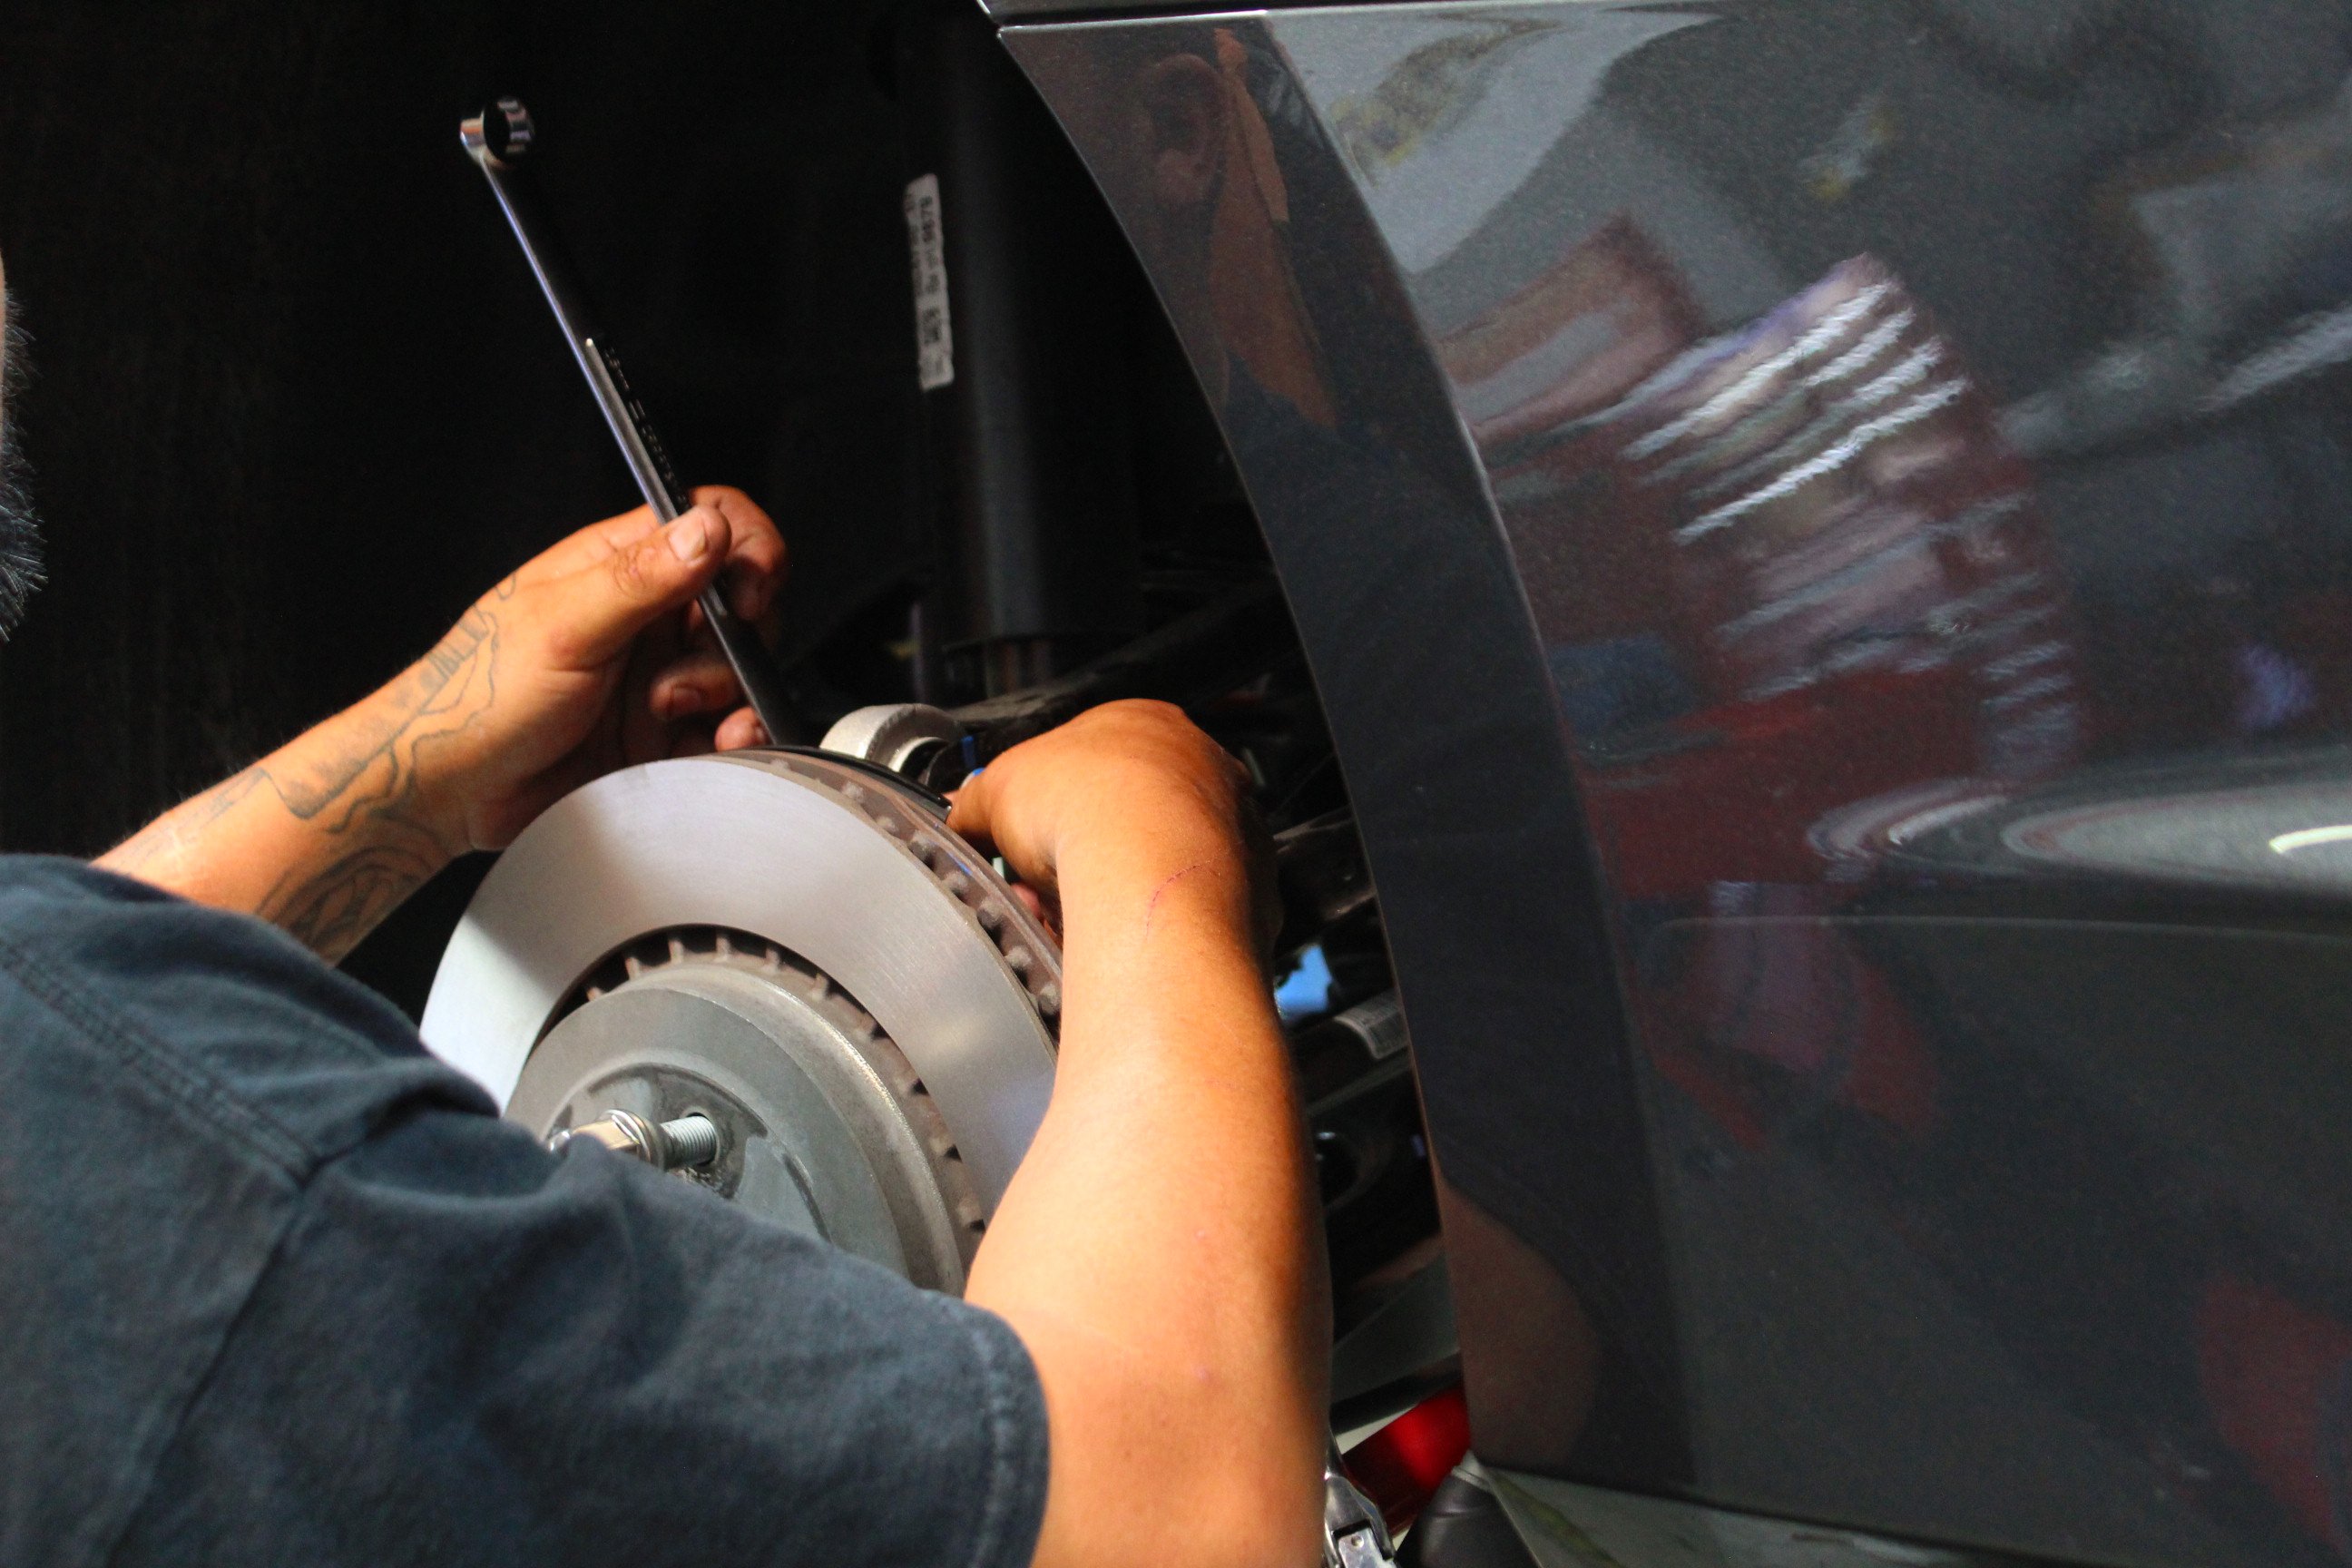
To wrap things up and make sure that we were ready for the road course, we upgraded the Camaro’s brakes to a set of Hawk DTC-60 front and HPS 5.0 rear pads. The DTC-60 is a fairly aggressive pad with less initial bite, but much better heat resistance – especially when combined with the Prospeed RS683 Xtreme Performance brake fluid. Since the front brakes do most of the work, we could afford a less aggressive pad in the rear with more bite during trail braking and preserve the stock rotors. Toyo also kicked in a brand-new set of R888R (275/40R20) rubber, since we pretty much used up the last set during our baseline and 5K test sessions.
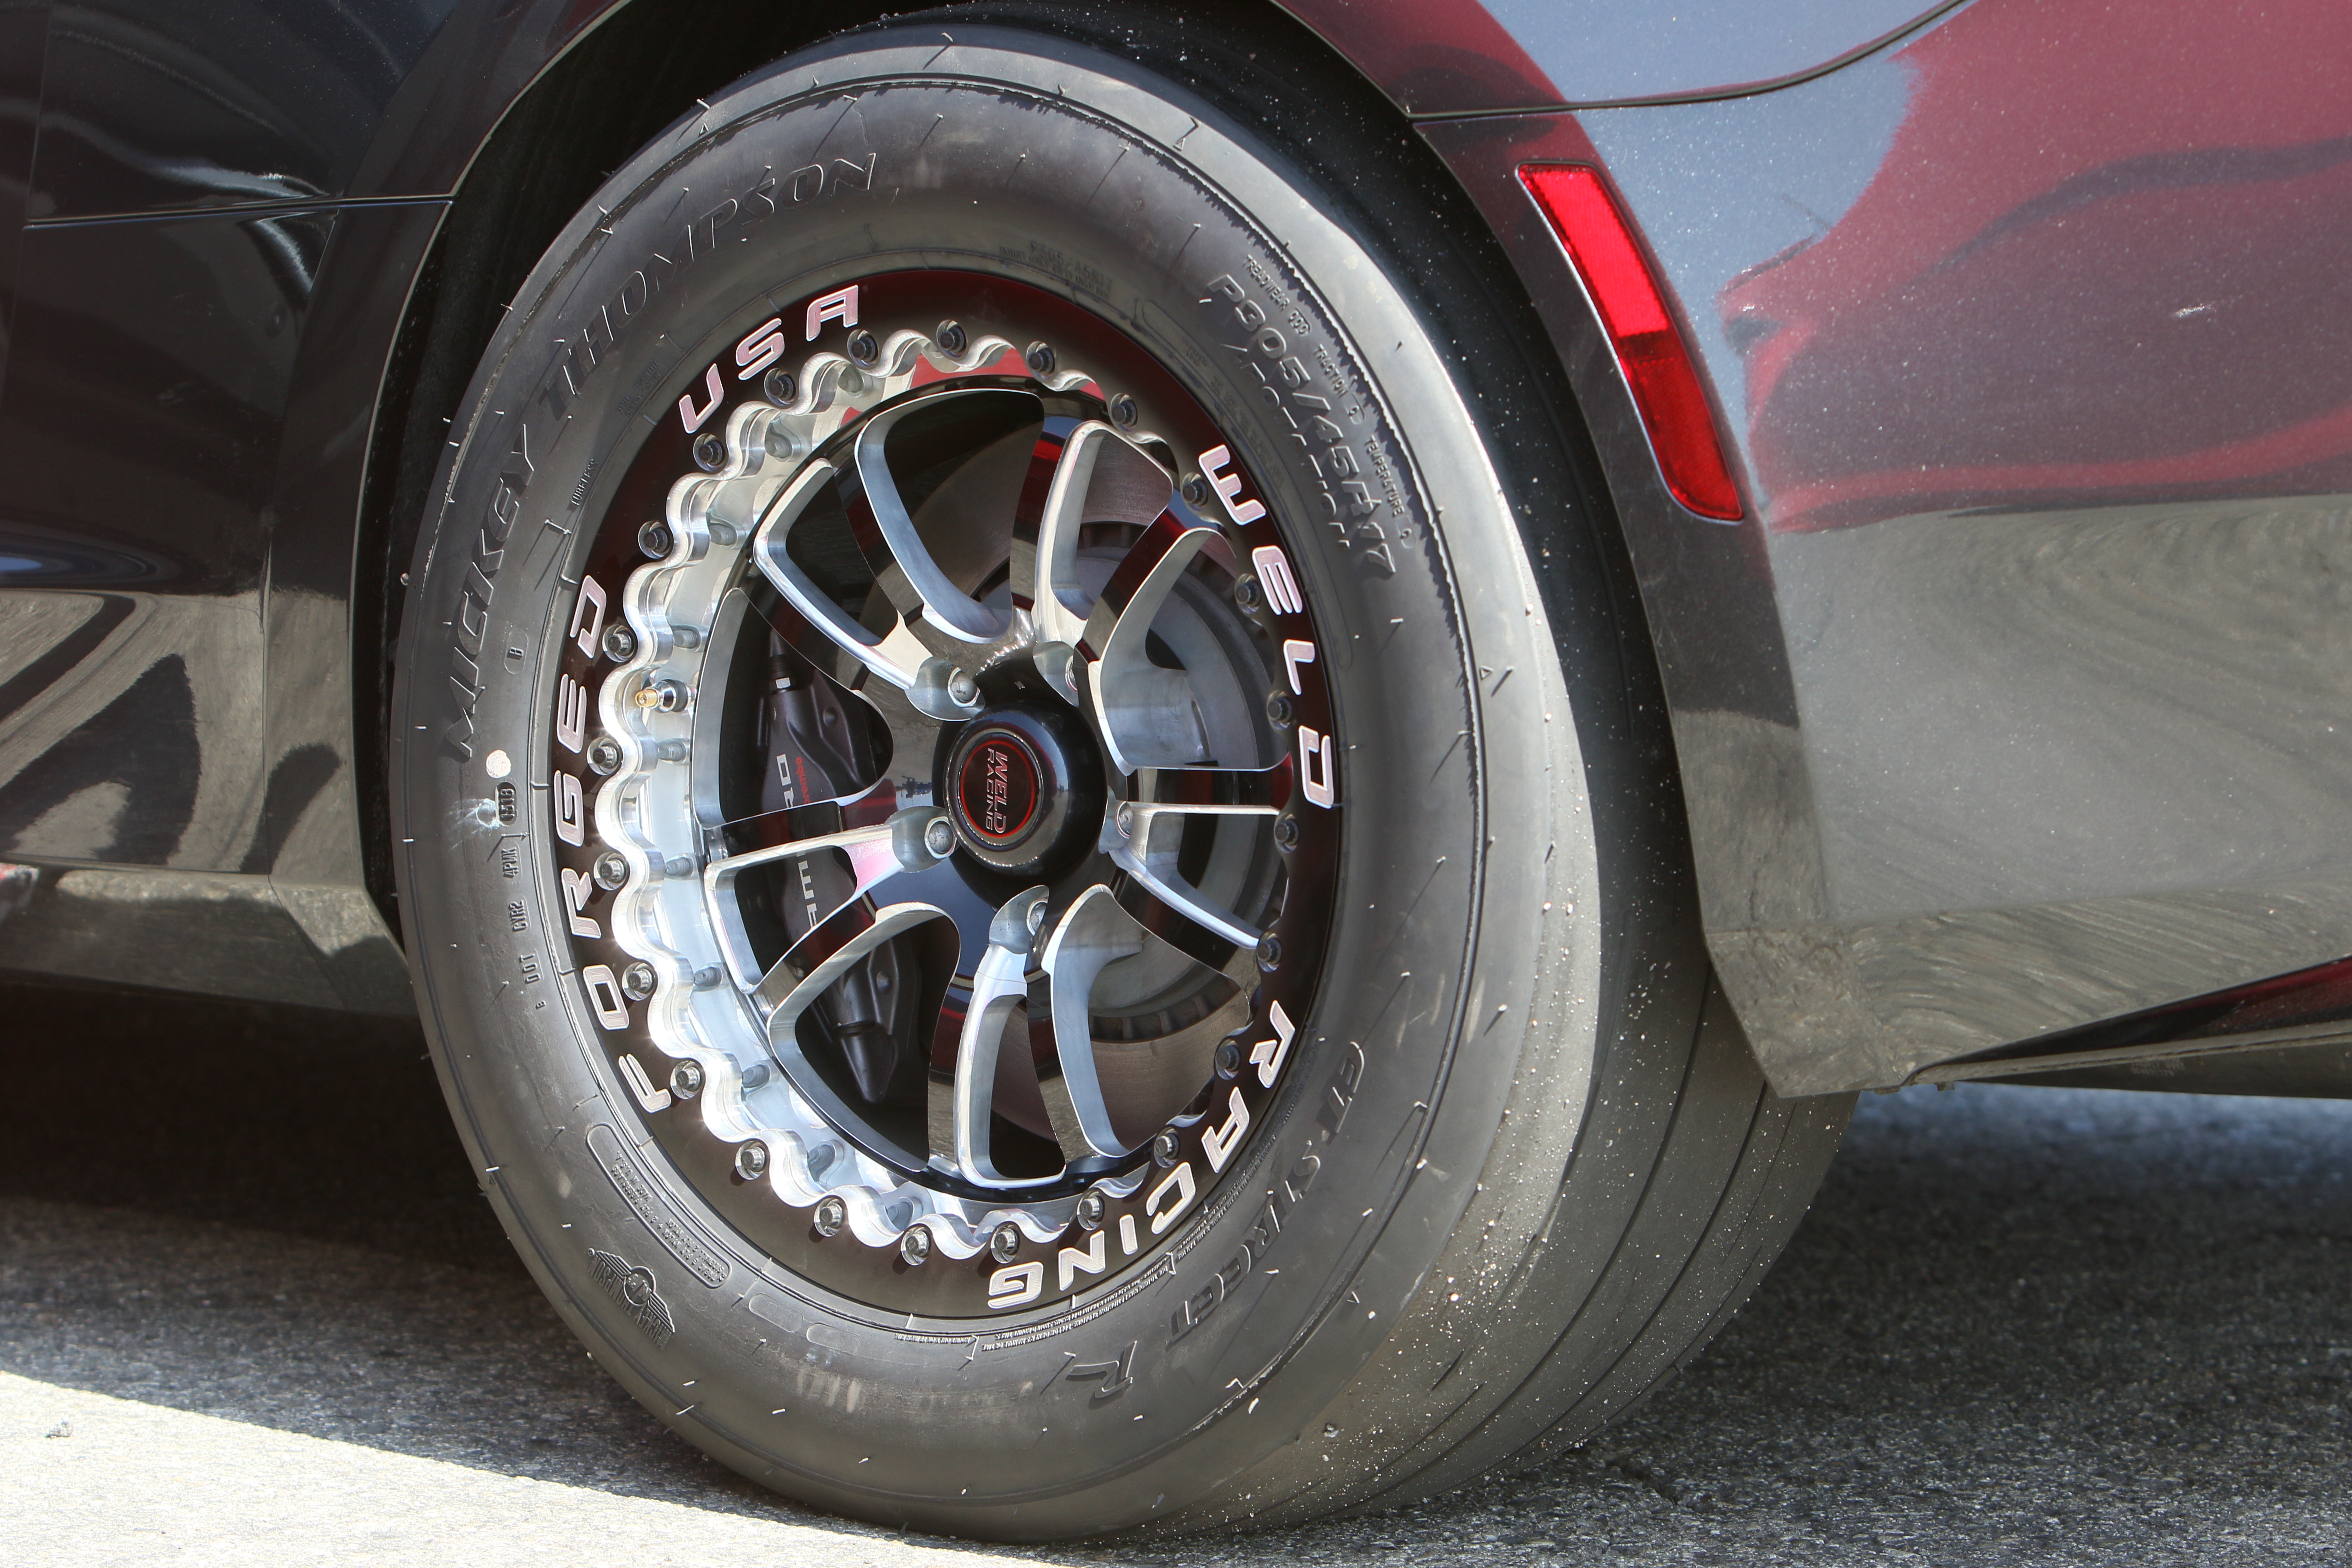
In case you are wondering, at the drag strip we needed a lot more tire than we used in the past in order to get all that power to the ground. With that in mind, we went with a set of Weld RT-S S70 wheels wrapped in 305/45R17 Mickey Thompson ET Street R tires out back. The S70’s modular design and tight manufacturing tolerances allowed us to fit a 17-inch tire on the back of our Camaro without sacrificing anything in the way of braking power. No modifications were necessary to fit the wheels and the added sidewall height will pay dividends at the drag strip. Constructed with a forged billet center and cold forged barrels, our S70 not only look fantastic on our sixth-gen, but will take any punishment we throw their way. We’ll be doing a full story on this wheel/tire combo in the future, so stay tuned for more. With that, we were ready to hit the dyno and find out just what kind of power our Camaro could lay down with our new modifications.
Pony Wars 2017 Camaro SS Phase 2 Mods
- ProCharger D-1X Stage 2 D1-X System w/ D-1X and Race Intercooler upgrades (PN 780-1GY212 6,796.99)
- COMP Cams Camshaft (PN 224-000-13 $478)
- COMP Cams valve springs and retainers (PN 26526TS-KIT $469.99)
- Manton pushrods ($155)
- Pace LT4 injectors (PN 12684130 $544.24)
- Pace LT4 injector pump (PN 12679090 $913.73)
- Pace fuel pump pipe (PN 12642289 $72.53)
- Texas-Speed & Performance ZL1 lift pump (PN 23377989 $210)
- Texas-Speed & Performance head porting (PN 199-LT1GMPORTING $900)
- Mahle Gen V LT Power Pak pistons -16cc dish (PN 930228365 $$1,039.99)
- SCAT H-beam forge 4340 connecting rods (PN 2-350-6125-2100 $449.99)
- Texas-Speed & Performance AFM delete kit (PN 25-LT1DODDEL-KIT $335)
- GForce drivetrain kit (PN CAM10700A $2,598
- BMR Lower Trailing Arms, Single Adjustable, Rod Ends (PN TCA060 $189.65)
- BMR Toe Rod, Double Adjustable, Rod Ends (PN TR007 $249.95)
Total: $15,621.52 ($600 was carried over from the $5,000 portion)
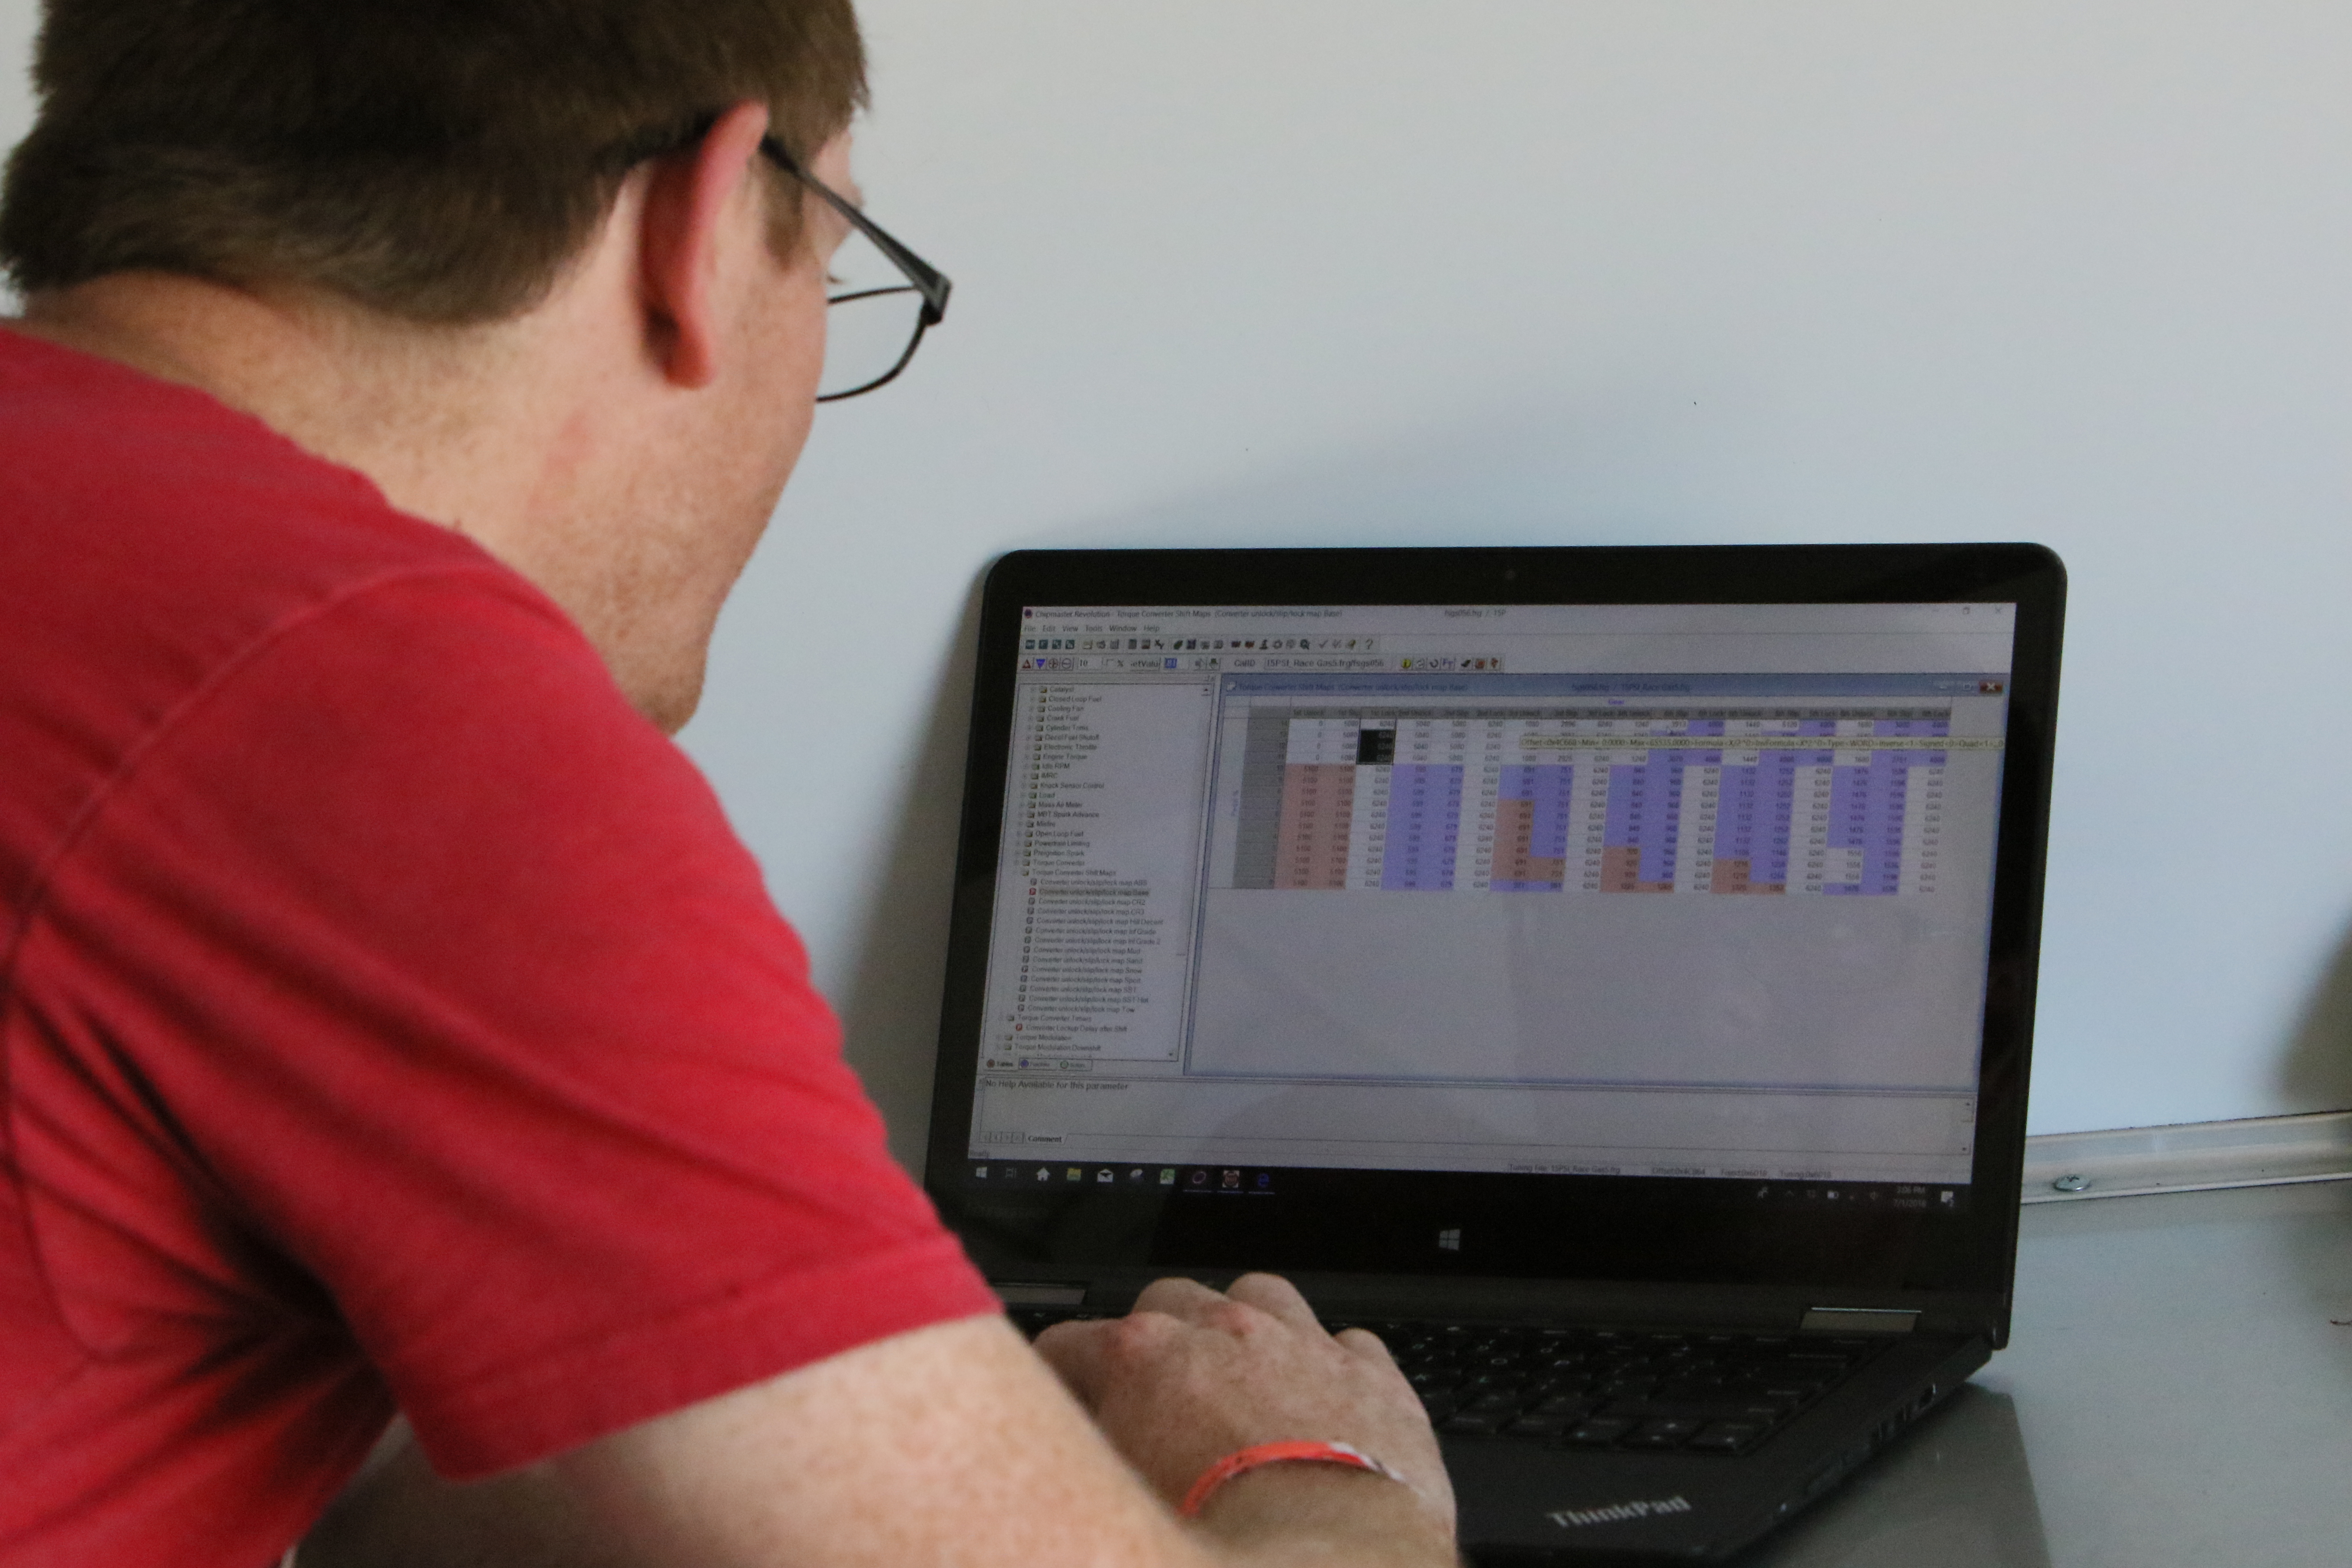
Once again, we turned to the guys at Diablosport to hook us up with a tuner that could modify the Camaro’s stock marching orders to compensate for our pressurized atmosphere. They recommended ace tuner Matt Kesatie of Kesatie Motorsports yet again to make sure our sixth-gen was turning out the power.
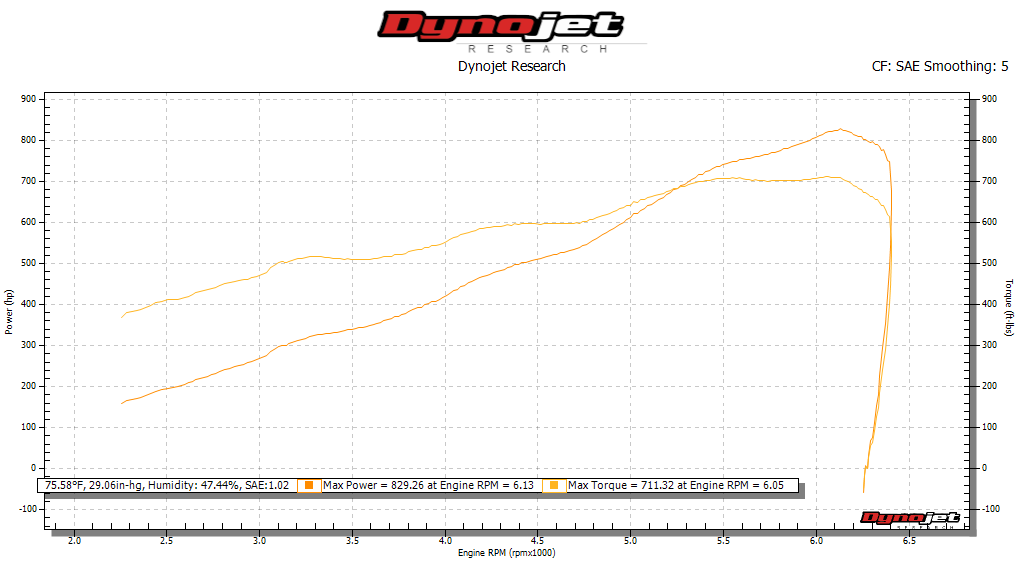
With the car strapped down to the rollers and a baseline map loaded in the ECM via our Diablosport i3 Platinum, we were ready to make some pulls to find out where we needed timing and fuel. Kesatie was careful to walk the Camaro toward its limits, leaning on the fuel system incrementally along the way. It was apparent after a light pull that the Camaro was ready to make some serious power. He started with 91-octane pump gas pulls, which would eventually become our road course tune, and then progressed to our drag strip tune-up using VP Racing MS100. This is an oxygenated, 100-octane, unleaded race fuel that is ideal for hot street cars pushing the limits like our Camaro.
With our ProCharger stuffing 15 pounds of boost down our newly augmented LT1’s throat, we were finally ready to show the Mustang what real power looks like. With all of the right numbers plugged into our tune, the Camaro wrung its fuel system dry while managing to hit 829 horsepower and 711 lb-ft of torque. That’s a gain of 411 horsepower and 277 lb-ft of torque! Not only is that a massive gain, it’s enough to earn the Camaro two points for the $15,000 portion of our competition and is exactly what we wanted.
We are well on our way to putting out the 2017 Mustang out to pasture for good. Backed by some of the biggest names in the automotive aftermarket — including ARP, BMR Suspension, COMP, Covercraft, DiabloSport, Dyna-Batt, E3 Spark Plugs, Holley Performance Parts, Mahle, Mickey Thompson, ProCharger, QA1, Royal Purple, Summit Racing, TCI, Weld Racing, BMR Suspension, Fragola, PRW, and others — this competition is beginning to get serious. Stay tuned as we head to the drag strip next and check out FordNXT, Horsepower Wars, and LSX Magazine to stay up to date on all the latest.