The fourth-gen F-body reigned supreme back in its heyday– these cars offer a unique torque arm suspension that worked great on both the road course and the dragstrip. But after 20 years of technological advances and lack of maintenance, these vehicles leave a lot to be desired compared to some of the independent rear suspension cars of today. So is the case with our 2000 WS6 project, the Dirty Bird. It’s a great car, but there are many areas that we need to address to make our Firebird fun again. And while the worn-out factory shocks and springs are a big problem, there is room for improvement in other areas, as well.

BMR Suspension has been manufacturing suspension parts since 1998. The company specializes in GM classic, and late model cars, and also offers products for Ford Mustangs and Dodge Challengers and Chargers. And while BMR offers a variety of products for GM vehicles, we are interested in anything that will make our fourth-gen Pontiac perform better.
Bilstein To The Rescue
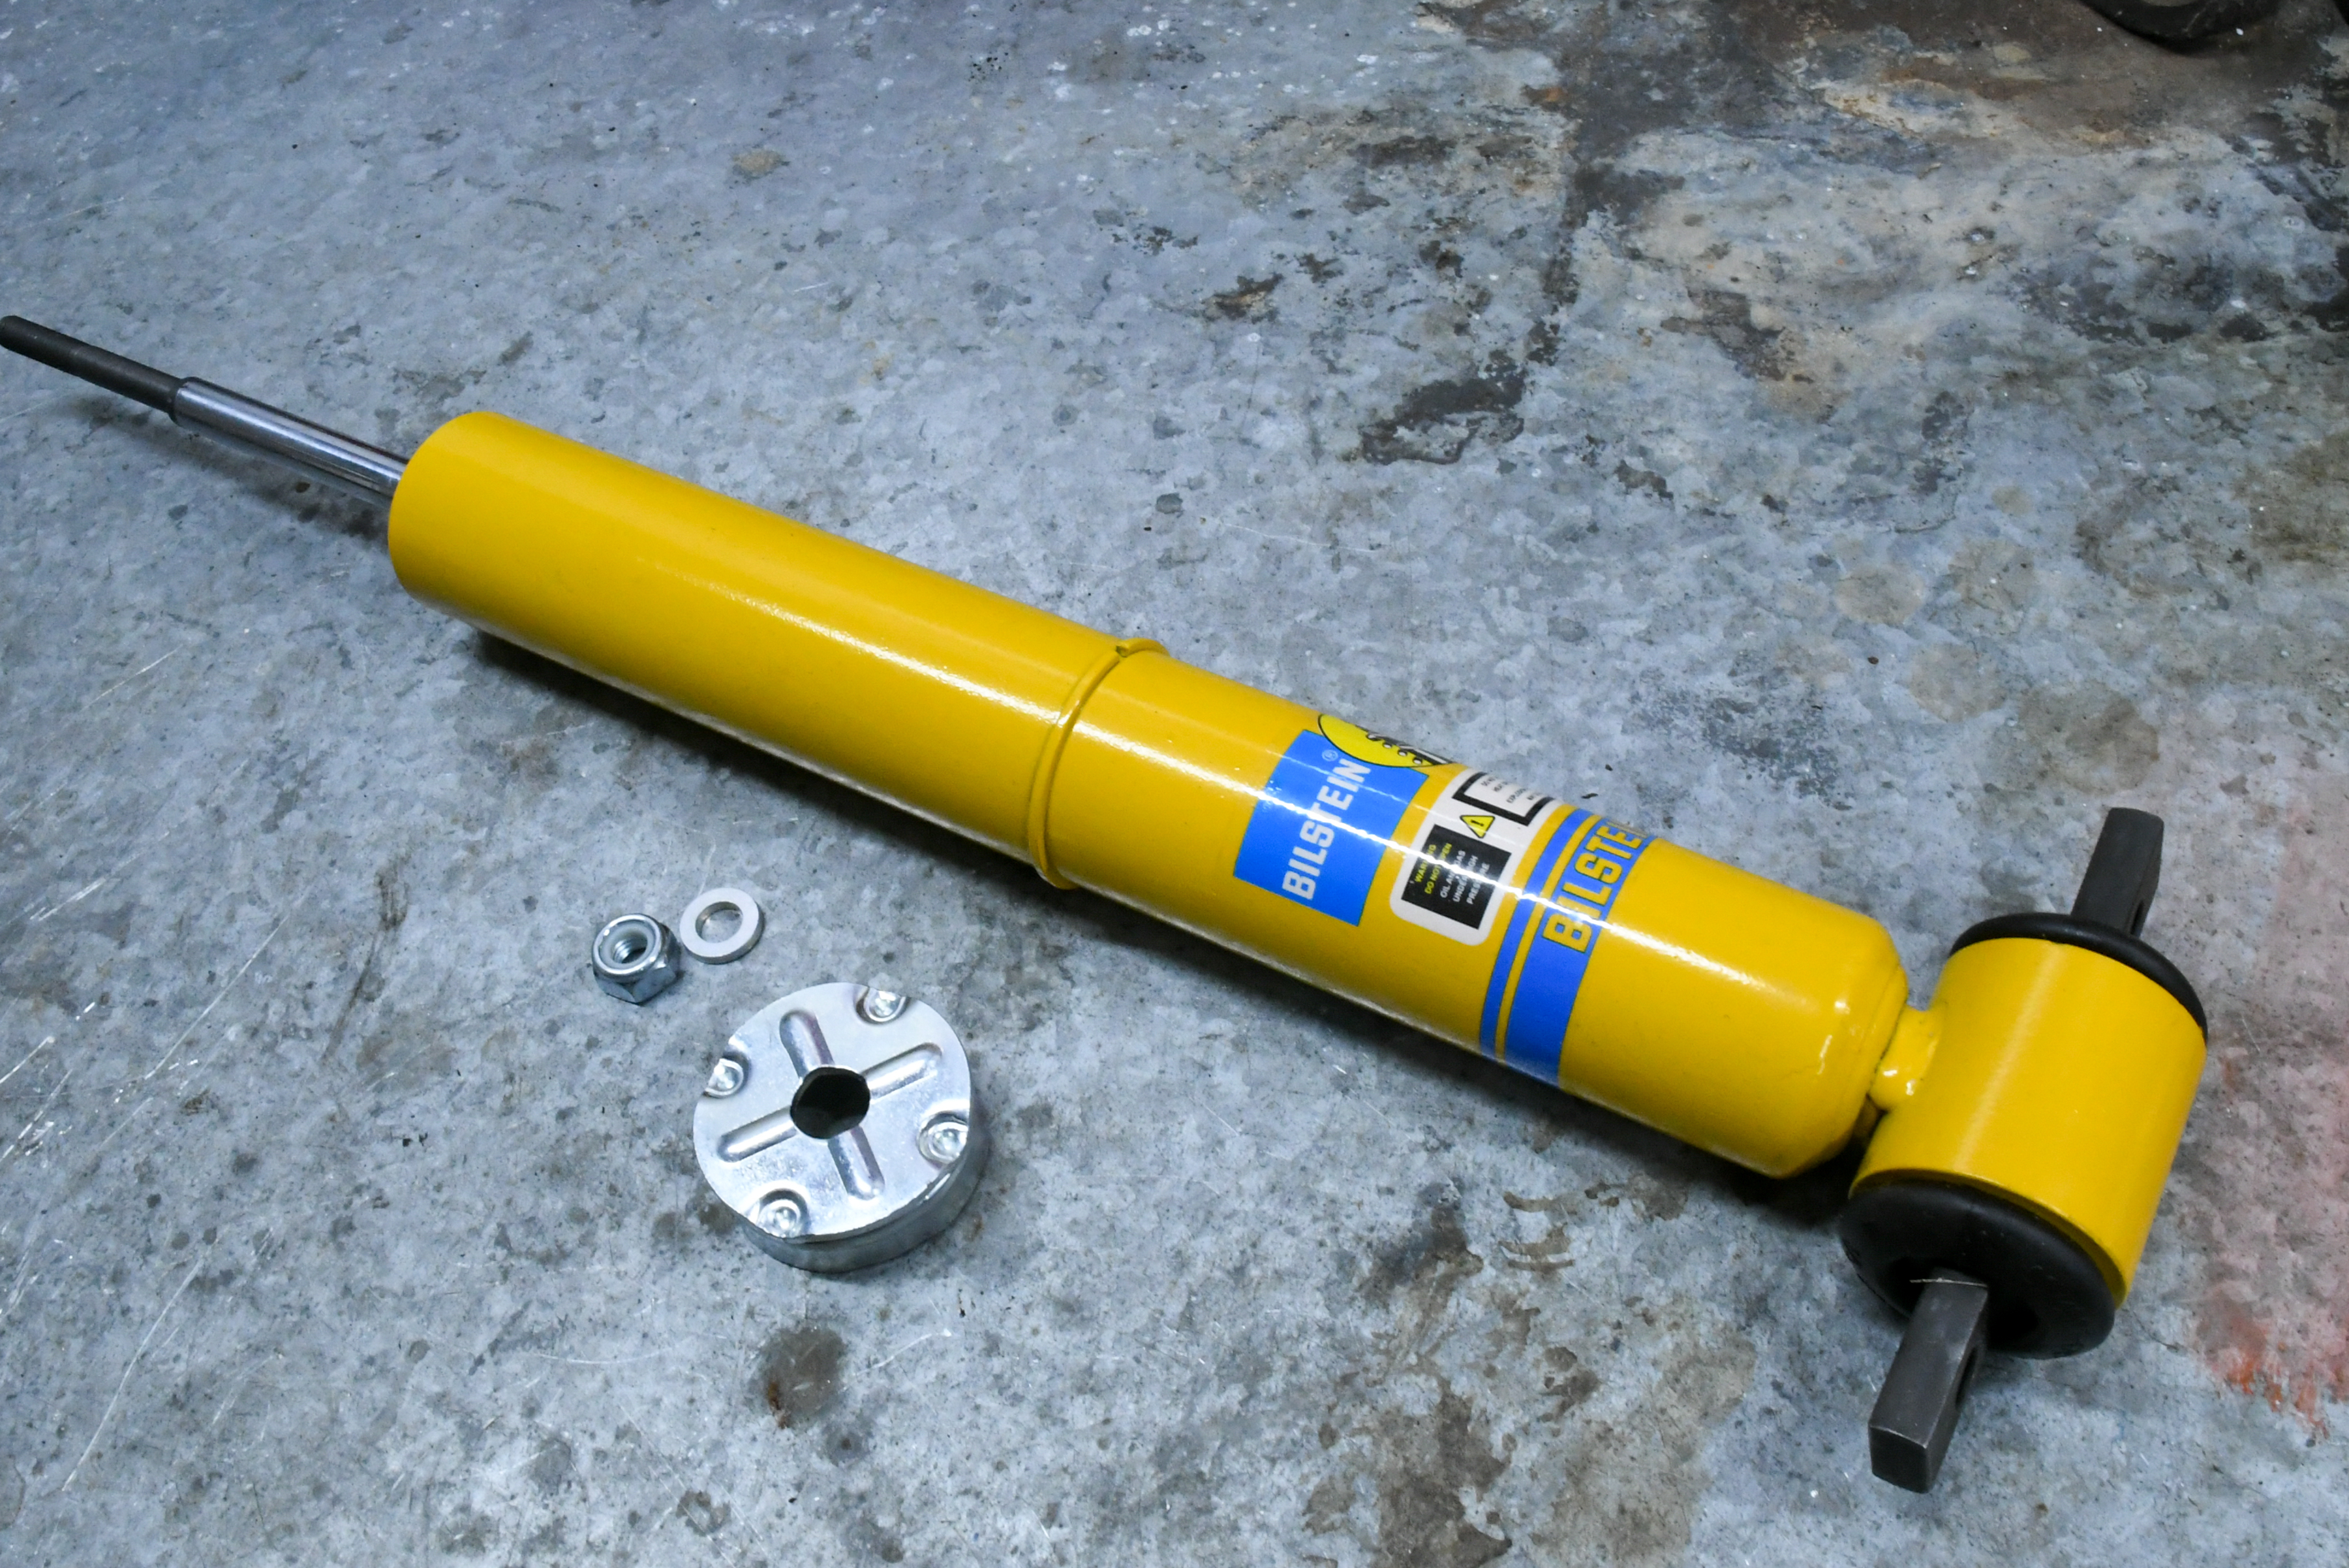
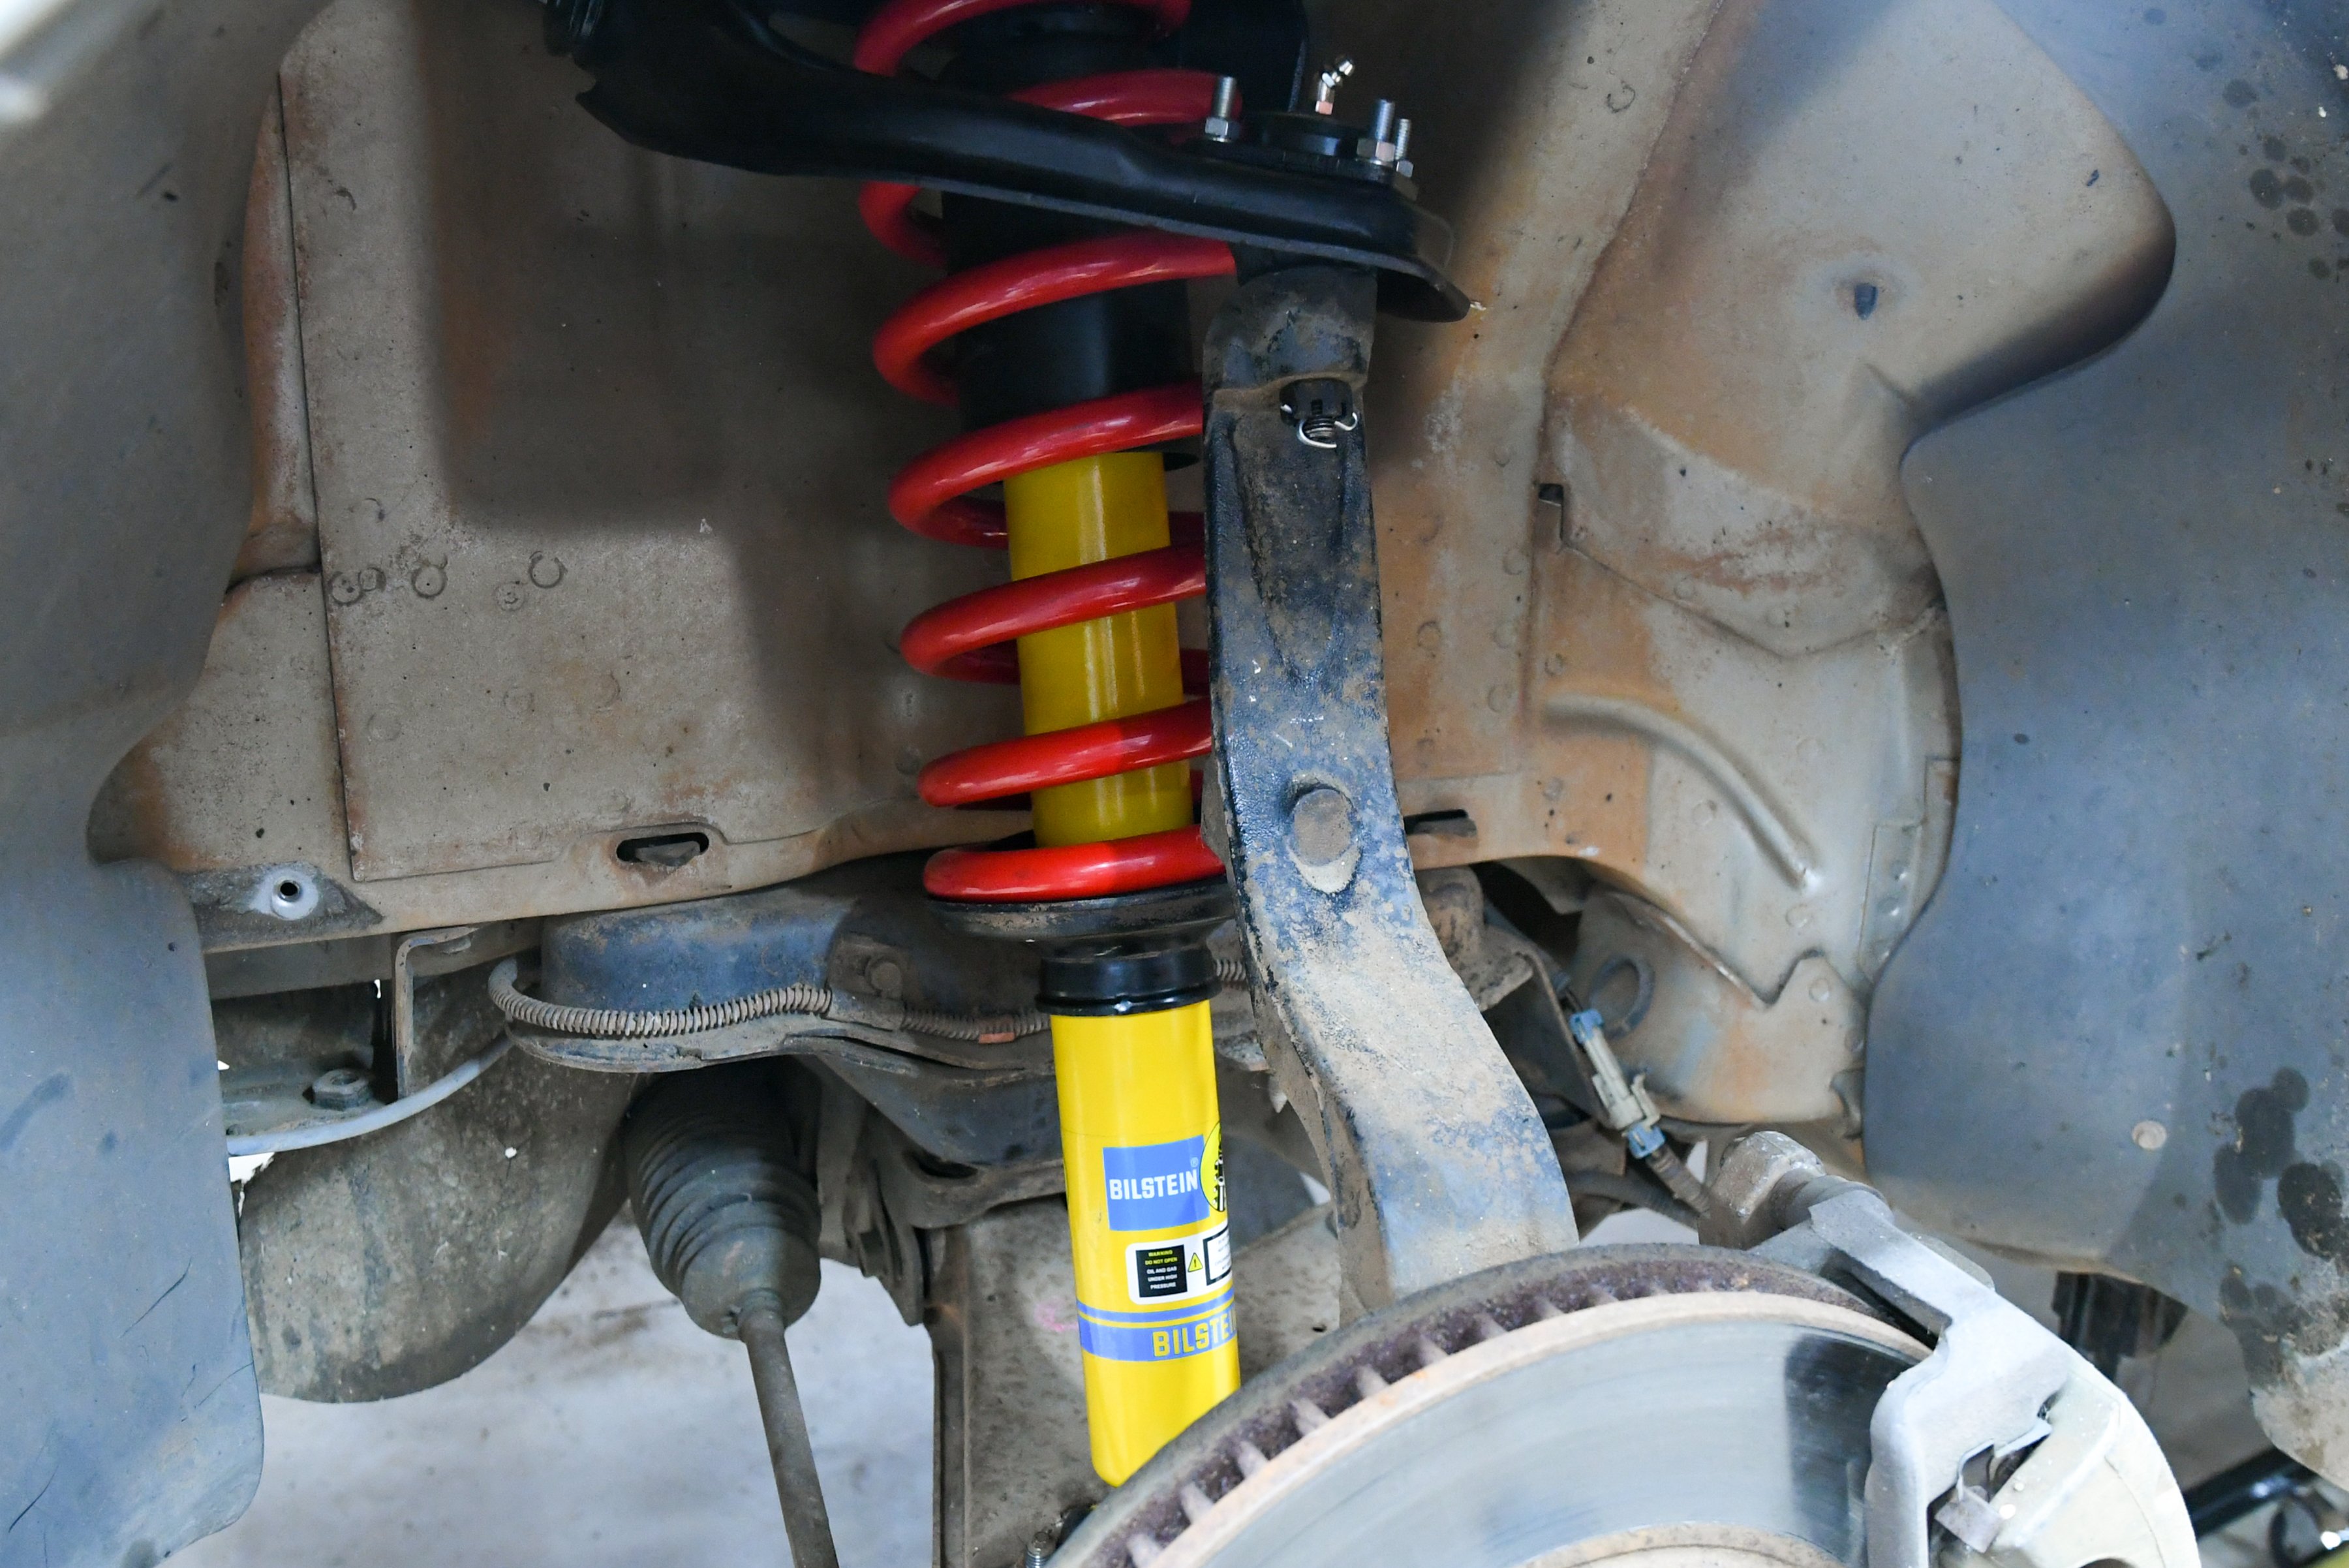
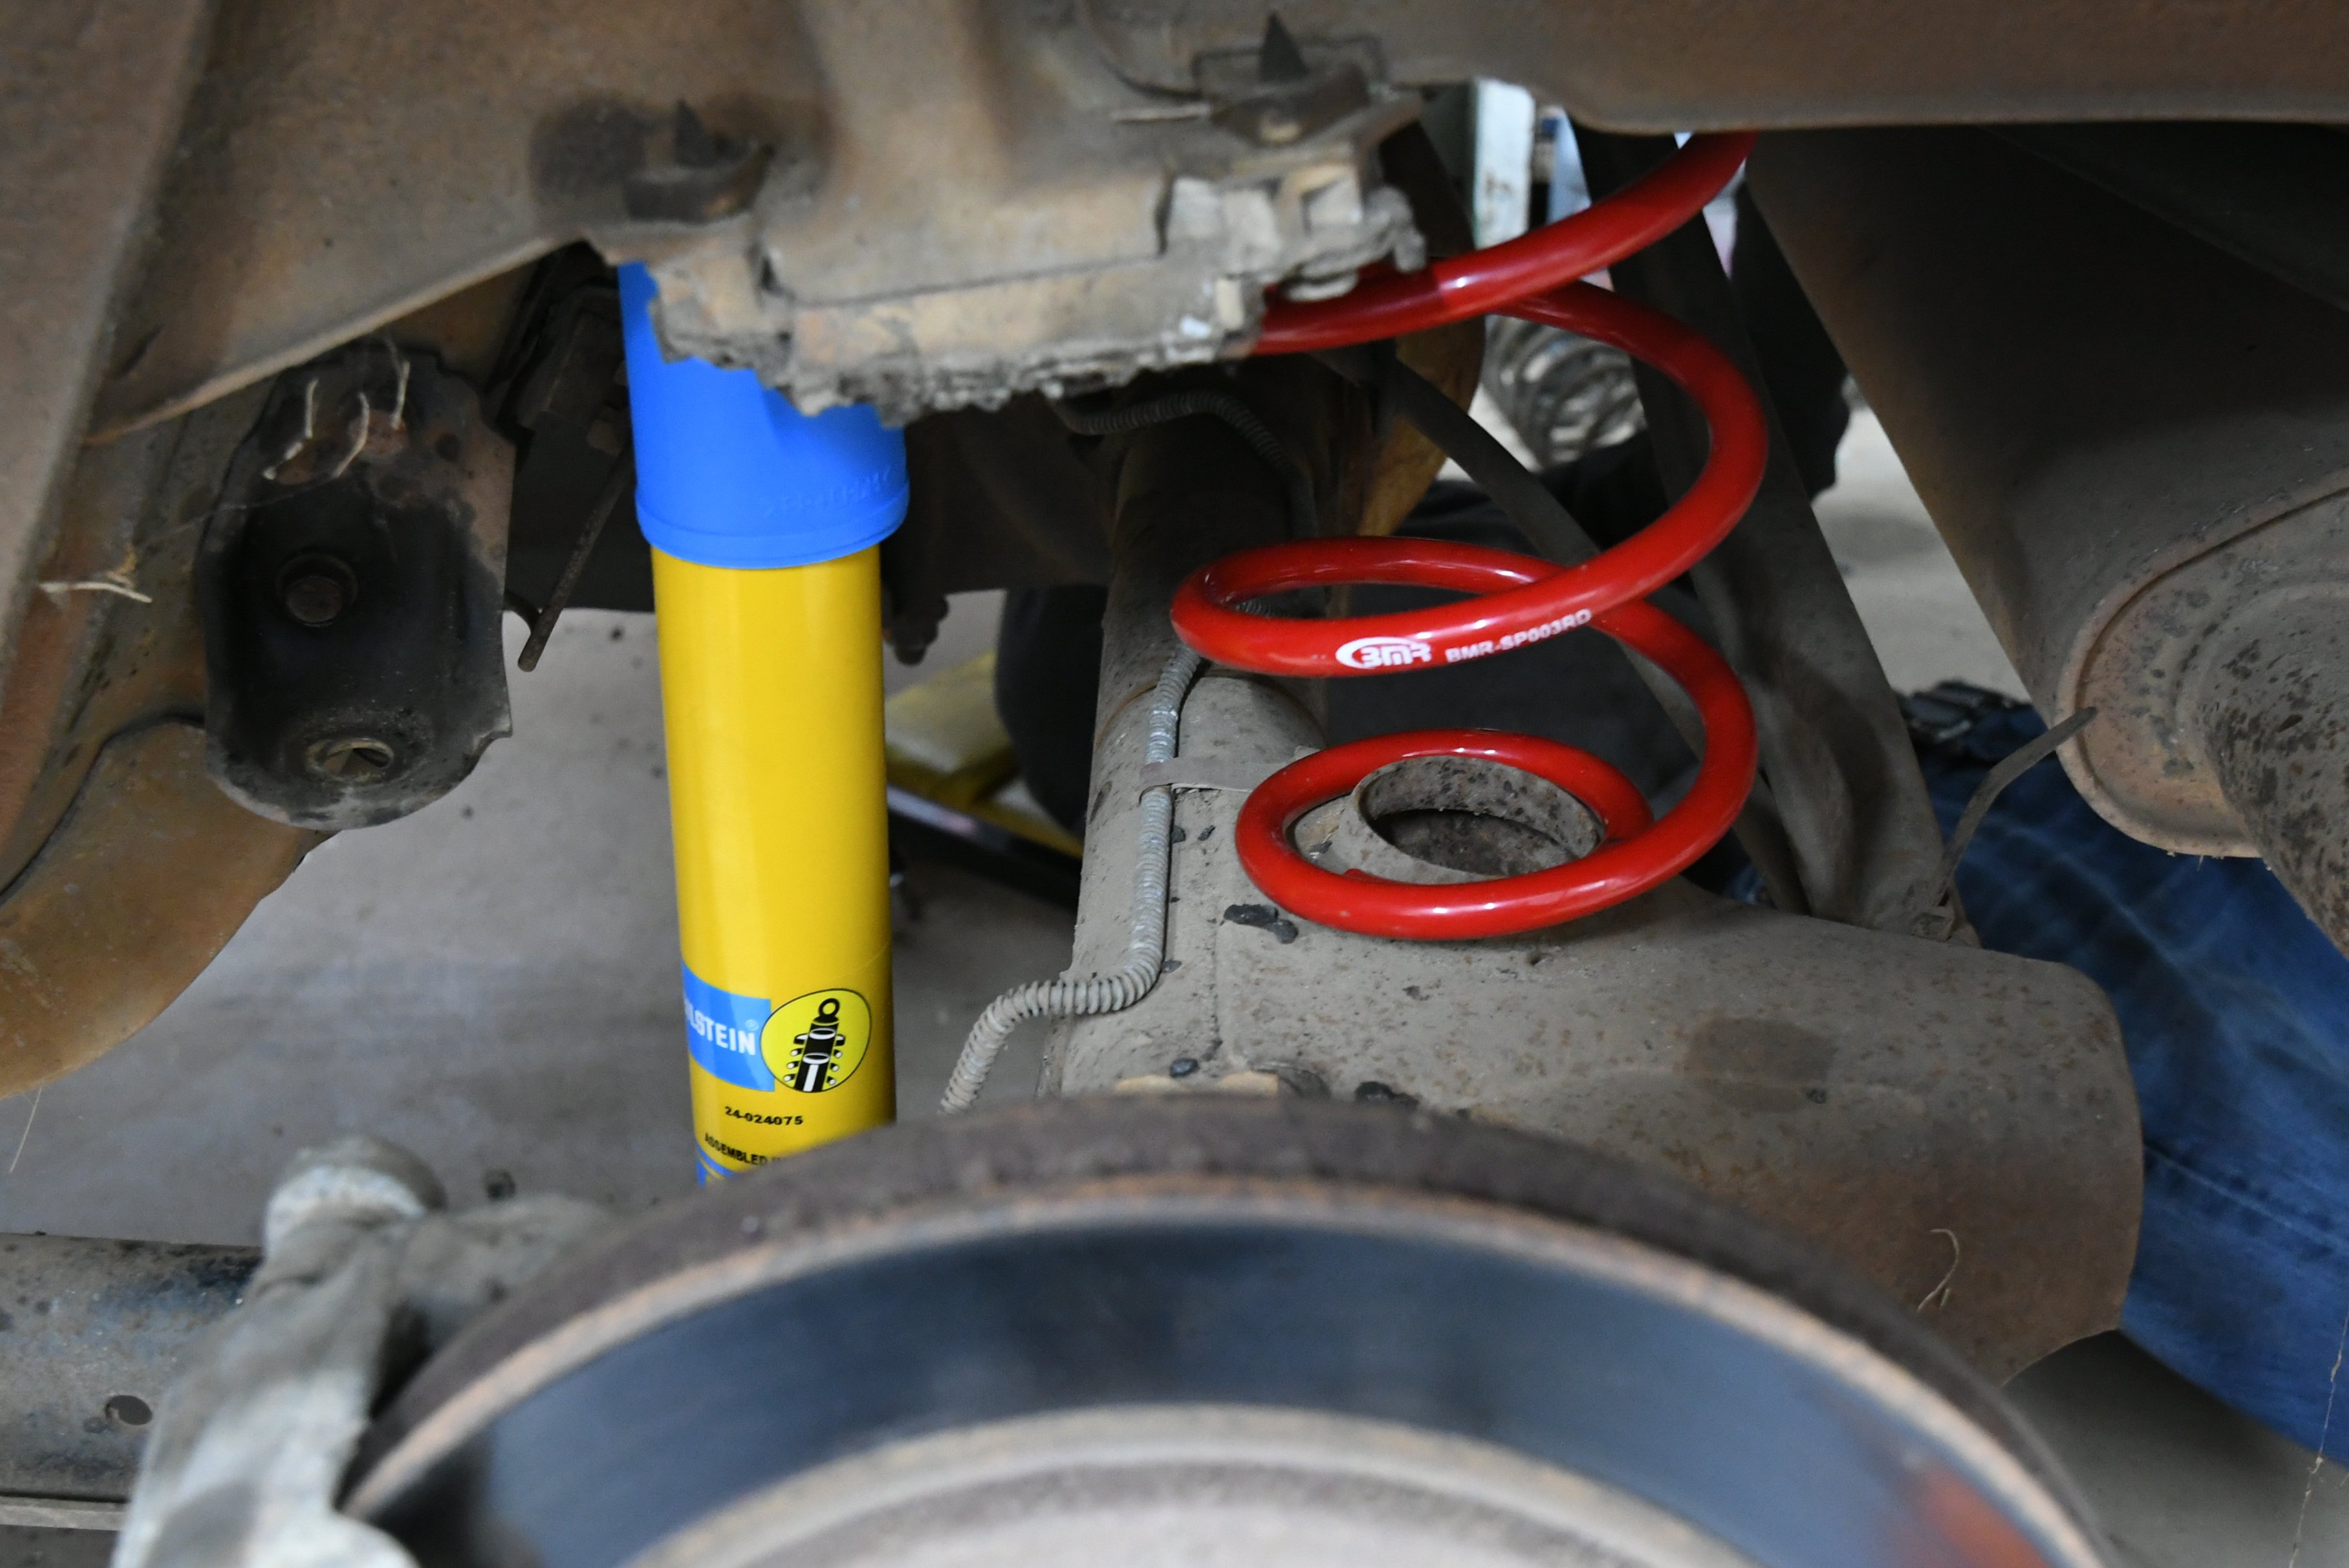
Since the factory-supplied DeCarbon shocks on our WS6 are still bolted on the car, we decided to start our rebuild there. Right now, the car bounces around and offers a pretty sloppy ride, especially in the corners. To remedy this ailment, we ordered a set of Bilstein B6 Performance struts (PN 24-024068) for the front and B6 Performance shocks (PN 24-024075) for the rear.
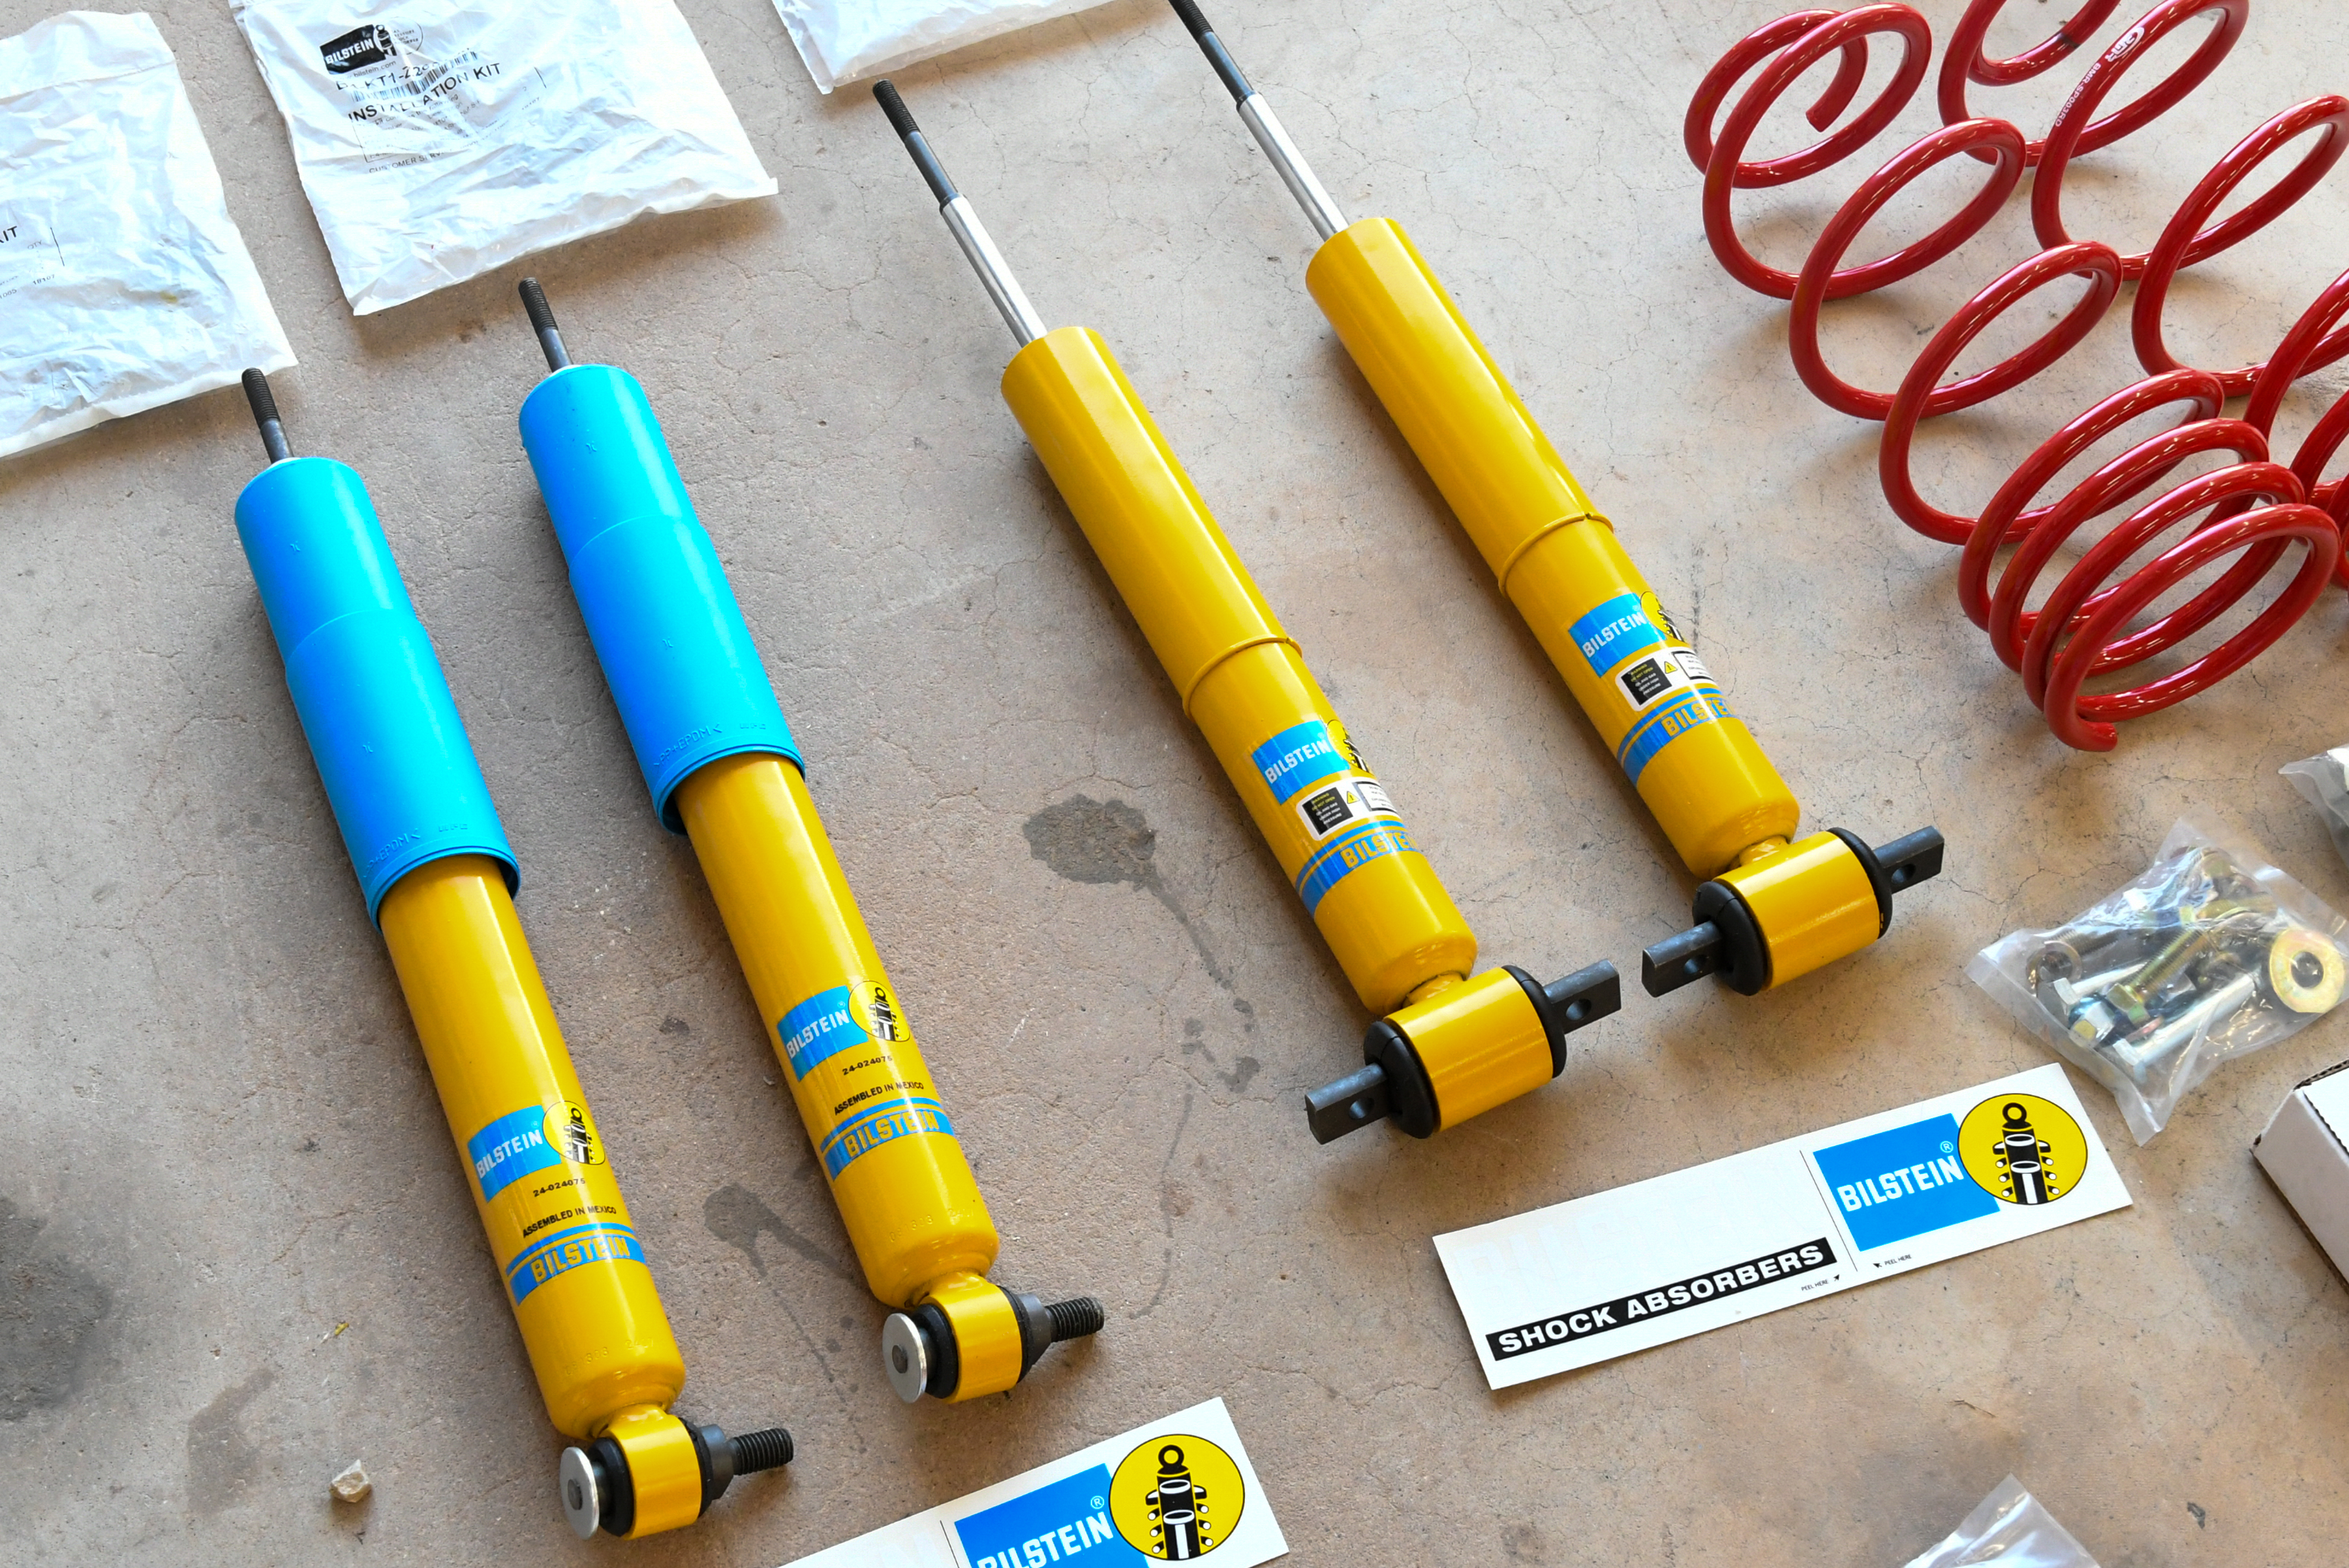
Bilstein’s B6 Performance series is a direct replacement for our WS6 and offers some added features, as well. While these units can be paired with the factory springs, we had something else in mind, but more on that later. According to Bilstein, these dampers offer specific valving with a monotube design to bring out the best handling performance. They rigorously test for quality that meets or exceeds OE standards and will provide improved handling performance.
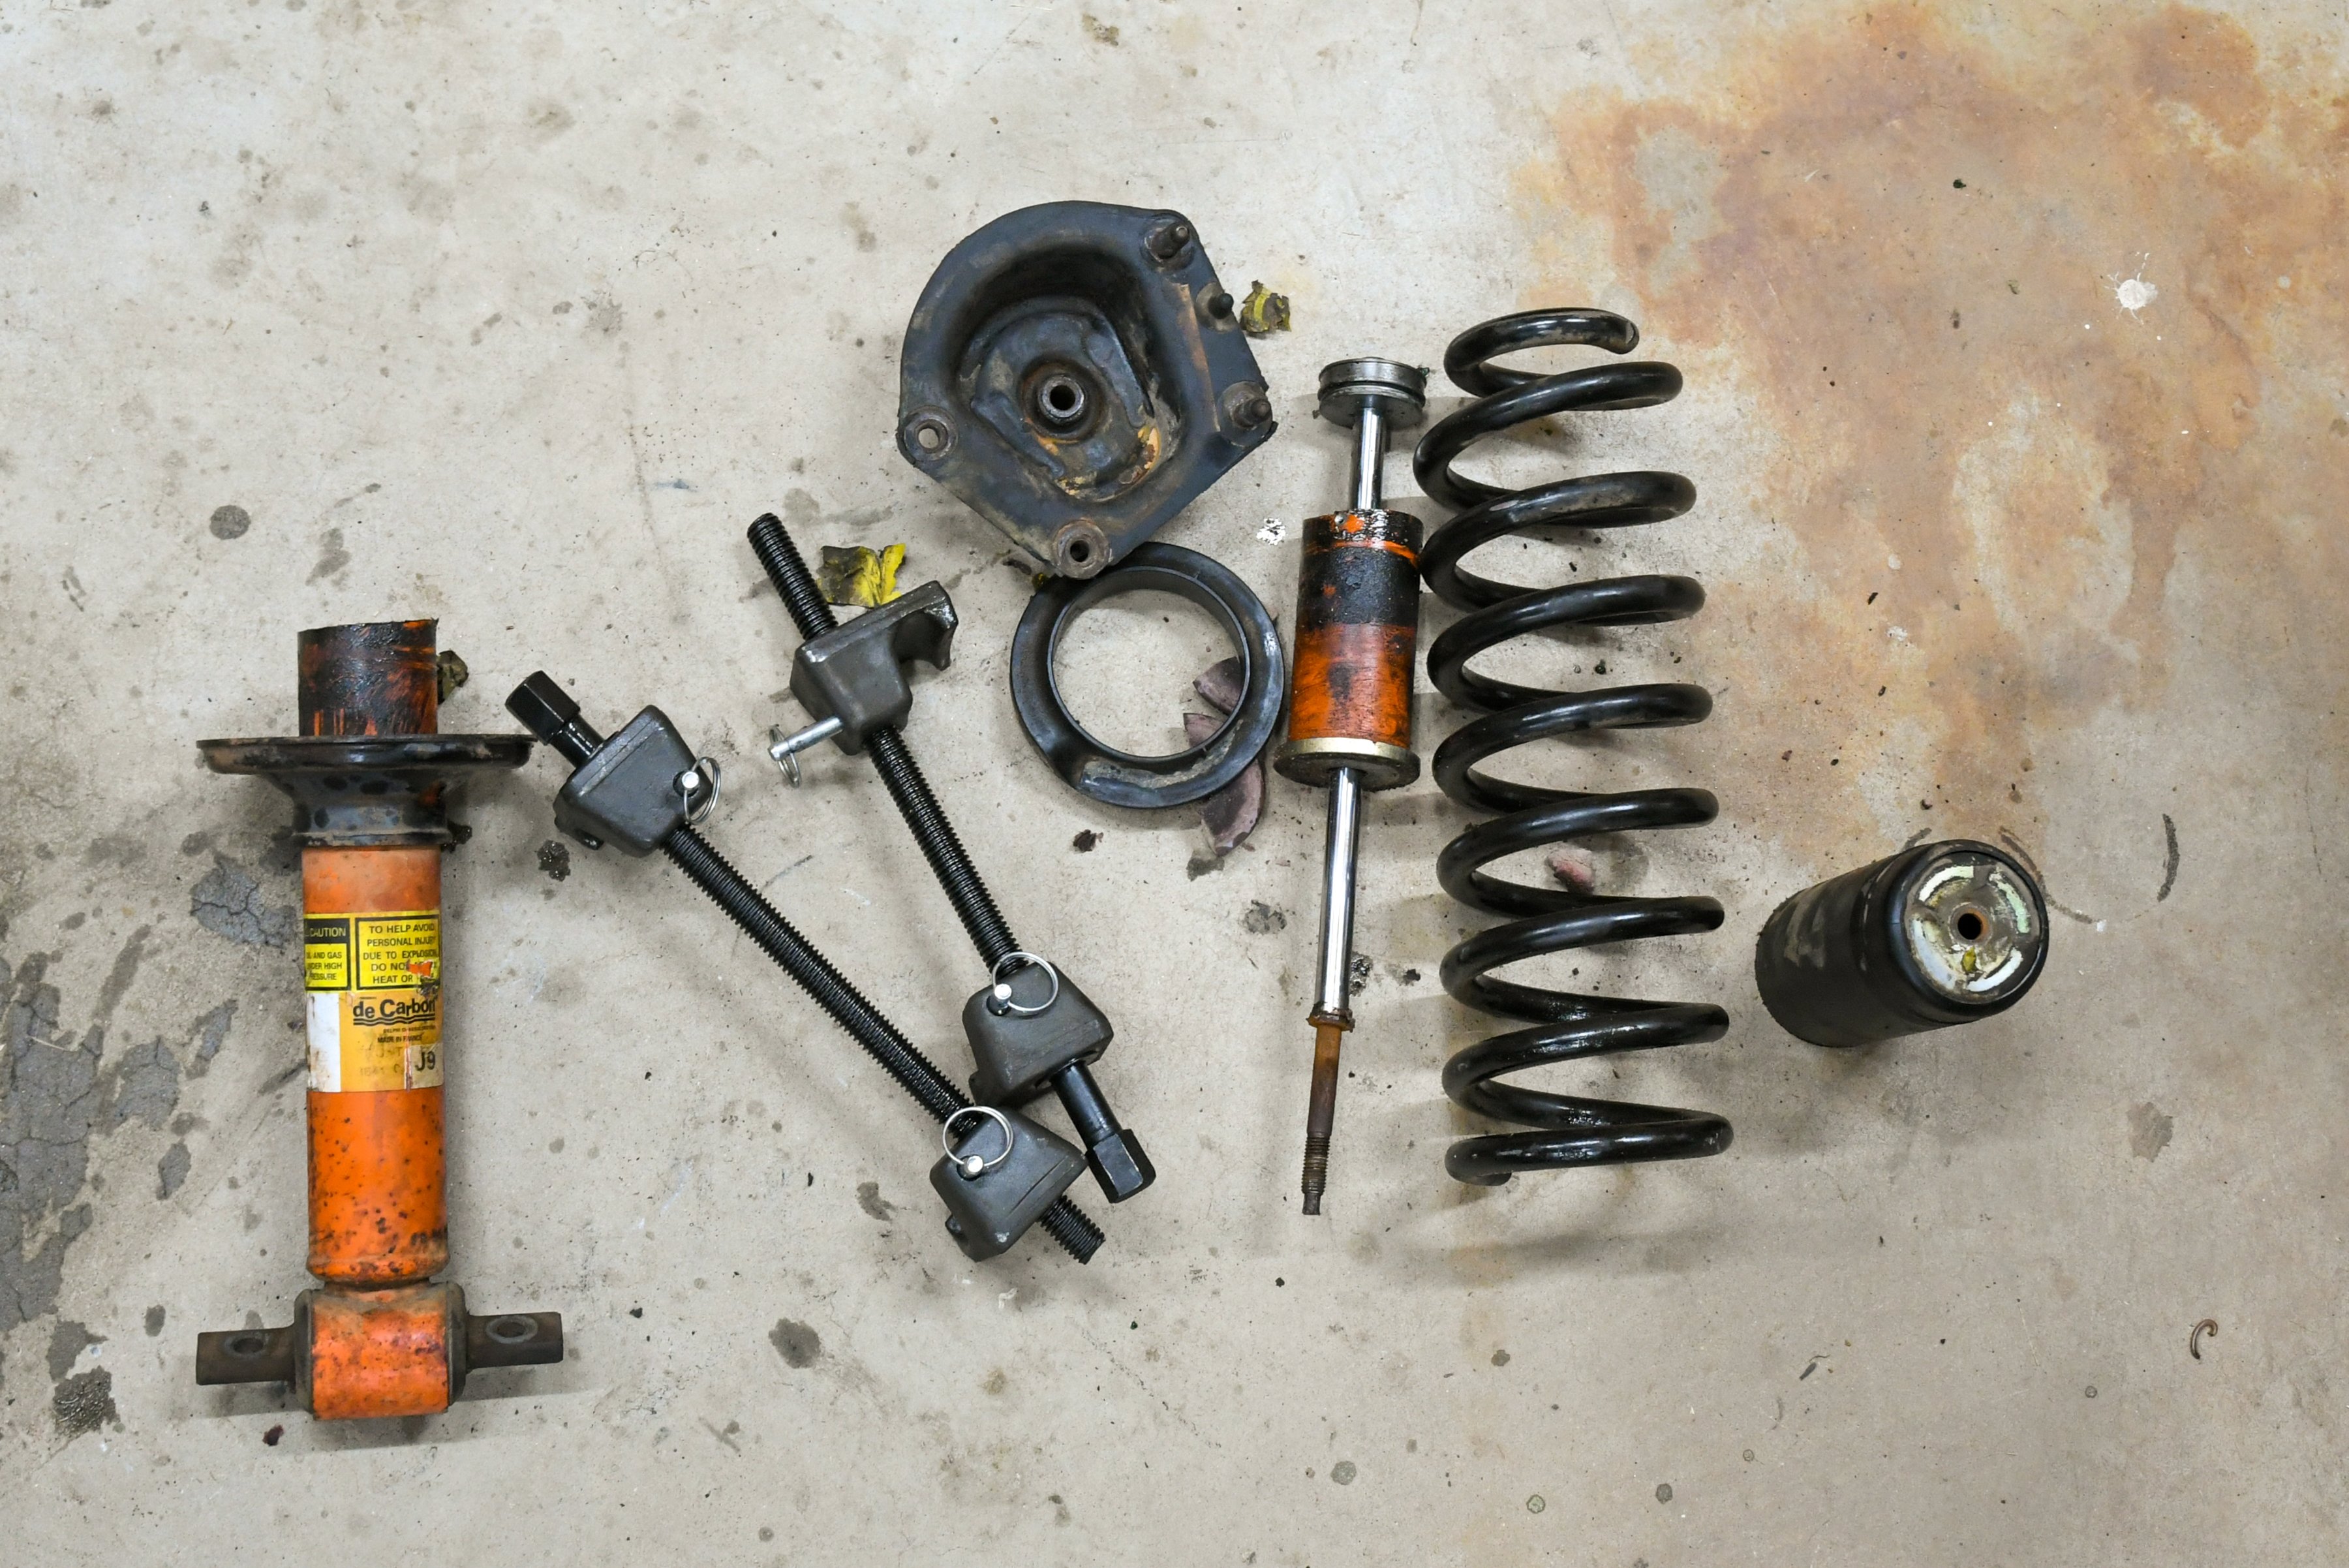
Our WS6 springs have 130,000 miles on them at this point, and while they were probably good for a few more, we’re looking to add more performance to the old bird. We turned to experts at BMR for its performance spring package (PN LSP003). This kit includes front and rear lowering springs (PN SP001), control arm relocation brackets (PN CAB002), and an adjustable panhard bar (PN PHR002). This kit takes all of the guesswork out of knowing what to order when lowering your car while saving you money.
The Easy Part
Changing out the suspension on a fourth-gen can be easily done in a garage with jackstands and basic handtools.
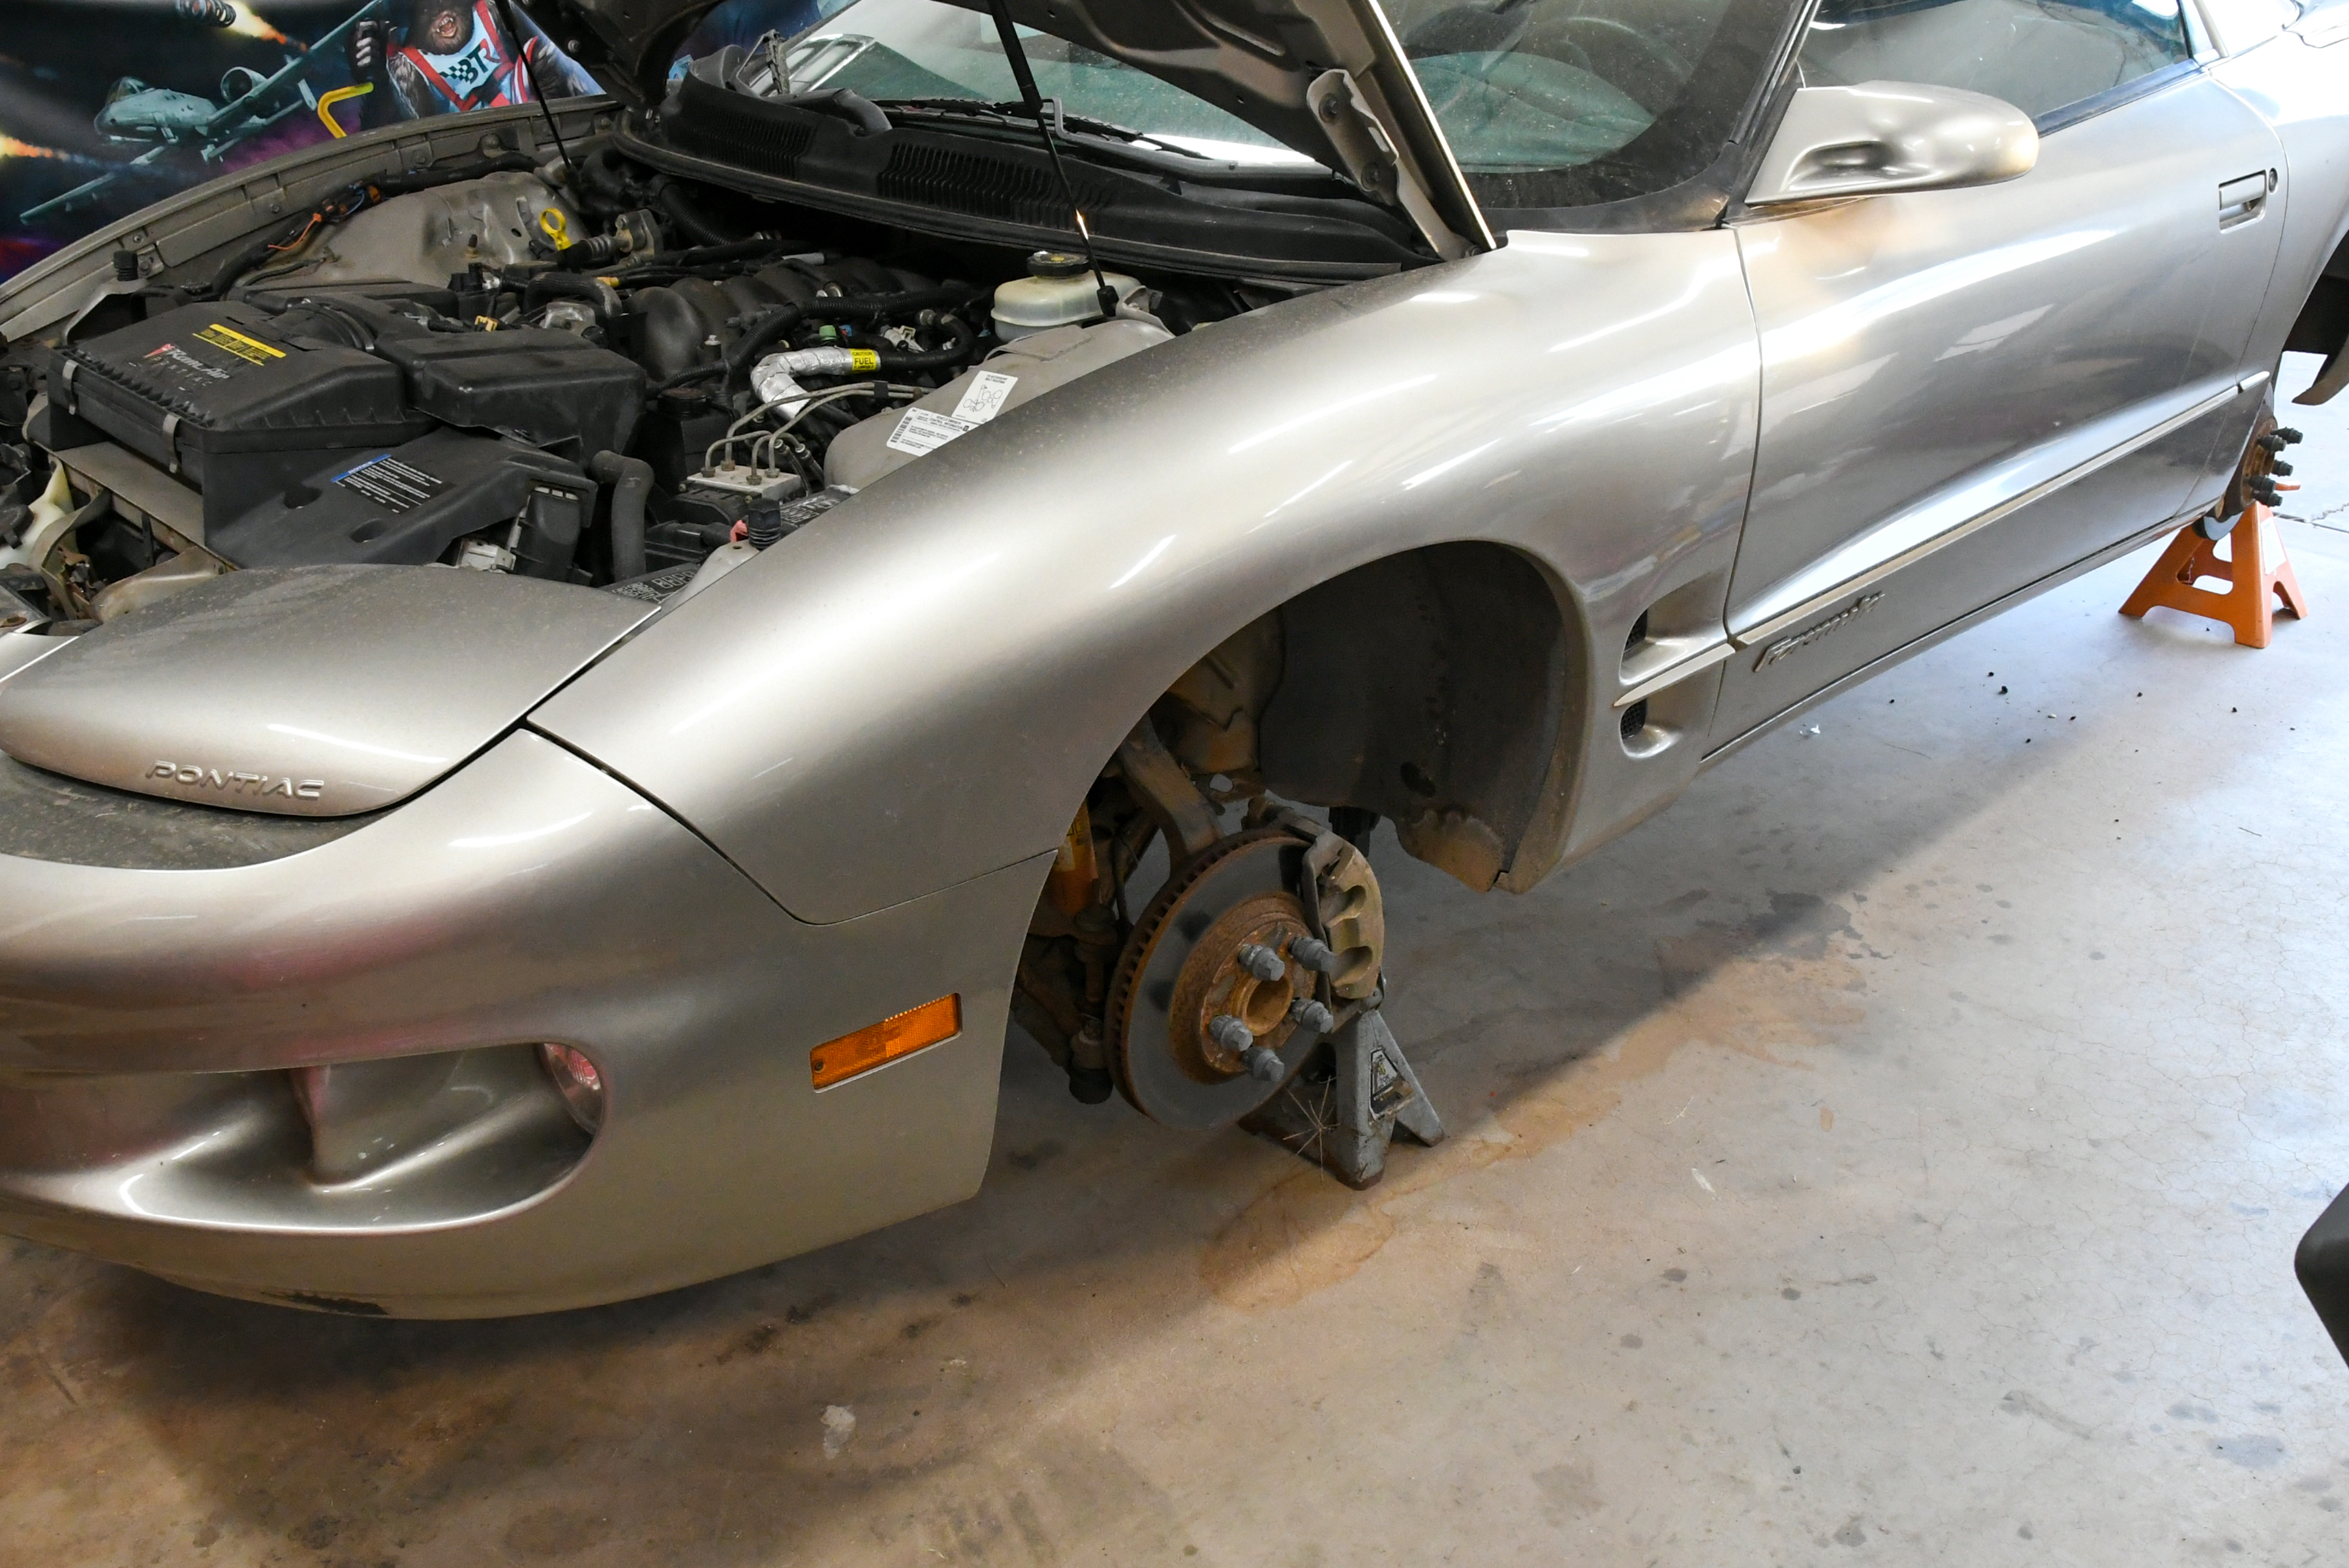
We decided to tackle the front end installation first. We know from experience that if you have any problems, it will be on the front of a fourth-gen. And with that thought, we went to work and put the WS6 up on jackstands and removed the wheels. With the car securely placed on the stands, it was time to remove the factory sway bar and the struts.
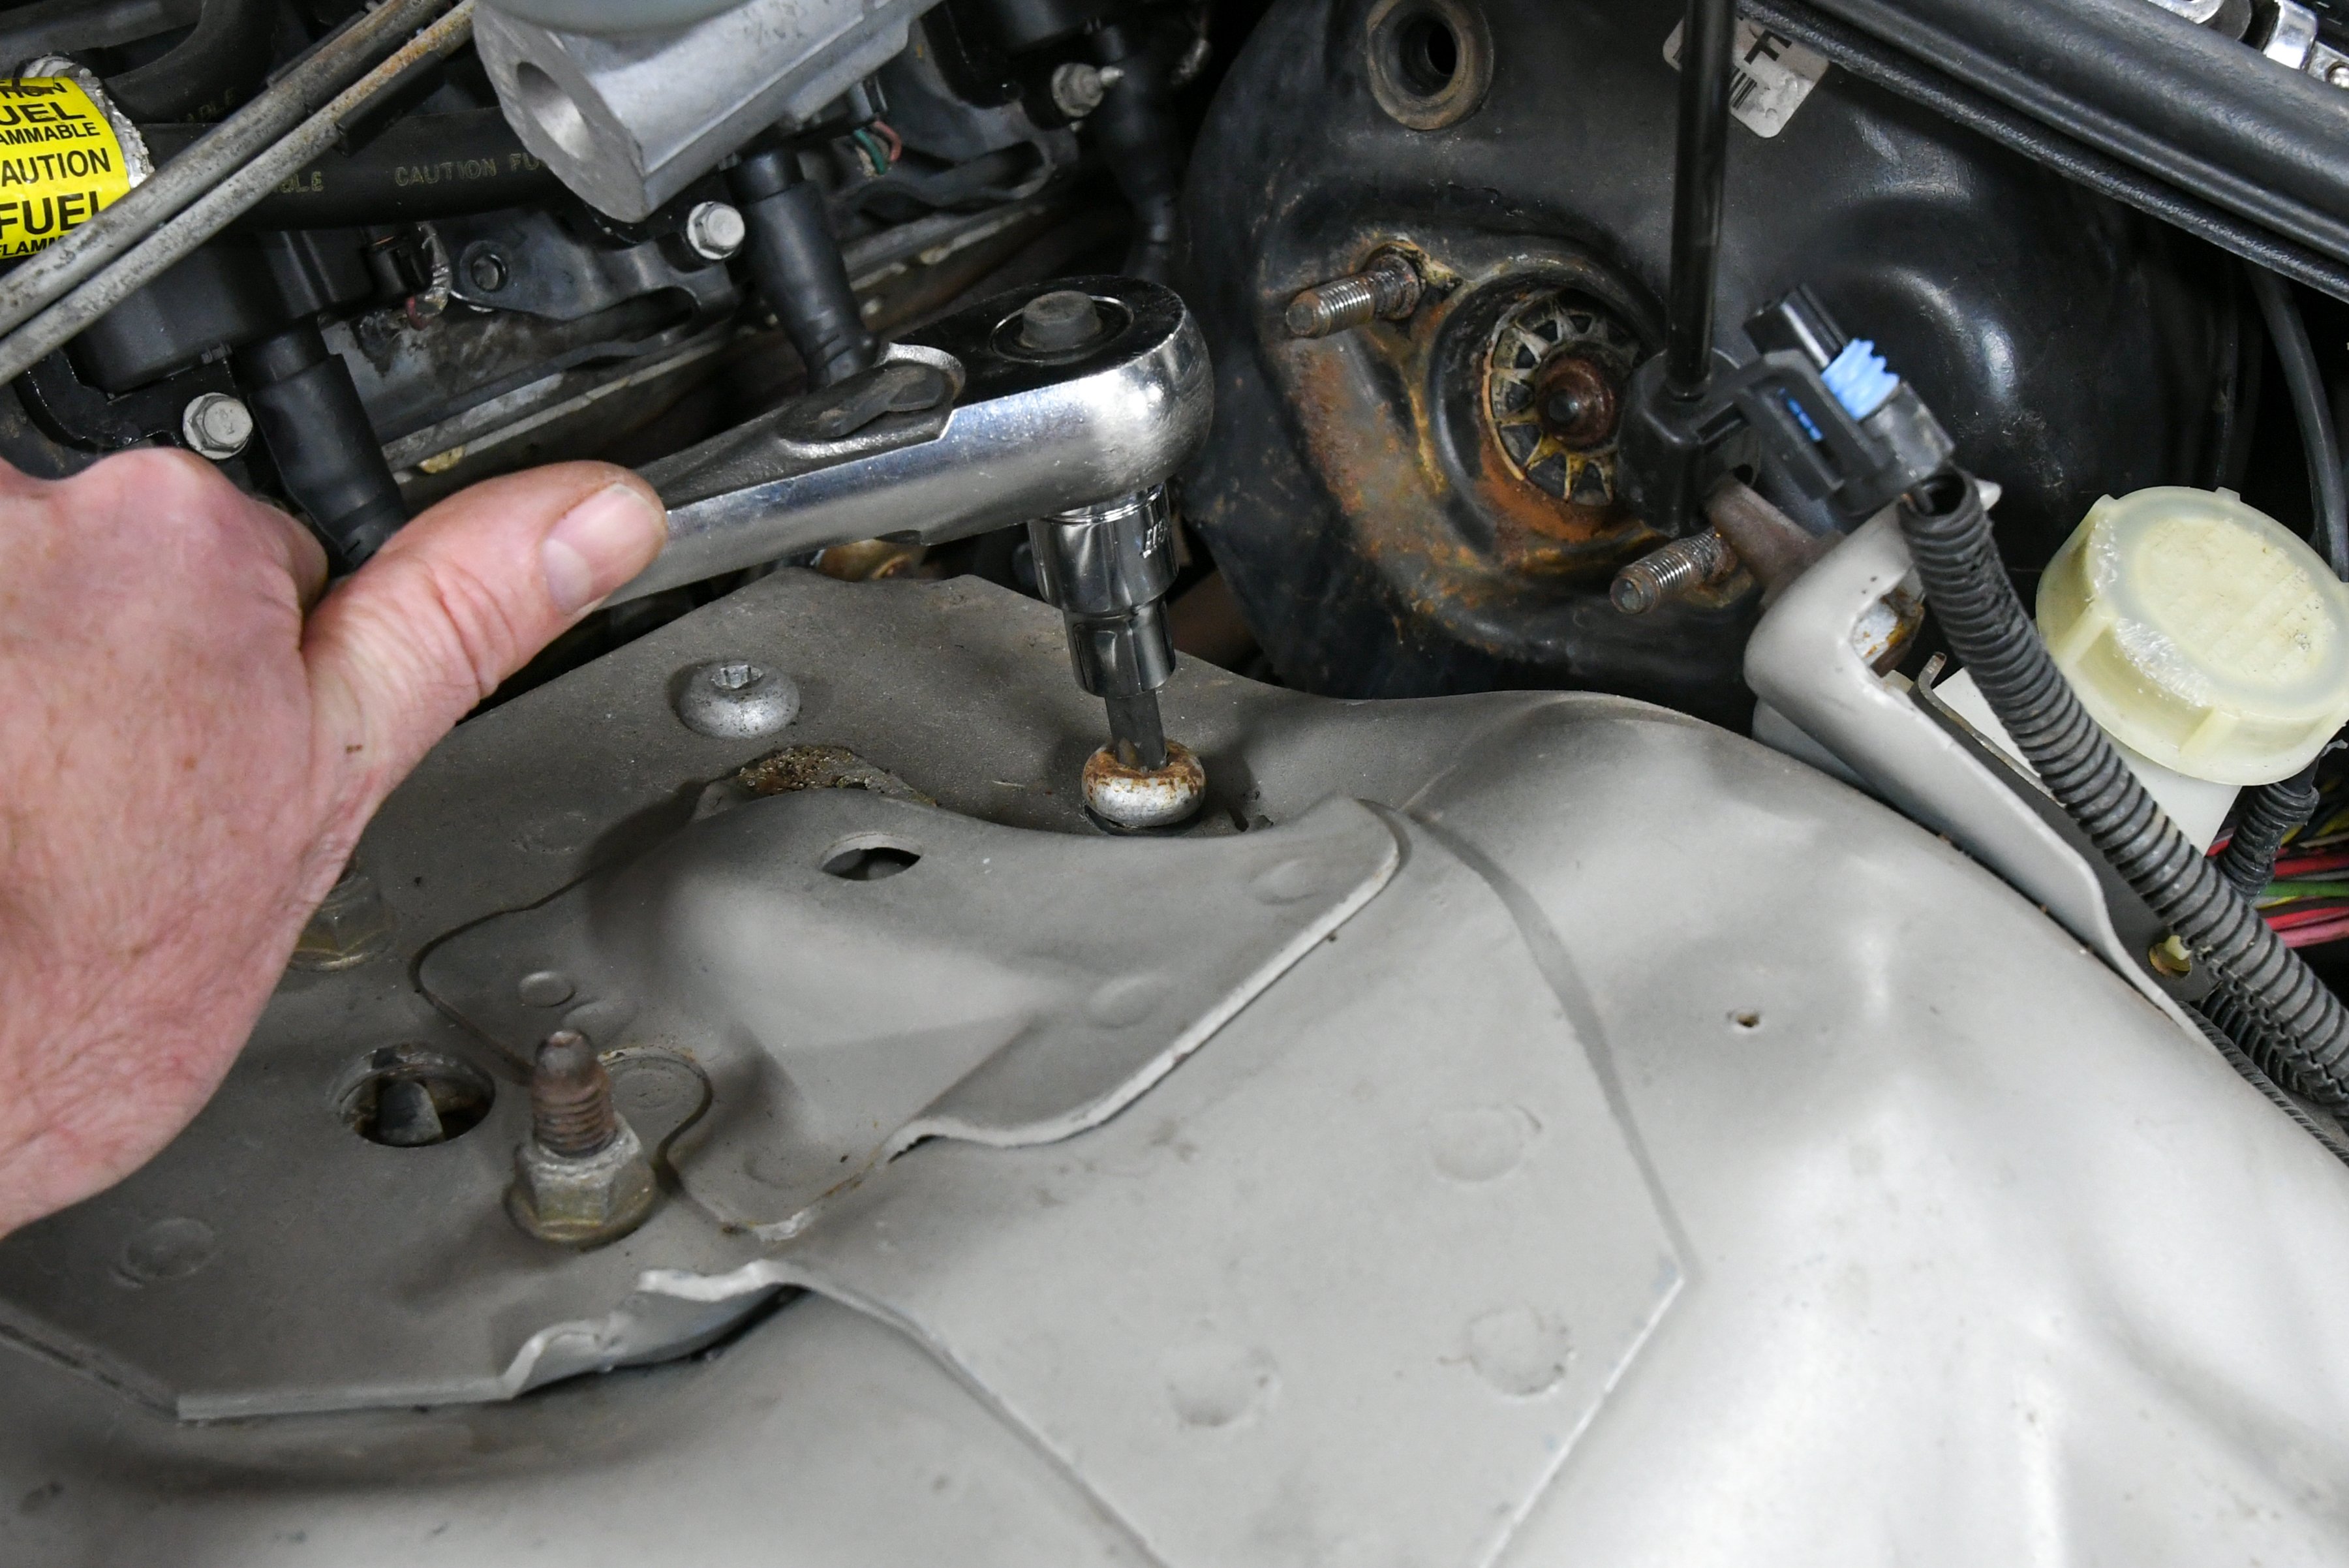
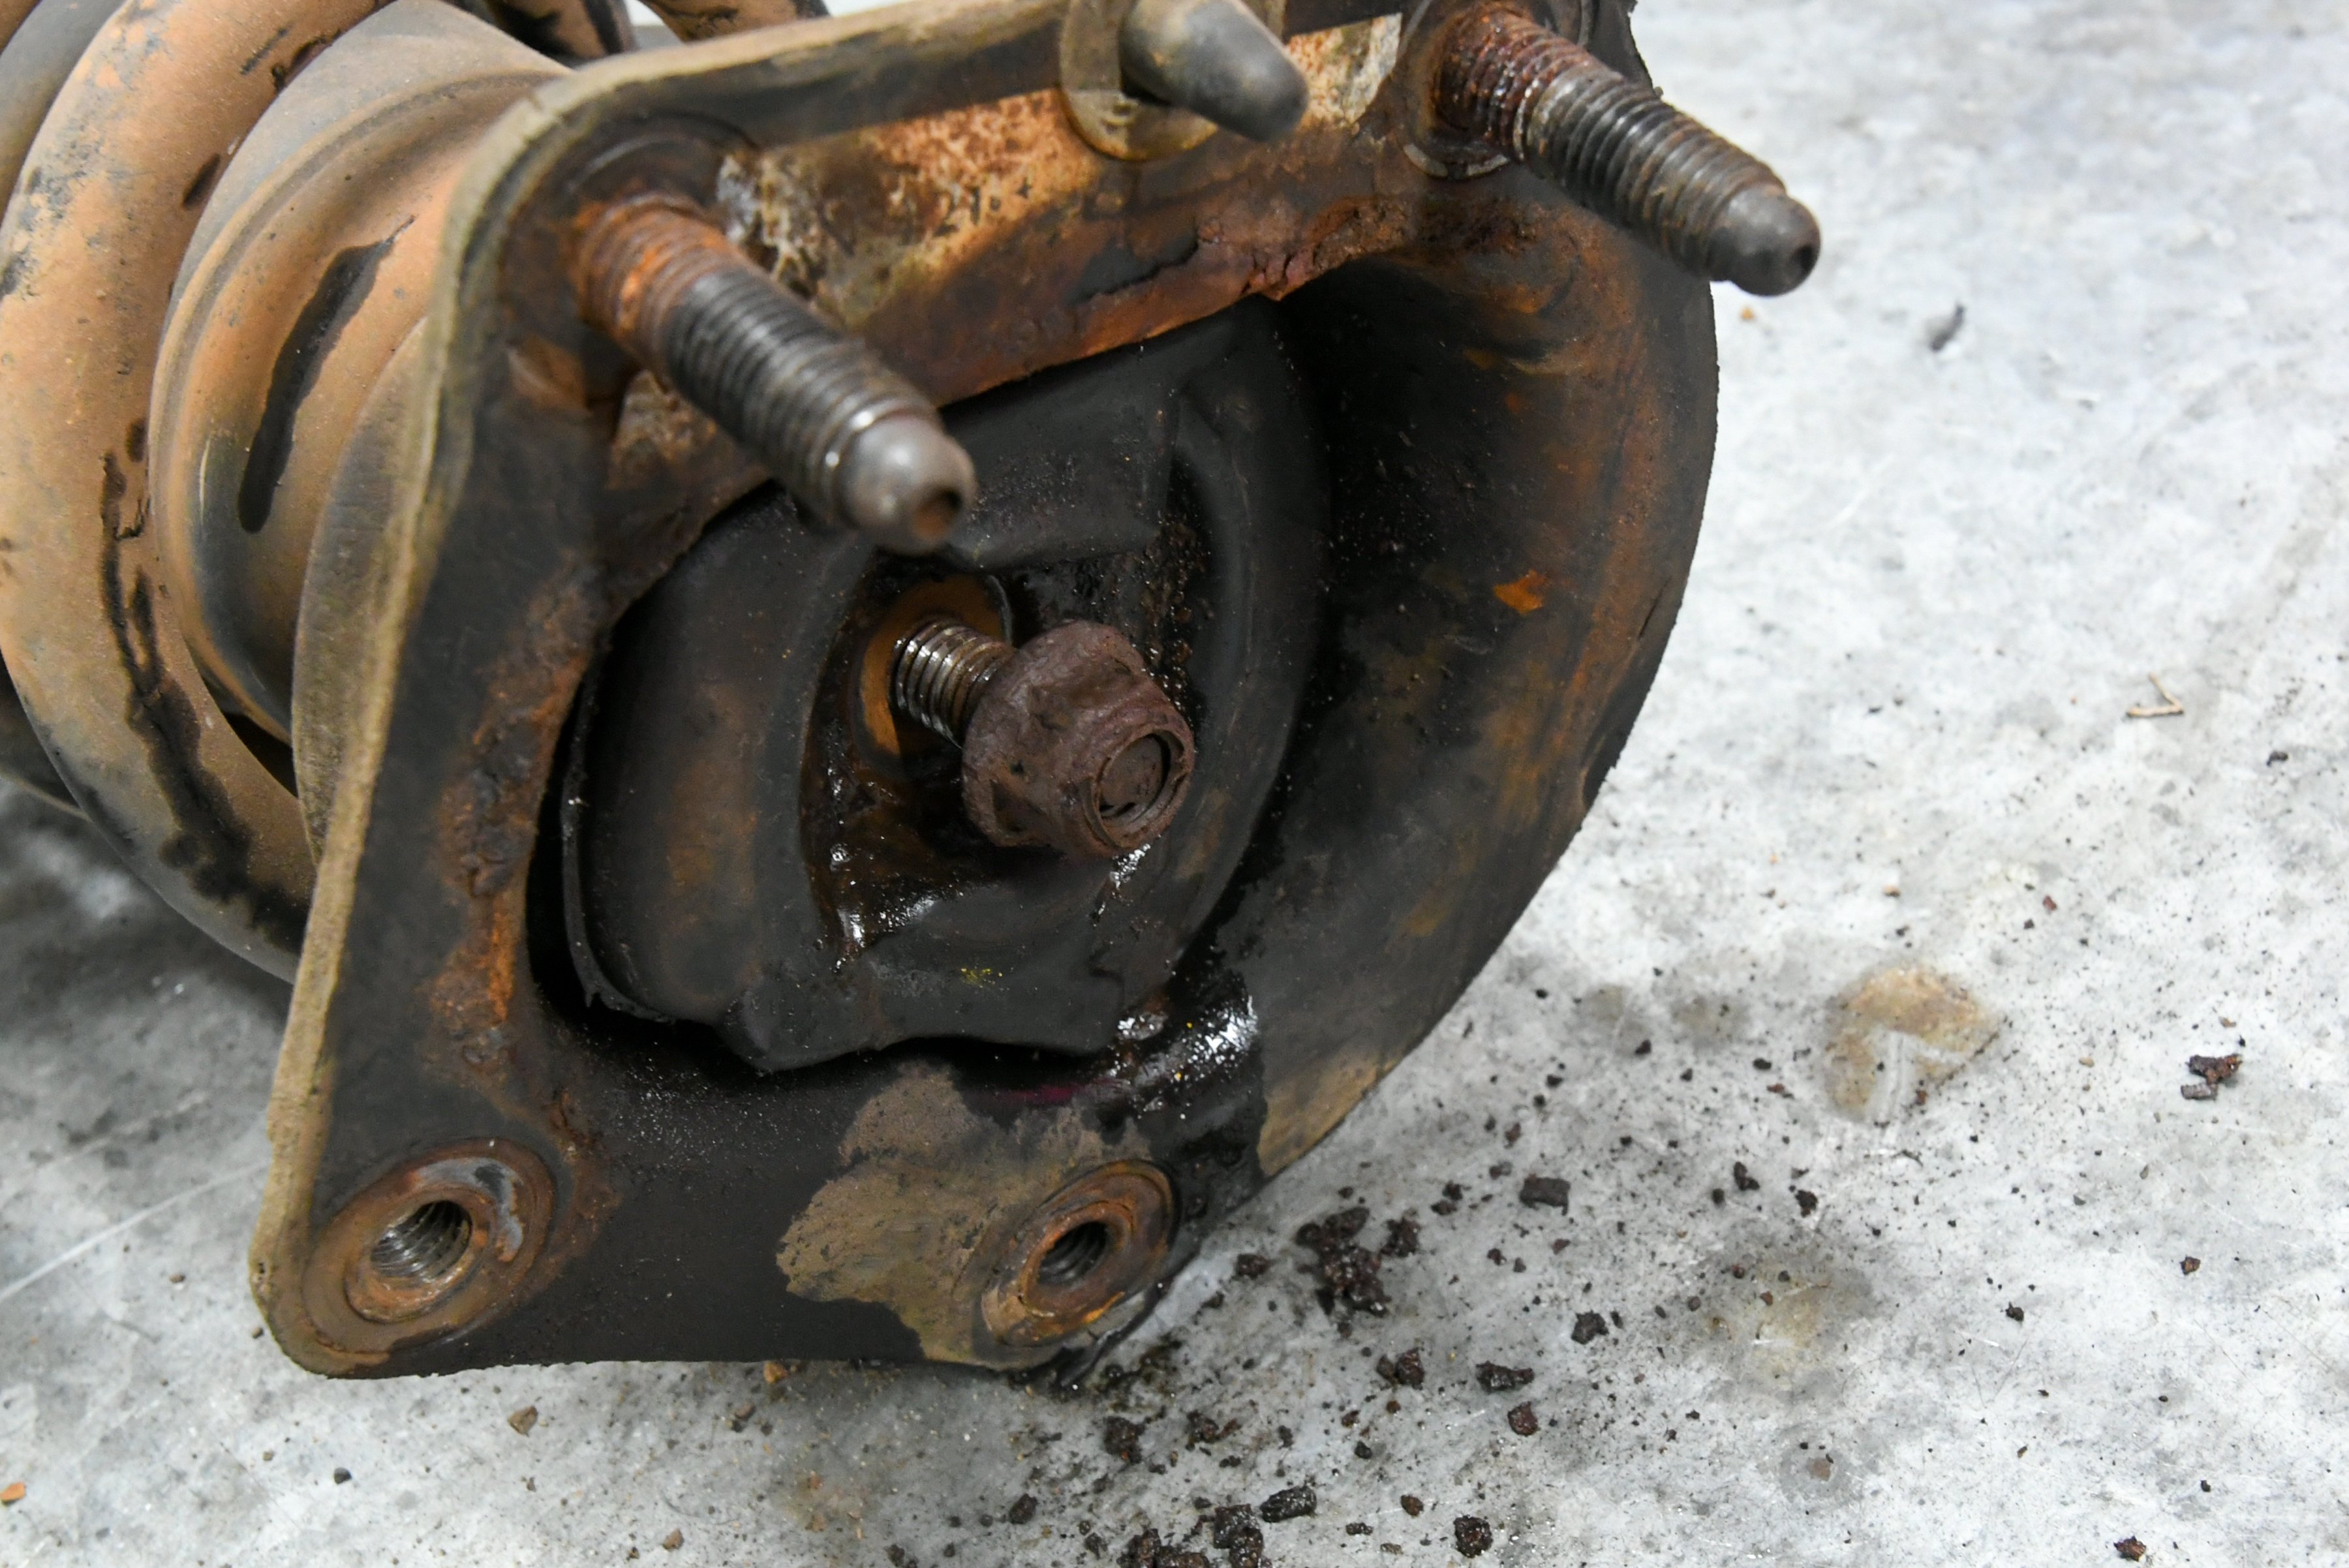
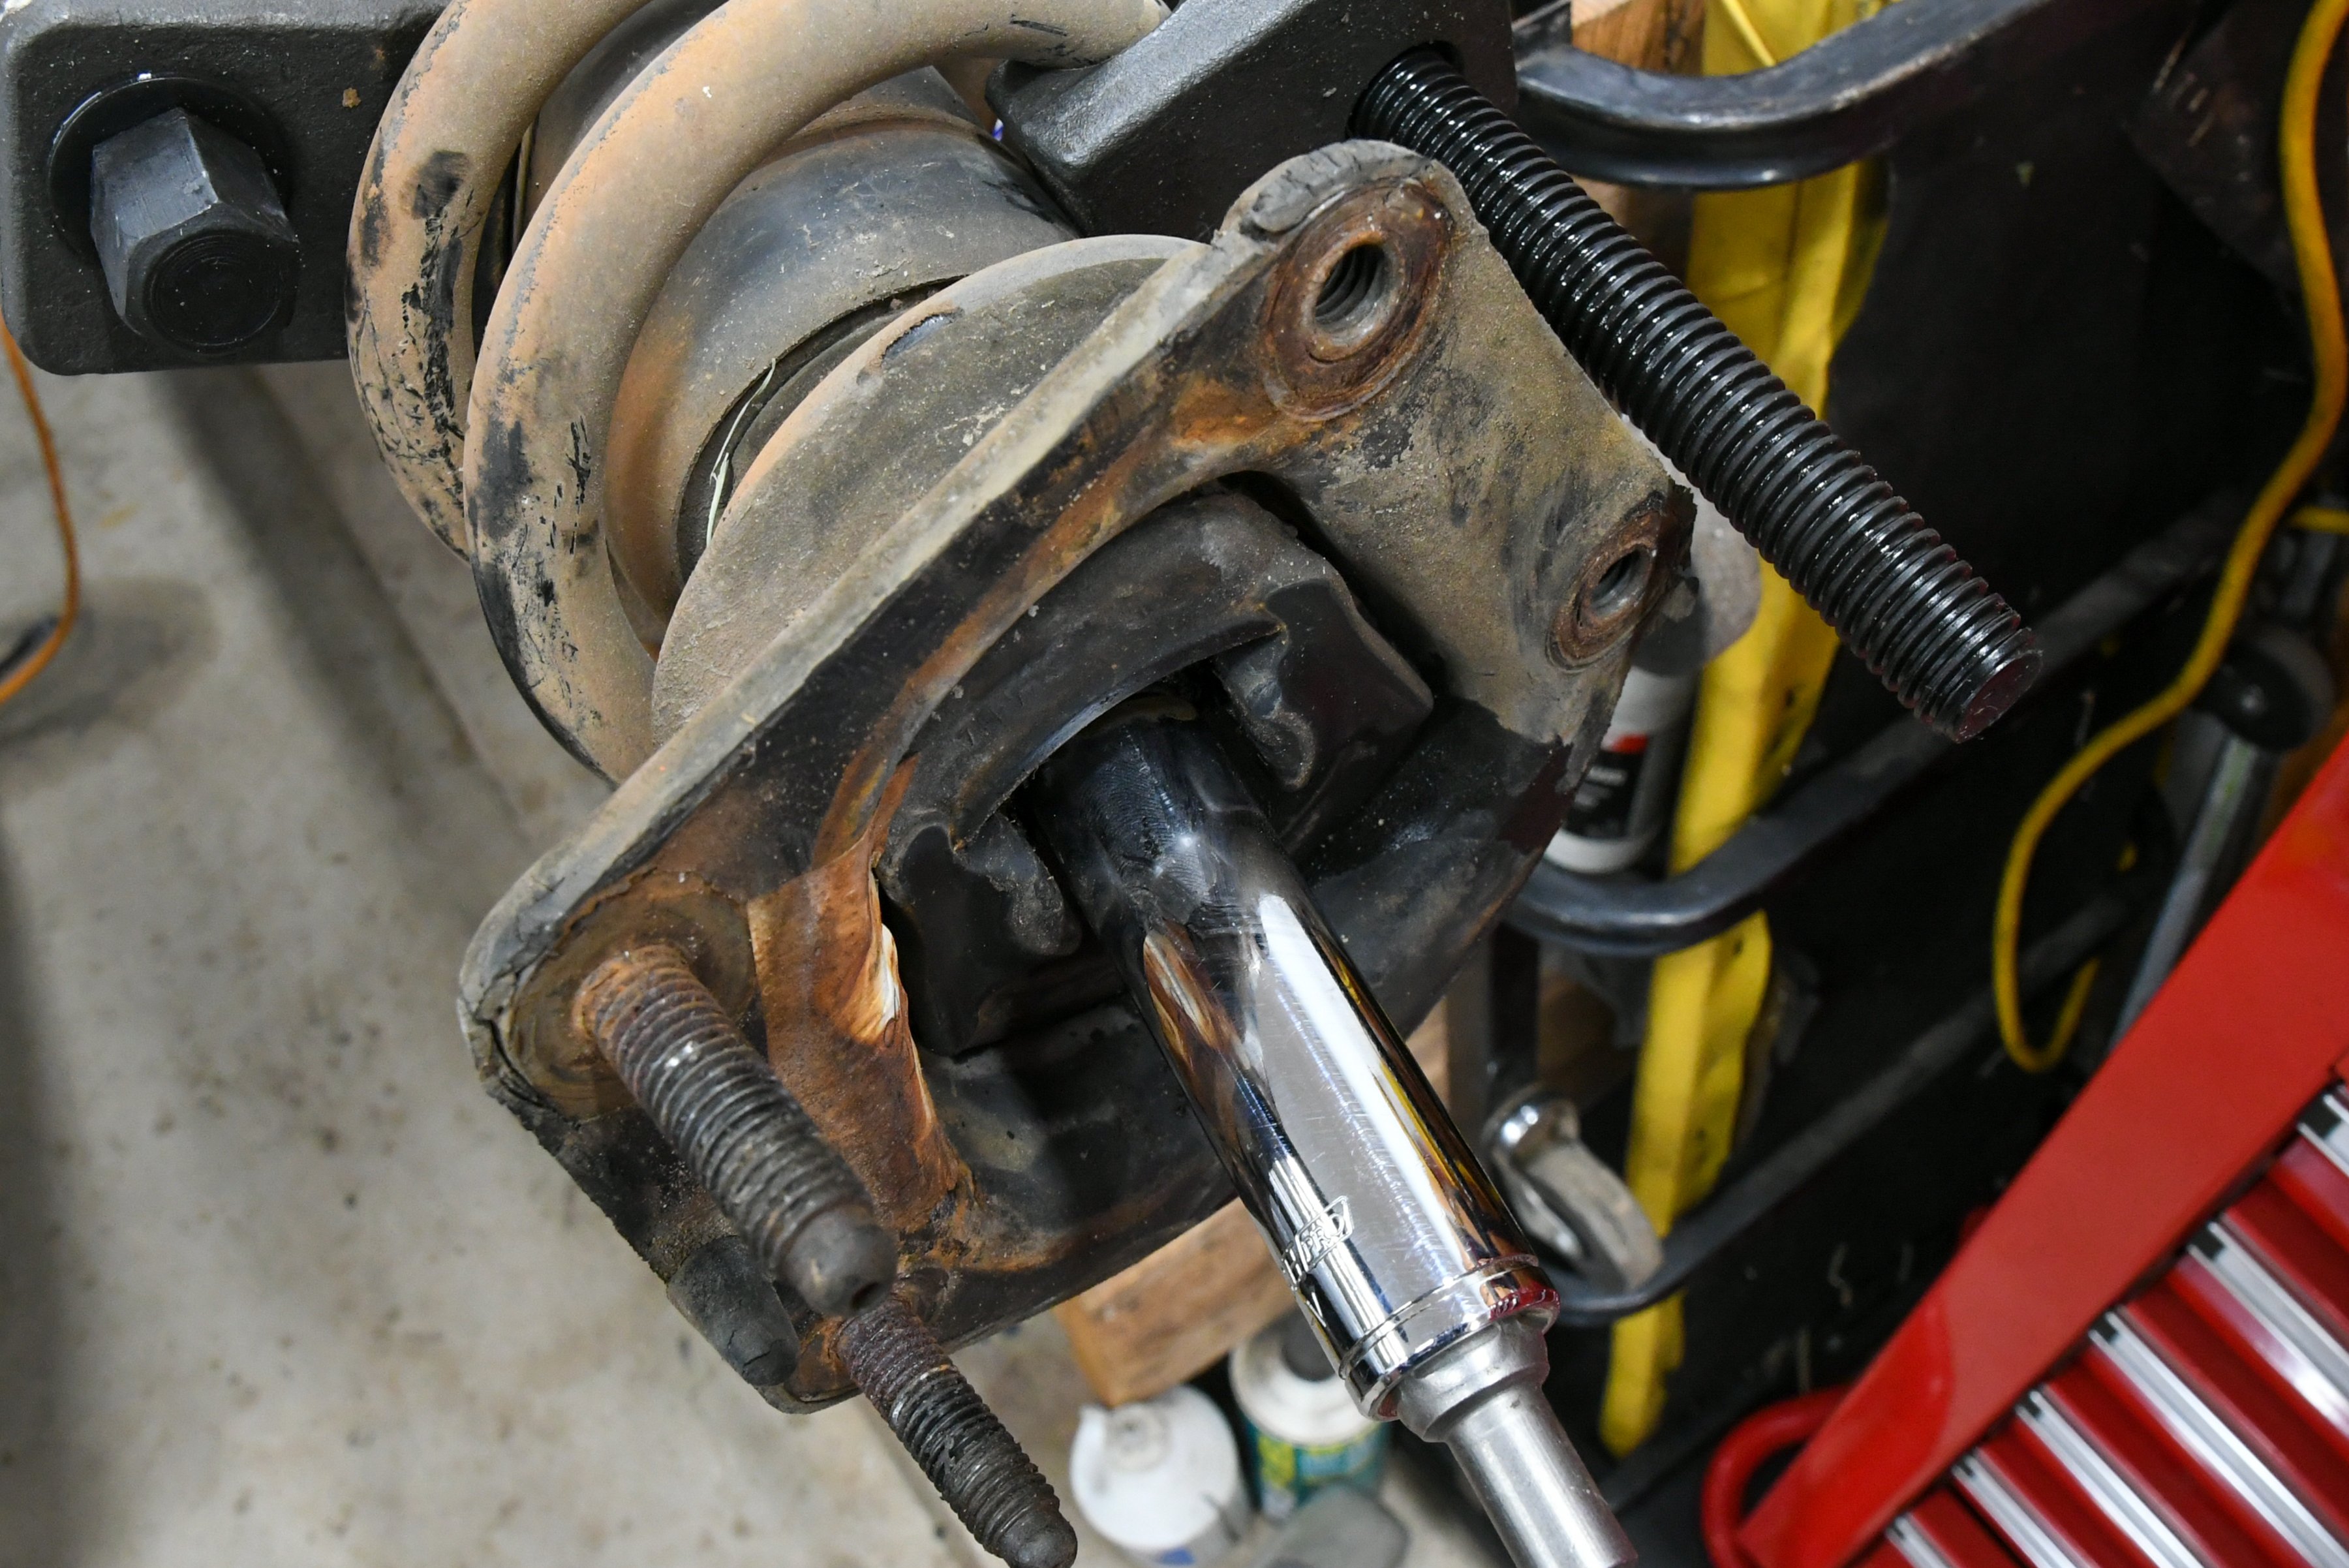
With the sway bar out of the way, the first challenge is to remove the upper ball joints. There are many different methods, but we prefer using a hammer, since the ball joints needed to be replaced. With the upper ball joint separated, we then addressed the four upper strut bolts on the driver’s side of the car. To accomplish this task, you will need to remove the master cylinder and then relocate it to allow access to the bolts. After pulling these bolts out of the strut, we removed the hardware from the lower control arm. At this point, the assembly will slide out with minimum effort. We then removed the passenger side the same way.
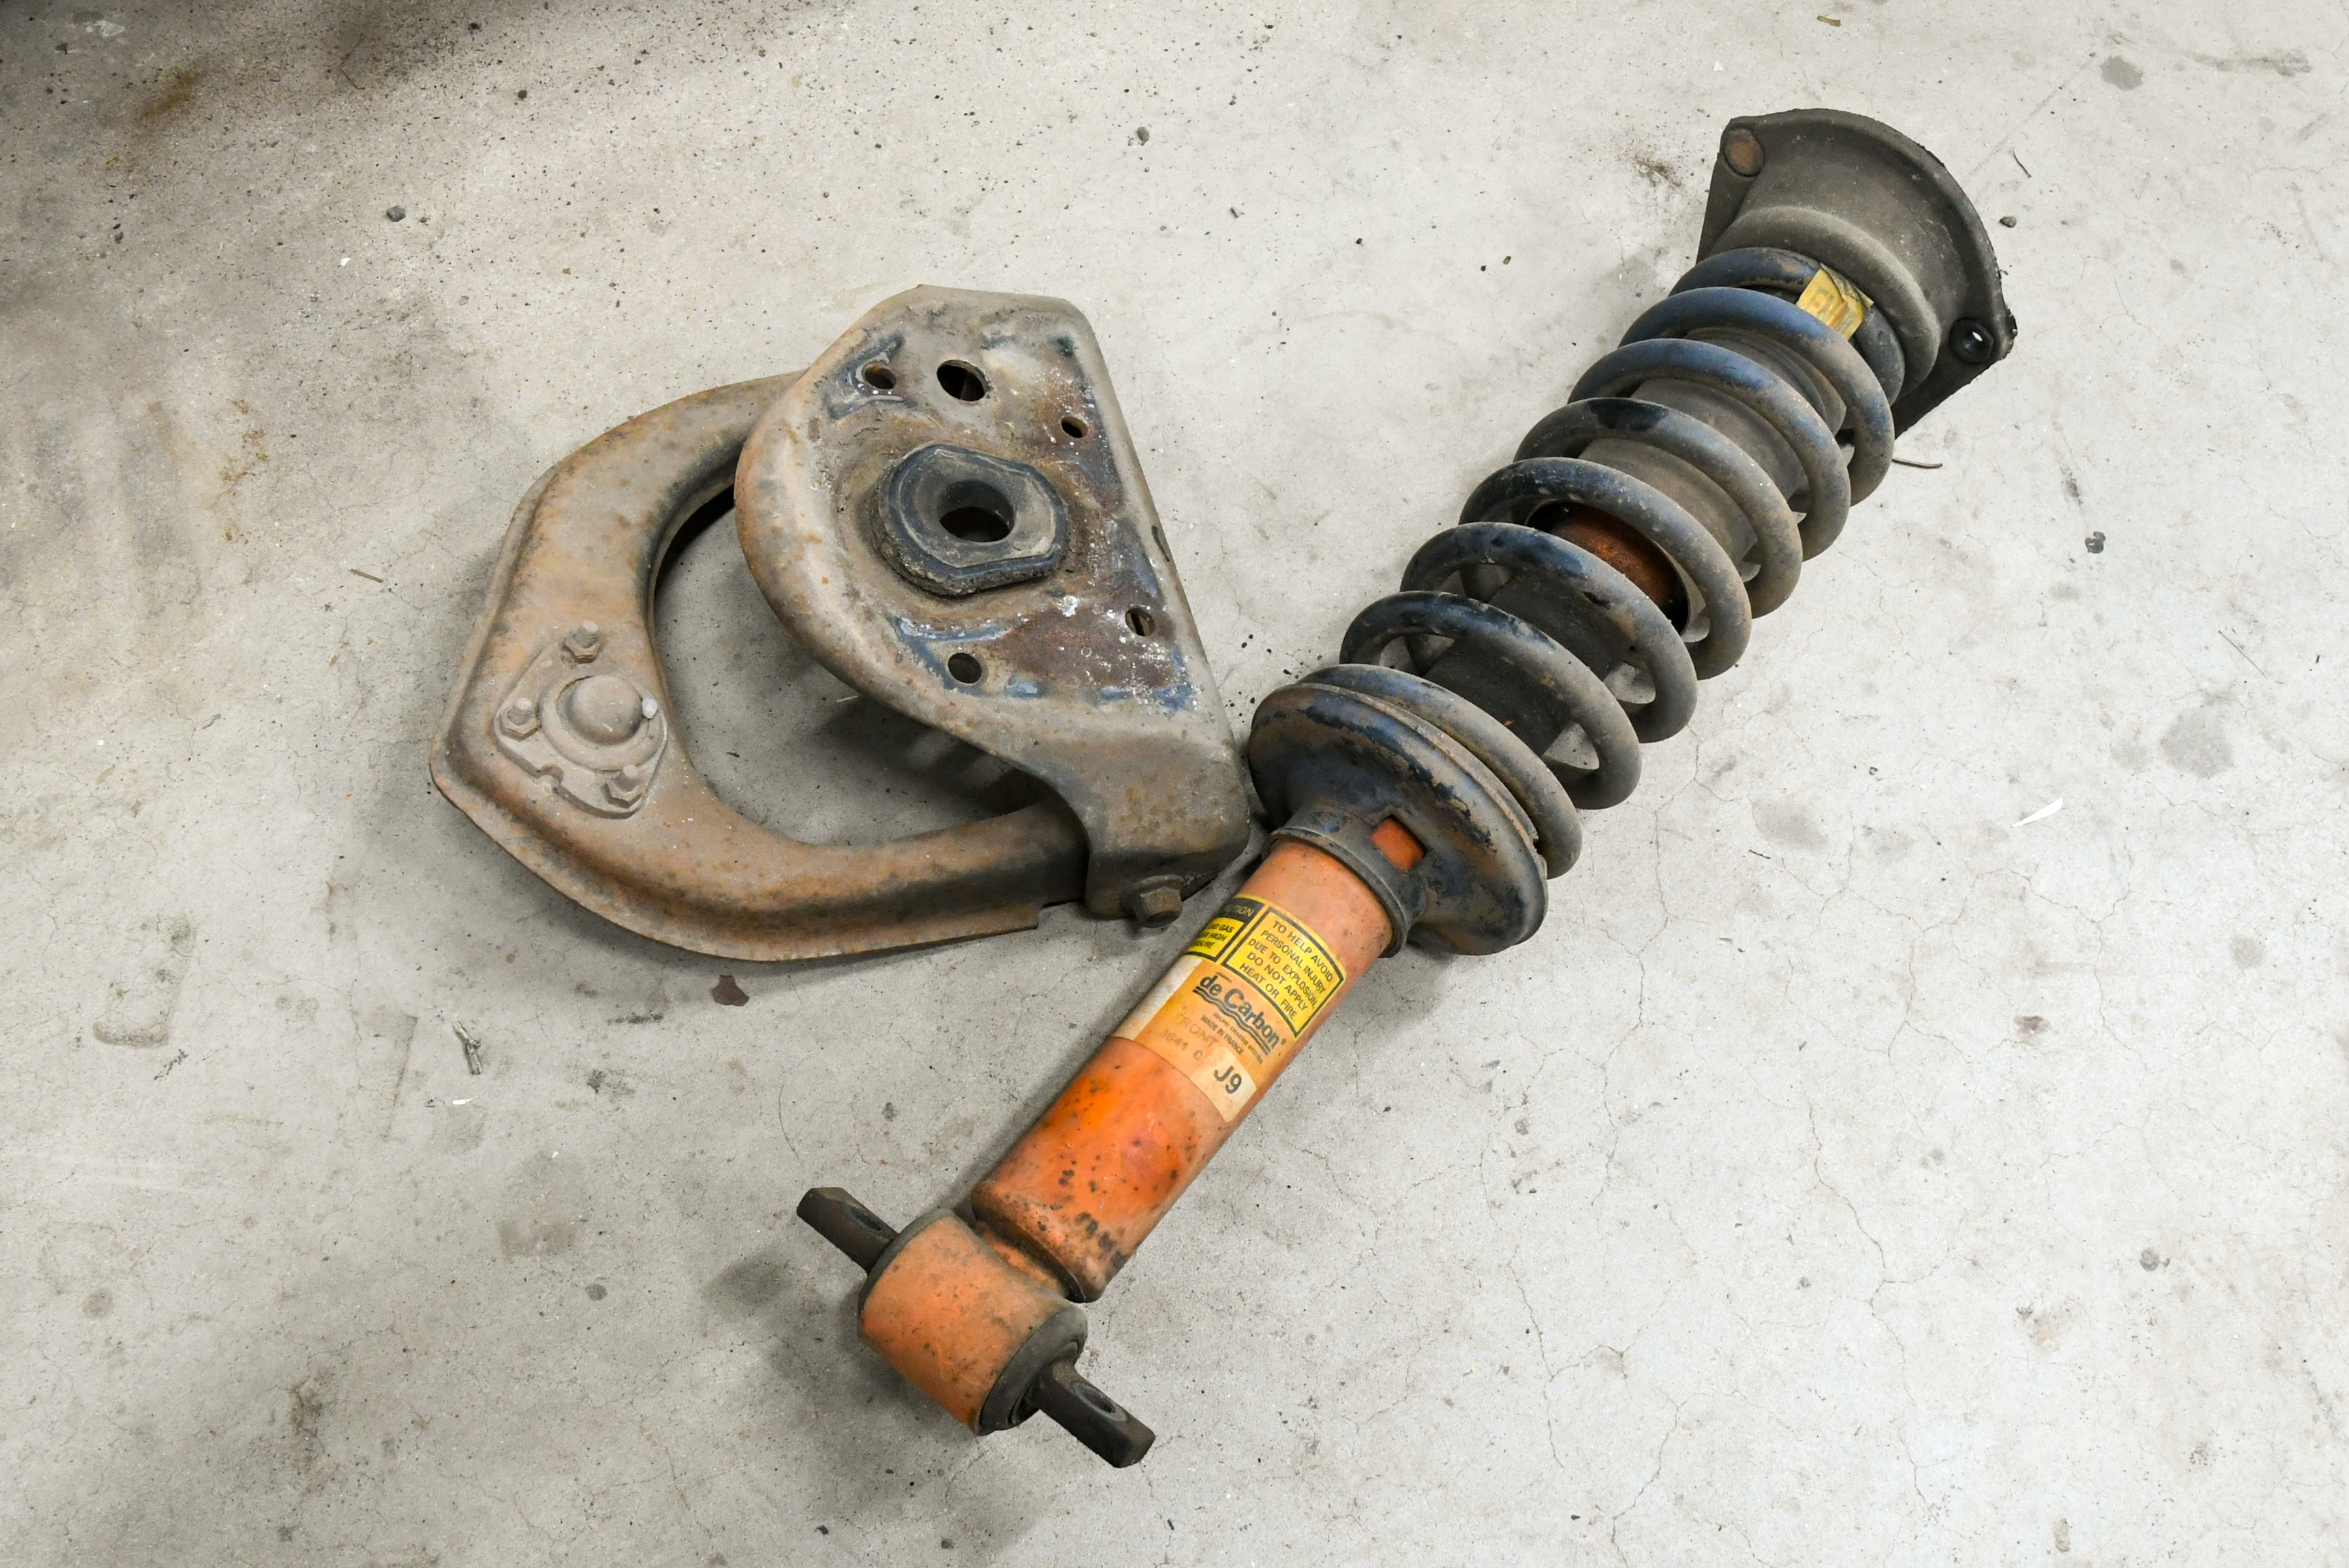
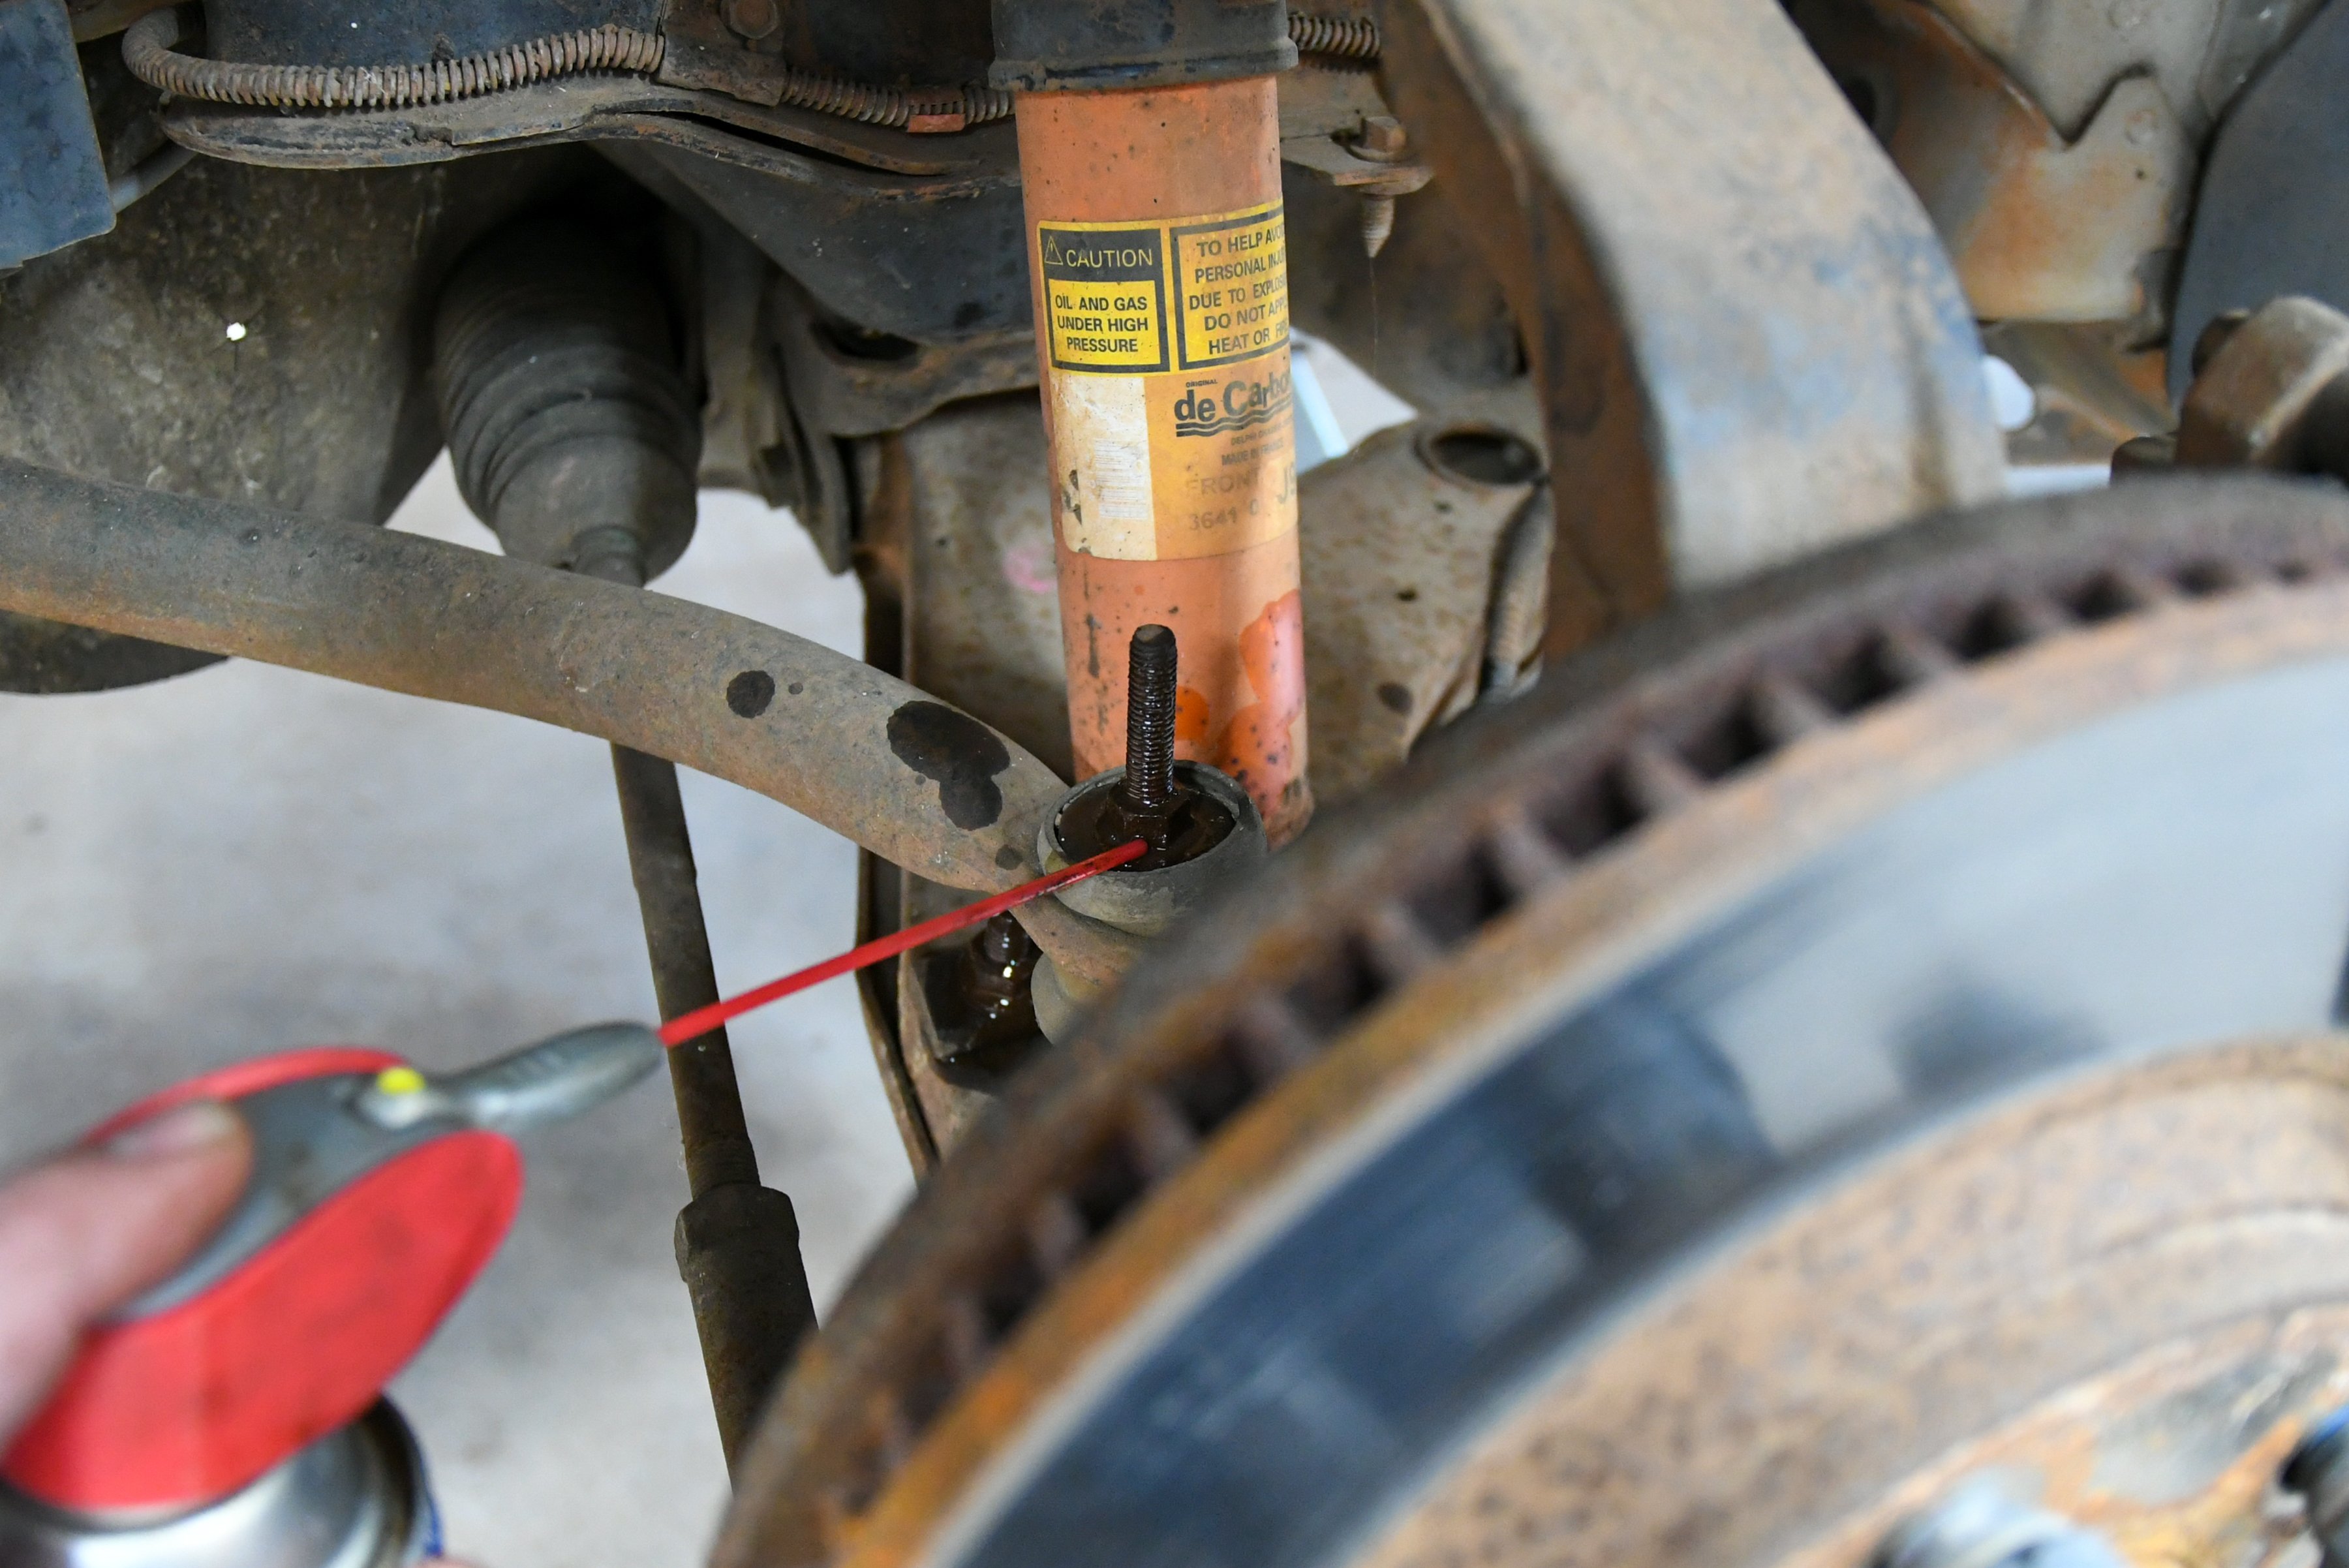
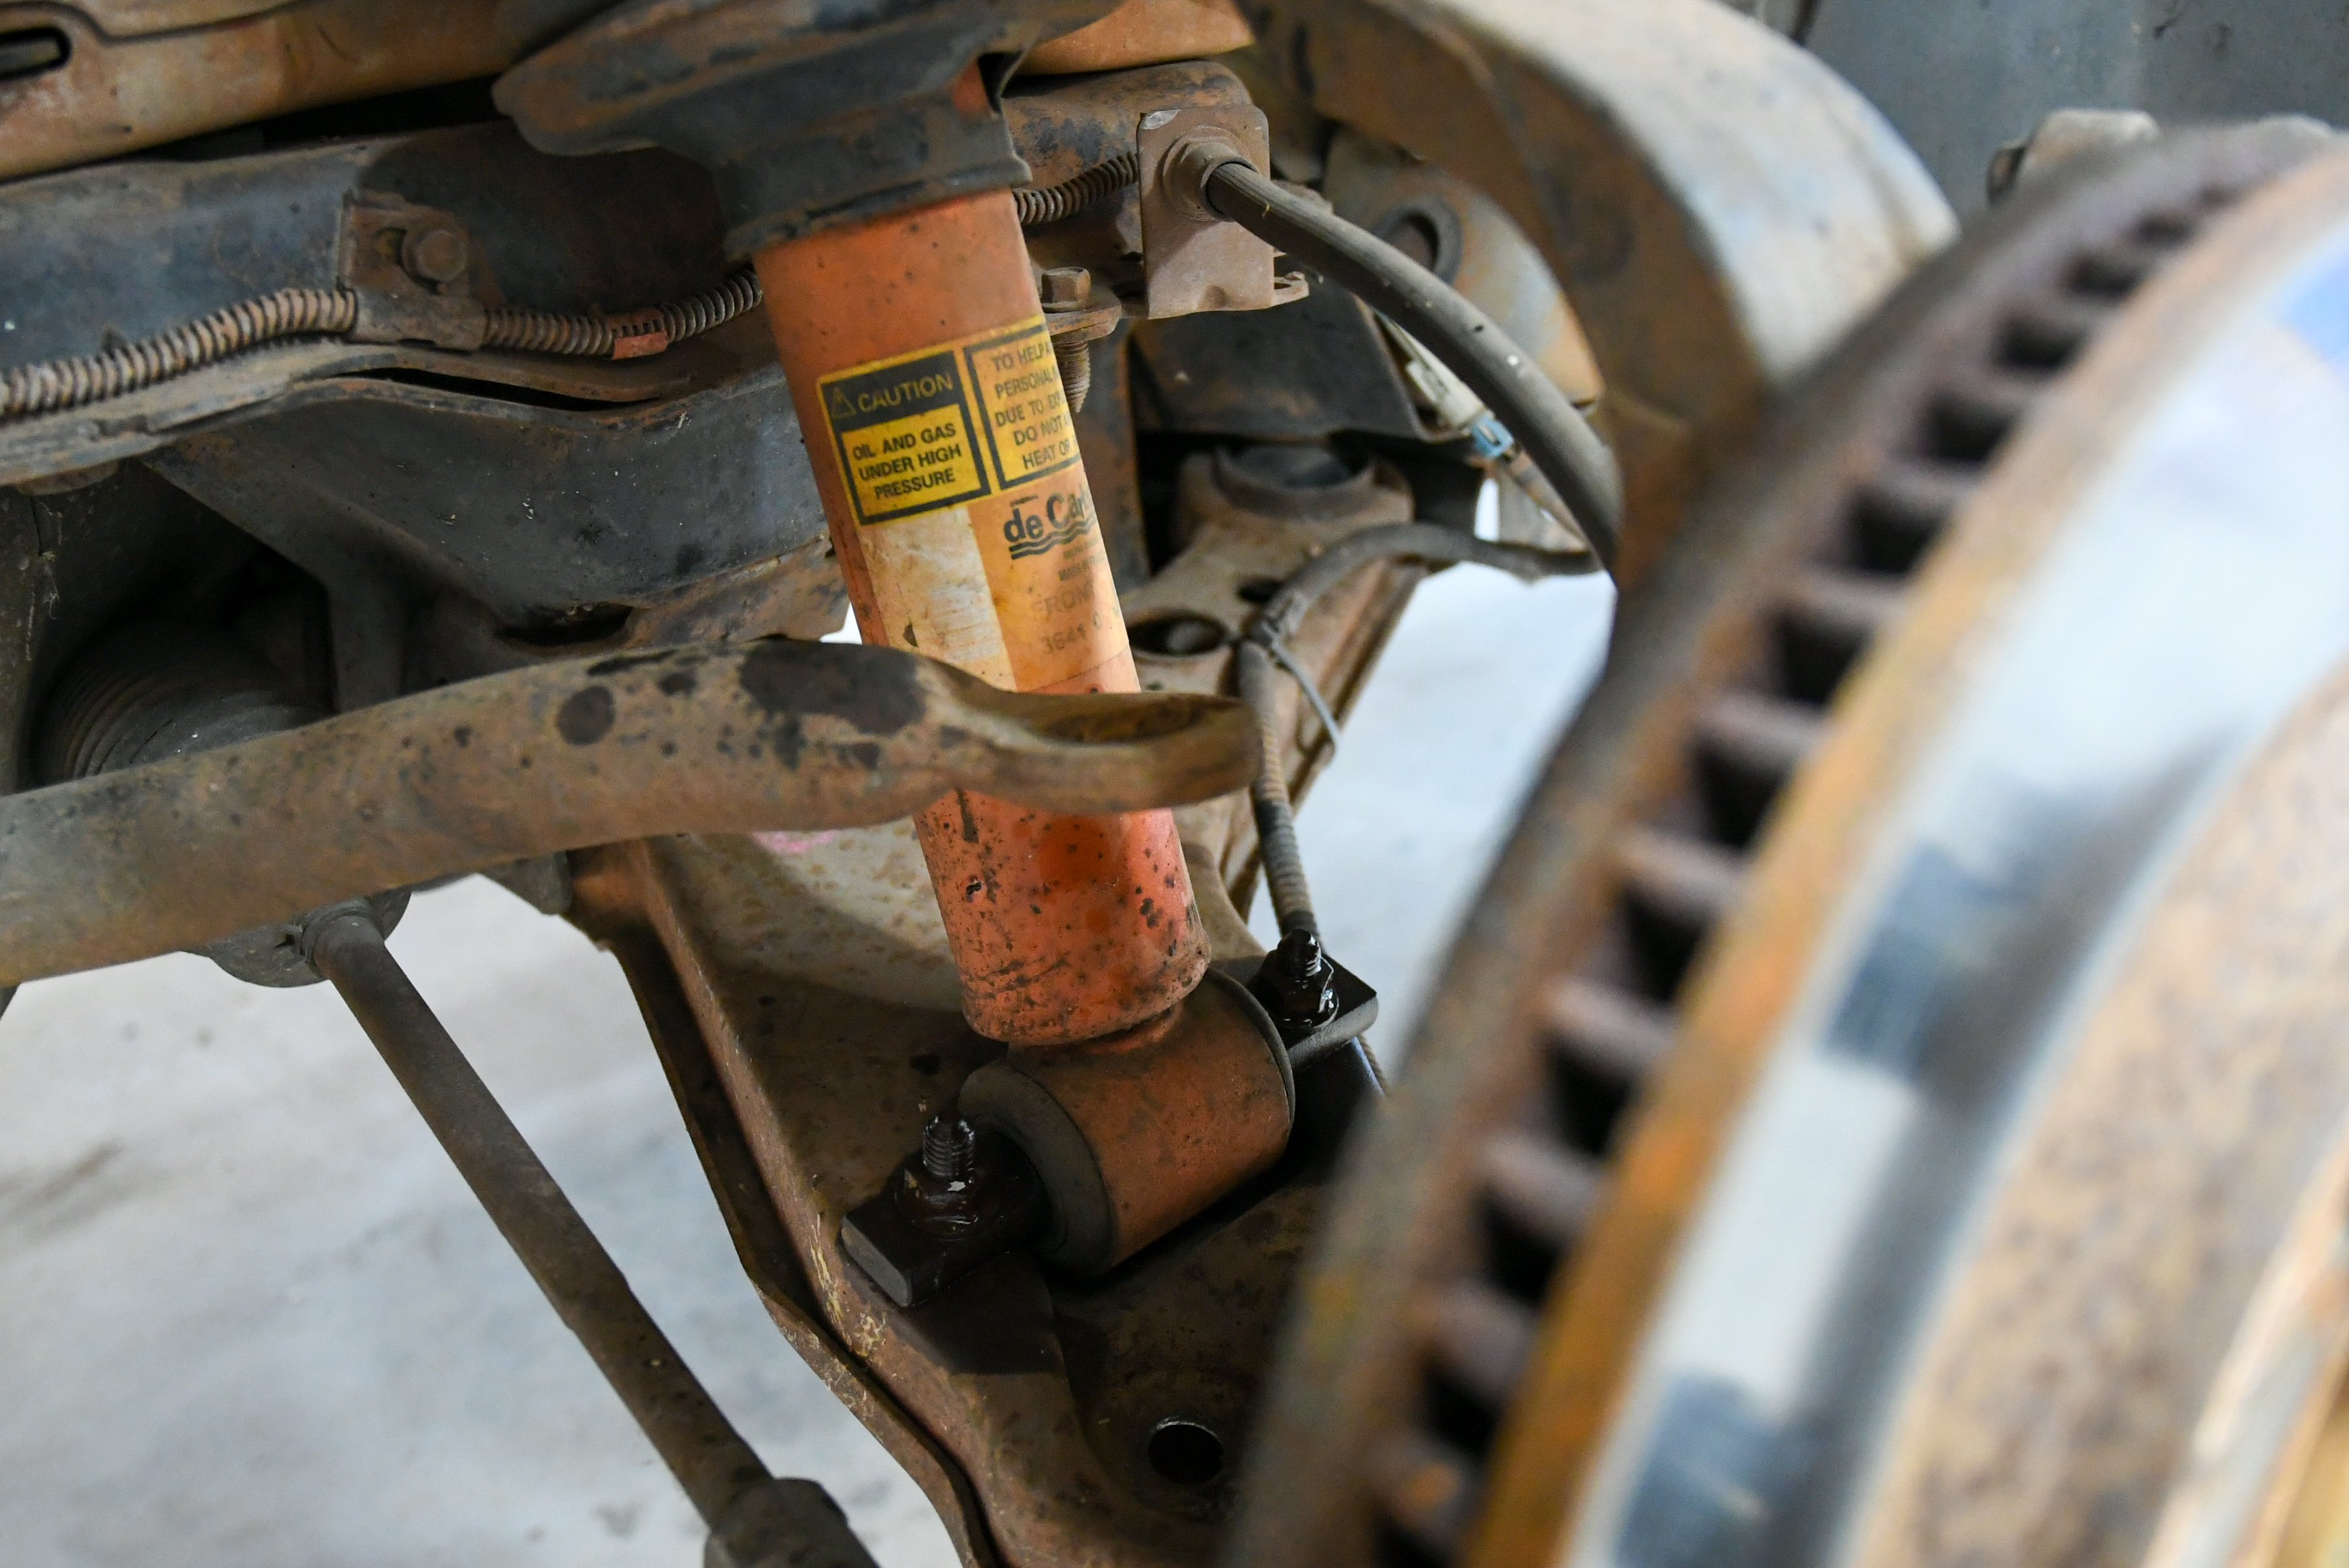
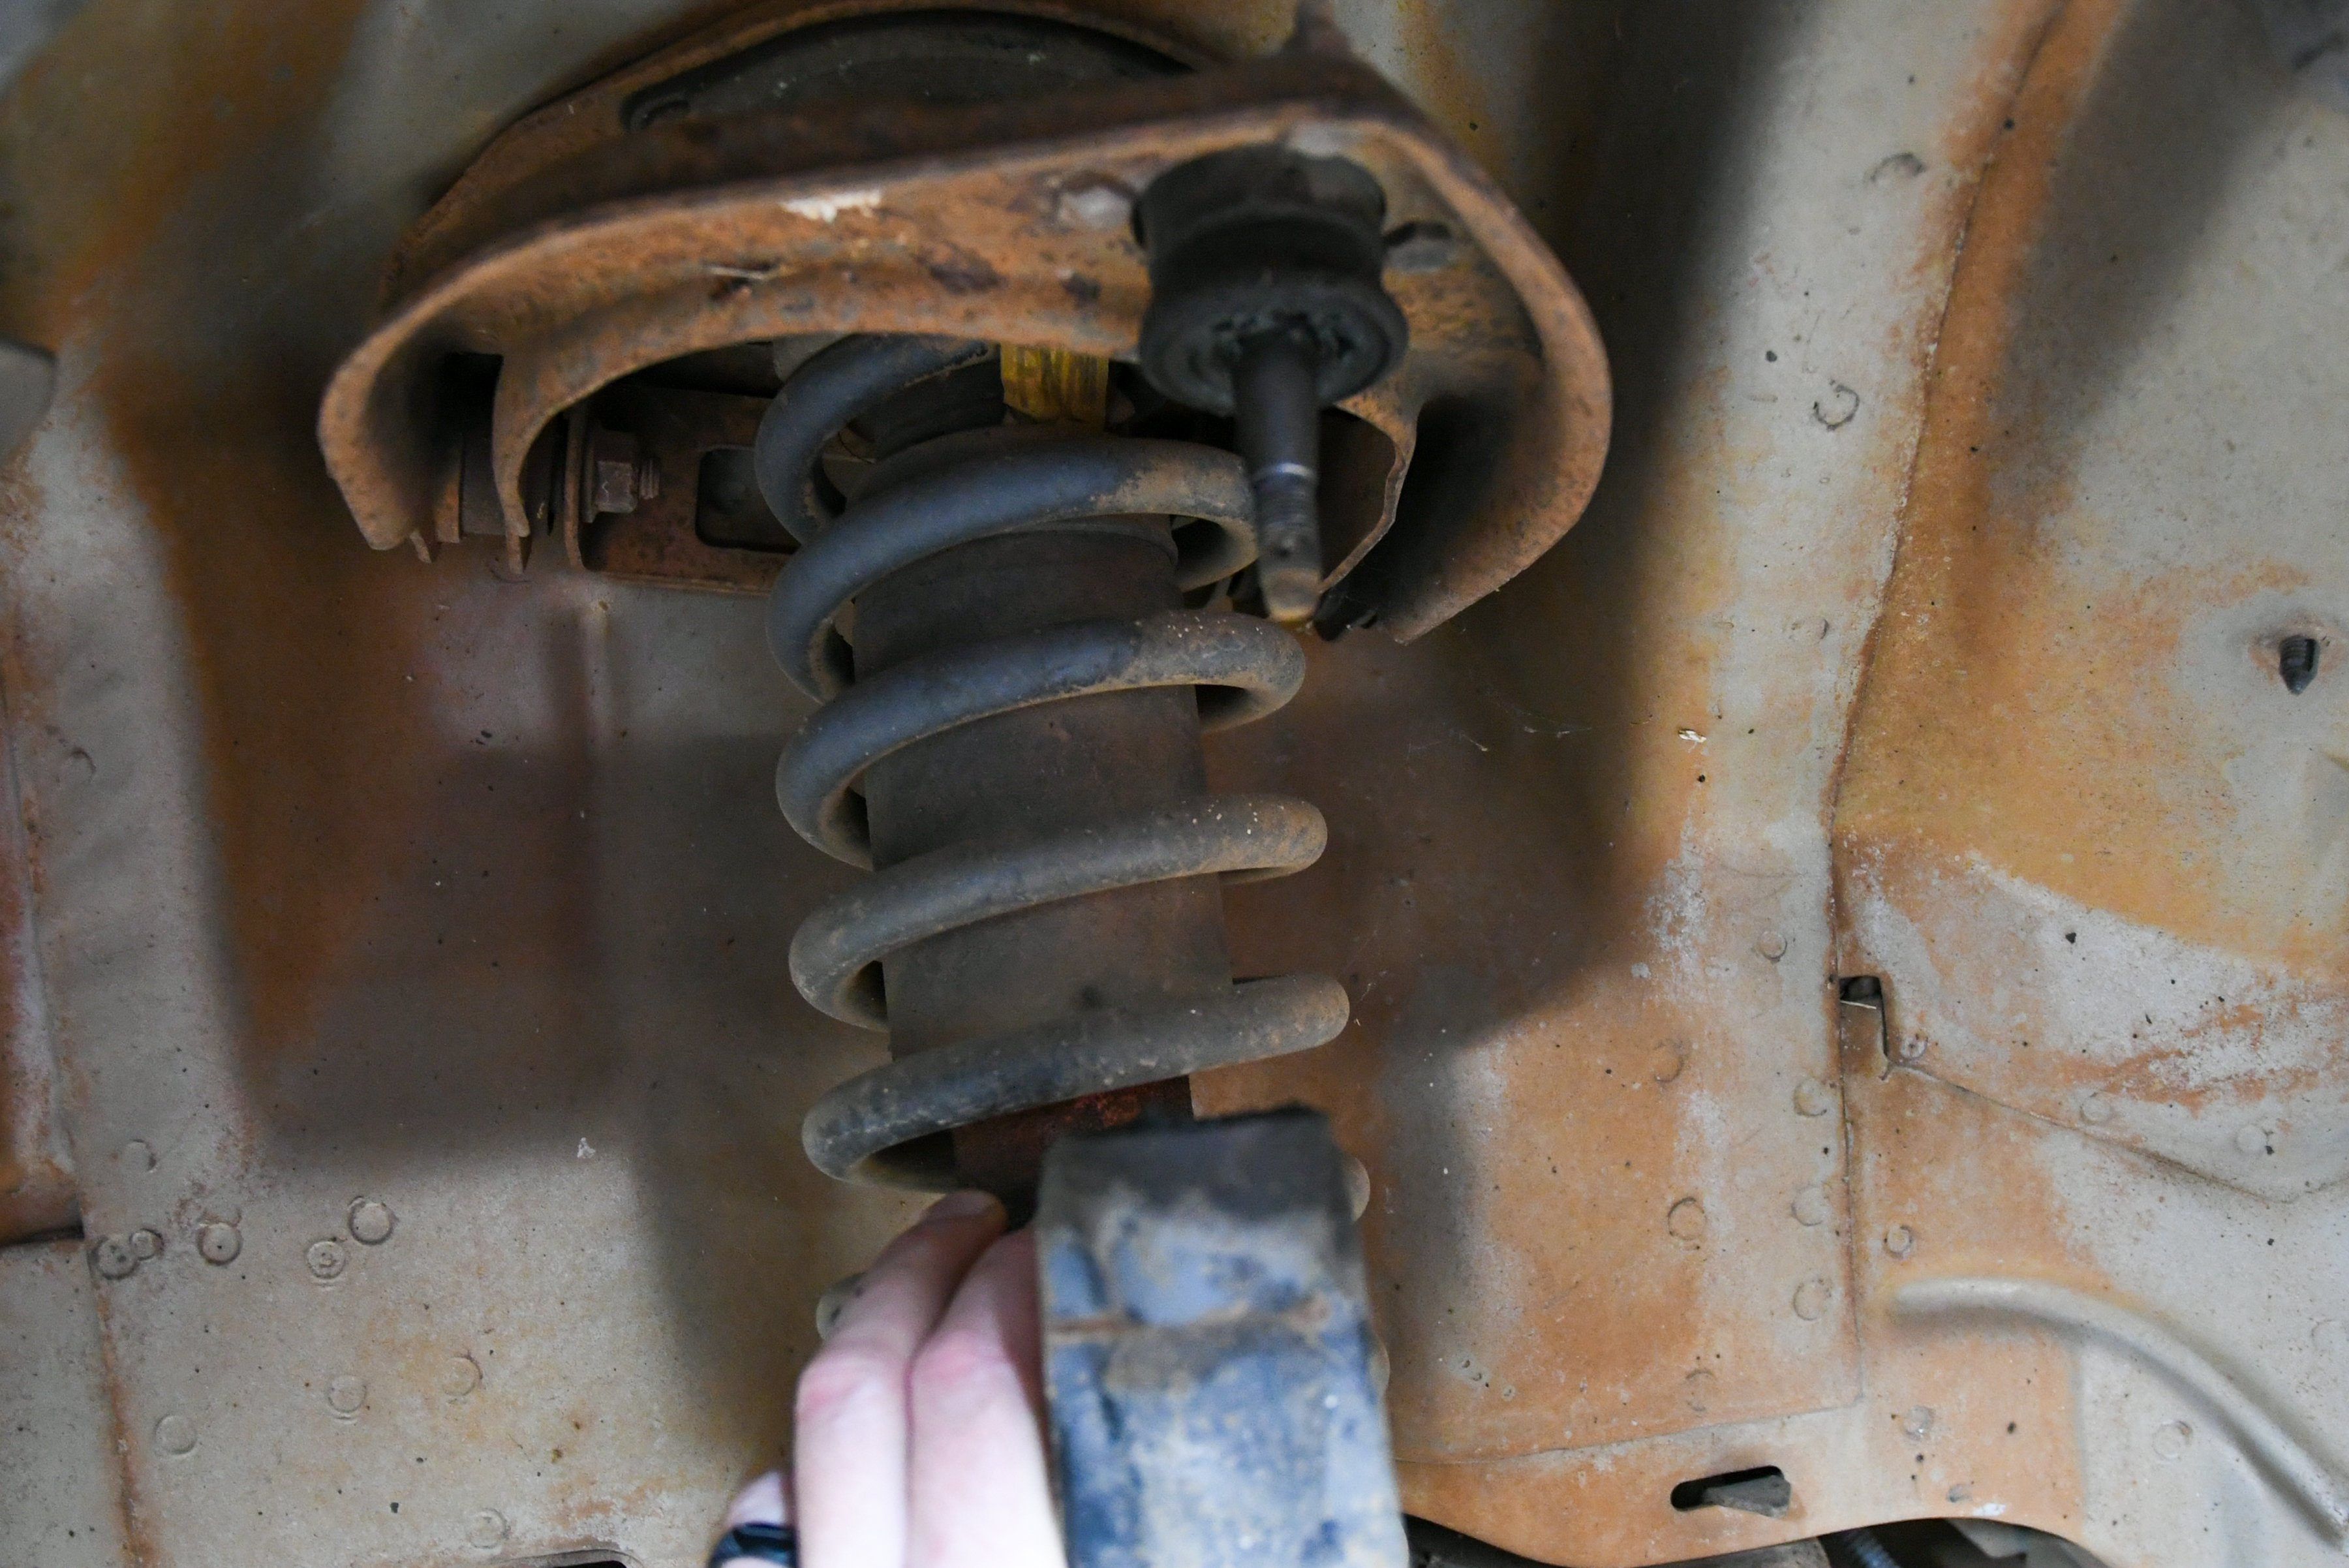
As you can tell by the picture, the DeCarbon shocks were original equipment and needed to be replaced.
The Hard Part
If you’ve never done a set of struts and springs on a fourth-gen, we can tell you to expect some difficulties. The struts will cause you some problems, and there’s not much you can do to prevent it, especially when the units are on a 20-year-old Firebird.


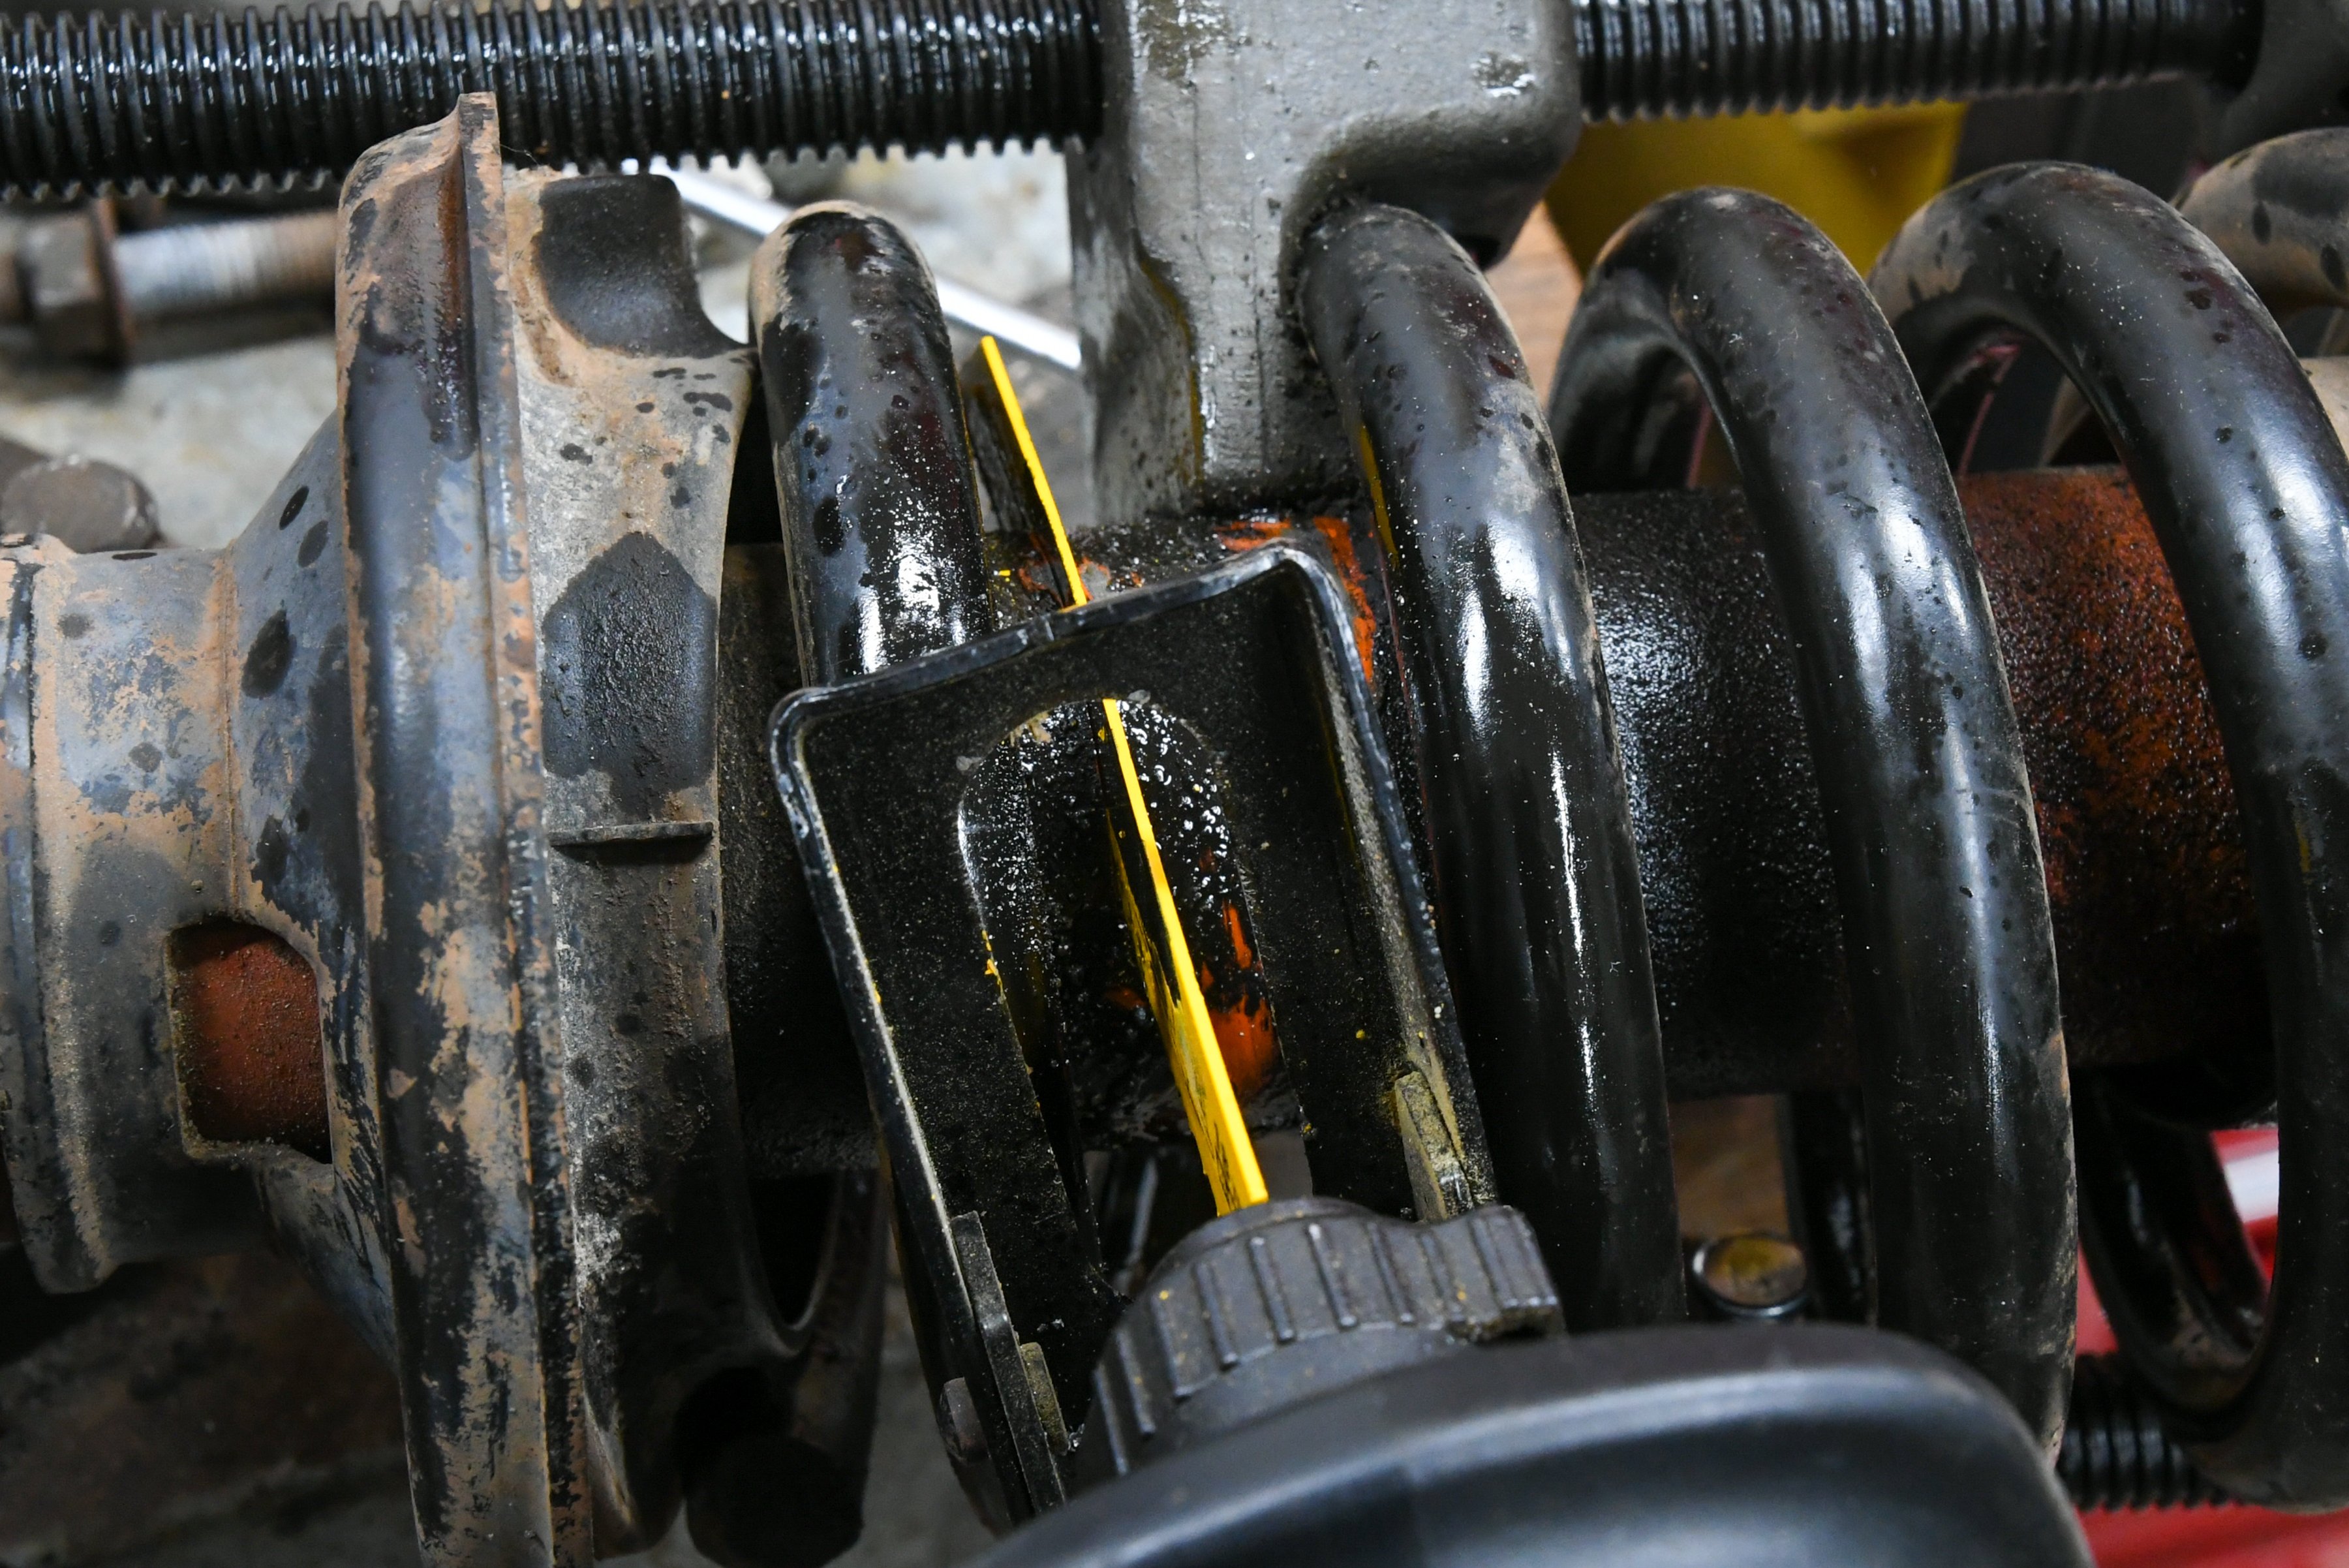
The struts on a fourth-gen have a tendency to rust which can cause some problems when taking them apart. You will need a spring compressor to remove the springs safely.
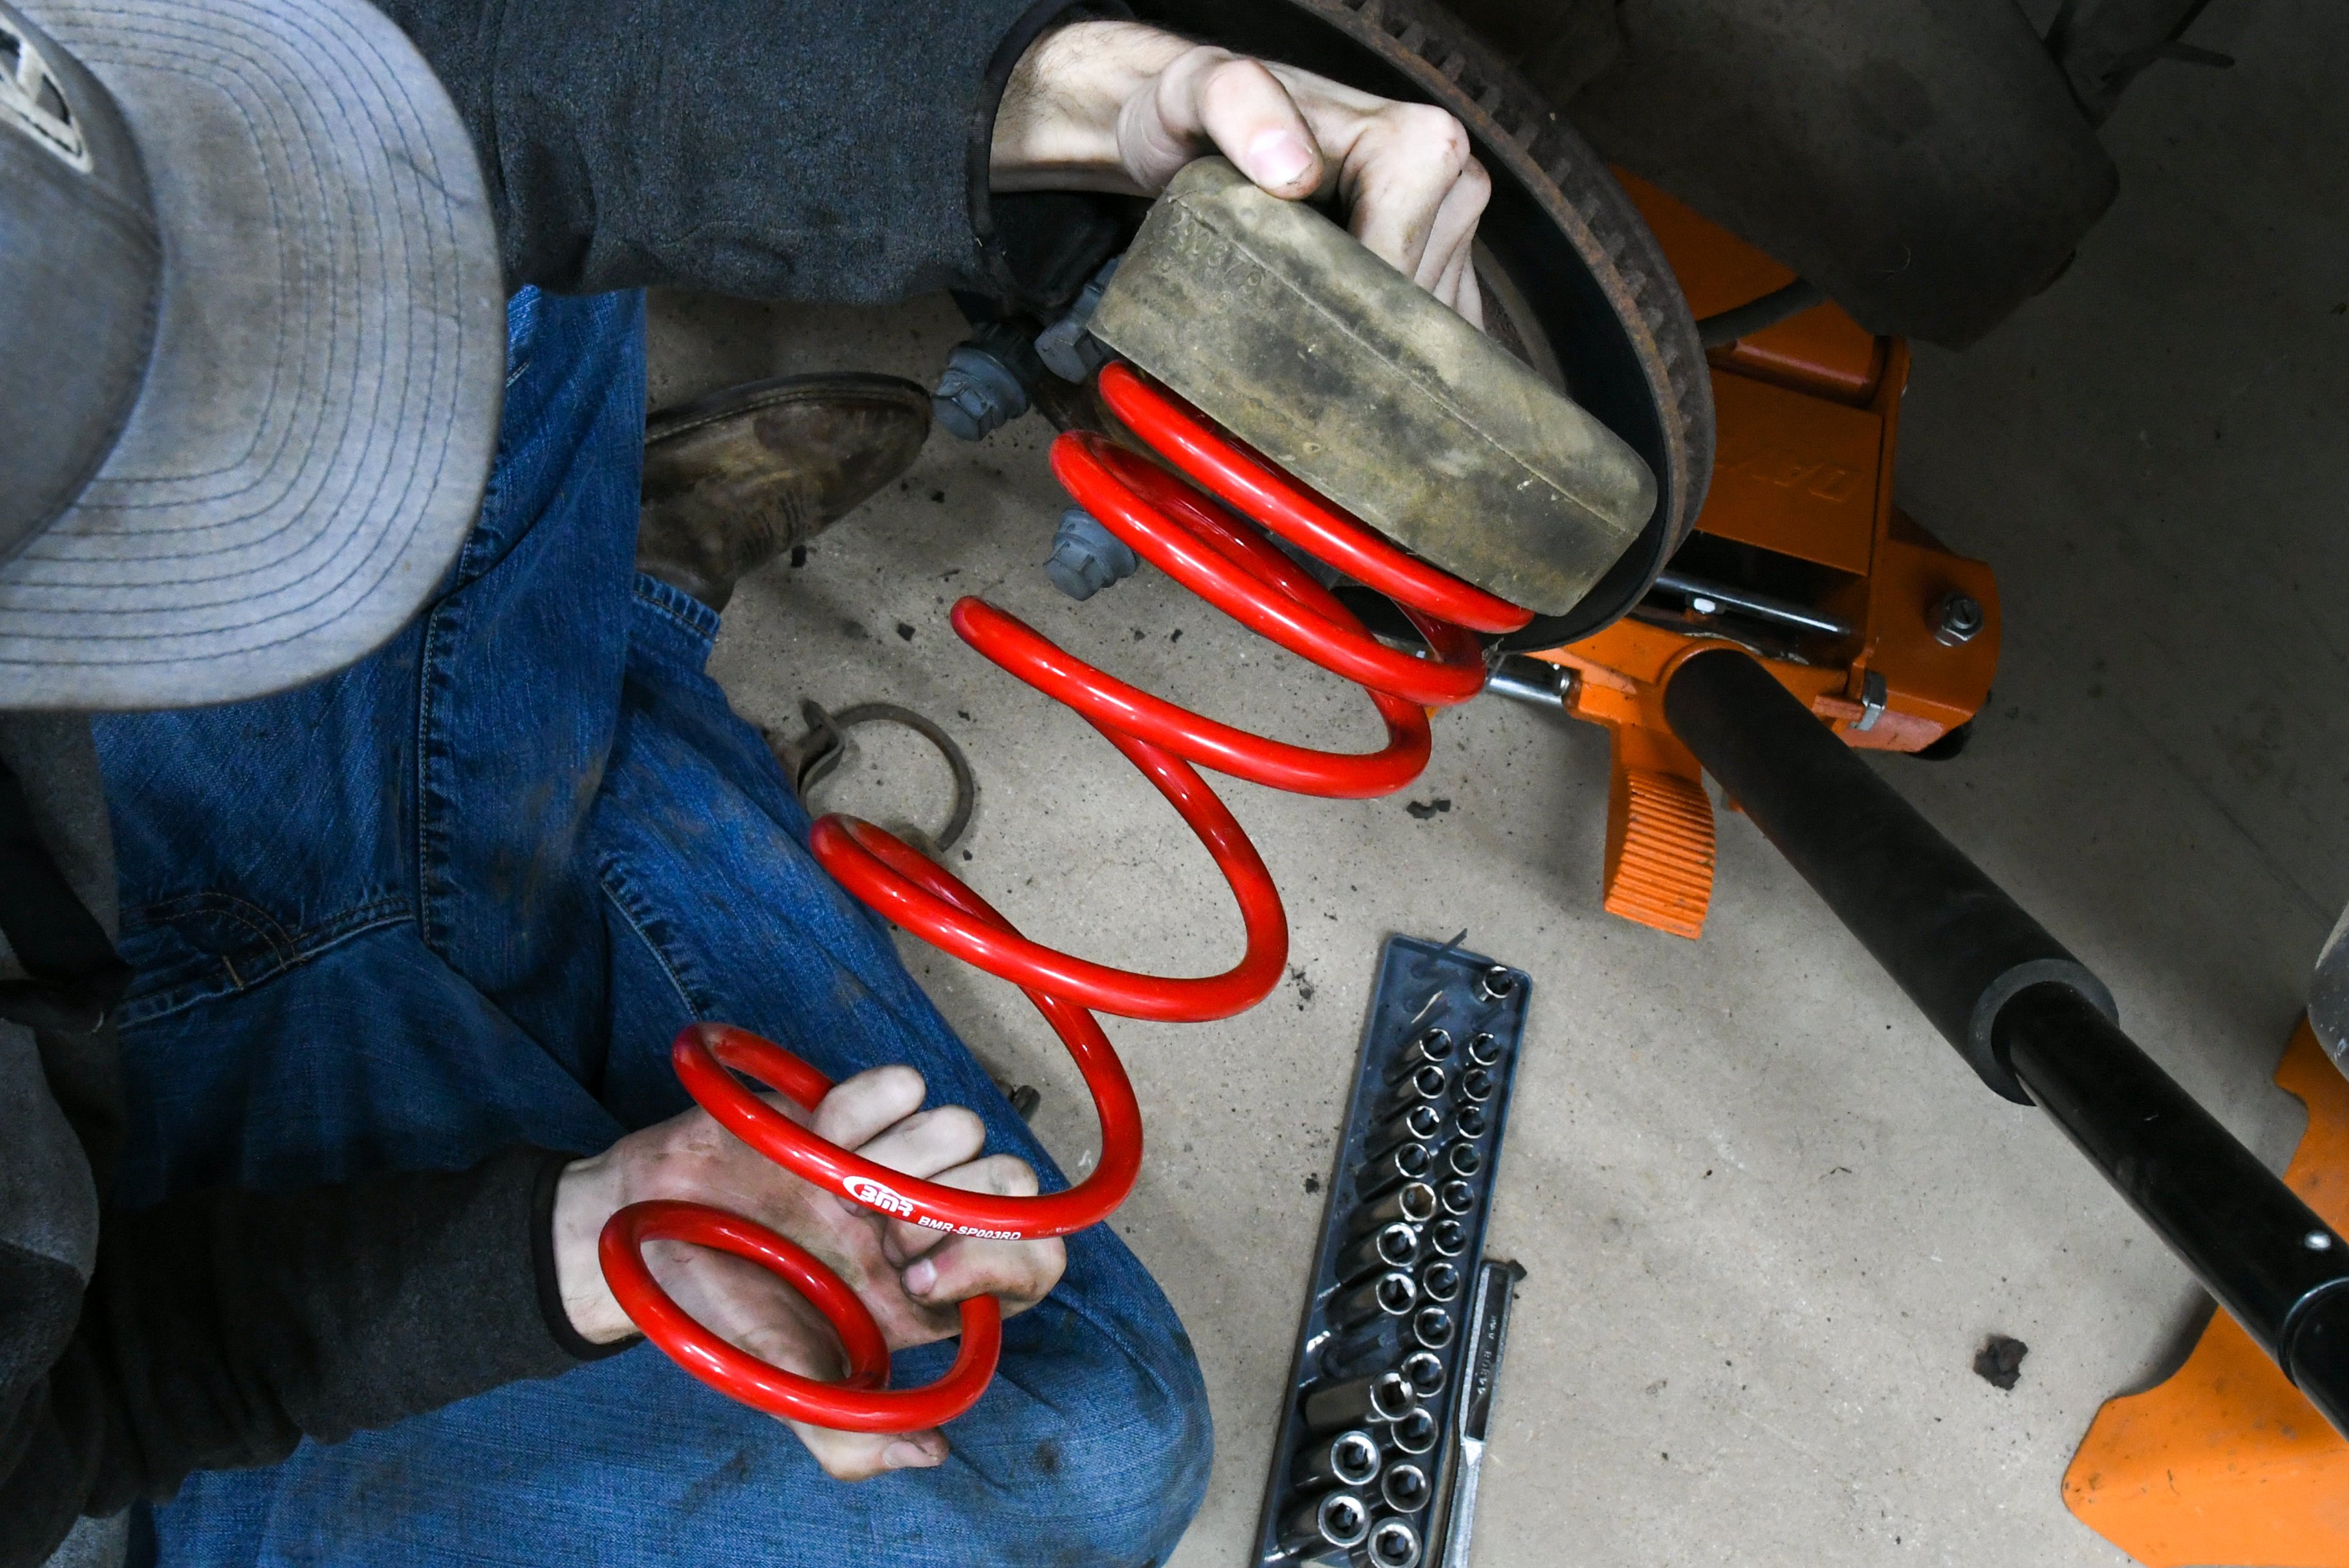
With the struts mounted in a vice, we used a MacPherson strut spring compressor to compress the springs. We then loosened the nut on top of the strut, which came right off with little effort. Usually, this nut will be rusted and can be a royal pain to remove. We thought maybe we were going to get lucky this round, but that was not the case. At this point, the spring isolator should slide off, allowing access to the spring, but it was rusted to the shaft and would not budge. We tried heat, a hammer, and even let it sit in penetrating oil for several hours, but nothing loosened it up. Finally, we decided to cut the strut, allowing us to remove the spring. This is a rather messy move, as the shocks are pressurized and oil-filled. While it is extremely messy, we got the job done with a Sawzall. In the end, it took longer to clean up the mess than to cut and disassemble the factory strut.
The spring removal didn't go according to plan so we busted out the Sawzall and cut the strut in half. We do not recommend this method. It's extremely messy and somewhat dangerous, but we got the results we needed.
As luck would have it, we had some problems on the passenger side strut assembly, as well. Instead of cutting the strut again and making another mess, we separated the rubber spring isolator from the sleeve. While we still had to cut the shaft, this method was much better than our previous idea of cutting the strut. The only problem is, you will need to purchase a new spring isolator, since this will destroy it in the process.
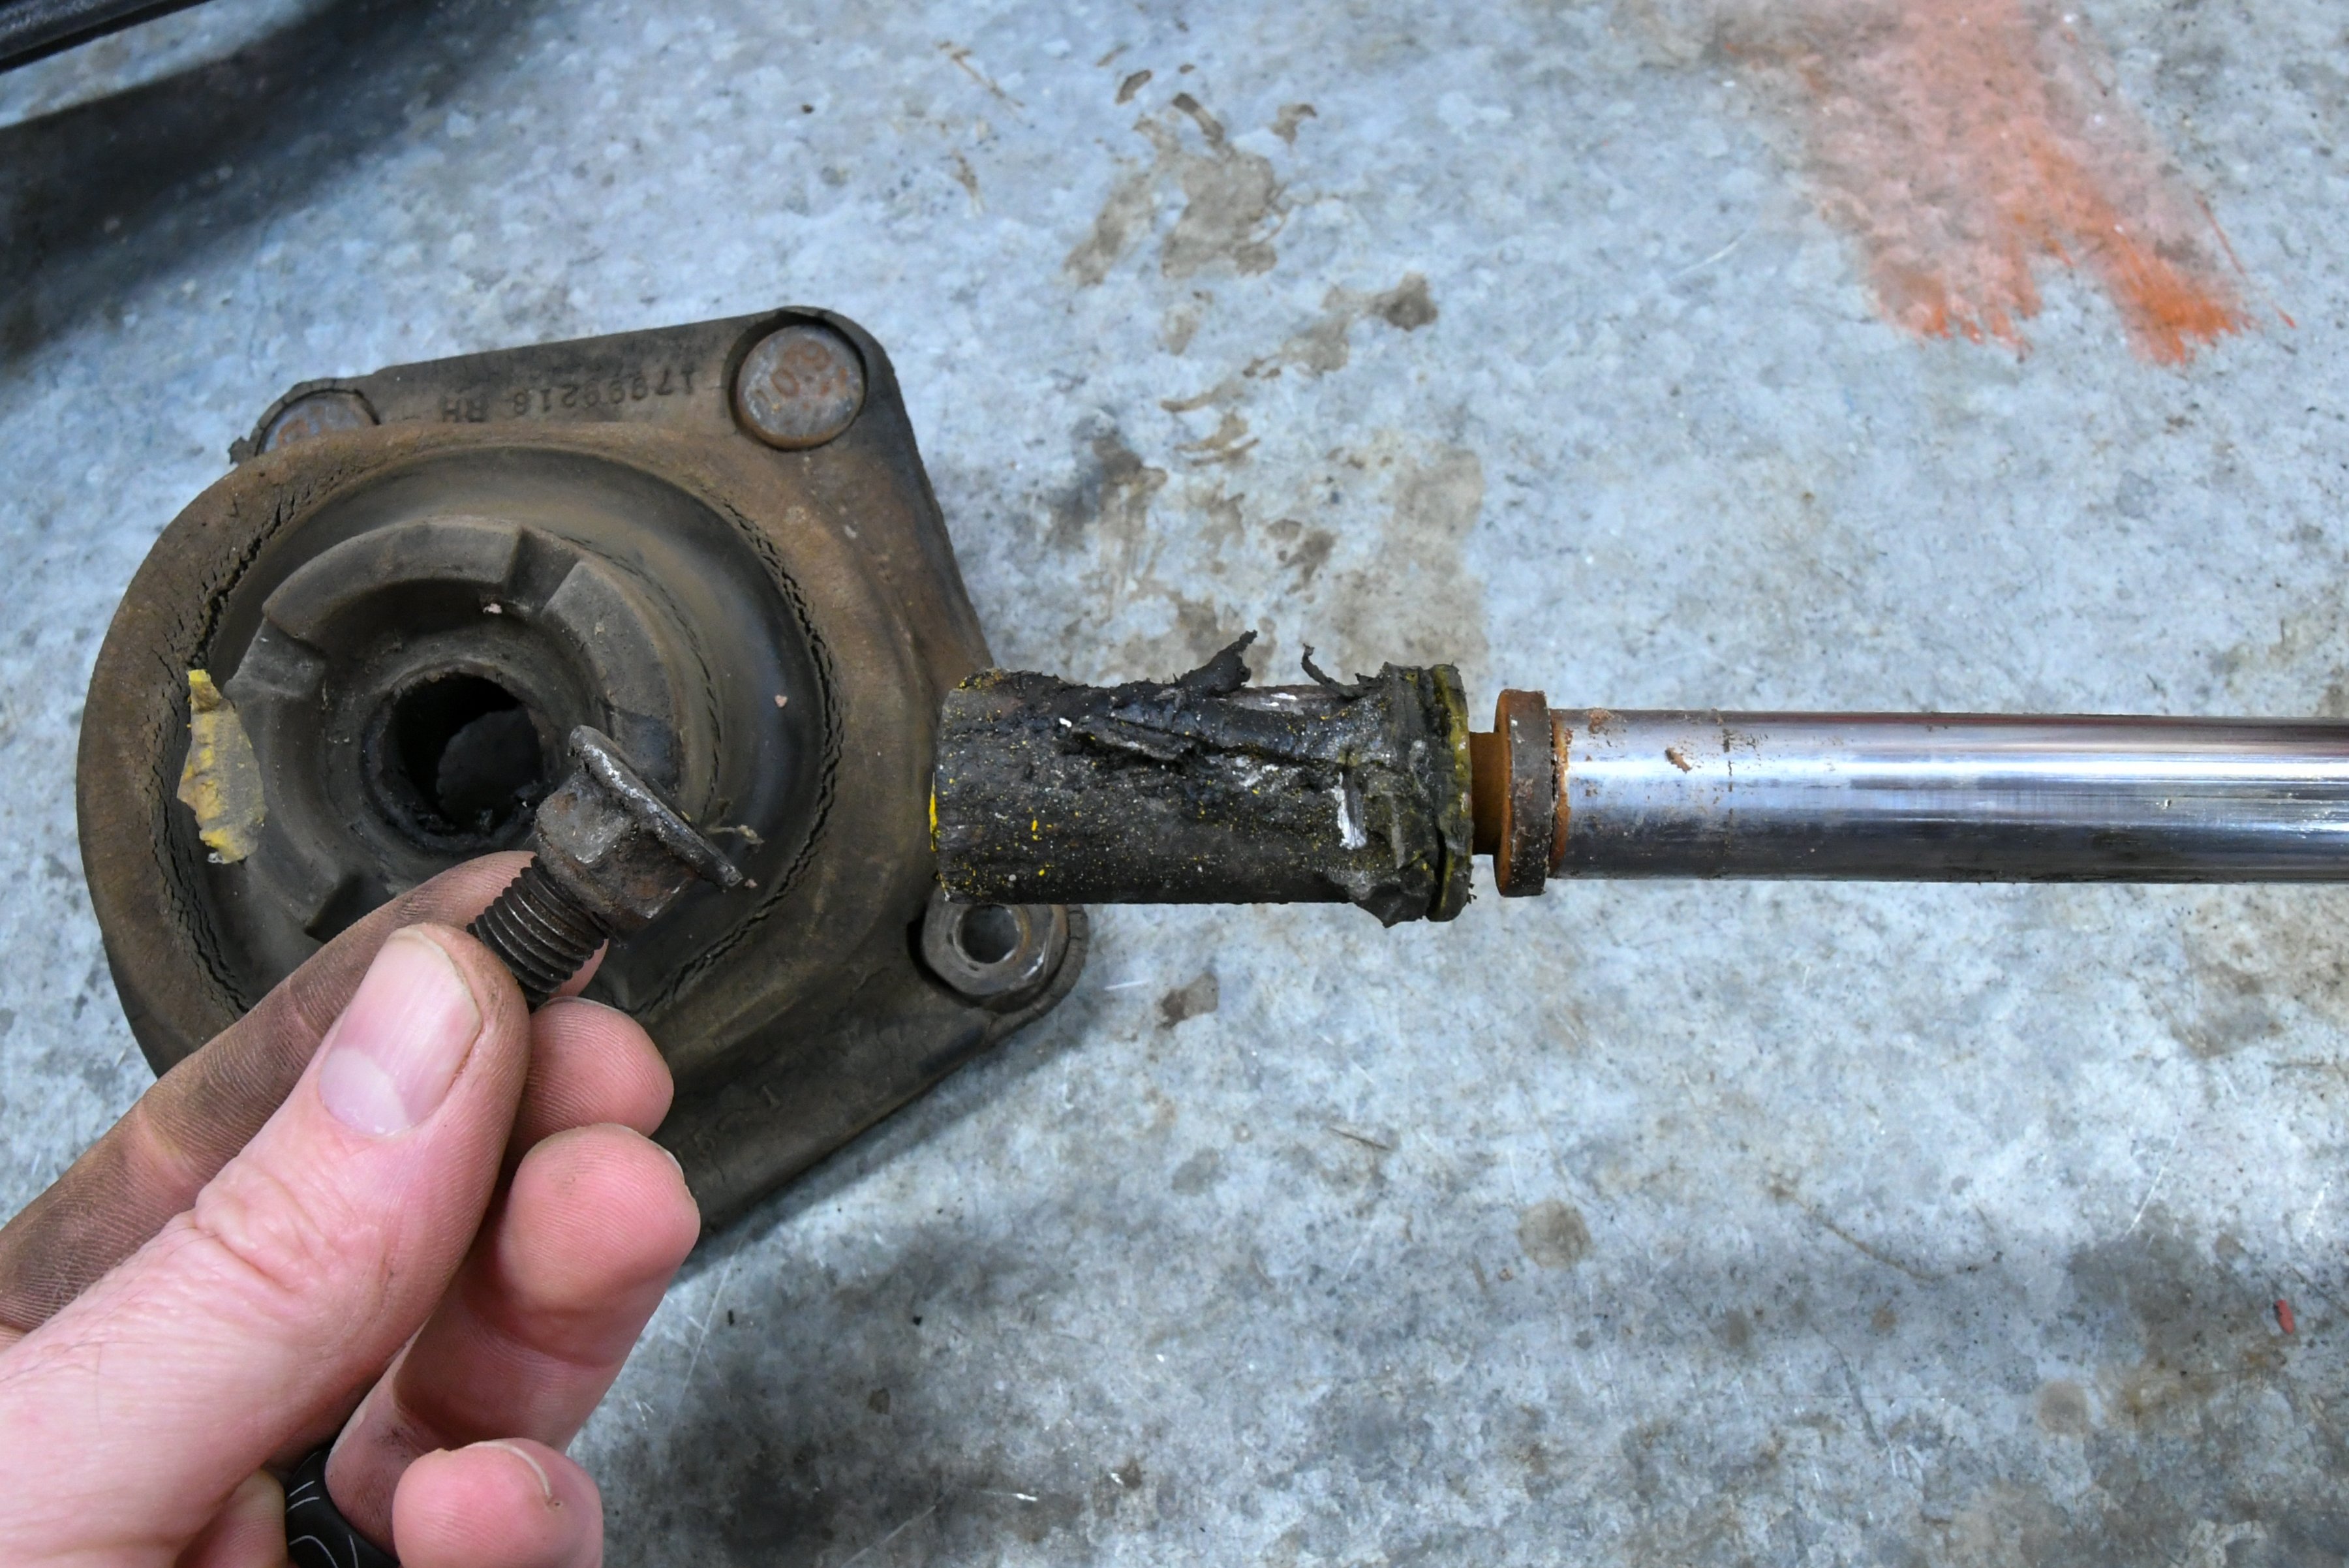
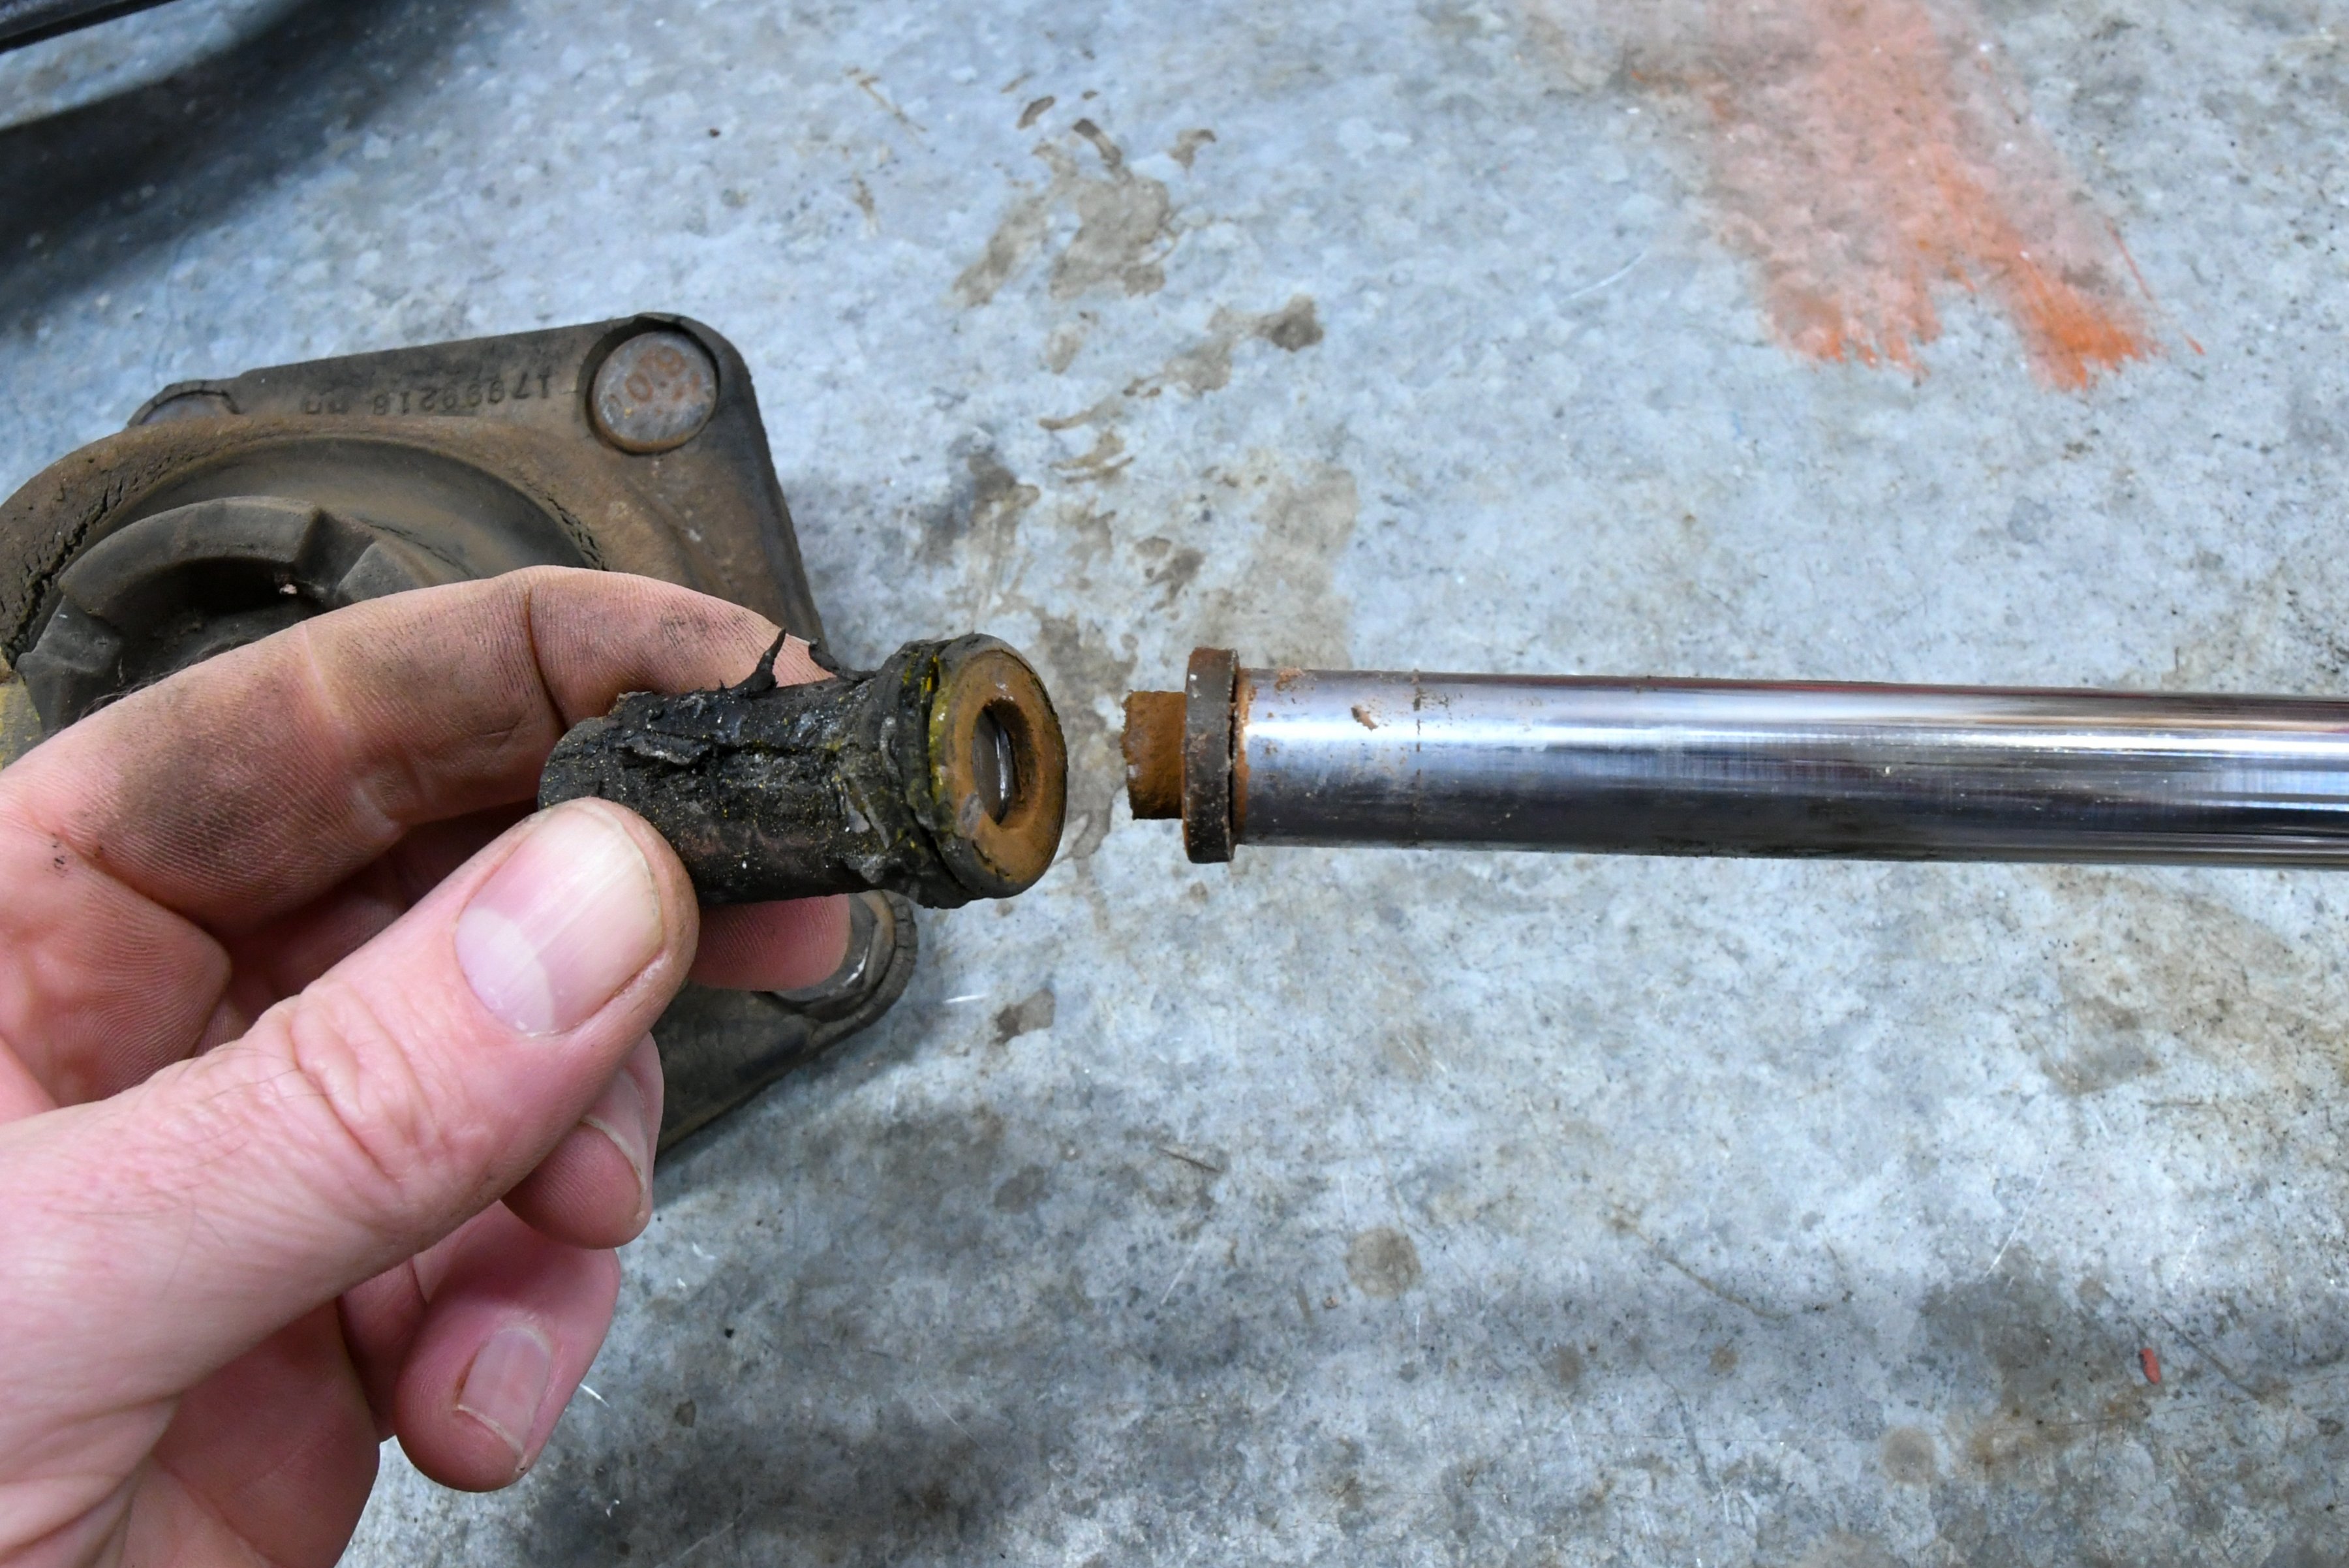
For the passenger's side, we separated the spring isolator from the metal sleeve. This gave us access to the rusted nut, which we cut off along with the rusted sleeve.
BMR’s Lowering Springs
We were curious about the advantages of the BMR F-body springs, so we reached out to Jonathan Cutler, Marketing Director of BMR Suspension. He shared, “You can expect a 1.25-inch drop with our springs, along with excellent handling and a smooth ride.” This was music to our ears. Too often, we have done lowering springs and the ride was compromised to the point the car was no longer enjoyable for a daily commute. However, we will see how the car rides after the installation to see if Cutler’s claim is true.
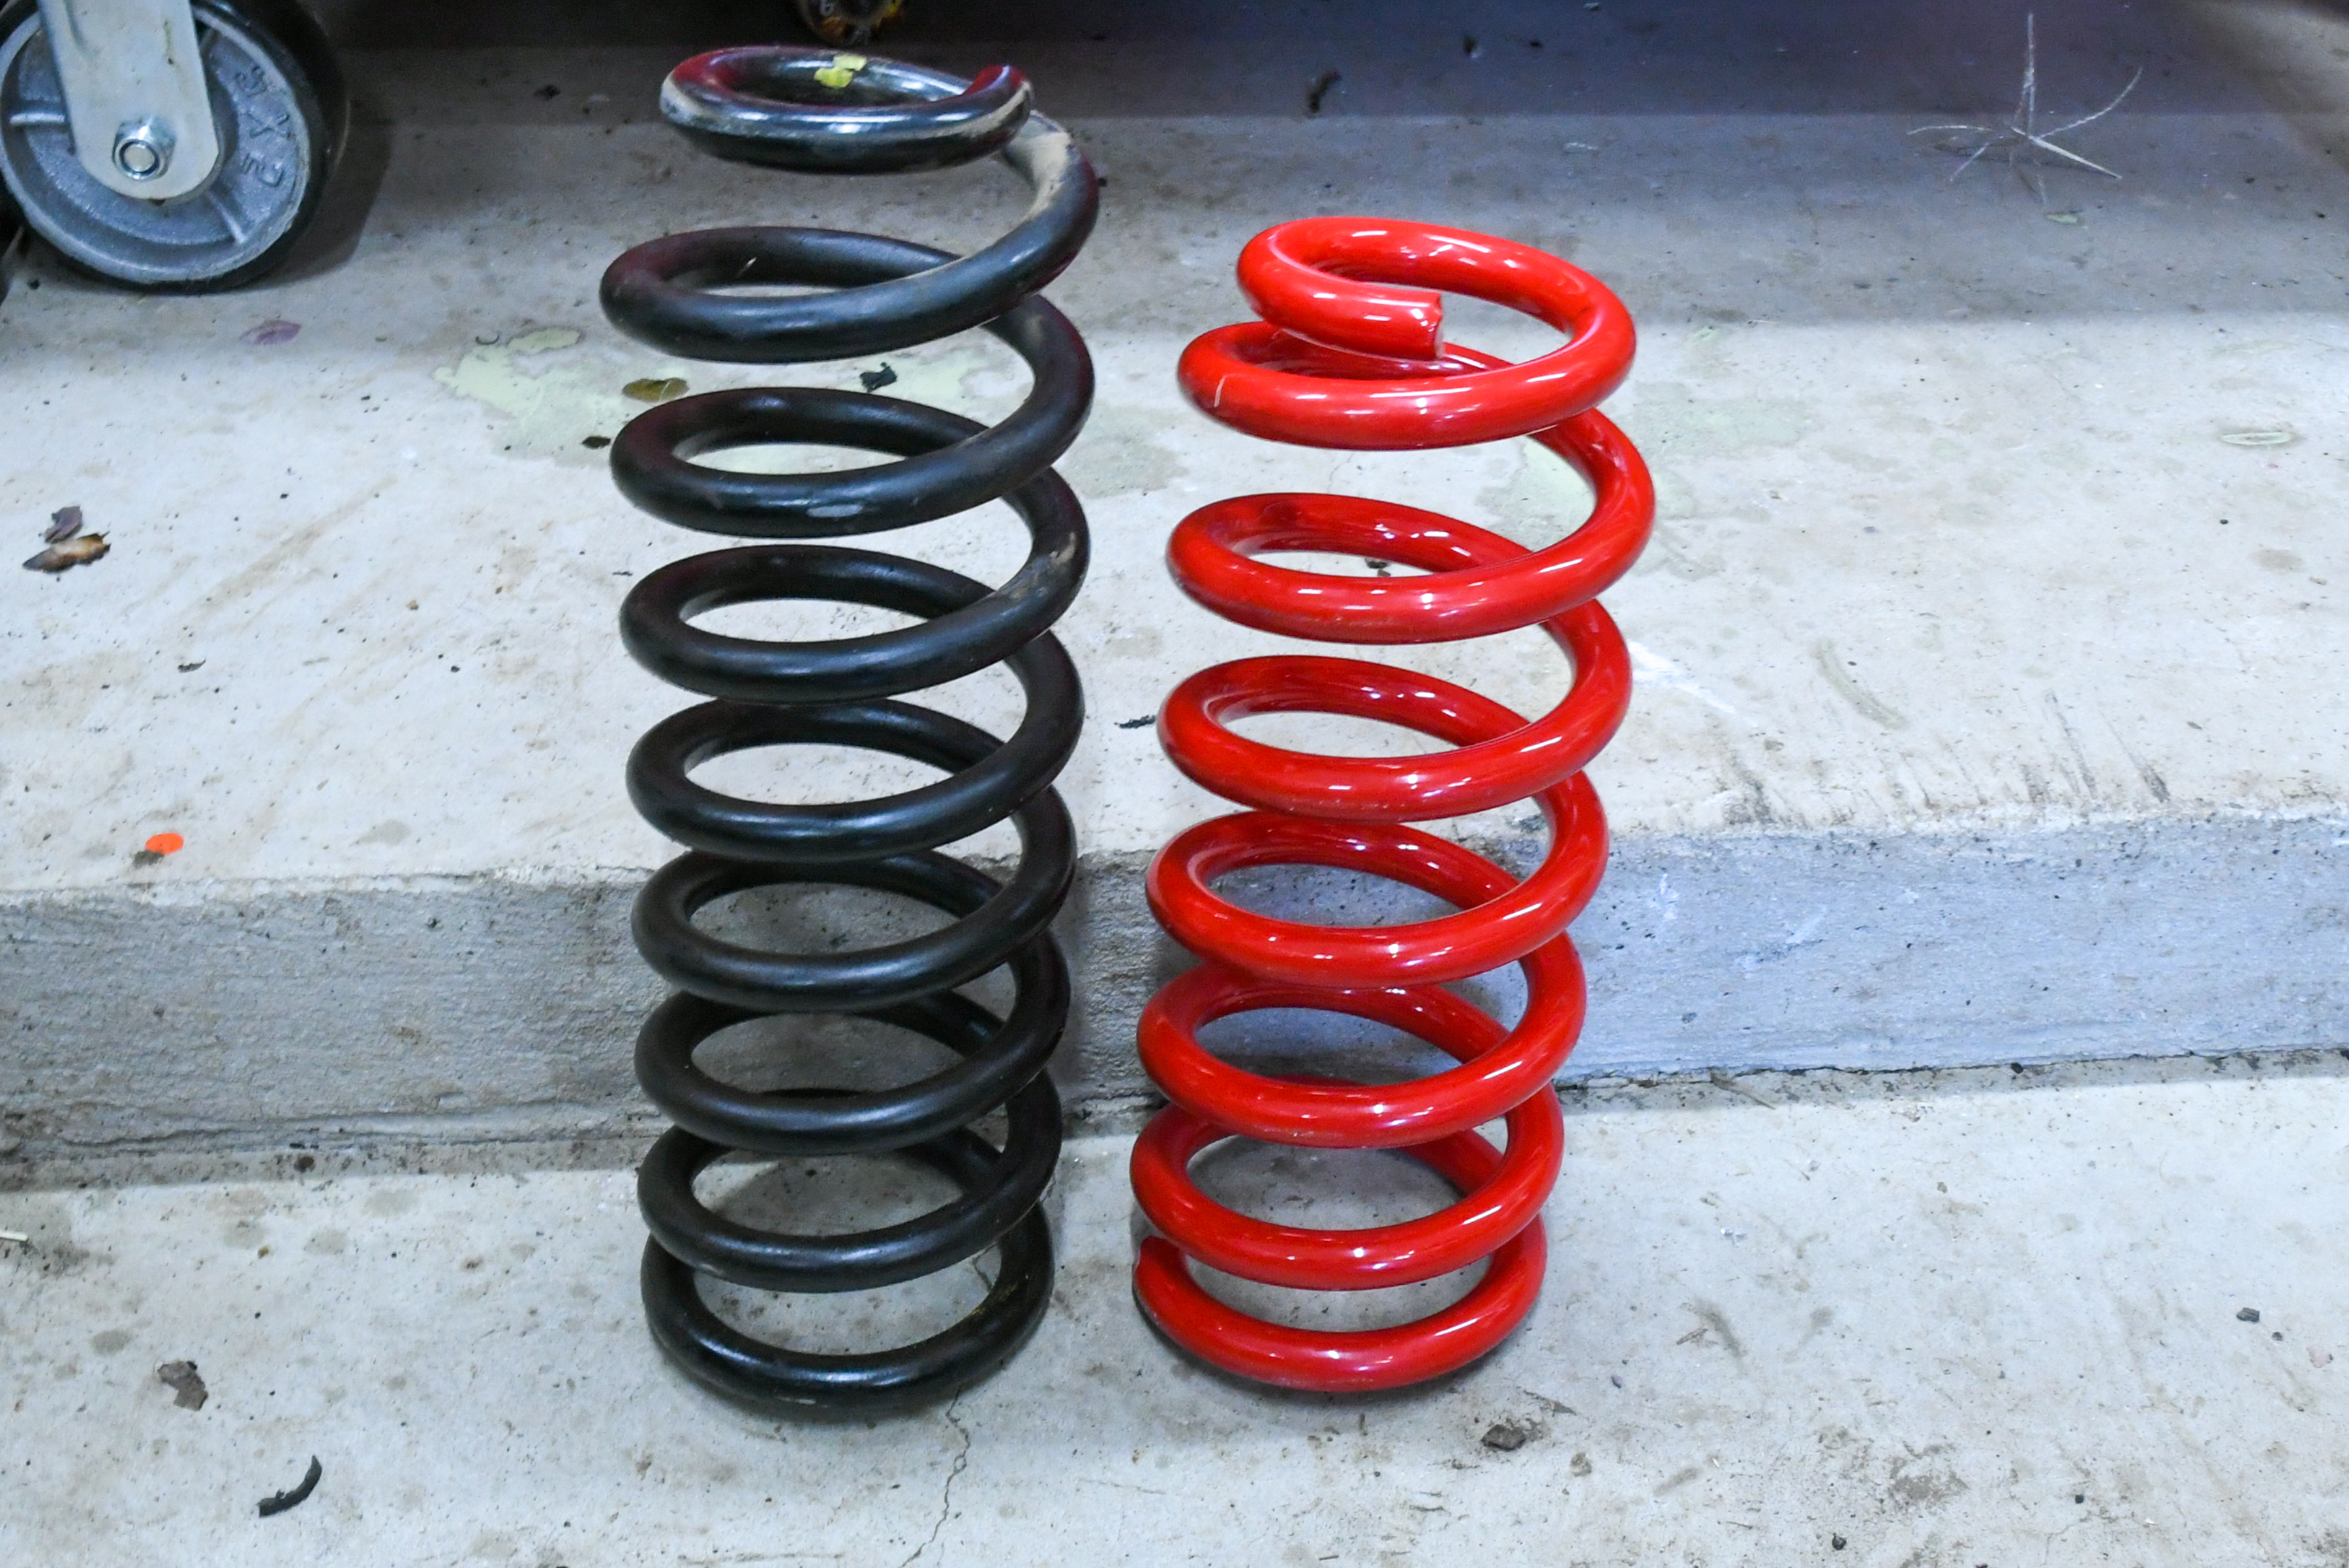
You can tell a big difference between the factory springs and the red BMR units, which will lower the car 1.25-inches.
Strut Reassembly
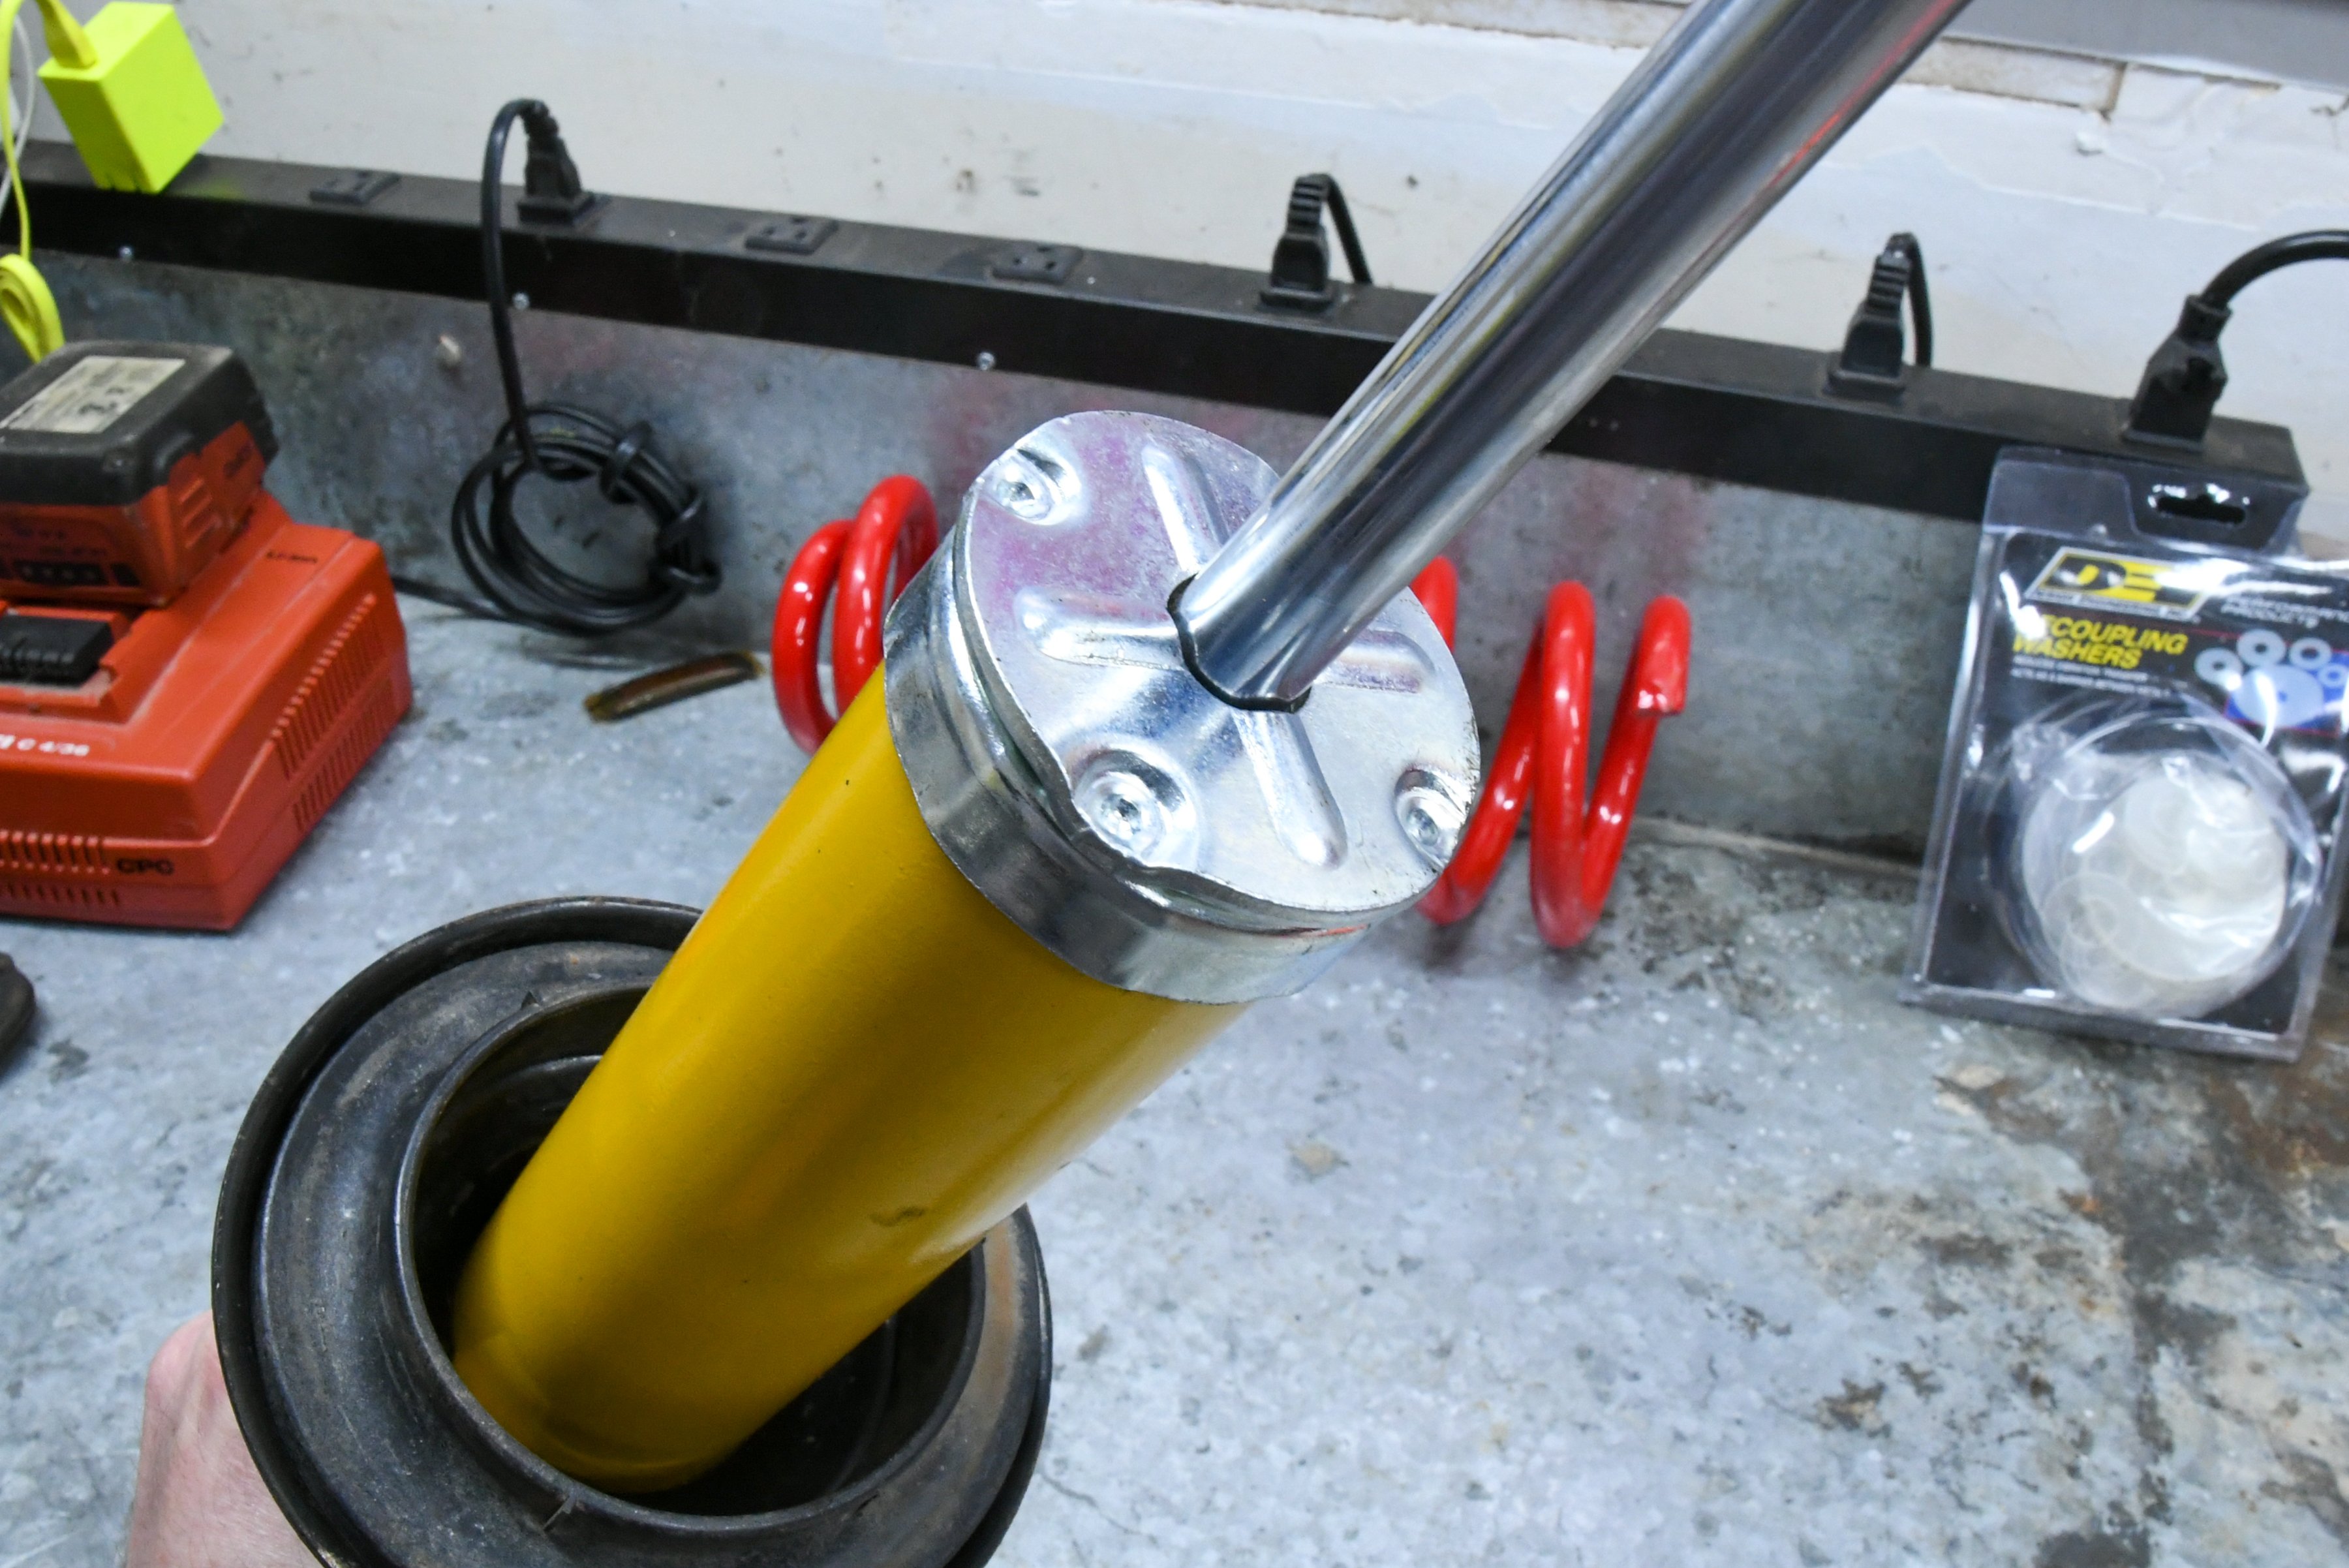
With the OEM struts dismantled and the new parts in hand, we could now assemble our Bilstein shocks and struts and BMR lowering springs. The first thing you will need to do is remove the spring perch from the OEM struts. These parts will then slide on the body of the Bilstein units. With the perches in place, you will then install the supplied metal caps on the Bilstein Struts. The caps will disperse the load when the car bottoms out, allowing a flat surface for the bump stops to hit. Speaking of bump stops: there wasn’t much left of ours, and we had to order a new set from RockAuto.com, along with bellows, spring isolators, and new ball joints. None of our local auto parts stores had these items in stock, so be sure you plan ahead.

Next, we installed the spring perch, bump stop and bellow, coil spring, and the rubber isolator. Since the lowering springs are shorter than the originals, we didn’t need to use the spring compressor, and we were good with that.


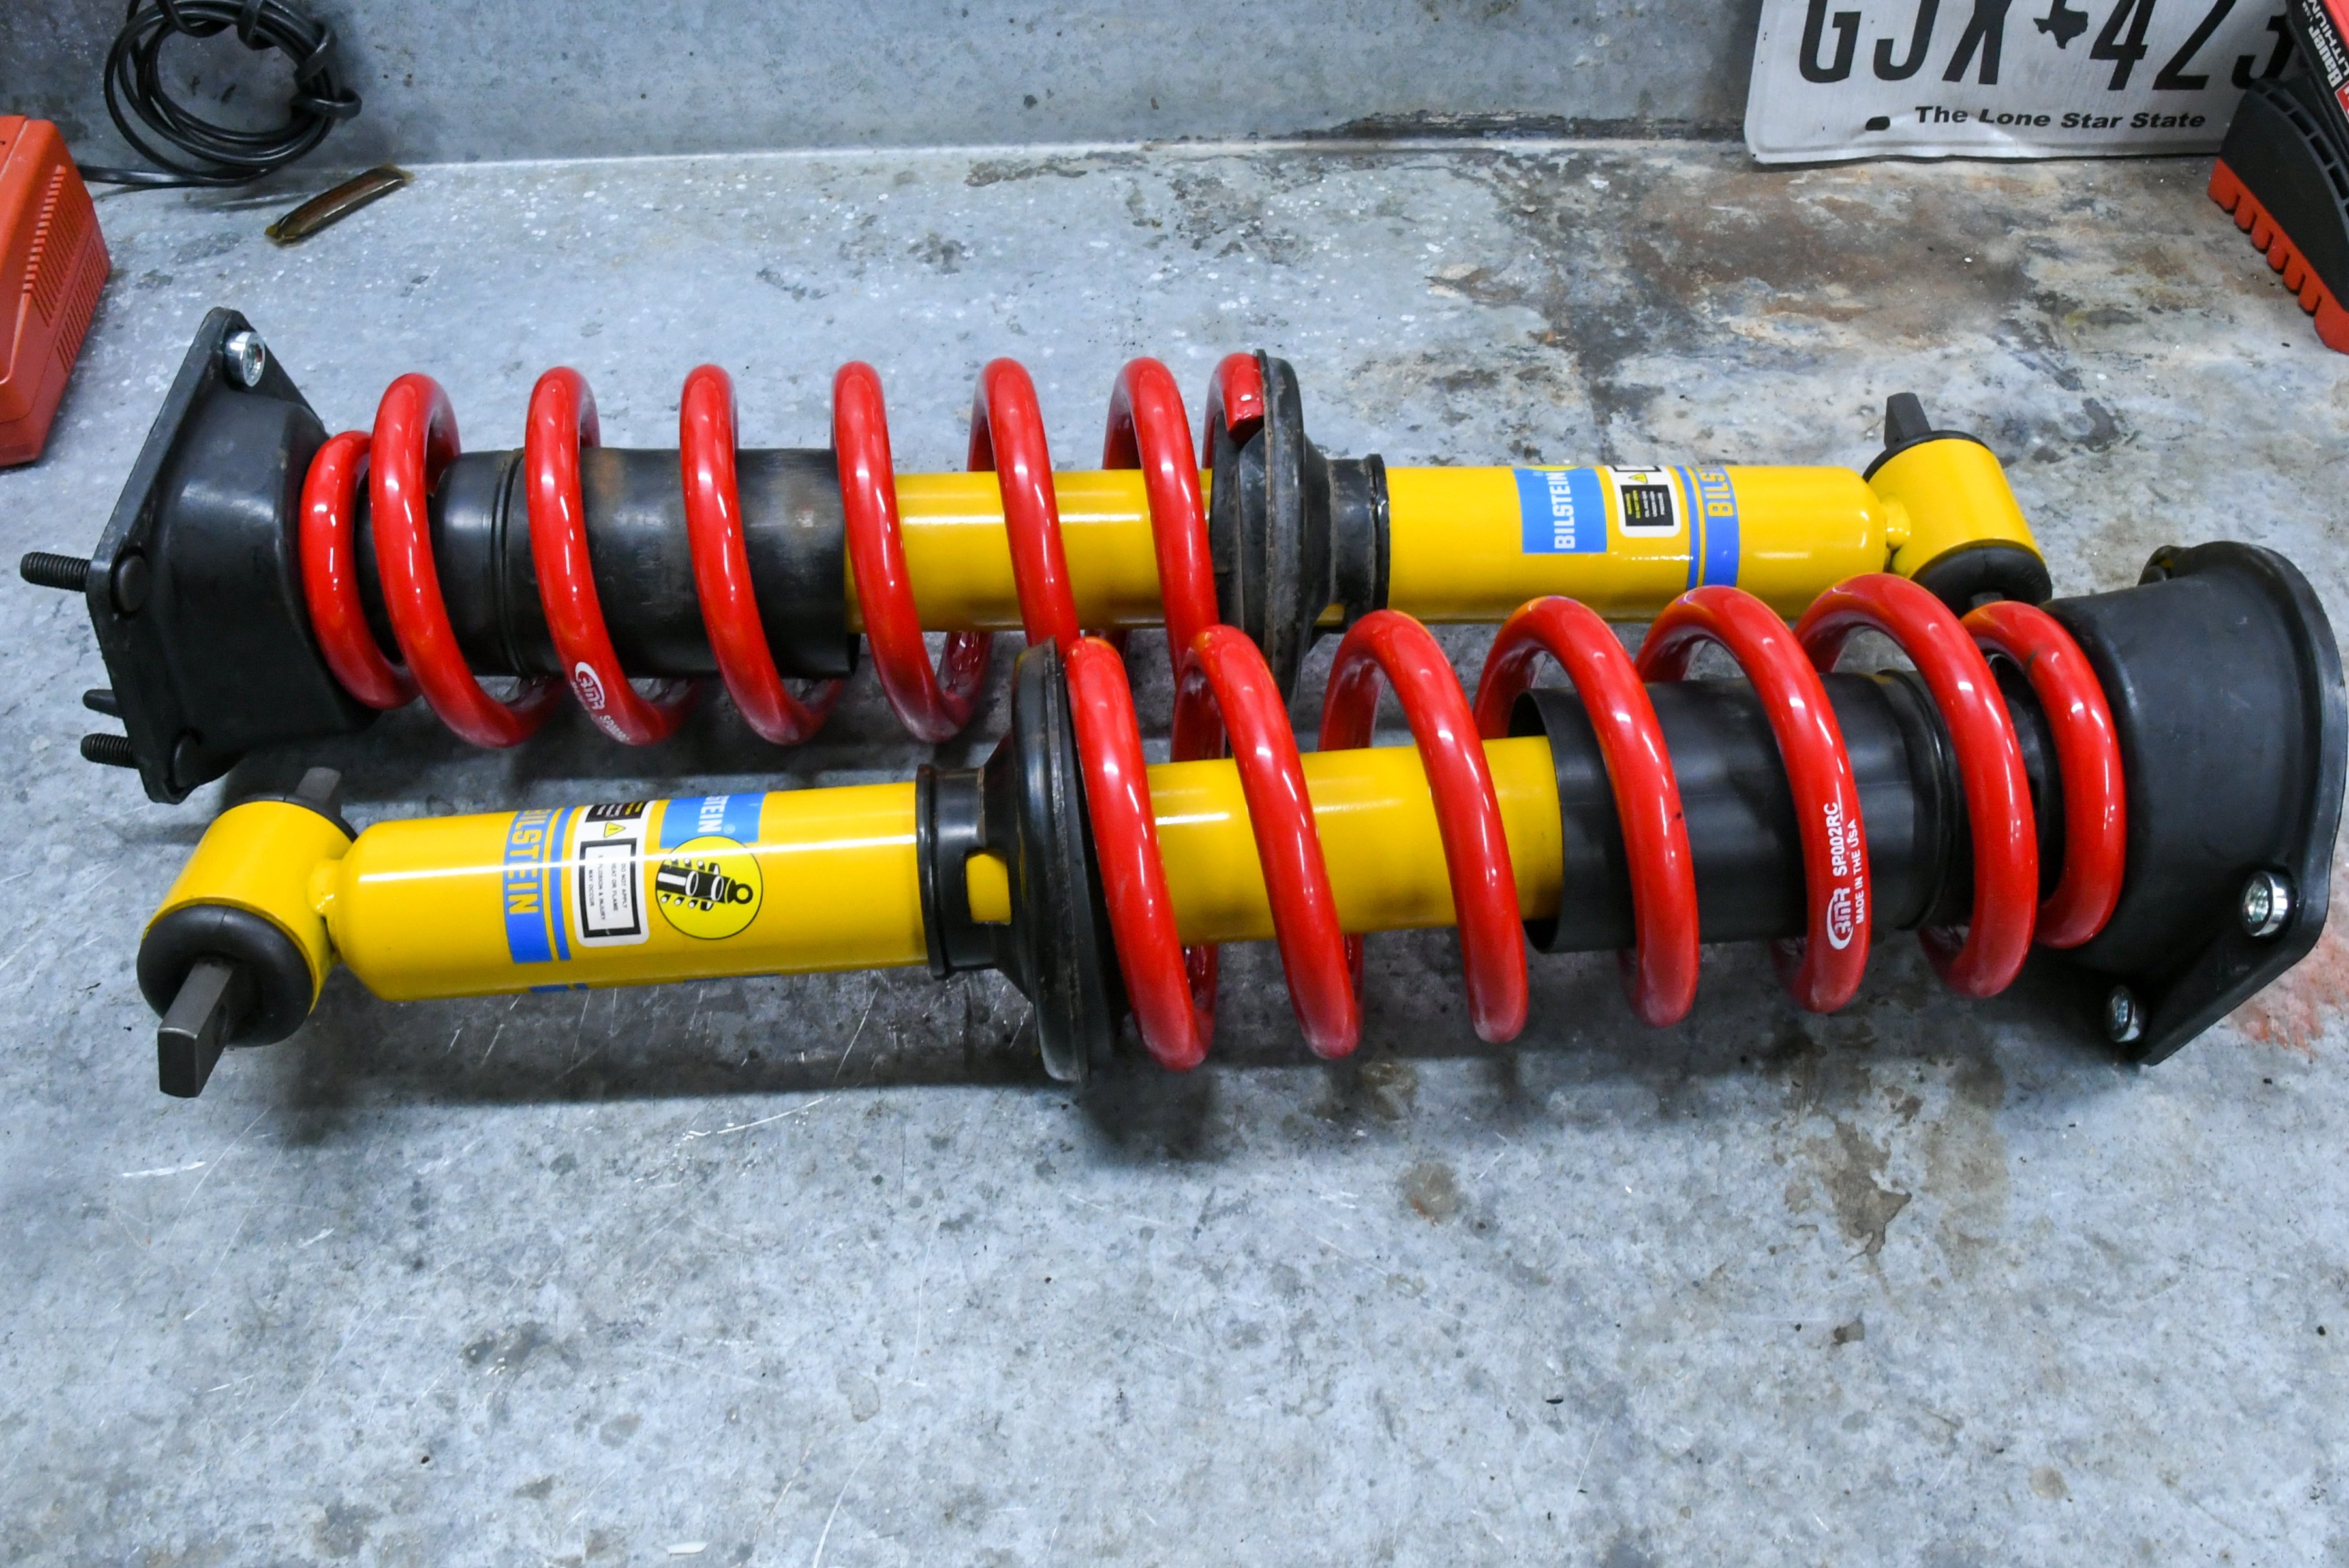
With the strut assembly put together, it’s a good idea to test fit them before tightening everything down. The struts will only go in one way, and you might need to reclock the units to get them to align. At this time, we also replaced the ball joints in the upper arms. This is a simple task, and you need to drill out the rivets and replace the ball joints and screw them back down. We then successfully test fit the strut assemblies, then pulled them back out and tightened the nut on top of the strut with the supplied washer, and reinstalled the Bilsteins with the BMR Lowering springs. At this point, it’s safe to button up the master cylinder.


Front Sway Bar
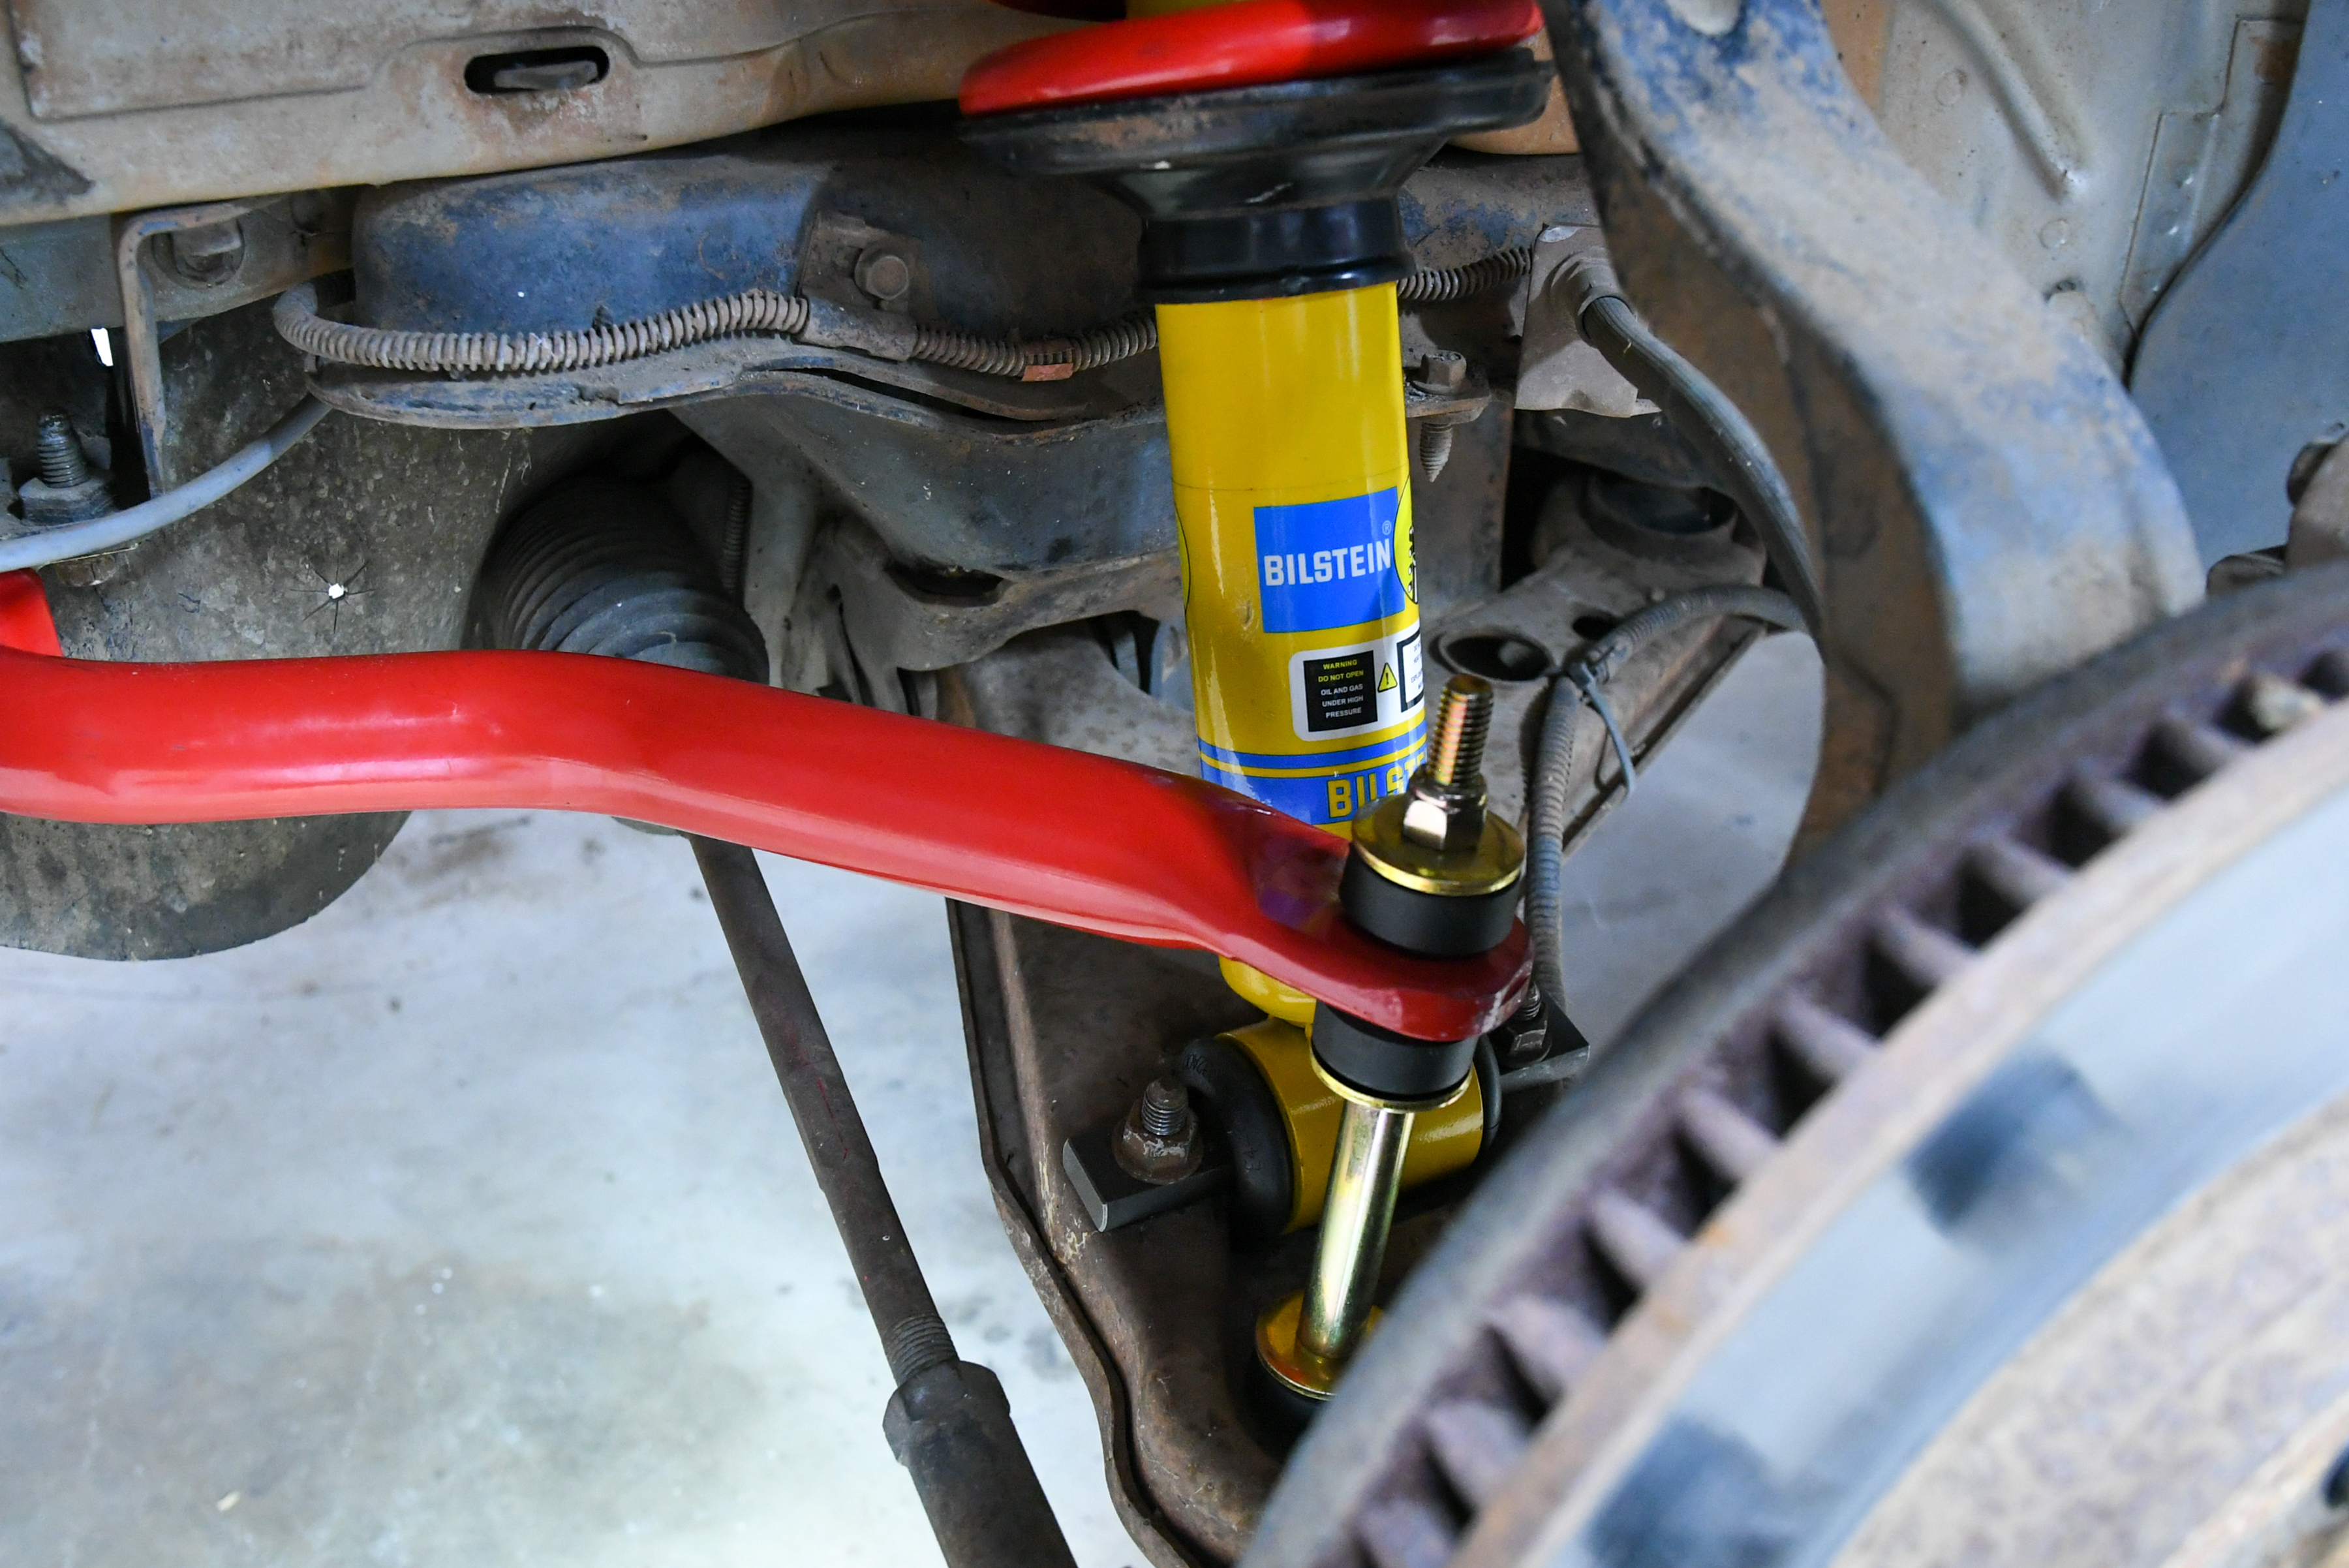
While we were working on the front of the car, it made sense to go ahead and install the BMR sway bar (PN SB001). And while you don’t have to replace the factory sway bars, it’s a good idea. “For the best handling, both the front and rear bar should be done at the same time,” Cutler told us. These units replace the smaller factory ones, and they simply bolt in place. BMR includes the bushings and end links needed, which is great considering how bad our end links looked.

Although it’s hard to tell in the picture, the BMR sway bar is larger than the factory and included new bushings, mounts, and end links.
The BMR sway bar increases the rate by 129-percent over the factory unit. This rate and adjustability allow you to fine-tune the handling characteristics of your F-body, limiting body roll which allows more aggressive driving in and out of the corners. It’s the perfect choice for street performance, autocross, and road race applications.
To The Back
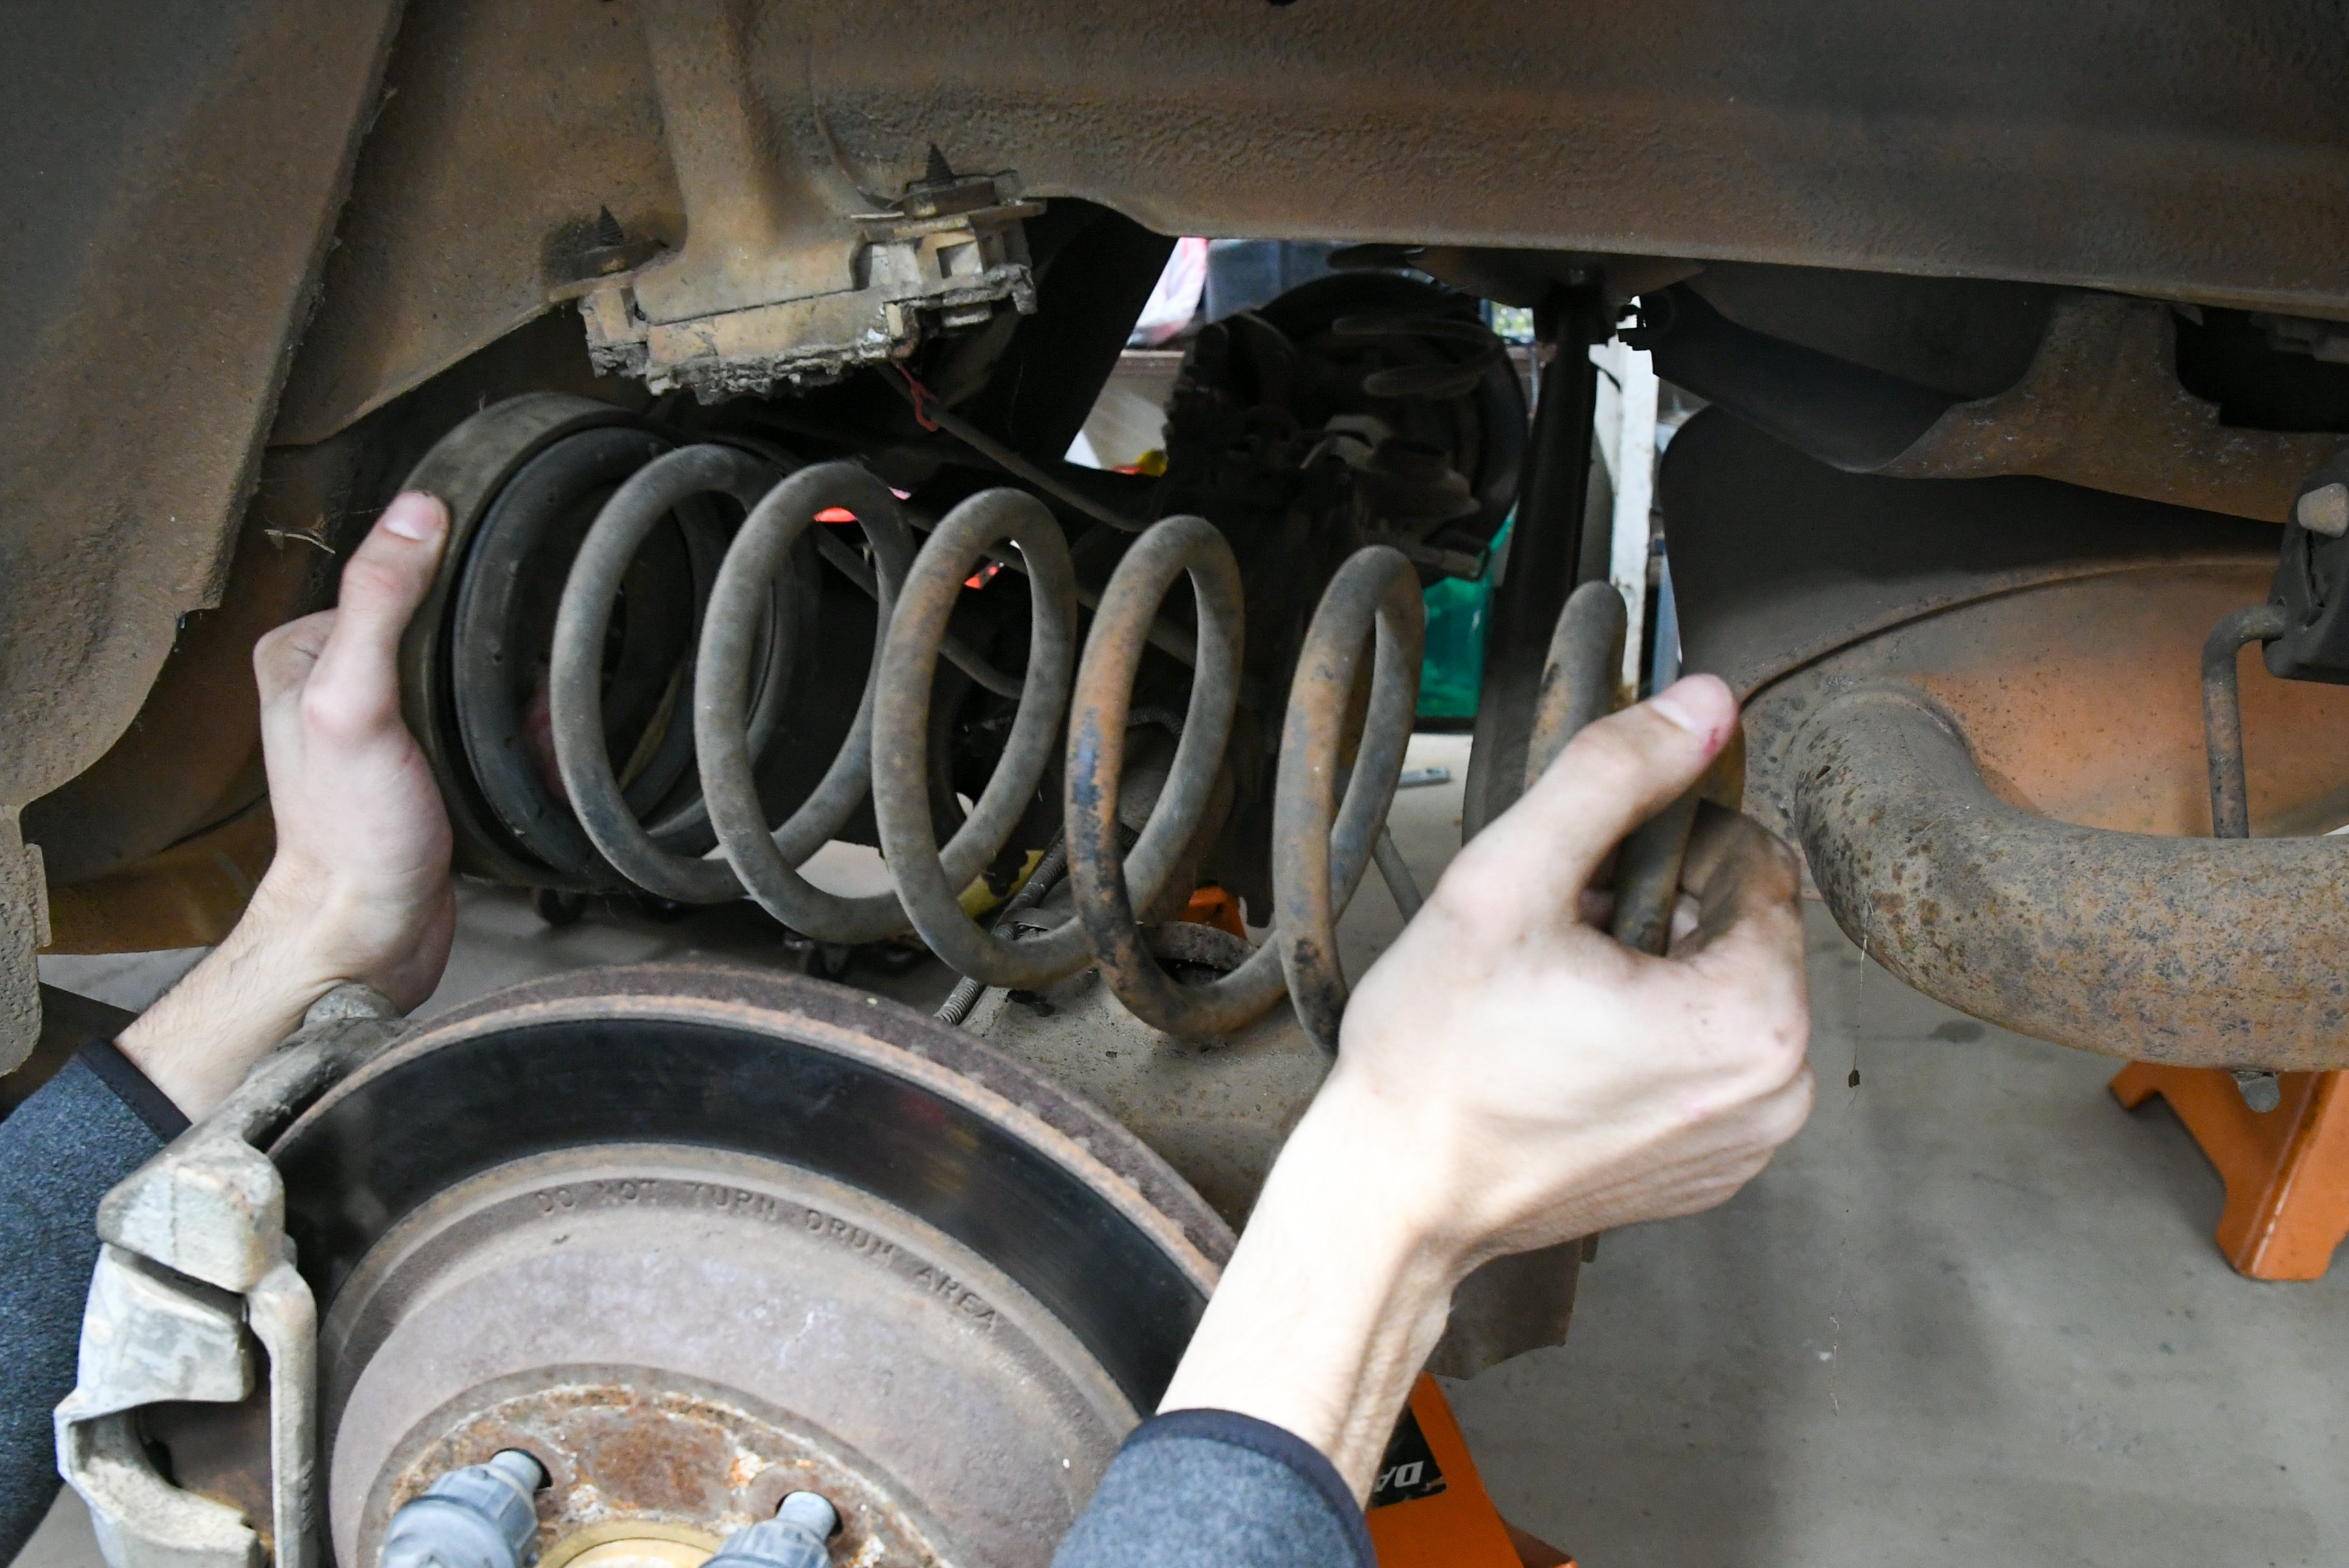
There’s nothing hard about changing the springs on the rear of a fourth-gen. We have worked on several of these cars over the years, and every time it’s as smooth as butter. Our WS6 was no different. With the rear end jacked up and the tires and wheels off, we first unbolted the shocks. The hardest part of this process is removing enough interior to get to the top shock bolts. Once the shocks were out, we then lowered the jack, which gave us enough room to remove the OEM rear springs. We then installed the BMR springs and new shocks from Bilstein.
Cause And Effect
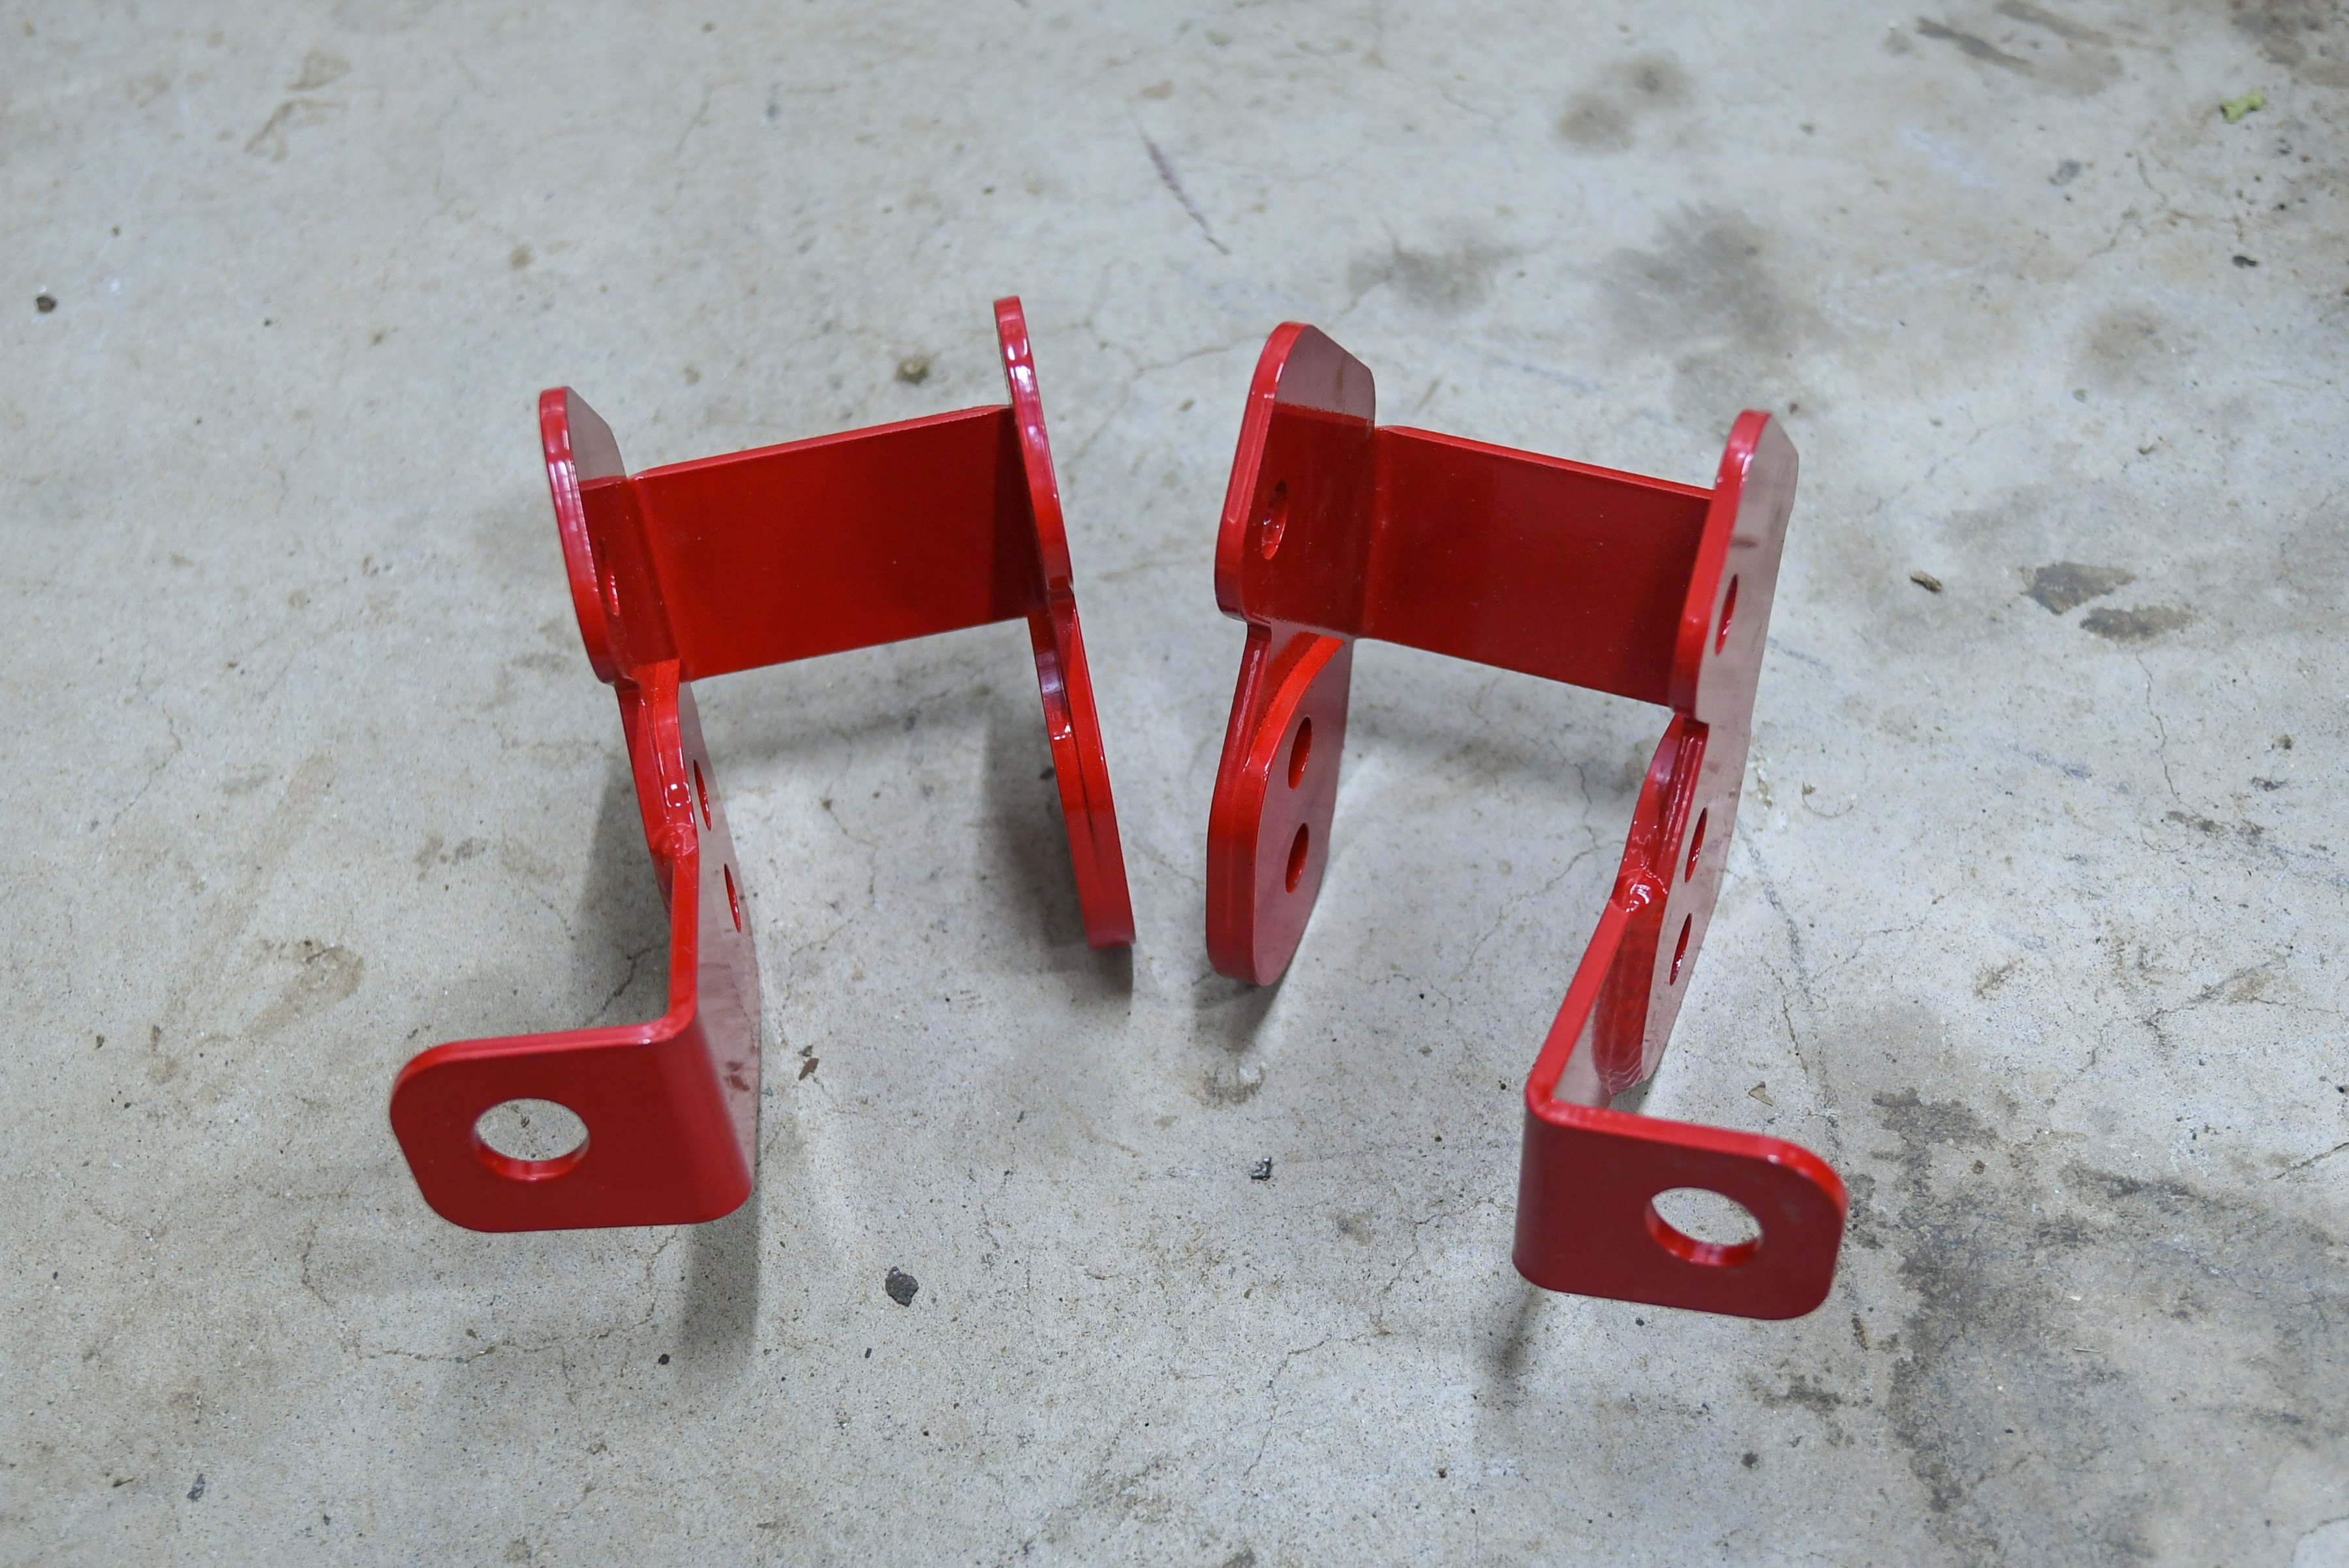
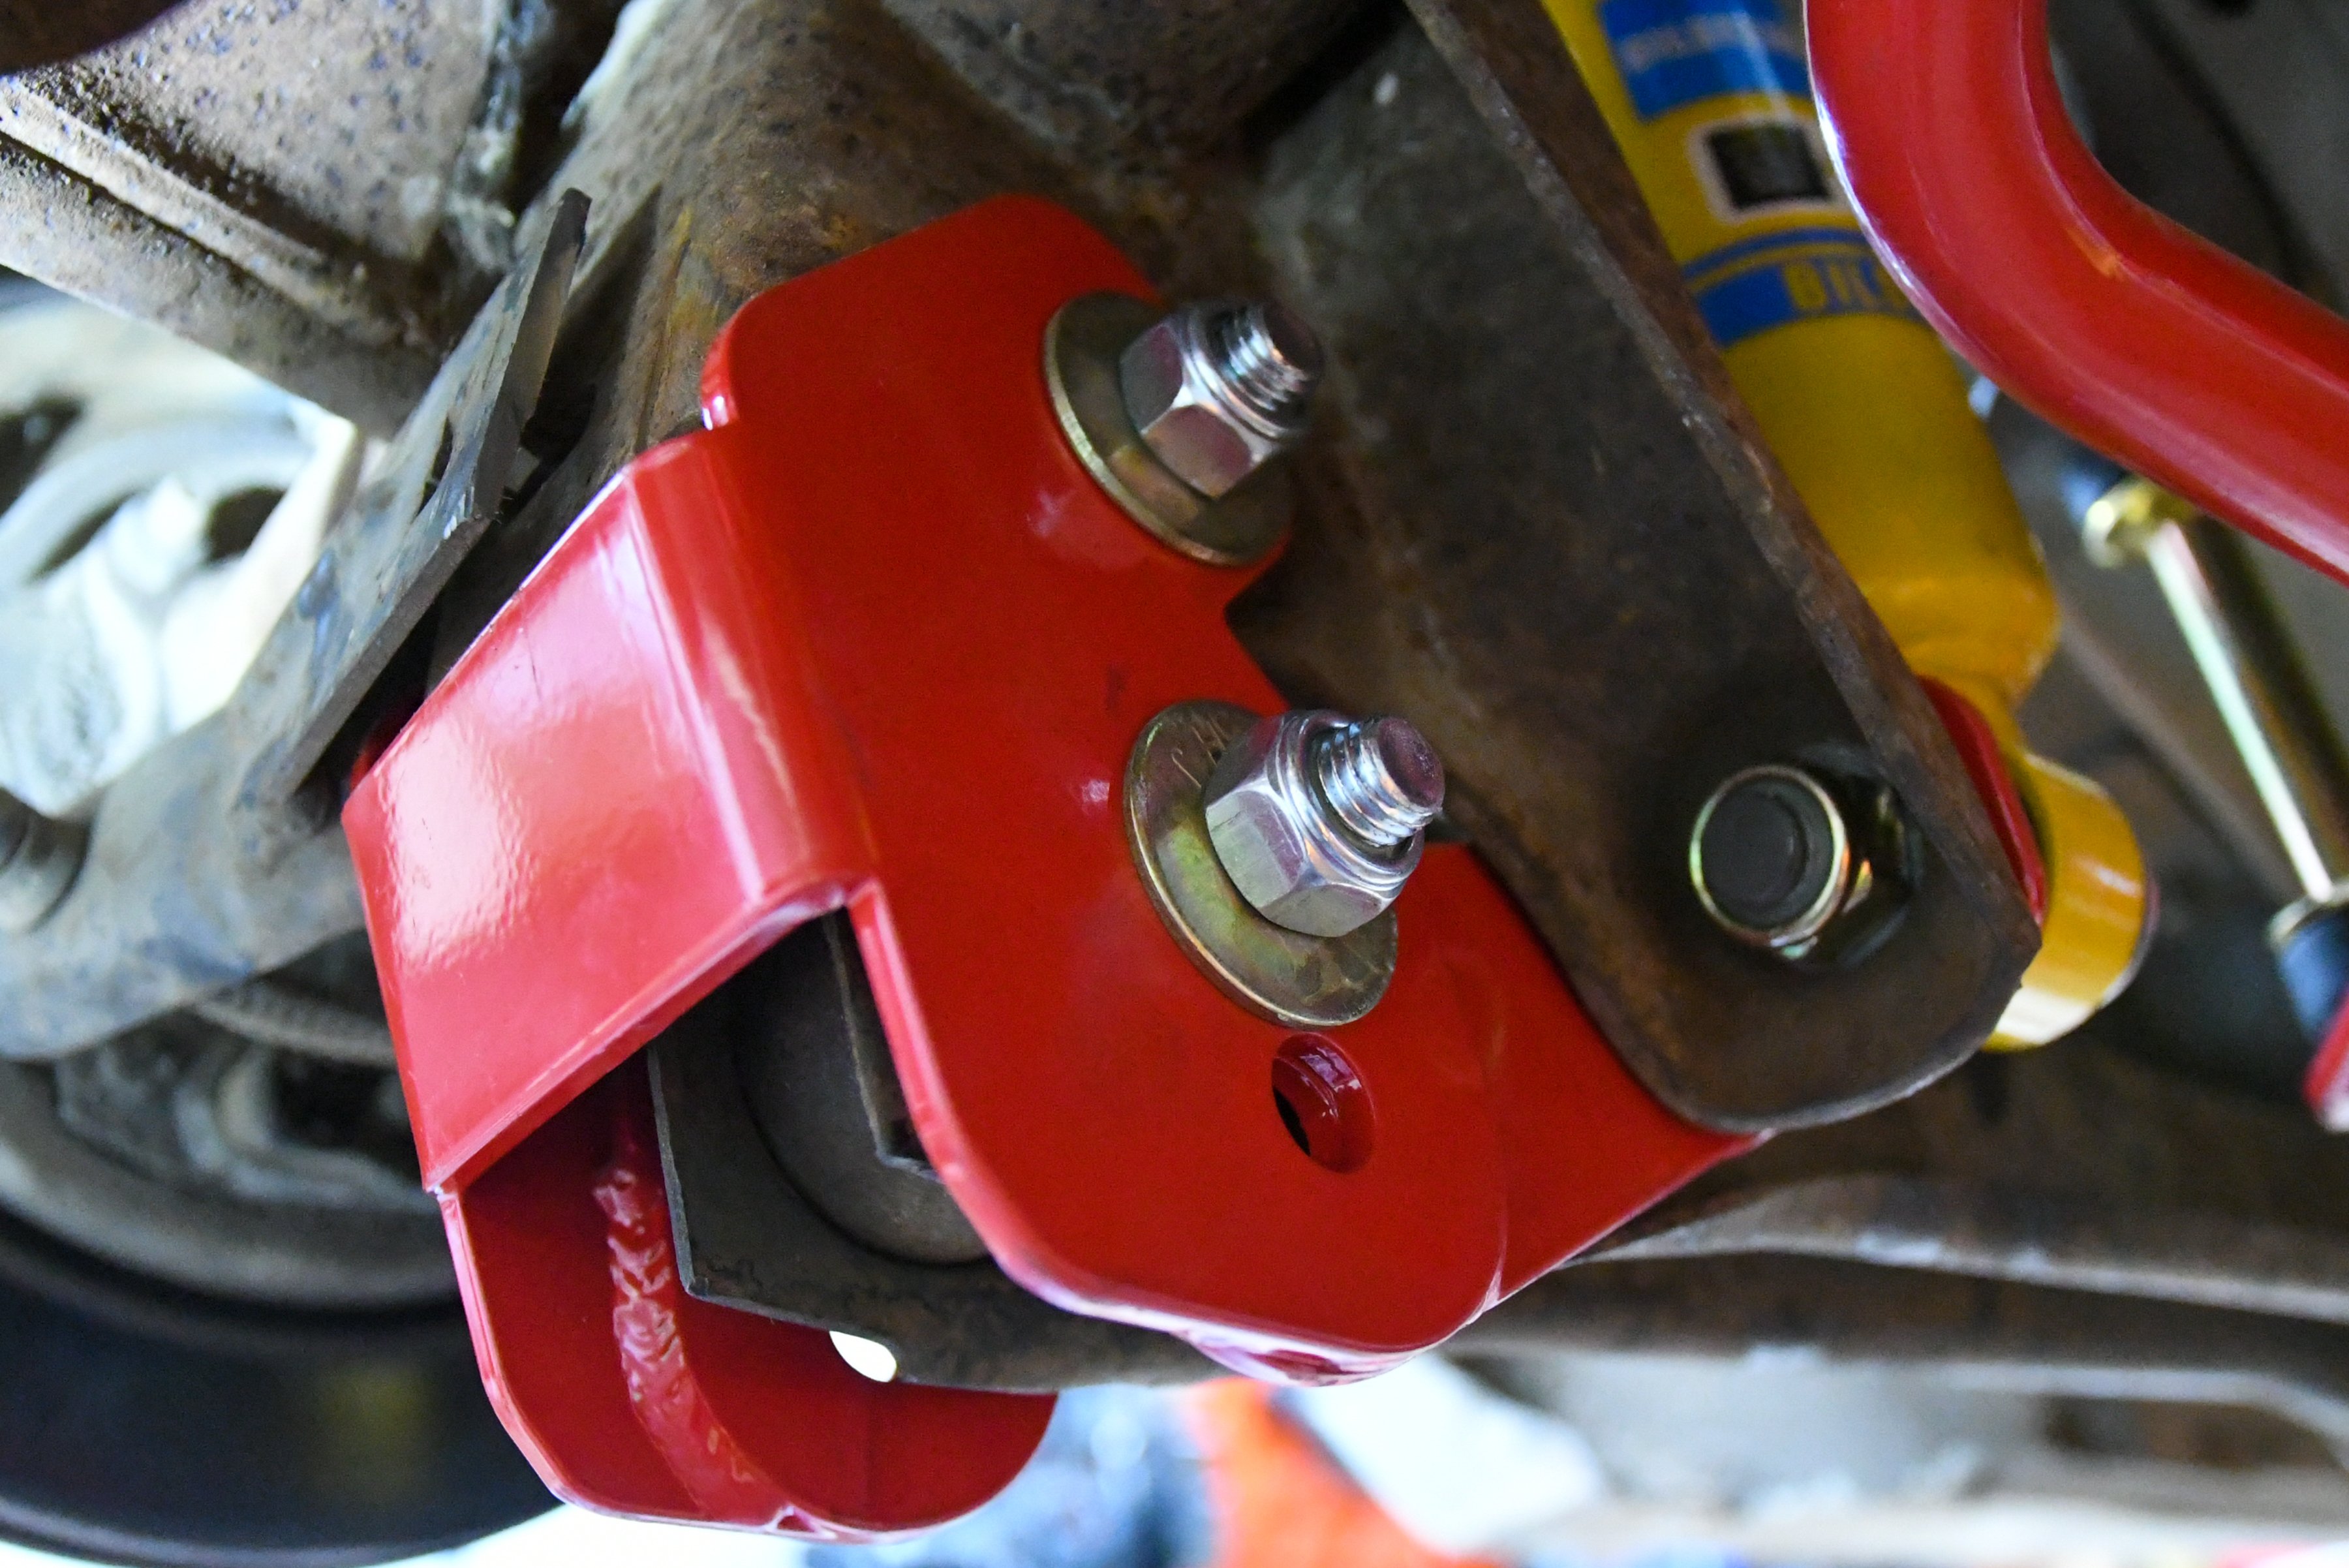
When you lower a fourth-gen, two things happen because of the lower stance: first, your suspension geometry changes — for this problem, BMR offers its lower control arm brackets (PN CAB002). “Lower control arm brackets restore factory geometry on lowered cars and allow instant center changes for racing applications,” Cutler explains.
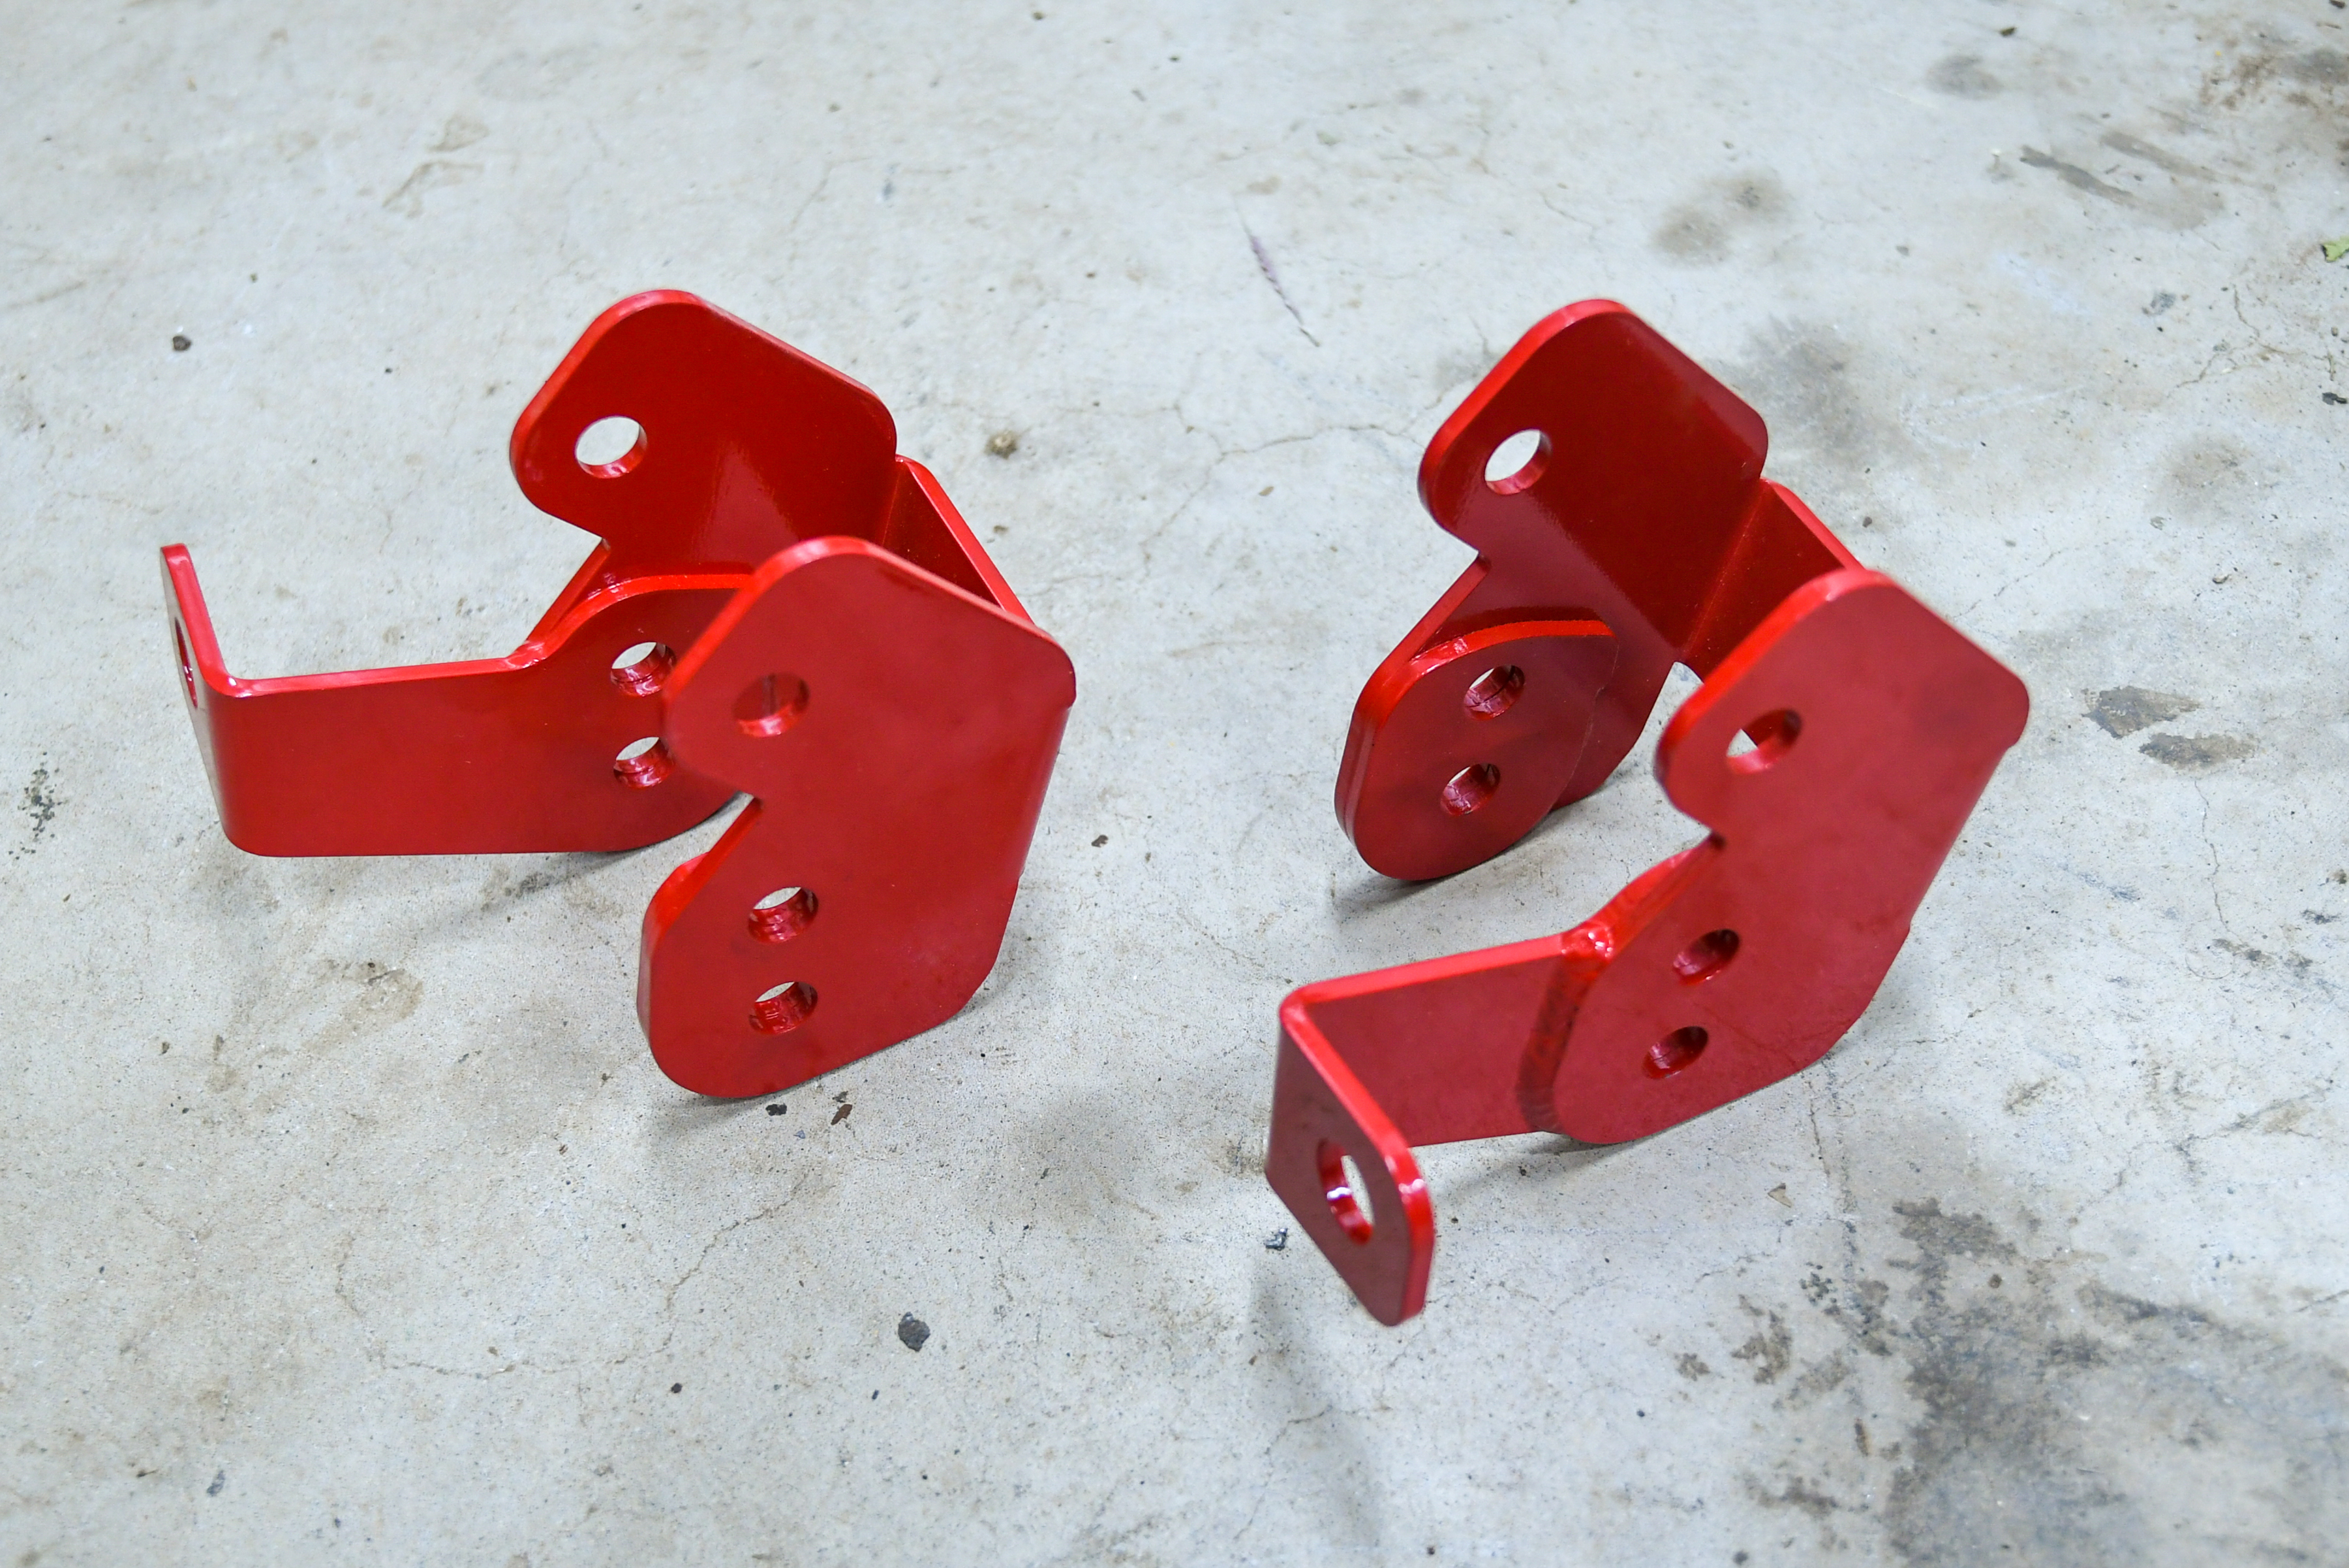
The BMR lower control arm brackets restore factory geometry on lowered cars and allow instant center changes for racing applications.
The second problem occurs with the Panhard bar — since it is fixed and non-adjustable, the bar that centers the rear end will push it further to one side of the car, causing it to no longer be centered. To fix this predicament, BMR offers an adjustable Panhard bar (PN MPHR002) to realign the rear axle. This bar is constructed from 1.25-inch Chromoly tubing, utilizes heavy-duty greaseable poly bushings, and will eliminate any deflection associated with the factory bar.

The factory Panhard bar is not adjustable, which causes the rear end to be off-centered when lowered. The BMR Panhard is adjustable and allowed us to recenter the rear with our new ride height.
We first installed BMR’s adjustable Panhard bar because it’s super simple. Basically, you will unbolt the factory one and install the new part. The tires and wheels need to be on to align it, which we will do last.
Installing The Lower Control Arm Brackets
Mounting the lower control arm brackets takes a little bit of modification to the rear axle, but it’s not too bad. First, we jacked the rear axle up a little and then removed the lower shock mount. We then unbolted the lower control arm rear bolt and dropped the control arm down out of the way. With a cutoff wheel on a grinder, we removed the inside portion of the e-brake bracket per BMR’s instructions. You will then drill a hole through the bracket and bolt it to the rear end. Since our WS6 already had a hole and locating pin, we skipped this step, but we may come back and install a bolt later if needed. Next, you will slide the lower control arm relocation bracket into place and bolt it up with the supplied hardware. Now you can install the lower control arm and shock, and you’re done. Naturally, you will repeat this process on the other side of the vehicle.

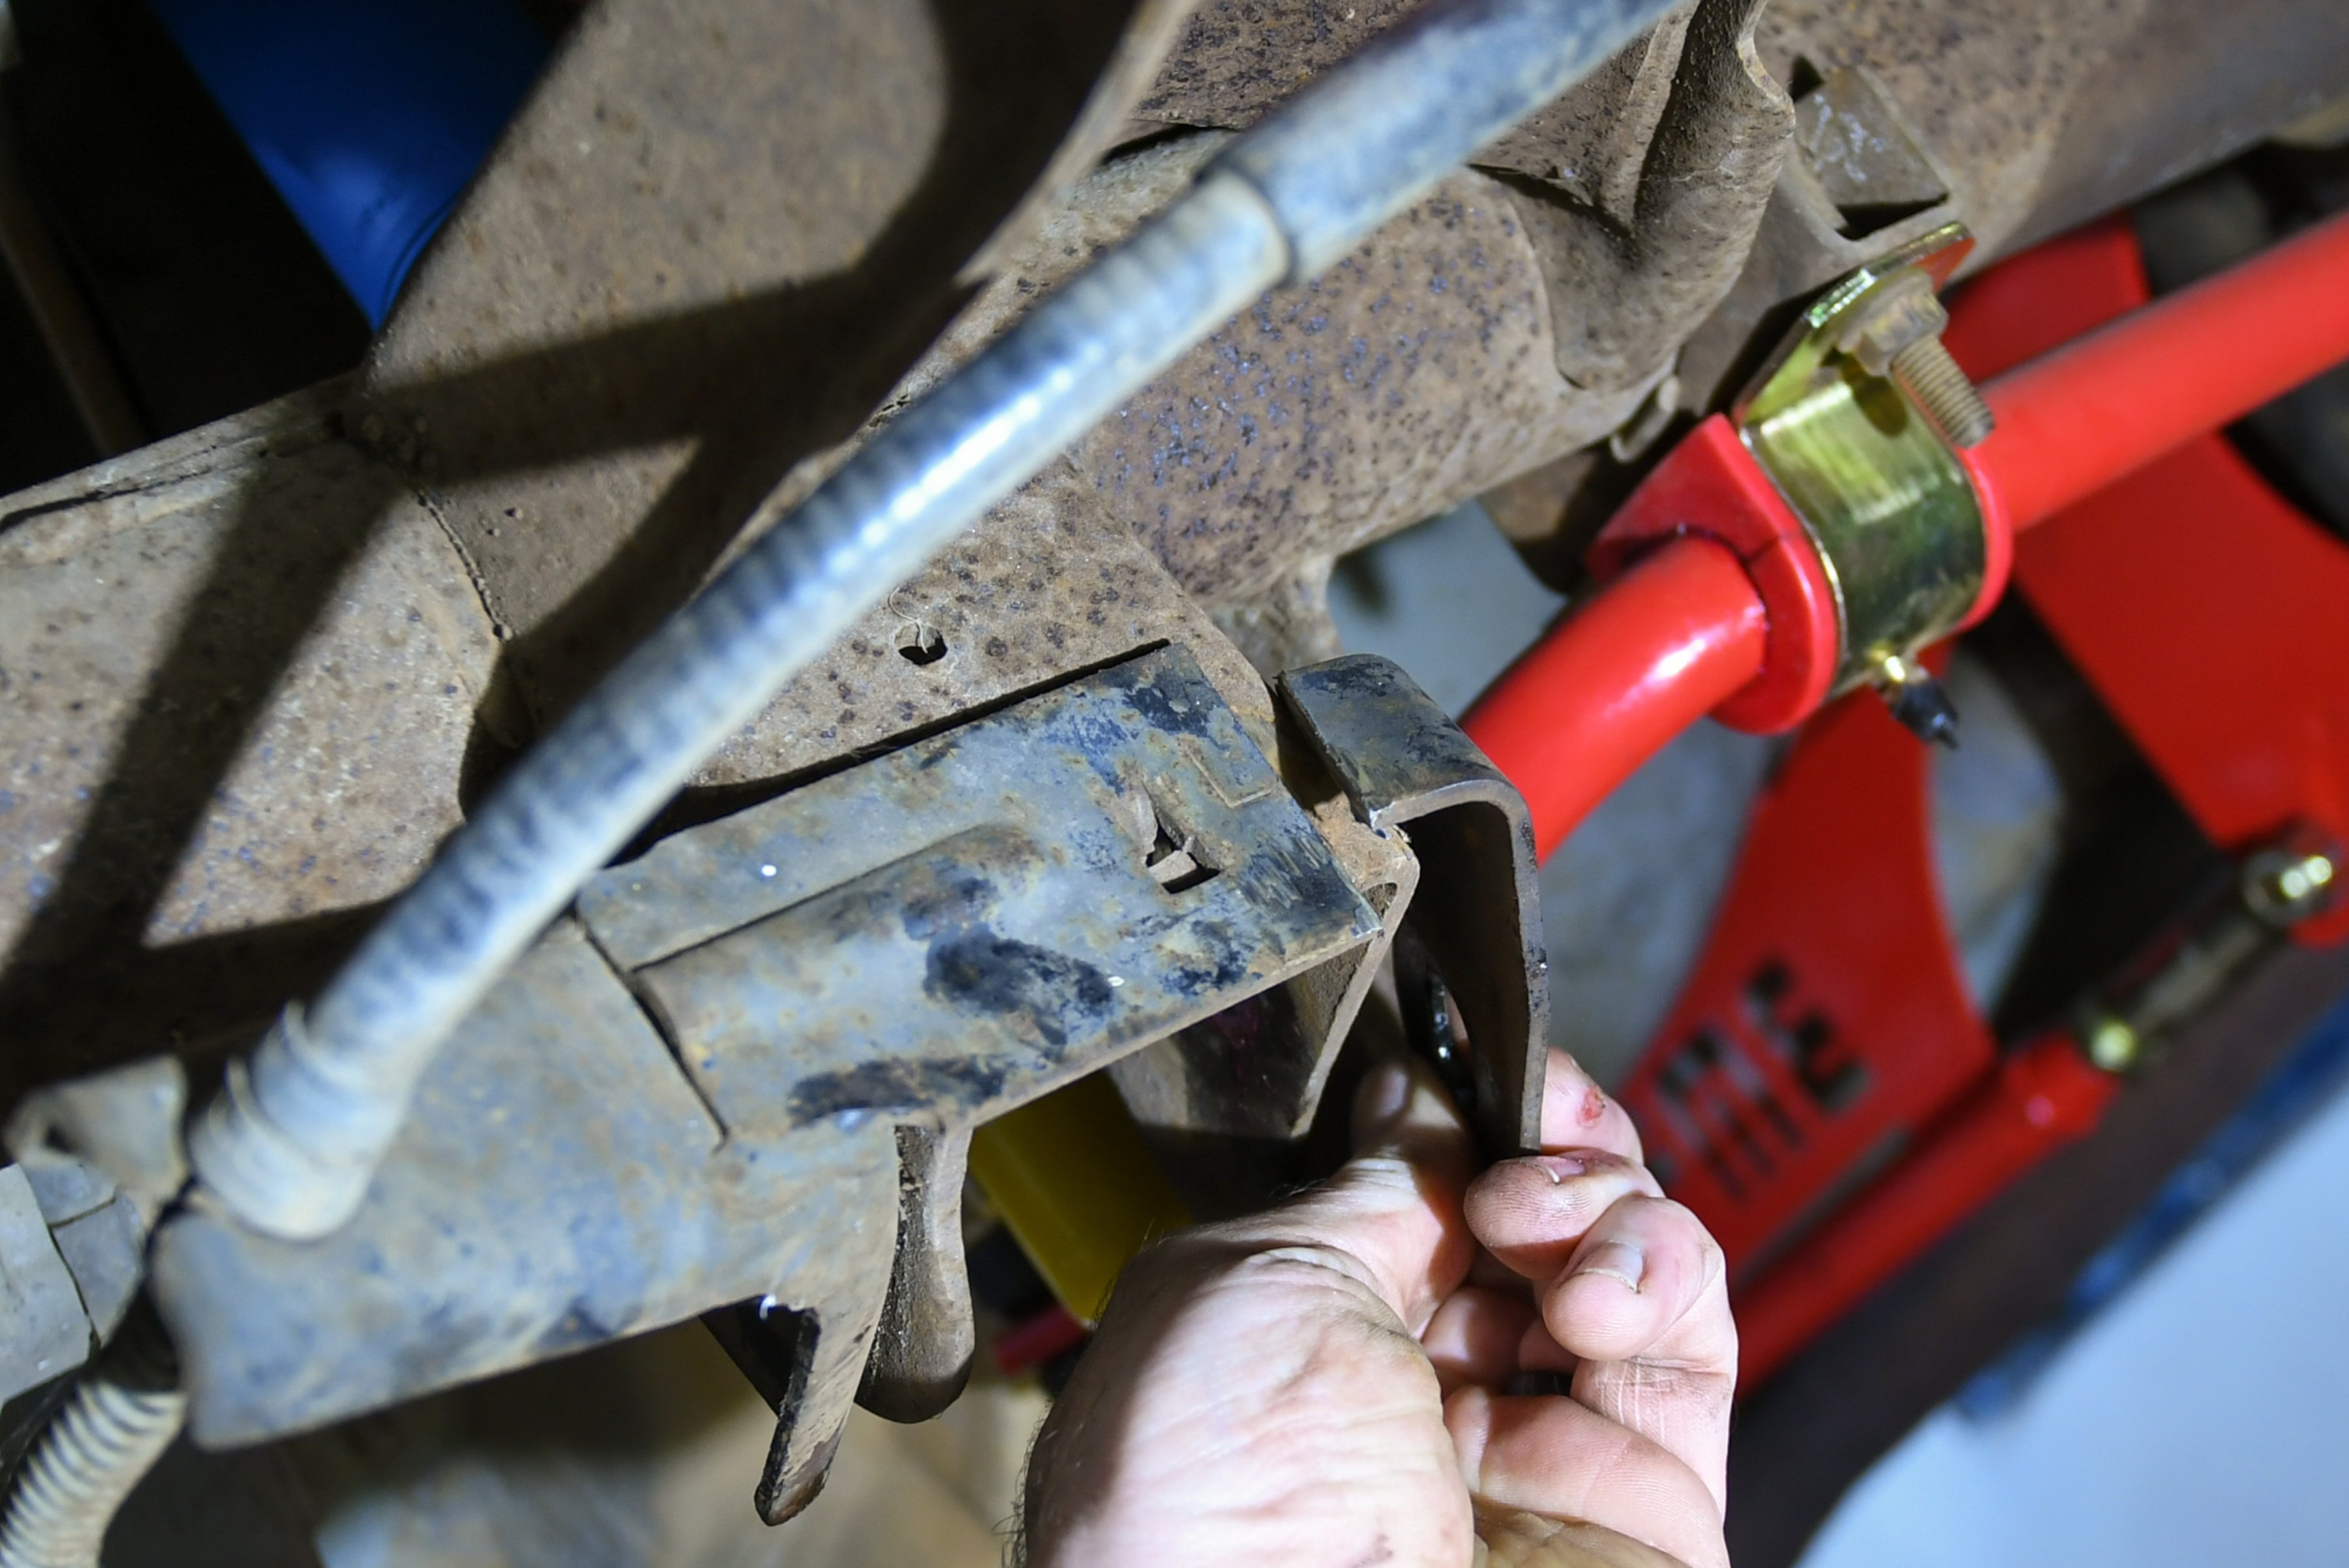
To install the BMR lower control arm brackets, we needed to cut the OEM parking brake bracket. Then we used the supplied hardware and bolted the bracket into place.
With both sides finished, we bolted the new rear sway bar (PN SB003) on the axle, as well. Like the front, it includes new bushings and hardware and is a much better design than the OEM part. We should note that we choose a red powder-coated finish for all of our parts, but if red’s not your color of choice, BMR offers a black Hammertone finish, as well.
Adjusting The Panhard
As we neared the end of our installation, it was time to bolt on the tires and wheels and set the rear Panhard bar. We jacked the rear up for this process and then set the axle on jackstands to get the proper ride height. We then taped a plumb-bob to the fender and used it to measure the difference from the tire to the string. We then made adjustments to the bar, going from the driver’s and passenger’s side until the rear axle is centered. When you have it centered, you can tighten the jam nuts and you’re good to go. We will drive the car for a few hundred miles and then check to make sure it’s centered to be sure.

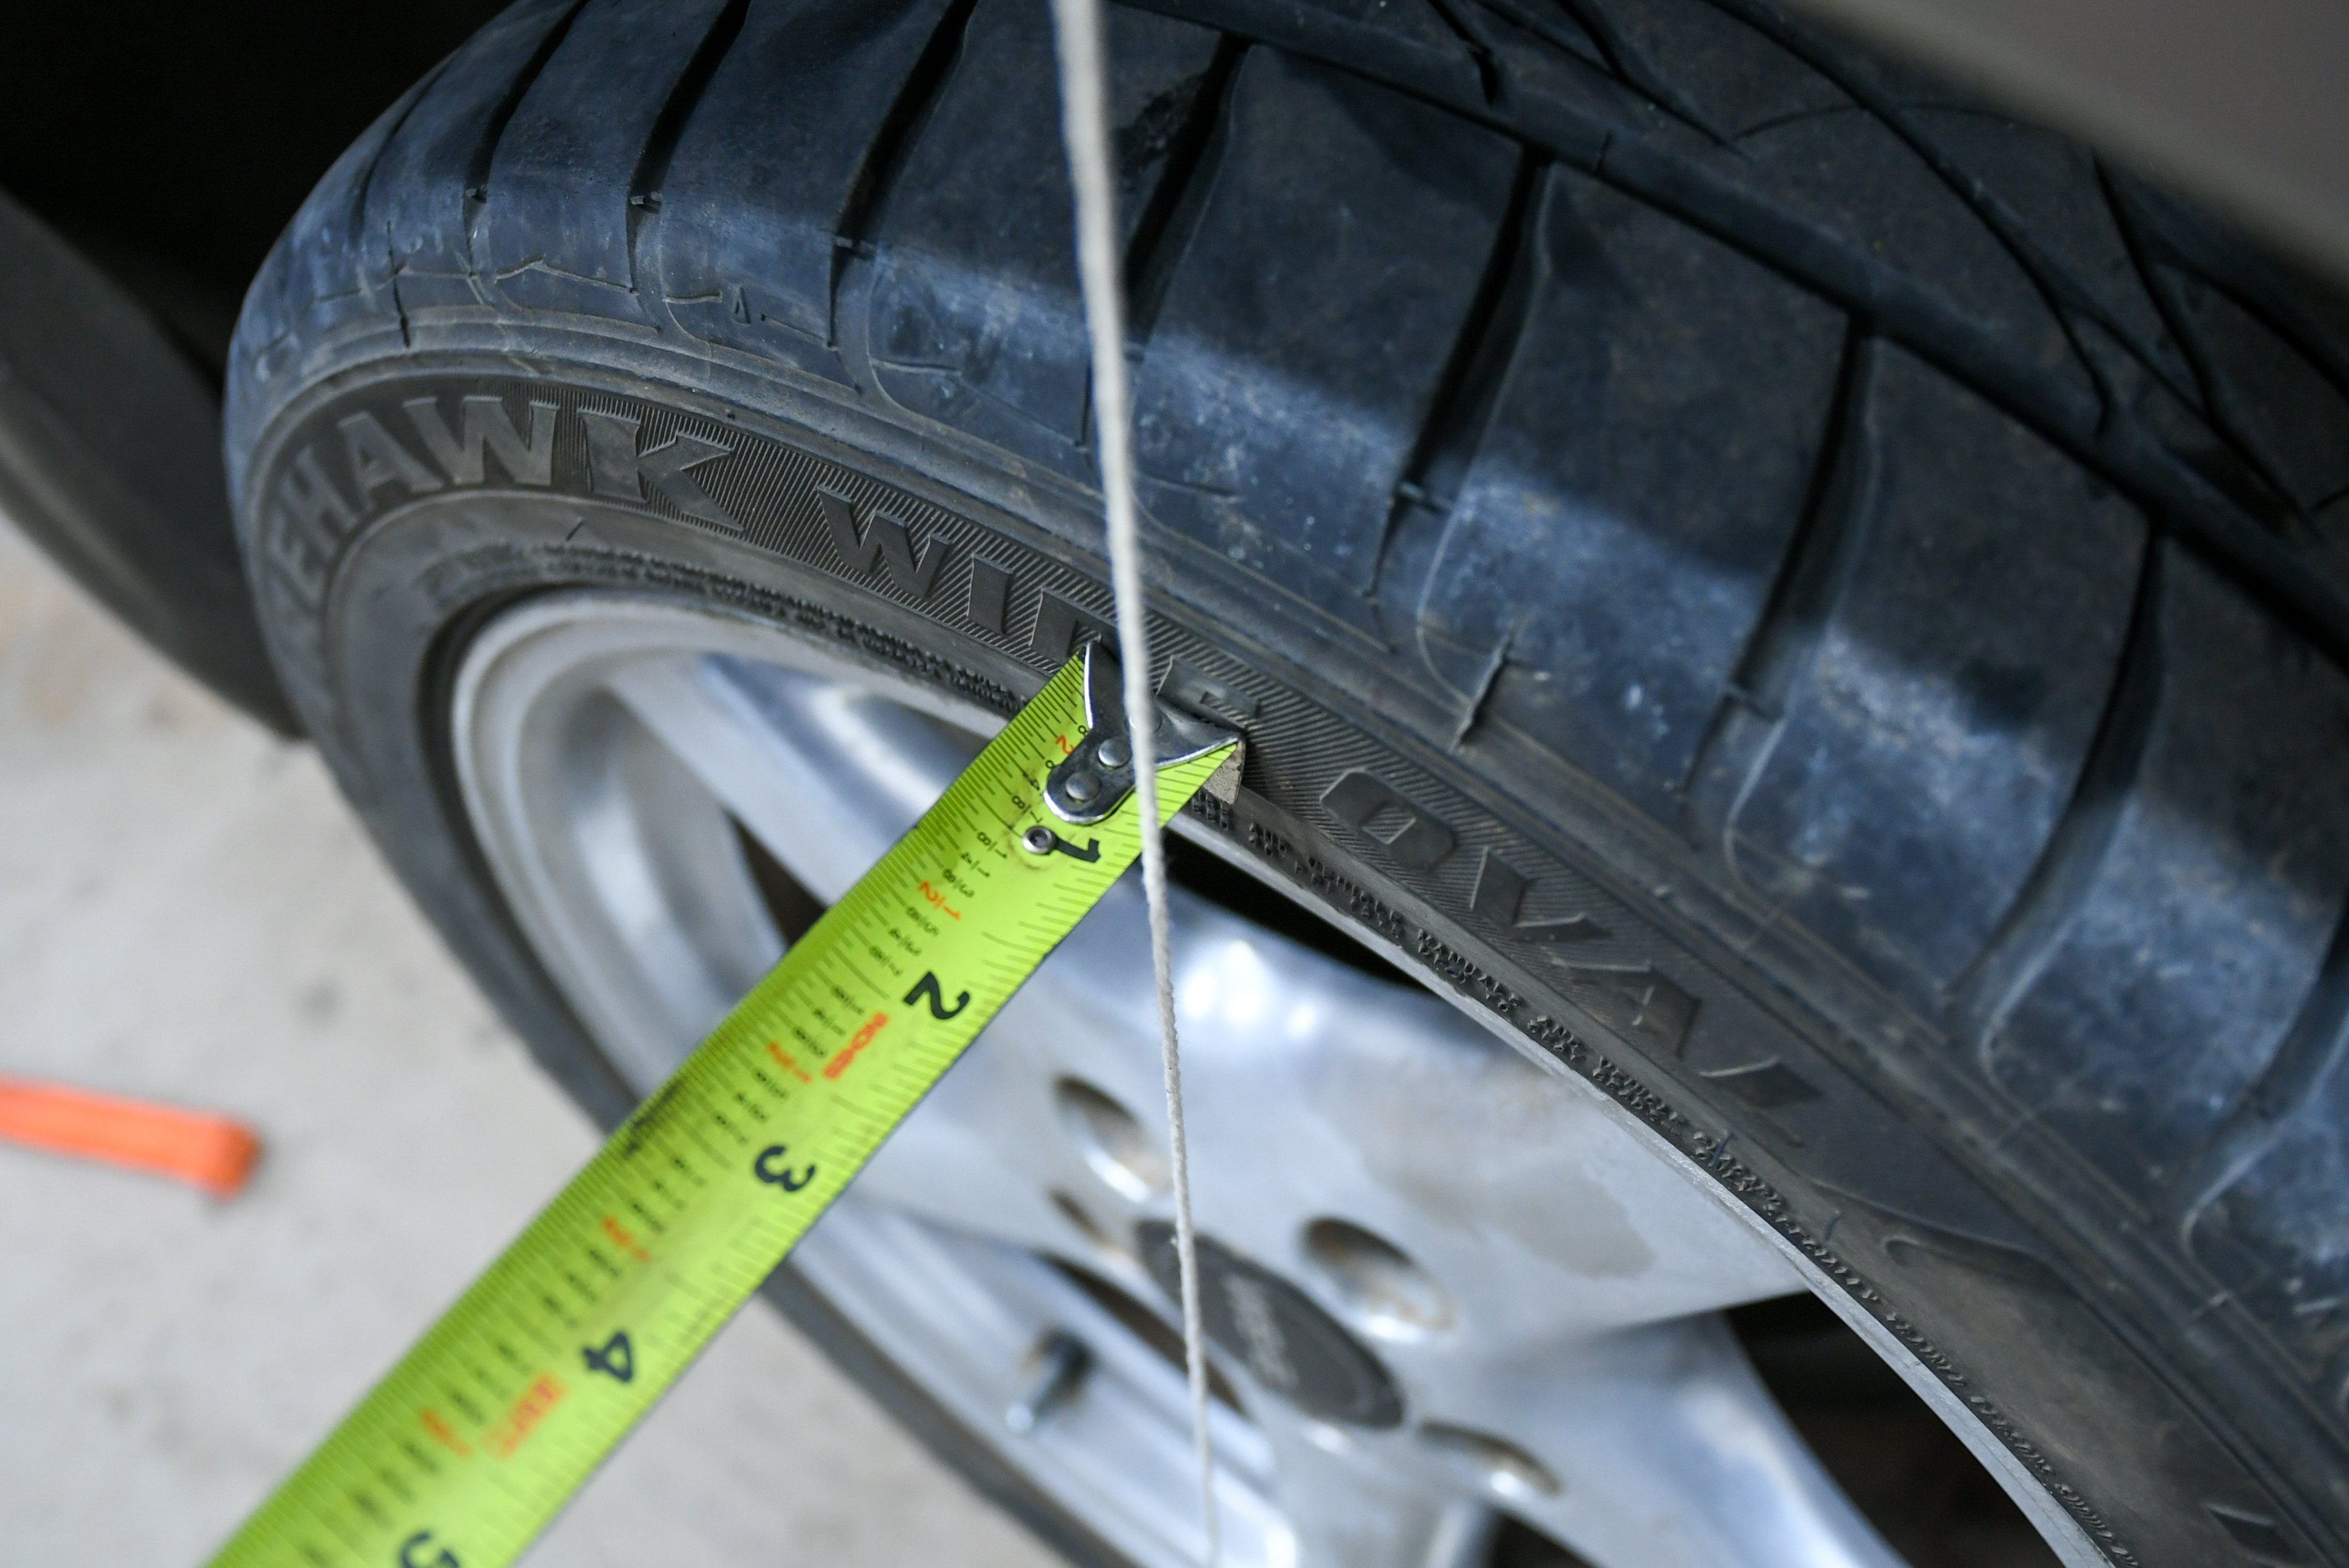
With the BMR Panhard bar in place, we then used a plumb bob and tape measure to recenter the rear axle.
The Test Drive
With the WS6 back on the ground, we could tell that the car was lower, but not too much. We were anxious to see if all of our hard work paid off, so we hit the road for a test cruise. We knew the DeCarbon shocks were worn out, but the difference the Bilsteins made with the BMR lowering package was incredible. A firm ride has returned, and the car feels agile in the corners once again. It’s evident that the Dirty Bird was long overdue for some maintenance.

Final Thoughts
Upgrading the suspension on a fourth-gen can easily be done over a weekend if you have all of the tools and replacement parts in hand. In our experience, you will have some headaches, especially with the car’s front suspension. And while we had our share of problems, the end result is a car that’s fun to drive once again, and we couldn’t ask anything more for a few hours of our time.
In our next installment, we will be taking the Dirty Bird up a notch as we add some more goodies from BMR.