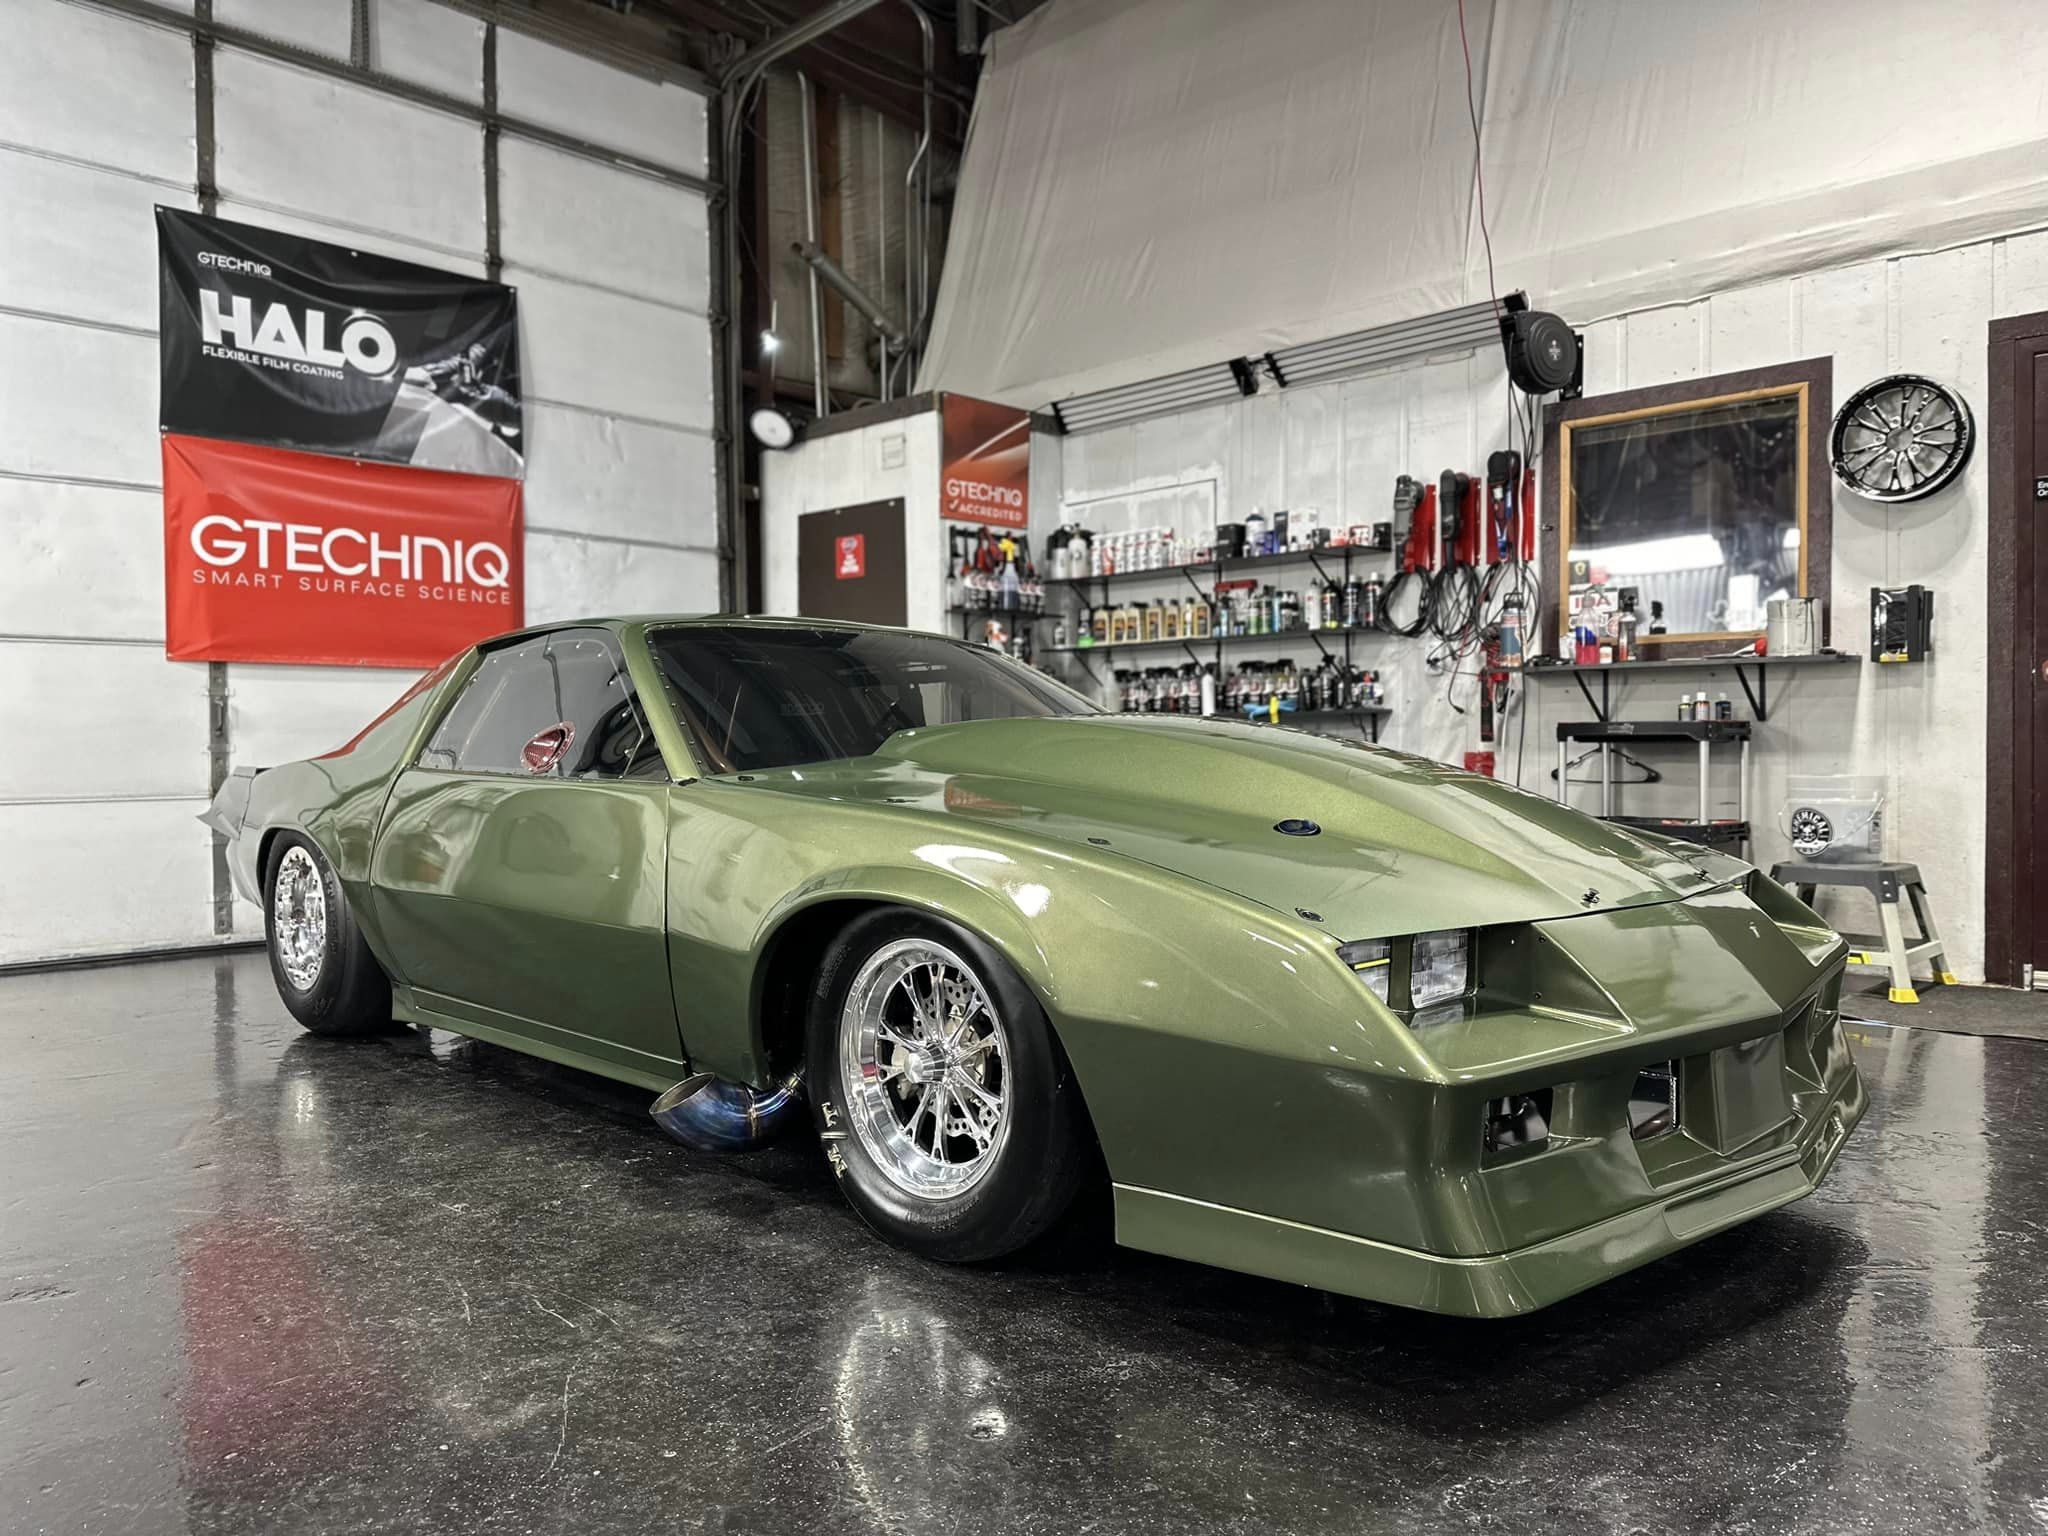
Several months ago, we decided to get busy with our latest project here at LSX Mag, McLuvin. This retro two-tone green 1976 Chevrolet LUV (Light Utility Vehicle) is a relic and screams retro. The only problem with the build so far has been parts availability. Like most of you, we are twiddling our thumbs while constantly hitting the refresh button on the computer to see if parts will ship. And even though the engine is not ready yet, we’ve had two deliveries that are too good not to share.
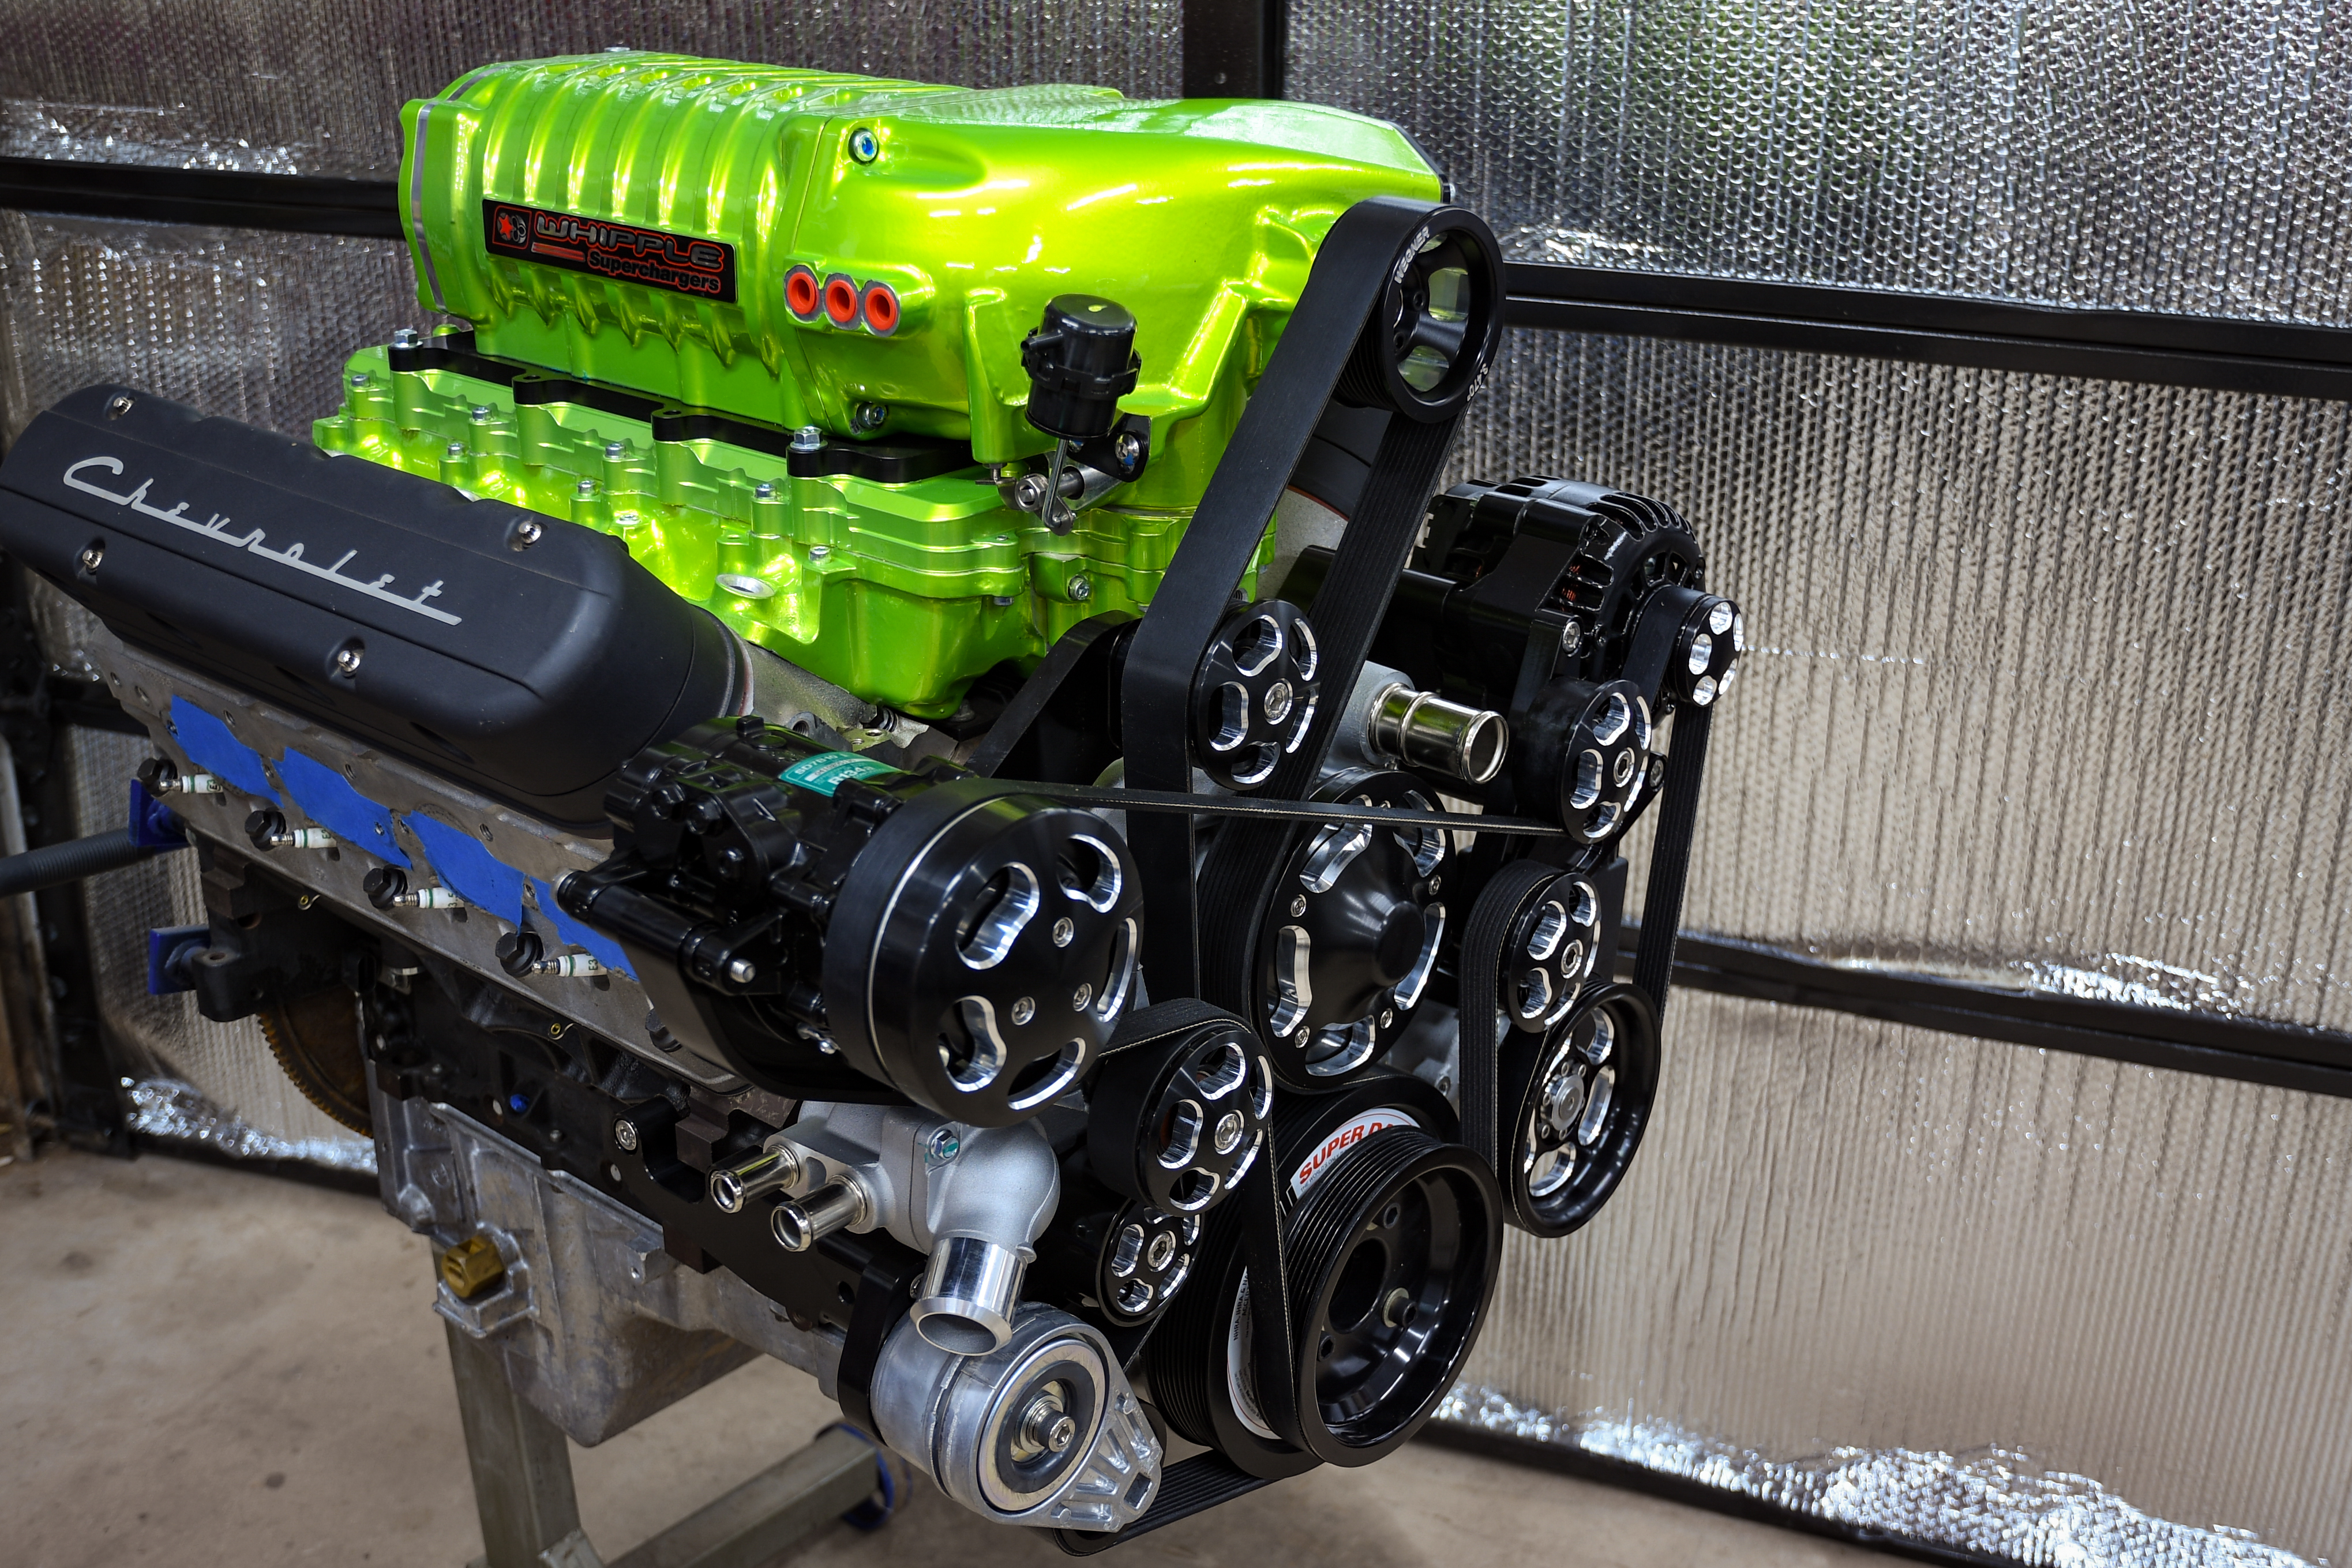
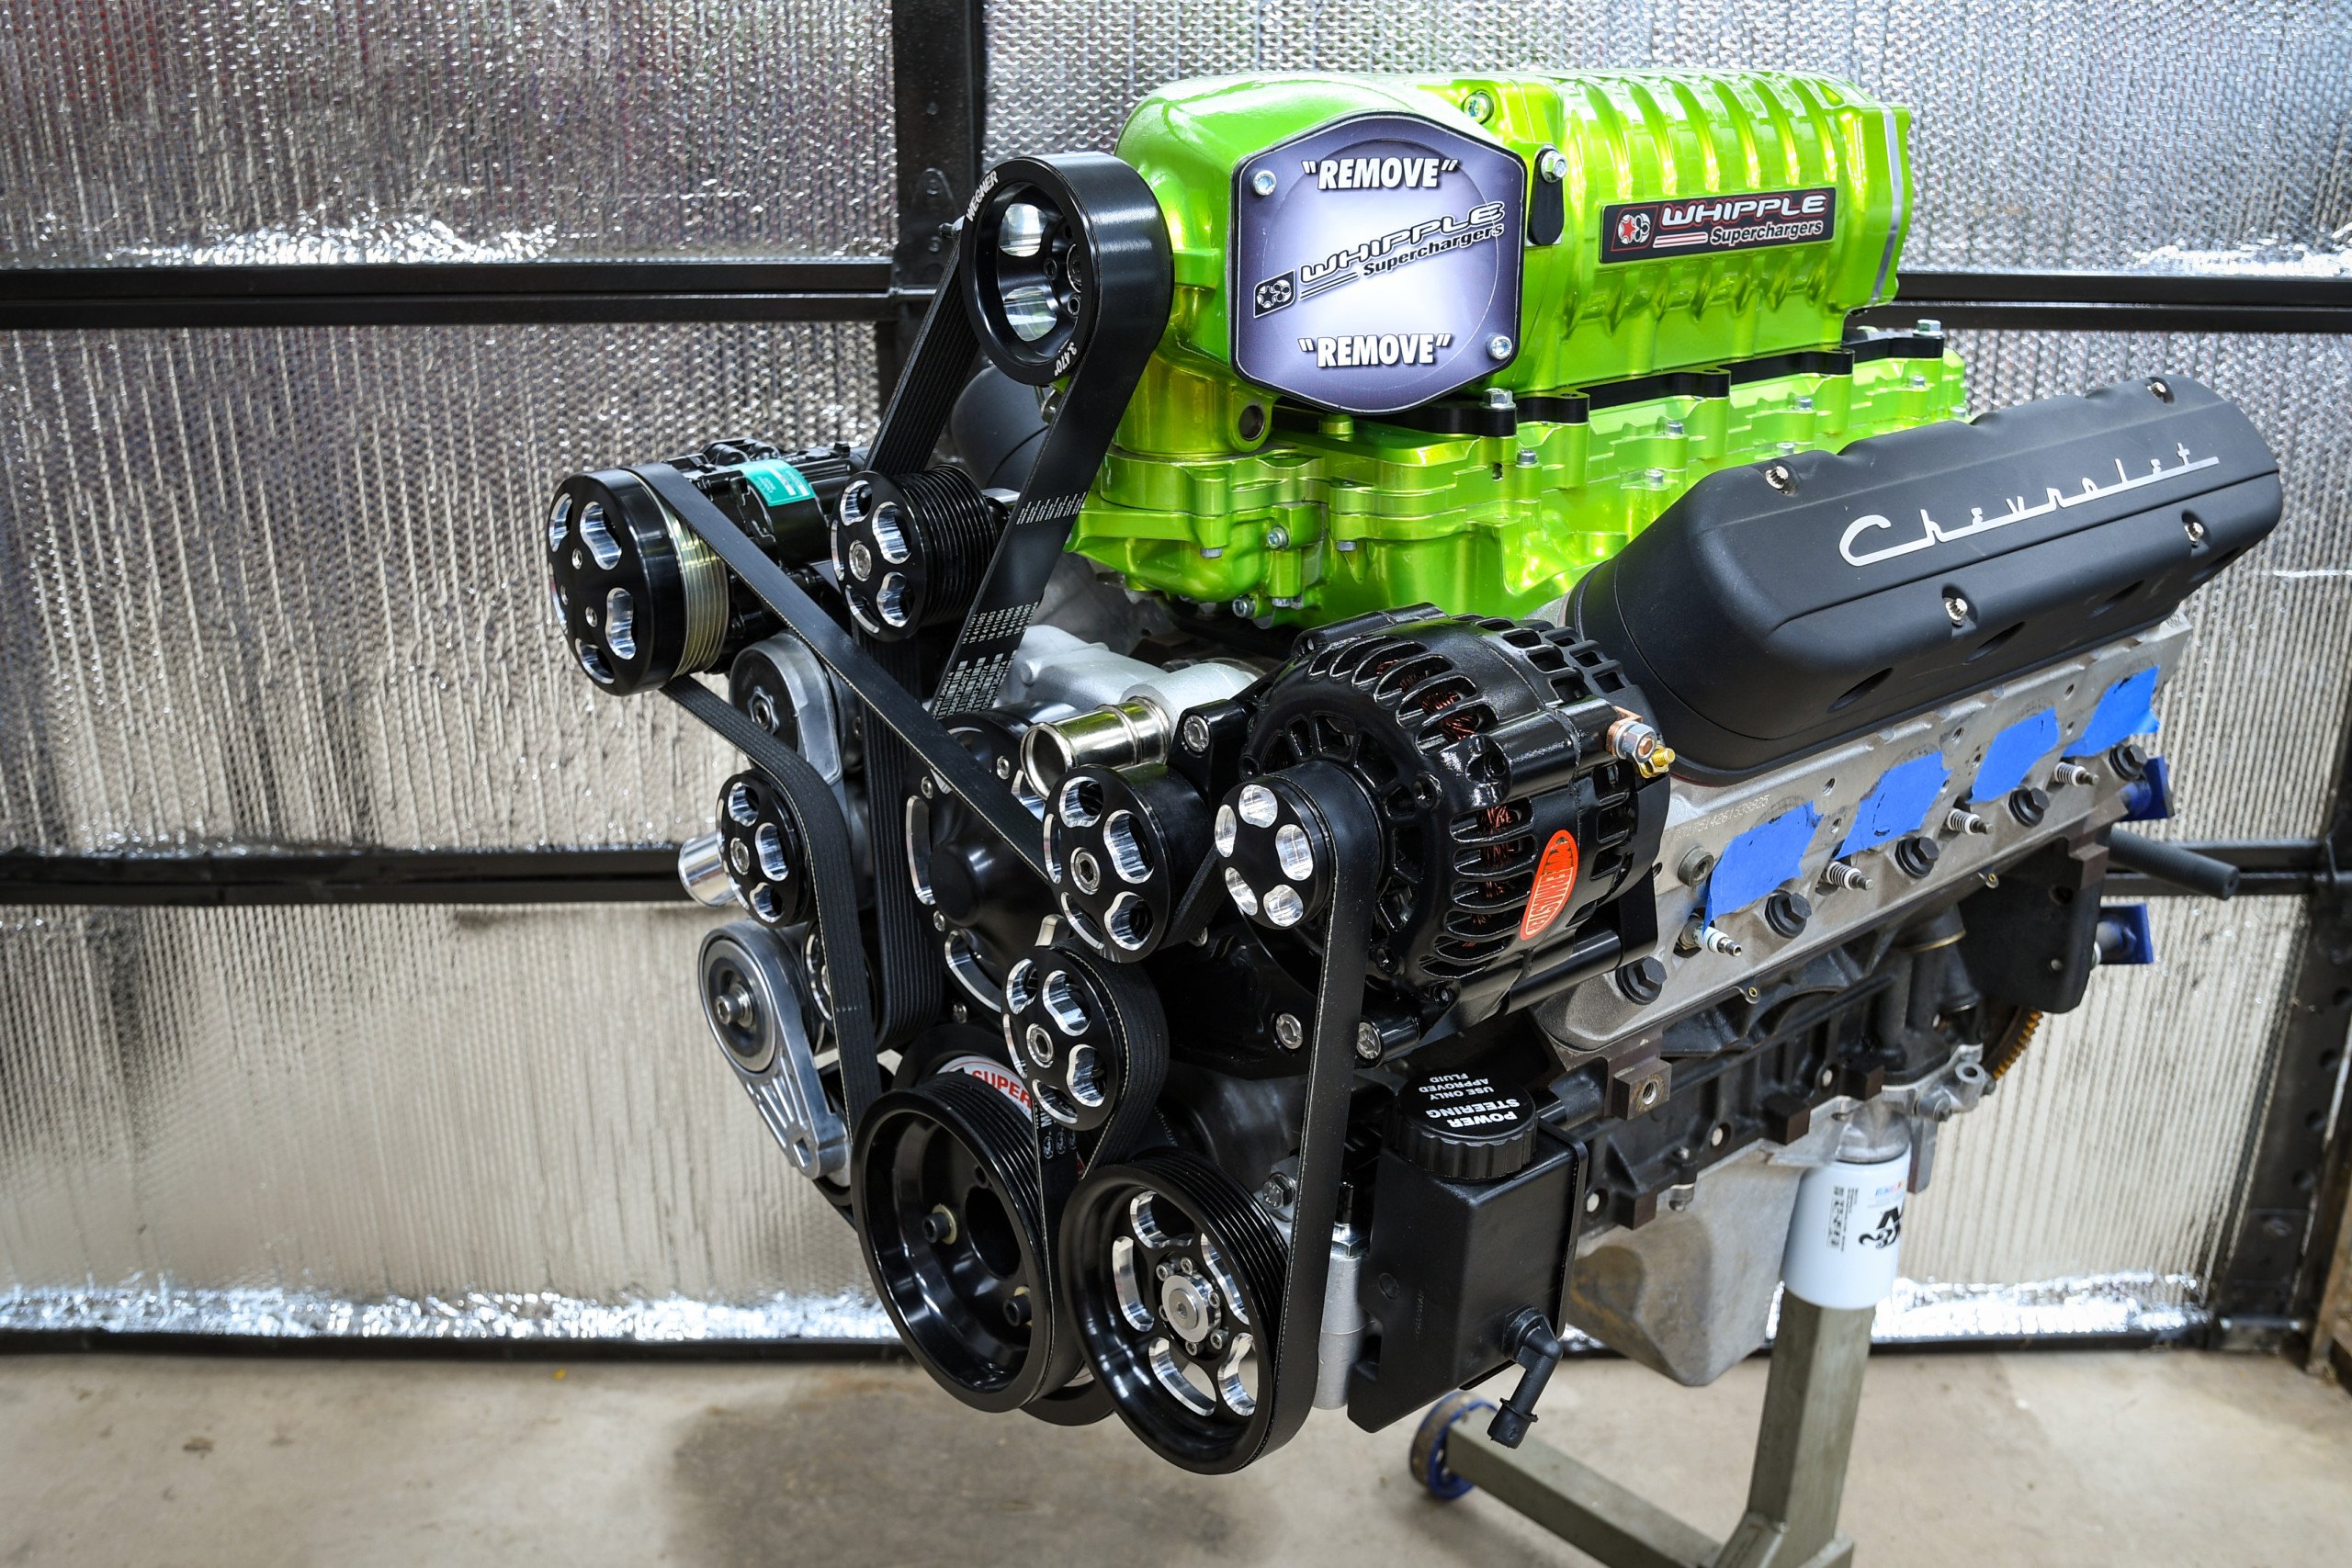
When we decided to build McLuvin, one thing was clear from the start. Our coworkers and readers alike suggested (over and over) that we would need to leave the colors alone. So, we ordered the craziest green Whipple Gen-5 3.0-liter supercharger we have ever seen. However, after we had the unit mocked up on an LS, it was apparent we needed an accessory drive system. And for this piece of the puzzle, Whipple recommended Wegner Automotive.
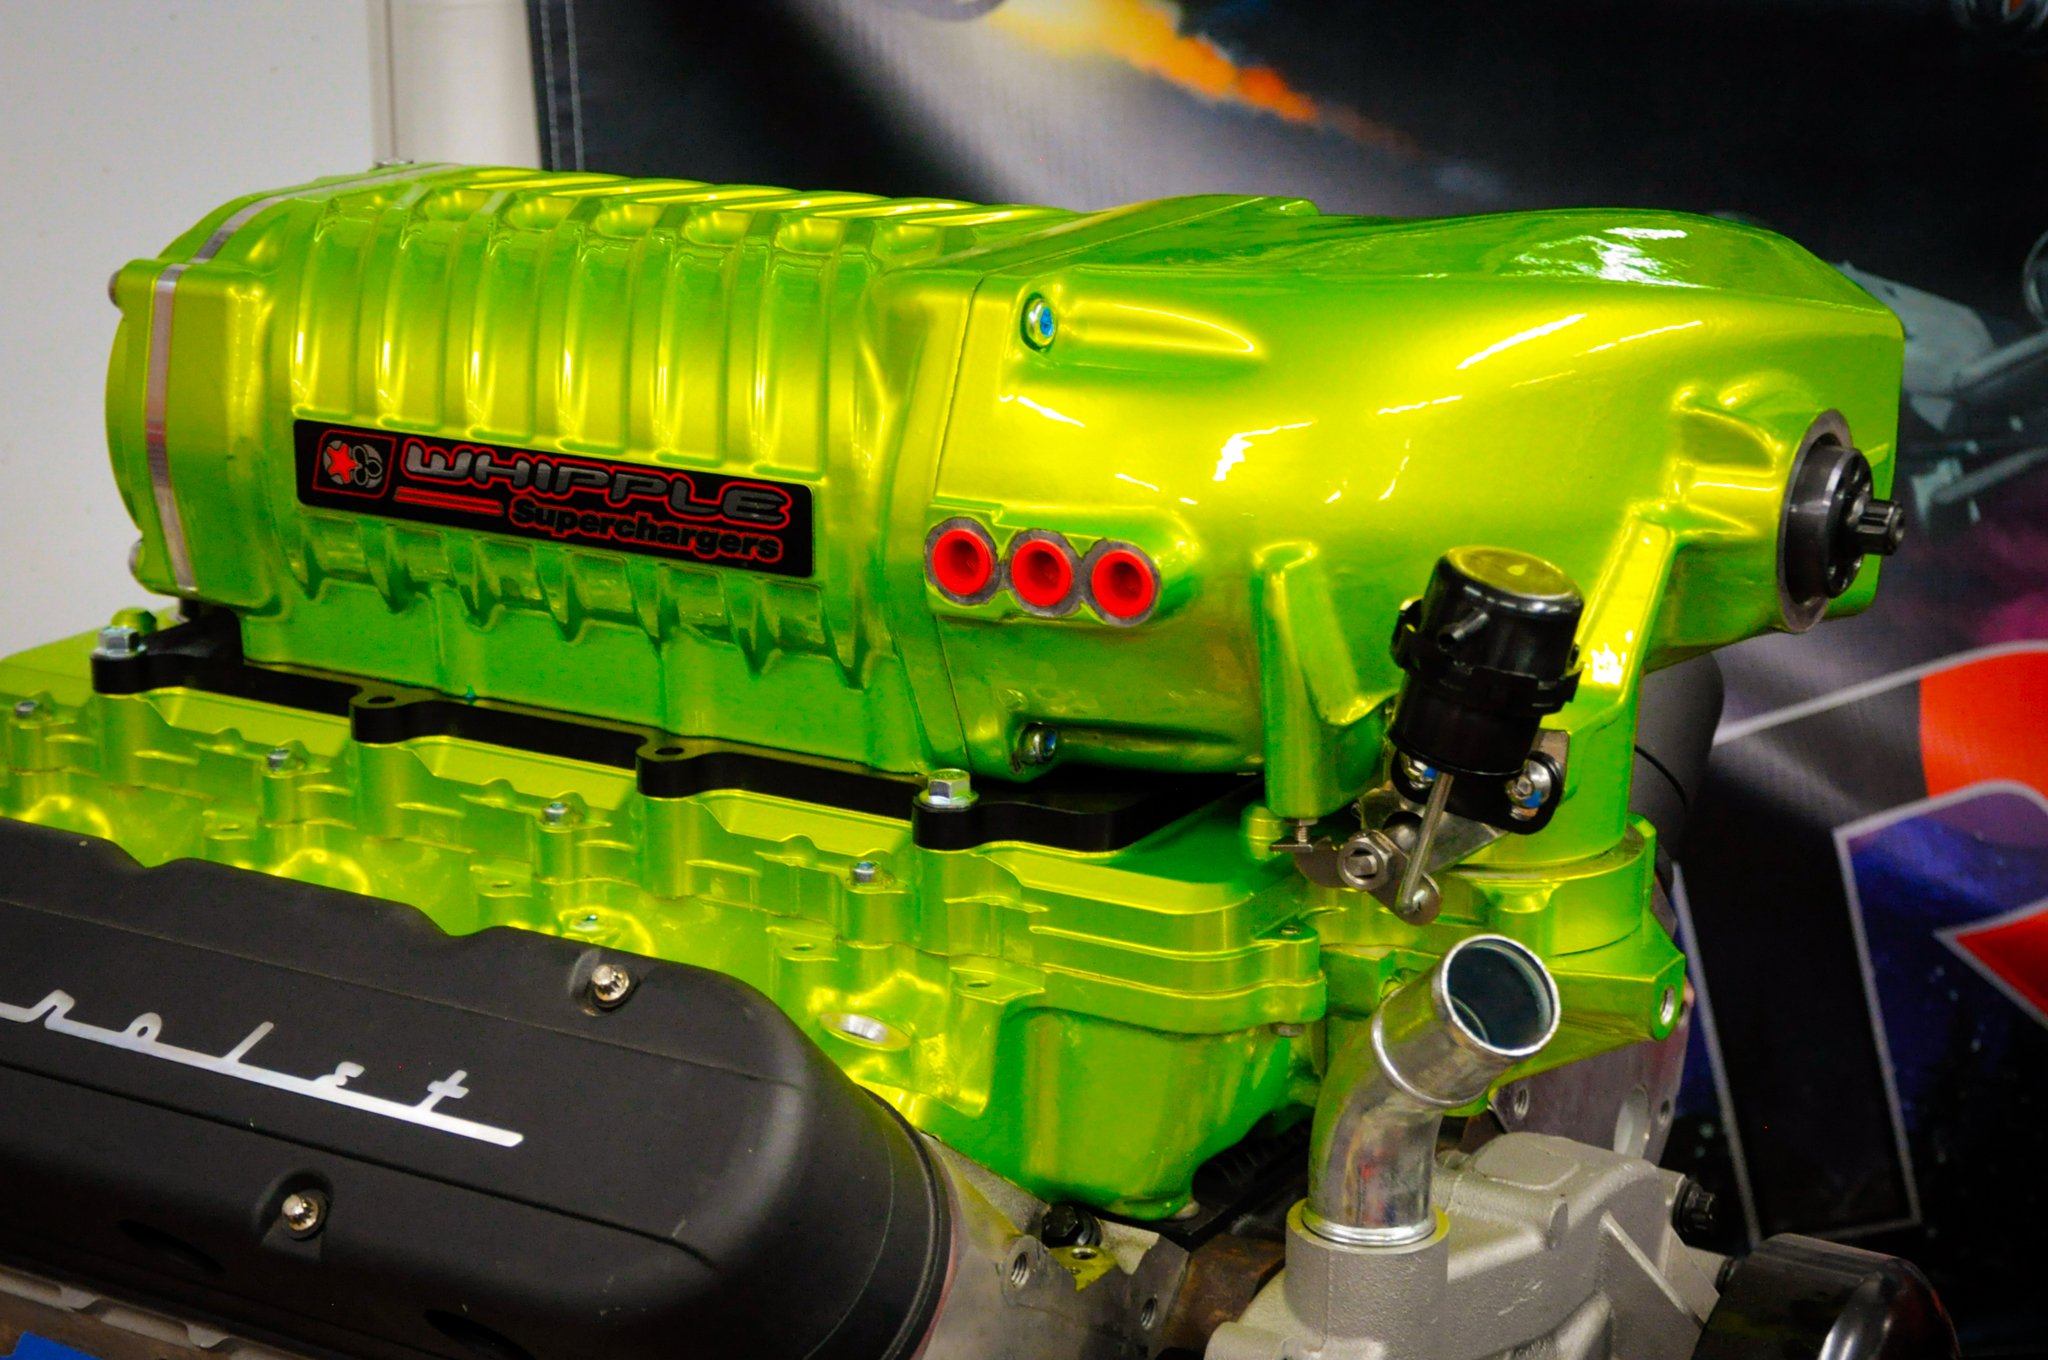
The green Gen 5 Whipple looks killer on our mockup engine, but there’s just one problem. We needed an accessory drive to spin it.
Enter Wegner Automotive
Wegner is known for some killer LS, and LT engine builds and works with prestigious companies like the Roadster Shop, Ring Brothers, and Kong Performance, to name a few. However, you may not know that Wegner also builds custom accessory drives in addition to its engine program. And after visiting the website, we knew that their P/N: WAK075 accessory drive is exactly what we needed to complement the wild Whipple supercharger.
After researching Wegner’s accessory drive, we decided it was best to contact the company with some questions. And who better to field our queries than Casey Wegner, President/Owner of Wegner Automotive.

The Wegner Automotive front accessory drive comes complete with some of the best components on the market and a fit and finish to match.
Q&A With Casey Wegner
LSX Mag: How long does it take to design a new drive from start to finish?
Casey: Most new drives can take six to eight months to get designed and on the shelf. We dyno test everything in-house before it goes to market , so we make sure other engine builders and car builders have no problems.
LSX Mag: How much power/boost have you obtained with the WAK075, and what is its limit?
Casey: Our drives are all designed to be able to max out what the supercharger is capable of. We have run the WAK075 on a 3.0-liter Whipple to over 20-pounds of boost on a 427 cubic-inch LS with no issues.
LSX Mag: What’s the most challenging part of designing a drive like this?
Casey: It’s challenging to keep functionality while making the drive easy to install and holding the tightest packaging to fit in most applications.
LSX Mag: What are some common causes of belt slip on a supercharged application?
Casey: Improper belt length and too small of a supercharger pulley for the application are usually the primary culprits.
LSX Mag: What are the advantages of the two belt design?
Casey: With a two belt design, there is less stress on auxiliary components, and supercharger ratio changes (crank pulley) do not affect the accessory speeds.
LSX Mag: What are your drives made of, and are they all designed and machined in-house?
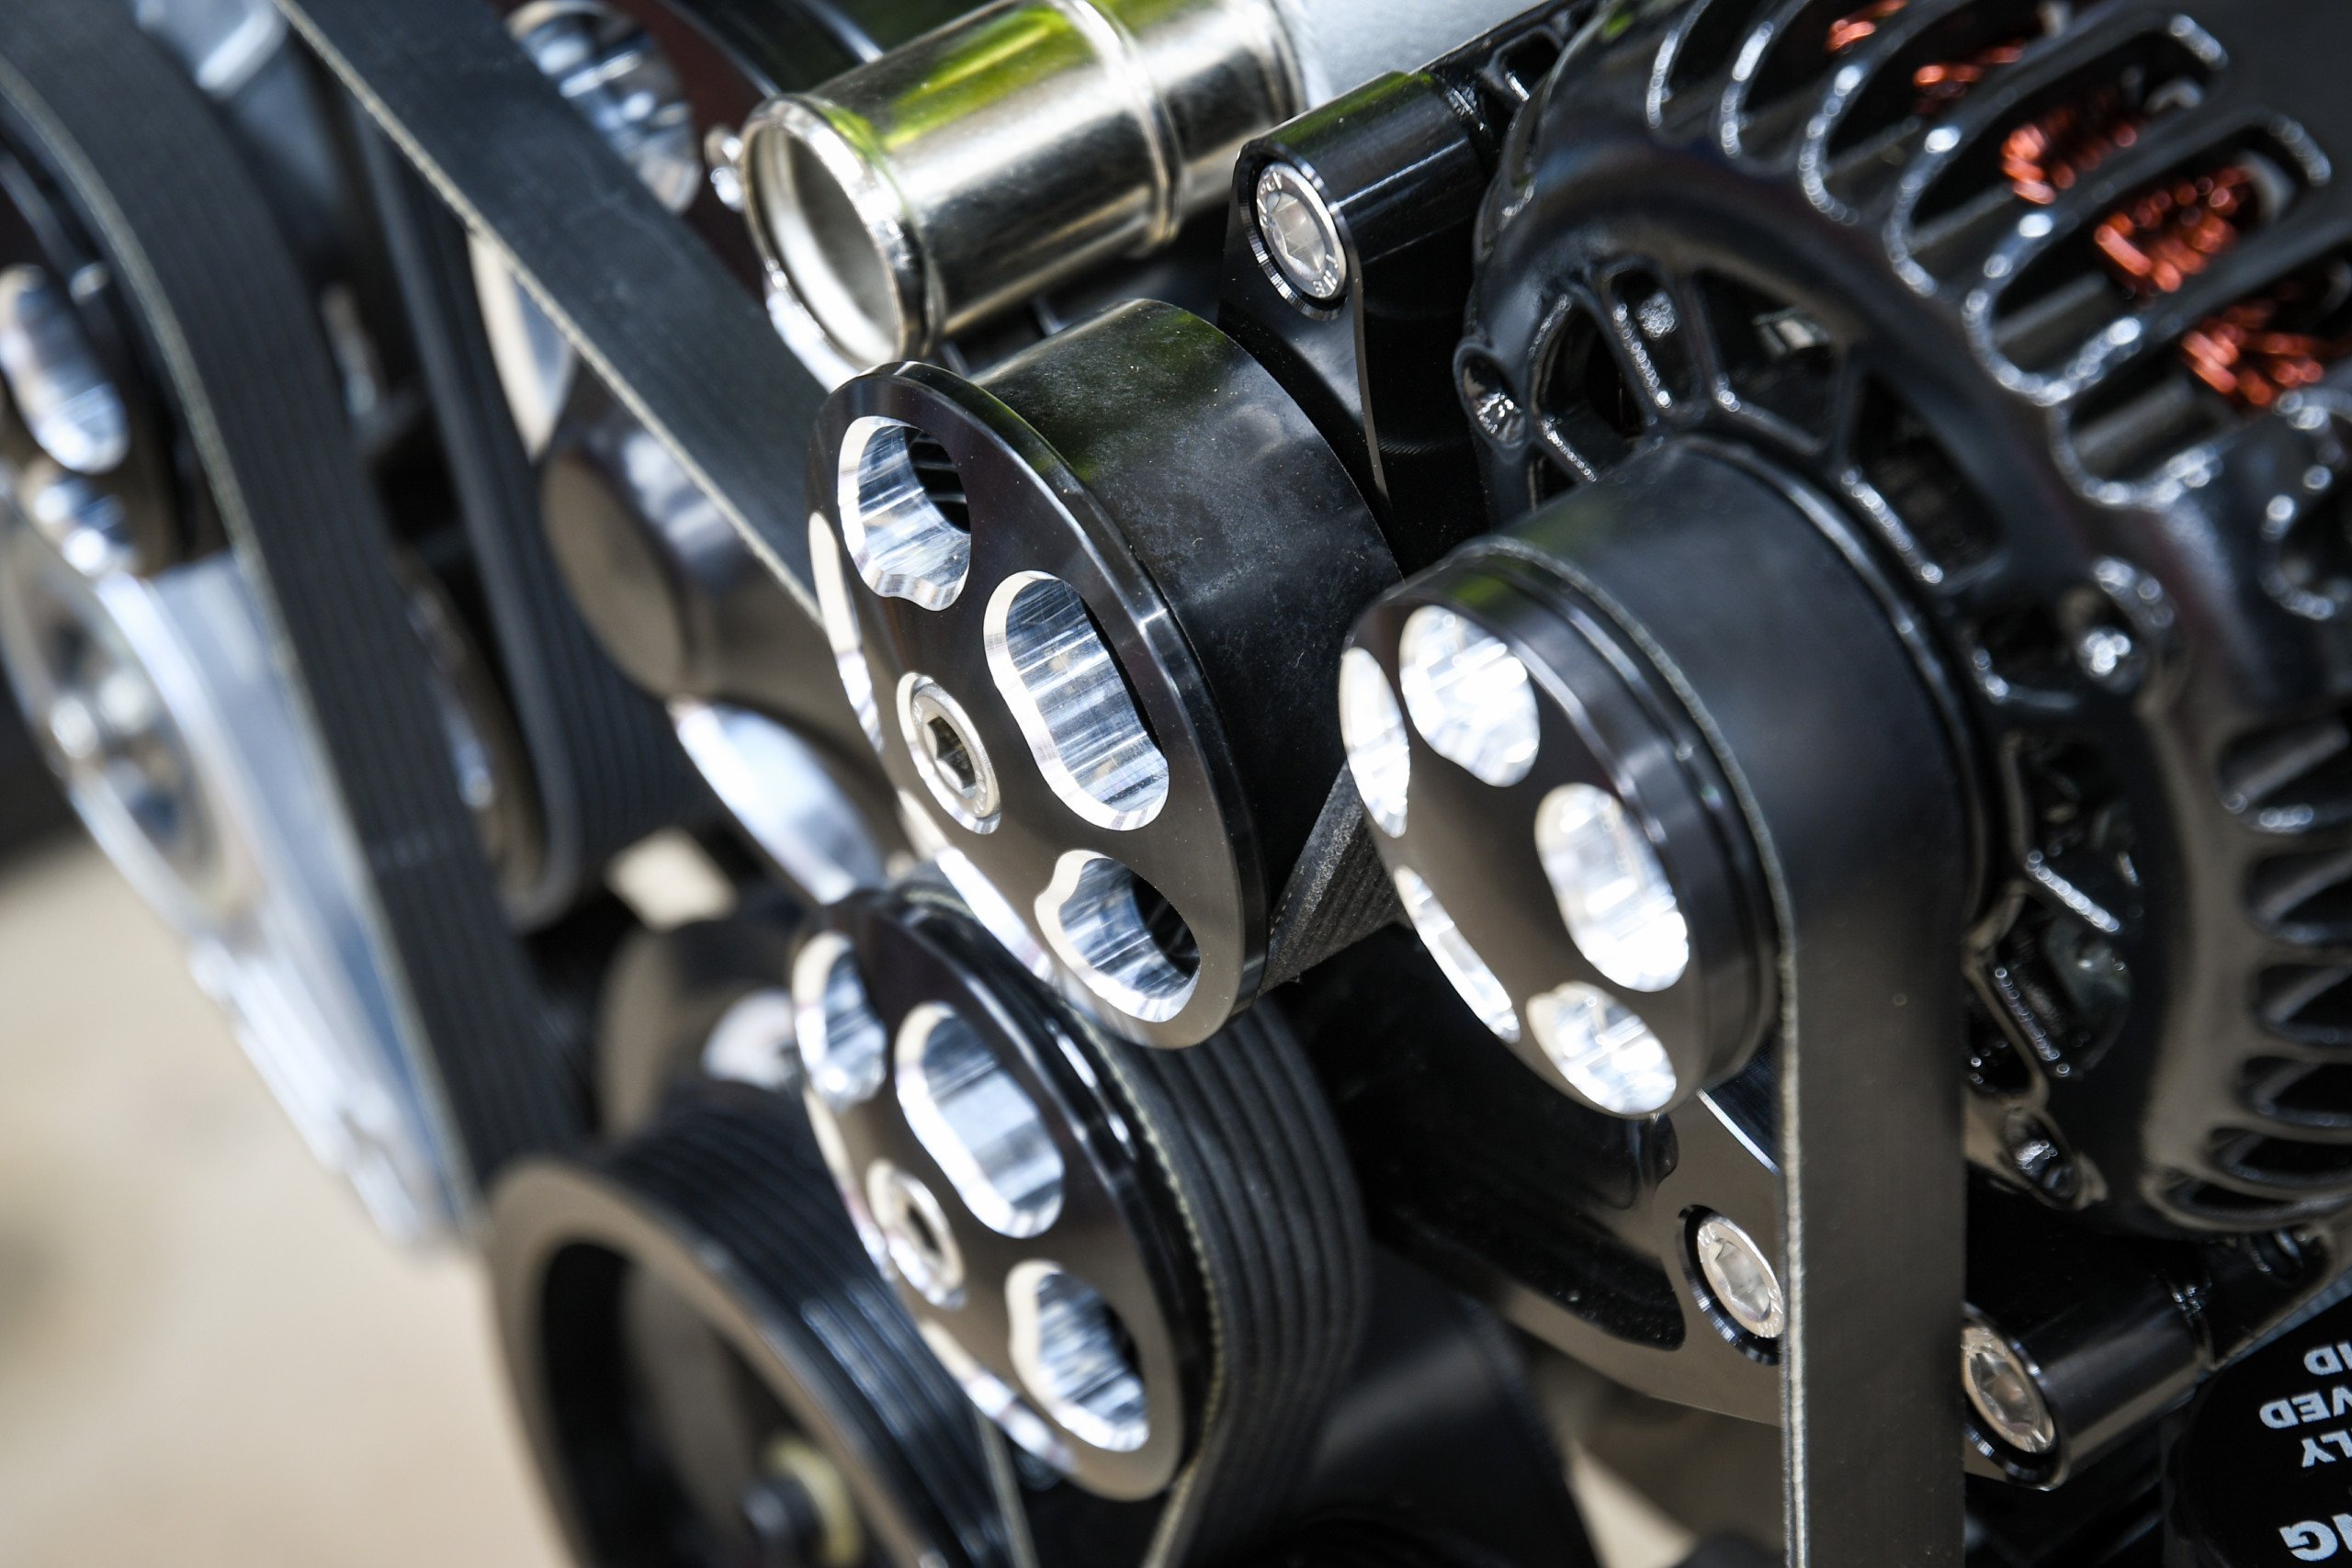
Casey: Our accessory drives are 100-percent made here at Wegner Automotive in Wisconsin. We use billet 6061 aluminum for the pulleys, covers, and brackets with stainless steel hardware.
LSX Mag: What do customers need to know about their LS engine before placing an order? Casey: We ask questions like: How fast do you want to go? How is the engine built/what boost can it handle? Is it a stock bottom end or built for boost? What is the intended application? Is it a hot rod, race, airboat, marine, etc.? Sometimes we build a complete engine instead of just selling the front-drive. We ask many questions to ensure the drive suits their application best.
It’s Go Time
With all our questions out of the way, we ordered Wegner’s WAK075 accessory drive. This product is available in a few different finishes, including black, a bare machined finish, two-tone diamond cut (which is the black anodized finish with machined highlights), and fully polished. After careful consideration, we decided on the two-tone diamond cut, which would give us some contrast with the black and the monster green Whipple.
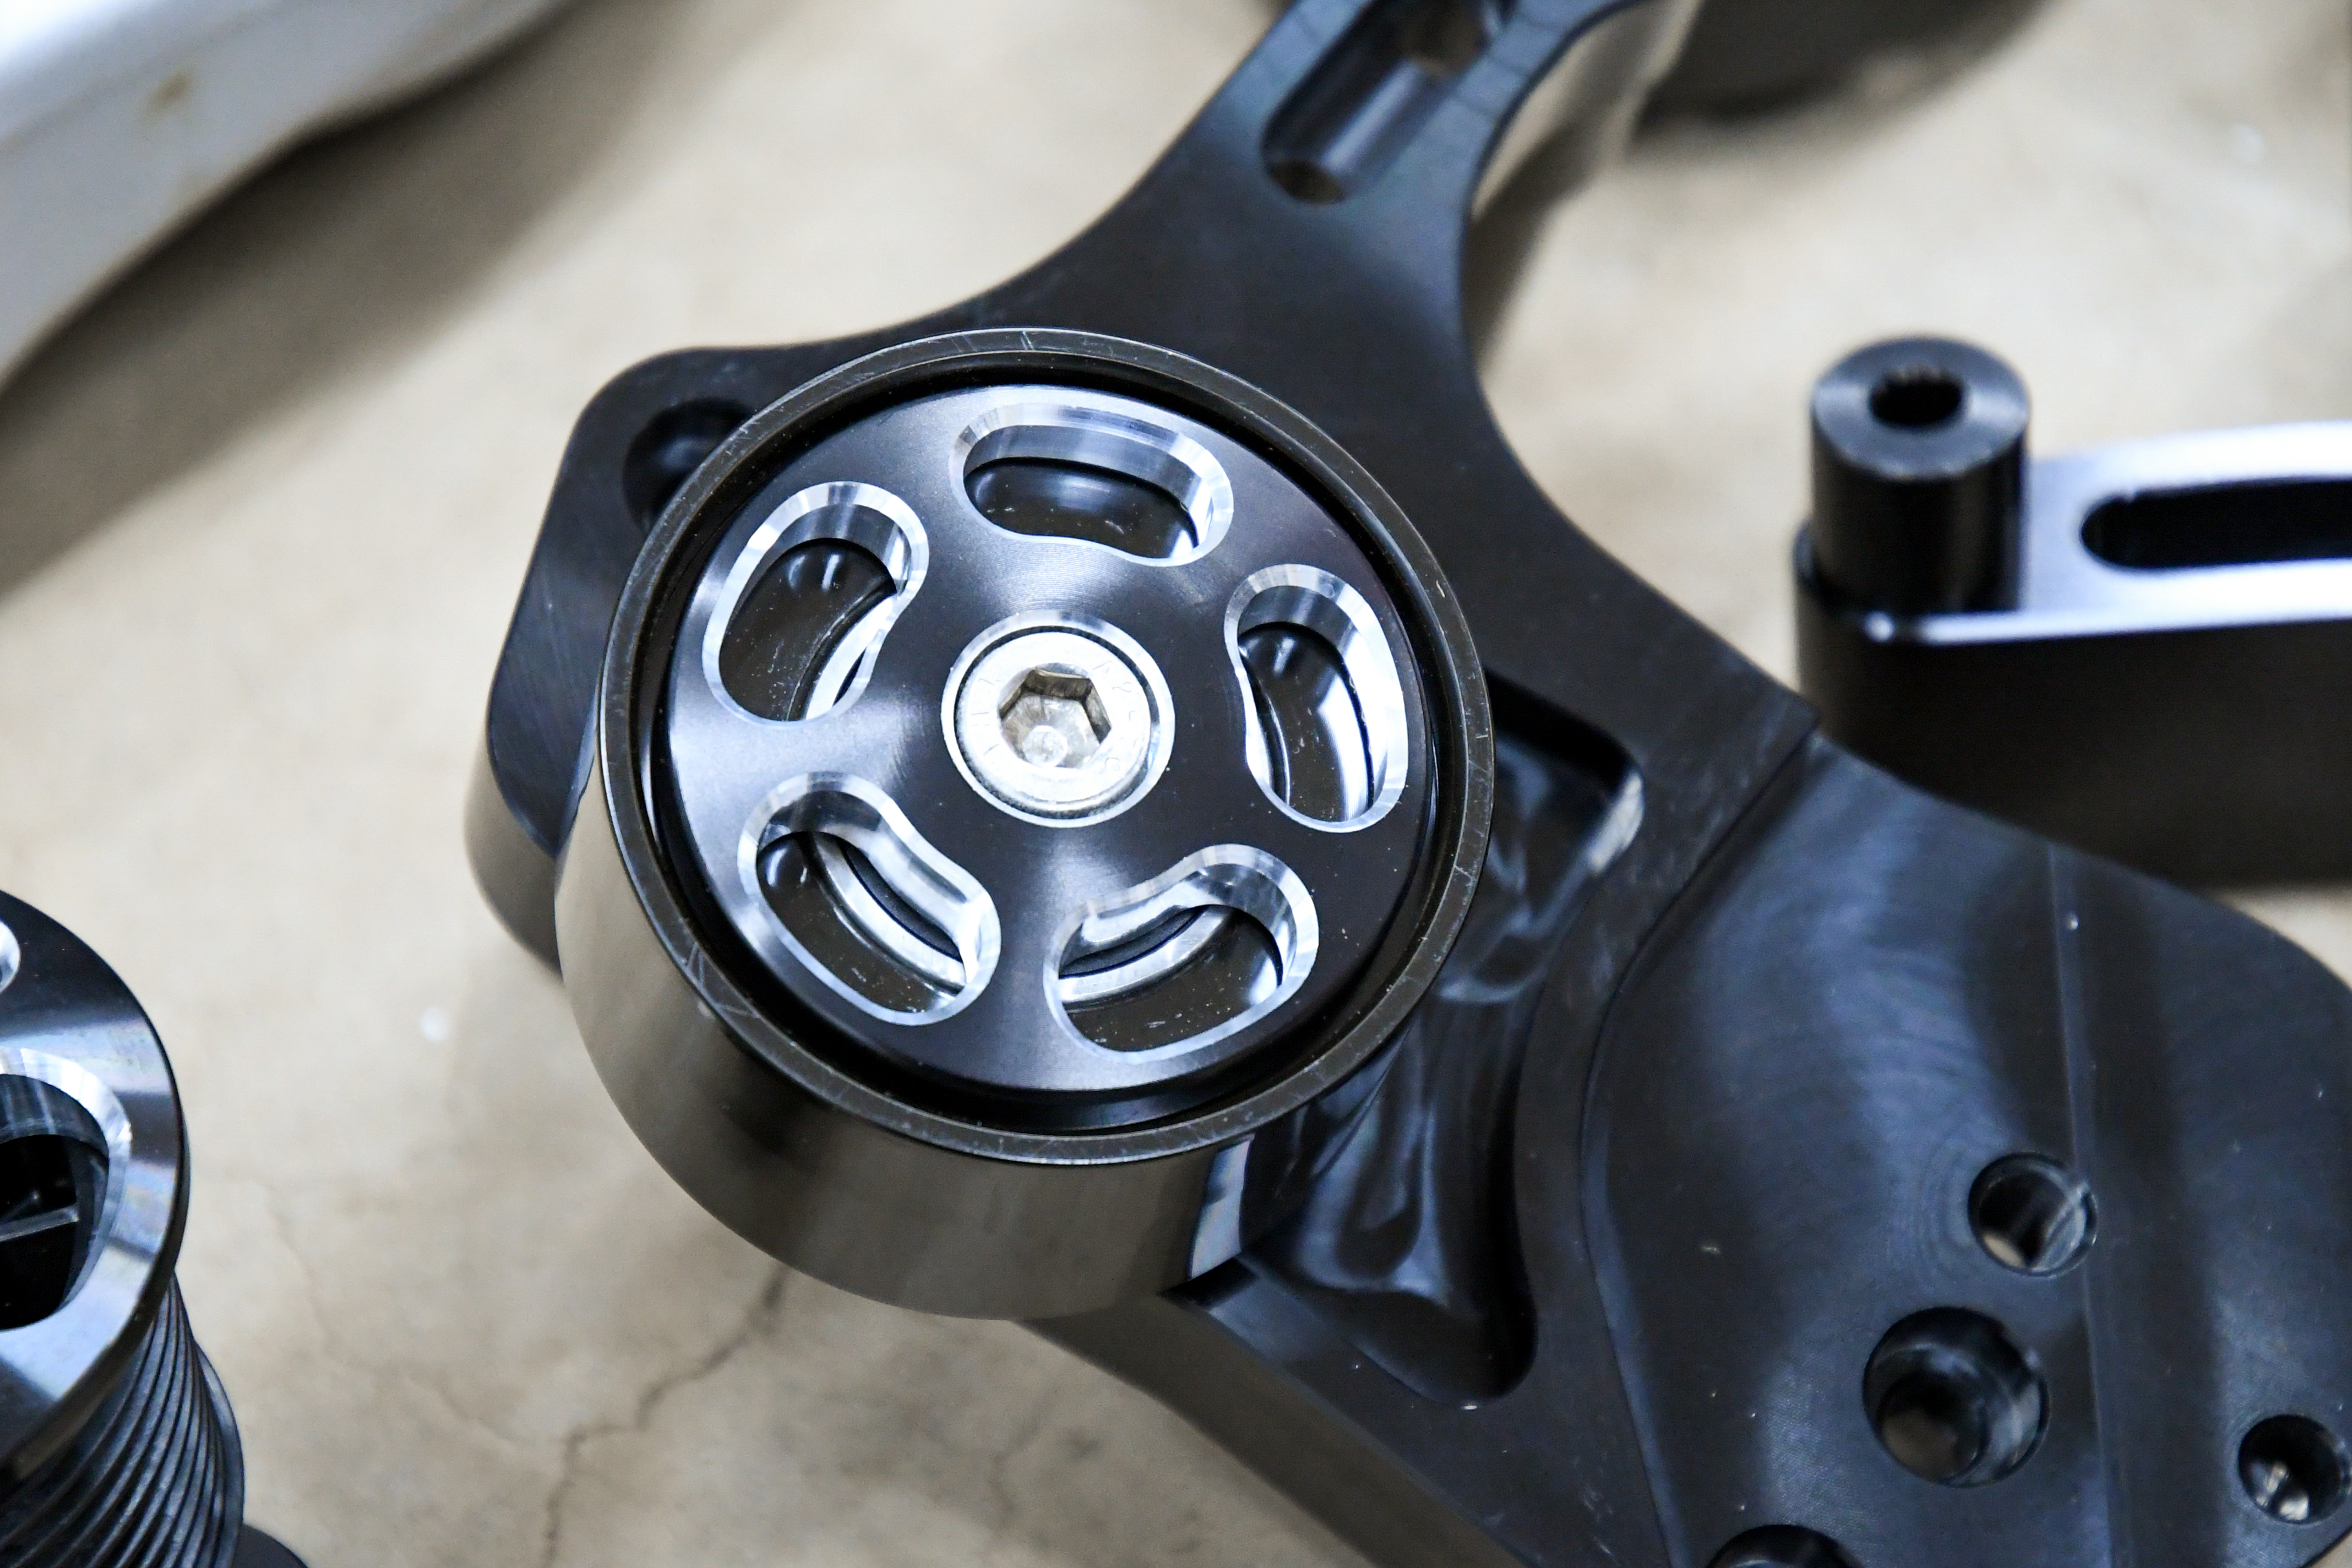
The two-tone diamond cut finish was an easy choice for this project.
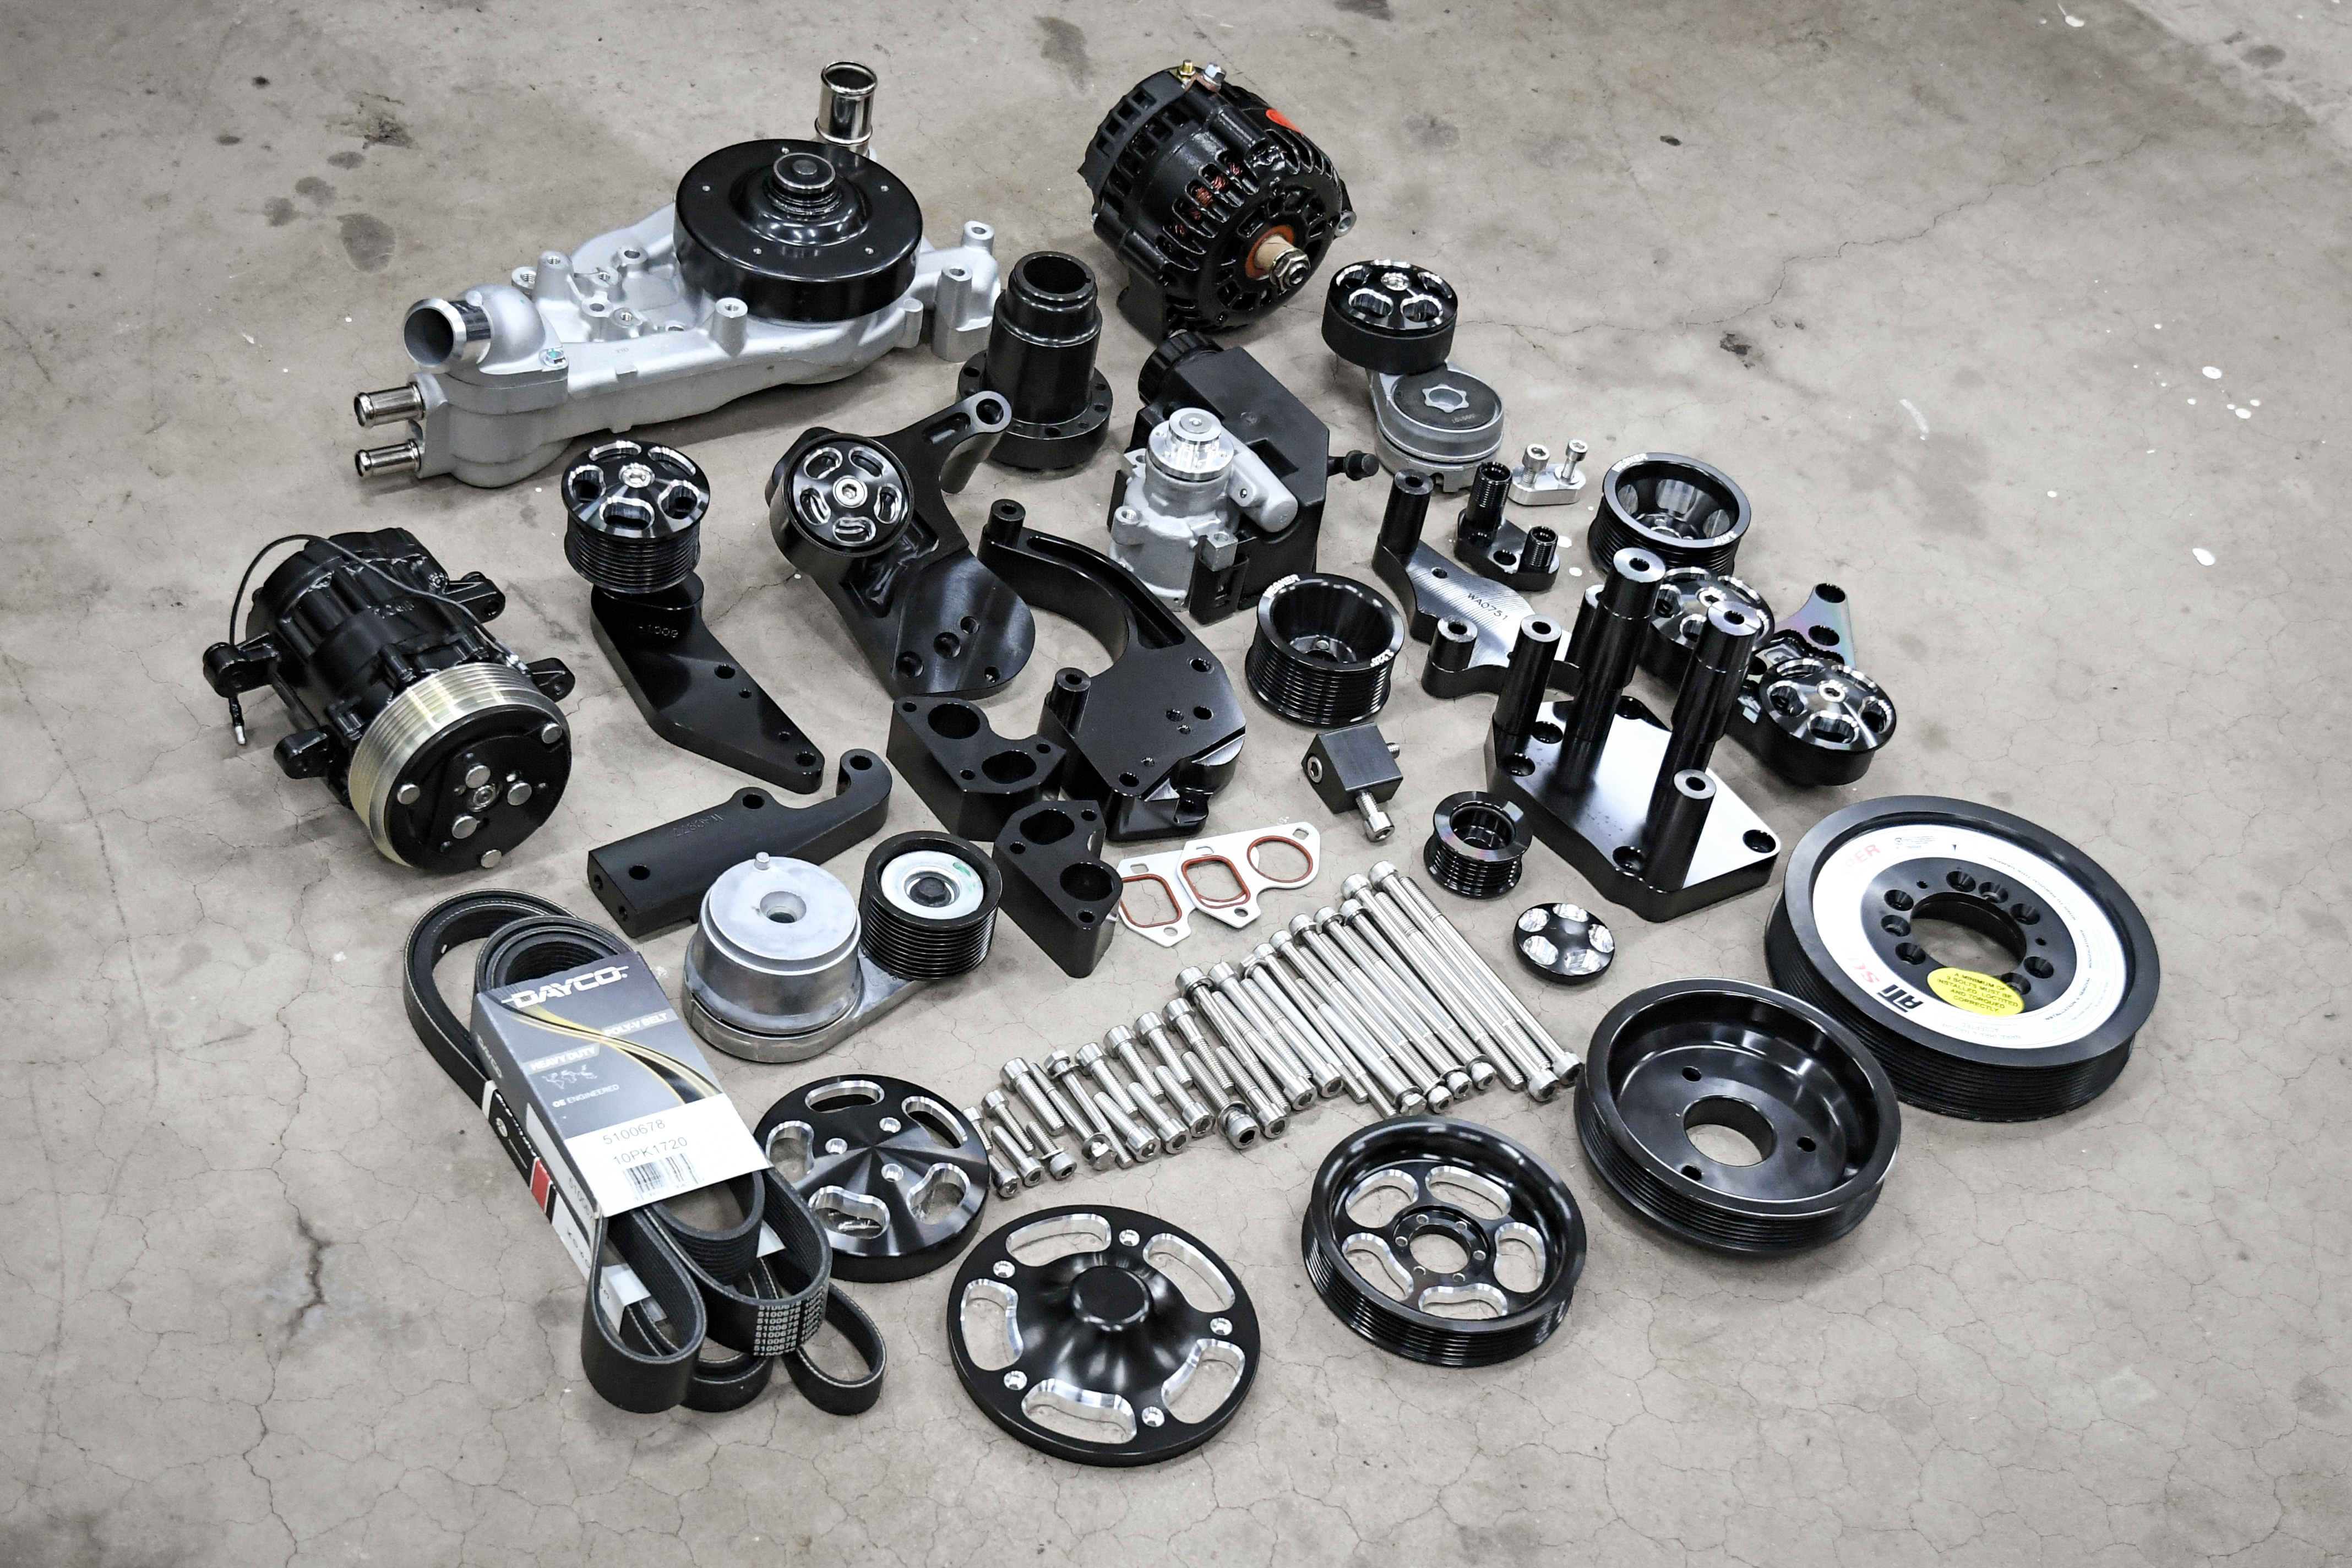
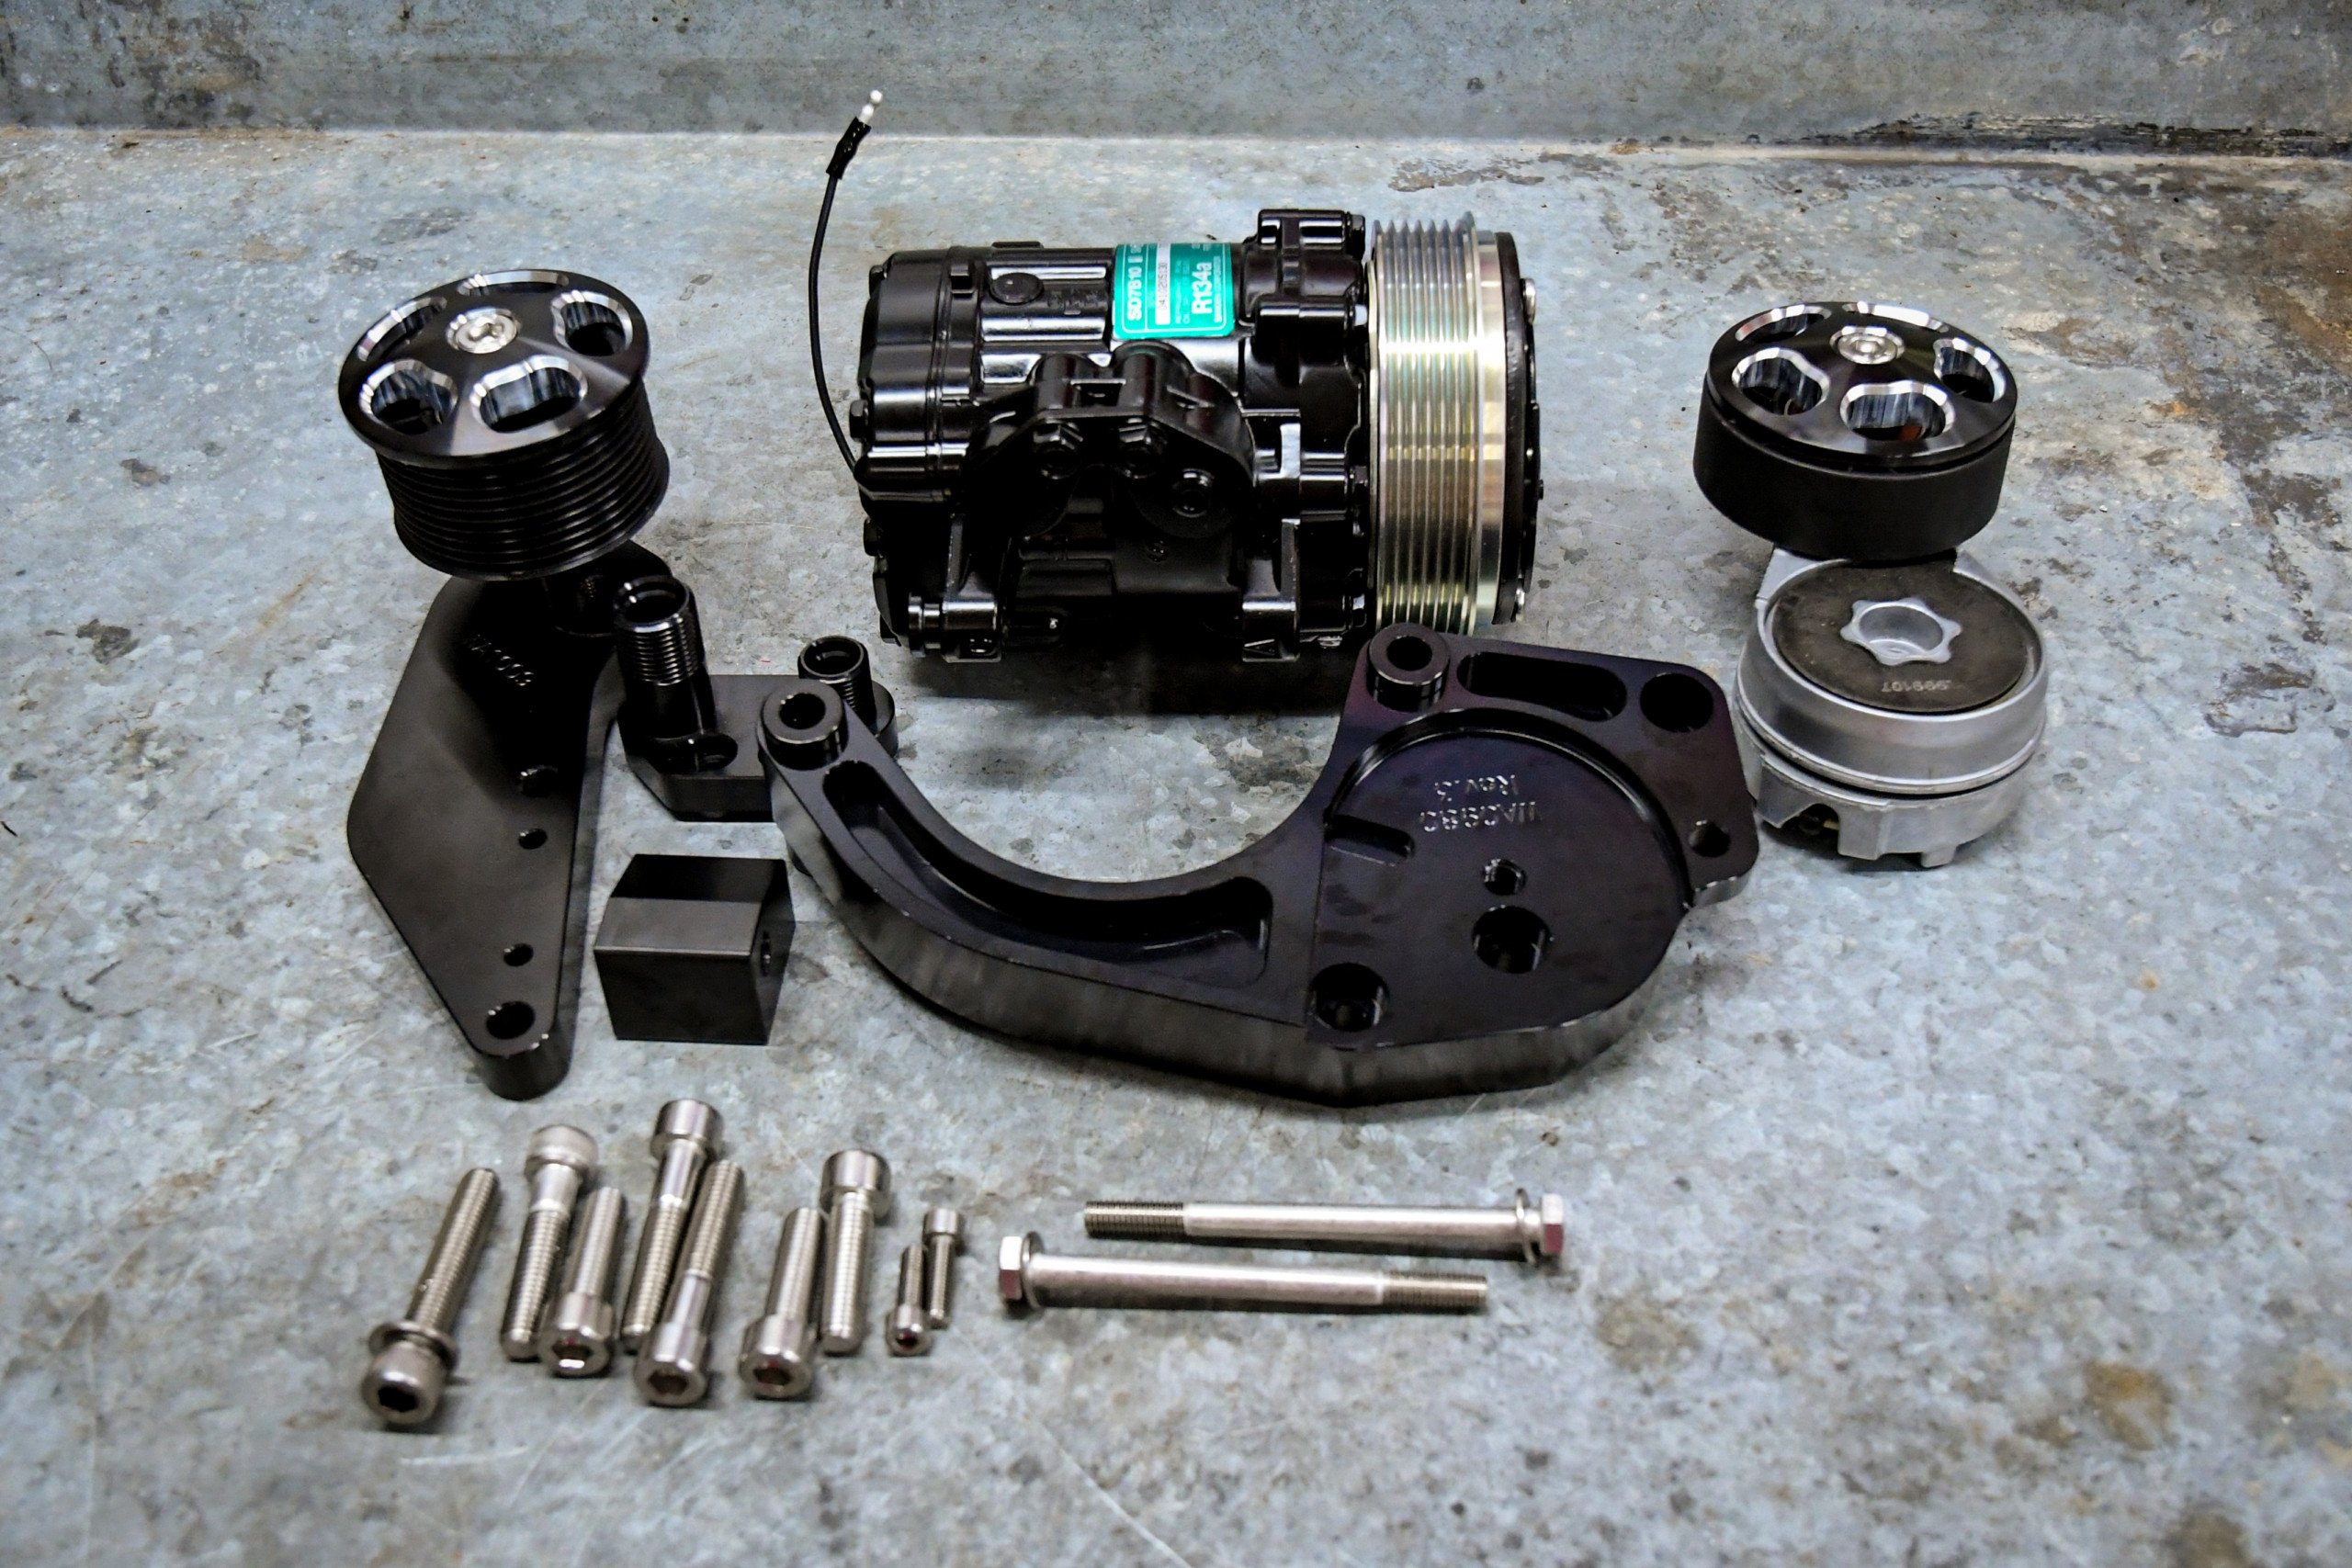
Much to our surprise, our new accessory drive arrived at the door in just a couple of weeks. The parts are packed strategically in a single box, and we’re happy to report that nothing was damaged during shipping. After laying everything out, we now understand why the Wegner accessory drive is more expensive than others on the market. Their attention to detail is impeccable.
Unboxing The Drive
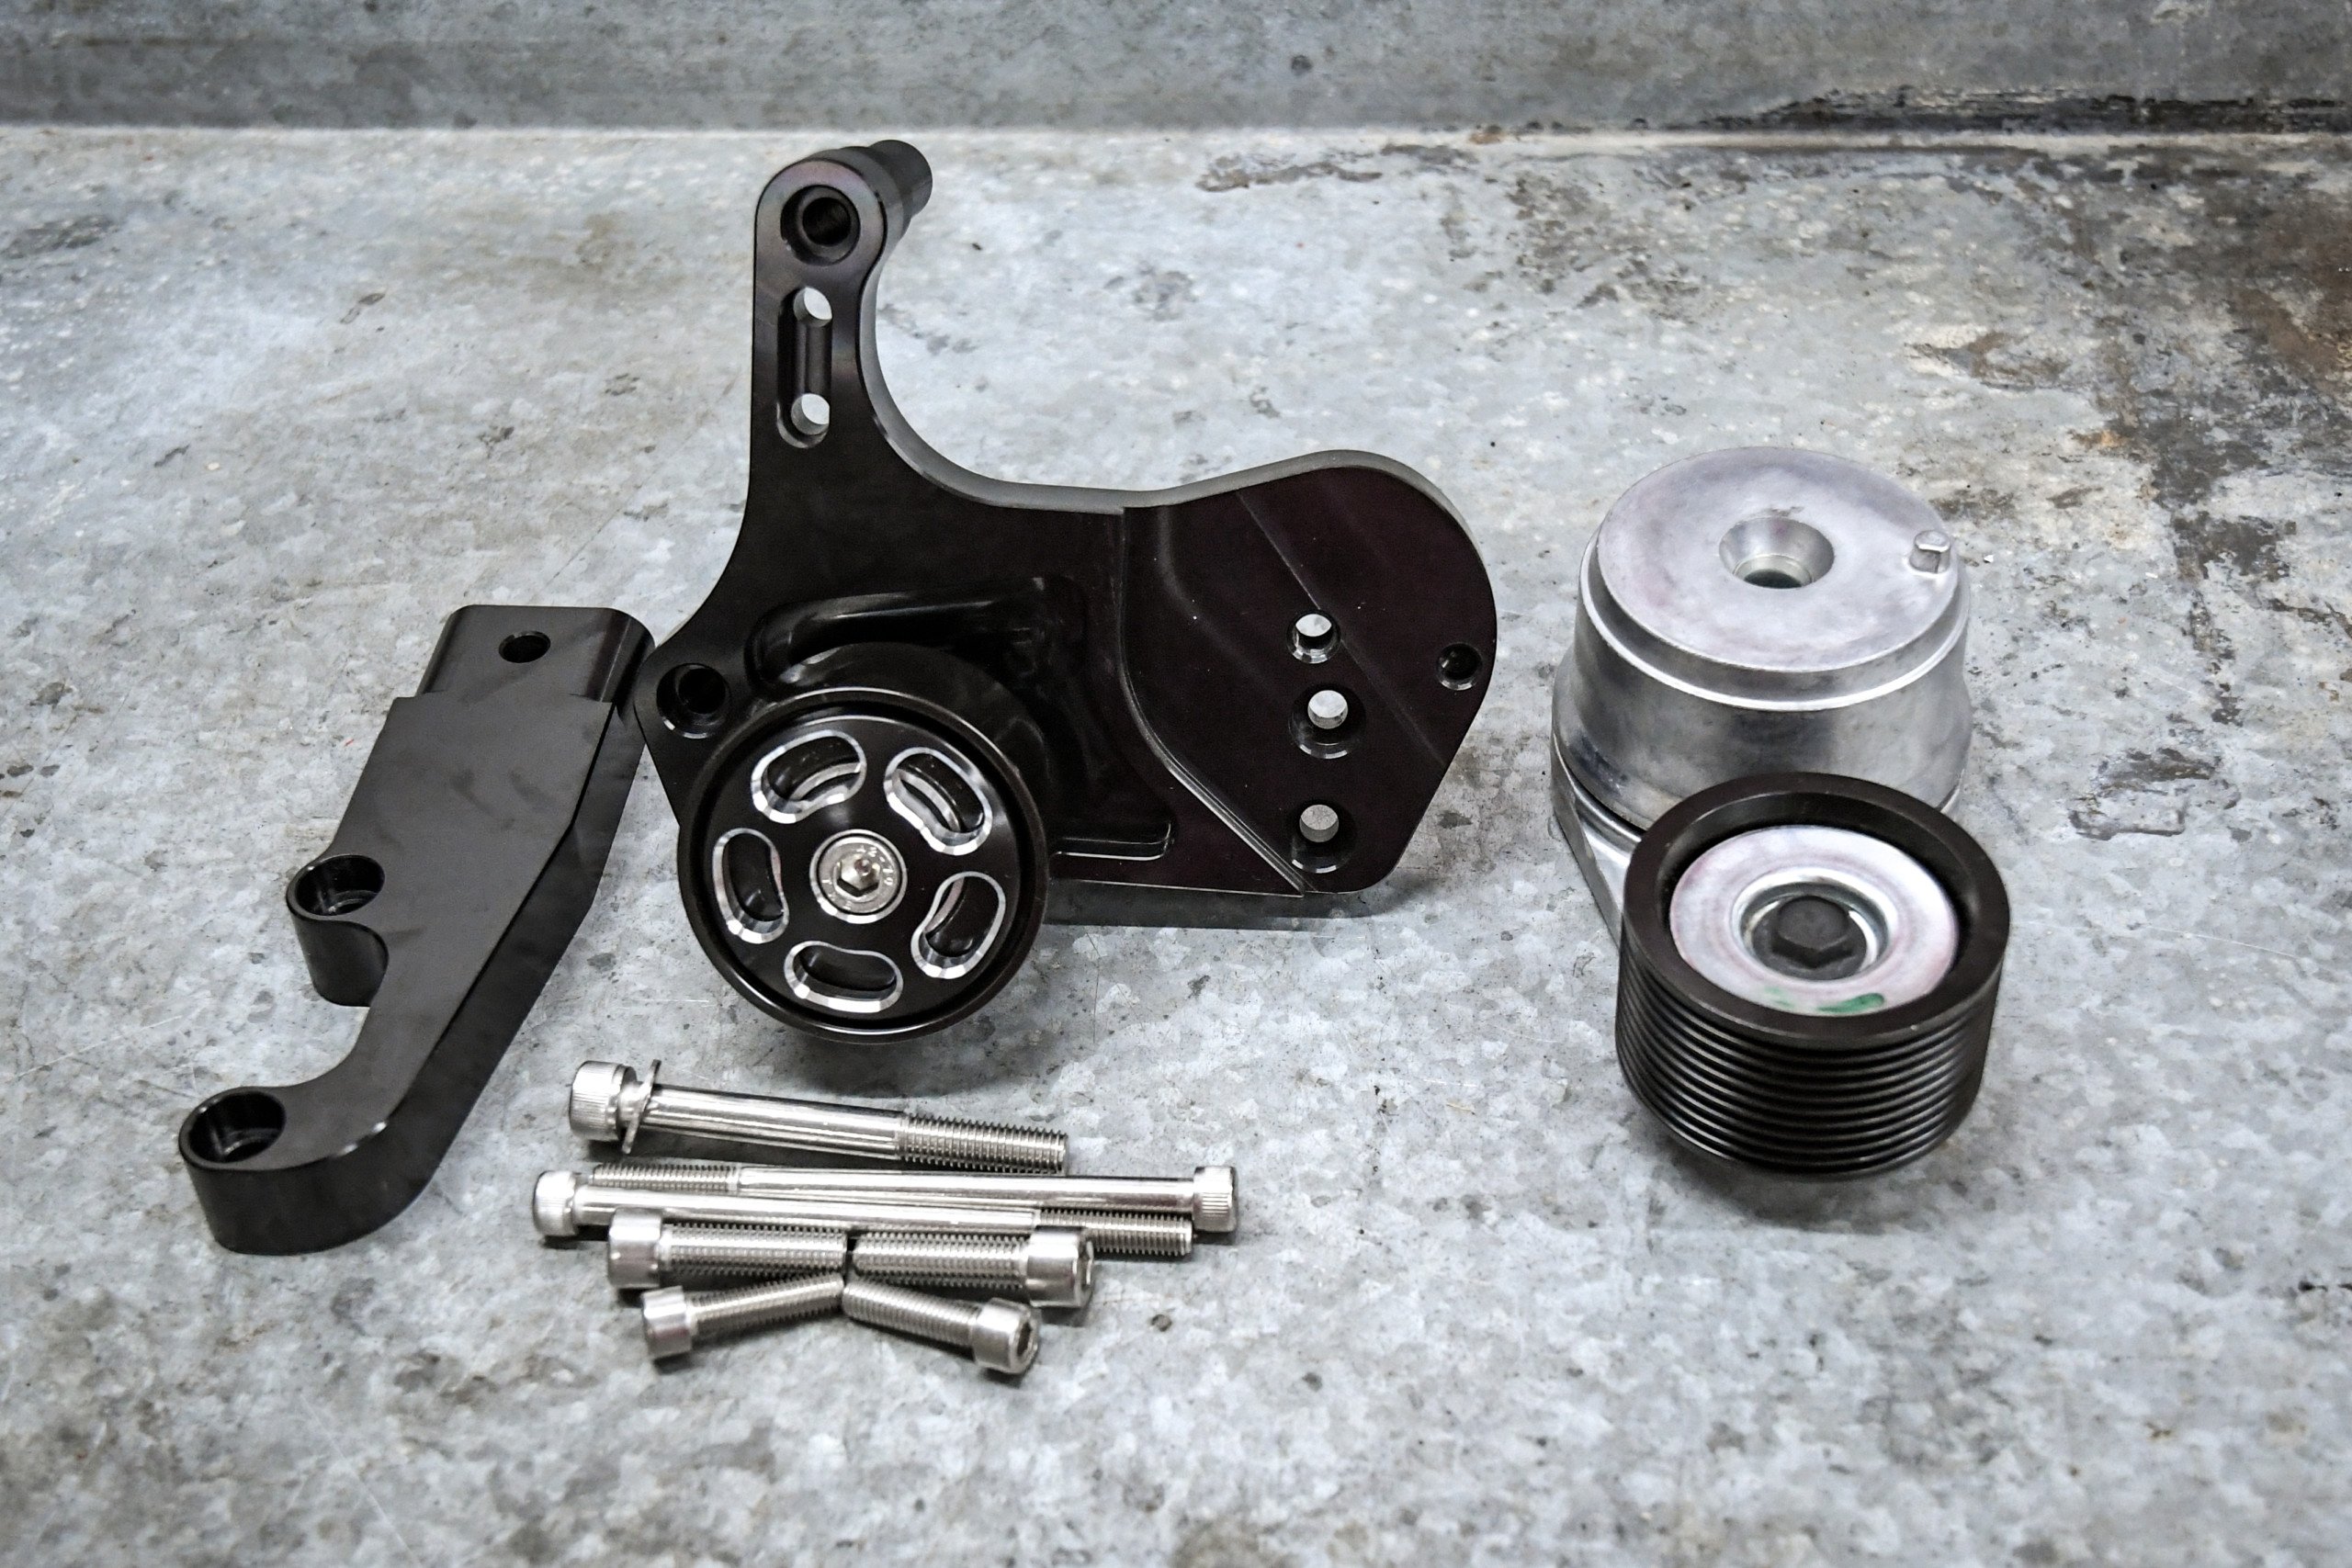
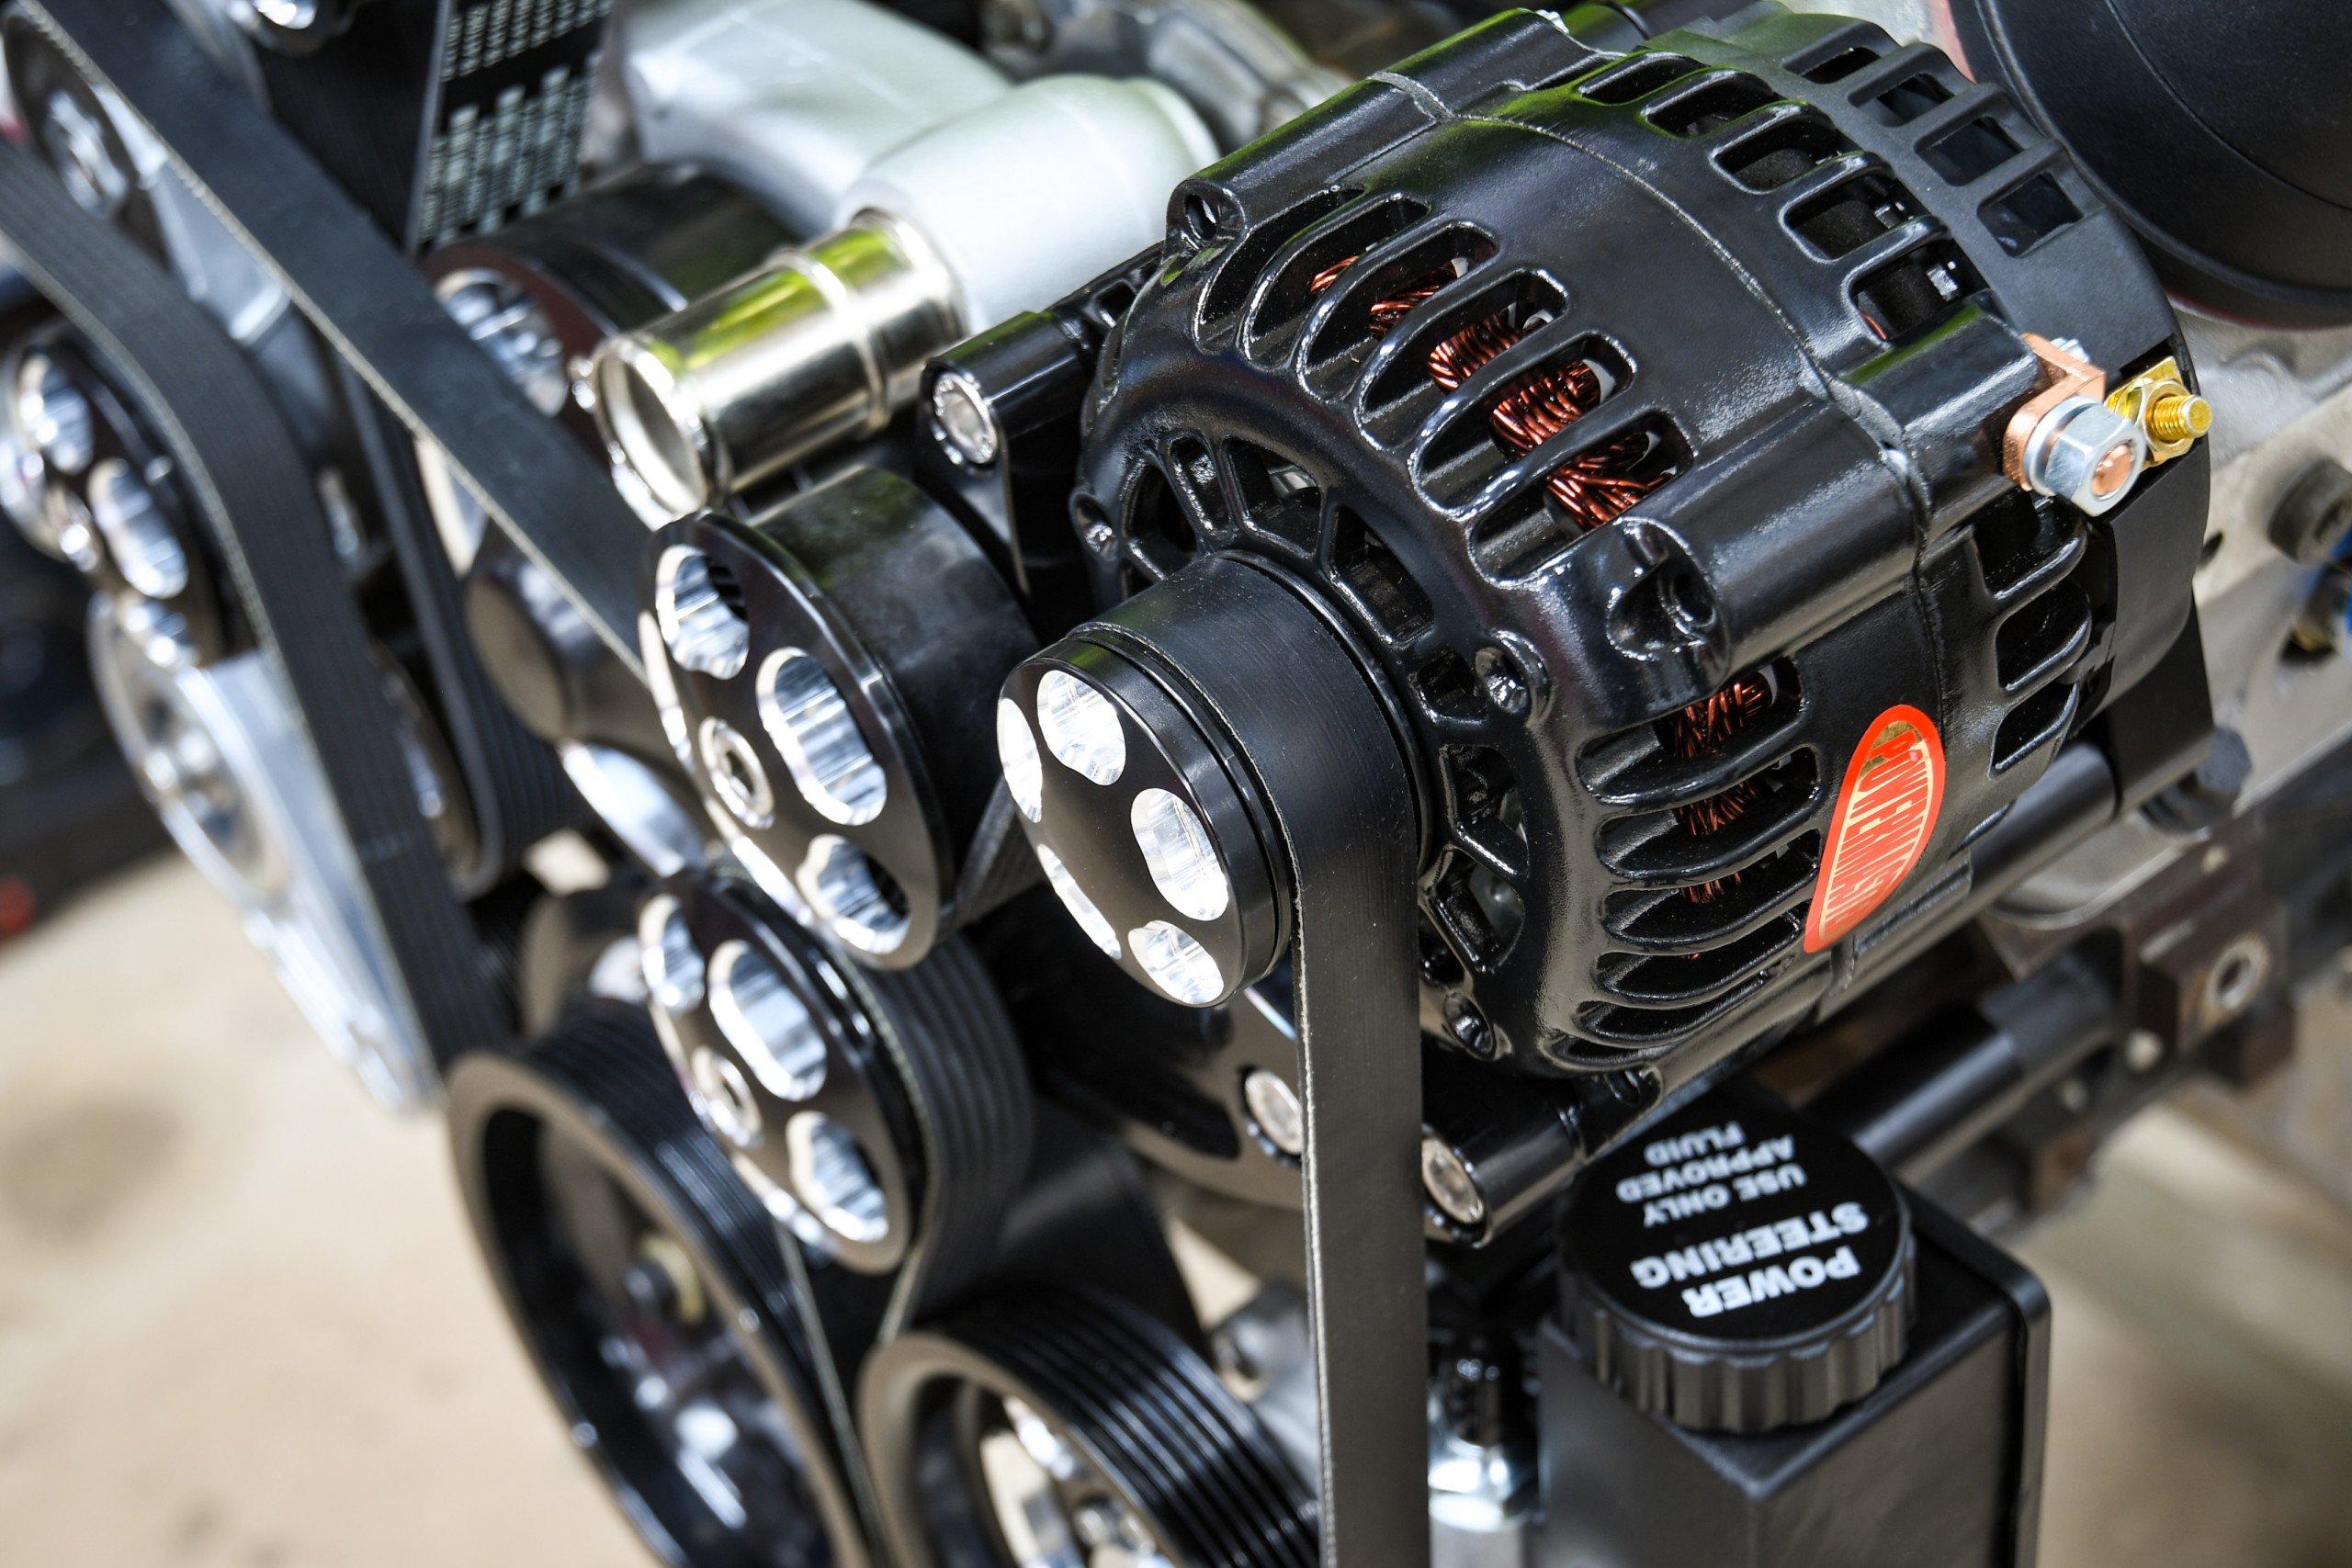
Wegner only uses the best of the best components from the performance aftermarket. The system includes an ATI ten-rib damper, heavy-duty Gates tensioners, a Powermaster alternator, PSC GM Type II power steering pump, OEM LSA water pump, and an OEM Sanden SD7 A/C compressor.
Wegner also includes CNC machined billet brackets, pulleys, and stainless-steel mounting hardware. And while this is an impressive list of components, that’s not why we give this unit a five-star rating. Rather, it’s the fit and finish of this package that takes the cake. But more on that later.
The Installation
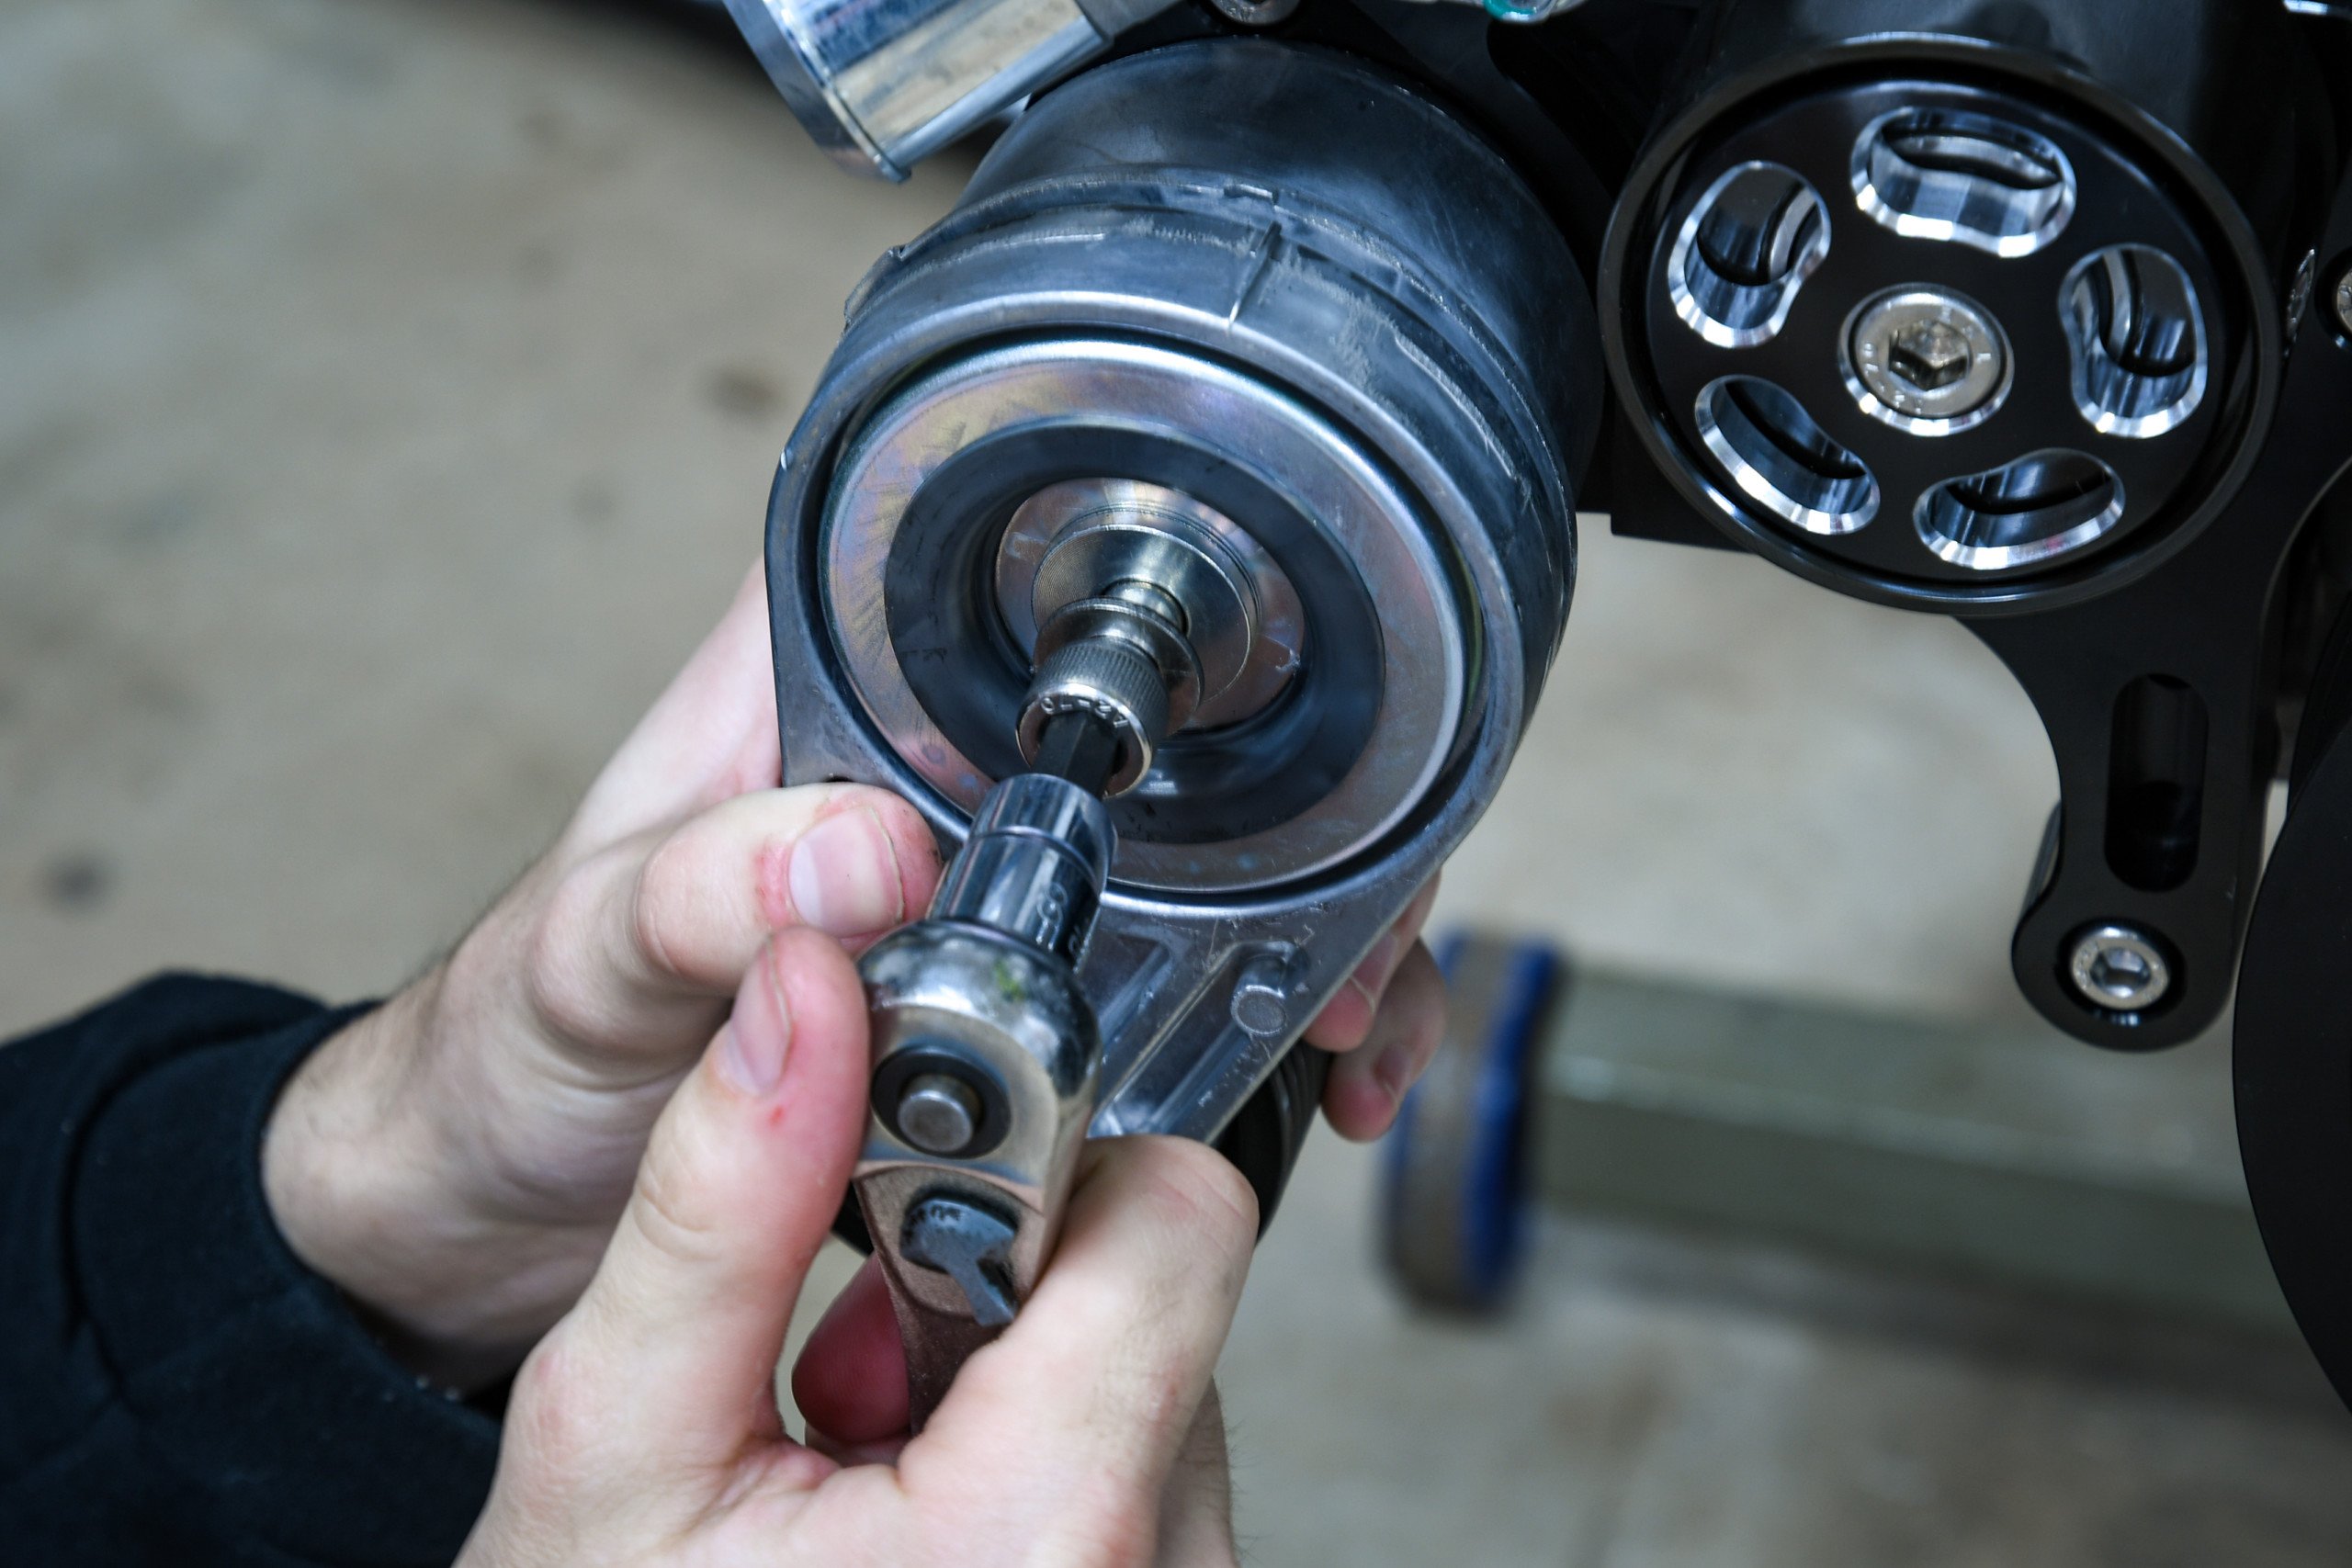
With the Wegner drive unboxed and unwrapped, it was time to assemble the accessories on our mockup engine with the Whipple. We started with the harmonic balancer first. The ATI unit is known in the automotive world as a high-quality piece. However, you want to make sure to use the correct tools for installation so that you don’t cause any damage to the crank or the balancer. It’s also a good idea to check the fit of the balancer even though ATI trusts the OEM LS crankshafts to be within spec to the .001 inch.
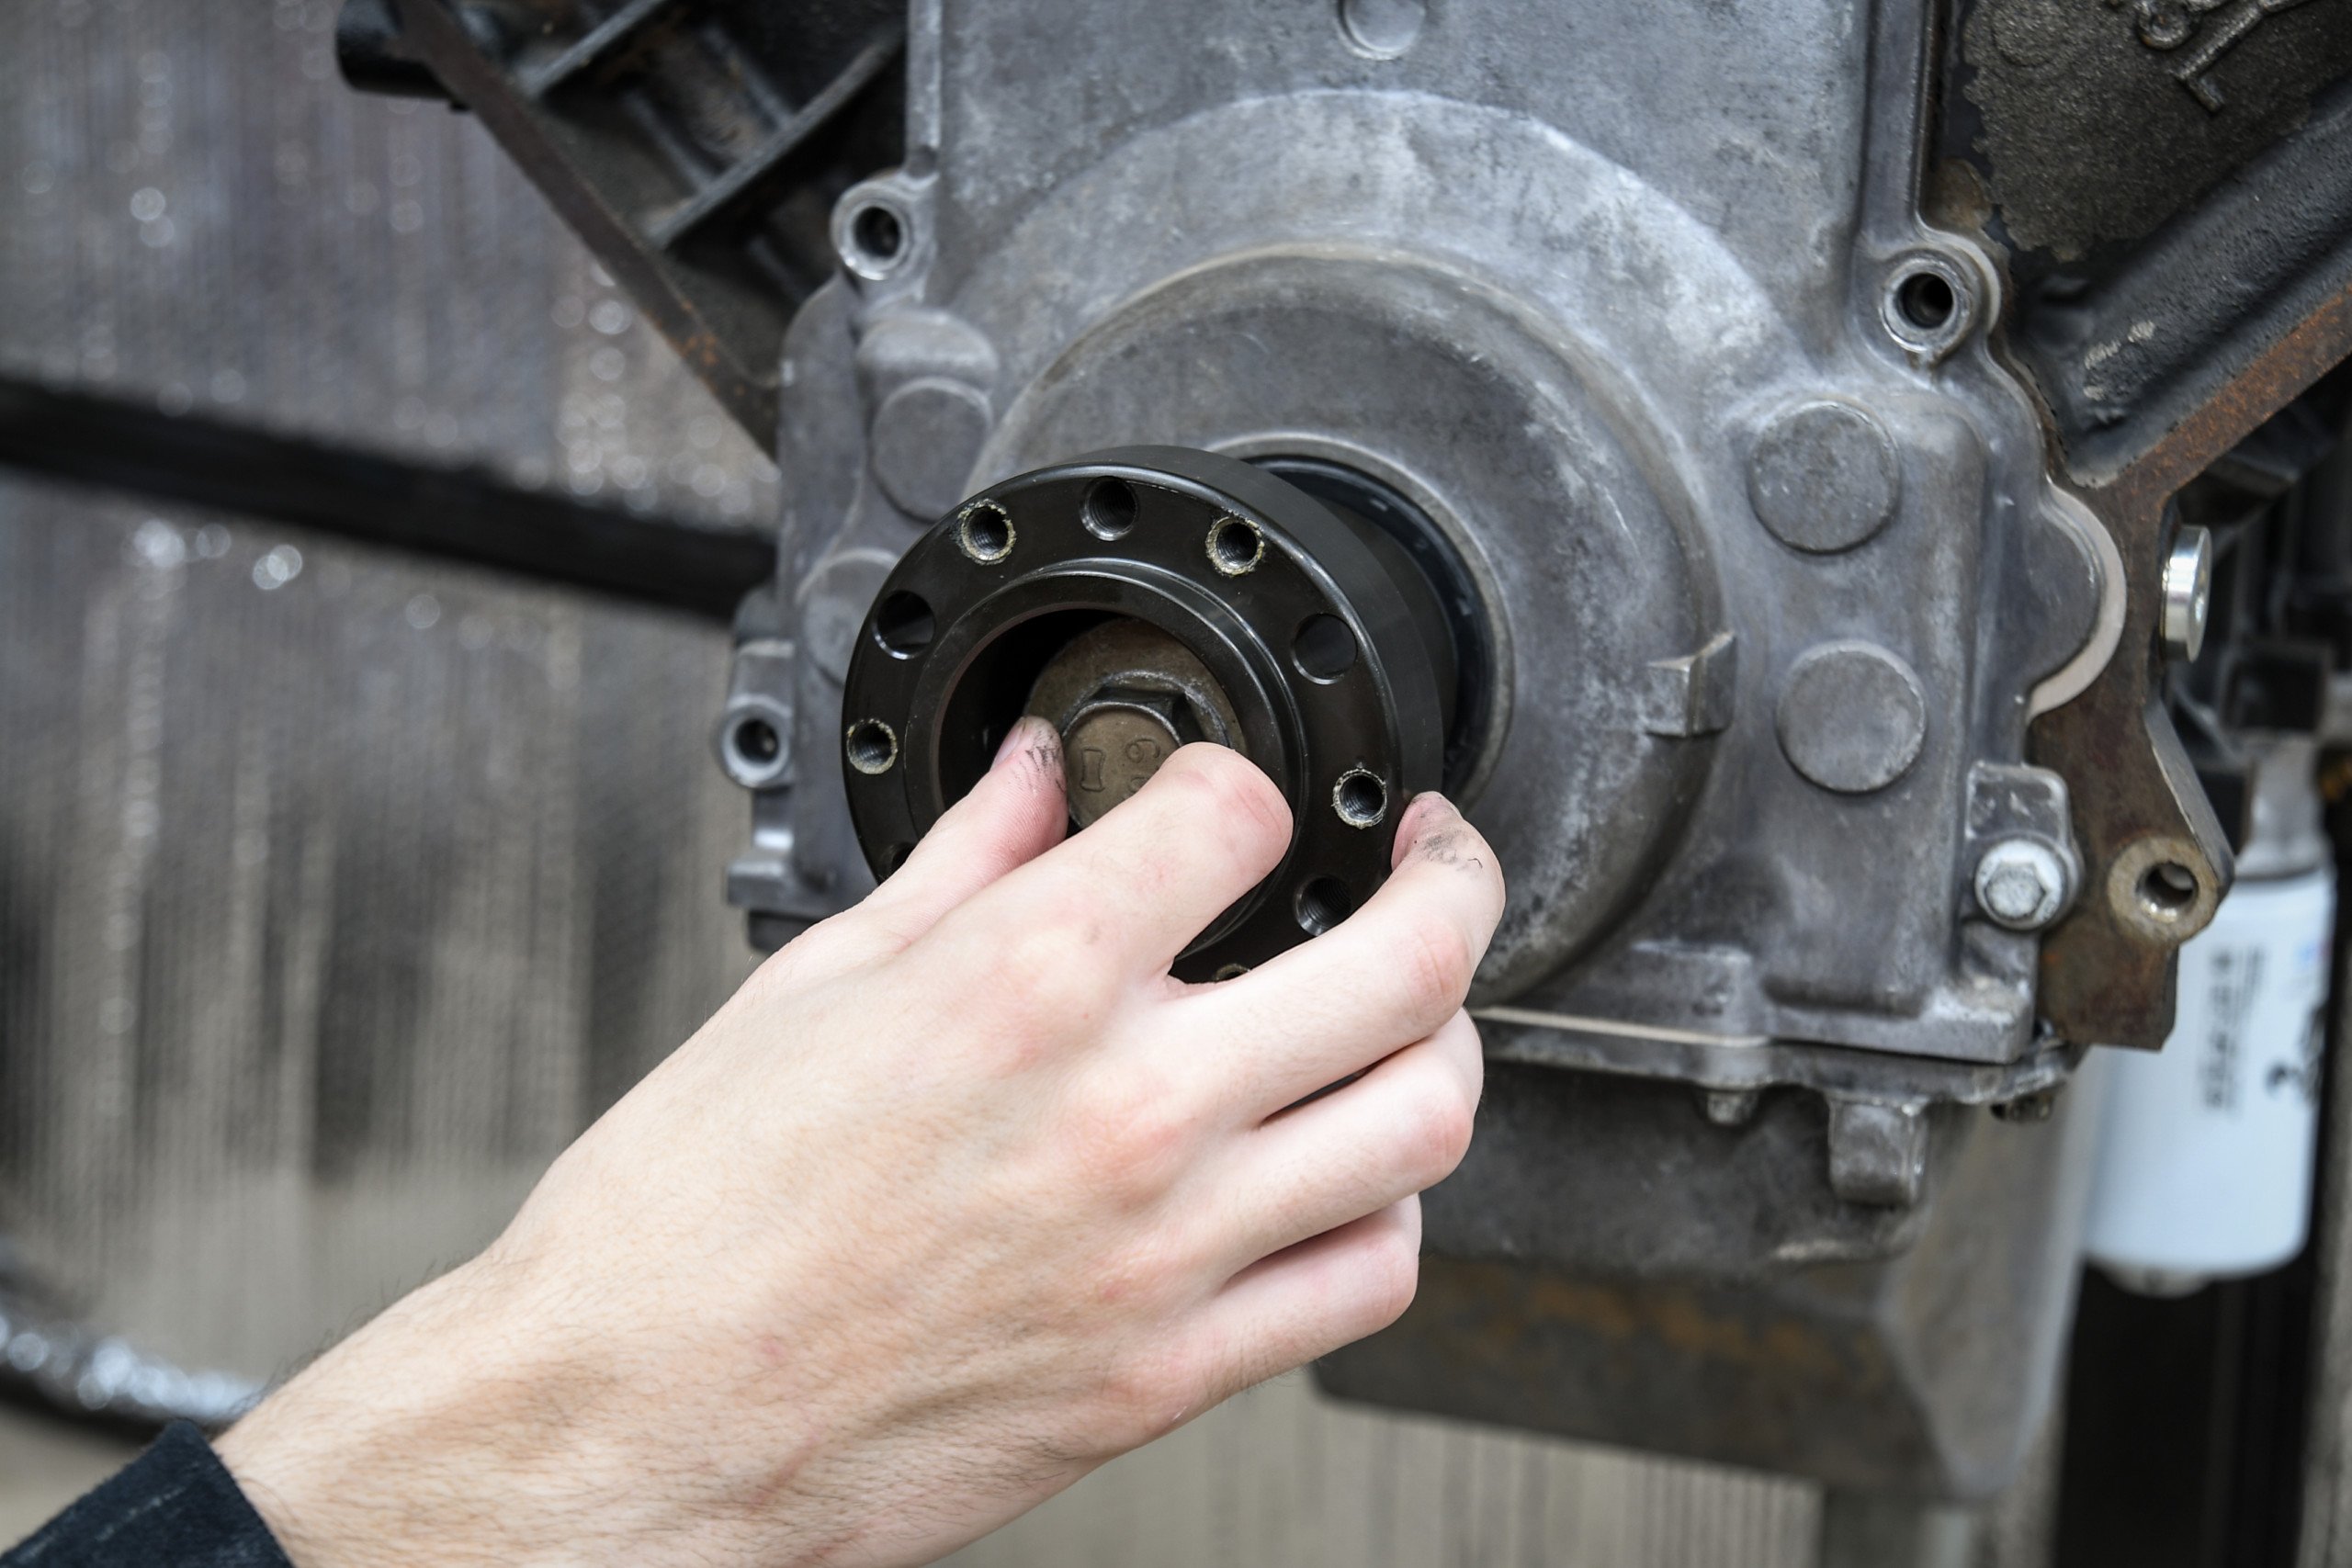
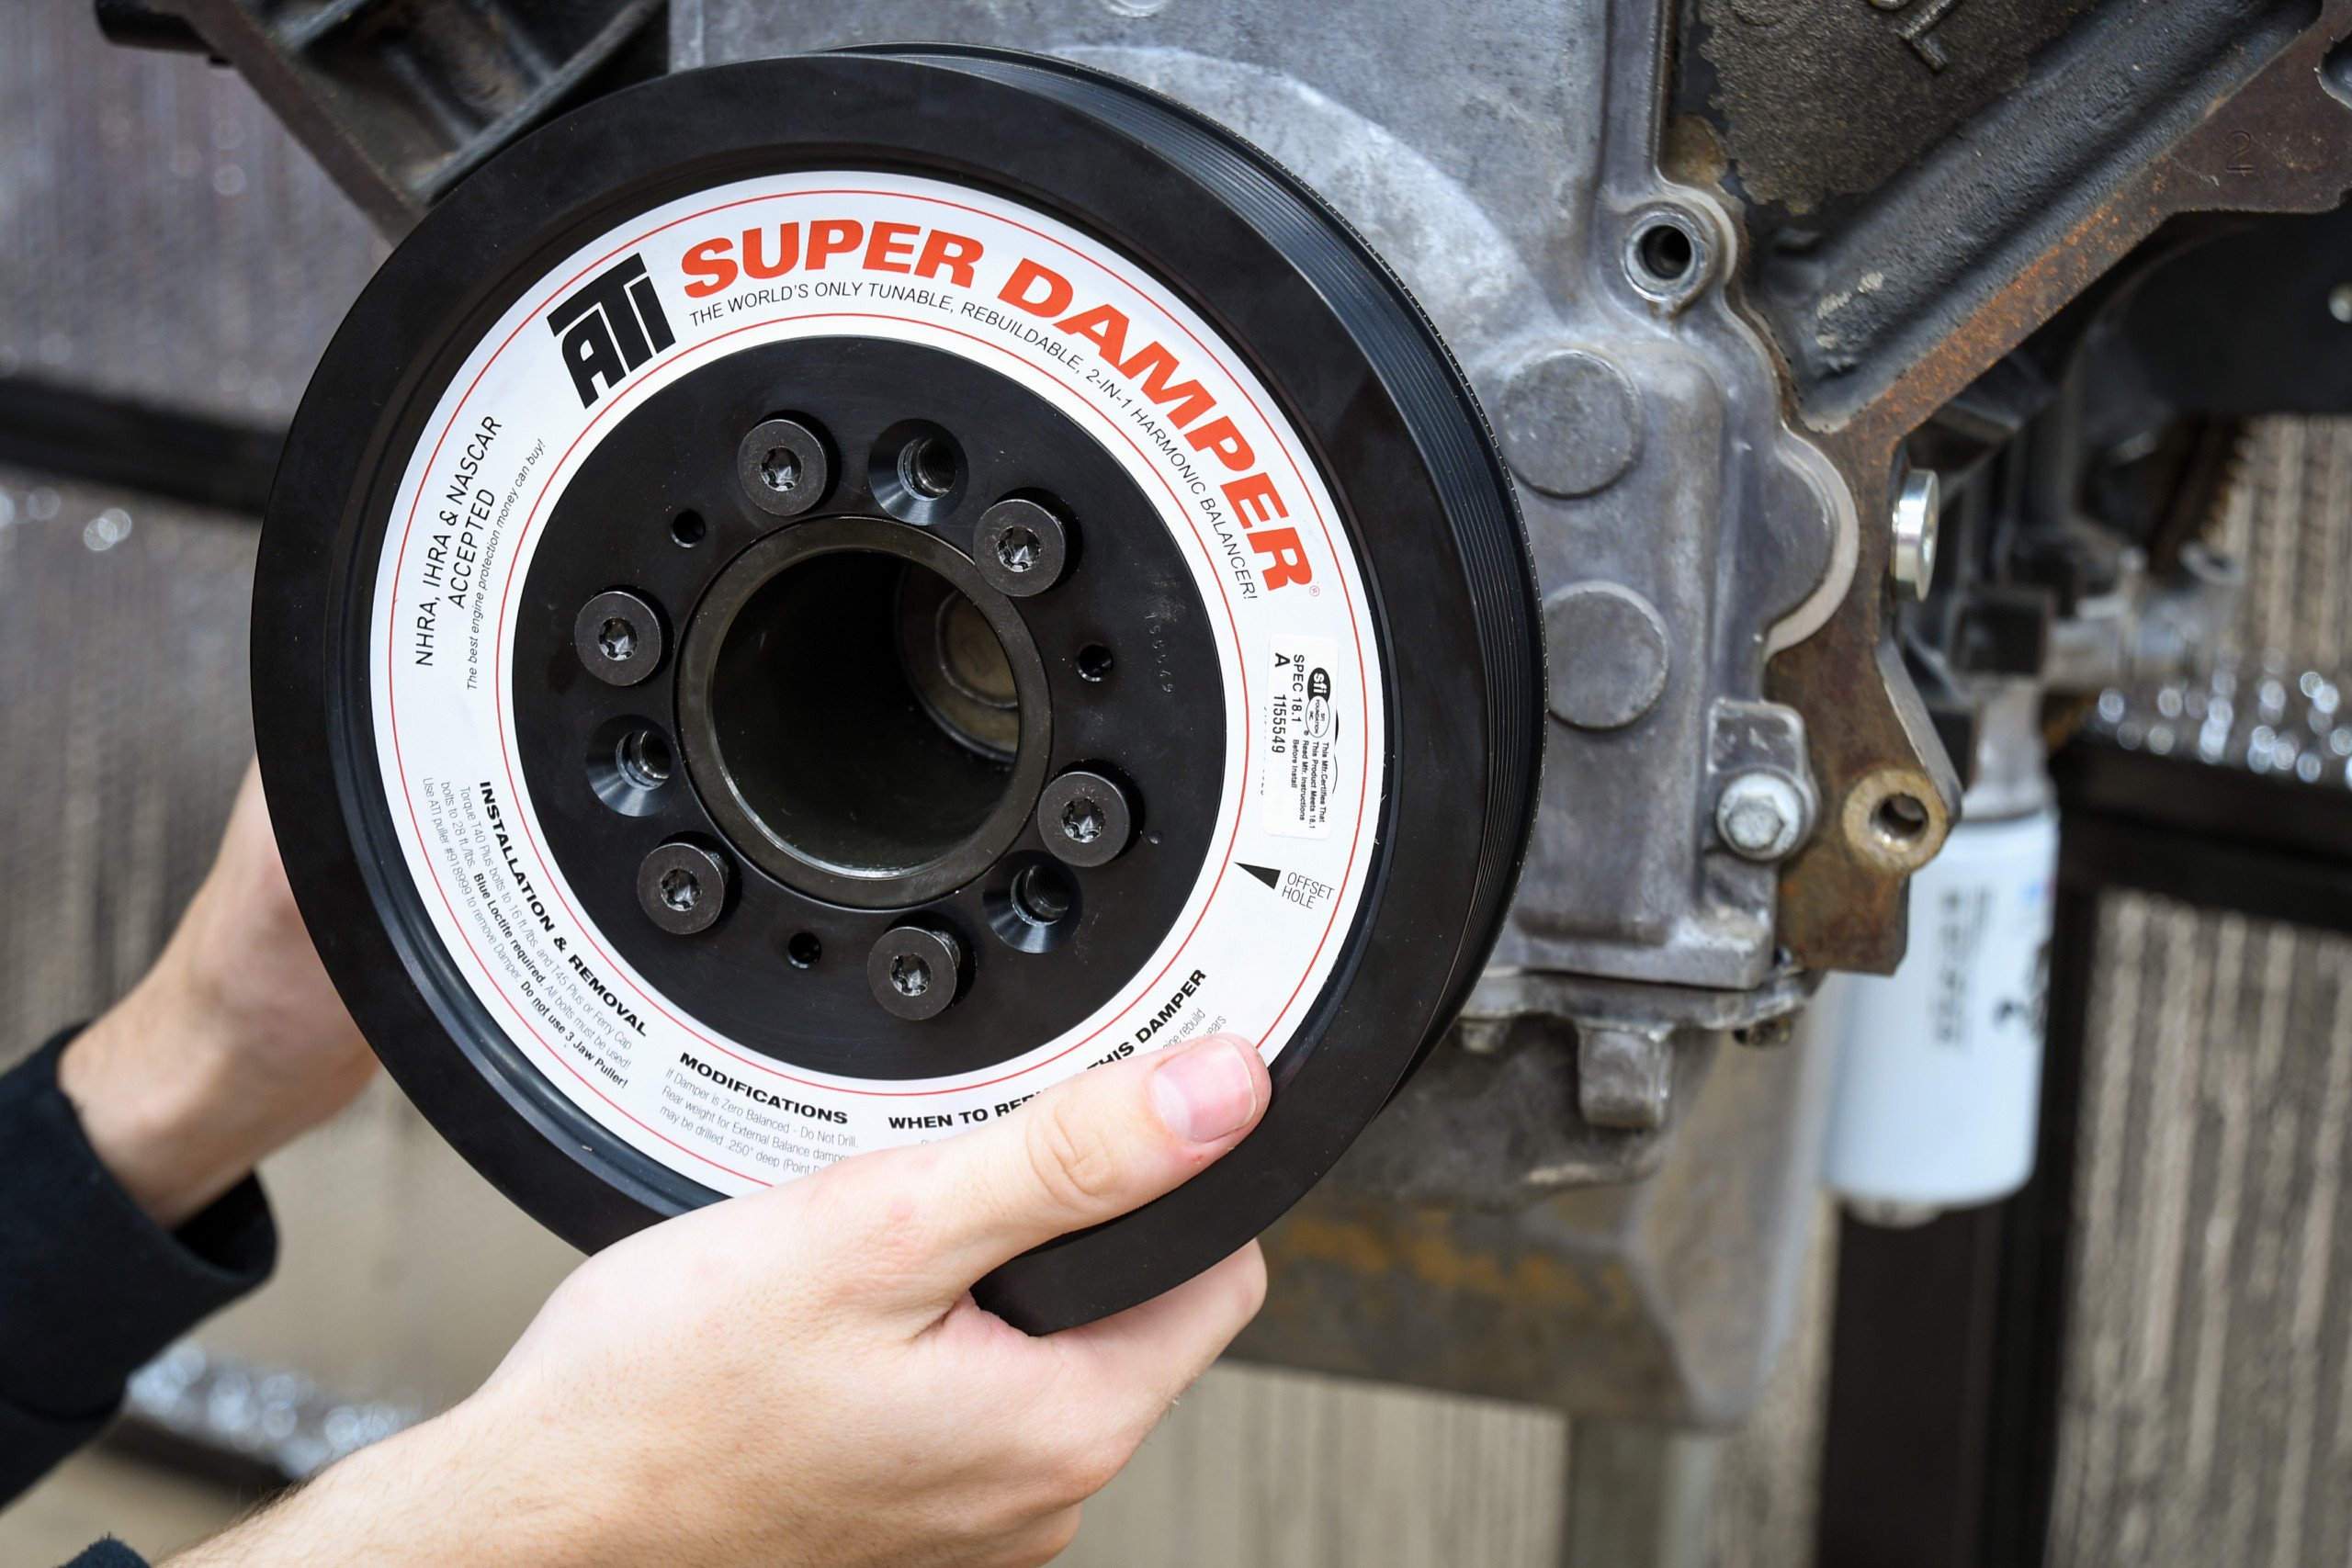
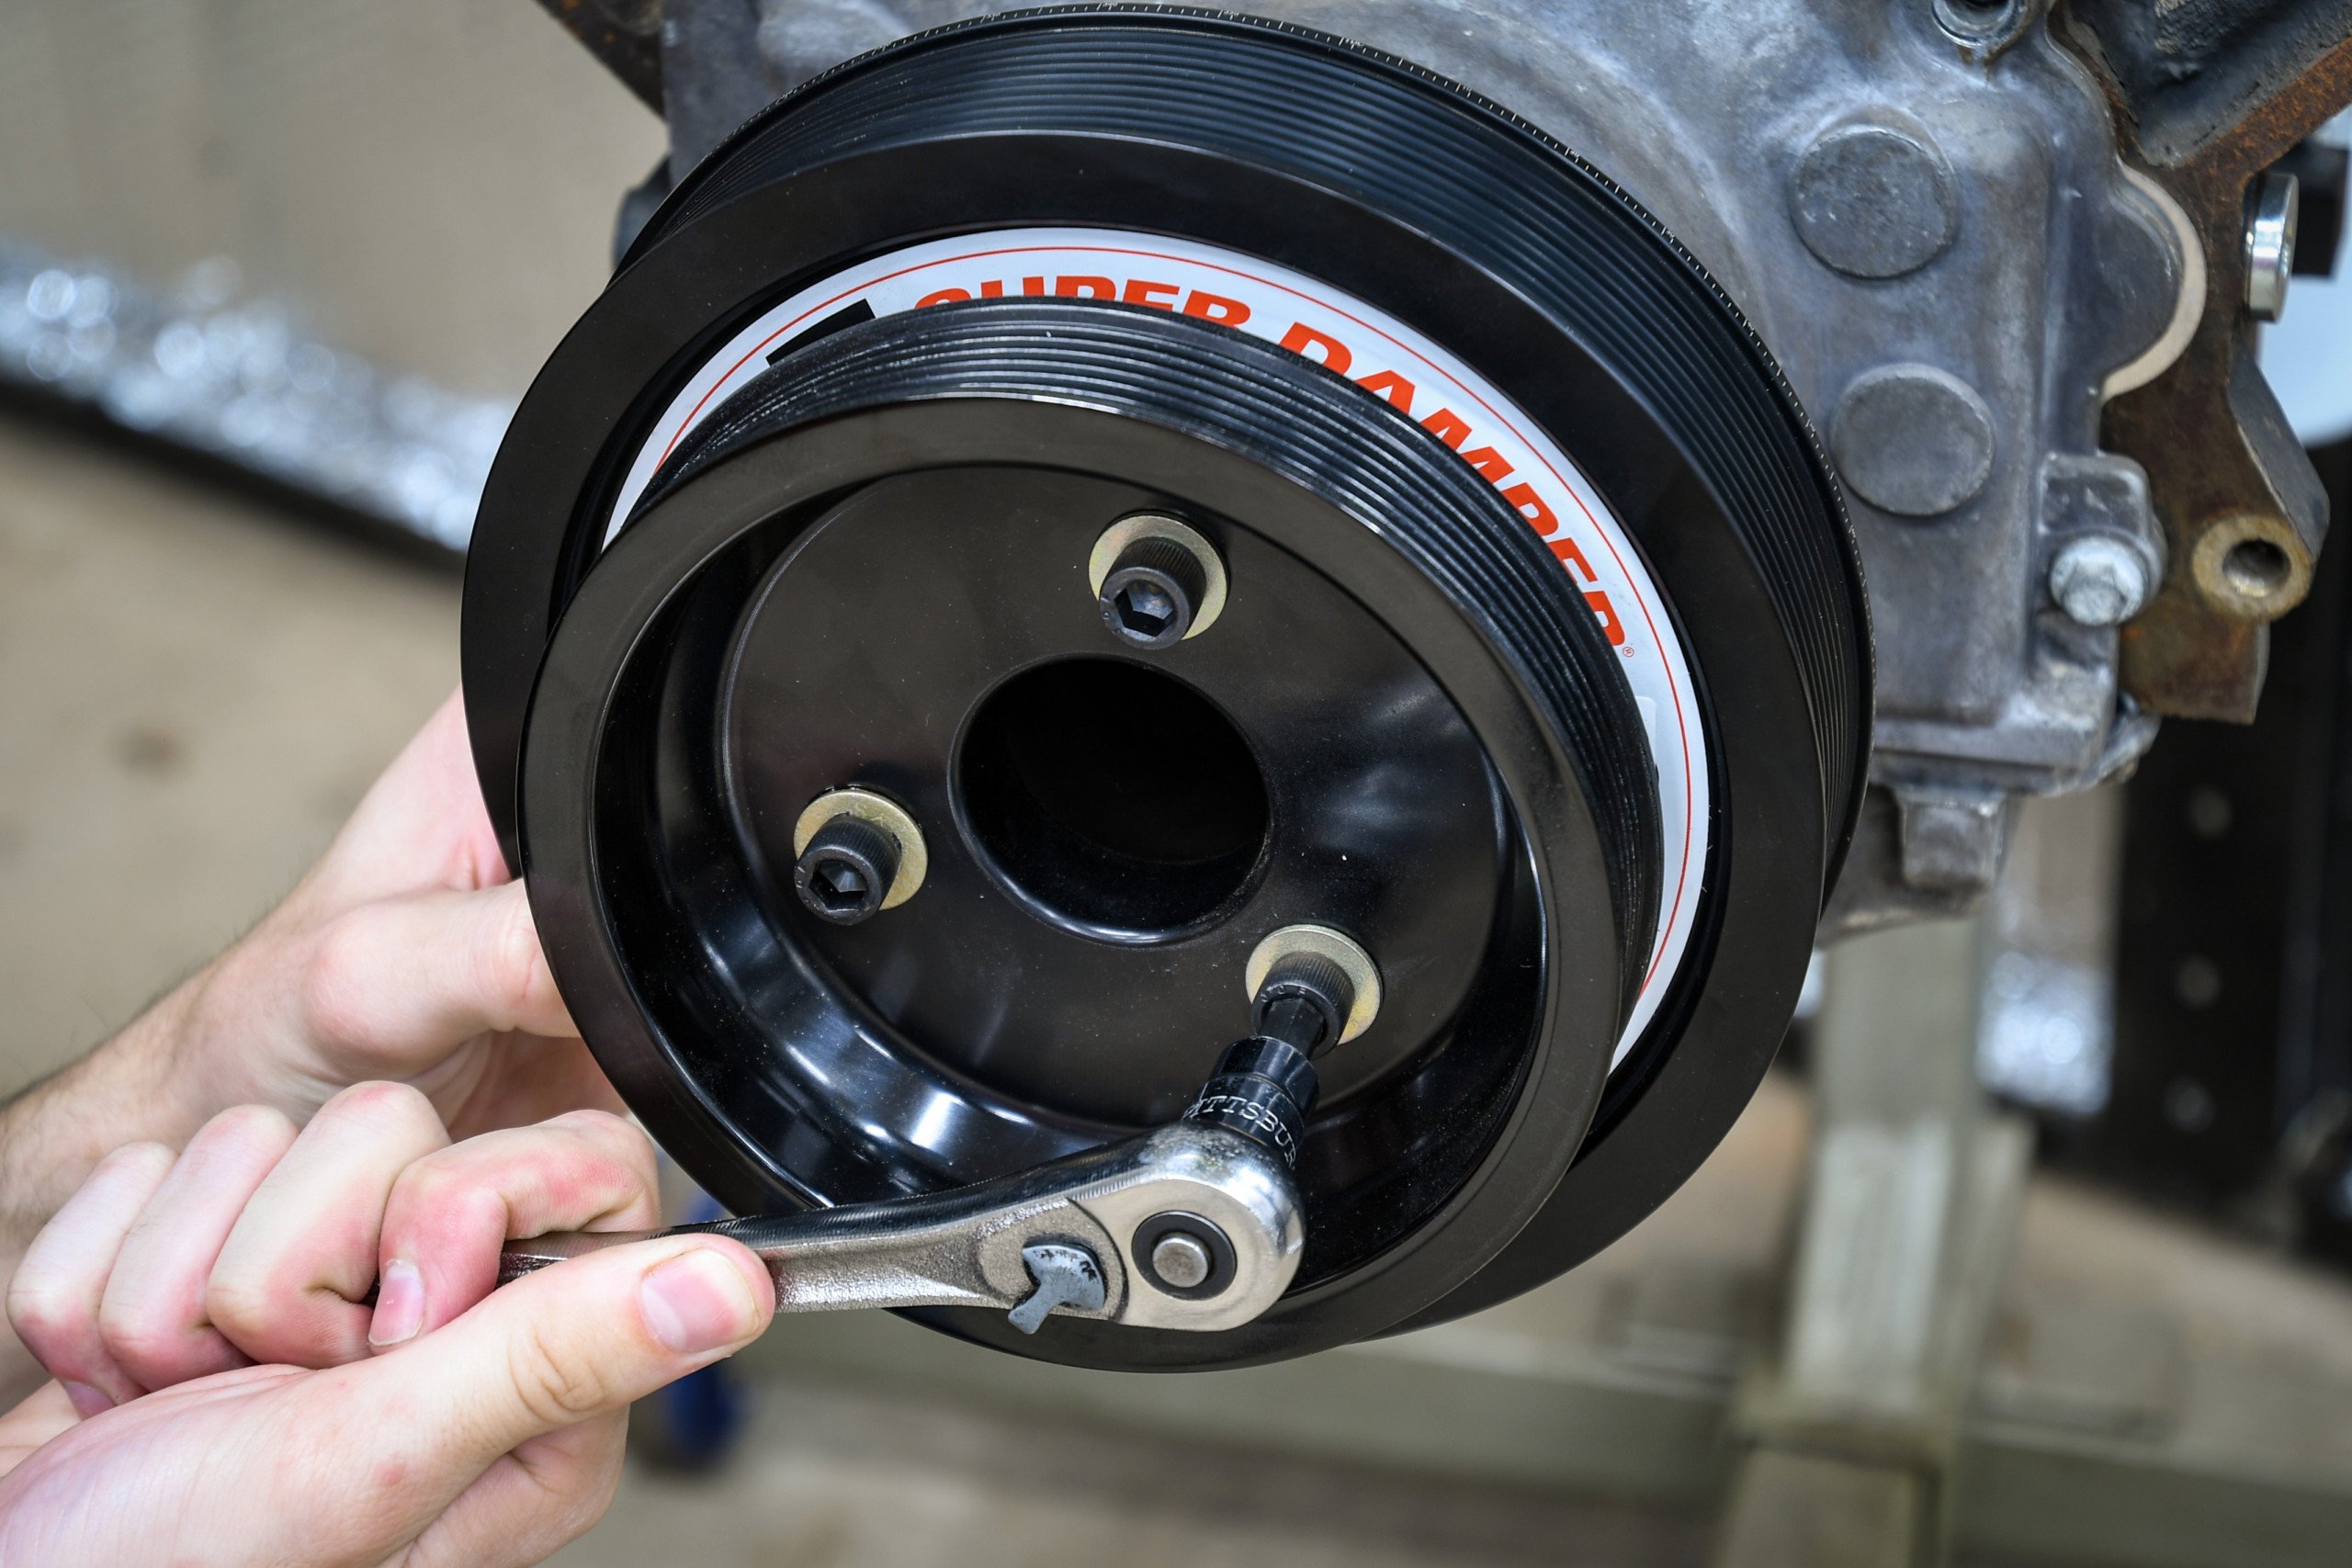
Our first step was to mount the hub to the crankshaft before installing the ATI supercharger damper and the accessory pulley.
Next, we attached the balancer using the supplied bolts with the hub before installing the crank bolt. Here’s one thing to note here. If we were using this crankshaft , we would need to pin the hub or have a machine shop install a double keyway. This process will ensure the balancer will not slip on the snout of the crankshaft when the engine starts making boost.
With the balancer on the crank, we focused on the rest of the installation. Also, we should add that Wegner includes detailed step-by-step instructions for the installation. And that’s a good thing because there are a lot of brackets and hardware for this drive system. So If you open everything up, make sure you don’t get the hardware mixed up. Ask us how we know.
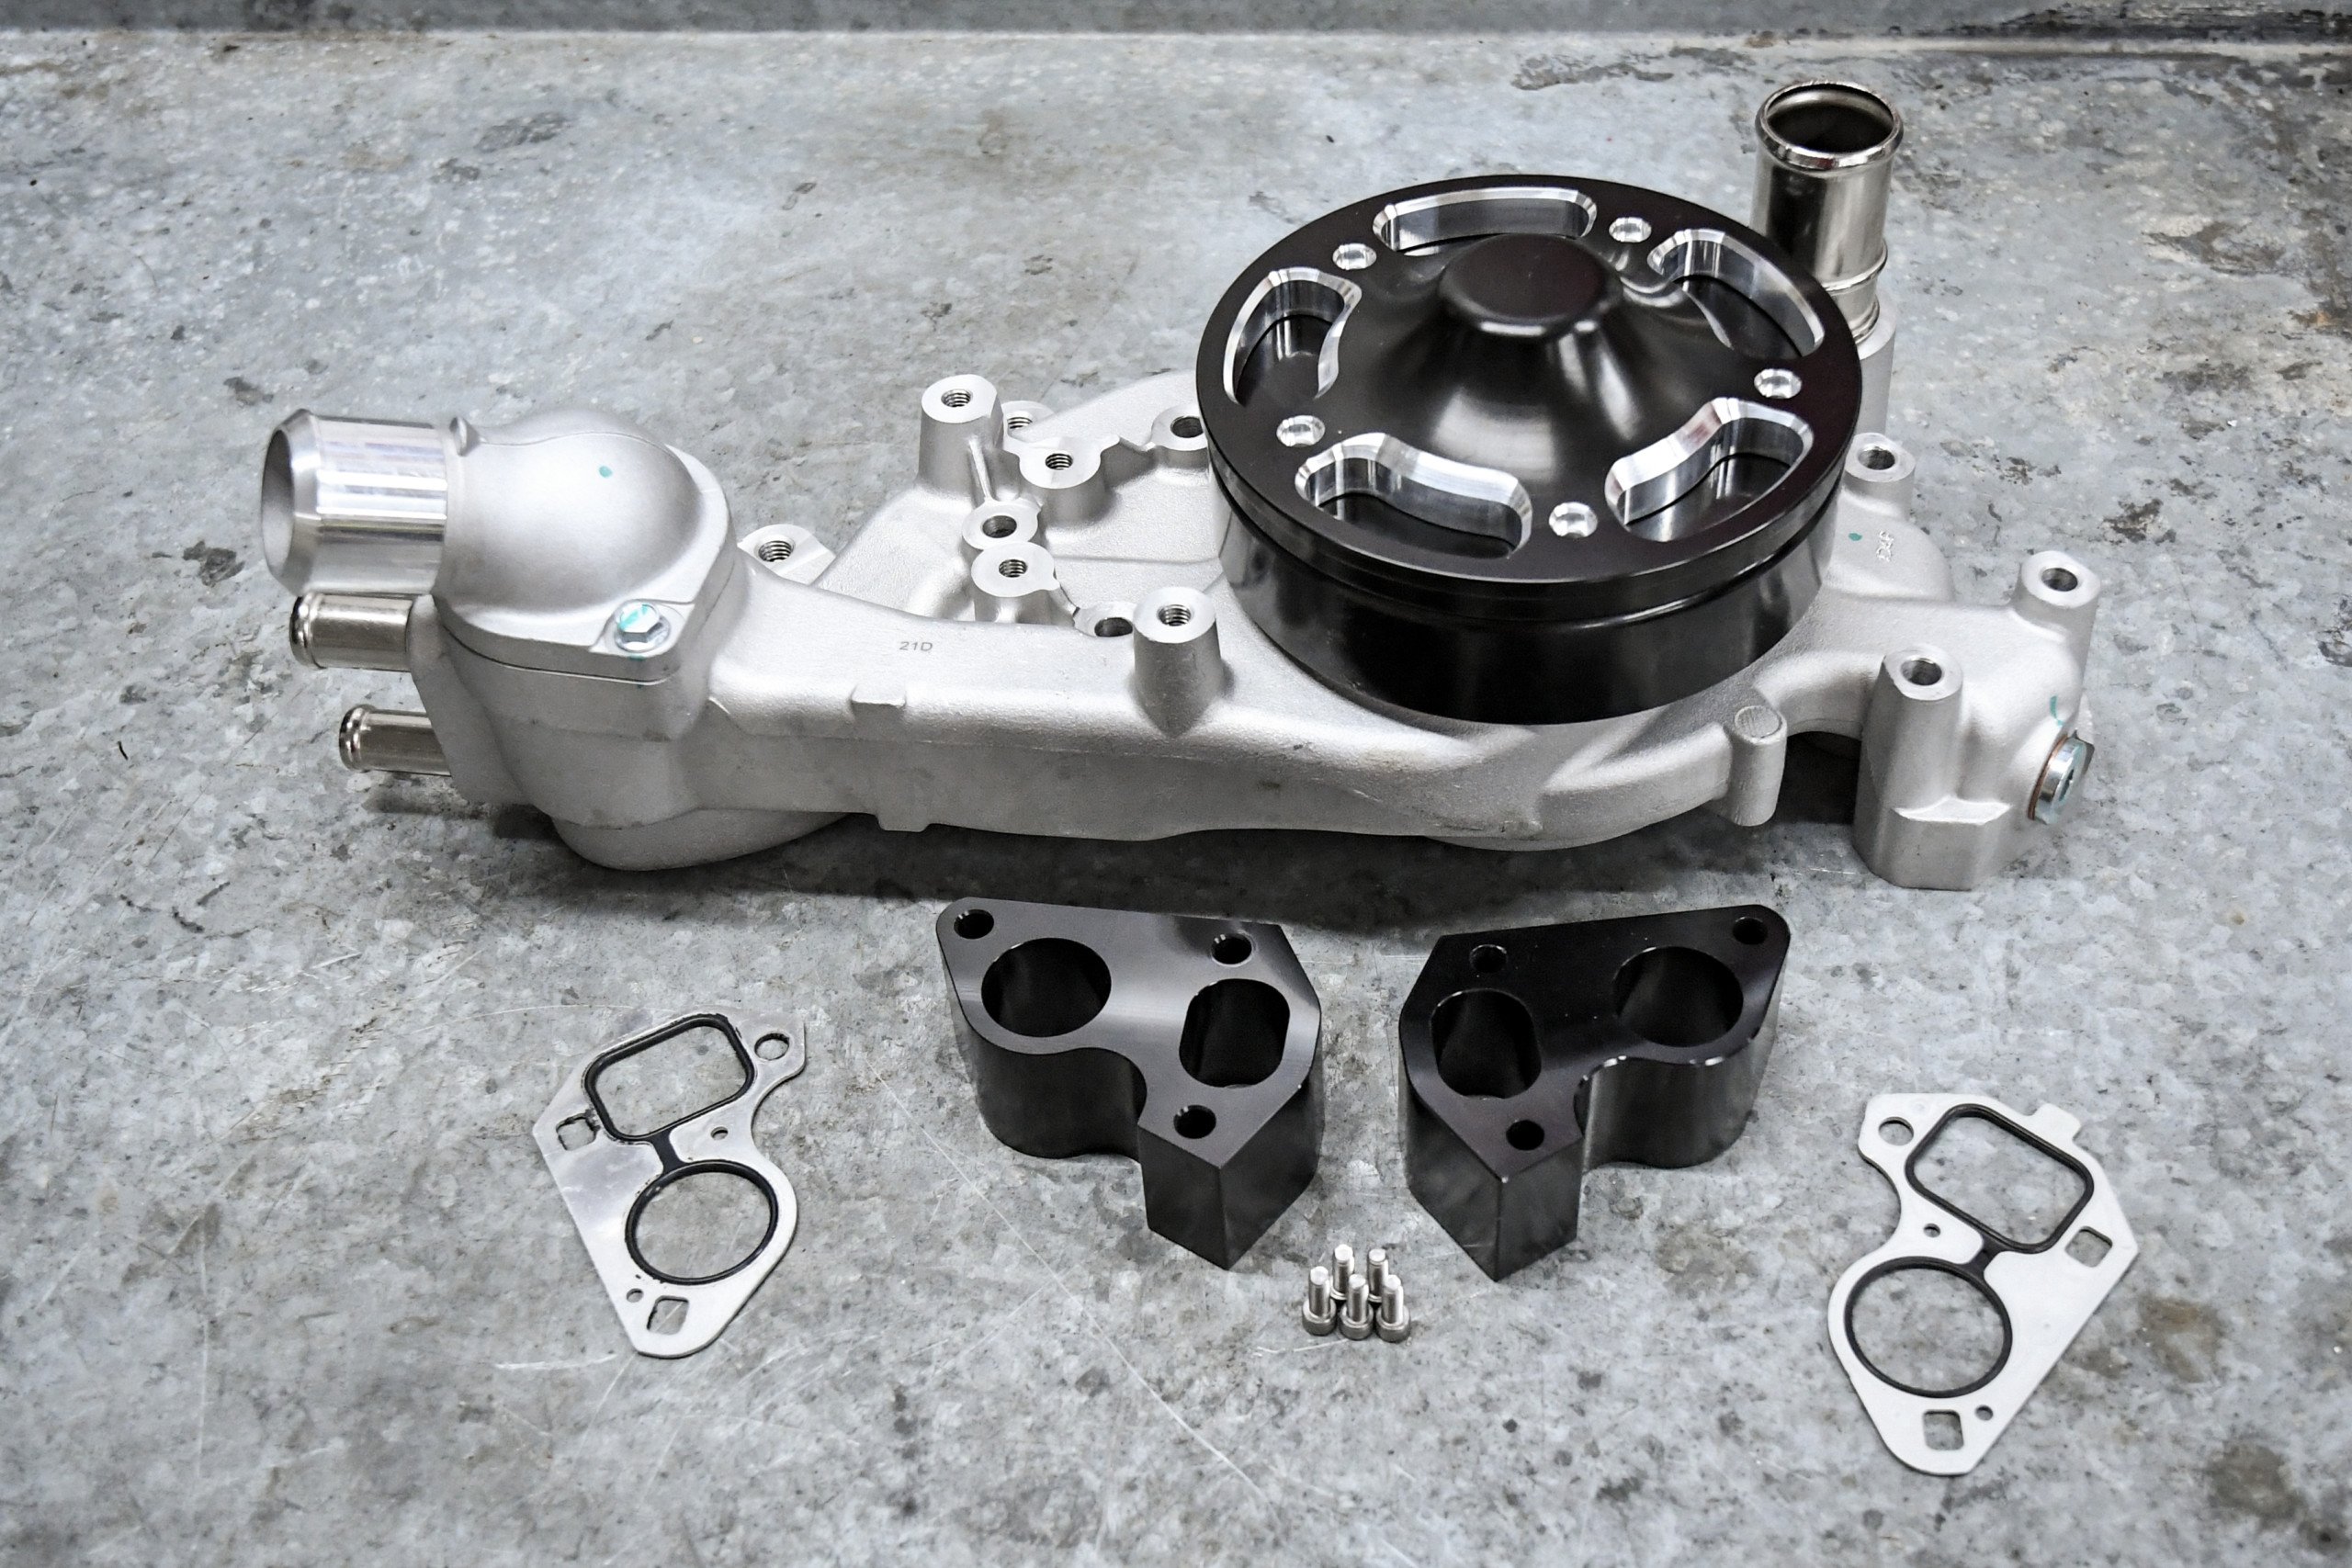
Wegner includes a new water pump, billet aluminum spacers, gaskets, and all the hardware.
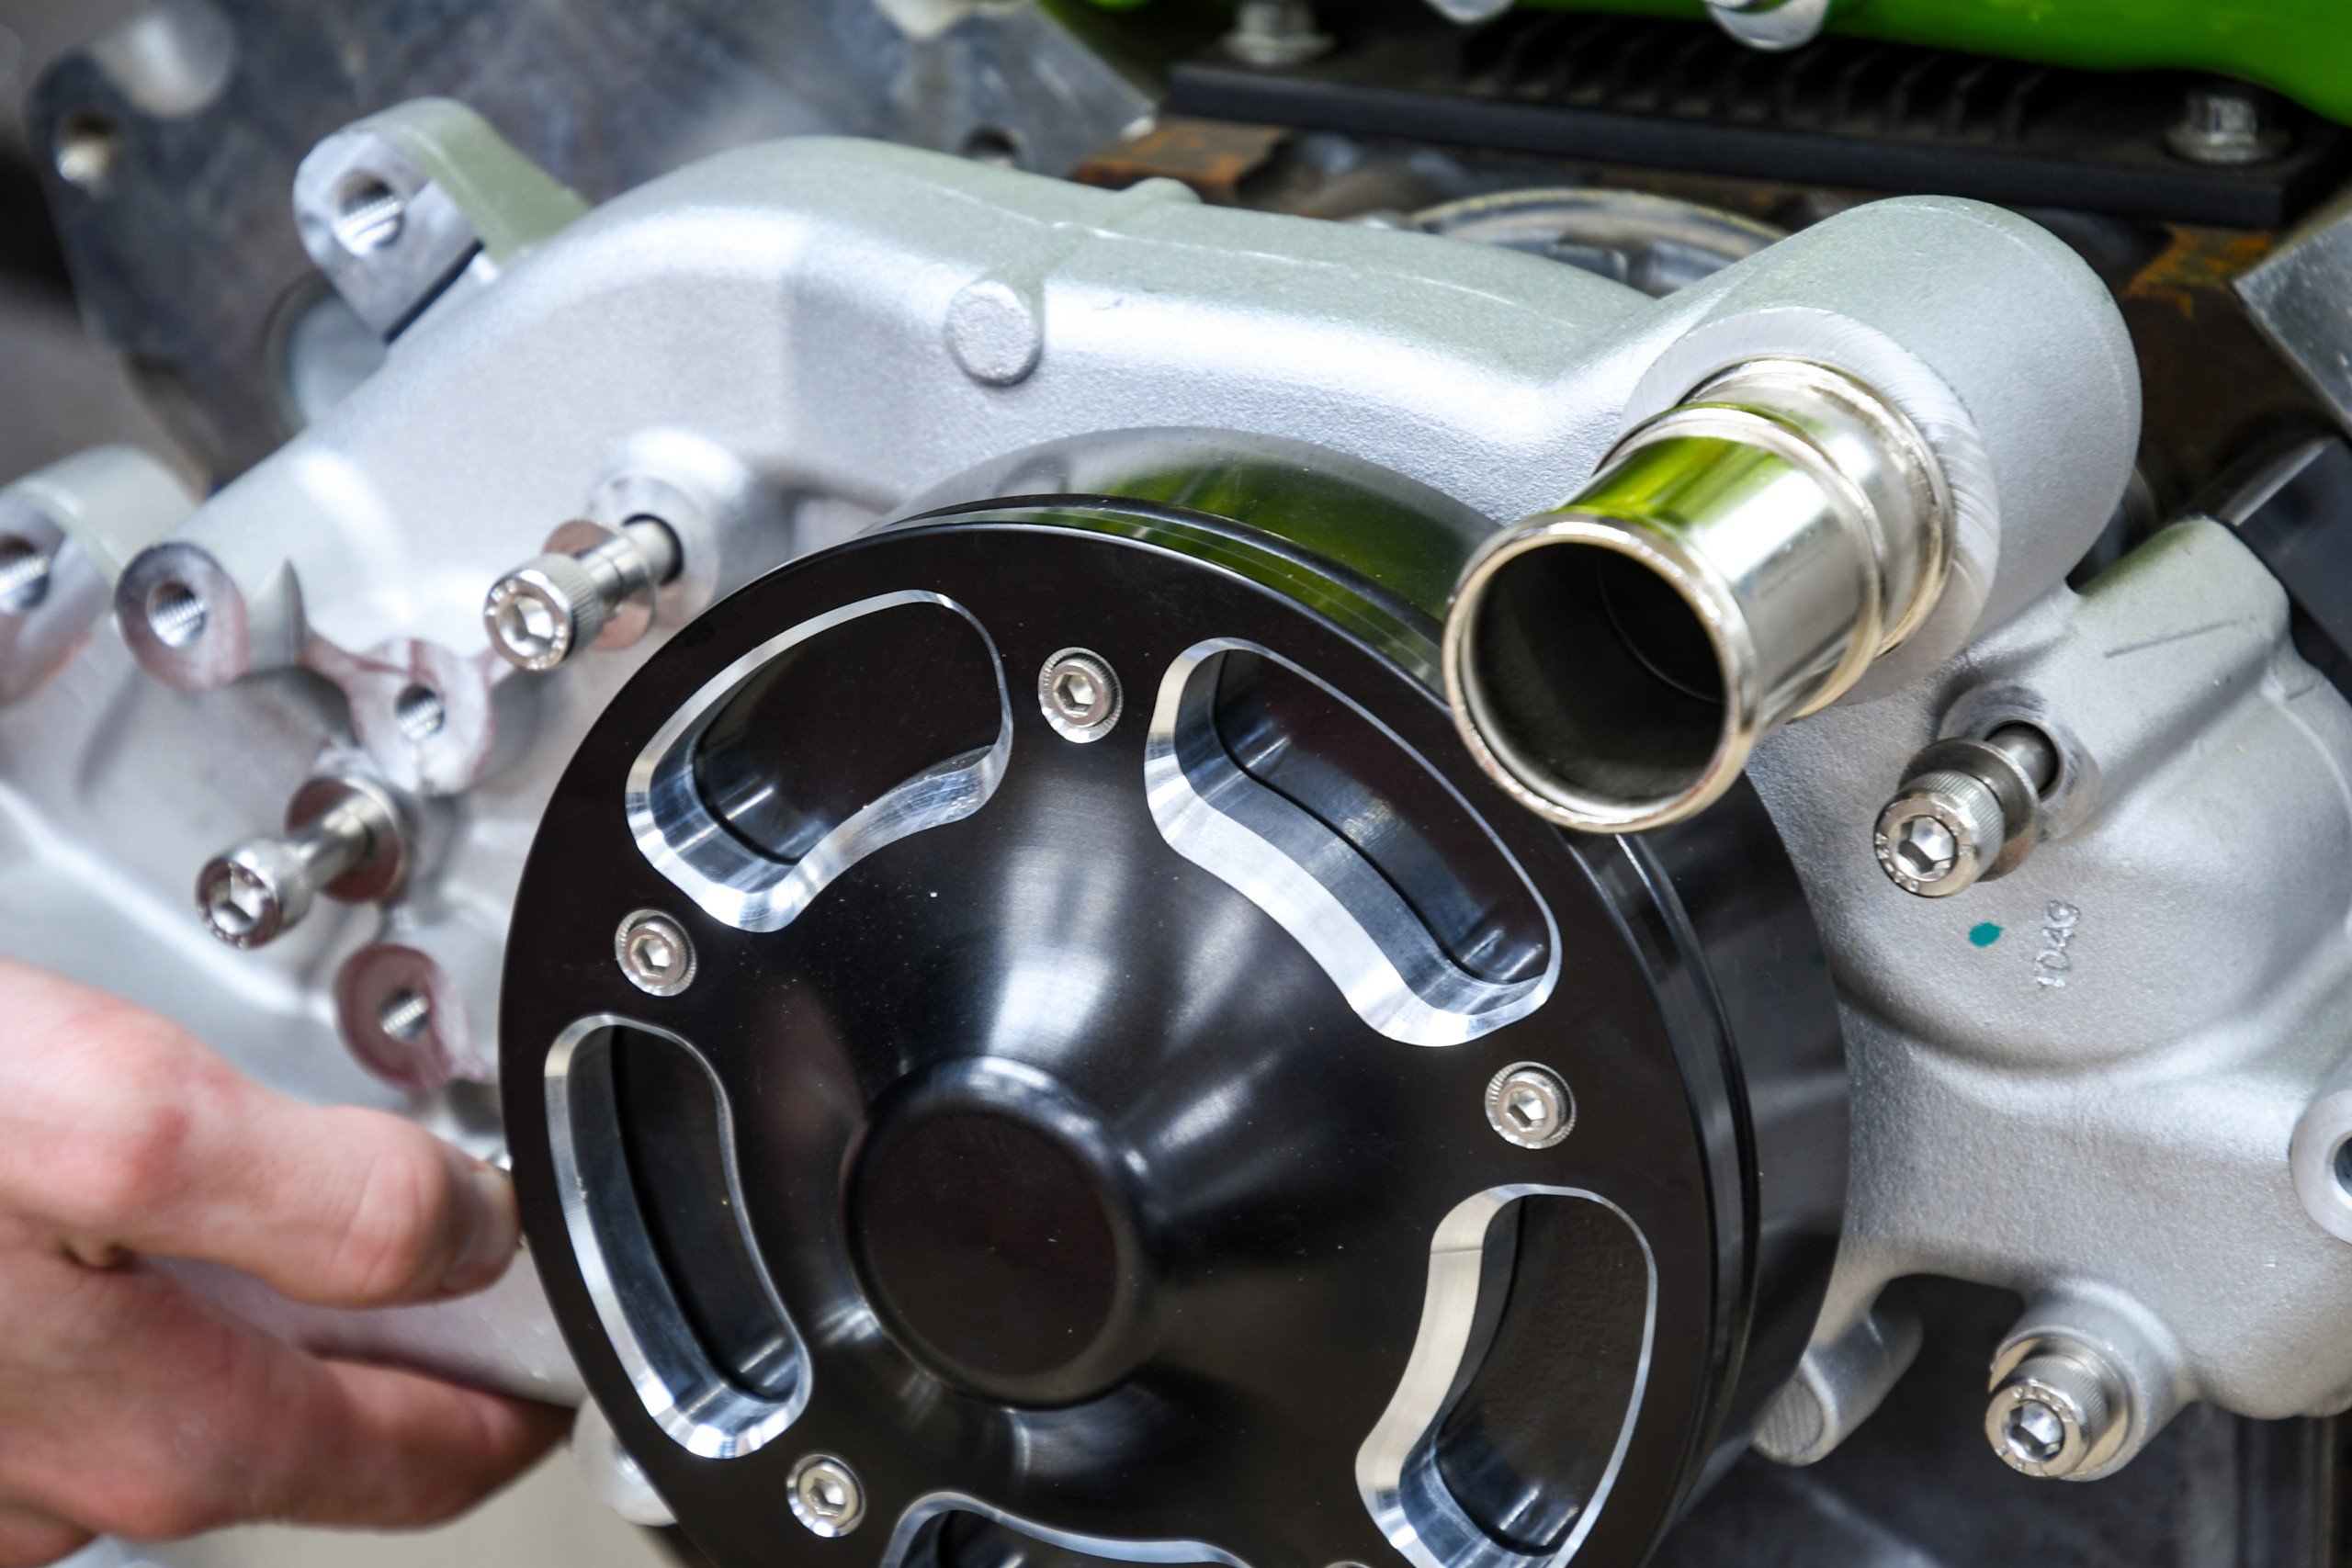
Next, we started with the new water pump and mounted it using the supplied gaskets, hardware, spacers, thermostat, and housing. With the water pump attached, it was finally time to assemble the ten-rib supercharger drive.
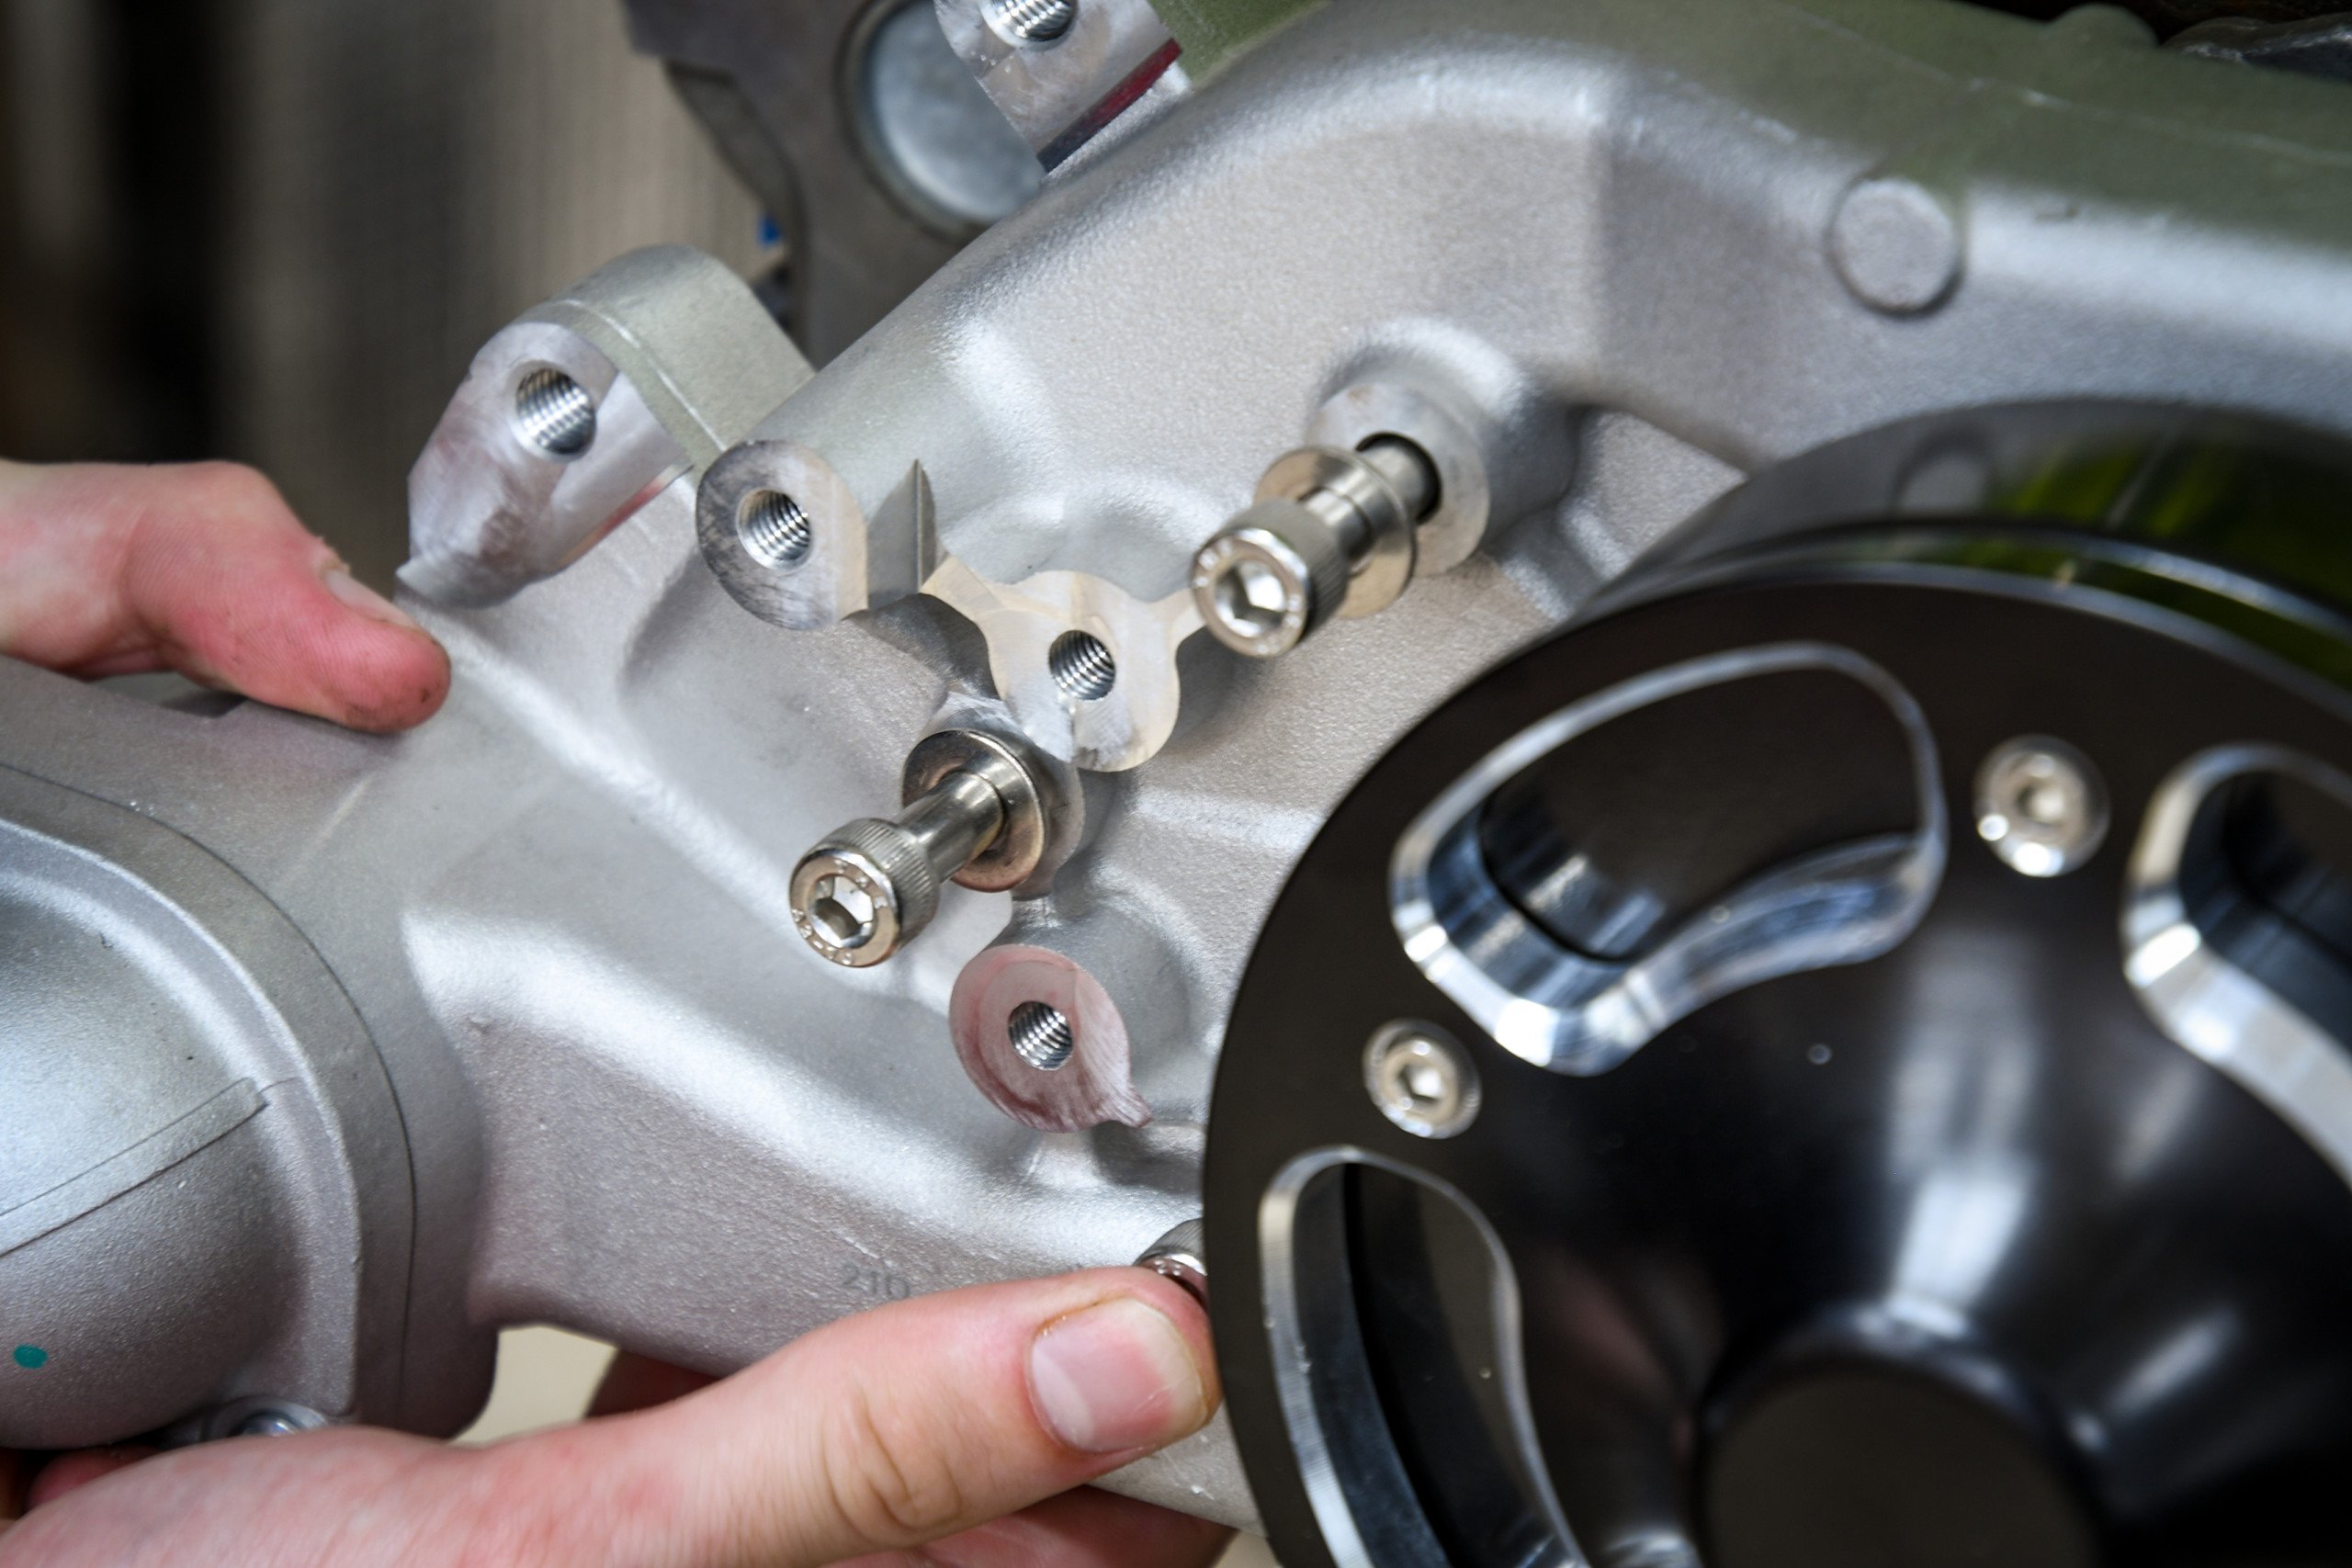
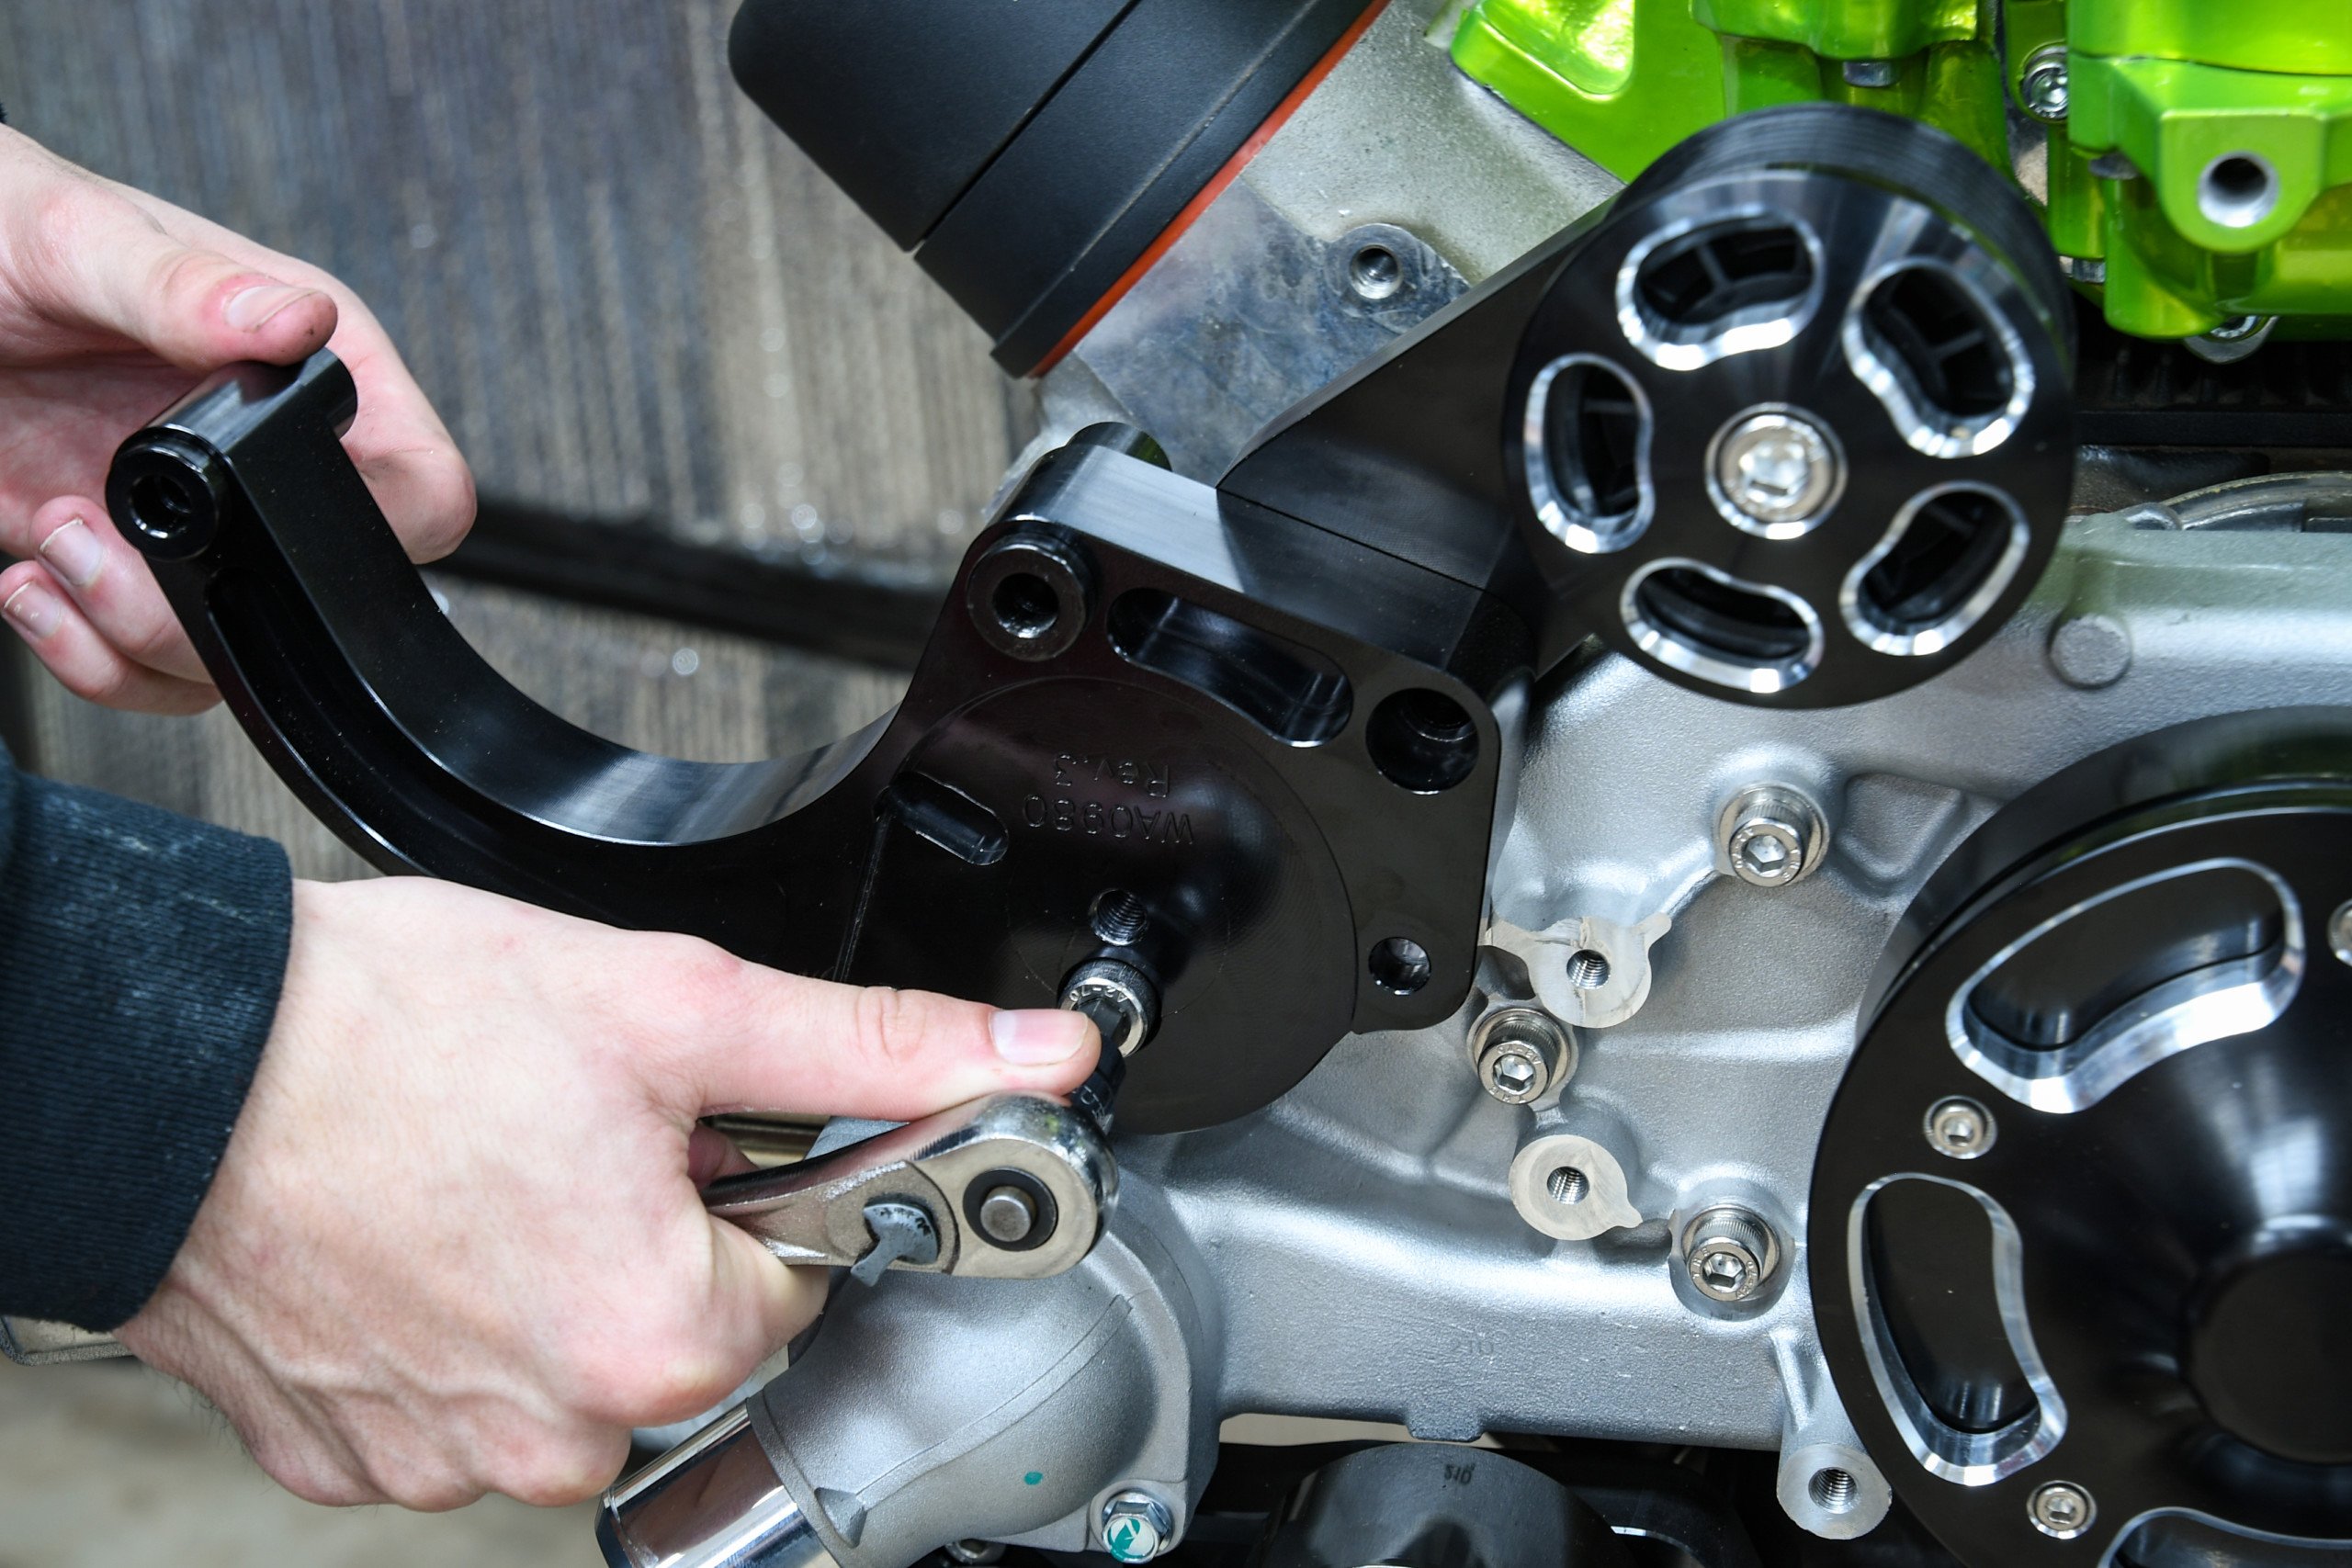
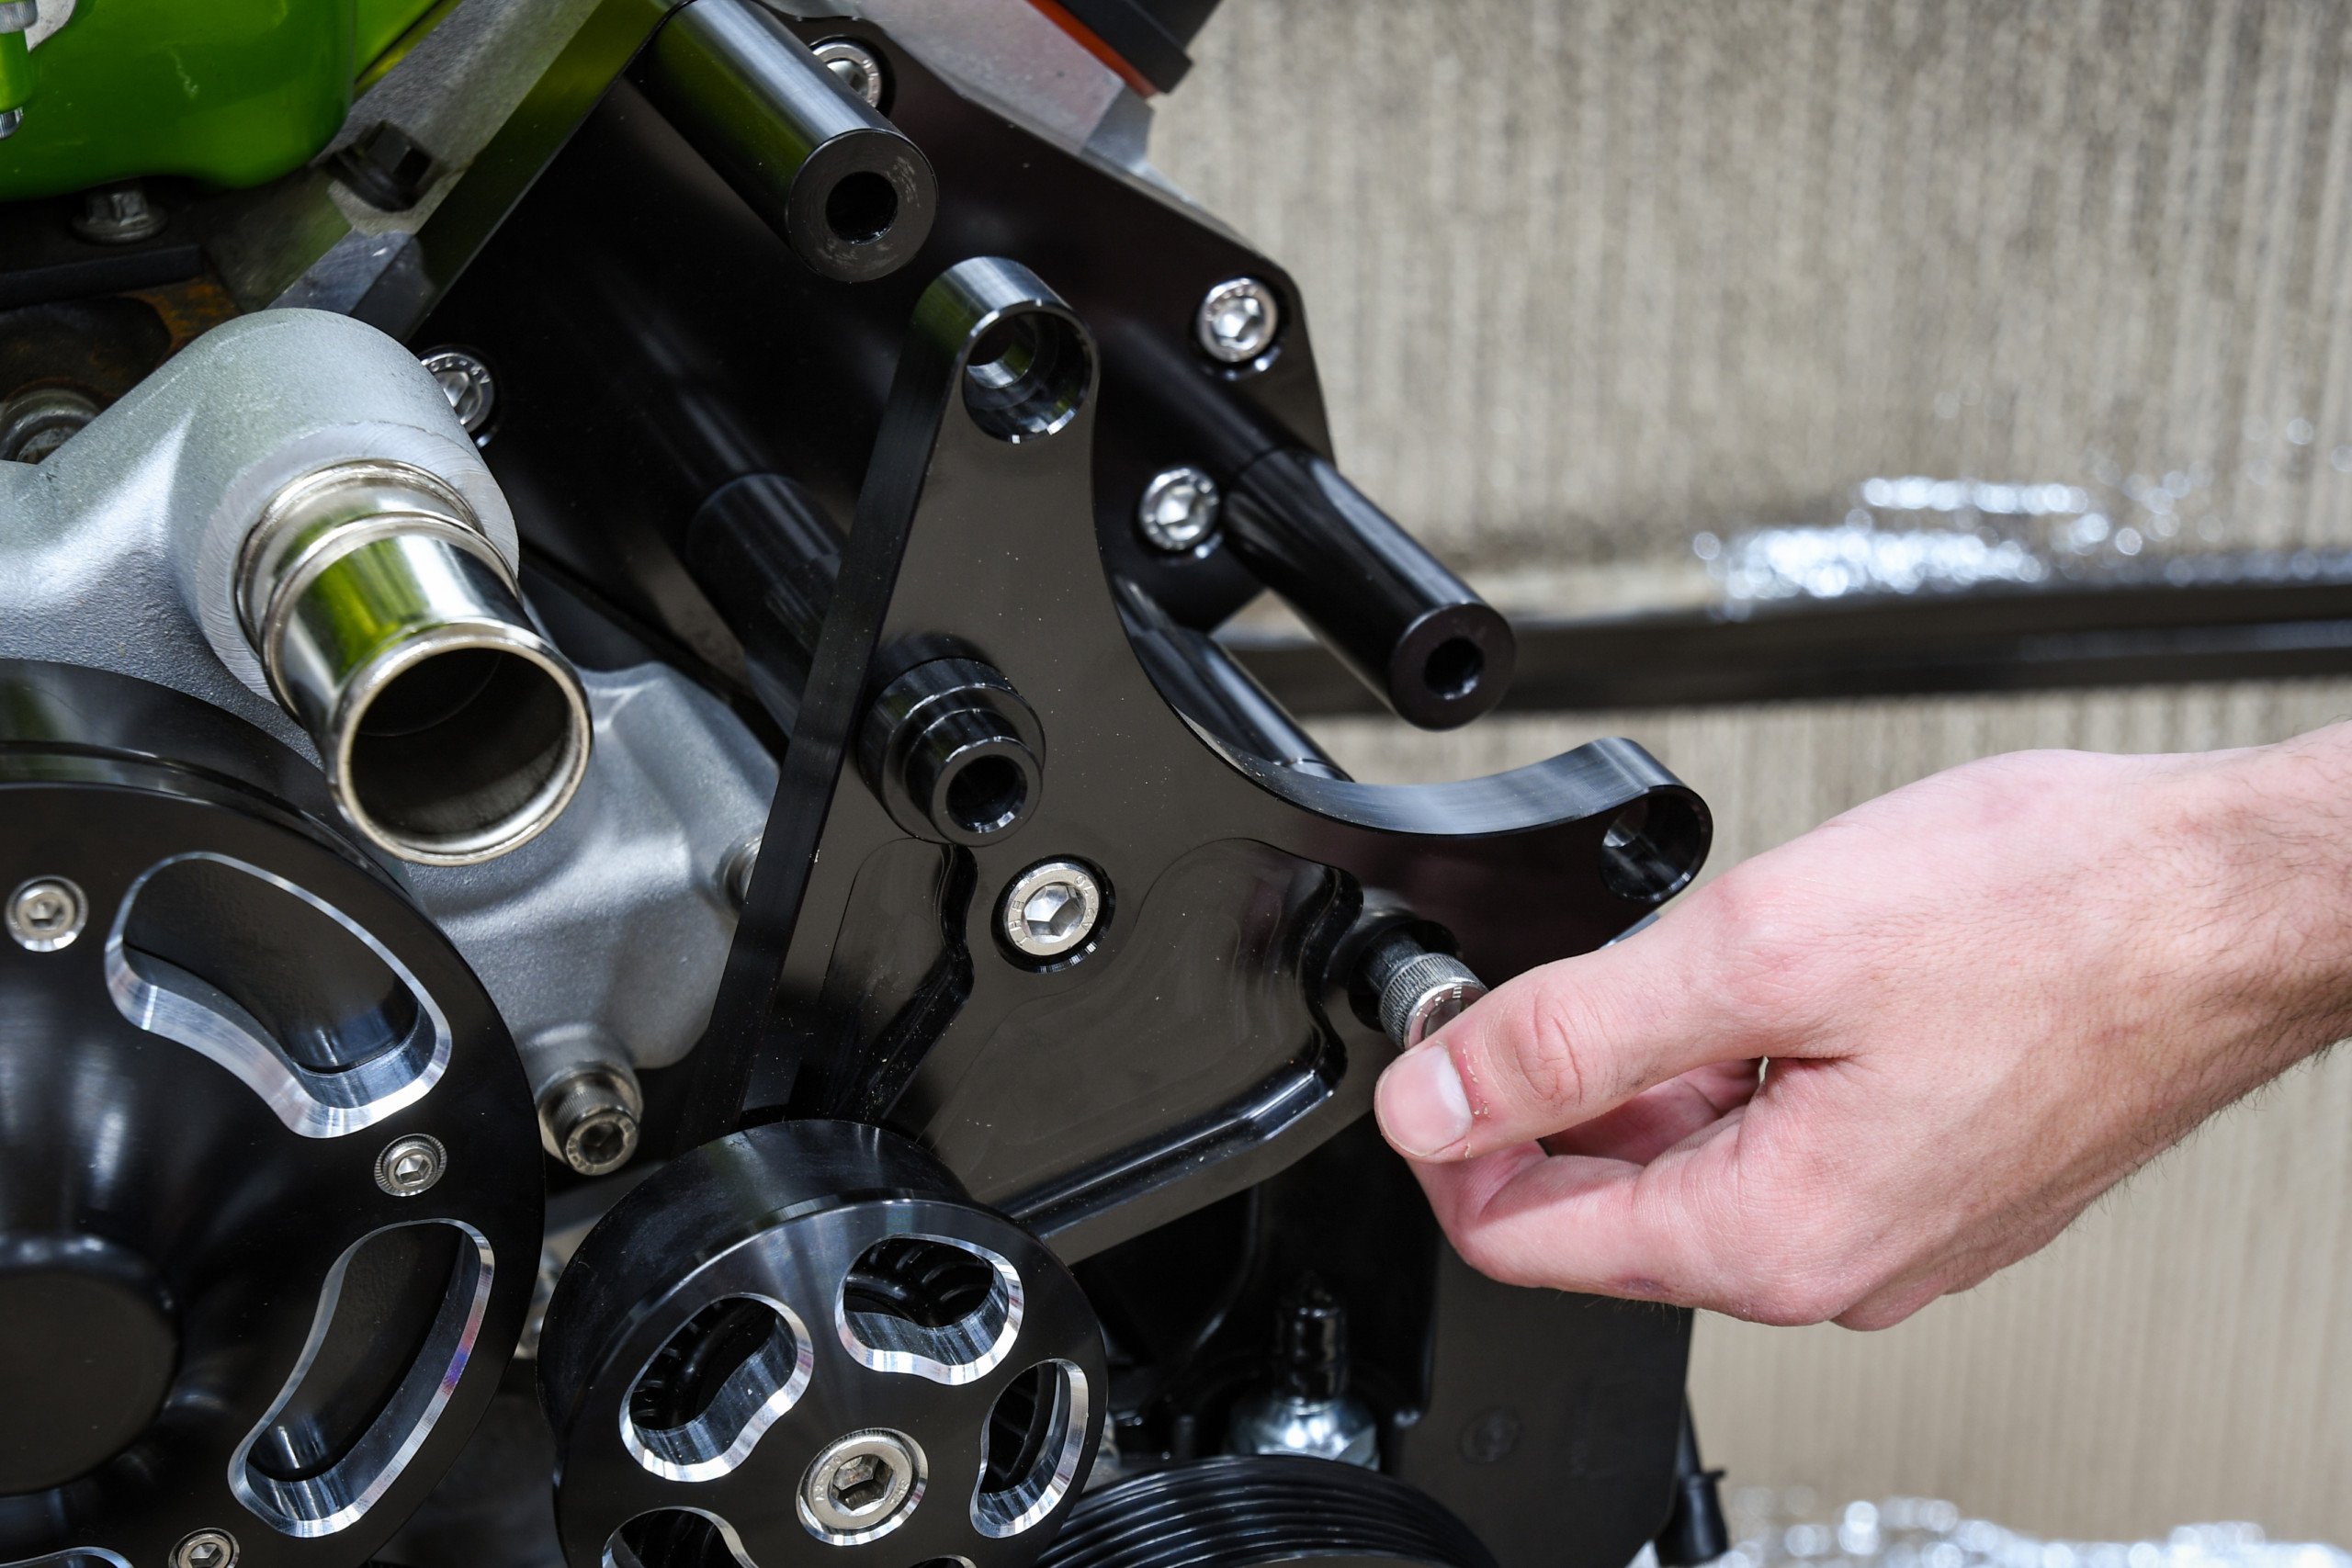
For the supercharger side of things, Wegner supplies some seriously stout brackets that guarantee against failure due to the added stress of a supercharger. First, we bolted two brackets to the engine block before installing a massive supercharger belt tensioner. Next, we installed the idler pully and cap before moving on to the A/C brackets and compressor.
With the water pump attached, we turned out attention to the supercharger idler pulley, brackets, and the massive ten-rib tensioner.
The A/C consists of three brackets, one for the upper supercharger idler, a compressor bracket, and a stiffener bracket that connects to the water pump. With all three attached, we then mounted the compressor with the supplied hardware. After that, the only thing left to do was install the supercharger idler and cover.
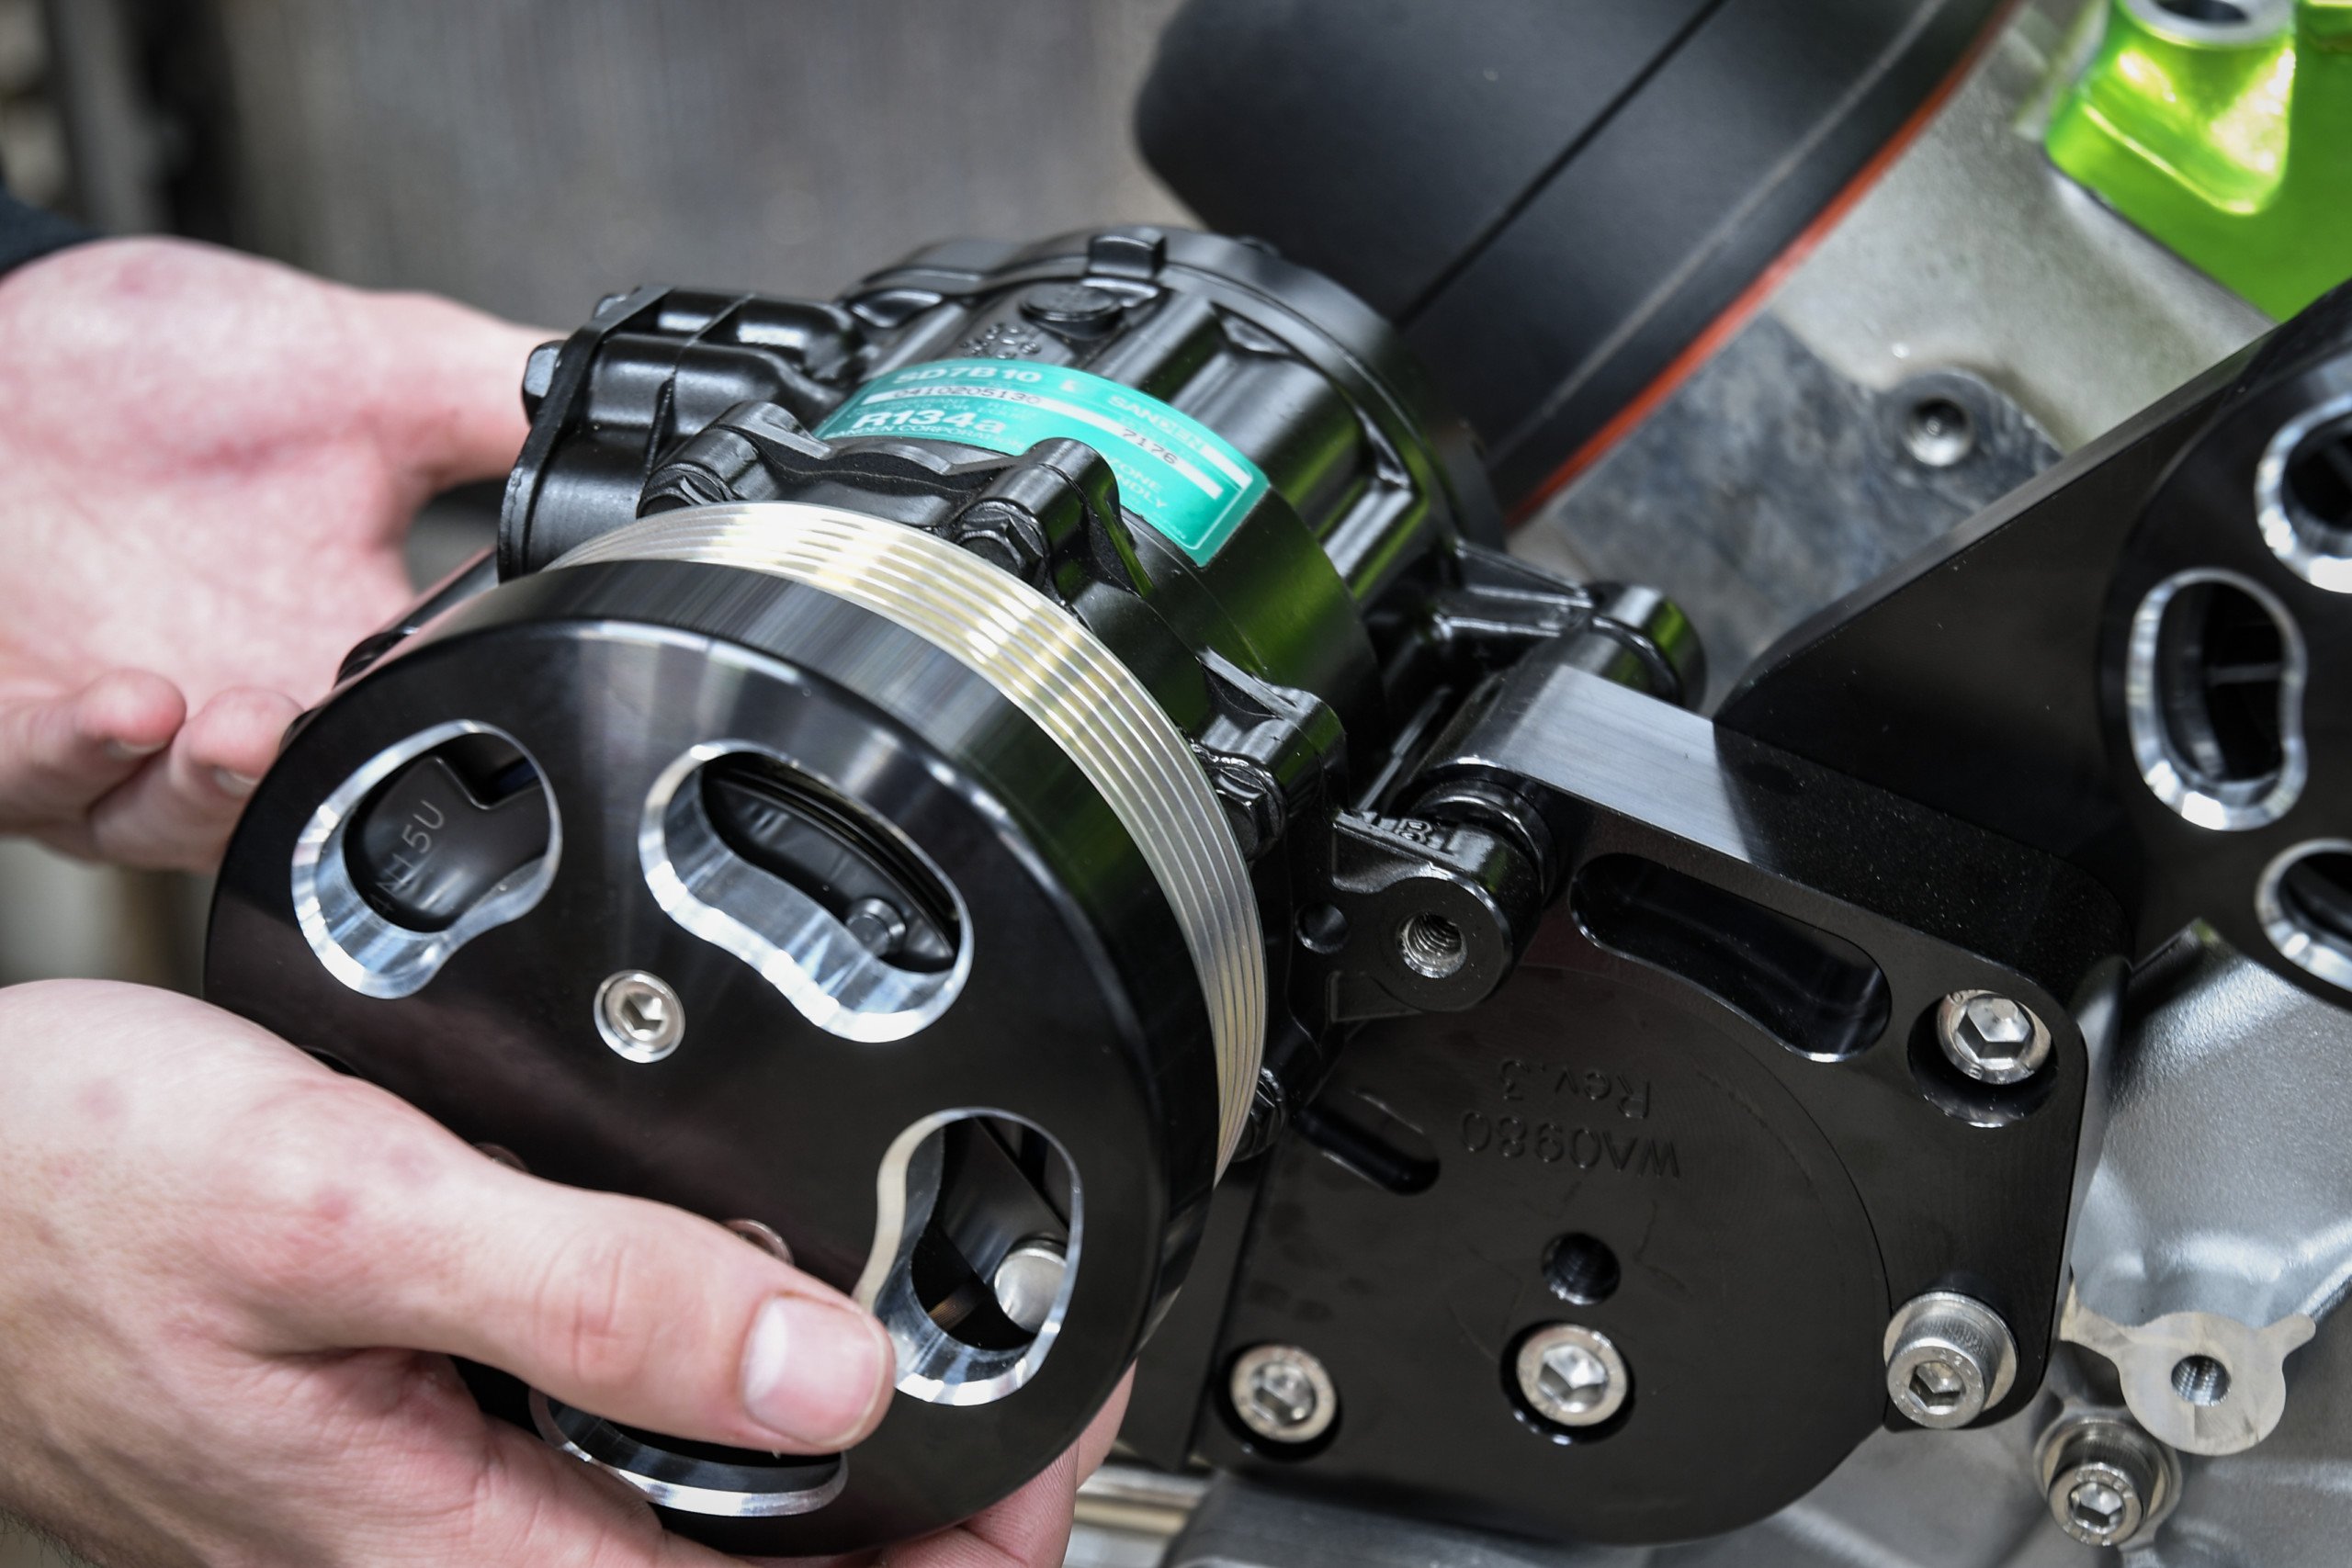
Since we like A/C down here in the south, we had to have it for this build. Wegner does a terrific job incorporating the Sanden compressor into its front drive.
The “Hard” Part
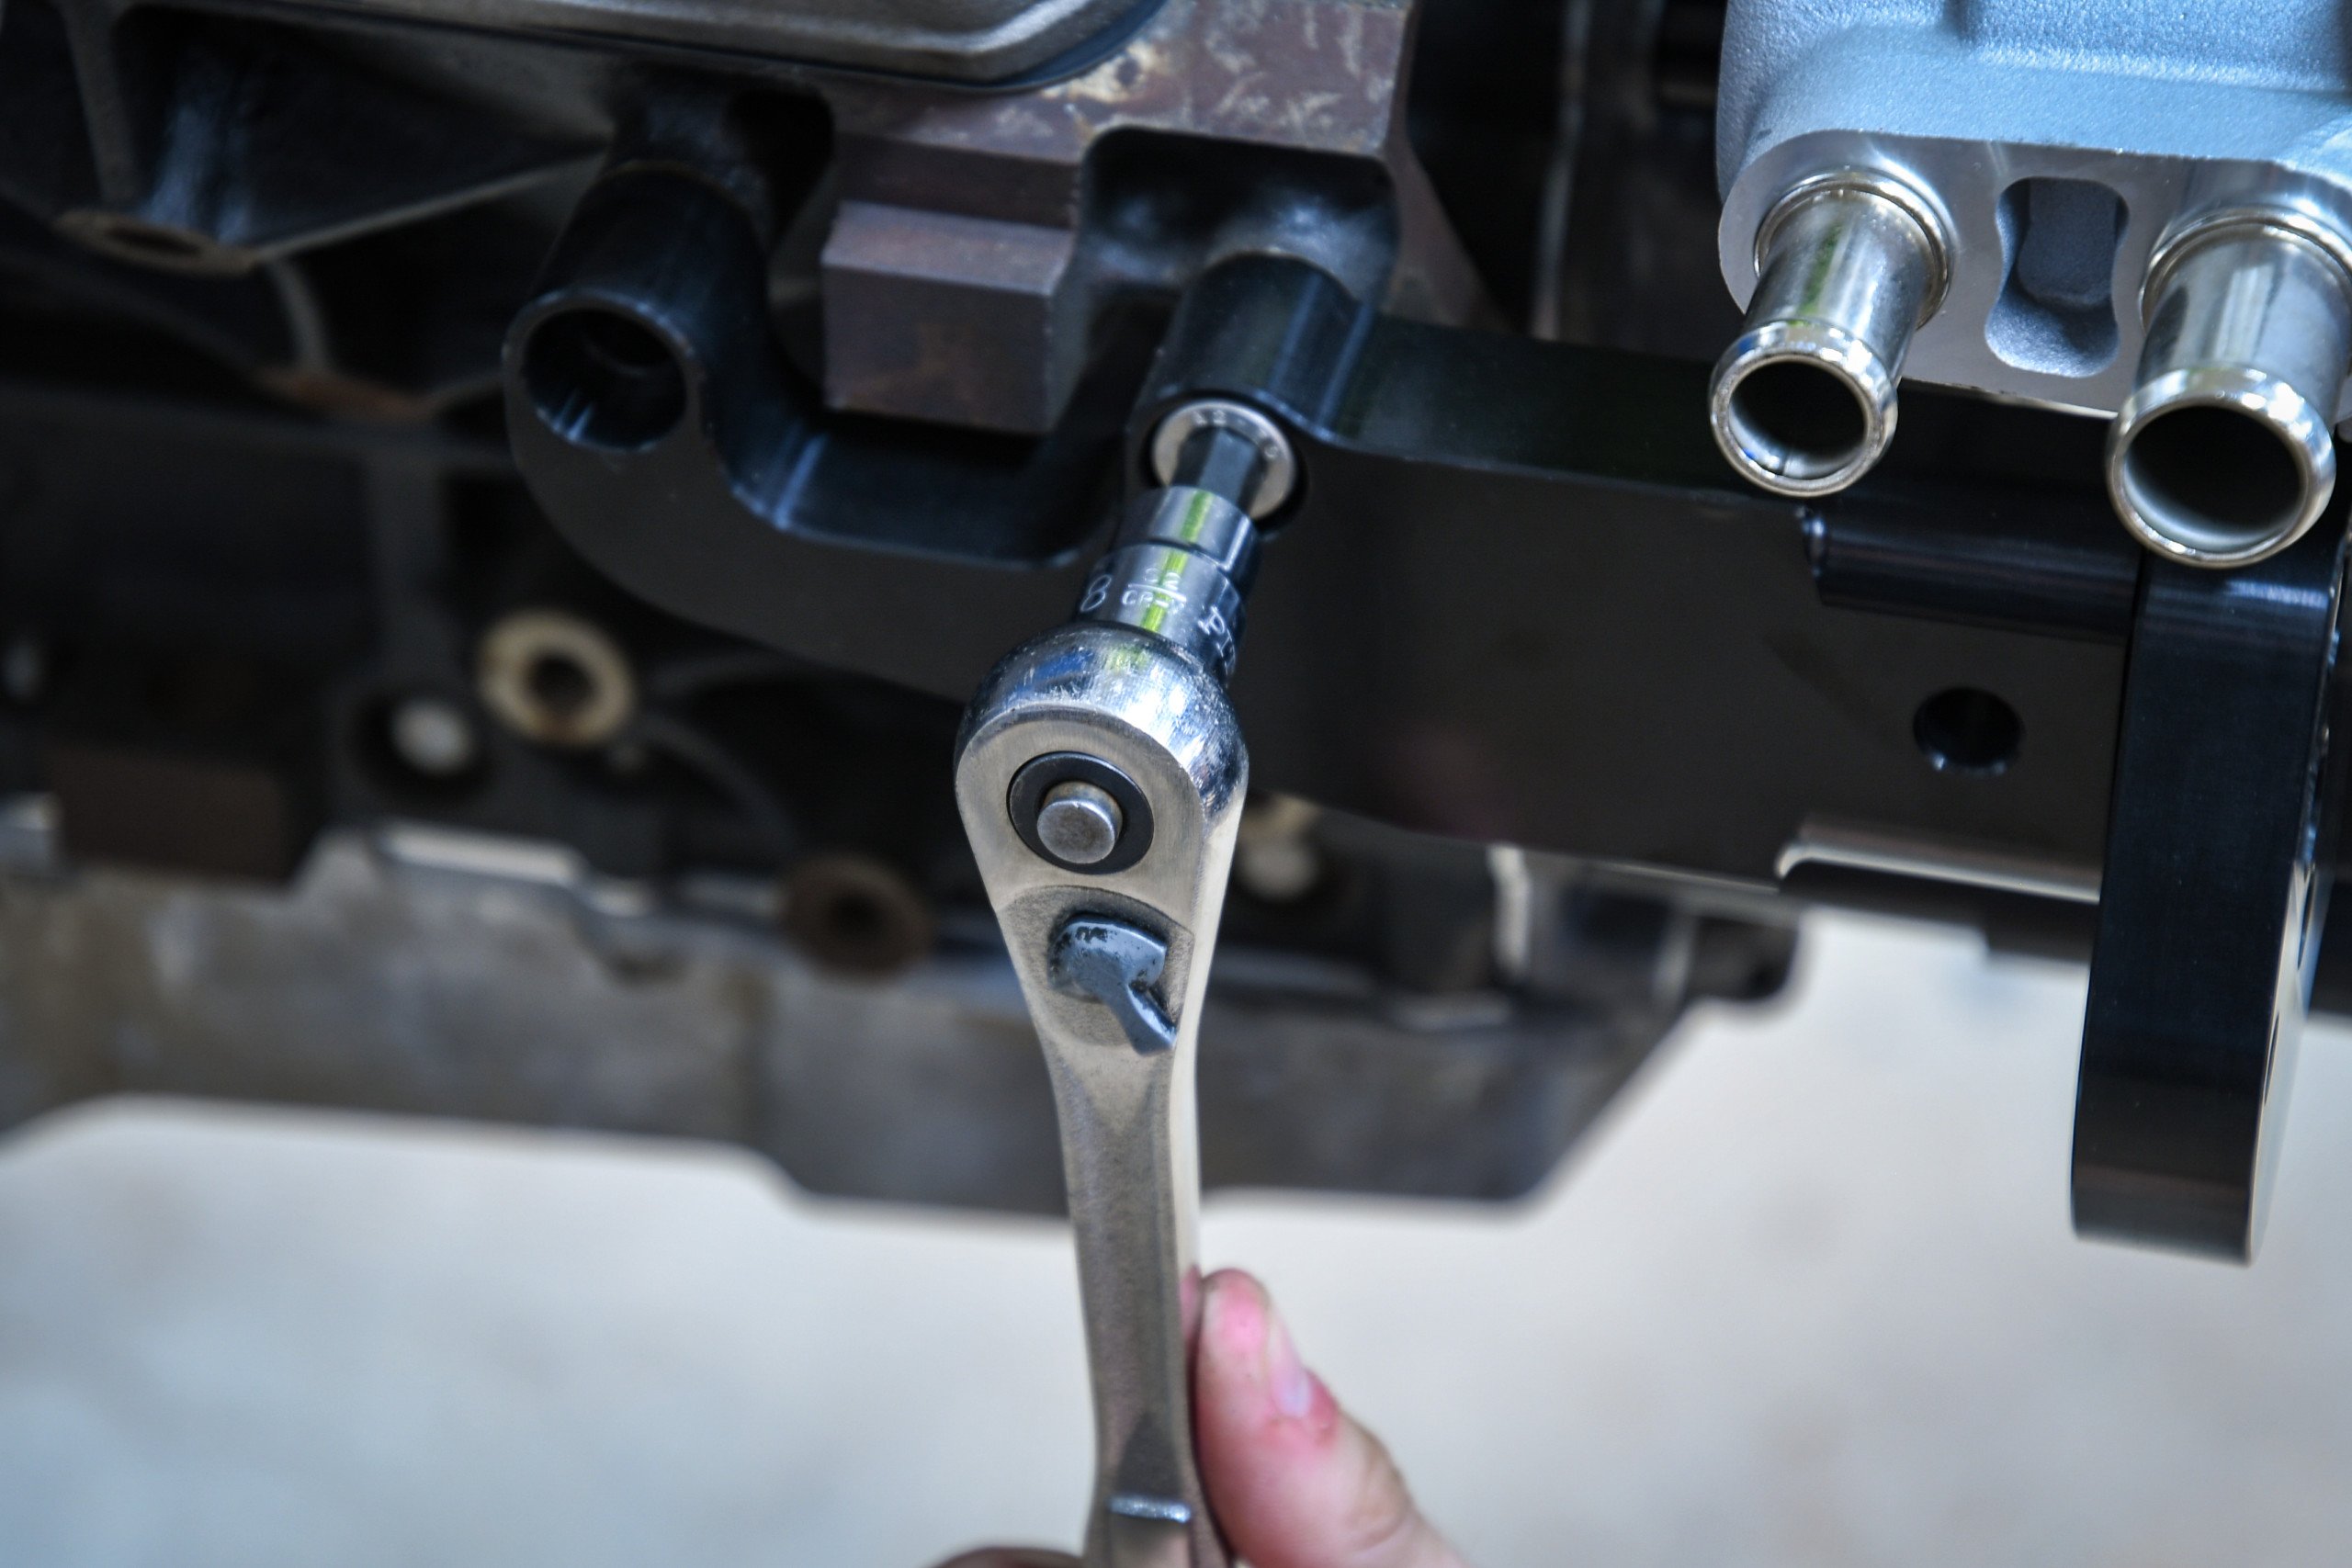
Since we were done with the passenger’s side of the engine, we turned our attention to the driver’s side. Here we focused on the power steering pump and alternator installation. If you are planning on using an iron block, you will need to drill and tap the engine. But don’t worry, Wegner’s instructions show you how and where.
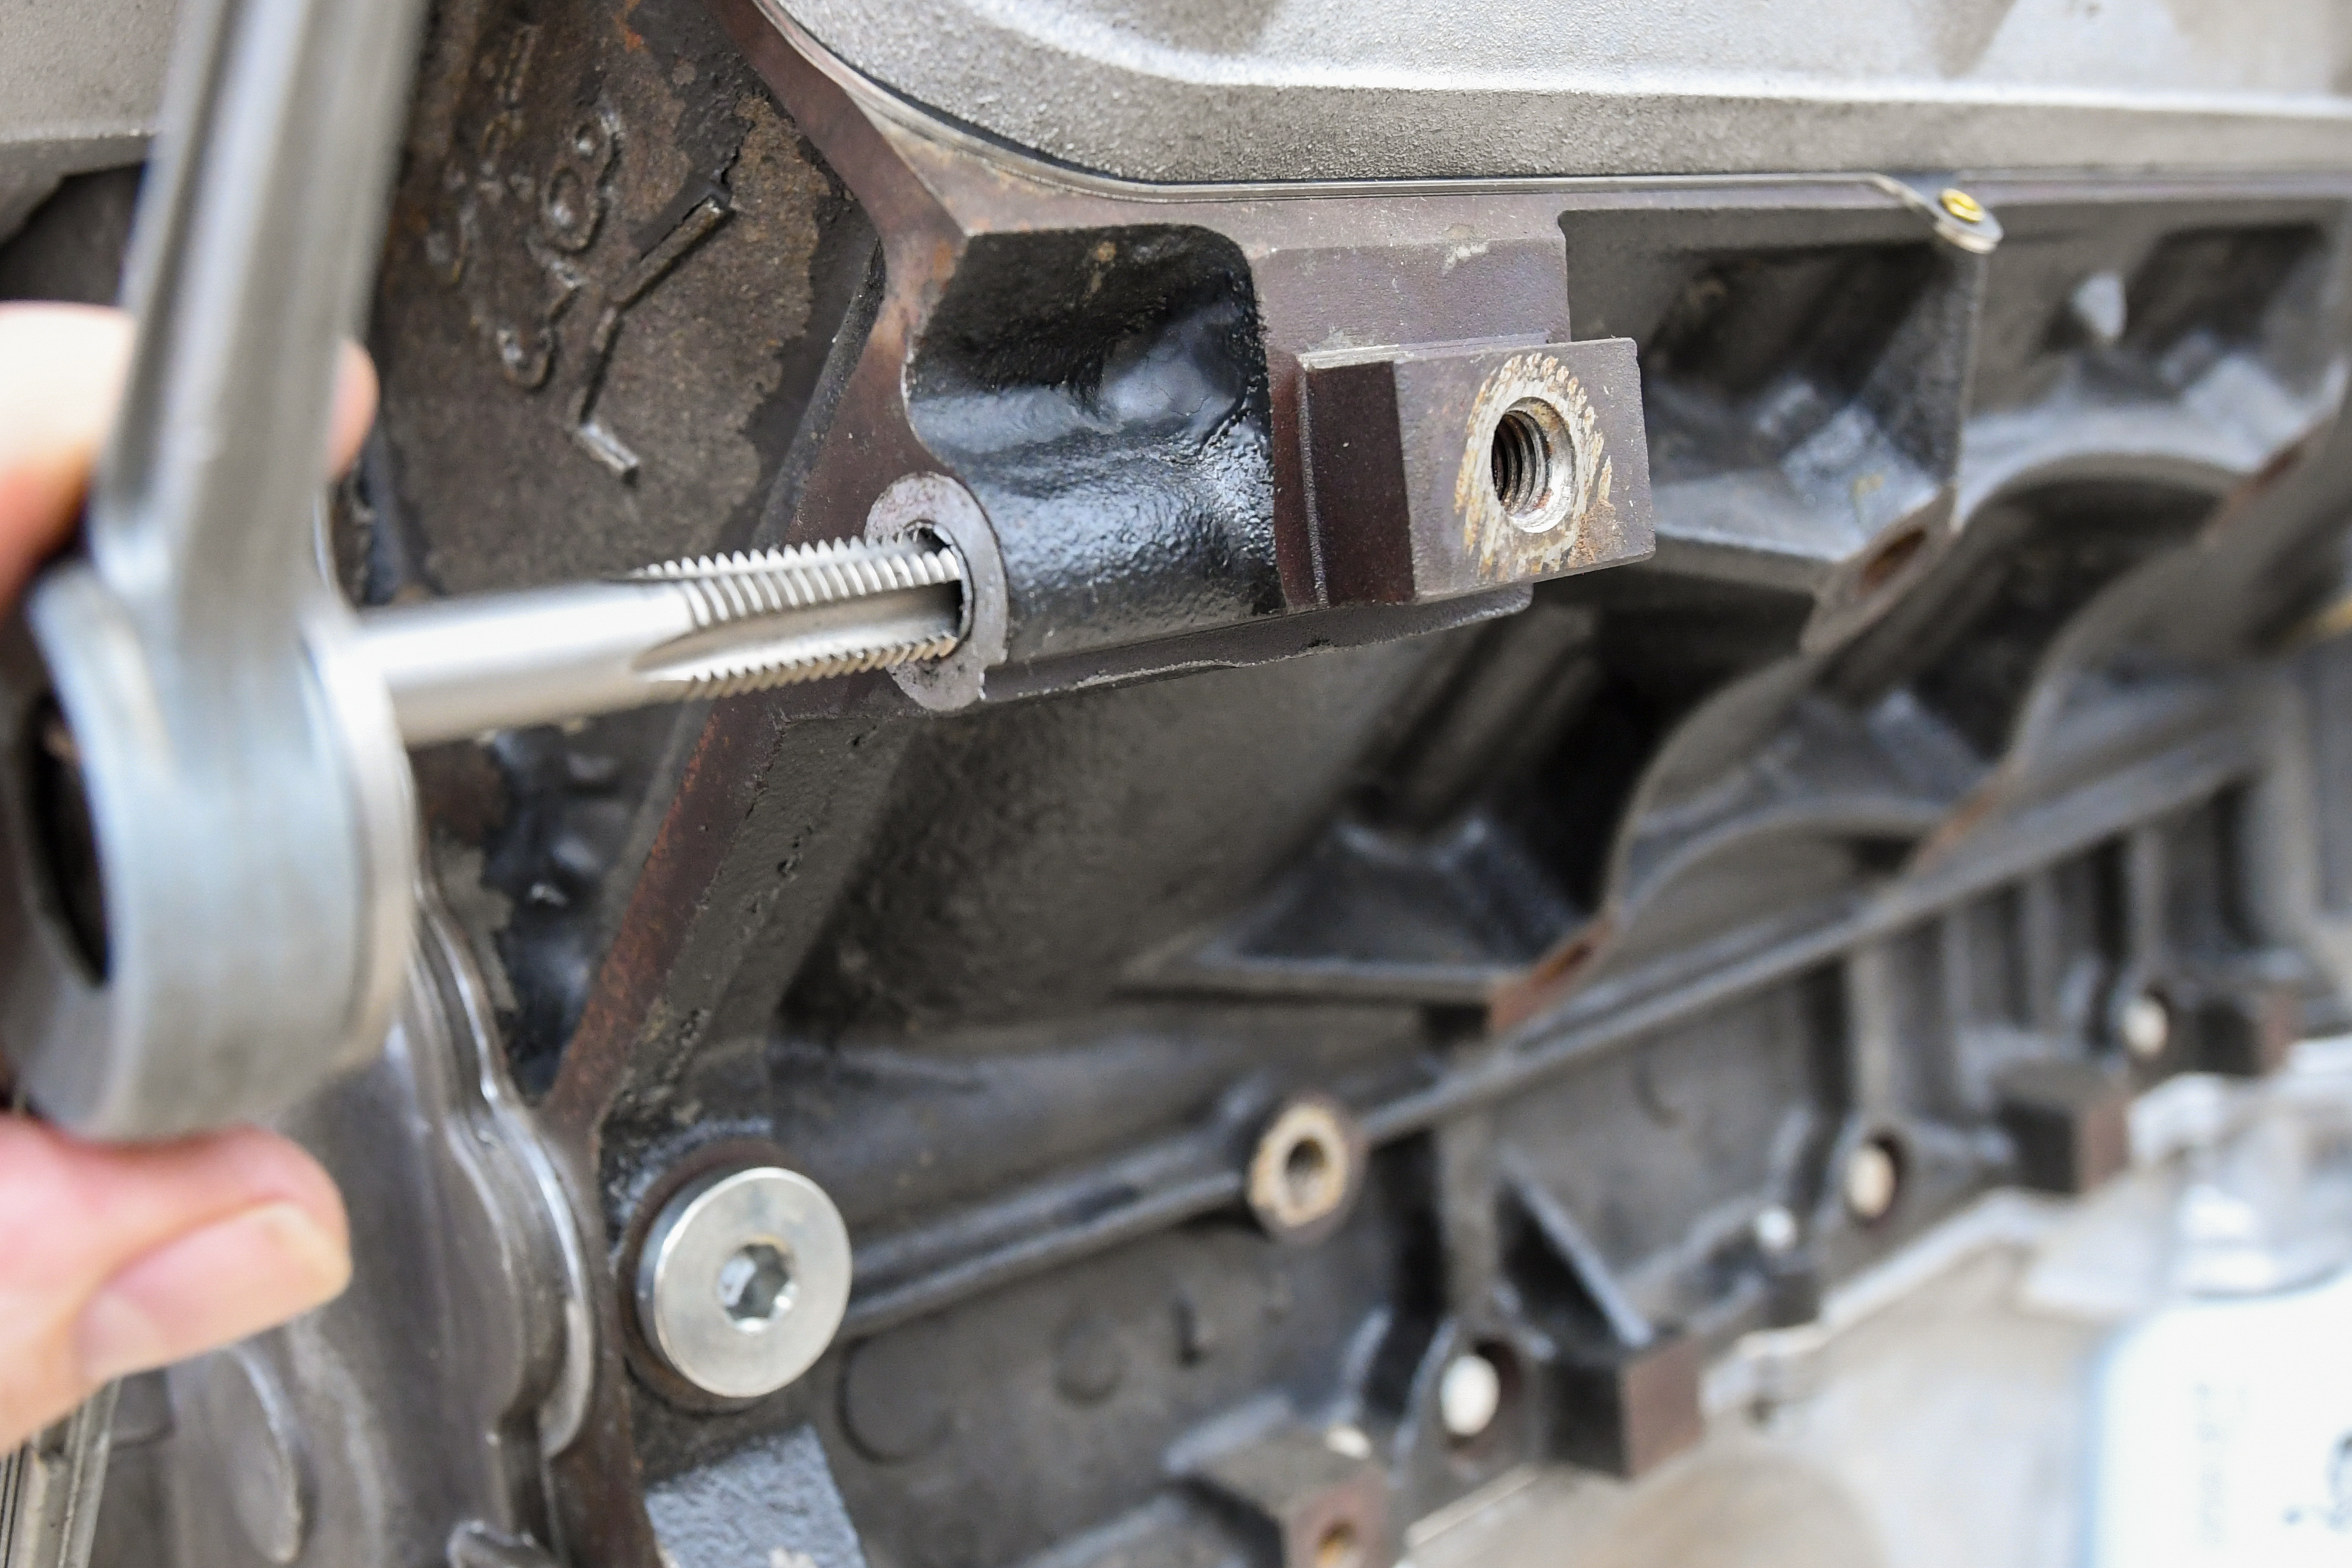
For those of you running an iron block, you will need to drill and tap it to secure the bracket for the power steering pump. While this might sound like a big deal, it’s not and only took about fifteen minutes from start to finish.
Drilling the engine block could be challenging if the mill is already in a vehicle. However, this process is straightforward with the motor on a stand as everything is easily accessible. After drilling and tapping the hole, we followed the instructions and attached the Type II power steering pump. Then we mounted the pump, followed by the pulley.
The last piece of hardware to bolt on the engine is the brackets for the Powermaster alternator. Wegner supplies two heavy-duty brackets that bolt to the head, again on the driver’s side. After both were secure, we positioned the alternator in place. Next, we installed the alternator pulley and billet cover.

The last piece of the puzzle is the alternator bracket and the Powermaster alternator.
Belt Installation
Finally, it was time to install the belt and wrap this project up. First, we installed the supercharger ten-rib belt. To do this, the supercharger tensioner will need to rotate counterclockwise while the belt slides over the lower supercharger idler. After it was in place, we put on the six-rib belt by swinging the tensioner clockwise and slipped the second belt under the idler pulley.
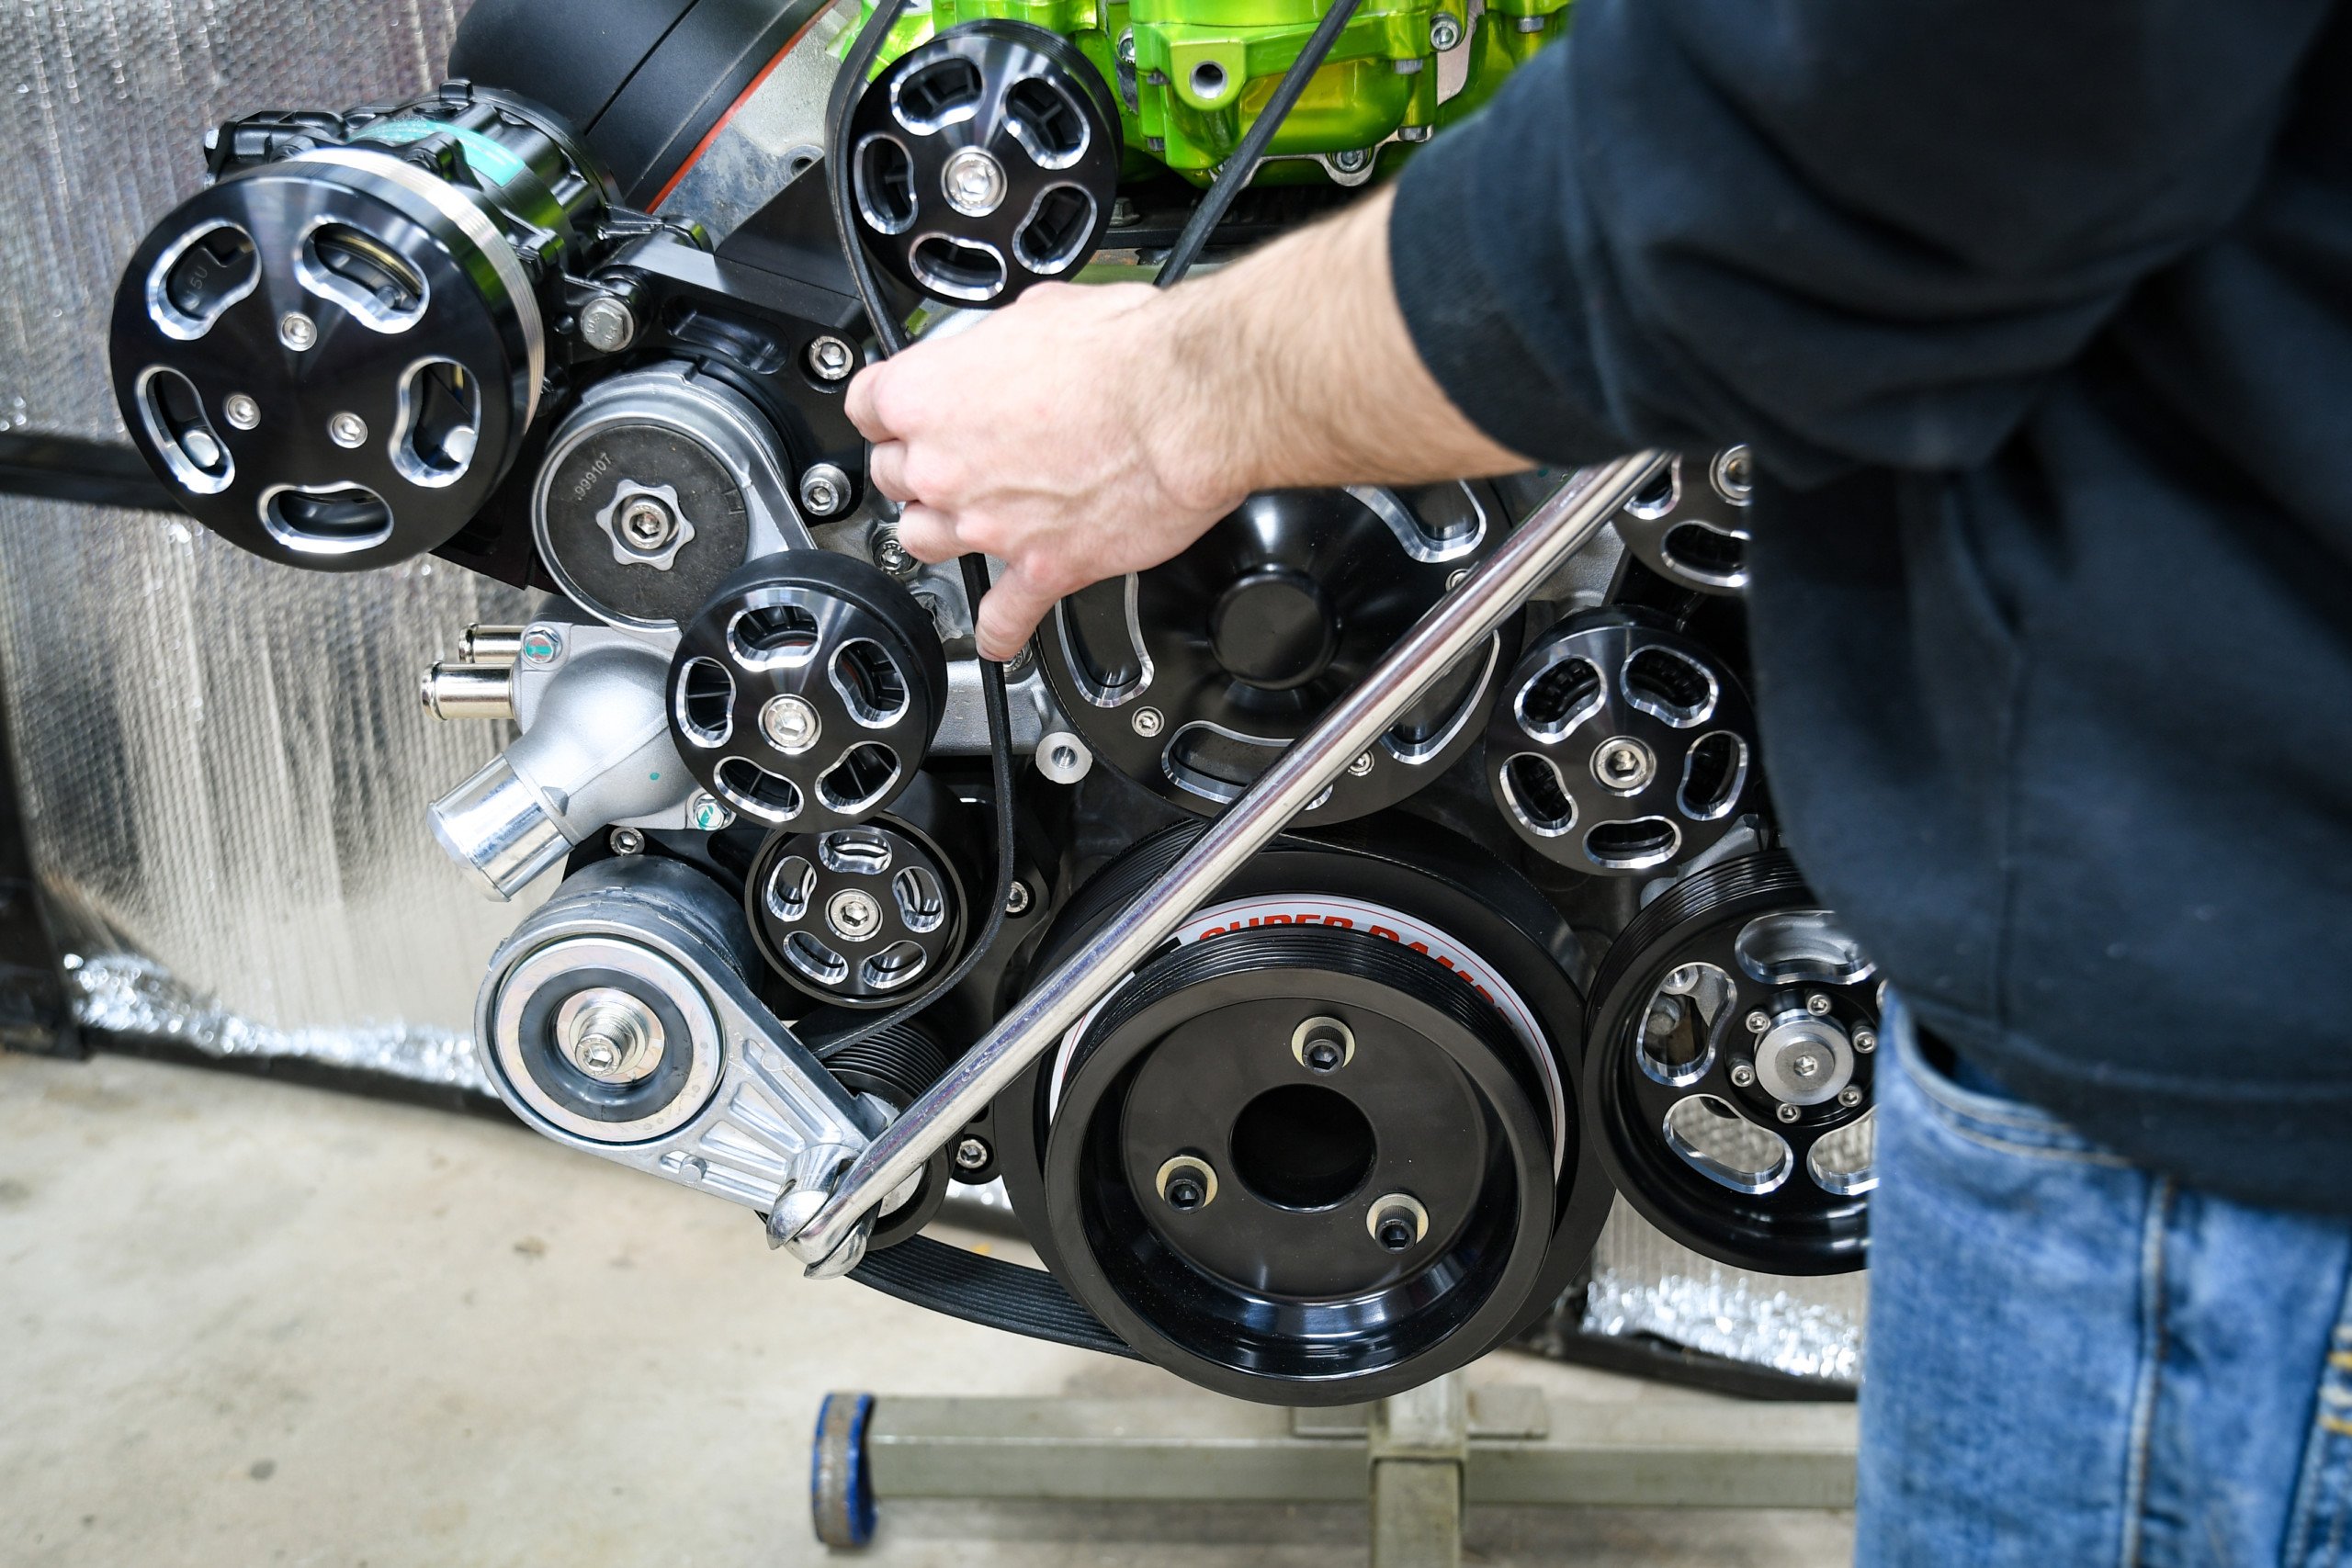
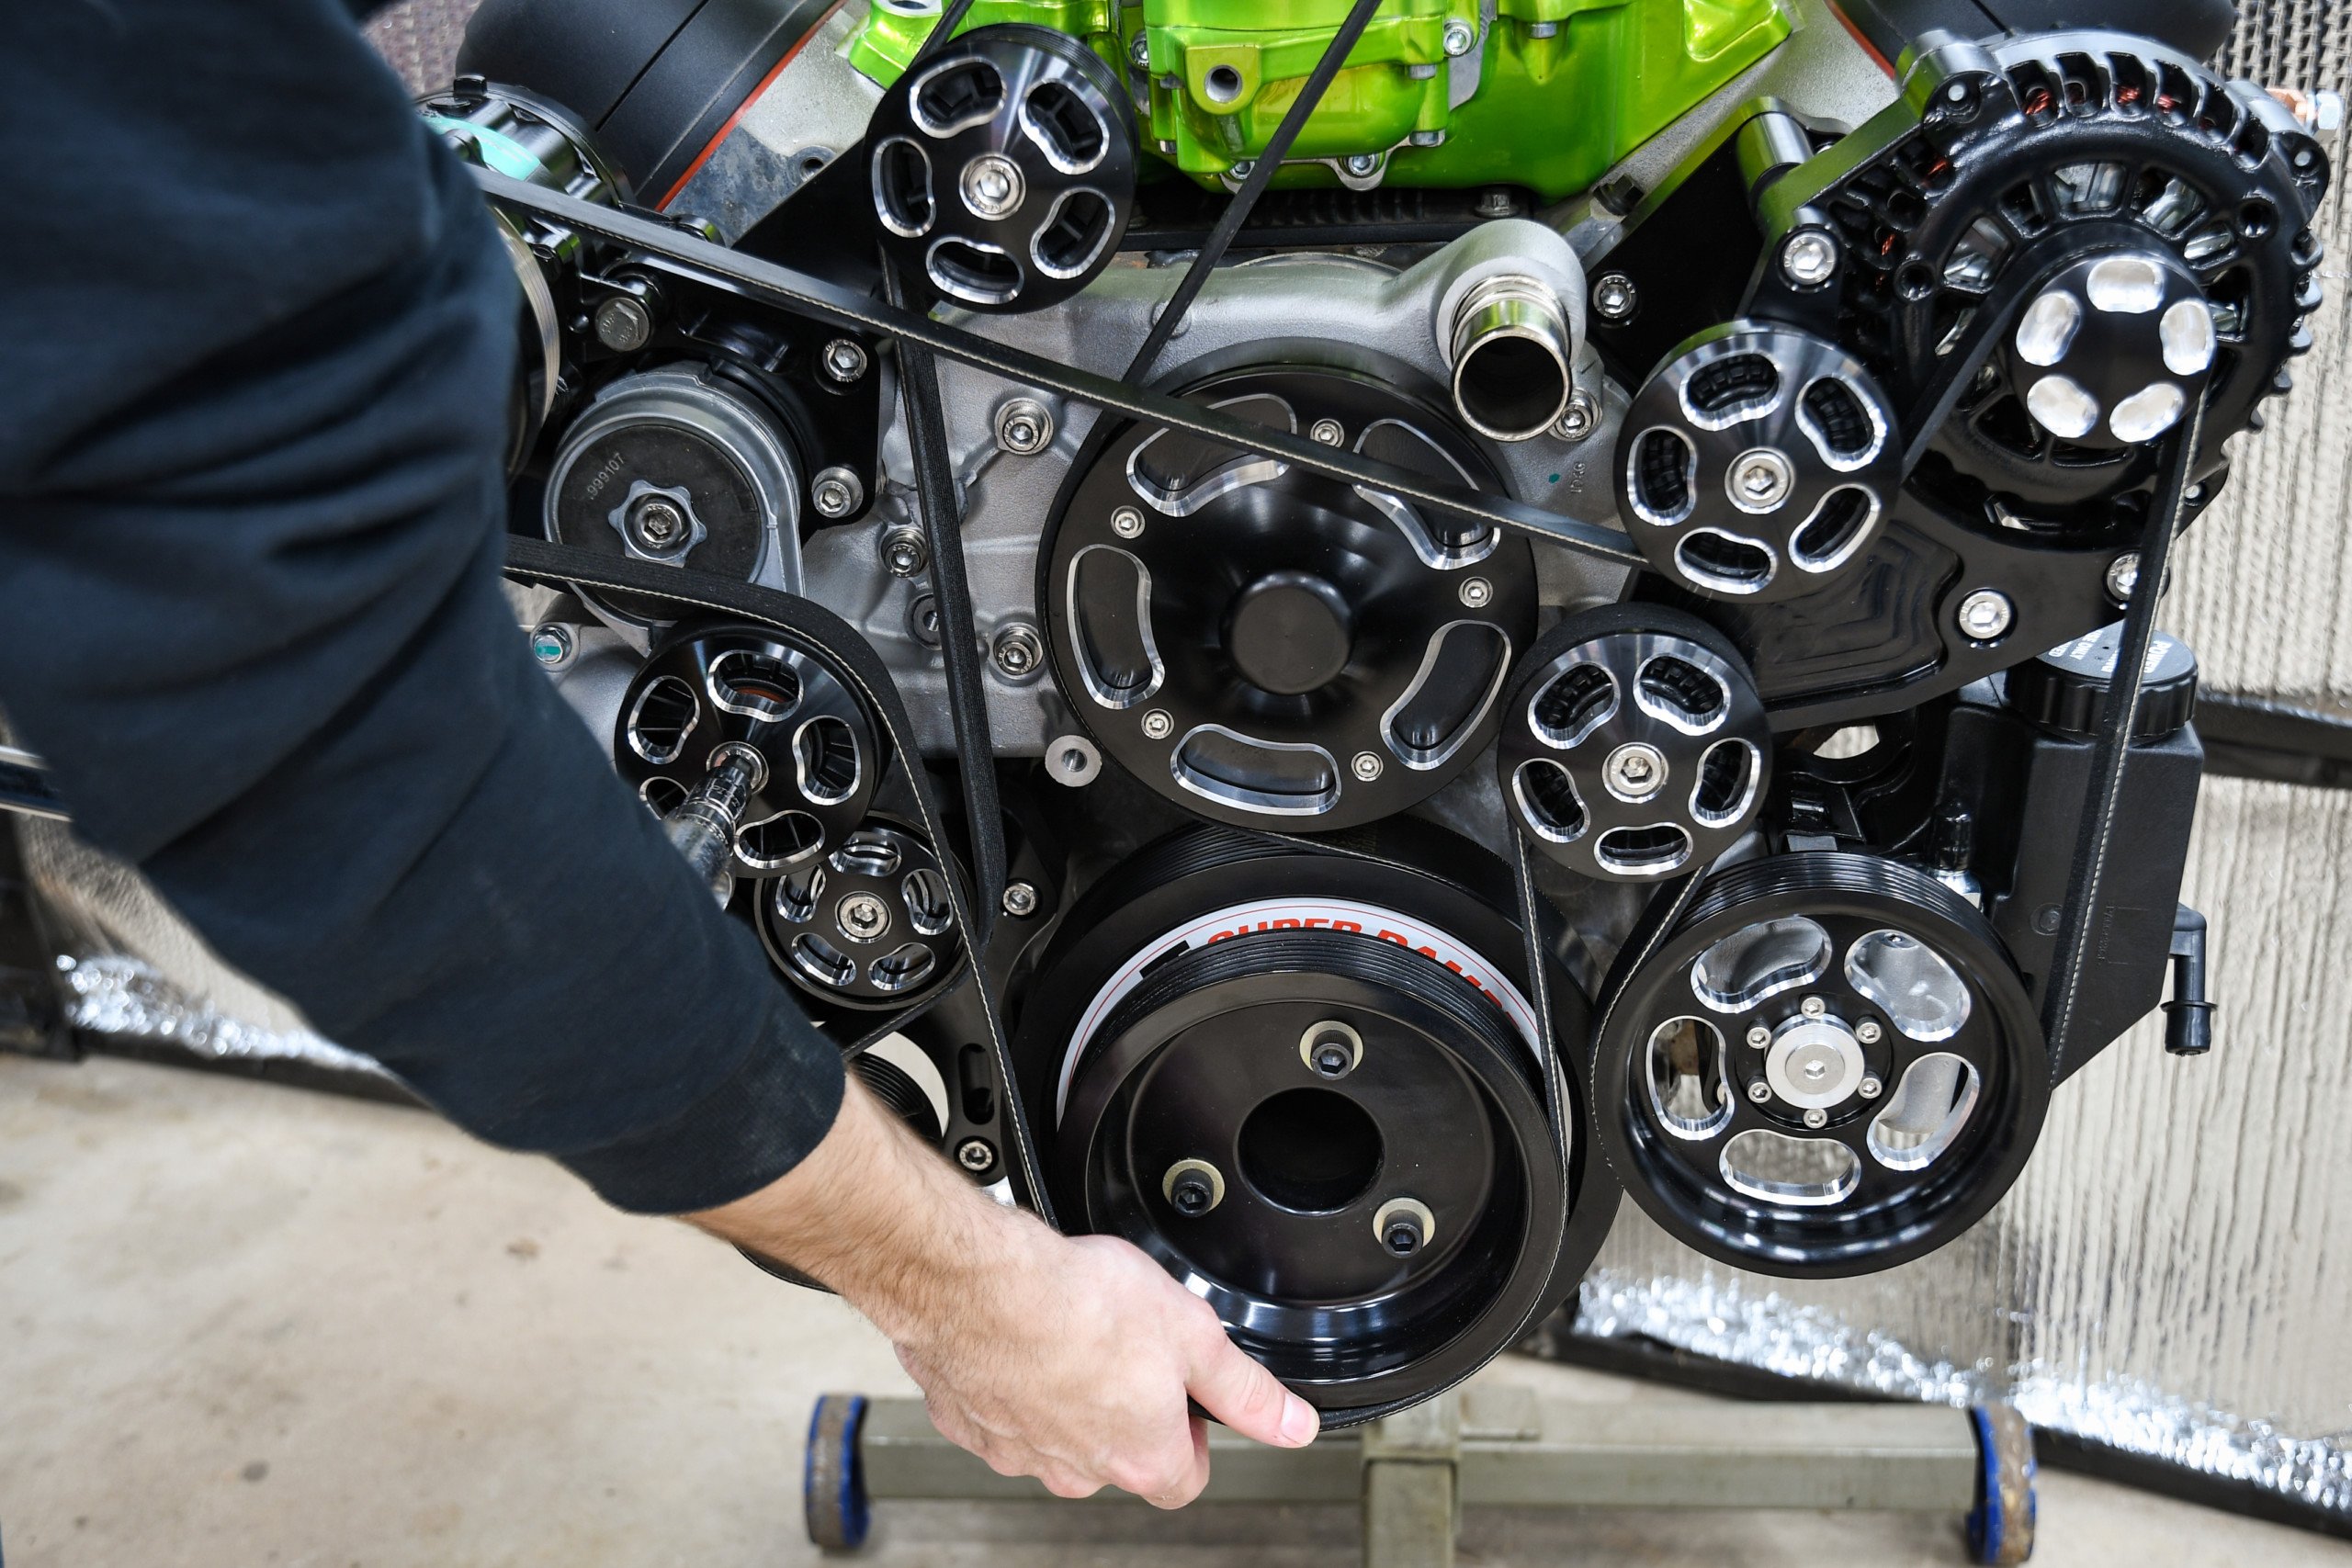
The dual belt configuration certainly has its advantages and looks fantastic.
Casey told us that a daily driver can see thousands of miles over several years before a belt needs to be changed. But a car that goes to the track should be checked daily and the belt (I’m guessing) replaced more often, and most people fall somewhere in between. He also suggested installing everything, driving it for a few miles, checking the belt alignment, and making sure nothing has loosened up.
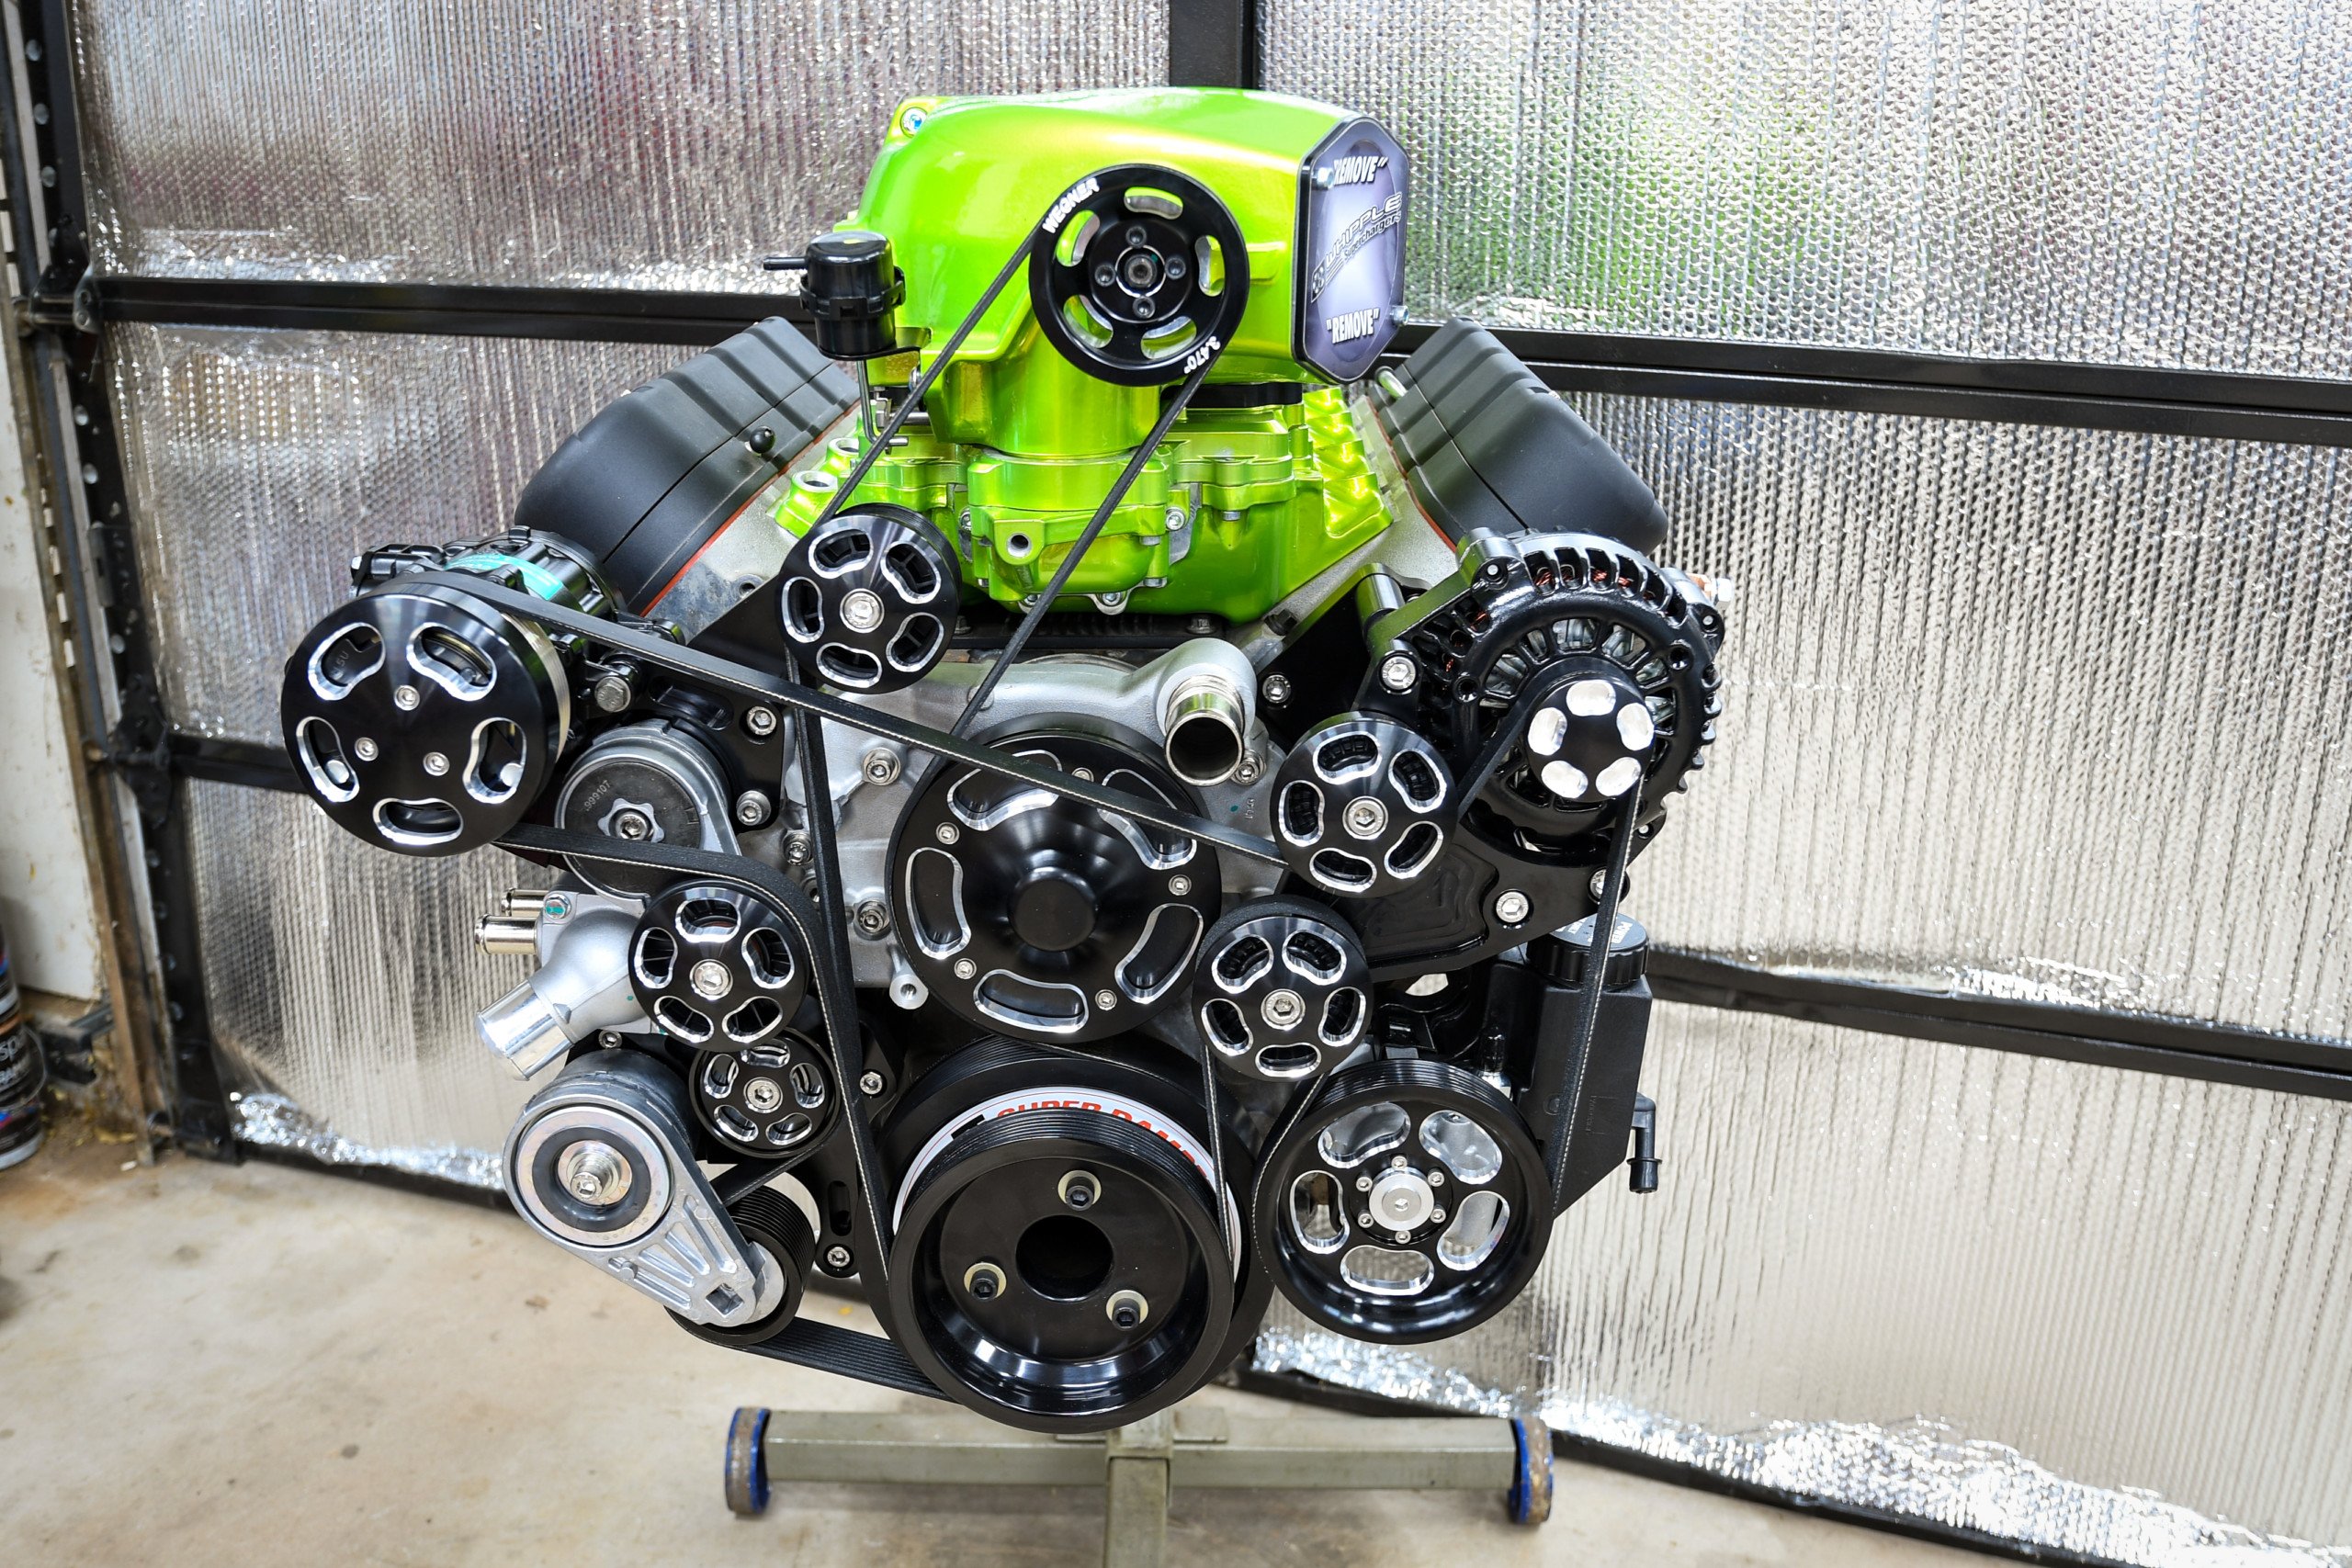
That’s A Wrap
Wegner Automotive’s belt drive is a functional piece of art. The machining and finish are nothing short of top-notch. However, we will be hitting the dyno soon (if our parts will ever ship) to see if this unit performs as good as it looks. So stay tuned to LSX Mag as we push Project McLuvin forward.