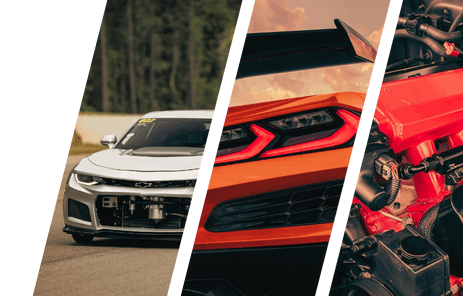
In our last update, we gave our 2013 Camaro project, Lucky 13, some much-needed interior love.
Lucky 13 is coming together pretty fast, and the next sections of the car we wanted to tackle were the suspension, driveline, and chassis bracing. Although the car is only a 2013, and virtually every bushing is still pretty new, we wanted to tighten up the suspension and be able to make adjustments whenever needed. As Lucky 13 will be driven on the street most of the time, we didn’t want the ride to be ridiculously stiff and unbearable, but at the same time, we want it to be track-ready at any given time.
 We reached out to BMR, who generously set us up with adjustable lower control arms, toe rods trailing arms, and front and rear sway bars, which should tighten up the rear end articulation very nicely. Whiteline did us a solid and provided us with its upper control arm bushings, as well as differential mount bushings.
As far as the driveline goes, we needed reliable, tough components. Chevy Performance Parts was very generous, and hooked us up with a Camaro ZL1 driveline kit consisting of half-shafts, a two-piece driveshaft, and the cast-iron, 9.9-inch, 10-bolt differential. The ZL1 driveline kit will help this build immensely, as it will provide a stronger crossmemeber than what came in the car, and allow us to put down power safely and reliably.
Chassis unification is also another important part of this build. Since we expect the Camaro to see quite a bit of track time, it was inevitable that the chassis would need to be reinforced in order to have a stable platform to work from, and put as much power down as possible while maintaining great drivability. If the chassis is more predictable in terms of handling, it will be easier to push the car to its limit because it will be a more tangible limit.
Our friends at LG Motorsports are all about improving handling and putting down power efficiently in Corvettes and Camaros, so they supplied us with their G5 chassis brace system. The kit includes rear section connectors, a front crossbrace, and pieces to connect the front and rear braces to the factory frame. To get familiar with the products, we talked with Pete Epple of BMR Suspension, and Anthony Forney of LG Motorsports.
Whiteline Bushings
 To properly equip Project Lucky 13’s suspension for track duty, Whiteline supplied us with rear upper control arm bushings (PN W63348) and differential mount bushings (PN W93356). As the ZL1 rear differential came with rubber bushings from the factory, we thought it would be a good idea to install polyurethane units before we got it in the car. The polyurethane upper control arm bushings will help a lot with deflection during hard cornering and rough surfaces, giving the driver a better feel for the road, and ultimately more precise handling.
BMR Sway Bars And Arms
 Project Lucky 13’s factory sway bars, and all factory Camaro SS sway bars for that matter, possess a low torsional spring rate due to being made from small-diameter bar stock, or tubing. BMR designed the SBO39 sway bar kit for autocross sessions, street performance, and road race applications, which is exactly what we’re building Lucky 13 for. Made from heavy-wall 29 mm (front) and 32 mm (rear) DOM tubing, BMR factored in vehicle weight, application, motion ratio, adjustable requirements, and coil spring rate when designing these sway bars to ensure the consumer will get the most out of their suspension setup. The sway bar end links provided with the kit are adjustable as well to get the most out of suspension fine-tuning.
“BMR cold-forms the majority of its sway bars. When you heat steel to form it, the metal is altered at a molecular level, requiring it to be heat-treated to keep it from being too brittle,” explained Pete Epple of BMR Suspension. “Cold-forming the bars does not require the heat treatment, as the steel is not made brittle from the initial heat applied to form it. Cold-formed sway bars do a great job of retaining their memory and spring properties, which is large part of why BMR uses that forming process.”
Adjustments to the sway bar’s stiffness can be made by moving the sway bar end link to one of three holes. According to BMR, the front end will see a torsional stiffness rate increase of 98 to 214 percent over the factory OE sway bar, and the rear will see a 100 to 200 percent increase over factory sway bar rate. The rate increases and adjustability of the sway bar will allow us to fine-tune Lucky 13’s handling characteristics on the street, as well as on the track for precise cornering with minimal body roll. Included in the sway bar kit are 88-durometer polyurethane bushings that drastically reduce deflection over the factory rubber units, which ultimately means more sway bar control.
“The factory suspension components are built mostly from stamped steel, which is fine for basic daily use. But when you get into any type of performance application, the fore, aft, and lateral loads put on the suspension components cause massive amounts of deflection,” Epple explained. “The added strength of the tubular parts and better bushing material reduced or eliminated much of this deflection, allowing us to get more power to the tires. Also, when you eliminate suspension deflection, the suspension system can perform how it was truly designed to.”


The fifth-gen Camaro’s factory stamped-steel control arms flex quite a bit under cornering loads, which isn’t good at all for track days, or spirited driving in general. The soft factory rubber bushings have massive amounts of deflection, which, when working in conjunction with the factory control arms provide inconsistent handling, and ultimately less power transferred to the pavement. Lucky for us, BMR’s adjustable lower control arms (P/N TCA029) are made from heavy-duty two-inch square tubing, and they are internally gusseted. The TIG-welded lower control arms come with grazable 95-durometer bushings installed, and the center-mounted adjuster makes on-car adjustment quick and easy.
“The lower control arms are a very complex part; they serve a lot of purposes and accomplish a lot of things. The boxed design of the lower control arms nearly eliminated any deflection seen in the stamped steel factory arms,” Epple explained. “The soft factory rubber bushings are replaced with 95-durometer polyurethane bushings, which reduces deflection and wheel hop. They are also designed to work with both the older FE3-style and newer FE4-style rear sway bars, making them perfect for any Camaro from 2010 to 2015.”
 BMR’s adjustable trailing arms are a huge improvement over the factory stamped-steel units. Made from heavy-duty .095-inch wall DOM tubing with 3/16-inch double-overlapped mounting plates, they will handle whatever we throw at them. The factory trailing arm’s sheetmetal construction flexes quite a bit, which induces wheel hop, especially with the soft rubber factory bushings. BMR equips the trailing arms with high-quality rod ends and stainless steel spacers for a longer life on the street and track.

The factory toe rods on the fifth-gen Camaro are made from flimsy stamped steel and use soft rubber bushings on the mounting points. Their duty is to keep the rear wheels in a fixed position, not pointing inward our outward under load. Deflection of these toe rods can cause poor launch stability, decreased braking ability, and inconsistent handling. BMR’s toe rods (P/N TR003) are made from 1.25-inch heavy-duty DOM tubing, use polyurethane bushings on the mounting points, and are double adjustable, meaning you don’t have to take them off of the car to adjust.
“When you get into lowered suspension, the adjustable components allow you correct the suspension geometry that was changed with the drop,” explained Epple. “By correcting the geometry, you can ensure the tire has the maximum footprint for the street and track. The correct geometry will also help with handling as the suspension moves through its range of motion. This is especially critical with an IRS-equipped car like the fifth Gen Camaros.”
BMR also has a rod end version of the toe rods (P/N TR004) that use QA1’s XR-series chromoly, teflon-lined rod ends. We went with the polyurethane version of the toe rods because Lucky 13 is still going to be driven on the street, and we don’t want to deal with rebuilding rod ends on a routine basis, or the noise of solid-mounted components.
LG Motorsports Chassis Bracing
 Chassis flex and wheel hop are all too common for the fifth-gen Camaro; it’s a heavy car and they’re very often pushed really hard. LG Motorsports’ G5 chassis bracing system is a viable solution to chassis flex and wheel hop, firmly unifying the rear subframe and differential to the the rest of the chassis, keeping it in place under heavy load conditions. The G5 system includes the rear sections, a front X-brace, and mid-braces that connect the rear sections to the x-brace in the front.
“The main goal of any car on track is to make the chassis as stiff as you possibly can, and make the suspension work for you. Our goal was to strengthen the chassis and tie all of the bolt on subframes together while not increasing road noise transmission to the passengers inside,” explained Anthony Forney of LG Motorsports. “We started at the rear to support the back of the car and lock in the subframe, which you can see is the most intricate part of the brace. It allows the rubber frame mounts to remain intact to dampen road noise but keeps the cradle from moving and twisting during hard loading.”
The G5 system will allow Lucky 13 to put power down more efficiently when exiting a corner, due to the reduced chassis flex and wheel hop. LG’s G5 system is made from lightweight rectangular tubing, and requires no cutting or drilling; it is strictly a bolt-on affair, and doesn’t add much weight, considering how much structural rigidity is gained. Of course, all brackets and hardware are included in the kit, making installation a breeze.
Chevrolet Performance ZL1 HD Driveline Kit
 Once we drop the LS7 and TR6060 transmission in the car, it’s going to be making some awesome power. To put that power to the ground safely and efficiently, we reached out to Chevrolet Performance for its ZL1 HD Driveline Kit, which is the strongest independent rear axle option for the Camaro from the factory. The kit comes with a two-piece driveshaft, 9.9-inch cast-iron differential housing, and asymmetrical half shafts.
 At 144 pounds, the 14-bolt, 9.9-inch cast-iron differential isn’t a lightweight by any means, and can handle a lot more horsepower than the factory aluminum unit that came in the car. To keep the differential fluid cool while putting power down, the housing has a fluid cooler built into it. The lines run from the transmission to the built-in cooler, and then back to the transmission, meaning that there is always cool transmission fluid running through the differential cooler, ultimately reducing the differential fluid by more than 100 degrees.
 The half-shafts included with the ZL1 HD Driveline Kit possess some pretty neat technology that is crucial for putting all of the power from the LS7 to the ground efficiently. With an asymmetrical design, the half-shaft on the driver’s side is a hollow 60 mm shaft, while the passenger side half-shaft is a solid 33 mm shaft. The reasoning behind the design is to offer different torsional stiffness rates that work with the limited-slip differential to minimize the chance of wheelhop on hard launches. If the half-shafts help the ZL1 Camaro get up to 60 mph in 4.1 seconds, they will work amazing on Lucky 13.
 Although a driveshaft out of a Camaro SS might look the same as a Camaro ZL1’s driveshaft, they’re significantly different. To handle the power from the LSA engine in the ZL1, the driveshaft has been strengthened. The companion flange that connects the giubo to the tailshaft of the transmission has also been beefed up to handle the extra power. With our LS7 engine in the car, the ZL1 HD Driveline kit will work great.
Activating Grip
 To start Lucky 13’s rear end overhaul, we racked it up on our Bendpak lift and prepared all of our BMR goodies. The sway bar, lower control arms, and trailing arms were the first victims of removal, which gave us absolutely no problem at all.

After the differential went in, we slid in the ZL1 half shafts, which were certainly the easiest part of the install; once you hear a click, they’re in. To prepare for the install of LG Motorsports’ chassis bracing system, we lifted the rear subframe assembly back up to the car and bolted it back in place.

Once we had a jack stand supporting the cat-back section of the exhaust, we removed the tunnel brace so we could fit the rear sections of LG’s chassis bracing kit. Using two more jack stands, we mocked up the rear sections in place, then bolted them to the chassis and rear subframe, leaving them hand-tight. When installing the rear sections, there are plate nuts that need to be inserted into the chassis to receive the bolt that secures the outermost part of the rear sections. There are openings in the chassis where they slide in, and even a tab to keep them in place while tightening the bolt.

During the mock-up process, we found that there wasn’t a nut in the rocker panel where we needed to secure the frame connectors completely, so we carefully welded one nut nut in each side to receive the bolts. With the nuts welded in place, we hand-tightened the frame connectors and moved on to fitting the front cross-brace. Using a jack stand, we held the crossbrace in place, and began installing it with the supplied bolts.
Installation of BMR’s sway bars and arms, Whiteline’s bushings, LG Motorsports’ G5 chassis bracing system, and Chevrolet Performance’s ZL1 HD Driveline Kit was quick and painless — although it did help that Lucky 13 is a theft recovery and was missing a laundry list of parts. That gave us quite a bit of breathing room while installing the components.
We can’t wait to get Lucky 13 completed so we can test out these parts in the conditions they were built for.
You might also like
Twin-Turbo Blazer Built To Survive Drag And Drive Abuse
Customs by Bigun built this twin-turbo Blazer with Haltech control, Rife Sensors, and 76mm Precision turbos for Drag and Drive.