If you have a classic hot rod or an older vehicle, odds are a modern powerplant under the hood will look out of place. These engines were designed in a different era, and it shows. Classic cars are simple by design and offer almost no electronics under the hoods. On the other hand, the LS engine is full of technology, which includes wiring, sensors, coils, and even plastic intakes. While the LS belongs under the hood of a new model car or truck, the powerplant looks entirely out of place between the fenders of a classic. Fortunately, the aftermarket has come to the rescue and has figured out several ways to disguise the LS engine to look like something it’s not: vintage.
This article will be the first of a three-part series on how to build a vintage-looking LS engine. We will take a look at some simple things that can be done to disguise the engine’s look and a more complex path to a vintage look.
The Easy Way
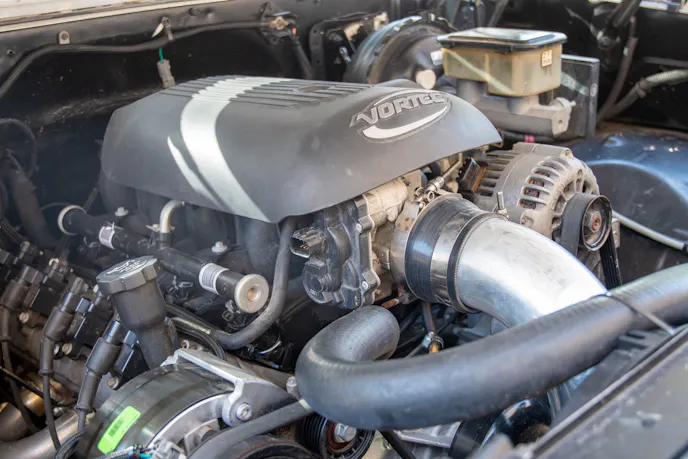
Recently, we did an LS swap on our ’91 square-body Suburban, and since the truck did come from the age of fuel injection, the 5.3-liter doesn’t look out of place under the hood. However, in our opinion, there is room for improvement. For one, the ugly truck intake is the focal point when you pop the hood. Matters only get worse if you don’t have the plastic Vortec cover to hide the manifold.
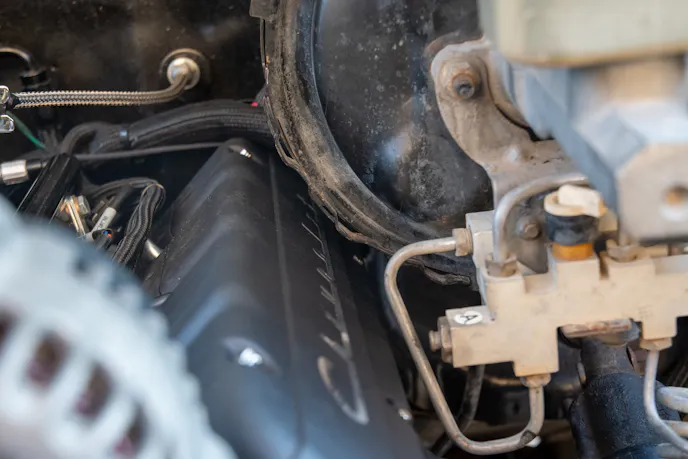
Another problem is the coils sitting on the valve covers. While you can remote mount them, you will quickly discover that the factory valve cover design is not what it used to be. Gone are the days of the Art Deco influence in the automobile. Now, form and function reign supreme under the hood of a modern car no matter how ugly it gets.
Holley’s Finned Valley Cover
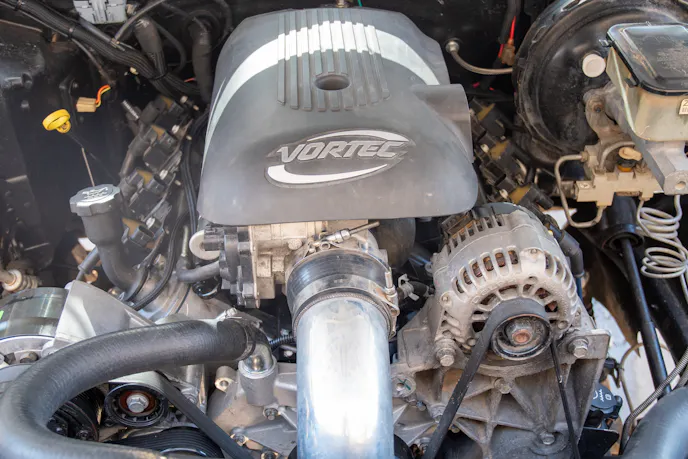
Nothing says 1960 like a set of finned valve covers. And Holley has a twist for the LS with its finned valley cover. To install this part, you will need to remove the intake manifold. With it out of the way, you unscrew the bolts, remove the OEM unit and gasket. Install a new gasket — we used Mr. Gasket (PN 4798G) — and bolt the valley cover in place. You can use the factory bolts, but we opted for the Mr. Gasket valley bolt set (PN 60920G). Holley’s valley cover is easy to install and is just the first step in changing our engine’s look.


Holley’s Two-Piece Valve Covers

To fix our valve cover and coil dilemma, we reached out to Holley for a set of its two-piece LS Chevrolet script valve covers. This product does two things for our engine. One, they provide a nice-looking part that enhances the engine’s appearance while covering up the coils and harness. Second, these valve covers will work with LS1 and Gen V coil packs. Since we already had spare LS1 coil harnesses, we ordered a set of Performance Distributors LS1 Sultans Of Spark (SOS) coil packs and LiveWire spark plug wires in silver.


The installation for the two-piece valve covers was straightforward. We had to remove the factory covers and coil pack and mount the new units. With the new Holley valve cover bases in place, we bolted down the coils with the supplied hardware, routed the coil harness, and then installed the coil covers. While the passenger side was a breeze, the driver’s side offered more of a challenge.
The two-piece valve covers need 3.75-inches of space to fit on the engine. While we did have enough clearance for the covers to clear the master cylinder, we didn’t have enough to install them. With the coils in place, you need enough room to get over them, which is more than the installed height. To fix this problem, we had to loosen the brake booster and move it to the right while installing the part.


After we had the coil covers on both the passenger and driver’s side bases, we used the supplied hardware to bolt them down. The next step was to install the LiveWire plug wires, which is a simple task. We applied the supplied dielectric grease to the plug wires before installing them to repel moisture and prevent corrosion.
Ditching The Plastic
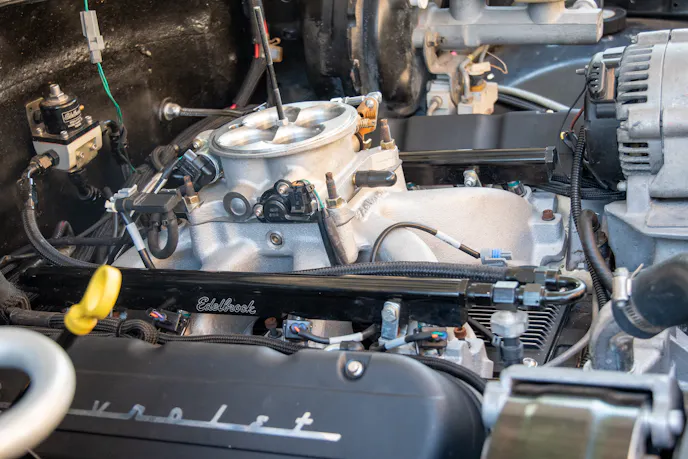
The factory Vortec intake manifold is nothing short of awful looking. And, it’s like Chevrolet knew it was ugly, too, because they decided to cover it up on some models. Our only option here was to remove the factory piece and replace it with a 4-barrel unit. We already had an Edelbrock Pro-Flow 4 EFI system from Edelbrock, which included a 4150 flange intake and throttle body. This set up closely resembles the older-style carbureted setup, but offers all of the advantages to multiport fuel injection (MPFI). We will talk about this type of fuel injection and some other options in a later article.
Air Cleaner
At this point, our engine looks much better than when we started, but we still needed an air cleaner that looked the part.

Since the Suburban is somewhat older, we wanted an air cleaner that looked period-correct for the 1990s. We decided to use a unit from Holley (PN 120-4240), that gives us an OEM look and installed perfectly on our 4150-style throttle body. The drop base air cleaner measures 16×4-inches and comes with a 4-inch red washable gauze filter and hardware.
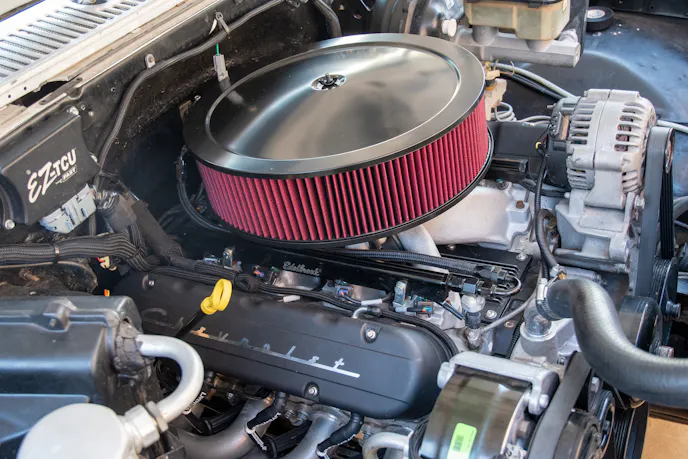
Holley’s two-piece LS valve covers, ribbed valley cover, and a four-barrel intake gave us a vintage look with minimum effort. It only took us a few hours to complete the transformation of our Suburban’s modern powerplant.
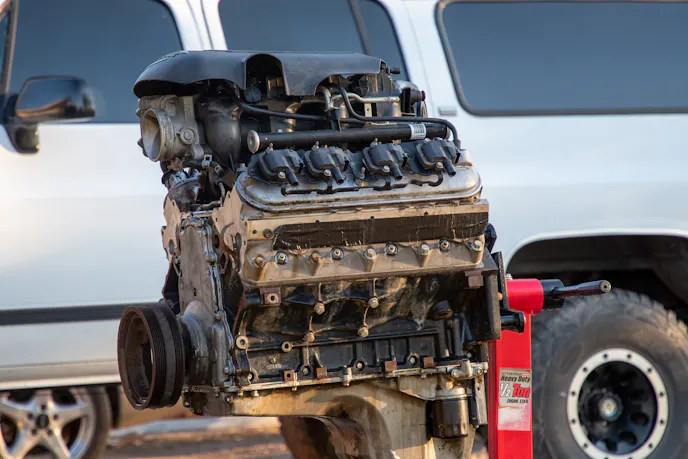
The Hard Way
Since we have more time on our hands than we need, we thought, “Hey, let’s build two vintage-looking engines.” While the first engine favors an older small-block Chevrolet, the second one will attempt to replicate that classic sbc look.
Clean As A Whistle
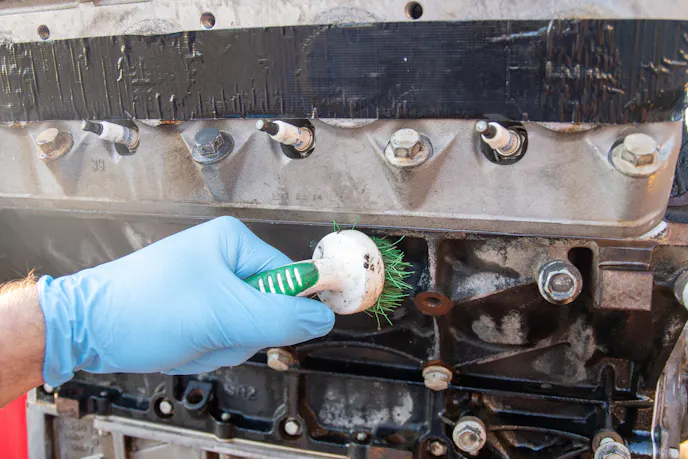
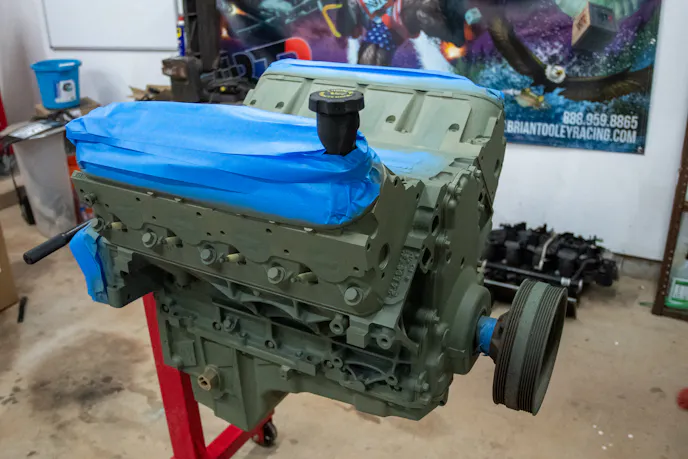
Our first step was to mask off the engine with duct tape to keep the chemicals and water out of the internals. Then we were ready to clean the engine, getting rid of the grease and grime. We started with Castol’s SuperClean degreaser for the first round of cleaning. We scrubbed on the 15-year-old powerplant for what seemed like an eternity, even though it only took about 15 minutes. We then hosed it off with water and started all over. After using about half a gallon of the cleaner, we moved on to soap and water. When we were finally happy with the results, we pressure-washed the engine and dried it off with compressed air.
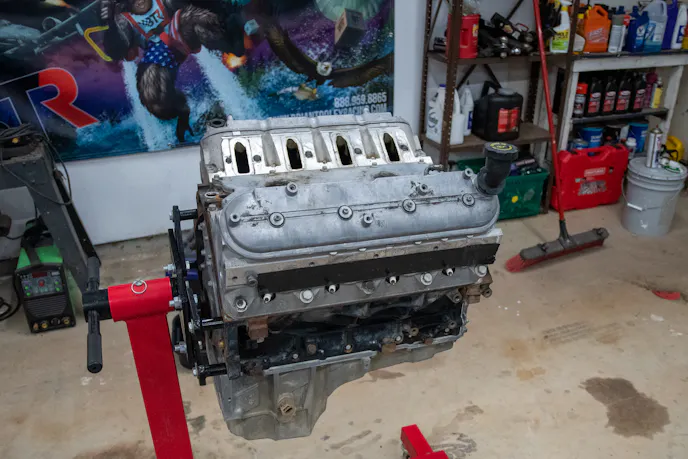
Masking
It was now time to mask off the engine again, but instead of duct tape, we used blue masking tape to cover the important parts of the engine, like the intake and exhaust ports. We also made sure that any holes that went internally into the engine were blocked off. This included spark plugs, cam, crank, and the oil pressure sensors holes. With everything sealed off and masked, it was time to get to painting.


Primer and Paint
Before we hit the engine with primer, the long block was wiped down with a lint-free cloth and acetone to remove anything that we might have missed. We then hit the assembly with two coats of etching primer, allowing them to dry in between the layers. etching primer has a low level of phosphoric acid, which “etches” the paint to a metal surface improving adhesion. It’s essential to take your time here to avoid any runs and make sure you get good coverage before applying the paint.
This particular engine will be going in a 1976 Chevy Light Utility Vehicle, also known as a LUV truck. Since Chevrolet painted its engines orange from 1955-77, it only seemed fitting to paint this powerplant the same color. We used Duplicolor’s engine spray paint to coat the engine. Again, you want to take your time here and allow the paint to dry in between coats before reapplying the product. We were happy with the coverage after two coats and allowed it to dry before removing the masking tape.
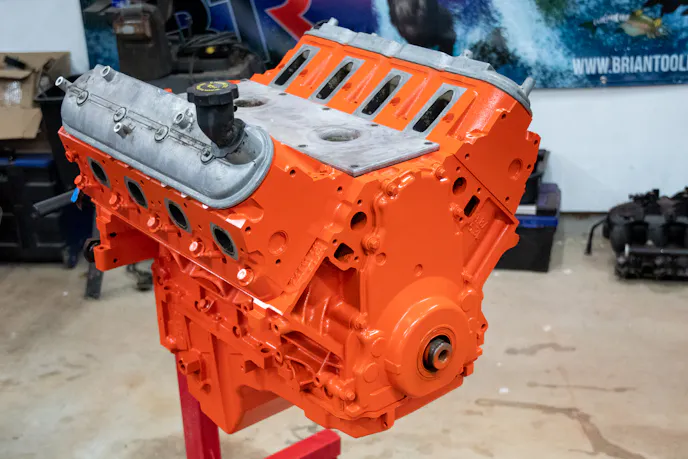
With the tape removed, it’s obvious that our LS is on its way to looking like a vintage engine. Be sure to tune in for part two of this vintage engine build as we install the ARP bolts, Eddie Motorsports accessory drive, and other products from Holley.
You might also like
Tornado Devastates Mid America Motorworks, Destroys Priceless Corvette History
A tornado devastated Mid America Motorworks, damaging rare Corvette prototypes, museum artifacts, and decades of history.