

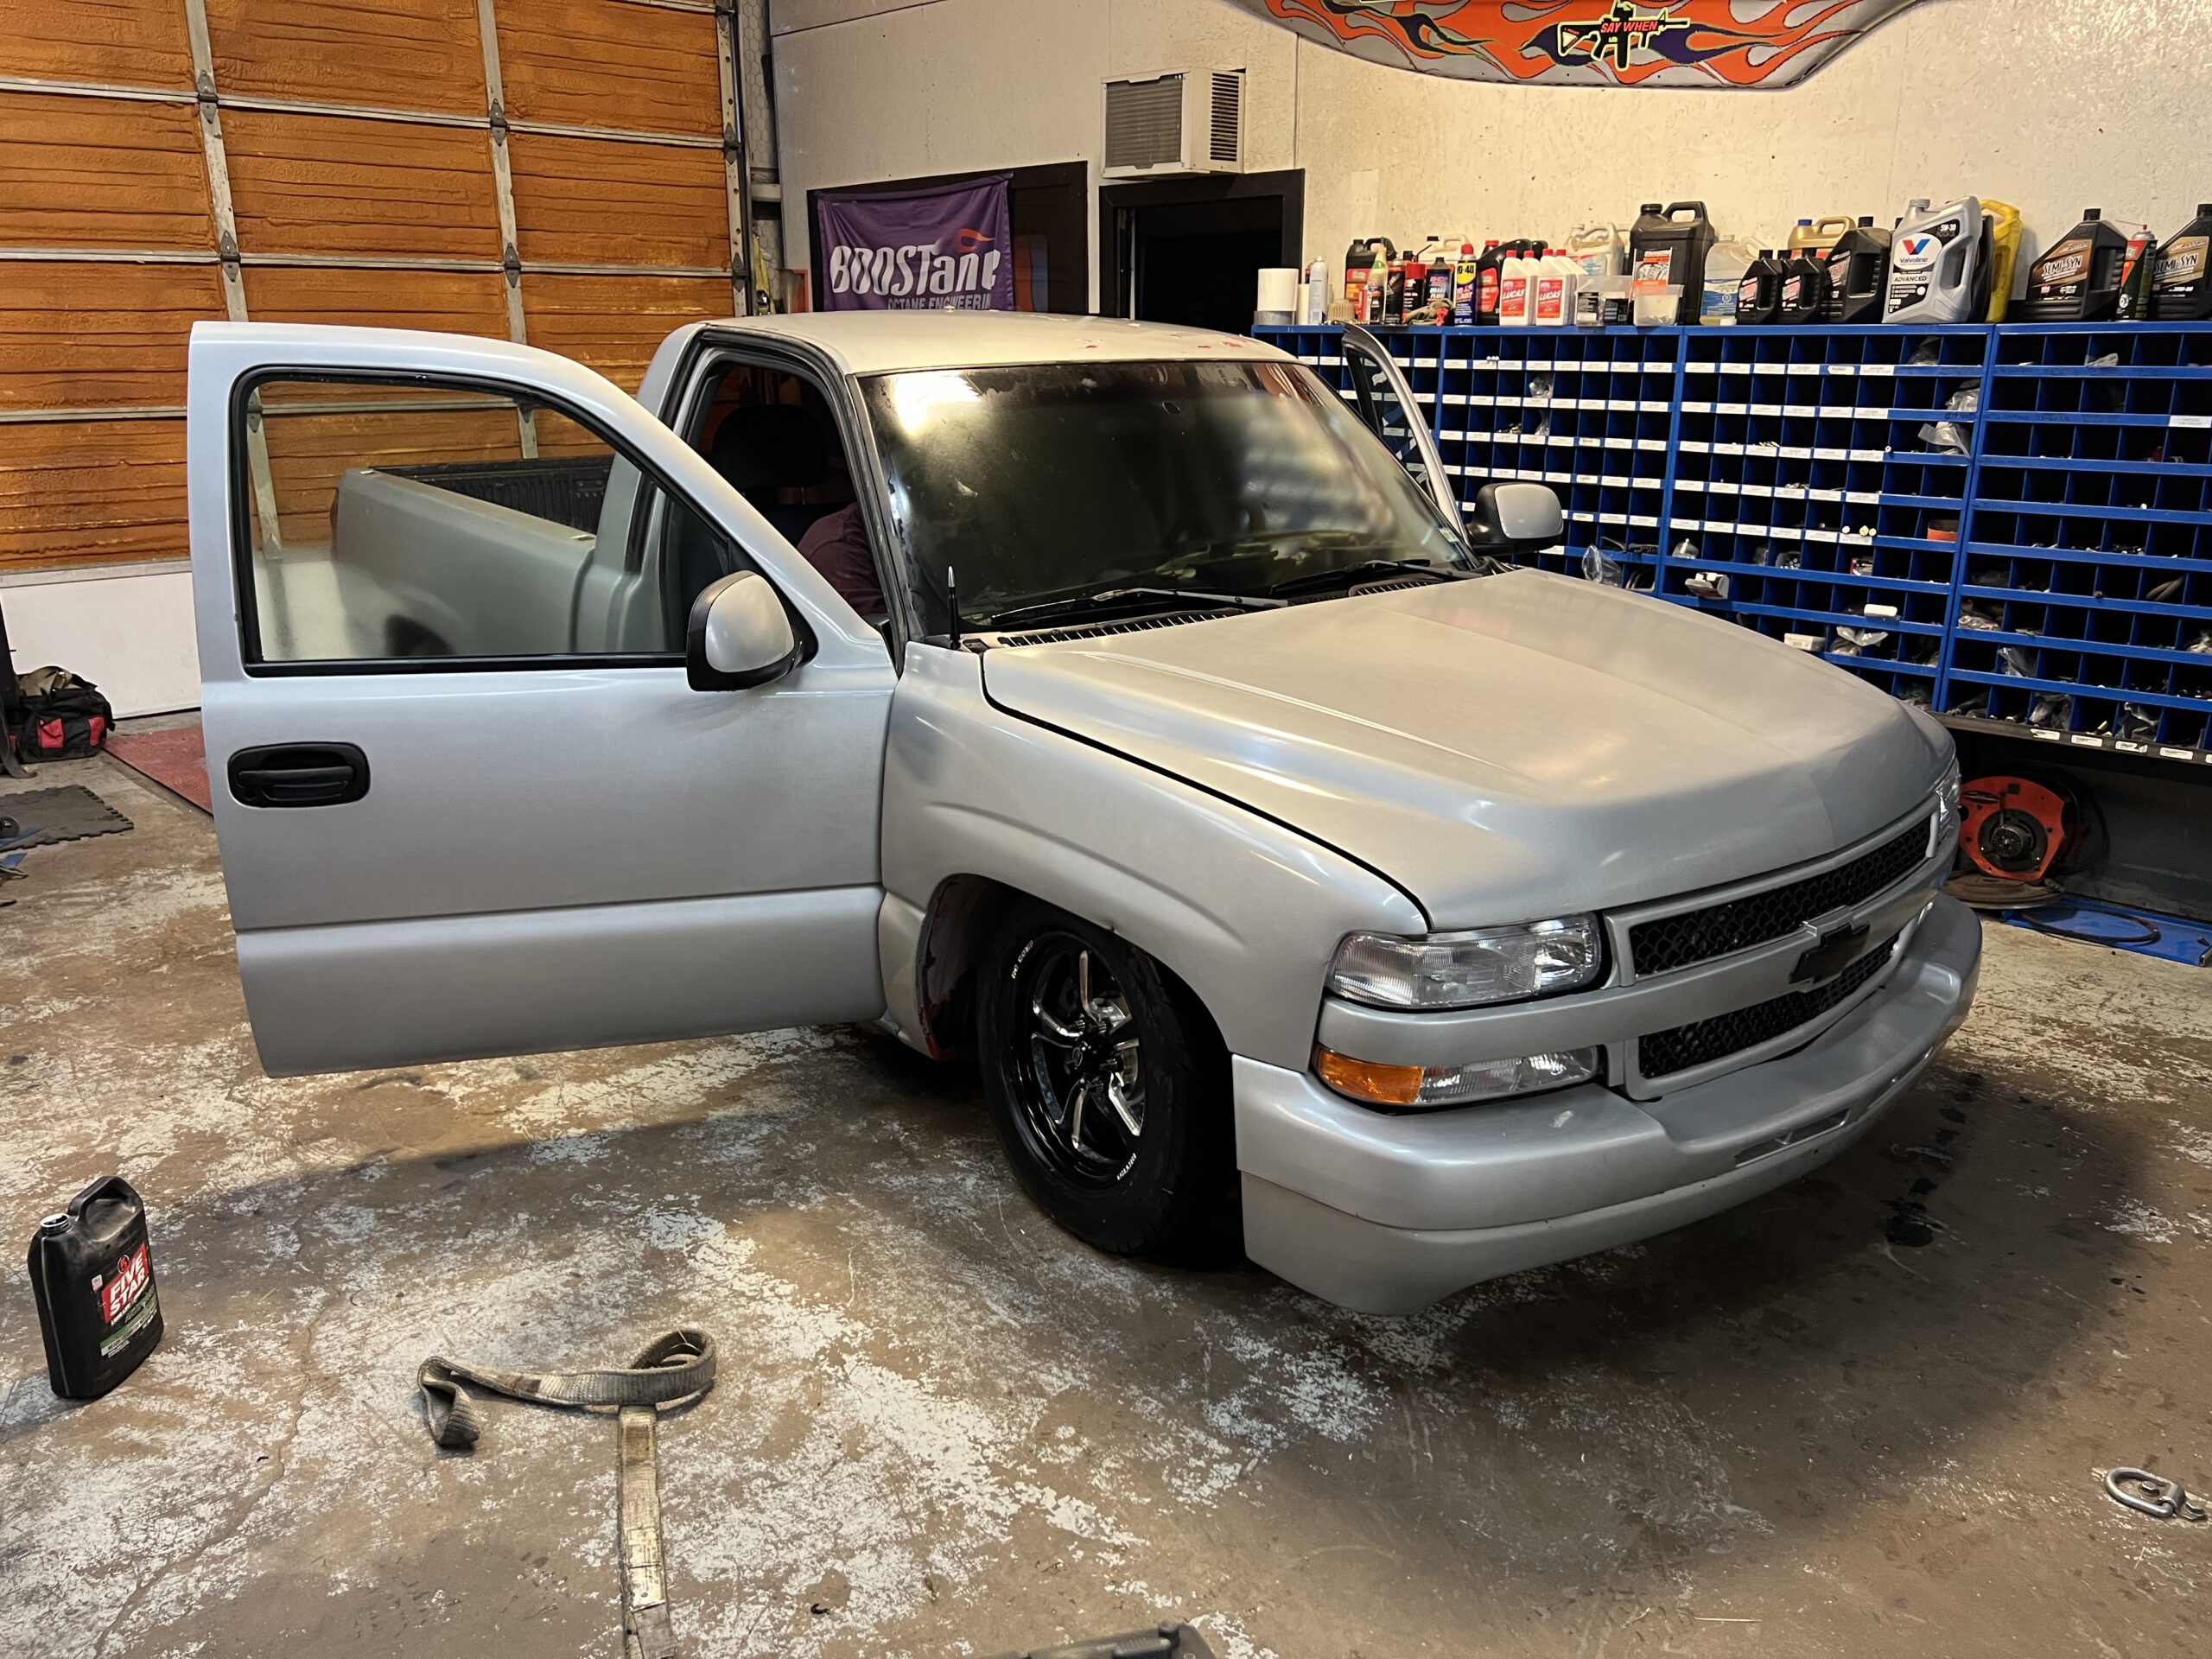
If you’ve spent any time around older project vehicles, you’ve probably seen wiring that makes you shake your head. Years of repairs, aftermarket accessories, stereo installations, alarms, and “quick fixes” eventually leave their mark. Electrical tape covers old repairs, abandoned wires disappear in an abyss located under the dash, and somewhere along the way, someone decided that twisting two wires together was good enough.
Our 2000 Chevrolet Silverado Was No Different. The truck is being built for drag-and-drive competition, where reliability is just as important as horsepower. Eventually, it’ll be powered by a ProCharged 5.3-liter LS, but before the engine ever finds its way between the frame rails, we wanted to eliminate one of the biggest question marks: the factory wiring harness.
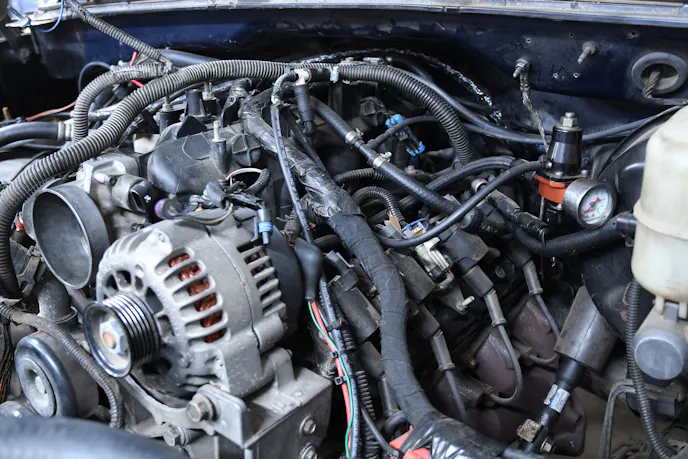
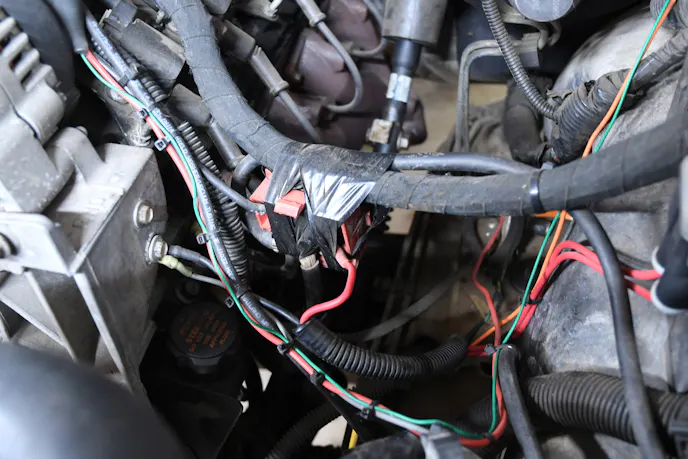
After 26 years, there wasn’t much worth saving. The insulation under the hood had become brittle from years of heat, previous repairs left wires cut and spliced together, and several accessories were added with little thought about the next person who might have to work on the truck. Could the harness have been repaired? Probably. Would we trust it? Not a chance.
Trying to diagnose a wiring problem at home is frustrating enough. Trying to diagnose an issue hundreds of miles from home while you’re supposed to be driving to the next track is a different story. Instead of repairing one section and hoping another didn’t fail later, we decided to remove the factory harness and start over with the Ron Francis Express Wiring Harness.
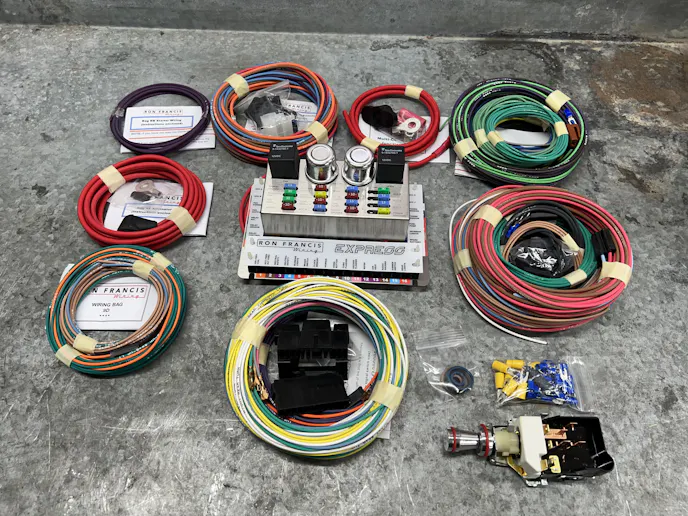
One of the biggest reasons we chose the Express harness was its flexibility. Most universal wiring harnesses are terminated at both ends before they ever leave the box. Once the fuse panel is mounted, the routing is largely dictated by the way the harness was assembled. If that routing doesn’t fit your project, your choices become limited.
The Express harness approaches the installation differently. The engine-side connections are already terminated, but the fuse panel side is left open. That allows every circuit to be routed before the wires are cut to length and terminated at the fuse panel. Instead of working around the harness, the harness works around the vehicle. It’s a simple concept, but one that completely changes the installation process.
Removing 26 Years Of Wiring
With the decision made, it was time to remove the original wiring harness and promptly deposit it in the shop trash can.
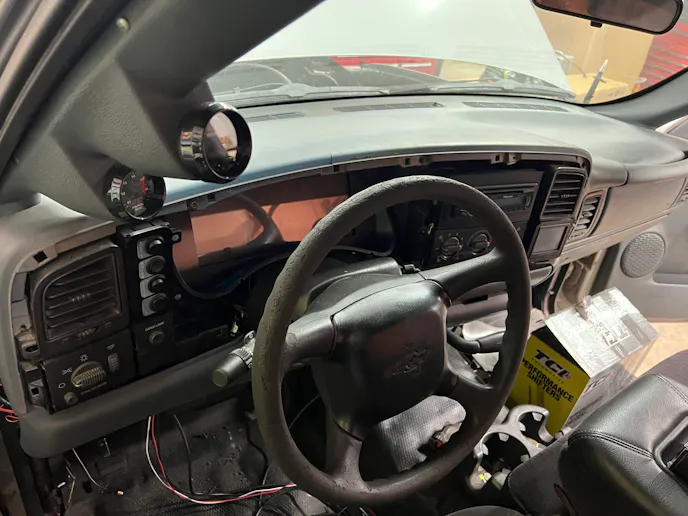
Pulling the dashboard quickly confirmed we made the right choice. The deeper we got into the truck, the more evidence we found that the wiring had been modified several times over the years. Tap-style connectors were scattered throughout the harness, abandoned wires no longer served a purpose, and more than a few repairs relied on electrical tape to hold everything together. The previous owner clearly believed electrical tape could solve almost anything. Unfortunately, wiring doesn’t always agree.
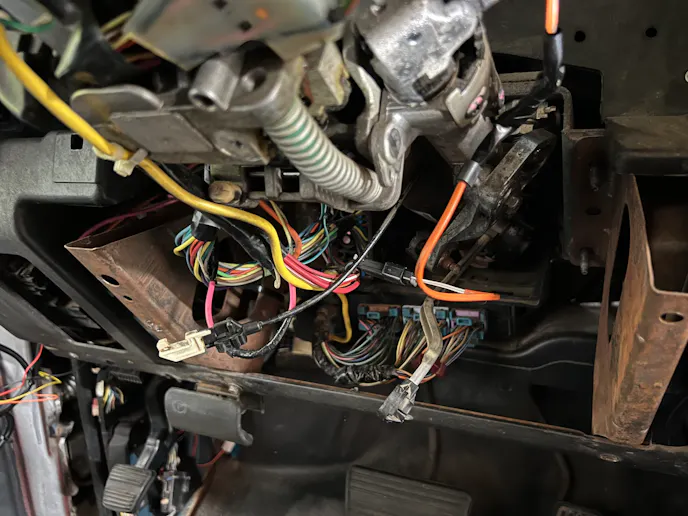
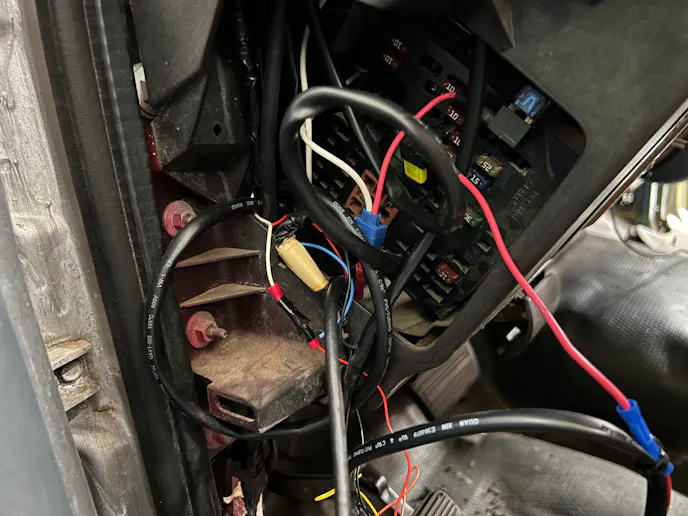
Another discovery involved the remote door locks and an aftermarket radio. Rather than wiring them on their own dedicated circuit, they had been tied into an existing factory circuit. It never caused a failure, but it easily could have overloaded the original circuit and sent us chasing an electrical problem that had nothing to do with the actual failure.
One lesson we’ve learned over the years is to never remove a wire until you know what it does, even if you’re replacing the entire harness. Every connector we planned to reuse was labeled with masking tape before it was unplugged, and factory wiring diagrams helped identify which circuits would remain and which ones could be removed. It takes more time during disassembly, but it makes reassembly much easier.
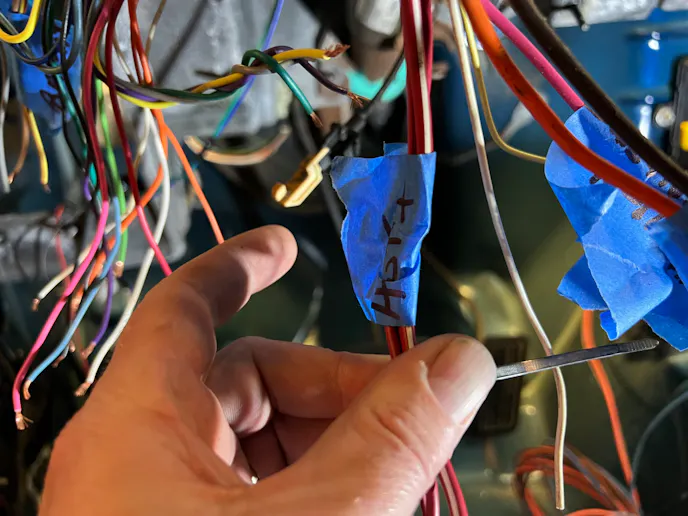
Once the old harness was out of the truck, the project became much less intimidating. Instead of looking at an entire vehicle, we could concentrate on one section at a time.
Finding A Home For The Fuse Panel
Before routing the new harness, the fuse panel needed a permanent location. The passenger side of the firewall checked all the boxes. The panel is easy to reach, leaves plenty of room for routing wires, and stays clear of the steering column, brake pedal, and accelerator pedal. If we ever need to add another circuit or troubleshoot a problem during a drag-and-drive event, everything is within reach.
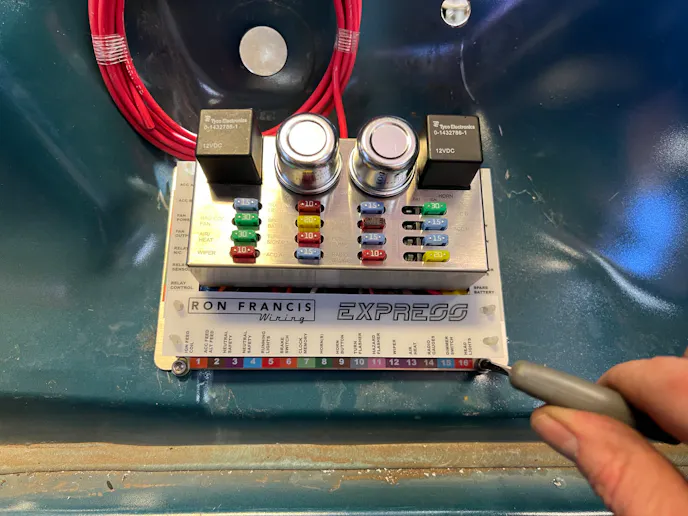
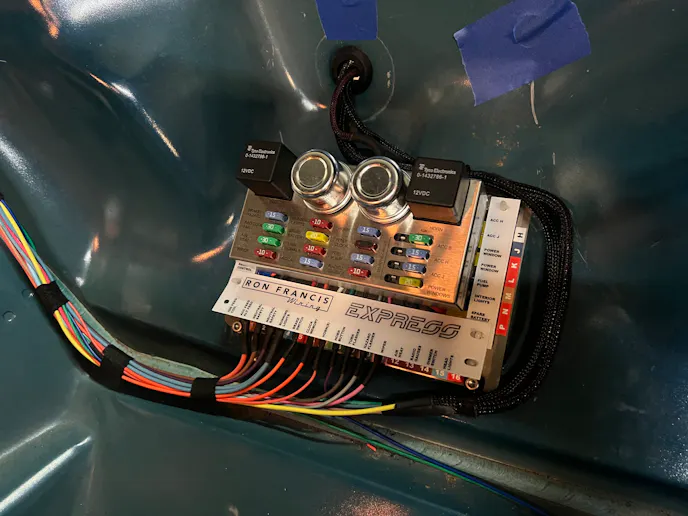
If we were wiring a high-end street rod or a show vehicle, we’d 100-percent hide the fuse panel. This truck has a different purpose. Serviceability took priority. If something ever needs attention during a drag-and-drive event, we don’t want to spend half an hour twisted under the dashboard before we can even start troubleshooting. We want to remove the lower dash panel and get to work.
Routing The Harness
With the fuse panel mounted, it was finally time to start routing wires.
Rather than terminating the wires first, every circuit was routed to its destination before a single connection was made at the fuse panel. Headlights, parking lights, turn signals, the ignition switch, fuel system, rear lighting, and interior accessories were all laid out first. Once the routing looked right, the wires were cut to length and terminated. One thing to note is that, during this process, we allowed enough slack in the wires to get good access, and then cut them to size before plugging them into the fuse box.
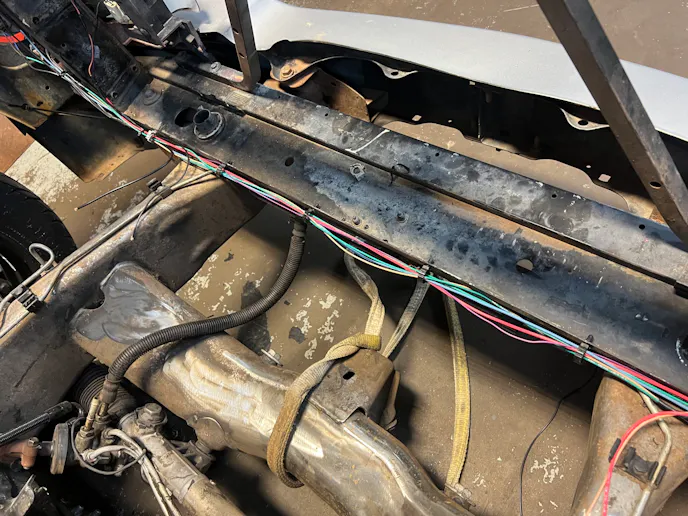
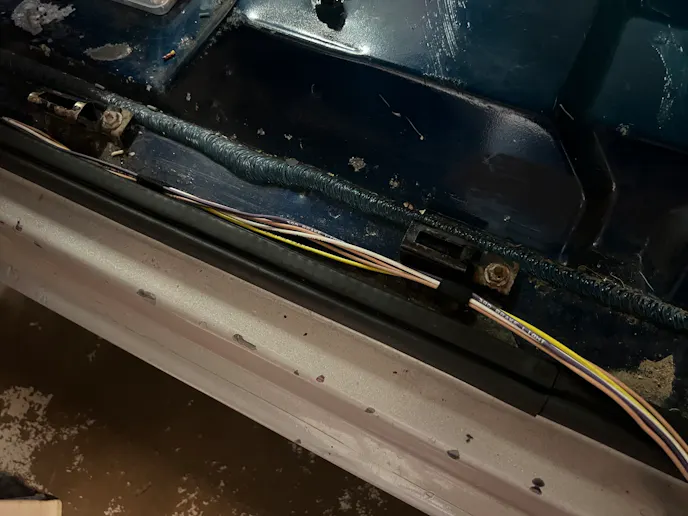
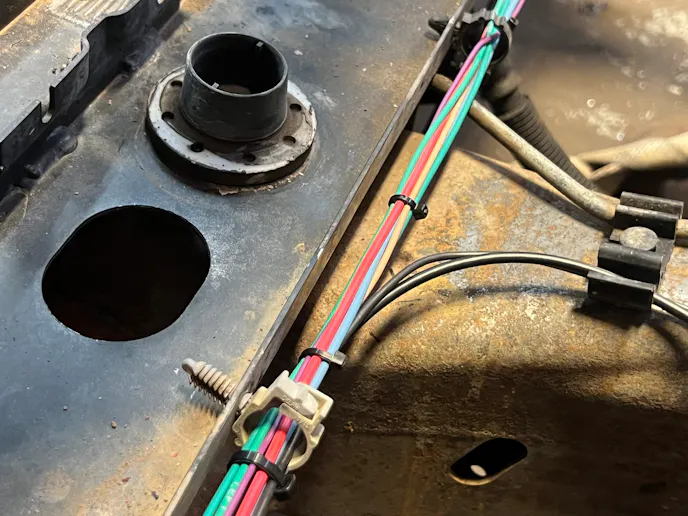
That’s one of the biggest advantages of the Express harness. Most wiring harnesses dictate where the wires need to go. The Express harness lets you decide. If a routing path didn’t look right, we moved it. If another path looked cleaner, we used it. Nothing was permanent until the wire was cut.
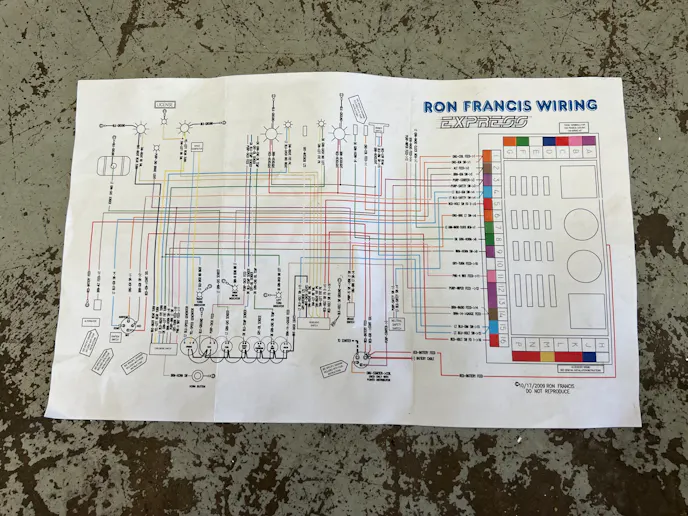
Taking the extra time to route every circuit before making a connection produced a much cleaner installation. Instead of bundles of excess wire stuffed behind the dashboard, every circuit followed a natural path through the truck. Good wiring isn’t hard — it’s time-consuming.
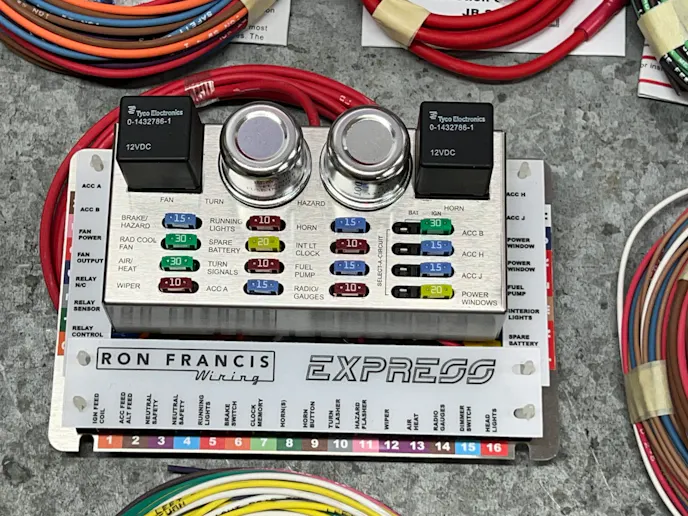
One big tech tip is to cut last. One of the biggest mistakes first-time installers make is cutting wires too early. First, route the wire and temporarily secure it, then step back and look at it. If you’re happy with the routing, make the cut. Taking another inch off a wire is easy, putting it back isn’t.
Making The Connections
A wiring harness is only as reliable as the connections holding it together. For this project, we used non-insulated terminals with adhesive-lined heat-shrink tubing. One of the reasons I prefer non-insulated terminals is that I can inspect the crimp before the heat shrink is installed. There’s no guessing whether the connection is good or not. The adhesive-lined heat shrink seals the connection from moisture while also providing strain relief, making it a much better option than leaving the terminal exposed.
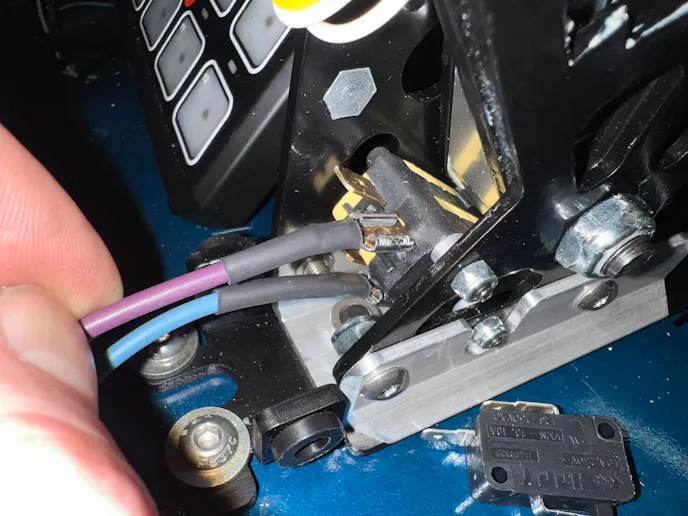
The right tools are just as important as the connectors themselves. A quality wire stripper and a professional crimping tool make it much easier to produce consistent, reliable connections. If you plan on wiring more than one vehicle, the tools are well worth the investment.
All of the wiring supplies used throughout this project came from WireCare. From professional wiring tools and terminals to heat shrink, braided loom, and weather pack connectors, they’ve become my go-to source because they stock quality products in one place.
Dressing The Harness
After verifying the front lighting circuits worked correctly, that section of the harness came back out one final time so it could be protected with split braided loom. Braided loom protects the wiring from abrasion, but it also gives the finished harness a much cleaner appearance. Once everything was reinstalled, the wiring blended into the truck instead of becoming the first thing you noticed when the hood was opened. The engine should be the focal point, not the wiring.
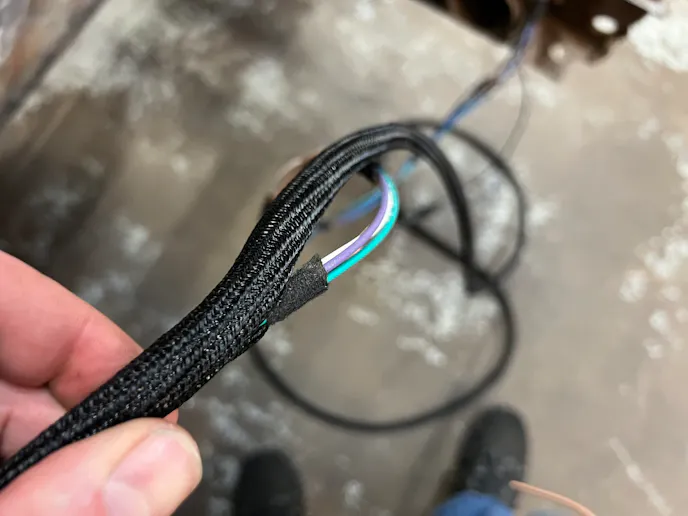
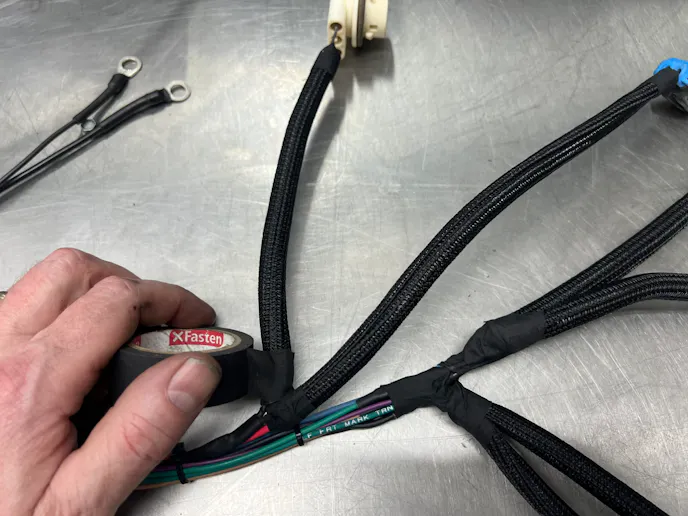
For areas that weren’t covered with braided loom, we wrapped the harness with cloth automotive tape instead of traditional electrical tape. While quality electrical tape has its place, years of heat eventually take their toll. The adhesive softens, the tape begins to unravel, and before long, you’re left with a sticky mess that’s miserable to remove. Cloth automotive tape does a much better job of withstanding years of heat and leaves the harness looking cleaner for longer. There’s a reason manufacturers use it on new vehicles instead of the plastic crappy stuff.
Tech Tip: Tools & Supplies
One thing we’ve learned over the years is that quality electrical work starts with quality tools and materials. Good tools don’t guarantee a good wiring job, but they make it much easier to produce one.
Tools
- WireCare wire stripper
- Professional ratcheting crimper
- Heat gun
- Digital multimeter
- Wire cutters
Supplies
- Non-insulated terminals
- Adhesive-lined heat shrink
- Weather pack connectors
- Split braided loom
- Cloth automotive harness tape
- Zip ties
Integrating The Factory Ignition Switch
One area where we decided to stray from the supplied Ron Francis instructions involved the ignition switch. The Express harness includes a universal ignition switch that’s perfectly suited for street rods and classic cars. In those applications, the switch mounts directly to a metal dashboard and works exactly as intended. That wasn’t the case with our Silverado.
The factory ignition switch is integrated into the steering column, and there was no reason to reinvent something that already worked. Installing the supplied switch would have left us with a factory ignition switch that no longer served a purpose, or worse, a hole in the steering column cover where it used to be, and neither option made much sense.
Instead, we adapted the Express harness to work with the factory ignition switch using weather pack connectors. If the steering column ever needs to come out, the switch can be unplugged and removed without cutting a single wire. The truck retains its factory appearance, the steering column remains serviceable, and we didn’t have to modify the dashboard to make an aftermarket switch fit. Sometimes the best solution isn’t replacing a factory component. It’s finding a better way to integrate it.
Building For Future Repairs
Anyone who has owned an older pickup knows there’s a good chance the bed will come off at some point. Whether it’s replacing a fuel pump, repairing rust, or working on the chassis, eventually the wiring between the cab and bed has to be disconnected. That’s why we added weather pack connectors to everything past the cab.
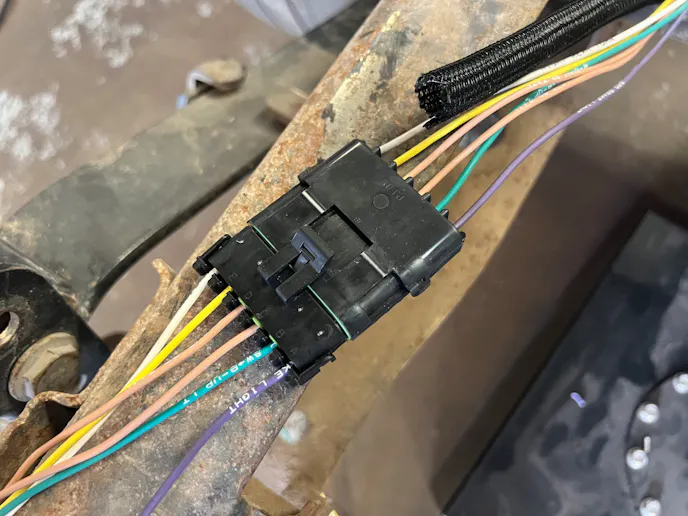
The taillights, third brake light, fuel pump, and fuel sender were all routed through weather packs, allowing the entire bed to be disconnected in minutes without cutting a single wire. Could we have hardwired everything? Sure, but then we’d be cutting up a perfectly good wiring harness the first time the bed needed to come off. We’ve learned over the years that spending a little extra time adding connectors during the installation pays off later. They’re inexpensive, easy to install, and they make future repairs much easier.
The Moment Of Truth
Every wiring project eventually reaches the same point. The tools are put away. The heat gun cools off. The last piece of heat shrink has been installed. Now it’s time to see if all those hours actually paid off.
With the battery connected, we started checking circuits one at a time. The Holley ECU powered up. The ignition switch worked exactly as it should. The starter circuit received power. At that point, we finally allowed ourselves to breathe. Then we worked our way through the rest of the truck. Headlights. Turn signals. Brake lights. Horn. Interior lights. Remote door locks. Everything worked.
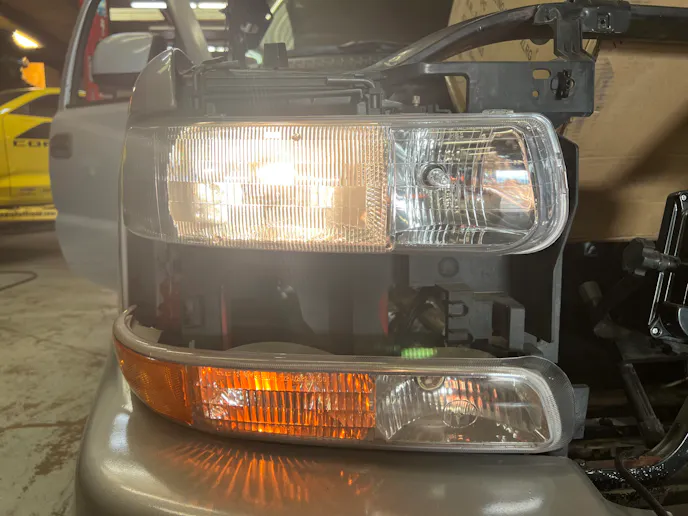
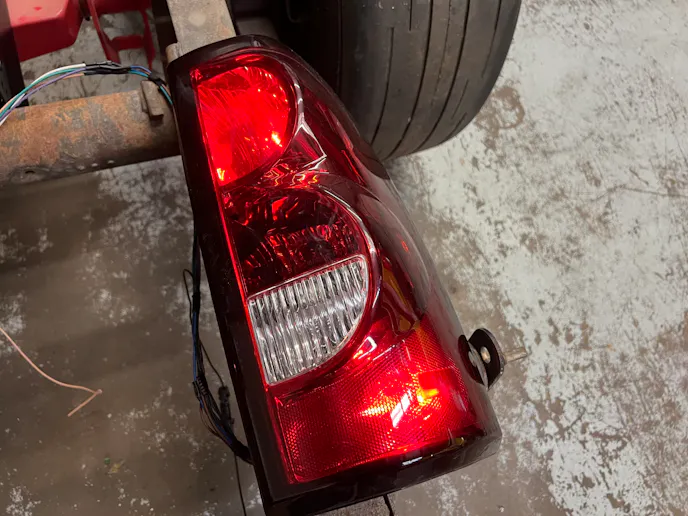
That was a huge milestone for this project. The engine isn’t even installed yet, but one of the biggest pieces of the build is complete. More importantly, we now have complete confidence in the electrical system before adding another layer of complexity.
Final Thoughts
Rewiring an entire vehicle sounds intimidating until you break it down into smaller jobs. That’s really all it is. One circuit at a time. One connection at a time. One section at a time.
The Ron Francis Express Wiring Harness gave us the opportunity to remove 26 years of questionable repairs and replace them with an electrical system built specifically for this truck. More importantly, it gave us the flexibility to route the harness the way we wanted, improve serviceability, and build something we can trust in during a drag-and-drive event. When someone opens the hood, the engine should be the focal point — not the wiring. That’s the sign of a quality wiring job. It doesn’t draw attention; it just works.
You might also like
ATI 6R80E Transmission Kit Brings Six-Speed Power To LS Swaps
The ATI 6R80E transmission kit adapts Ford's six-speed automatic to bolt behind LS and LT Chevy engines rated up to 1,000 horsepower.