For build updates, newest to oldest, scroll down.
Project Build Updates
– Digging Deeper: Converting An Axle From Semi-Float To Full-Float
– Electric To Hydraulic: Adding Power Steering To Chevy’s LT376/535
– Change Of Heart: Swapping In Chevrolet Performance’s LT376/535
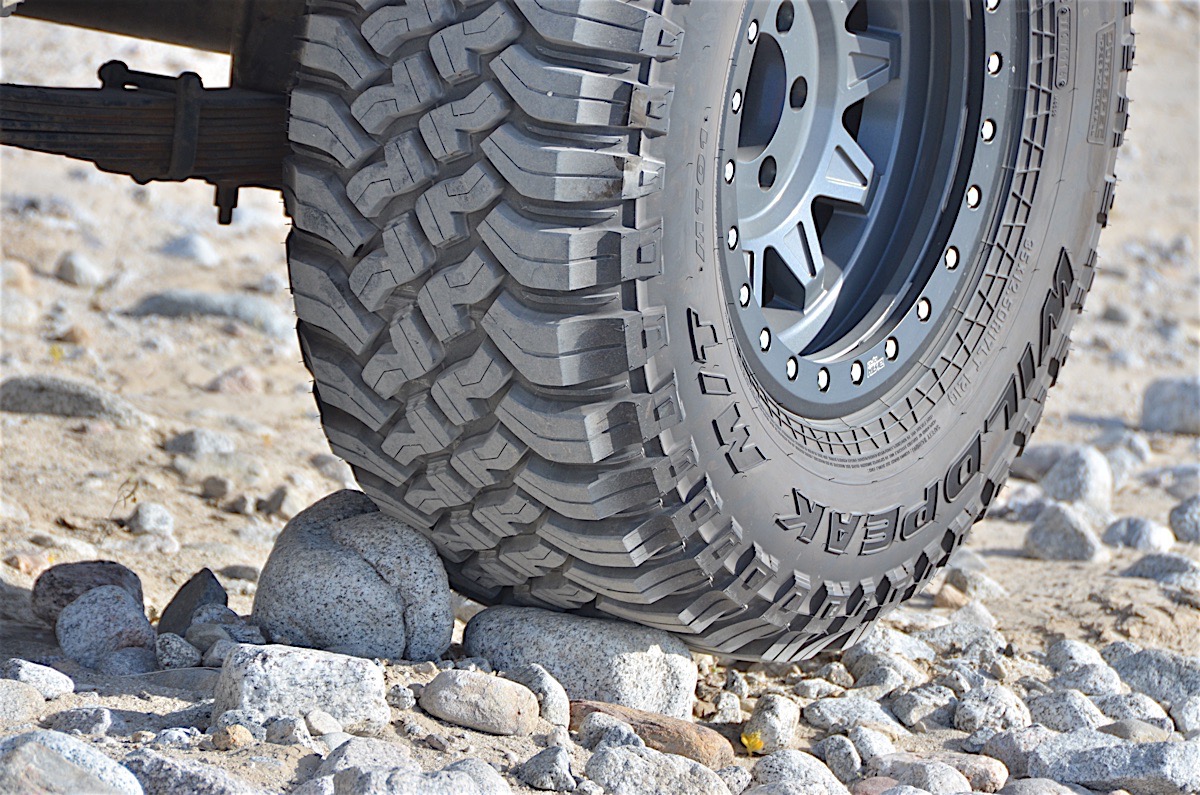
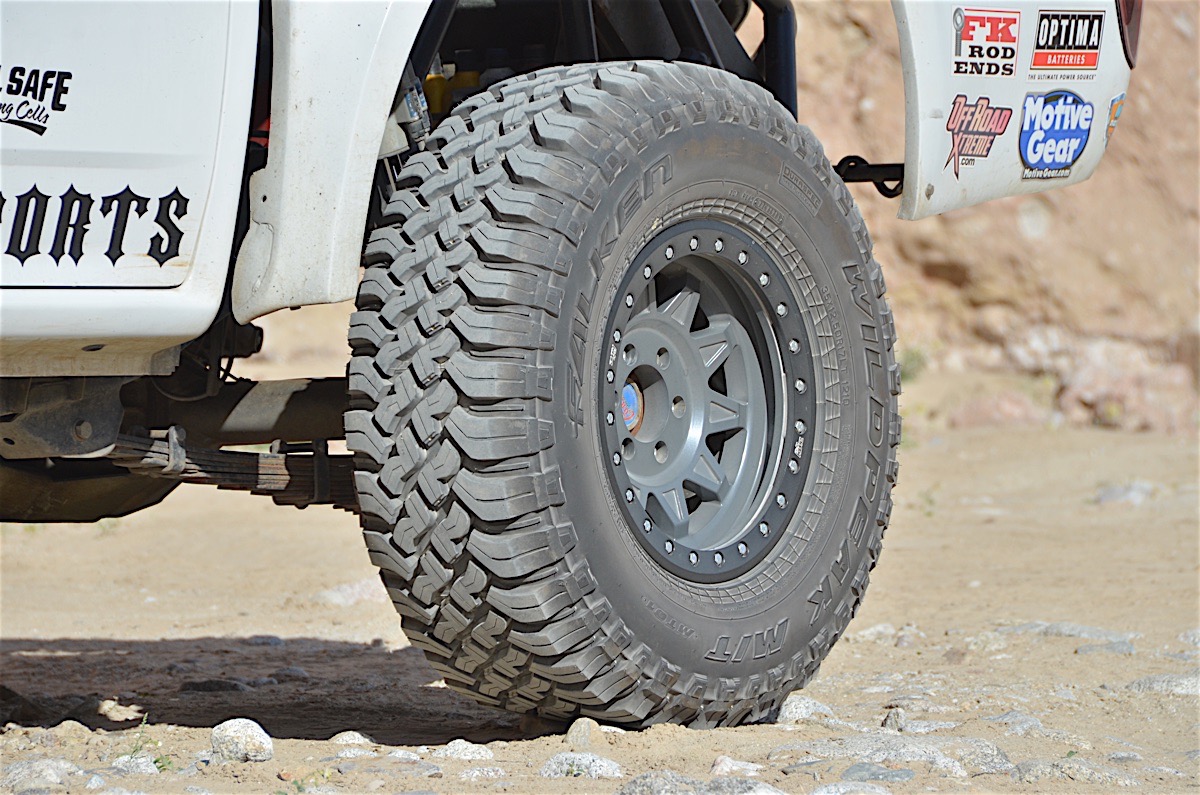
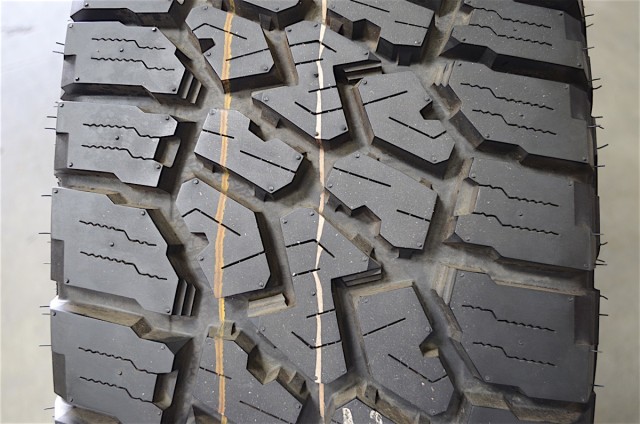
– Falken Wildpeak M/T Tire Review
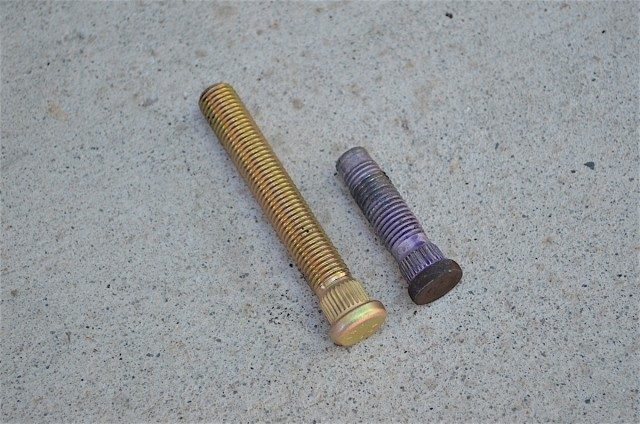
– Wheelin’ Safely With ARP Bolts And Longer Studs
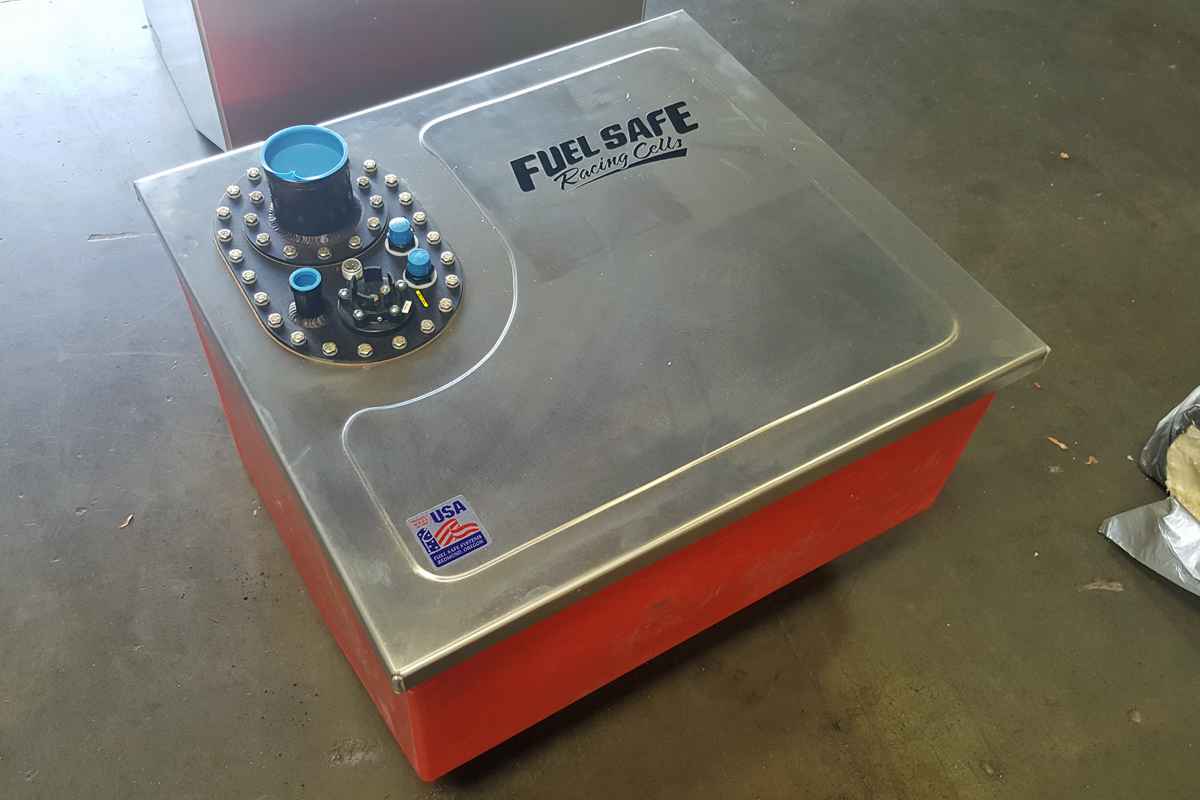
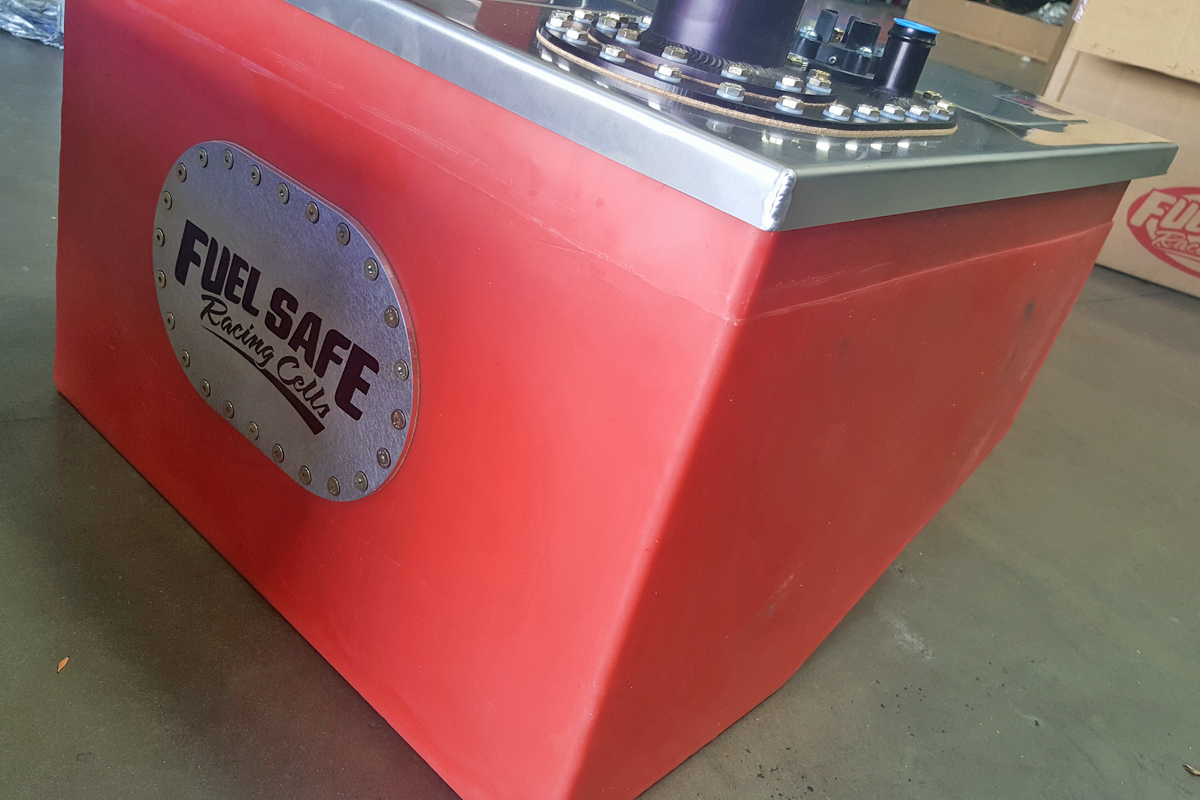
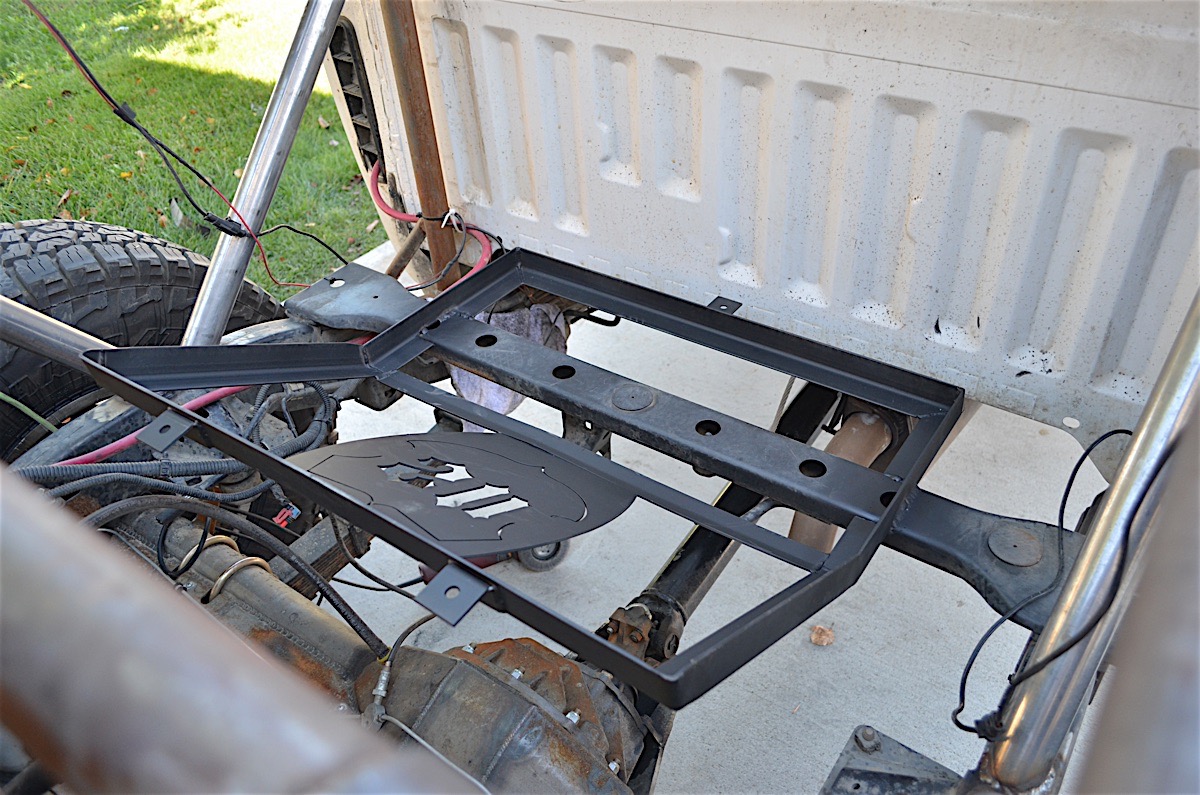
– Building the Ultimate Off-Road Fuel Cell
– Falken Wildpeak A/T3W Tire Review
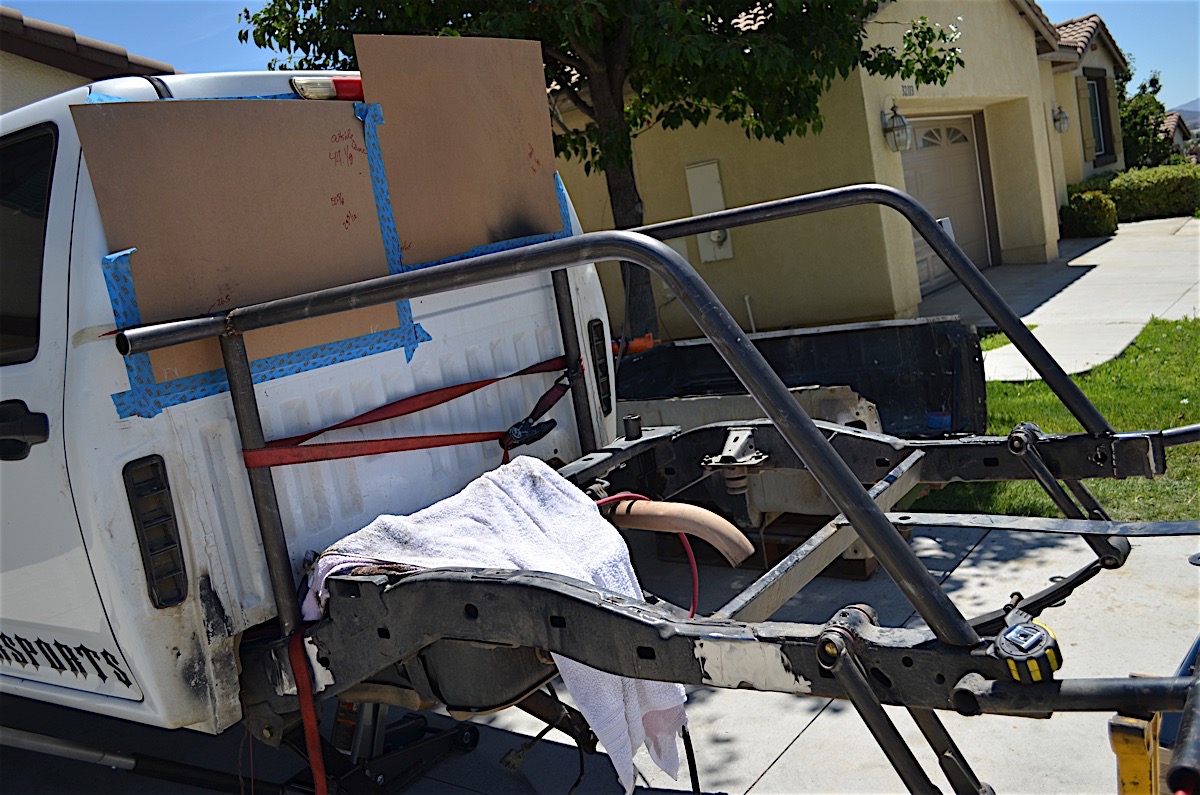
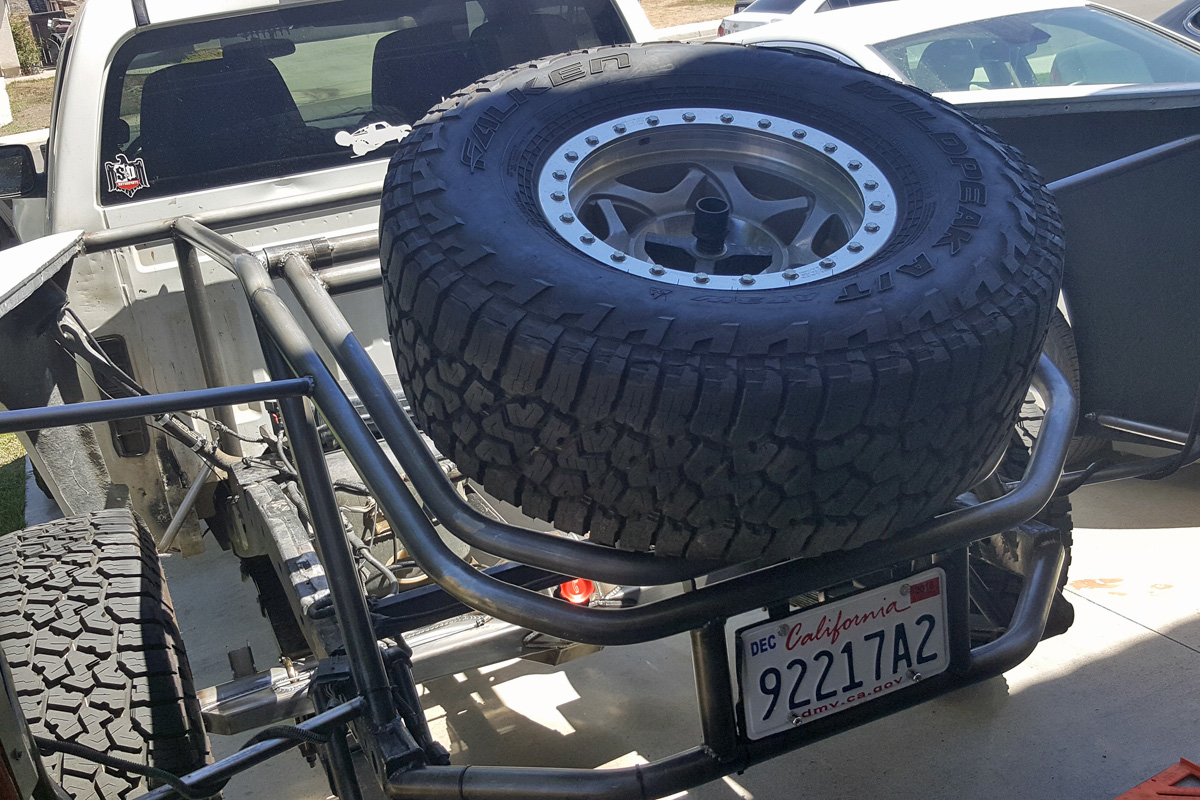
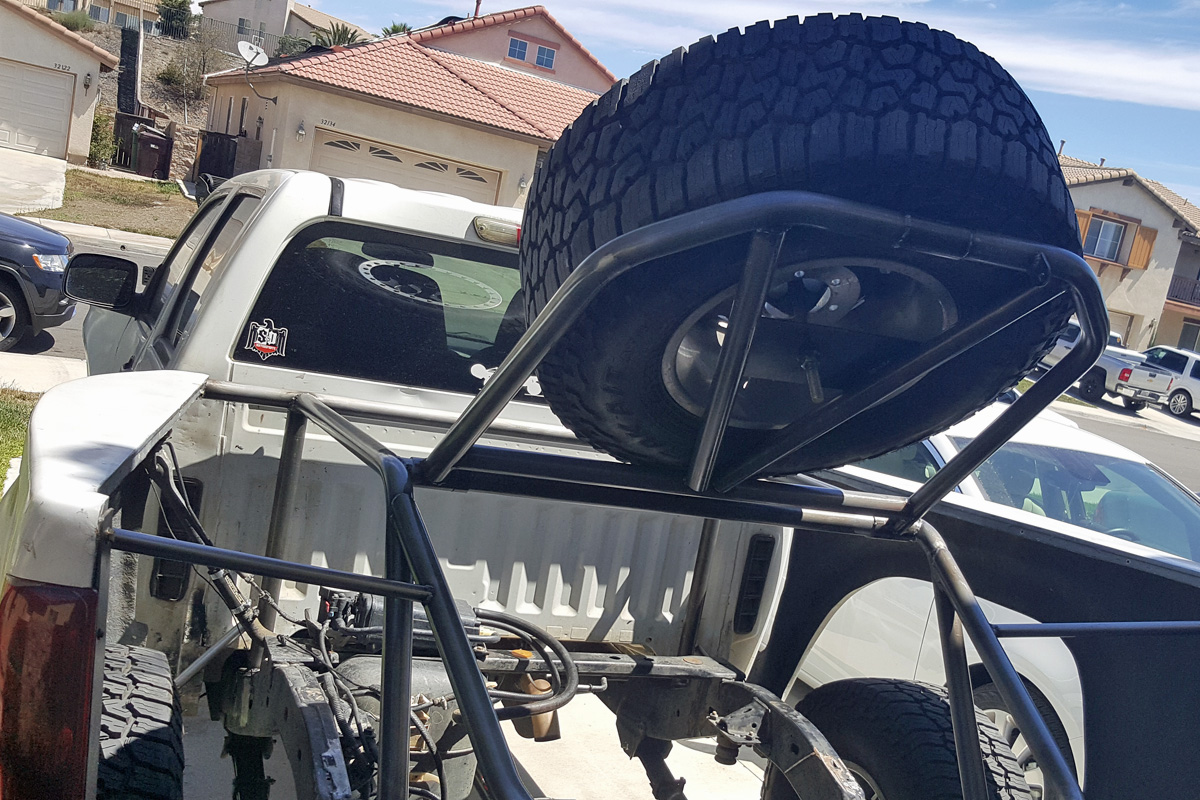
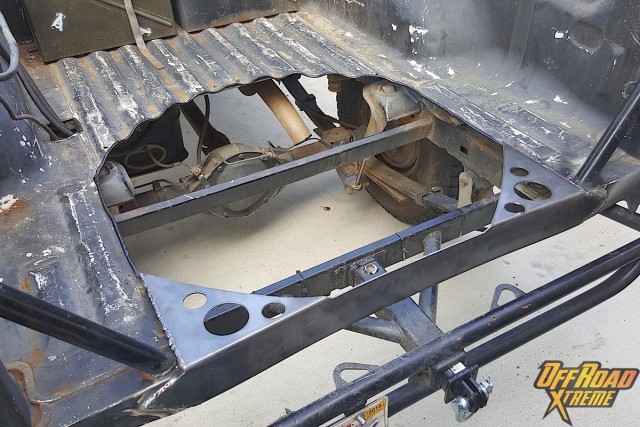
– Building A Rear Cage To Suit All Of Our Needs
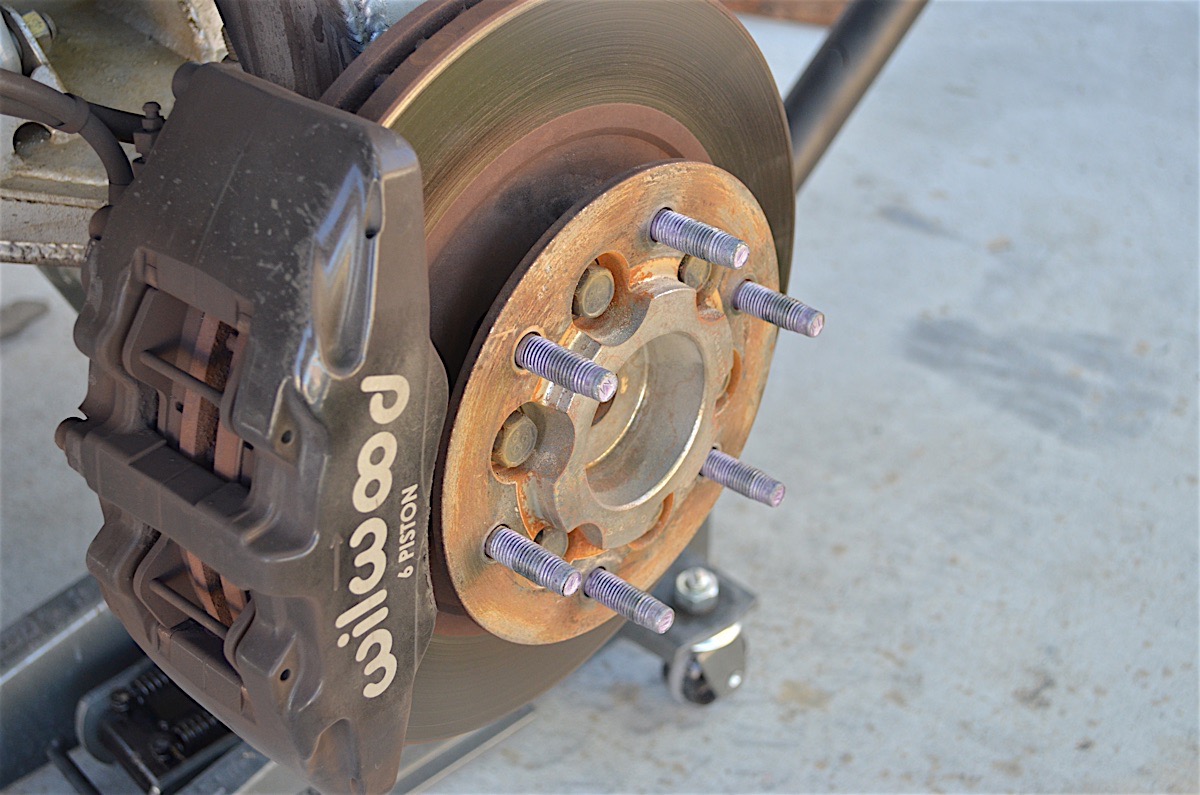
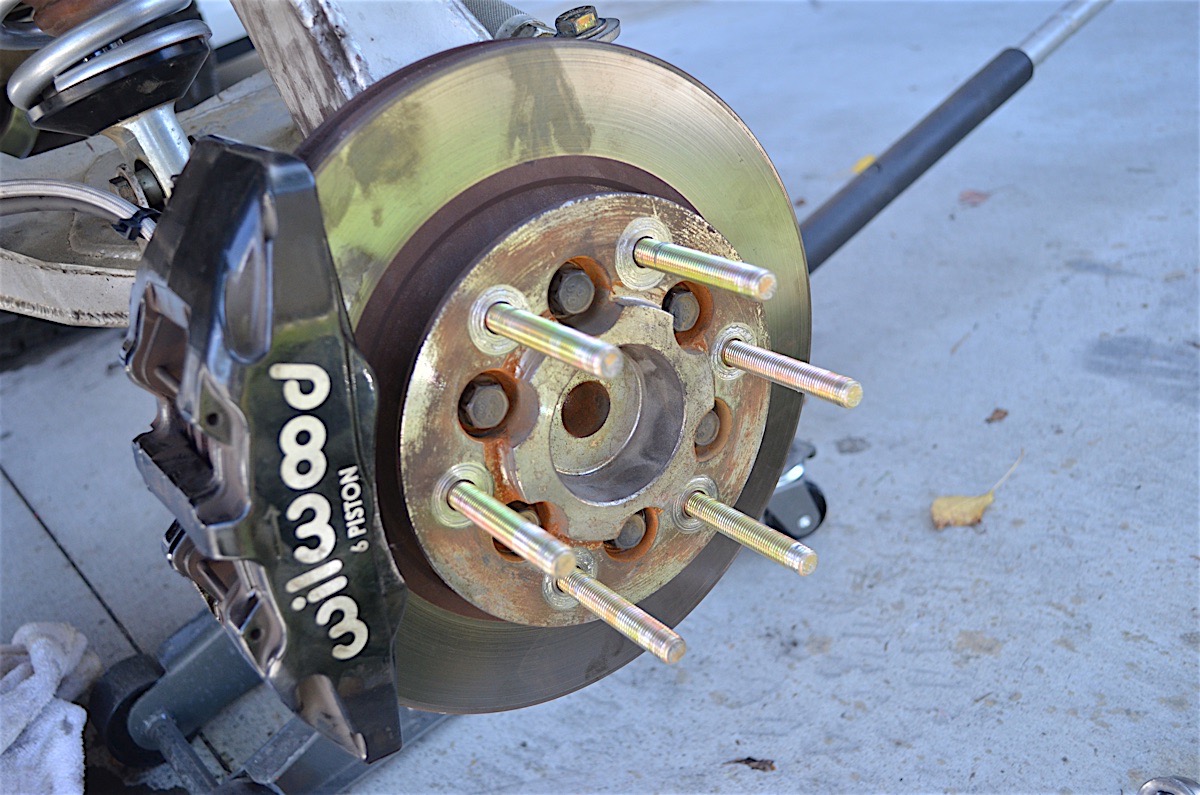
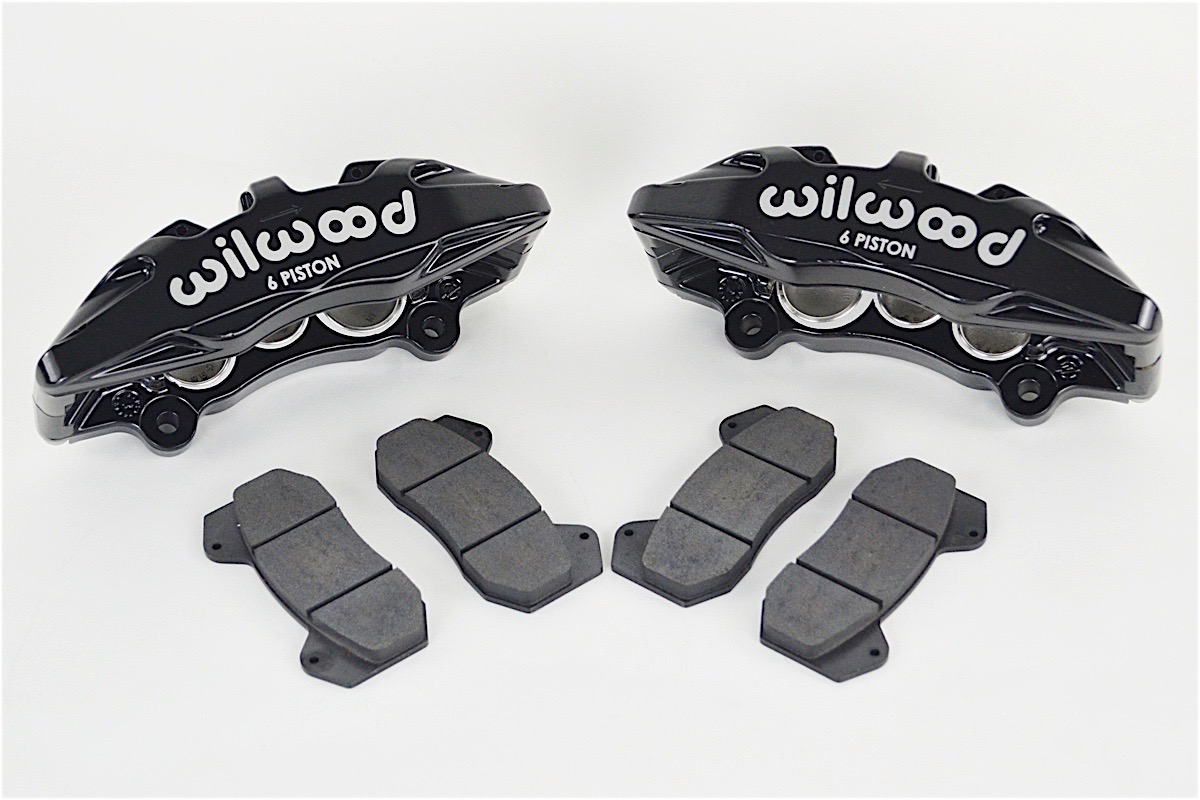
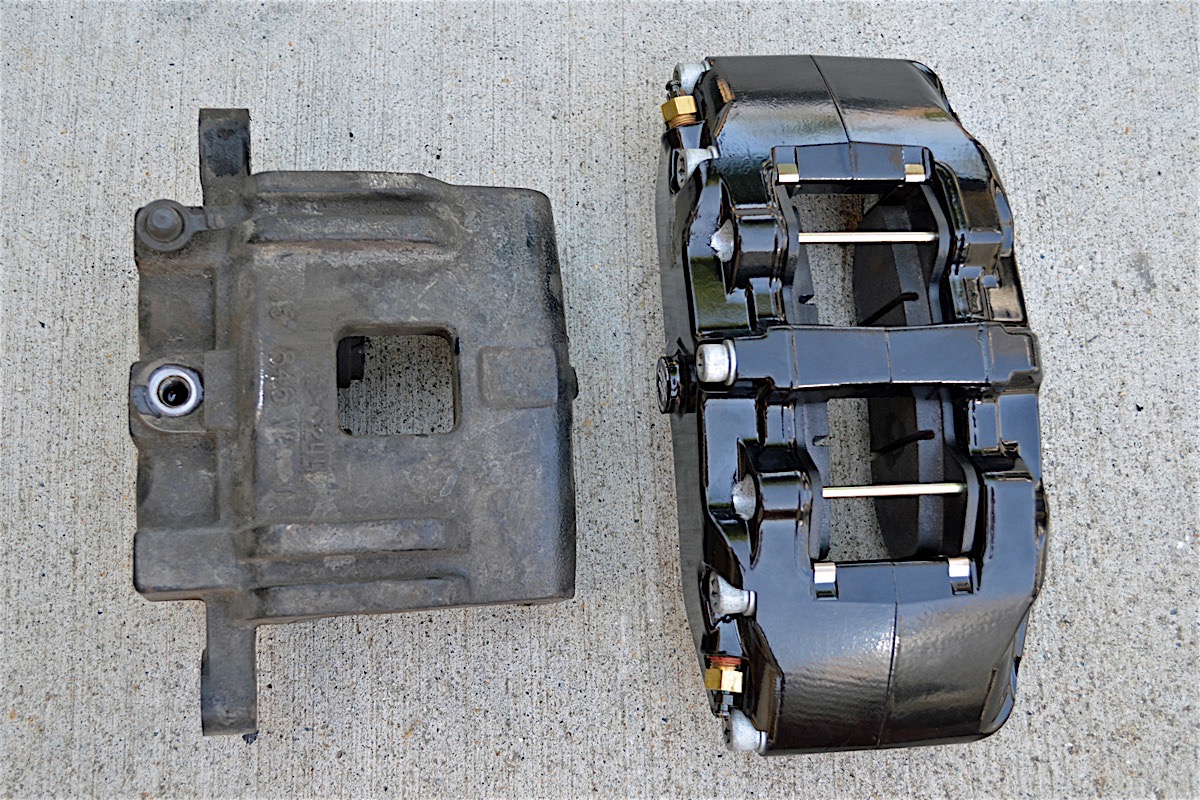
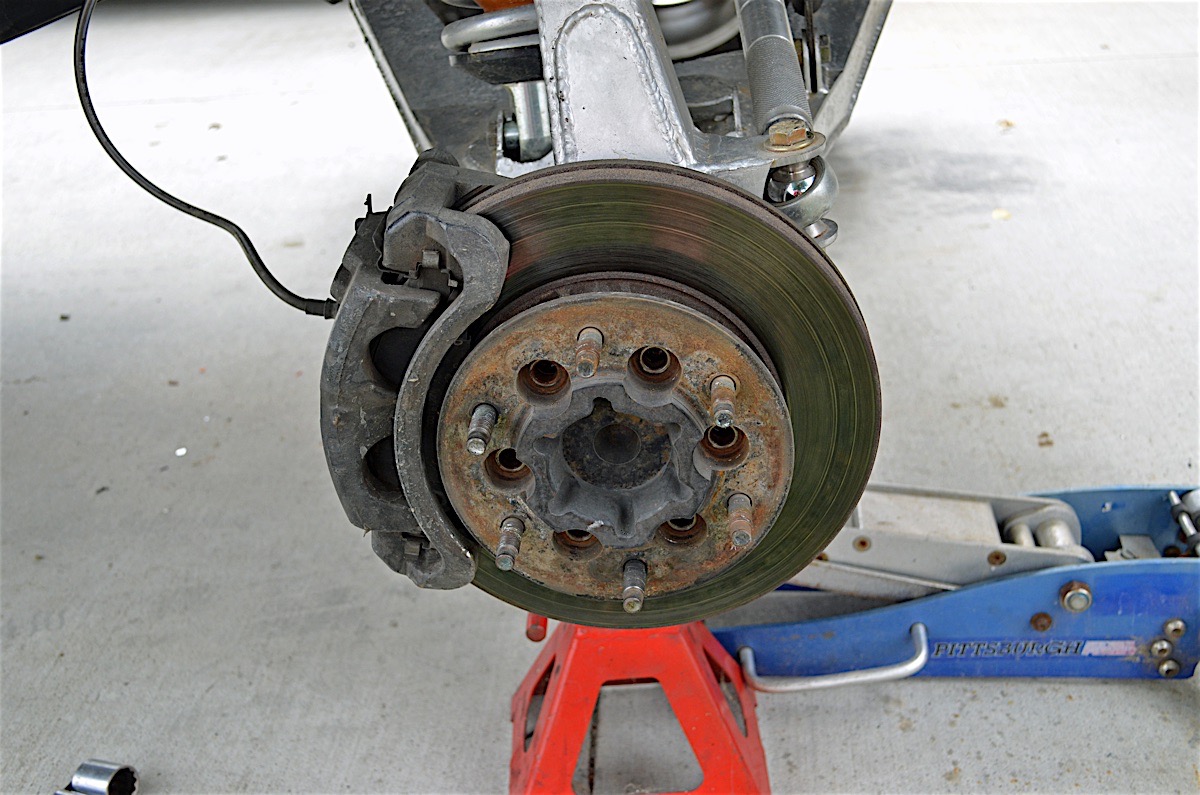
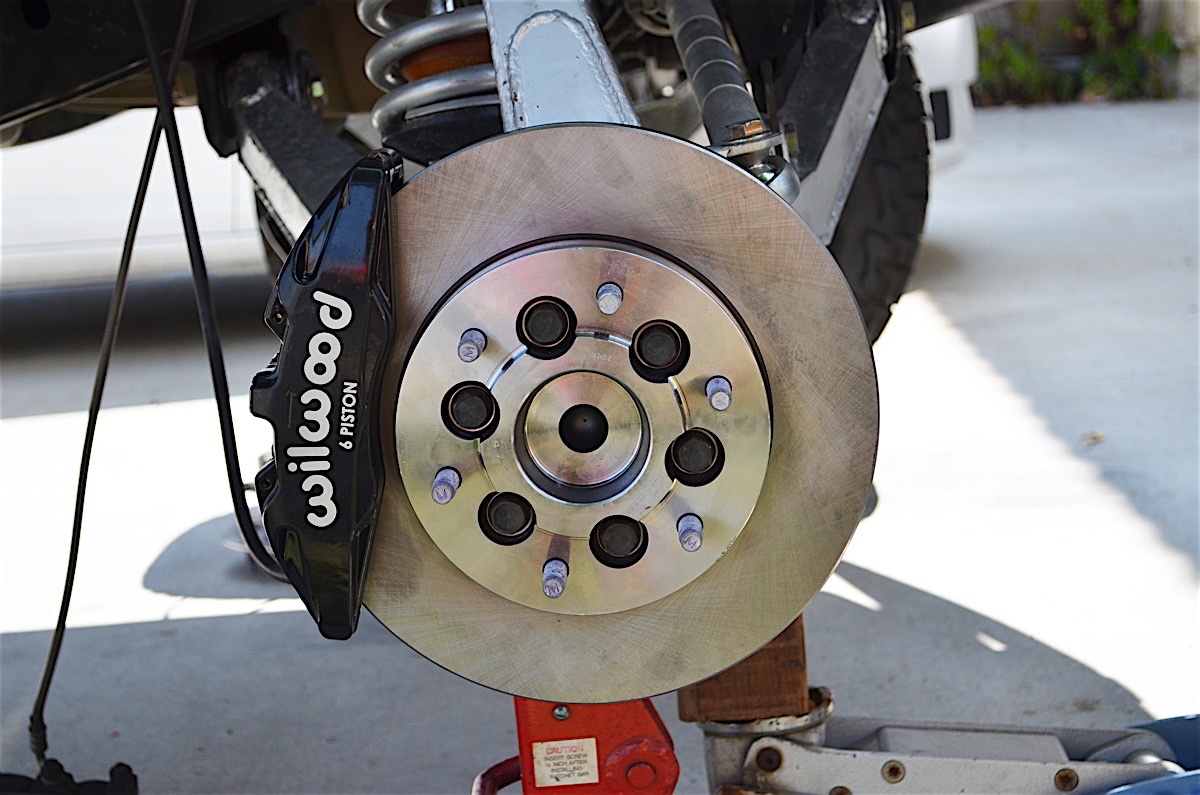
– Stopping In The Dirt With Wilwood Brakes
– Building A Currie F9 Axle For Project Storm Trooper
– Creating A Custom Long Travel Suspension
– Whoop Eater: Long Travel And Coilover Install
– Rigid Industries’ Rock Lights Brighten Up The Trail
12/4/2019 – It Has Been Some Time, But There Has Been Plenty Of Work
In the last year, there have been many highs and lows, but work on the truck has continued even if it may have not been at the pace that we had been going. We will dive deeper into all of the progress in future articles, but for the time being we wanted to update what has been going on with the truck.
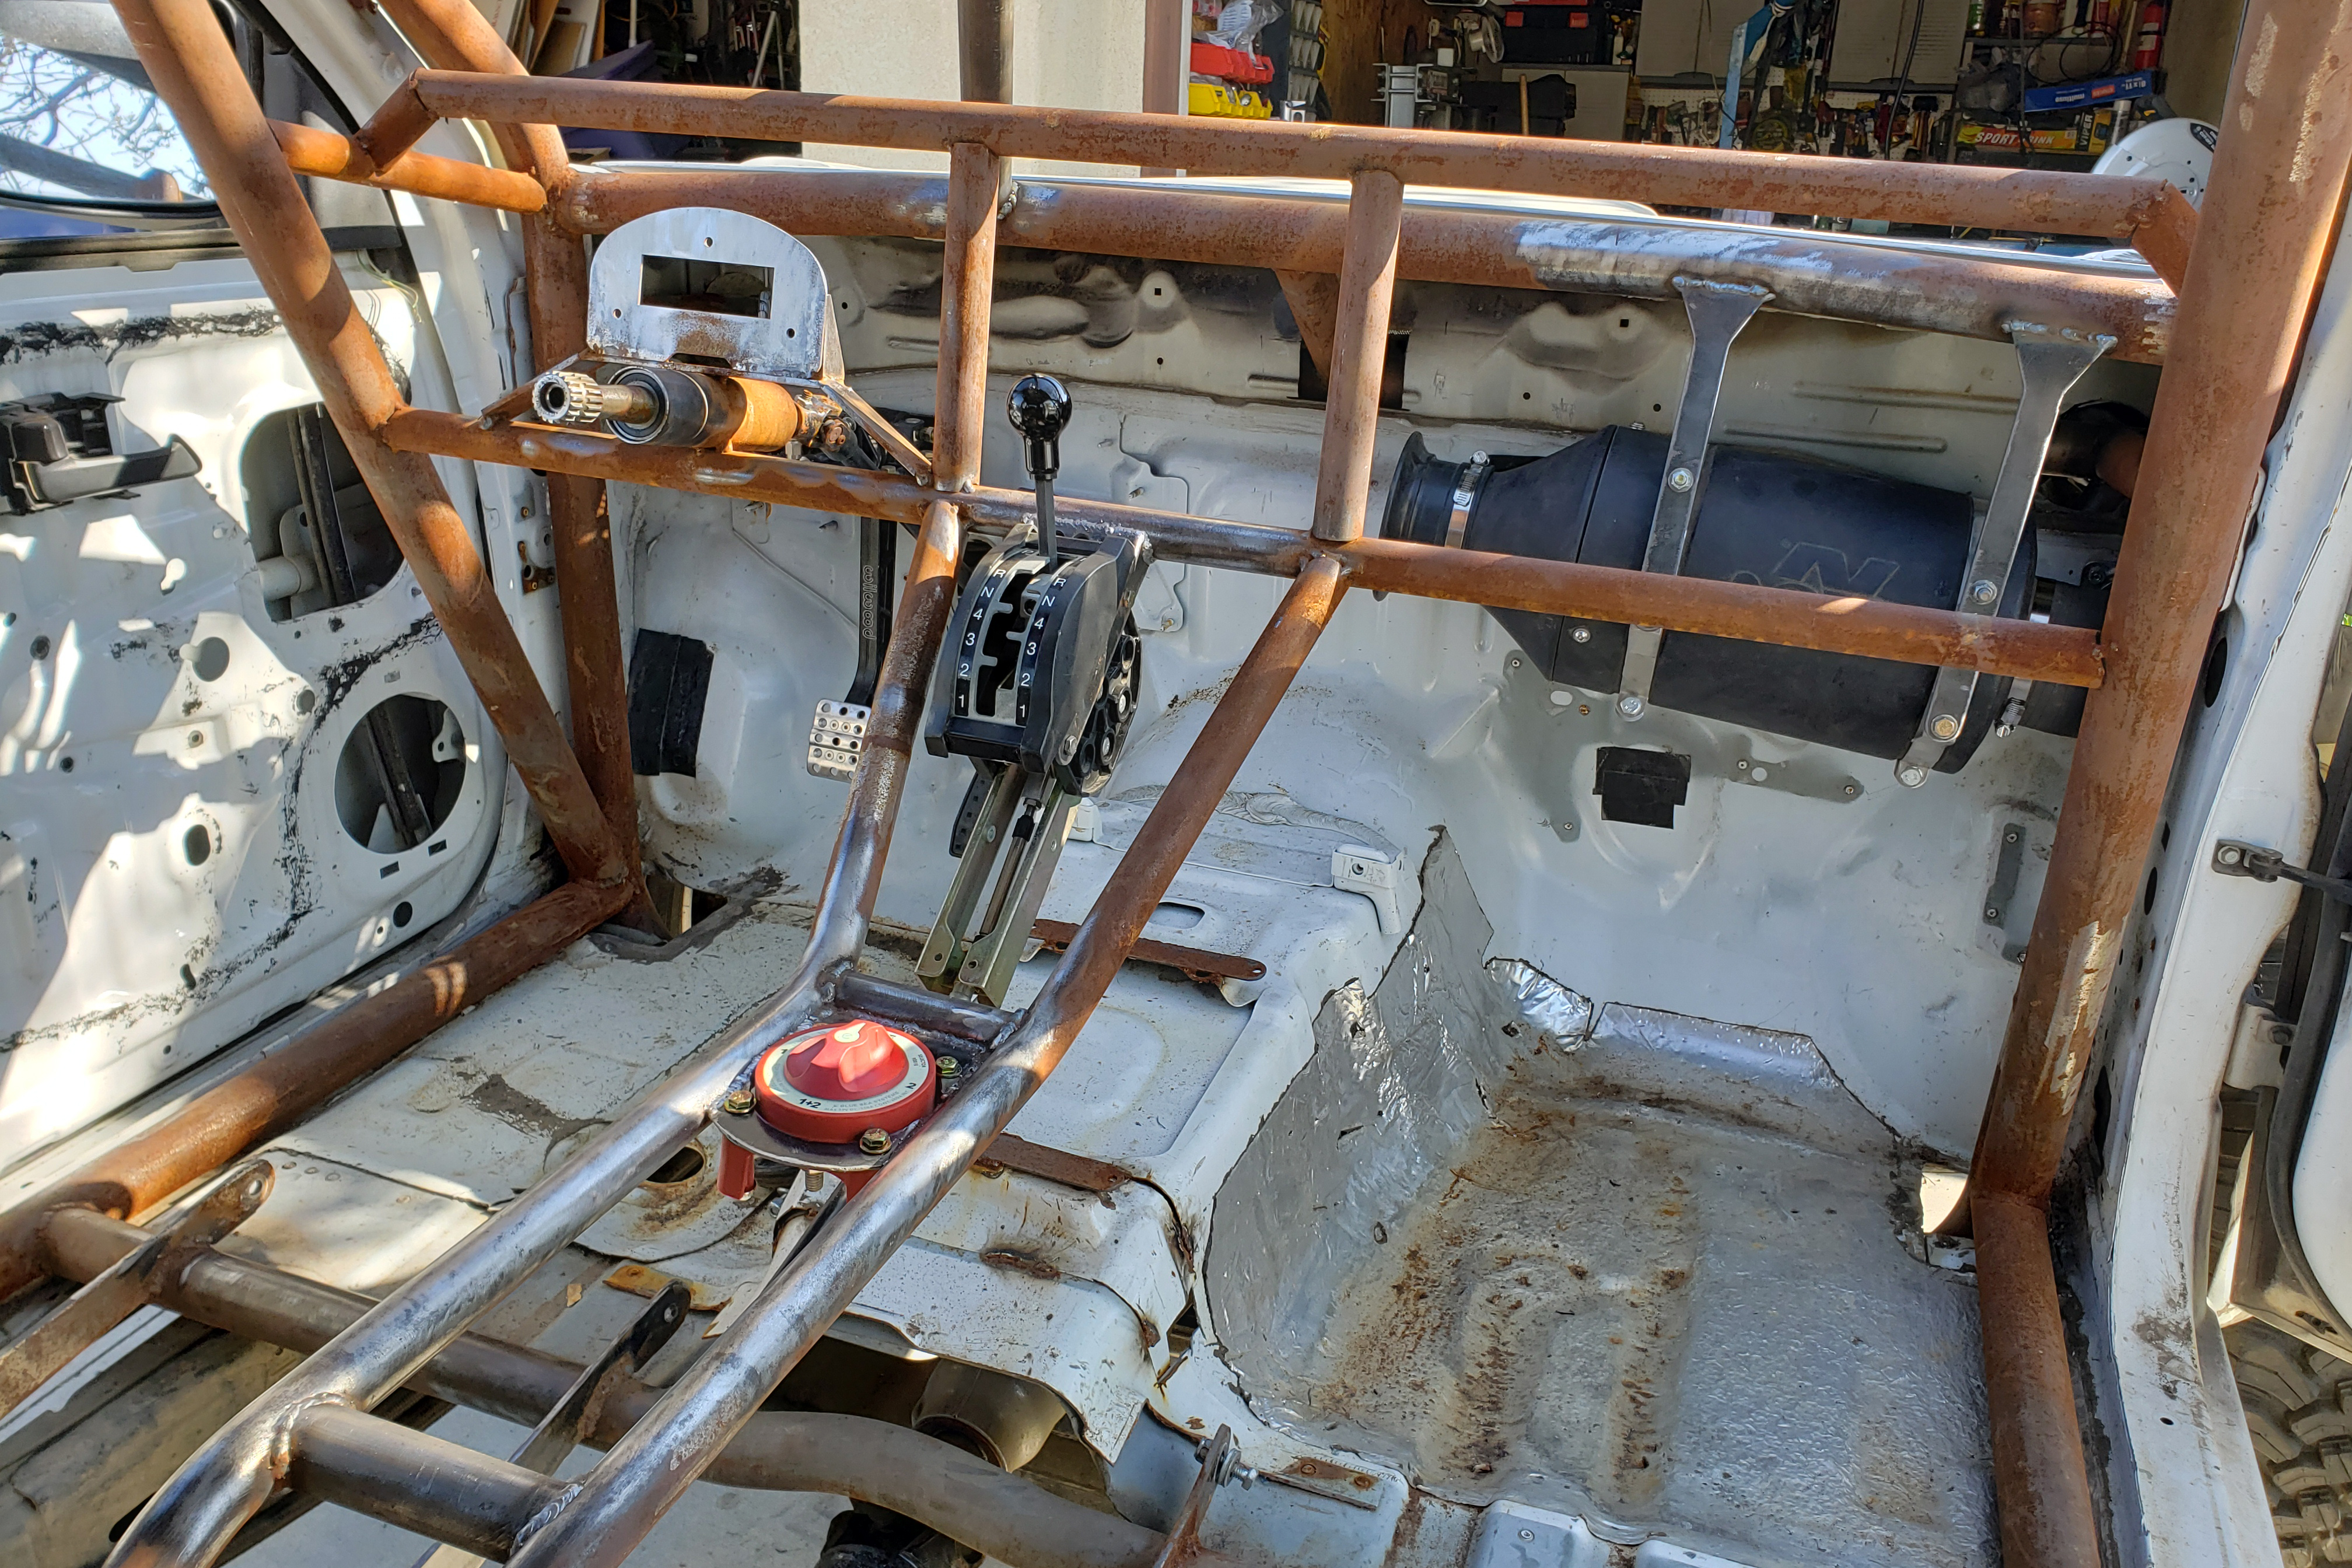
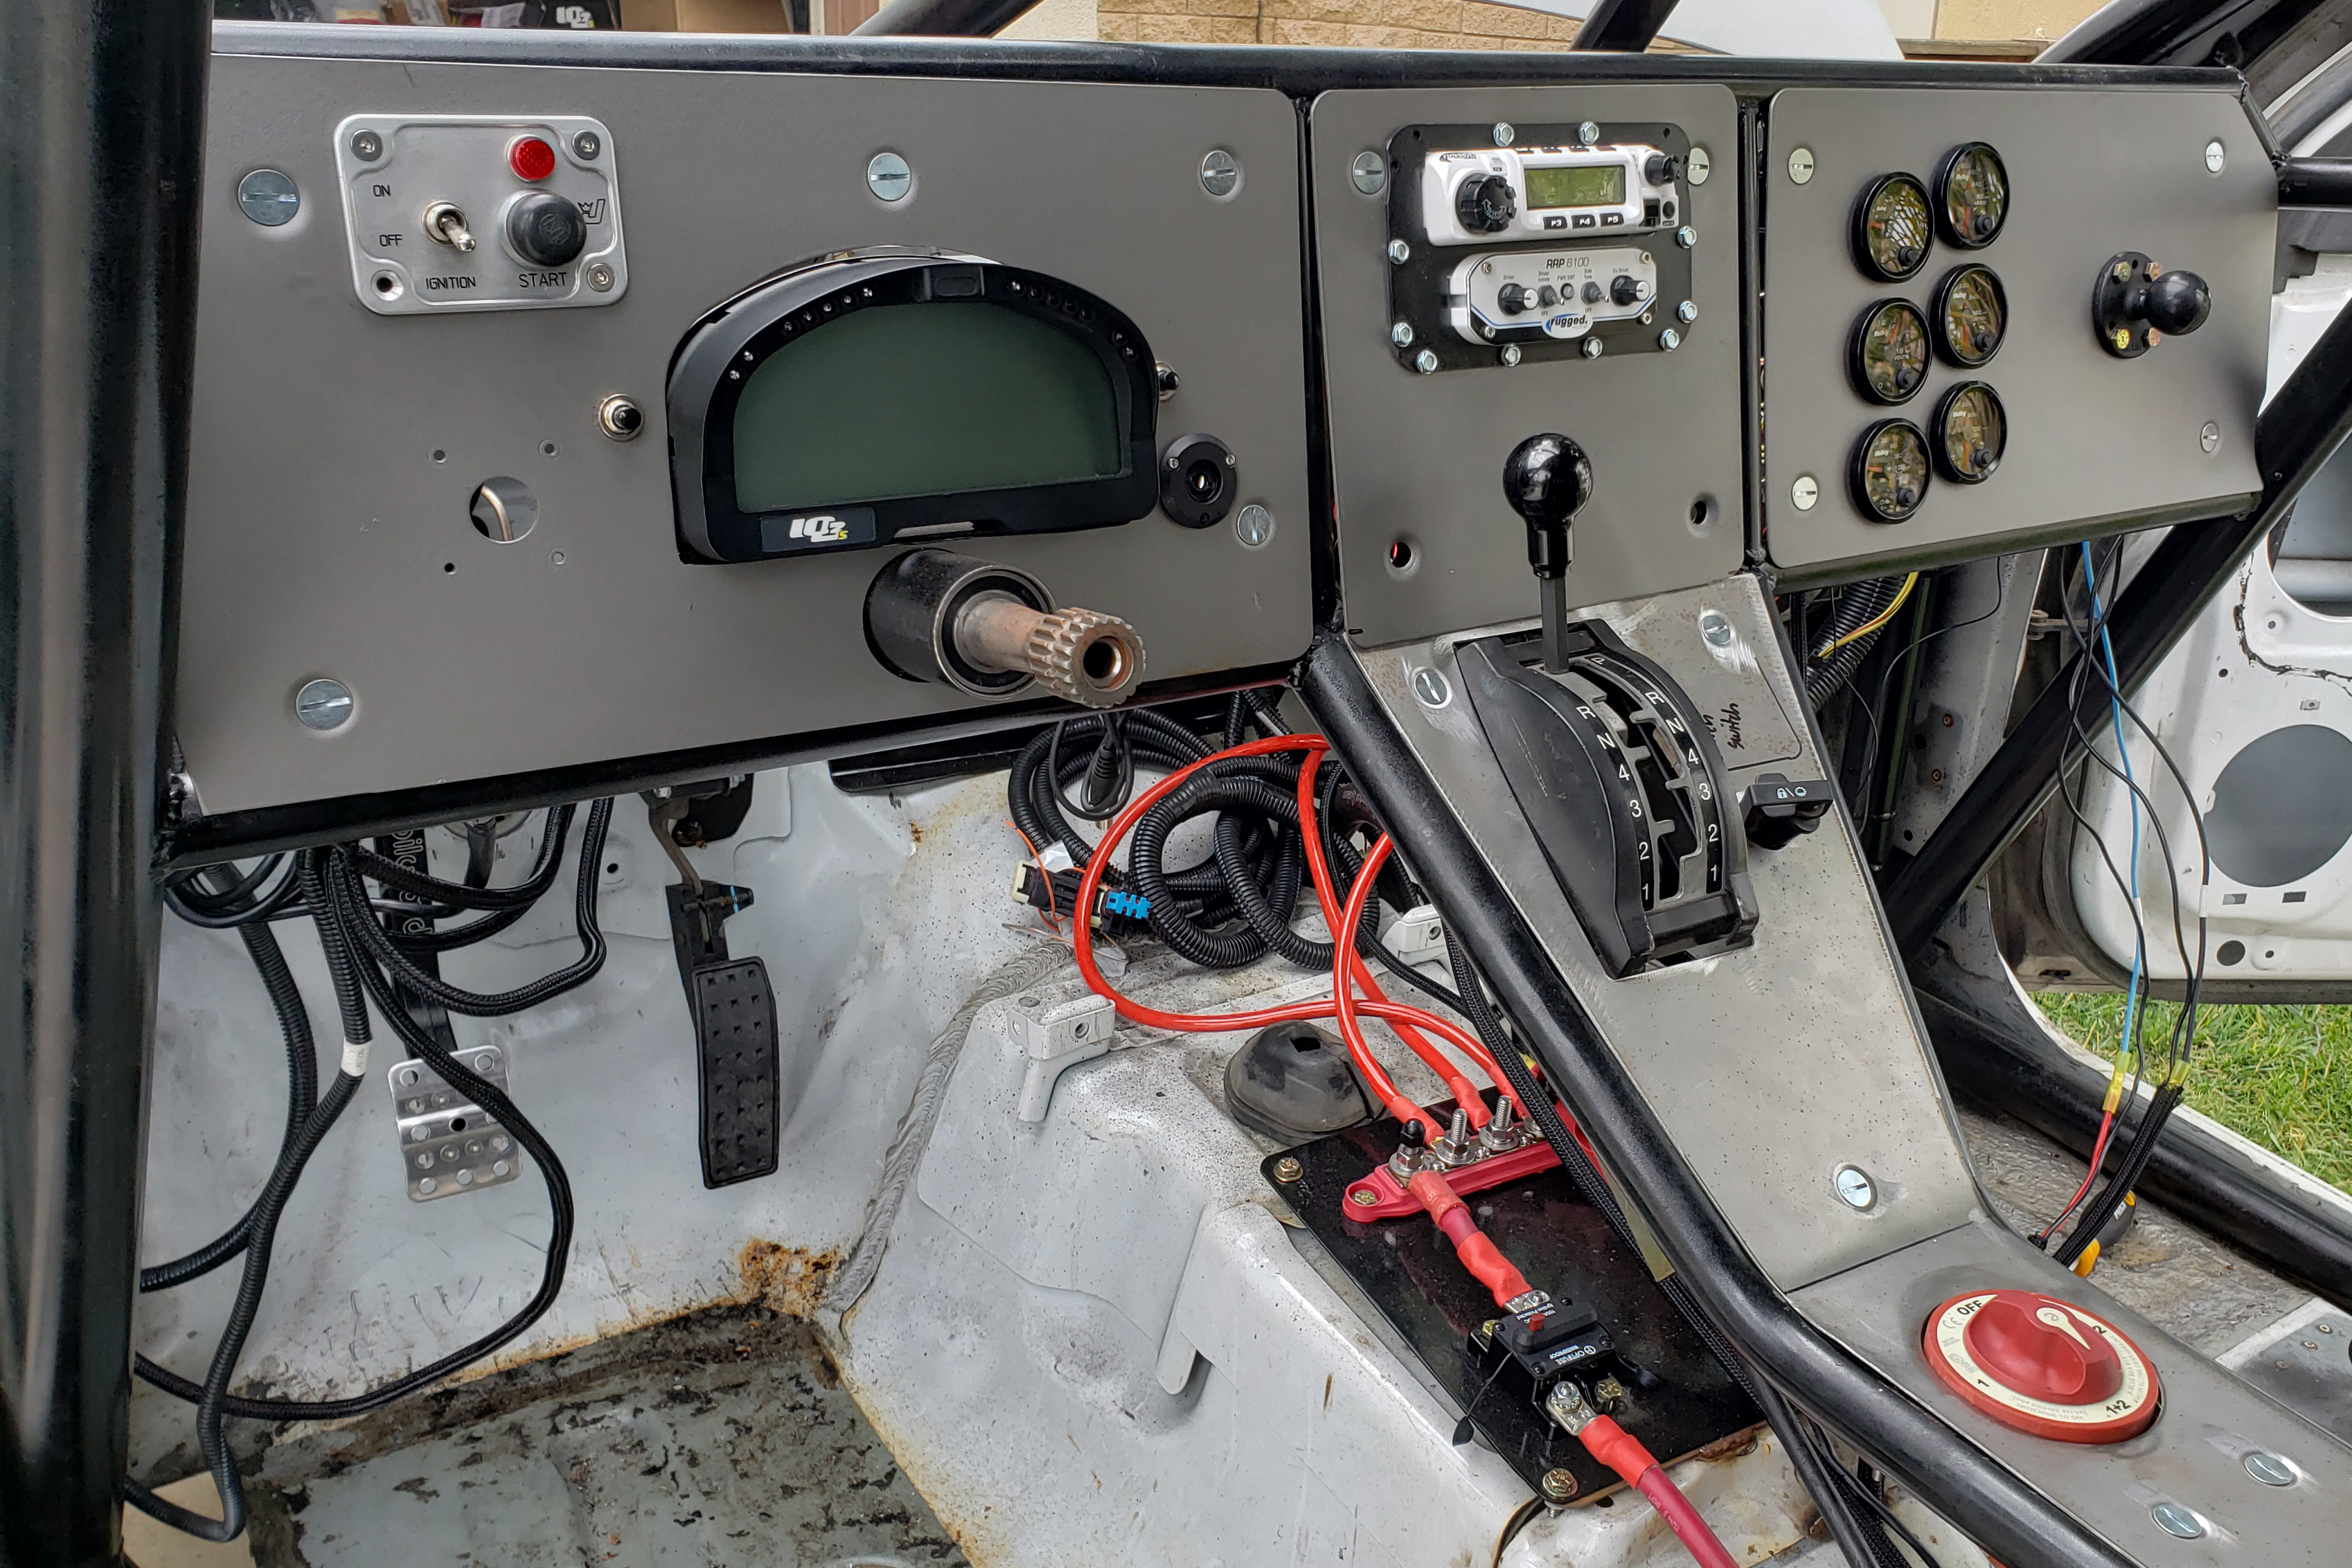
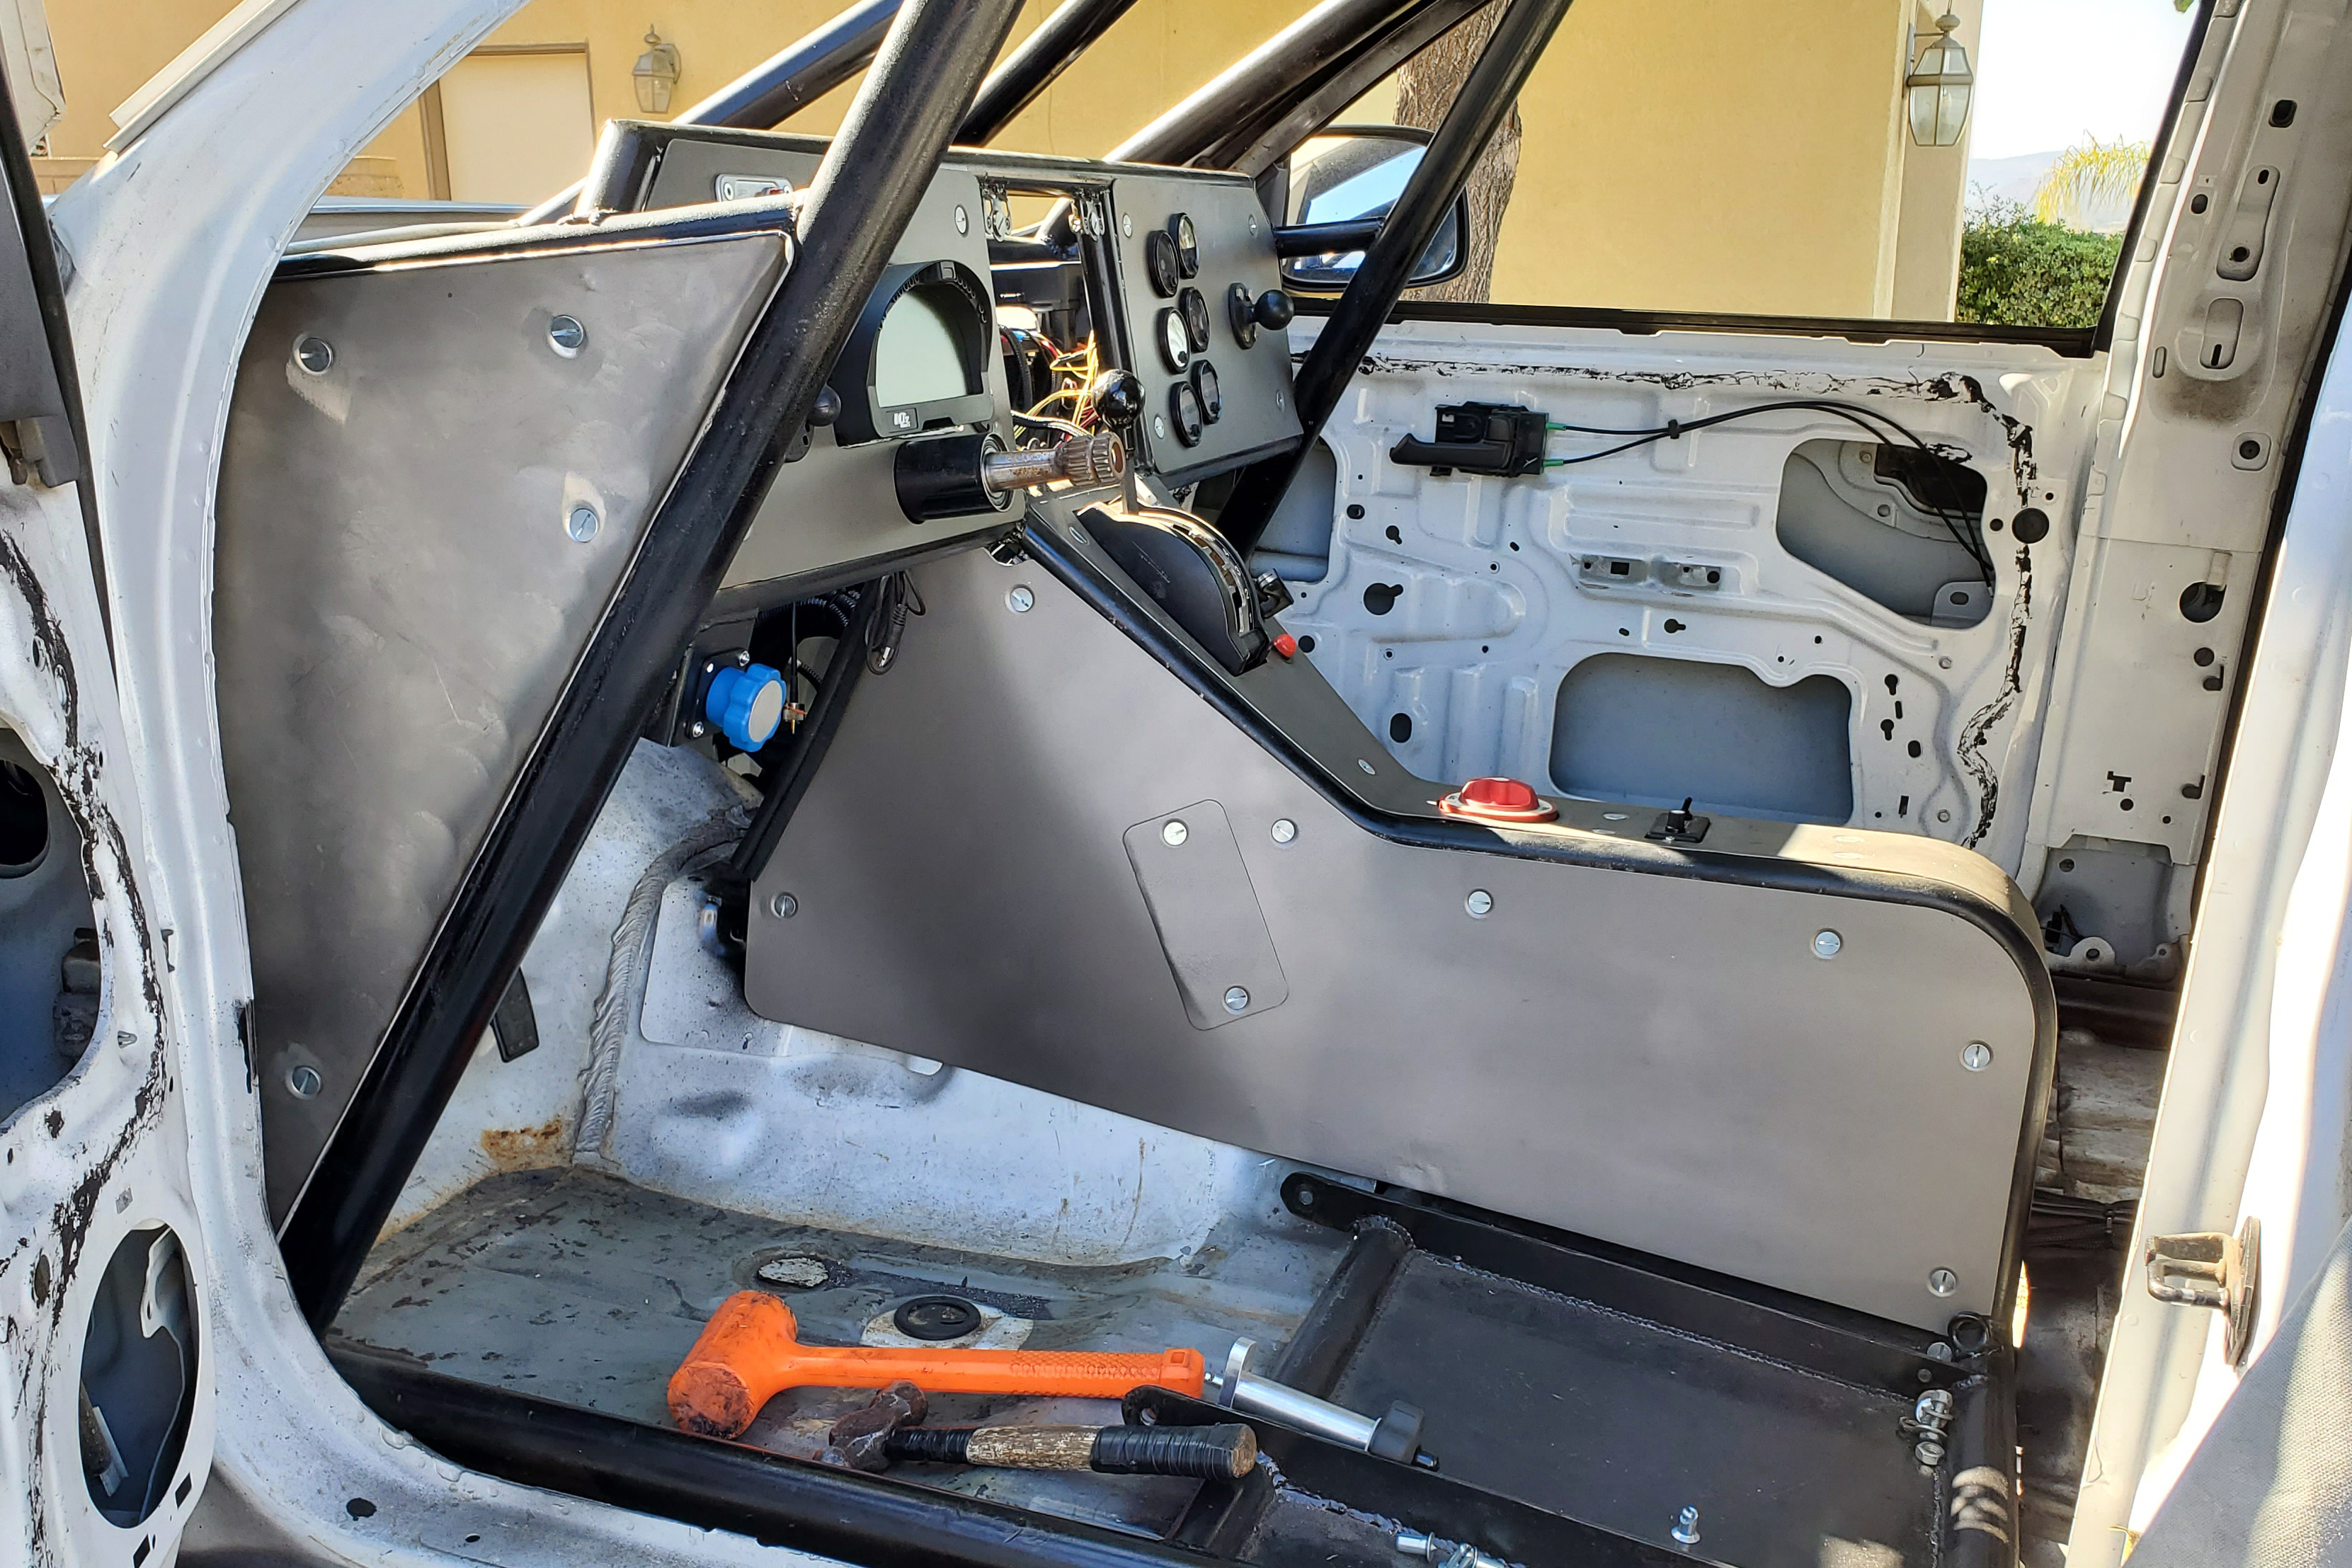
Storm Trooper's interior cage turned orange from the neglect, but it didn't stop us from pressing forward. It was a big task getting the truck back ready to go. One of the first things we did once we started working on the truck again was to get the interior cleaned up and finished. With the cage finished and cleaned we starting working on the dash panels and getting our electronics laid out to finally be able to start the Chevrolet Performance LT376/535, we had been dying to hear. The general layout of the dash came together pretty quickly as it was already known how we wanted to do it. Measuring and cutting the panels on our CNC Plasma table we got to work getting the fabrication done.
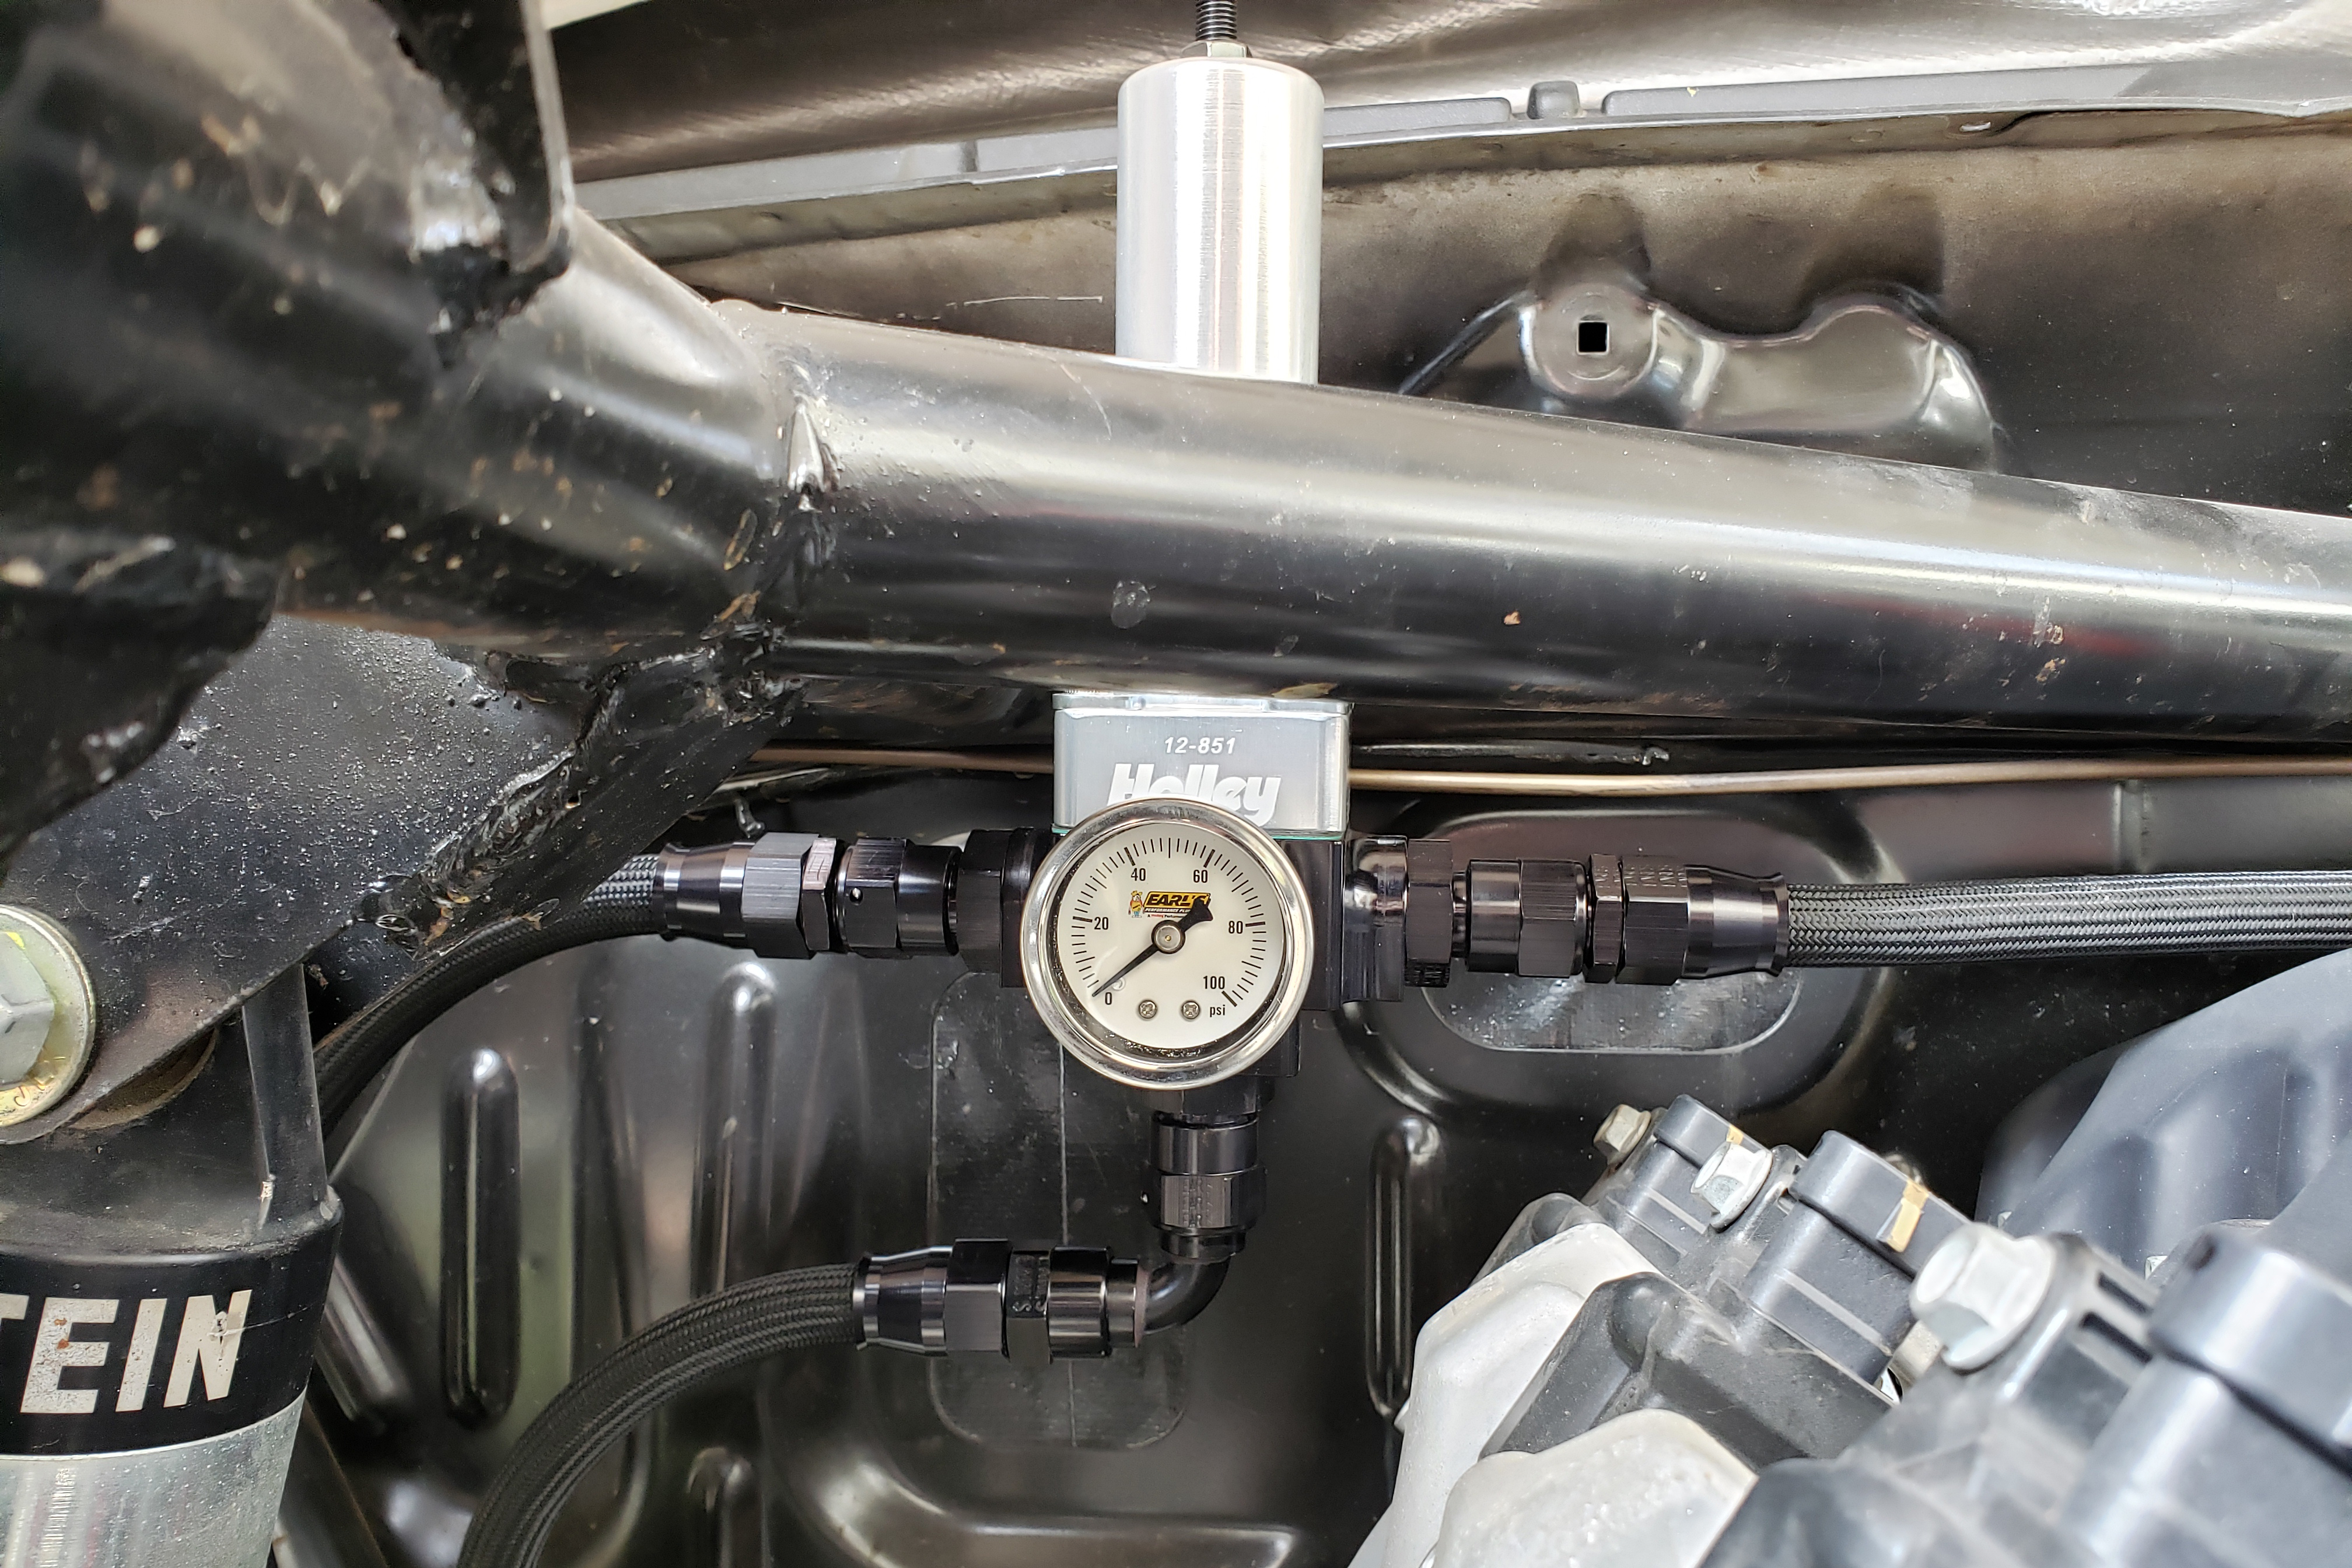
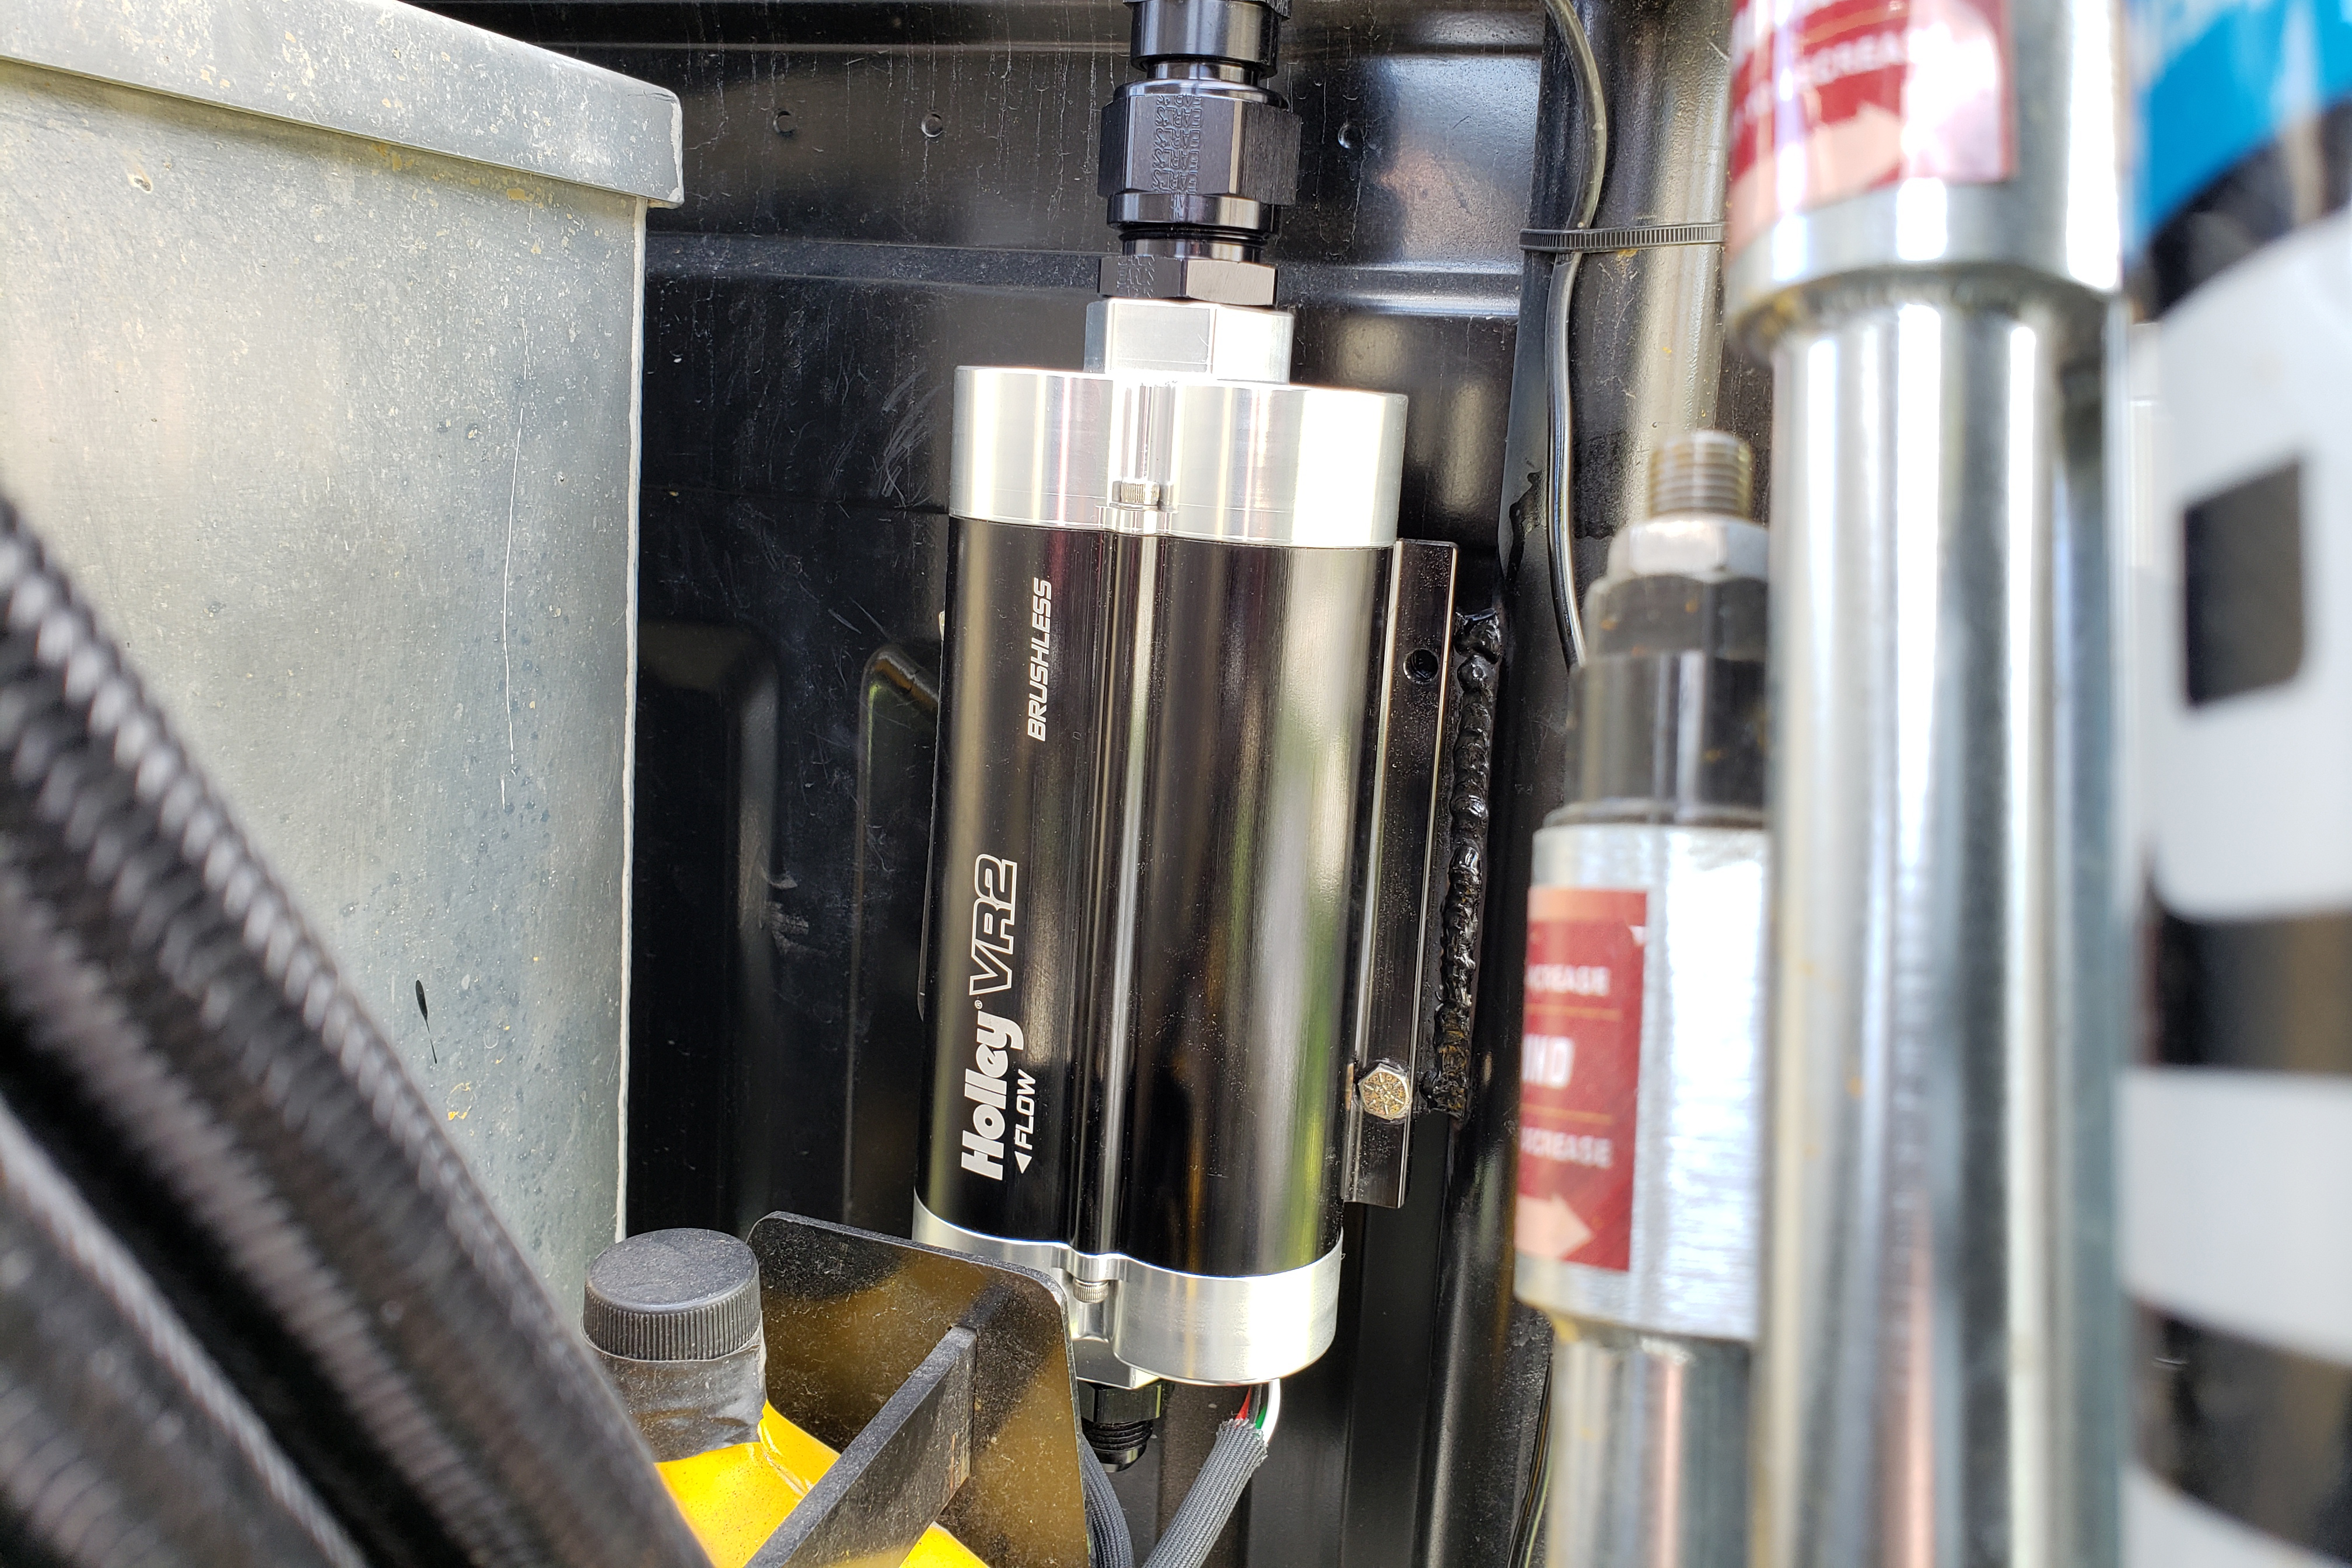
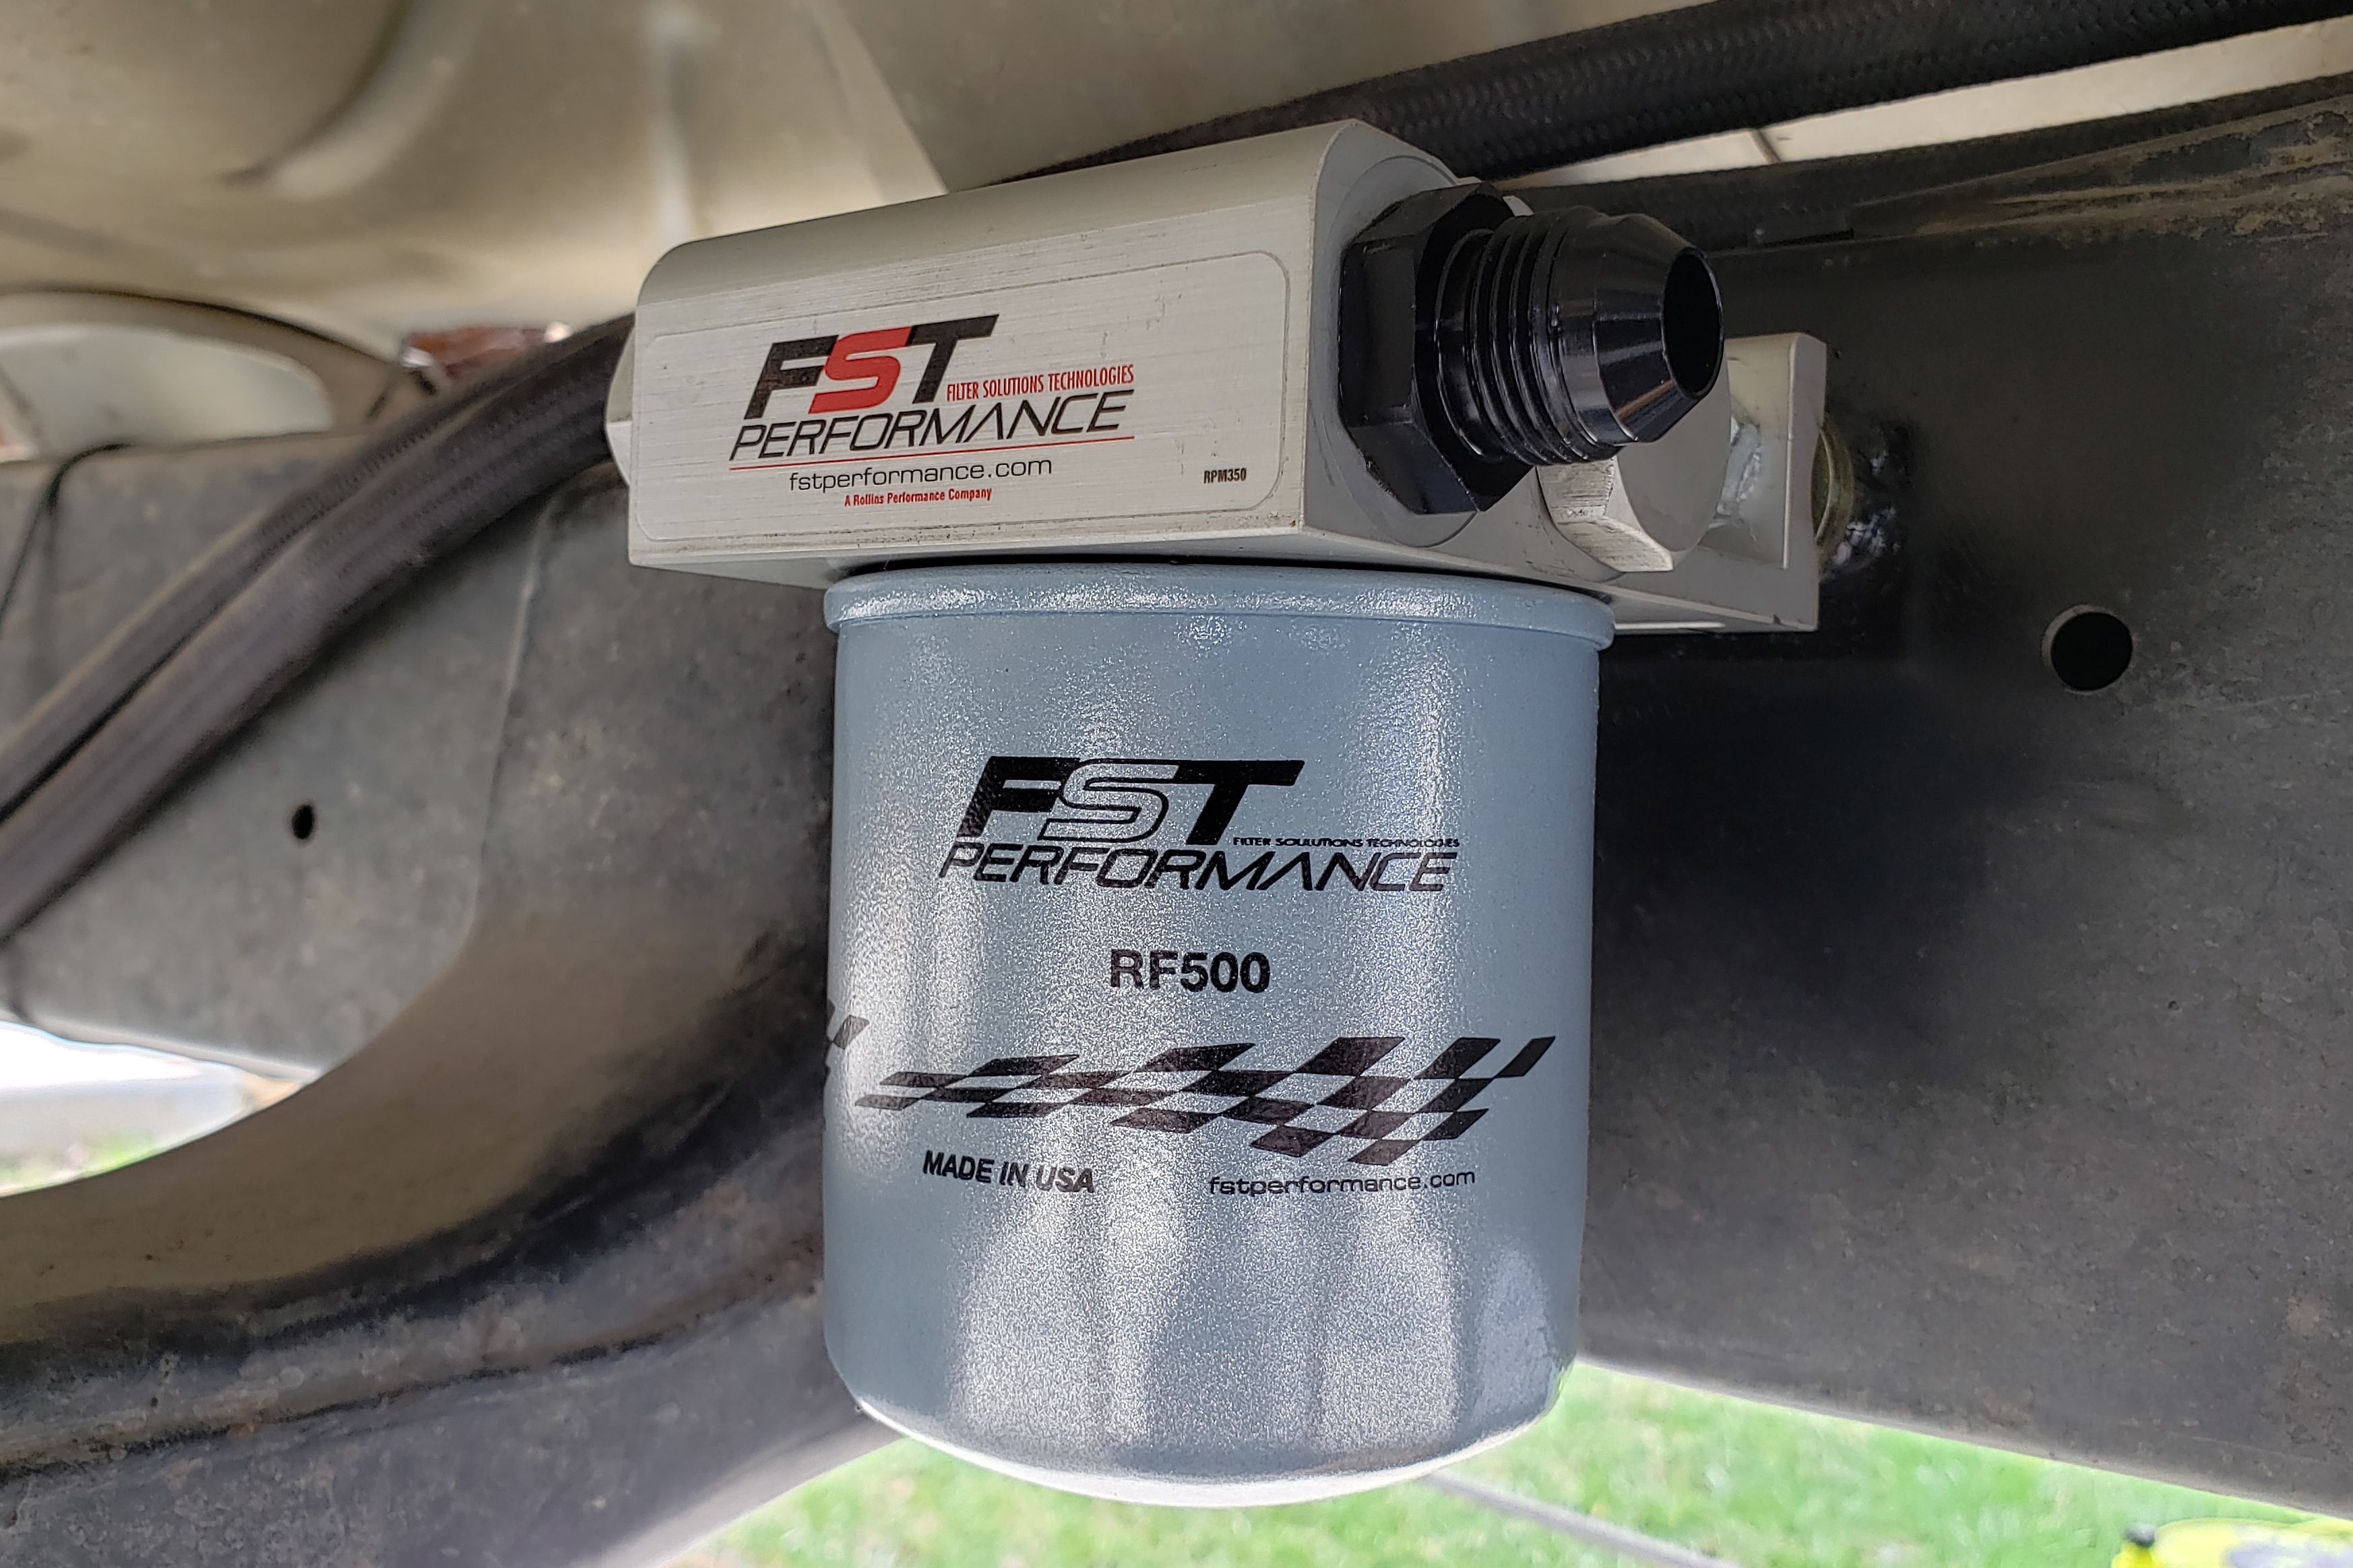
Next in line to do once the welding sparks stopped flying, the fuel lines and fuel system components started to get installed. The Holley VR2 brushless fuel pump was used to work with the PWM fuel system on the new LT engines. All of the oil lines were also run during this time, as well as protected with Earl's Plumbing Flame Gaurd.
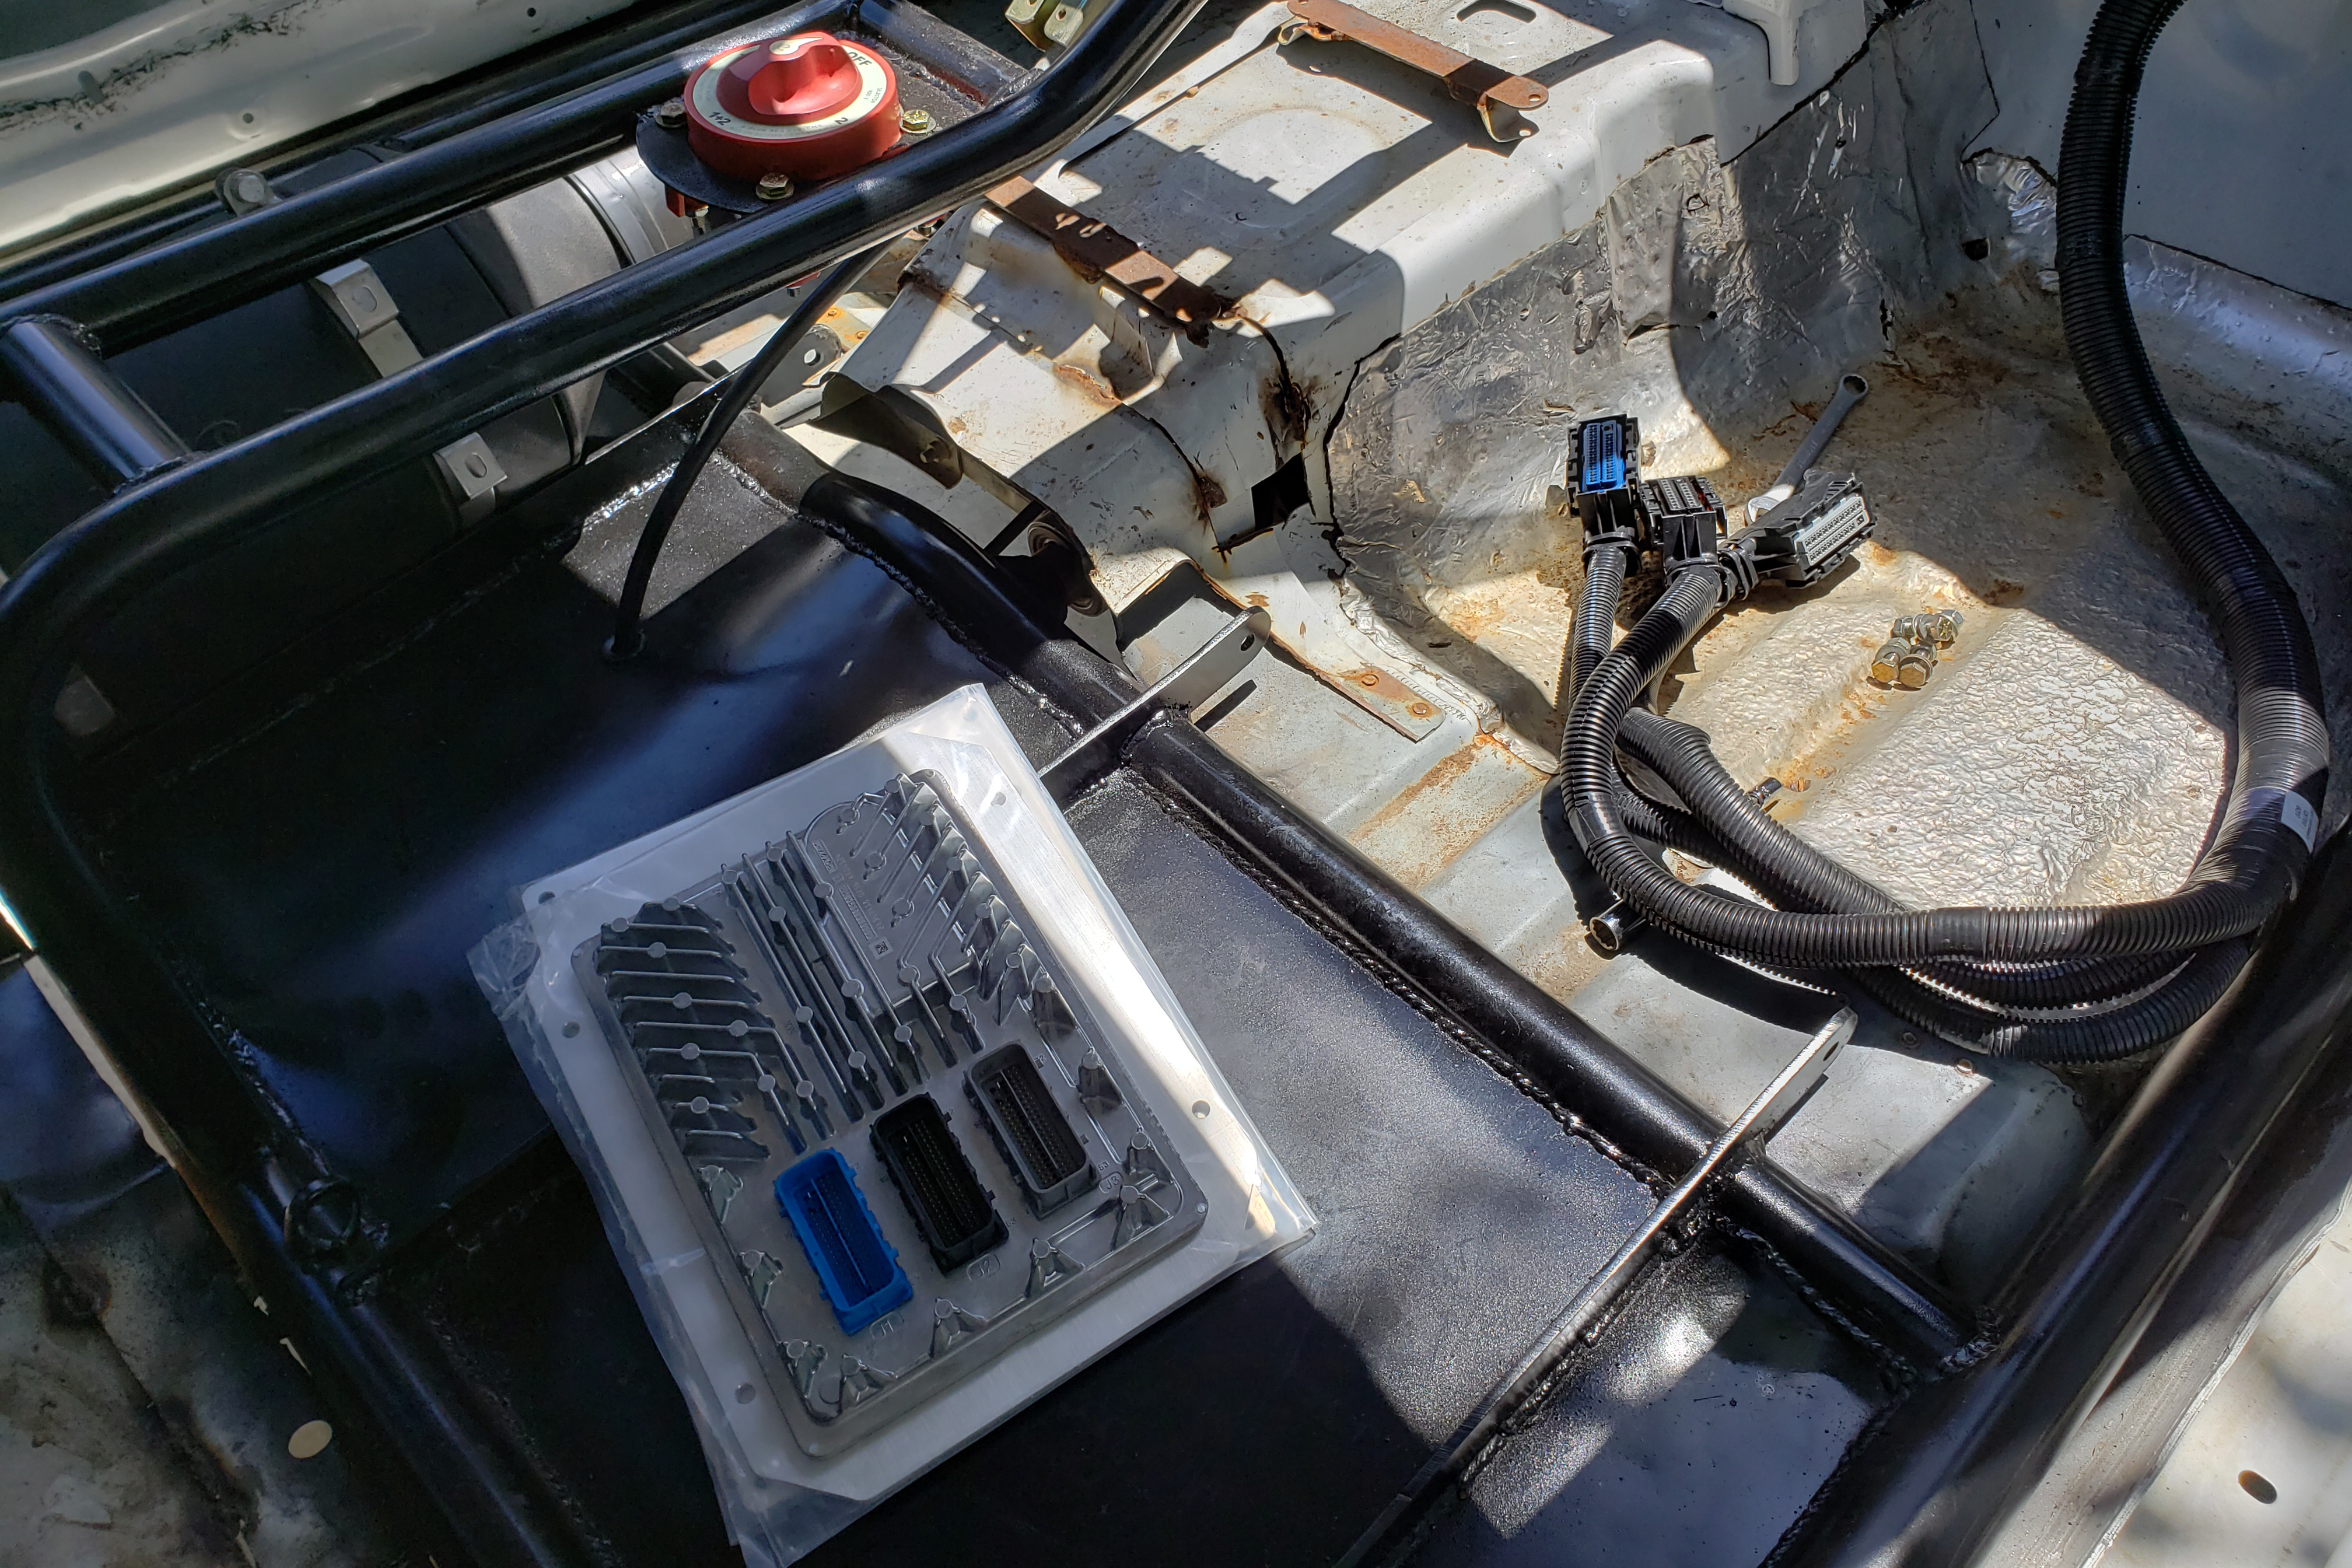
One of the best parts about the Chevrolet Performance Connect And Cruise is having the wiring complete. We needed to find out where we were going to put our ECU and fuse box, then it was a matter of just running the premade wire harness. The harness was laid out an installed within a couple of hours. With the main harness in, we ran the battery wires and connected some ignition wires to get the truck ready to fire.
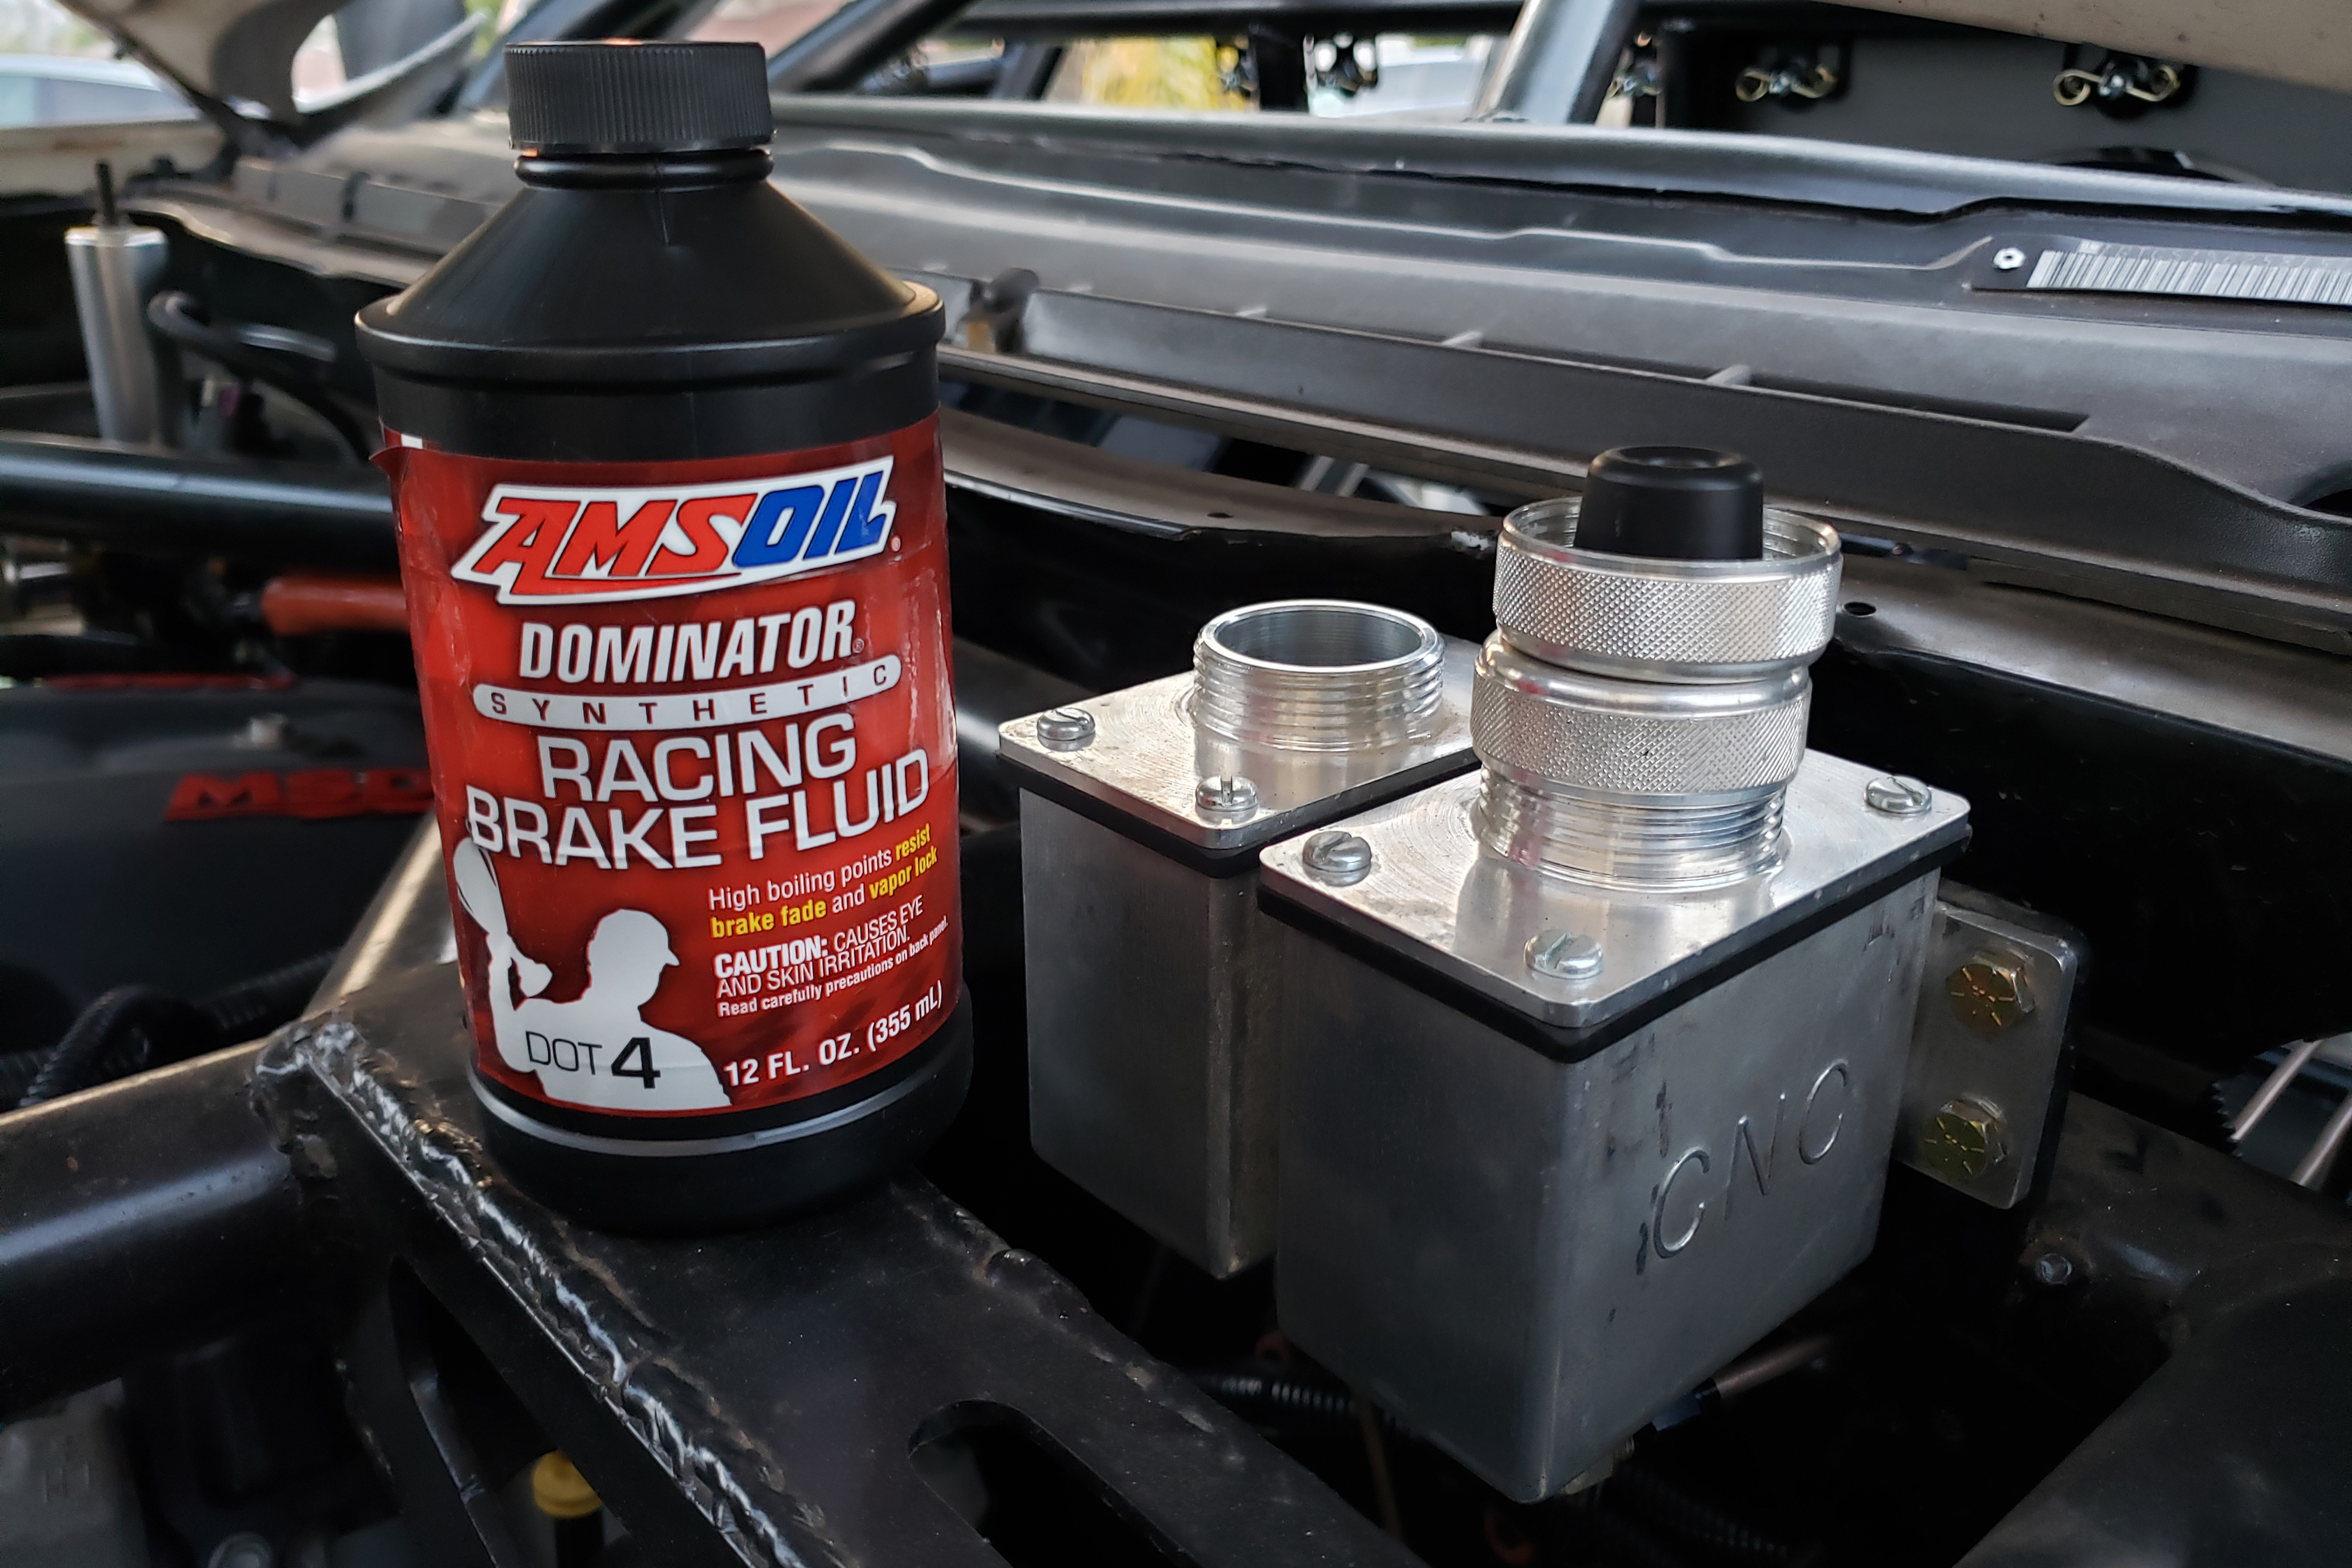
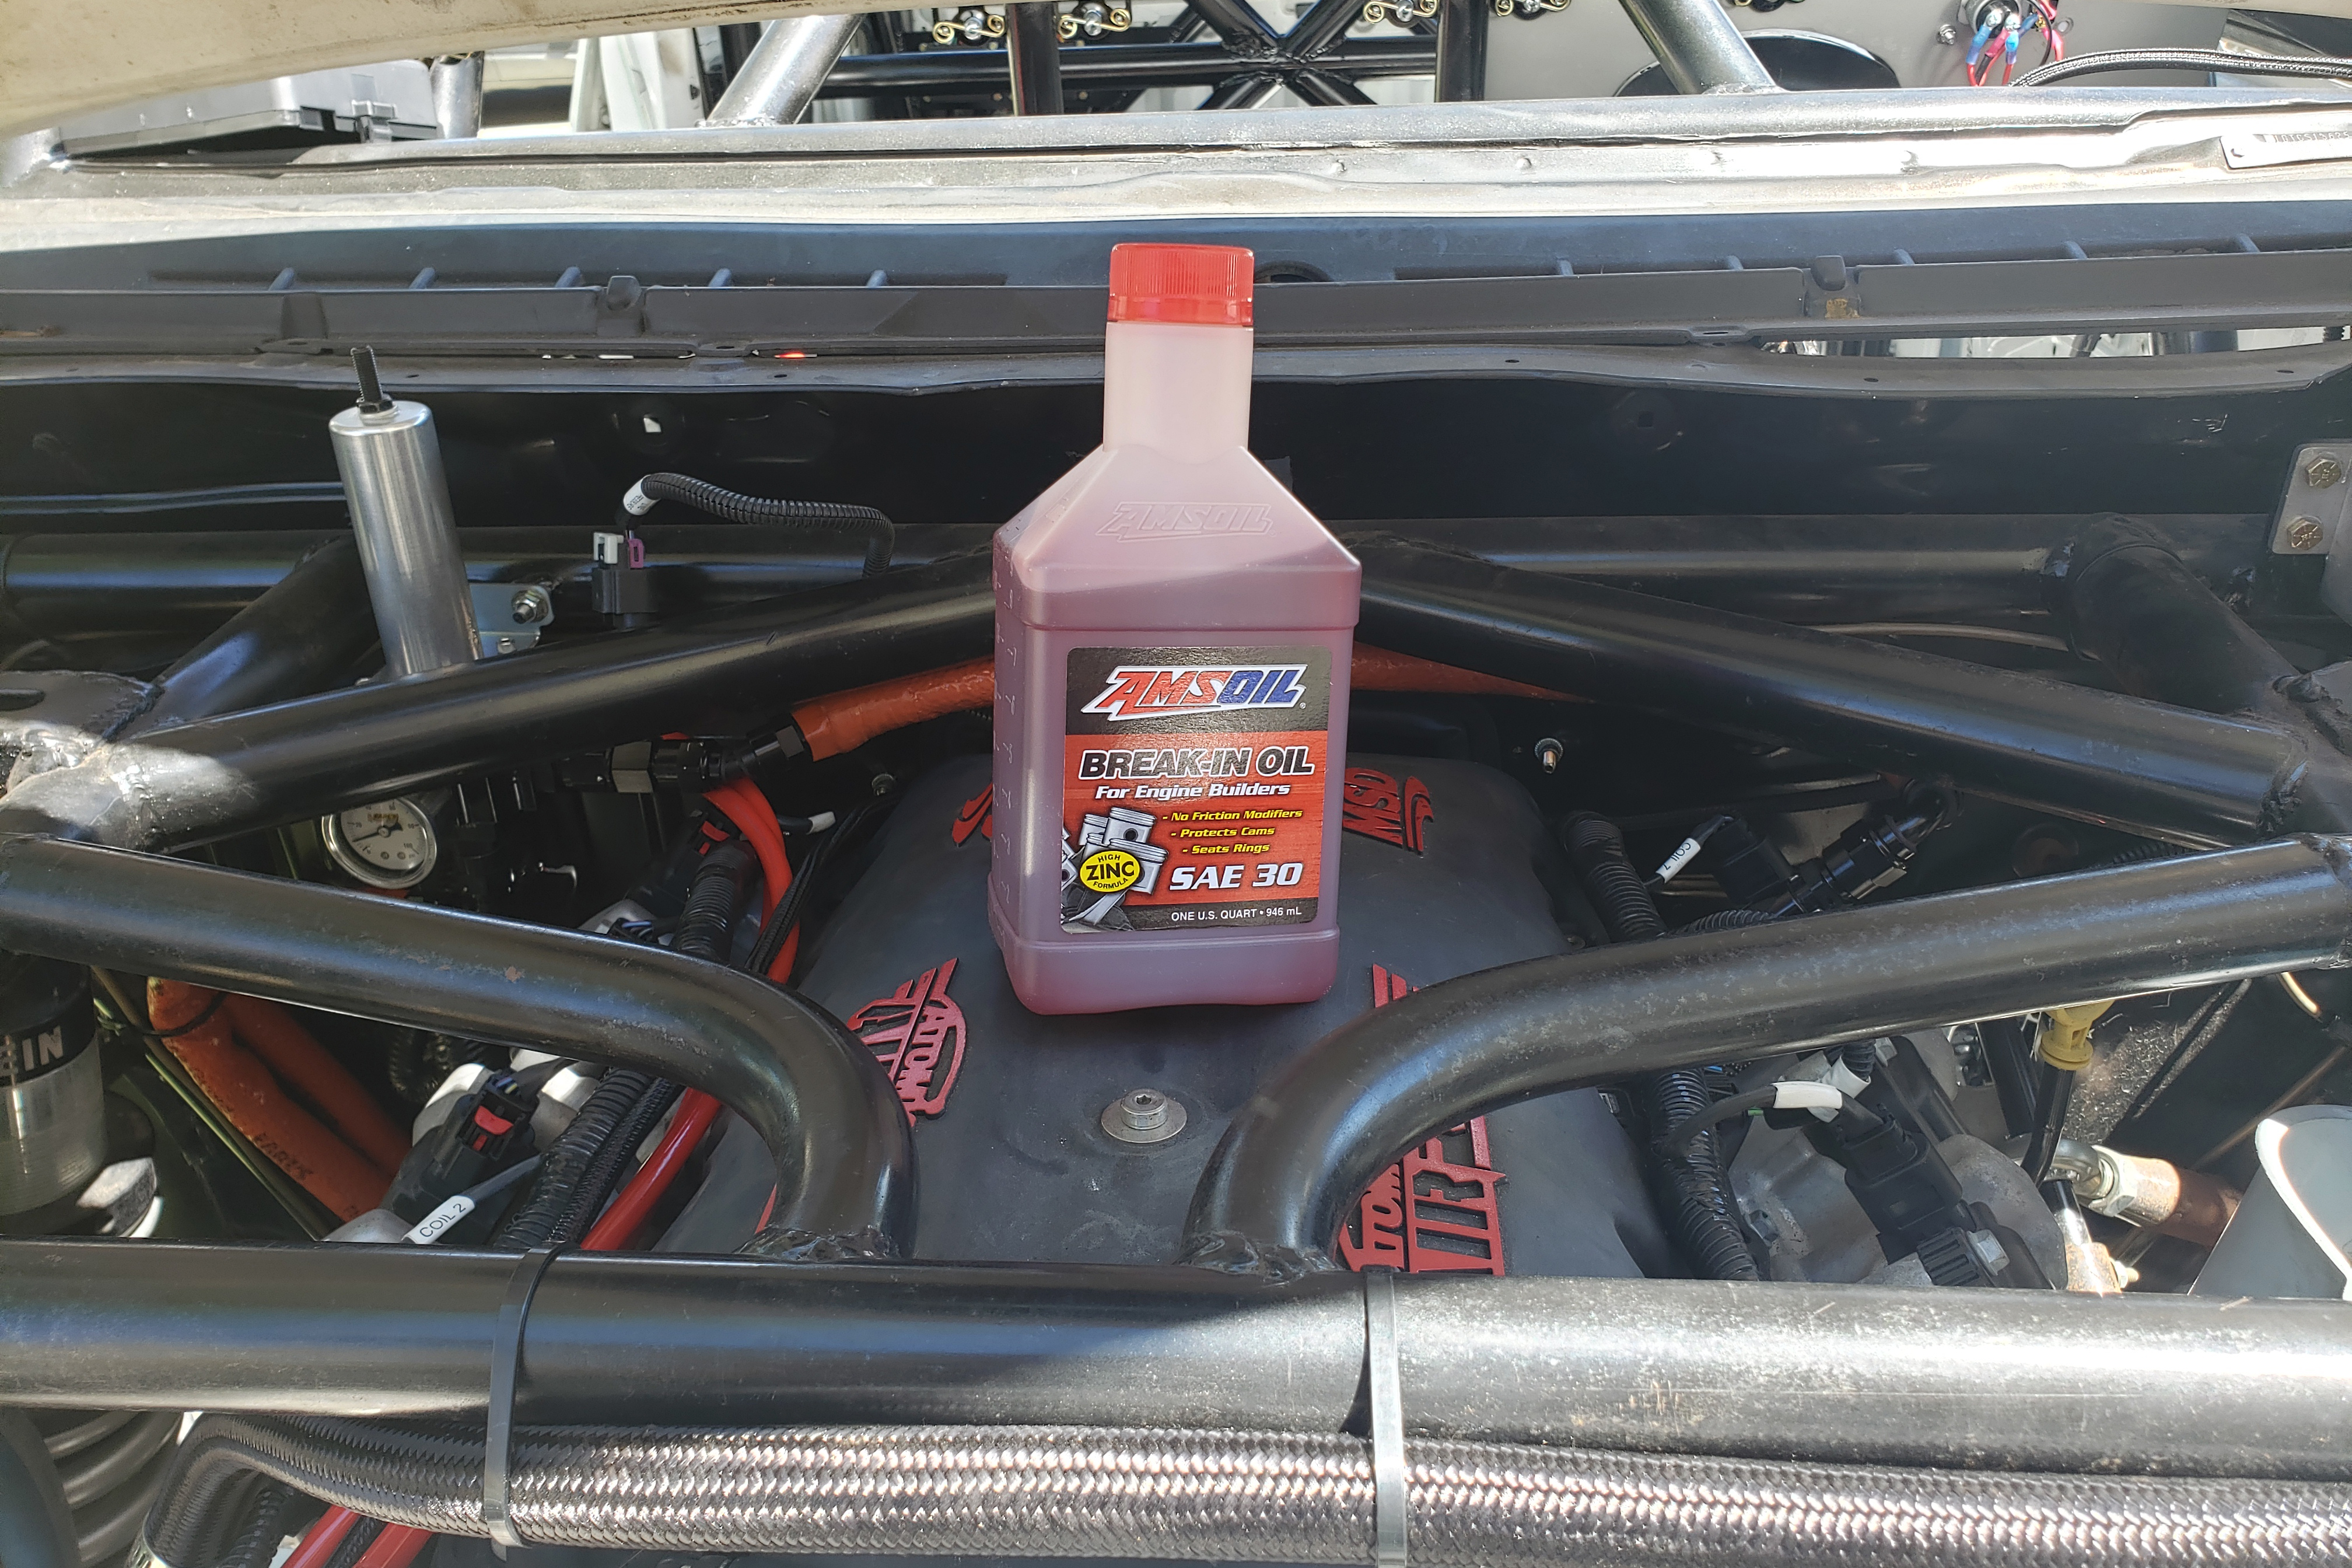
What is a vehicle without its fluids? We topped off all the truck's fluids with Amsoil products, from the break-in oil to the brake fluid everything was covered.

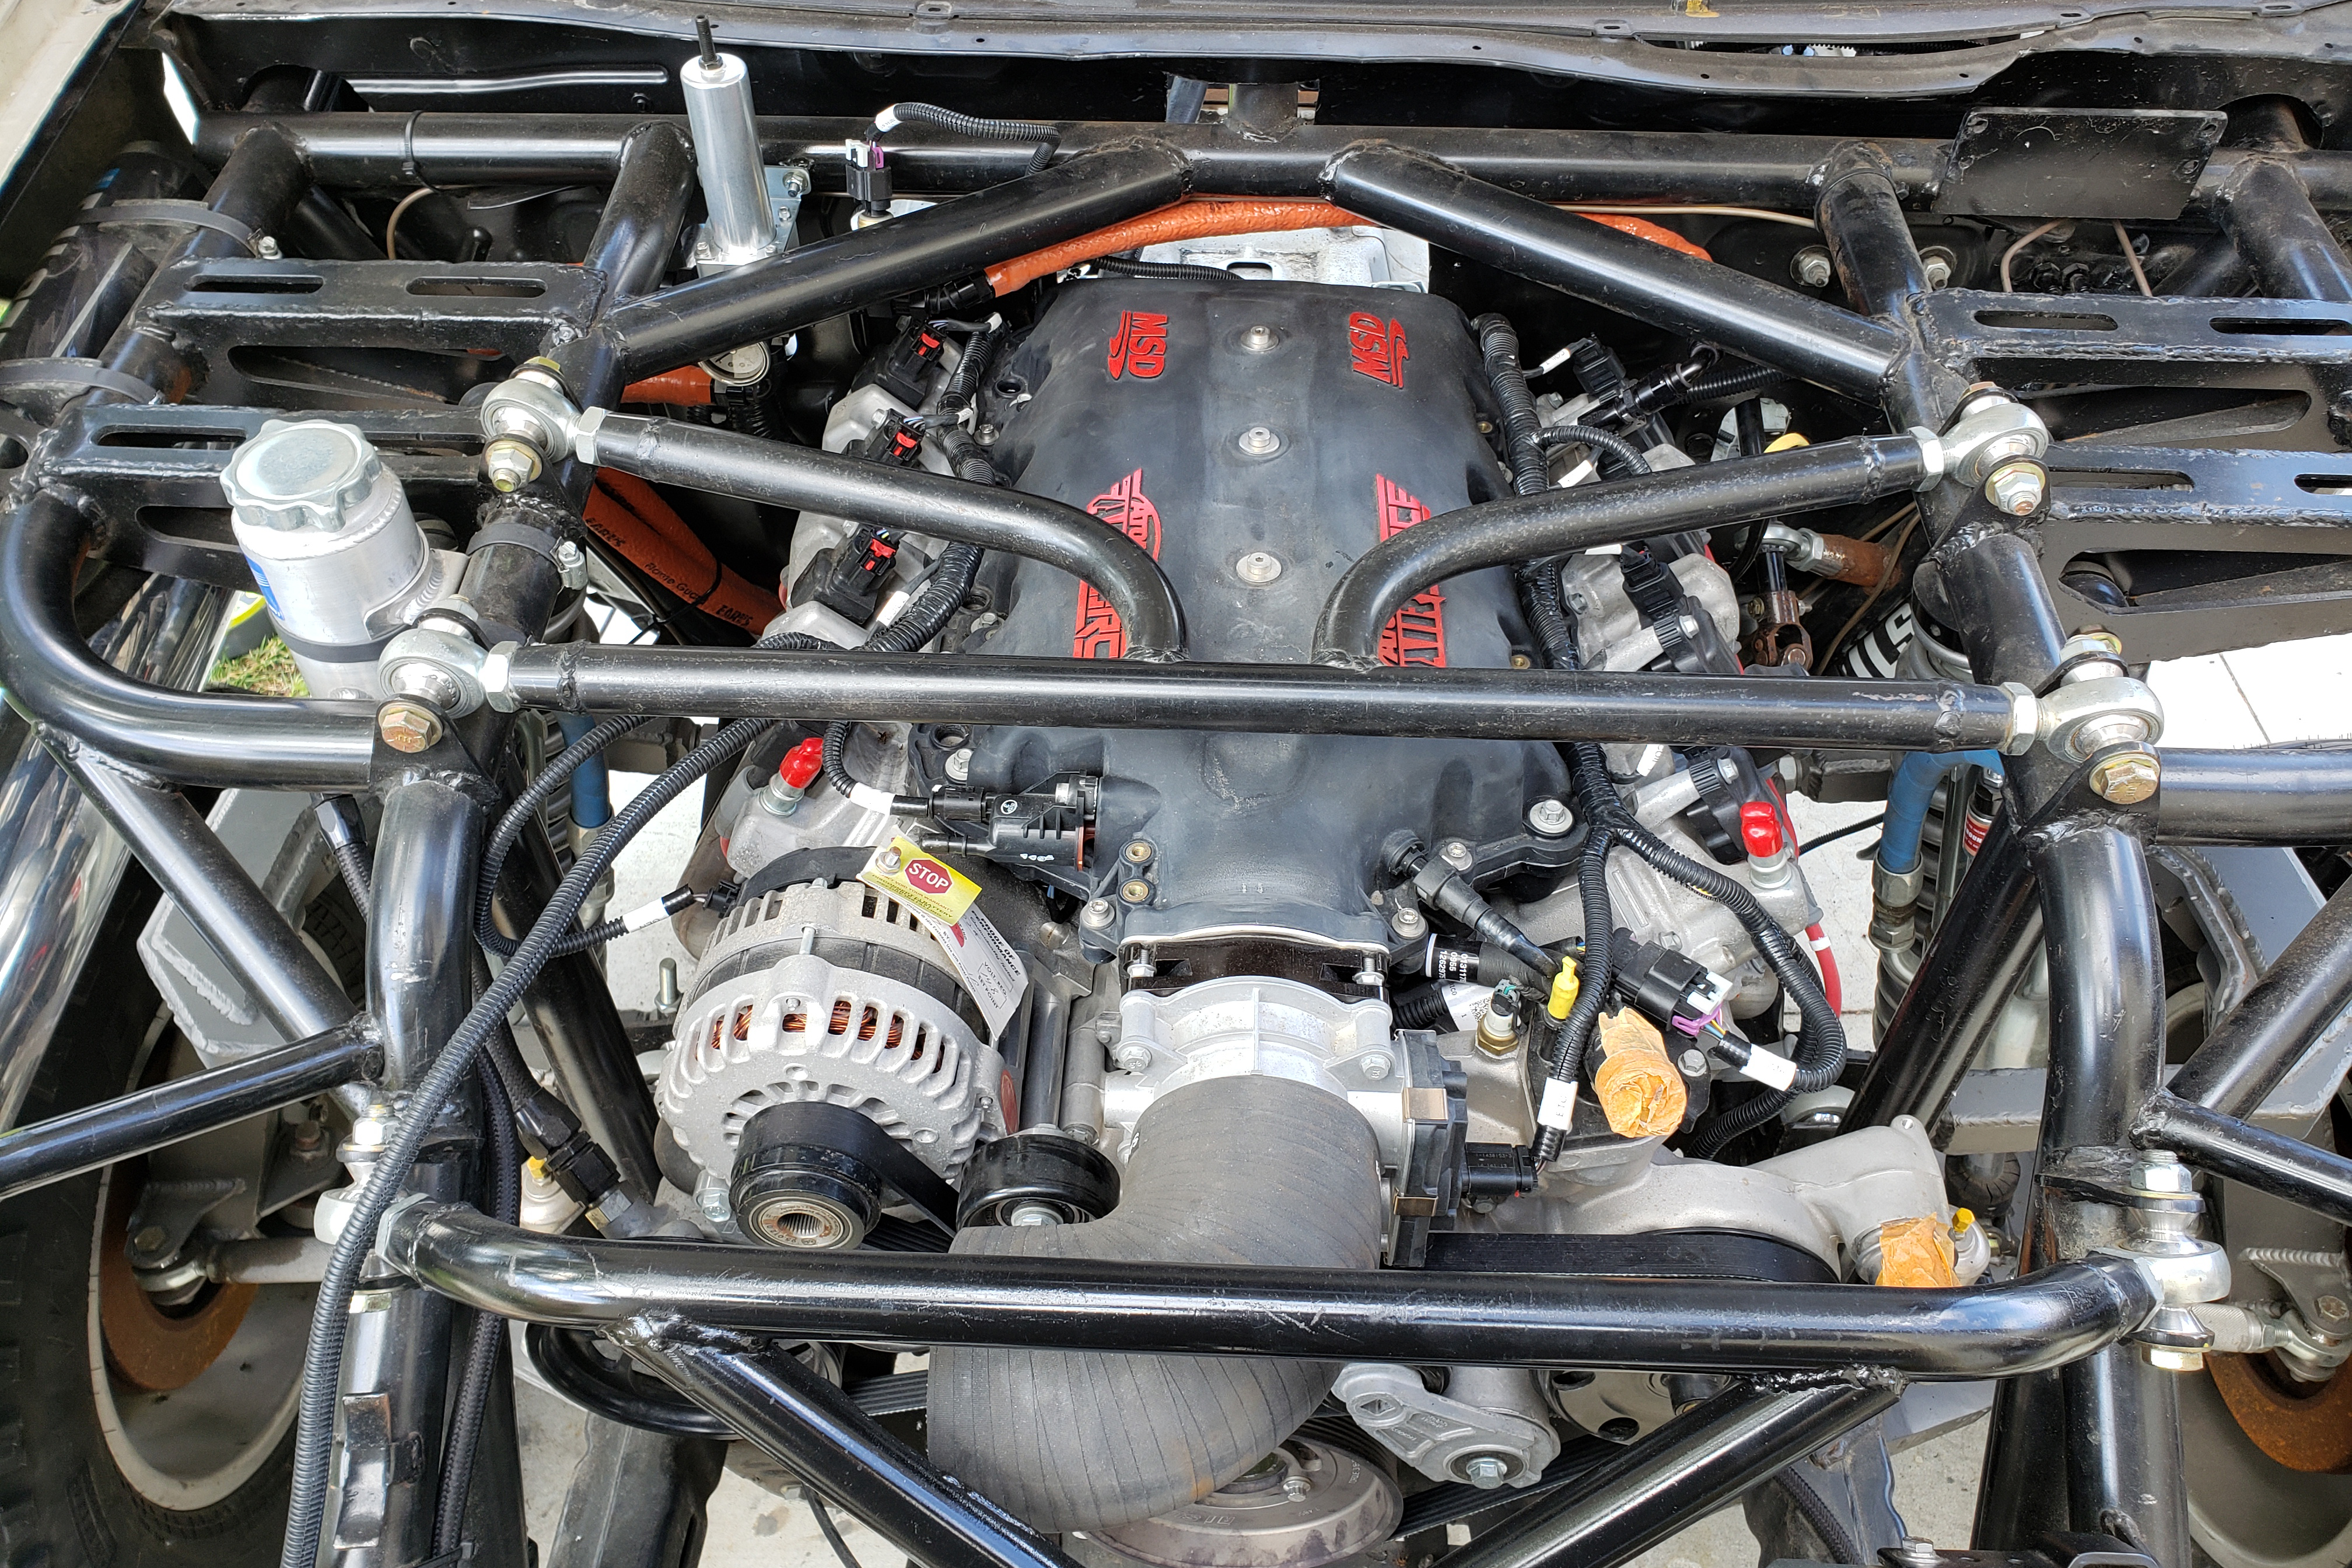
It has been a long process and the truck has come a long way, but the truck was finally ready to fire for the first time and see everything work together. We are really proud of the end result, from a concept in our mind to reality in front of us it turned out just as we planned. The idea was to make sure it was clean and simple and that everything could be easily accessed, removed or worked on. There is not much left to do under the hood from this point on, and are glad we could cross this part of the project off our list.
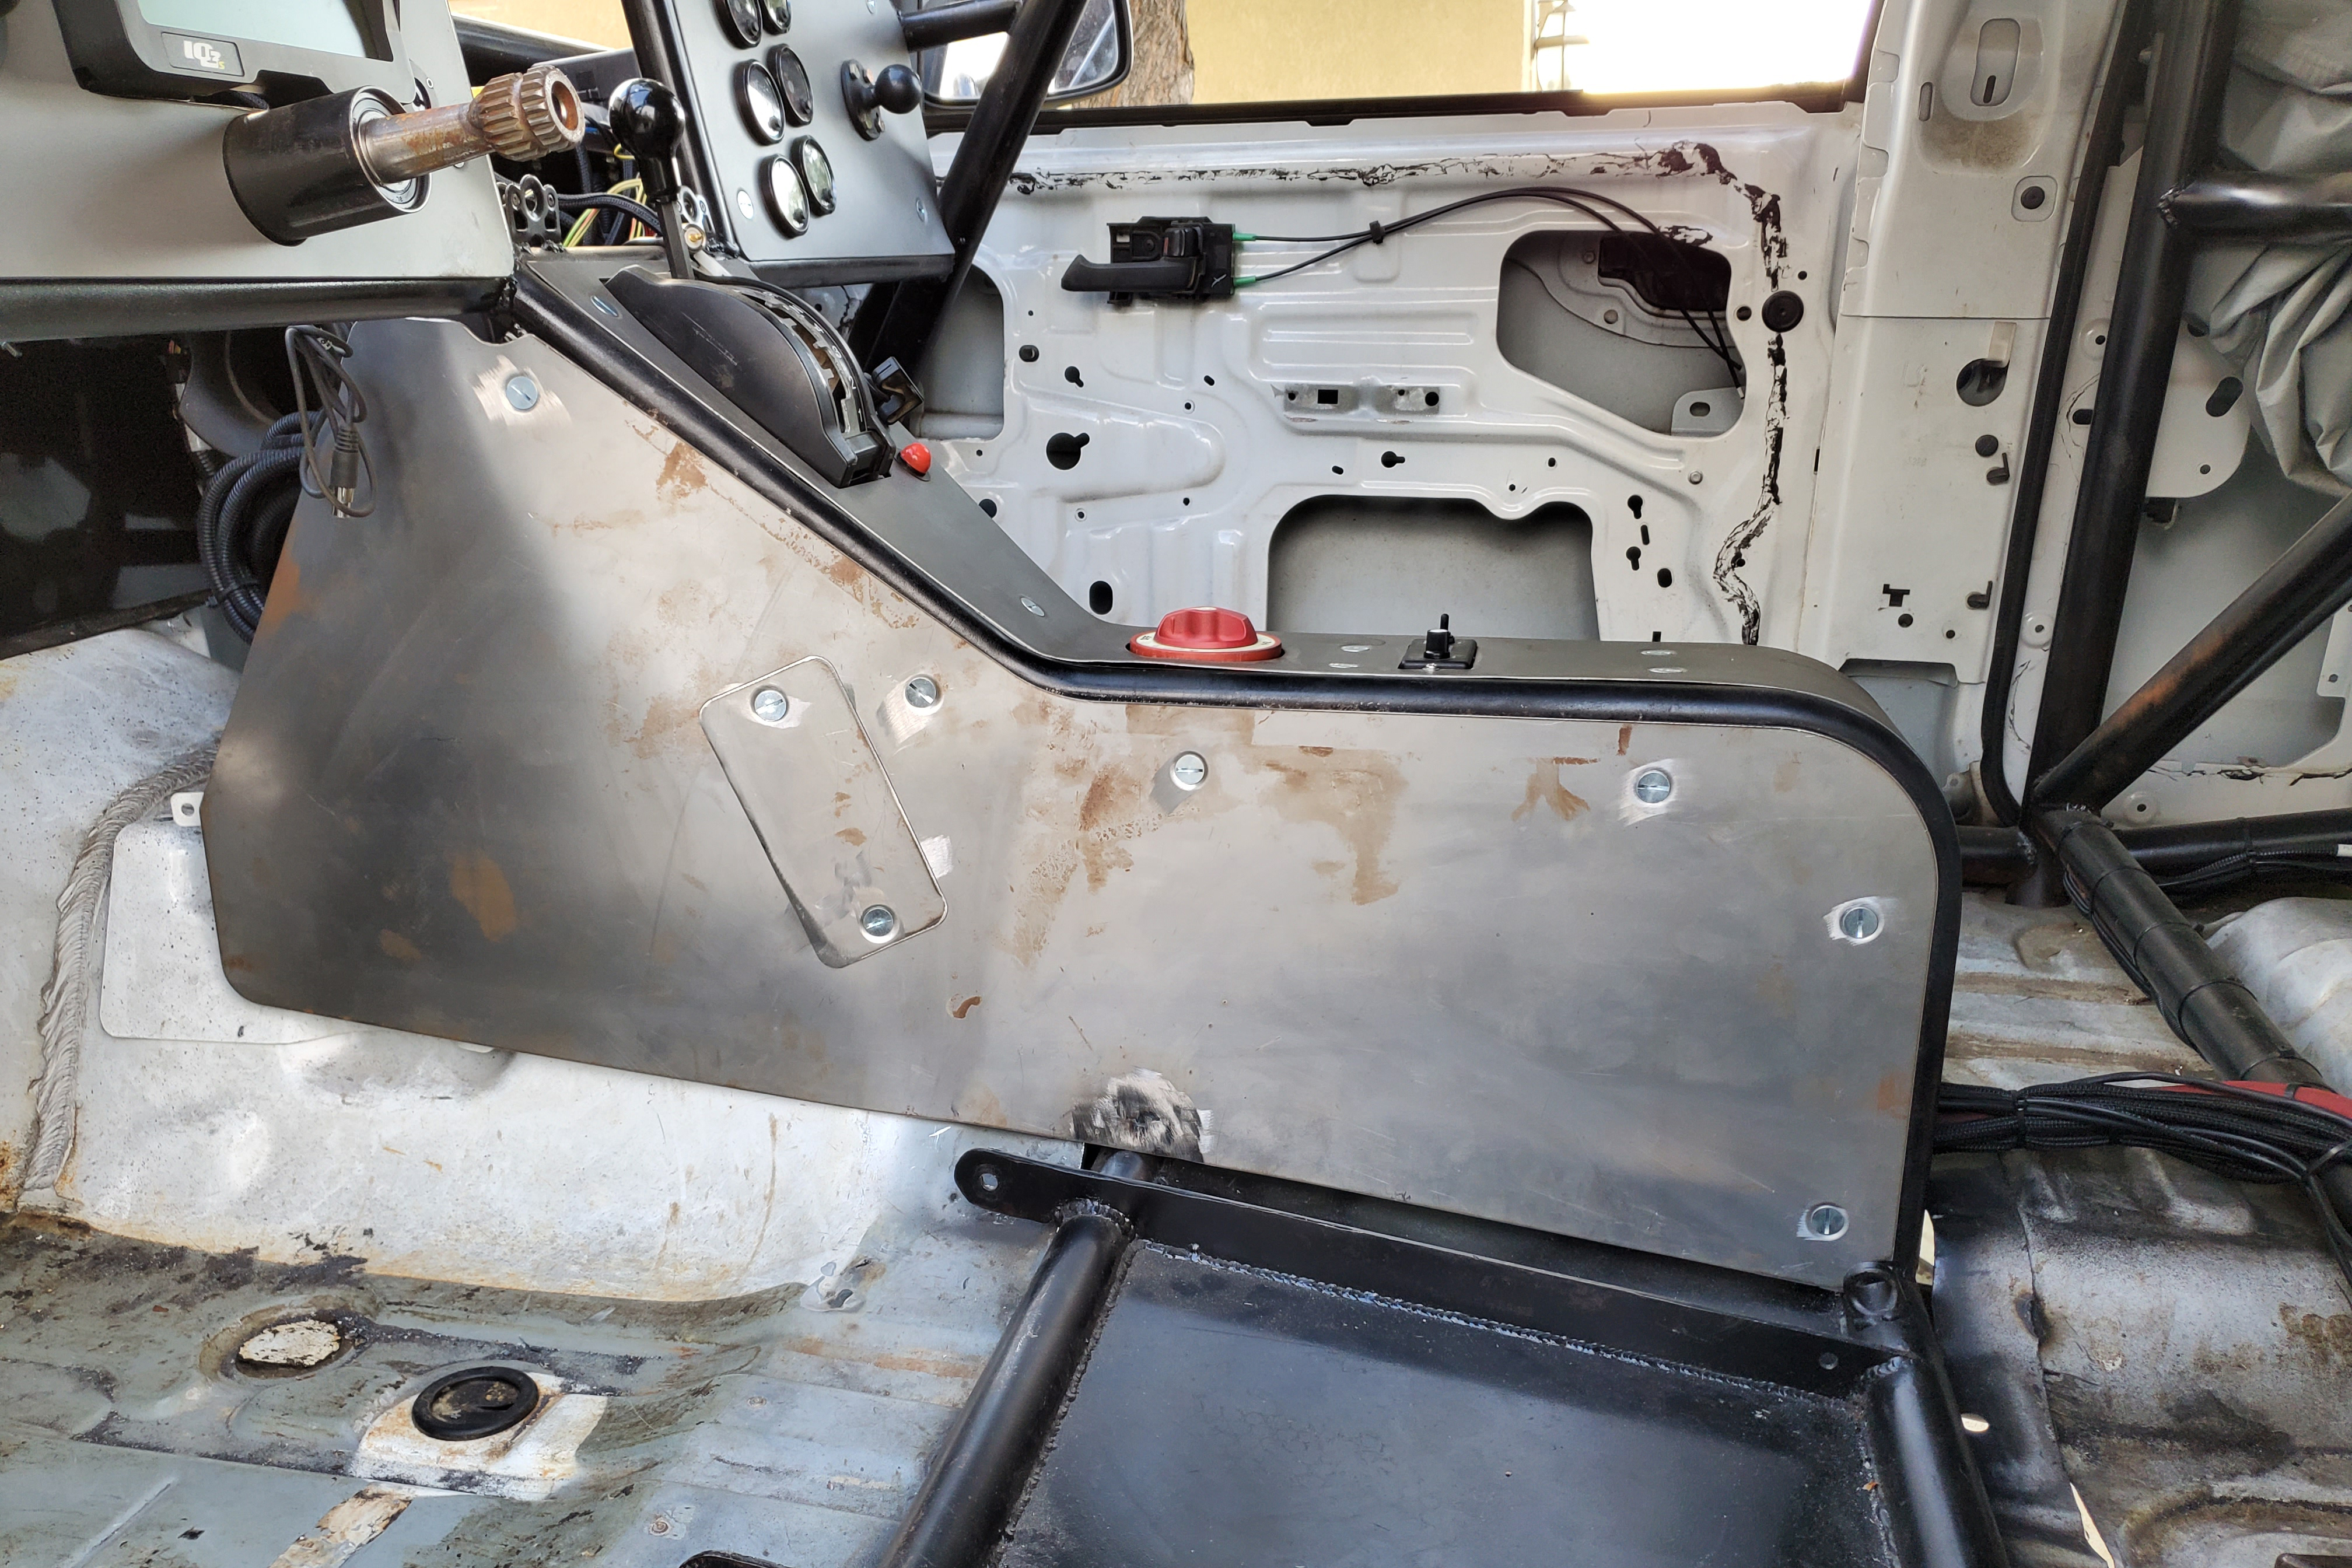
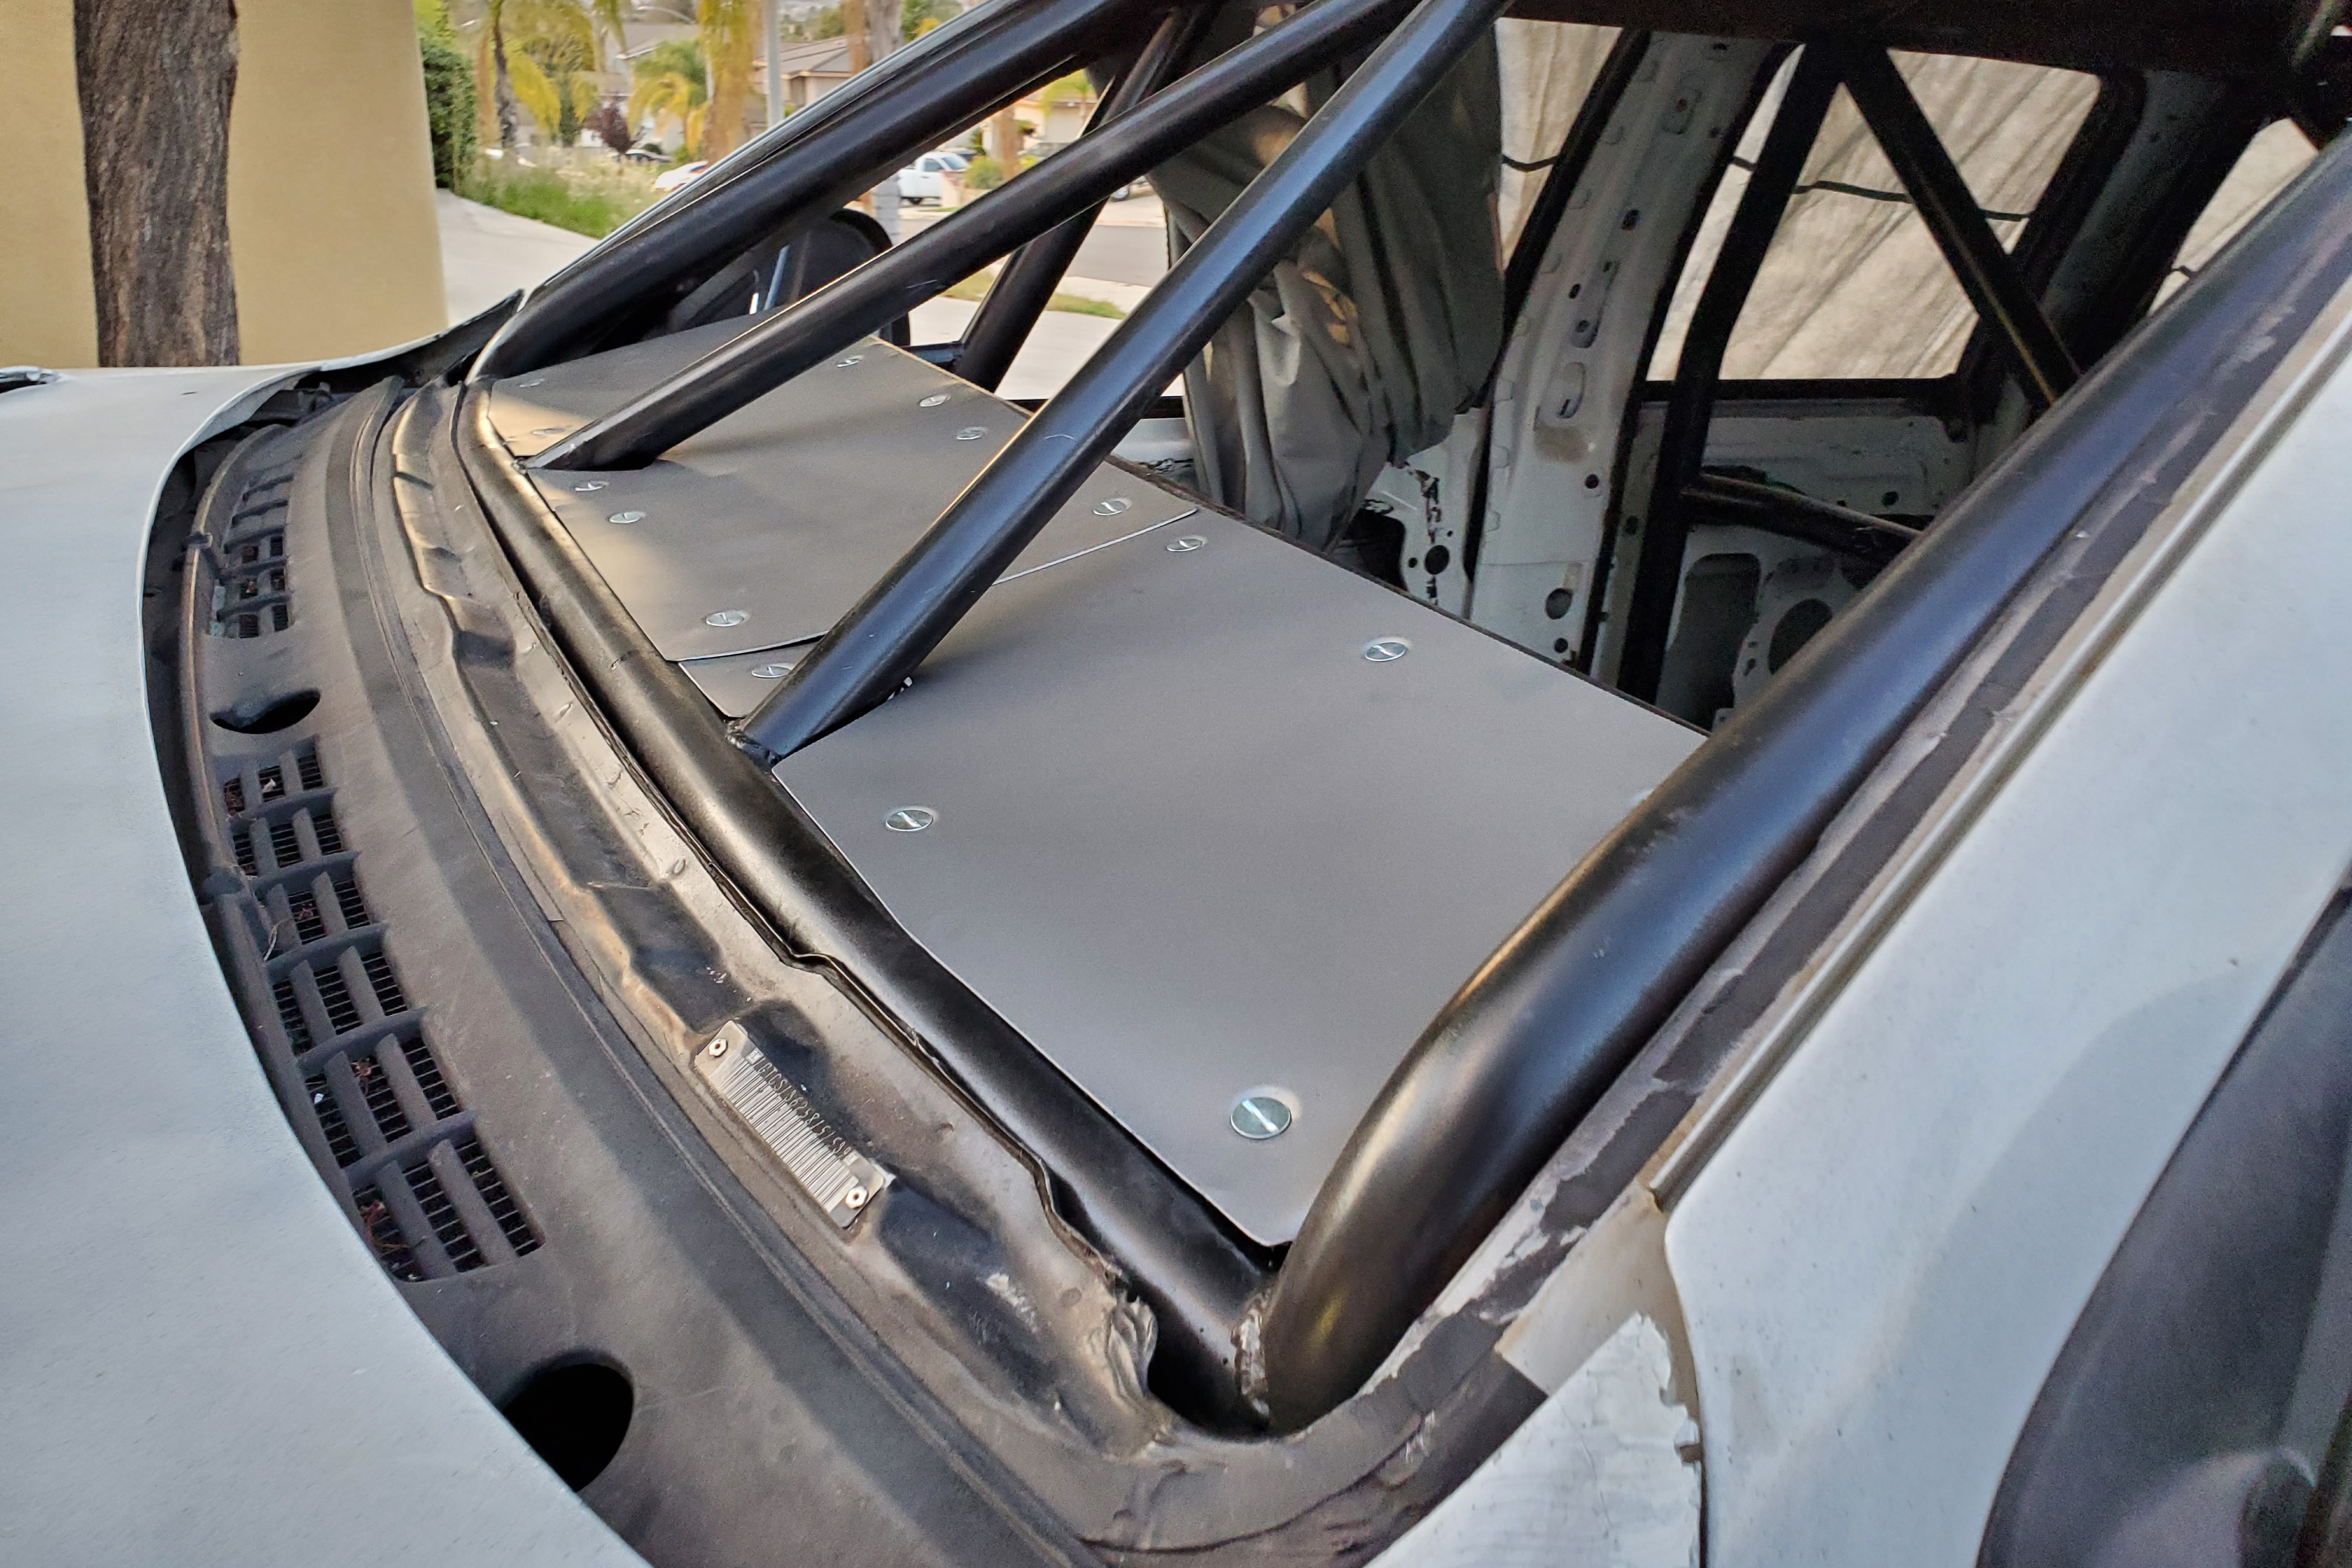
With the truck running we focused on making the interior look more like a truck again. The dash panels were completely finished as well as the center console. We left an access door in the center console to access some of the electronics if needed. The top of the dash was done in three parts. This was to make the creation of the top easier, but also allowed for individual sections to be removed and the area below accessed. No need to pull the entire top of the dash if you do not need to.
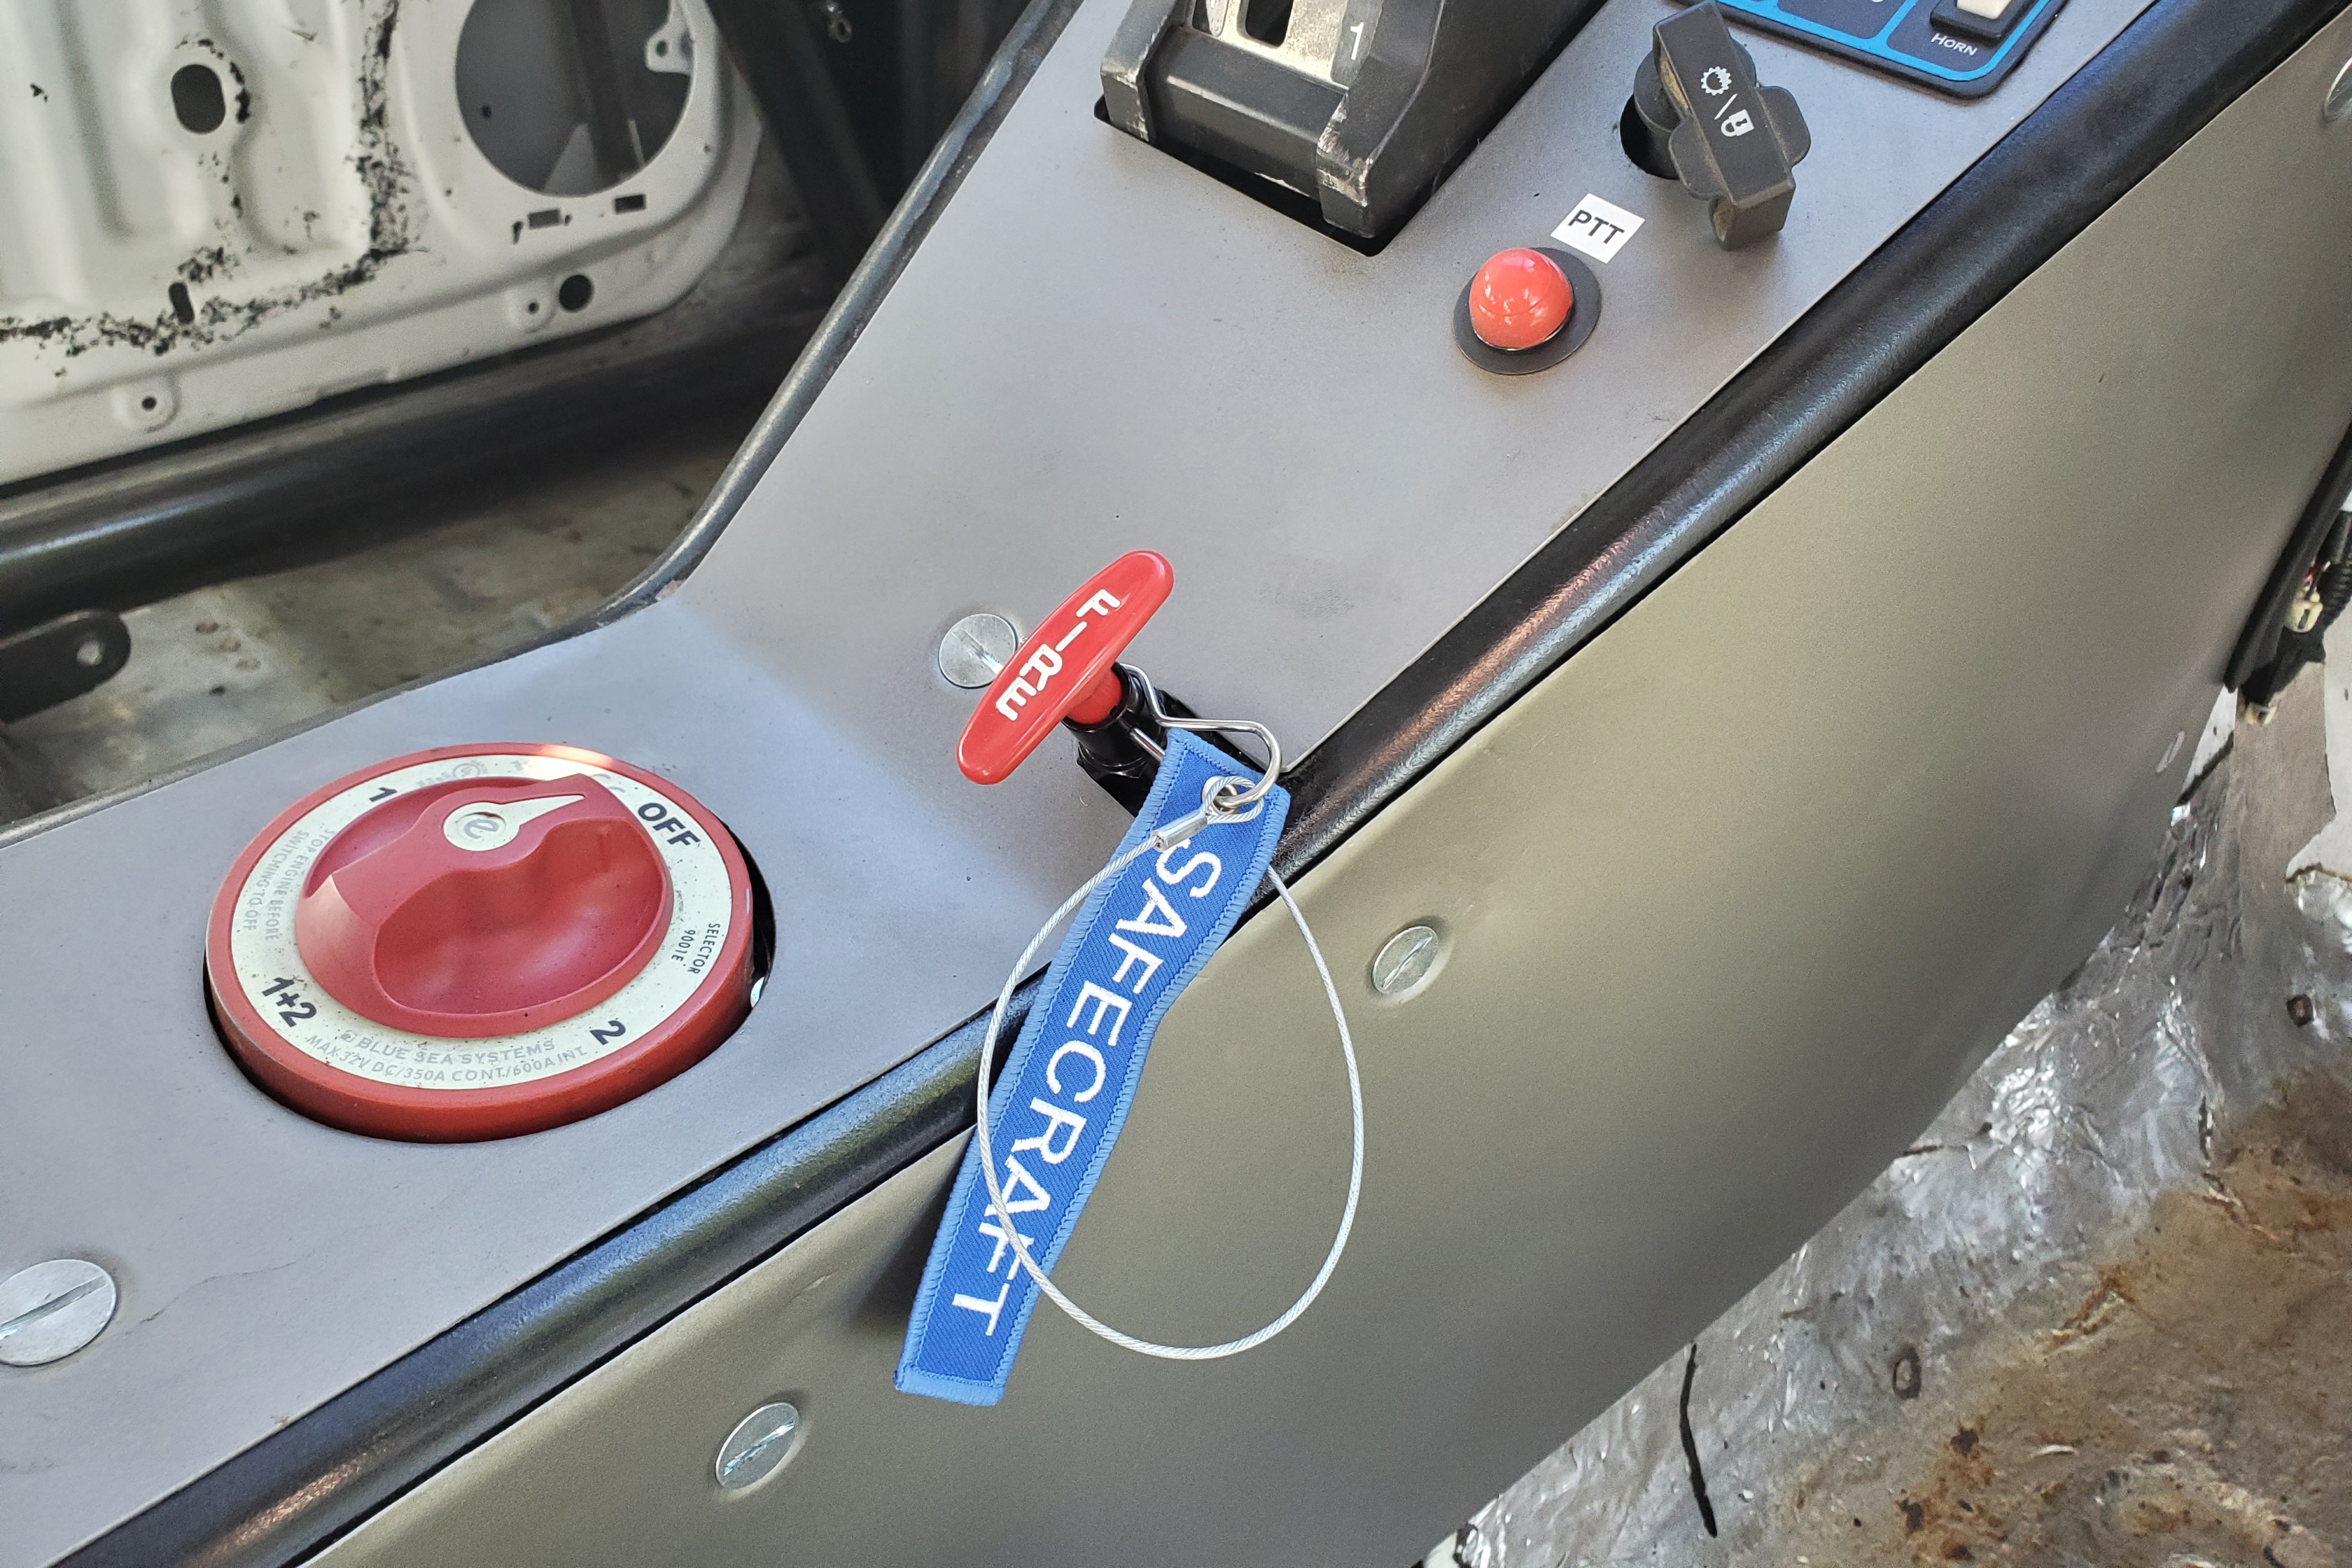
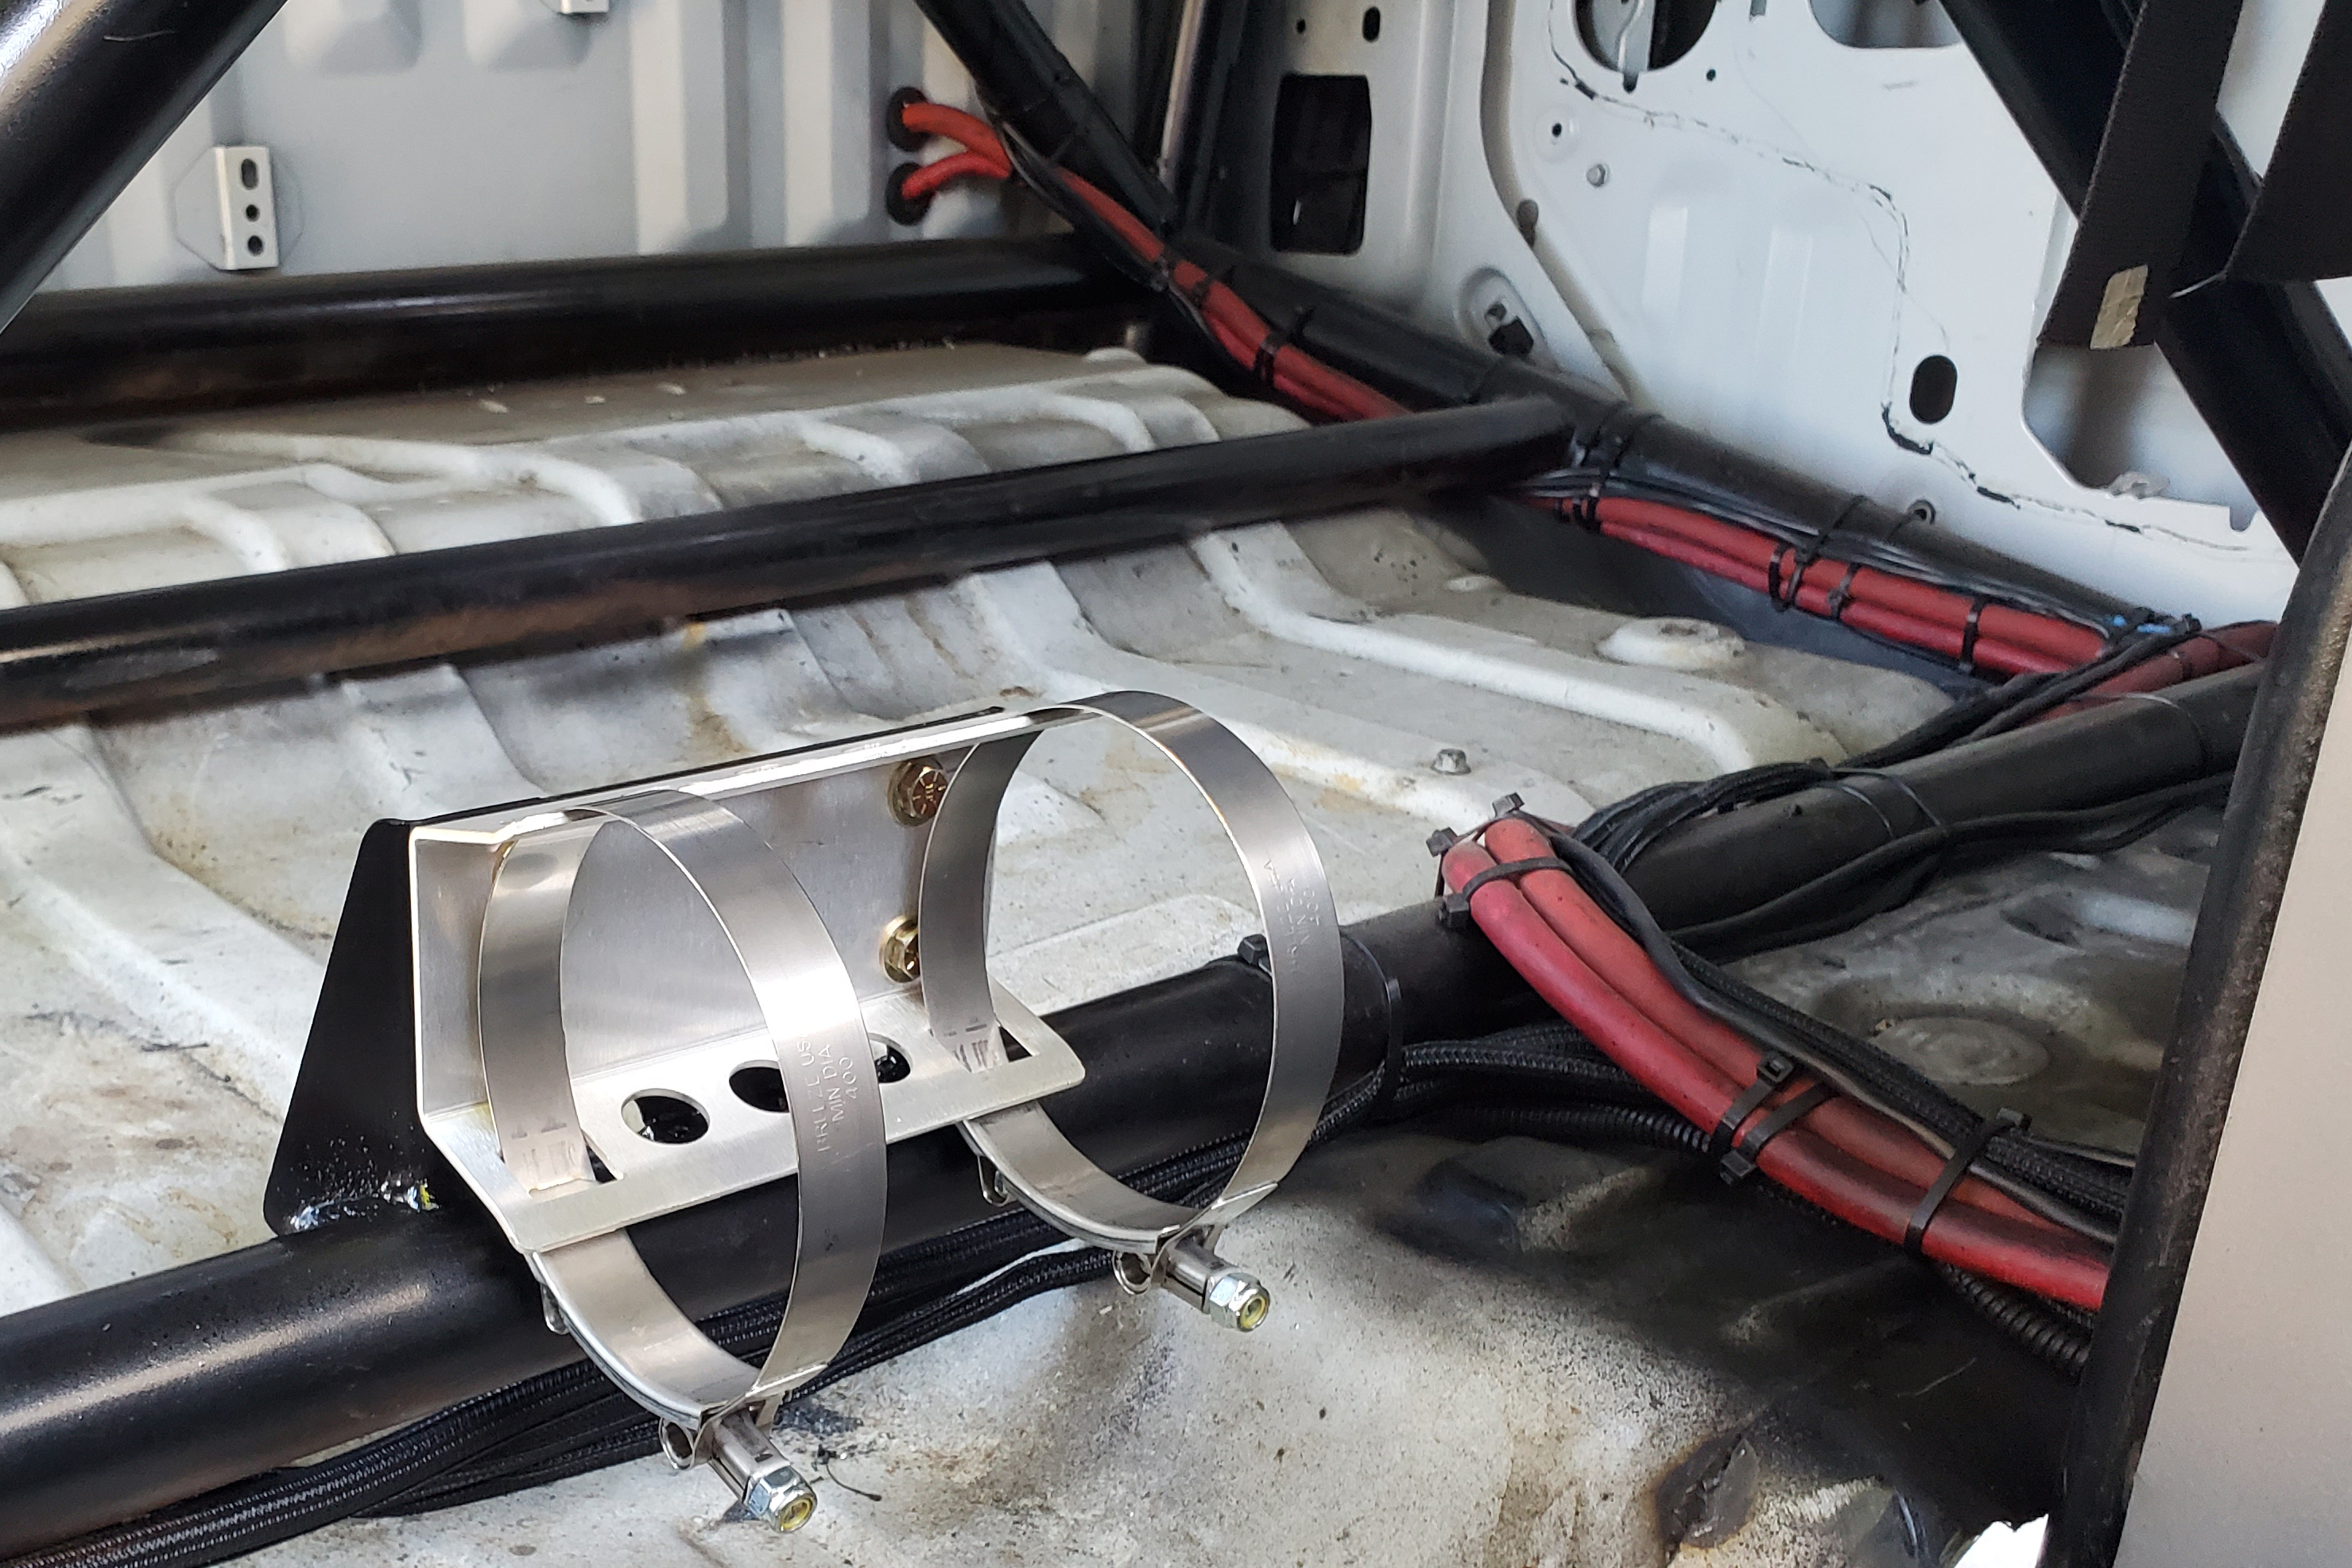
At this point in the build, it is finalizing installing the parts and putting the final touches on. One of the last parts of the puzzle was to get the Safecraft fire suppression system installed. We already had a Safecraft fire extinguisher mounted in the rear of the truck, but wanted to make sure we were completely protected.
Storm Trooper is still be worked on and waiting to see its first time in the dirt. We are hoping to have that happen very soon, but we will have to wait to find out exactly when. Where do you think we should take it first? Anything else we need to add to the truck before it hits the dirt? Let us know and it may just happen!
1/2/2018 – Getting Ready For Racing
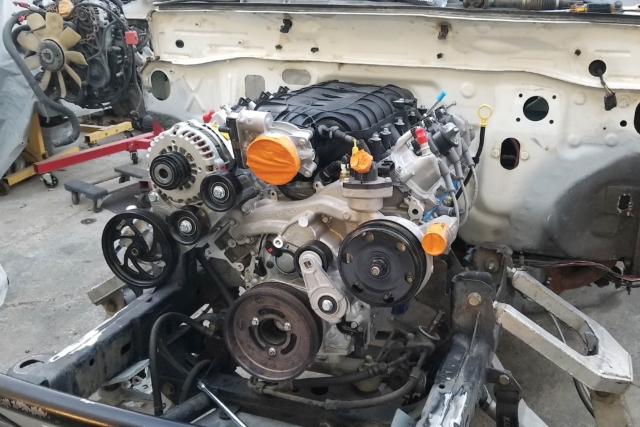
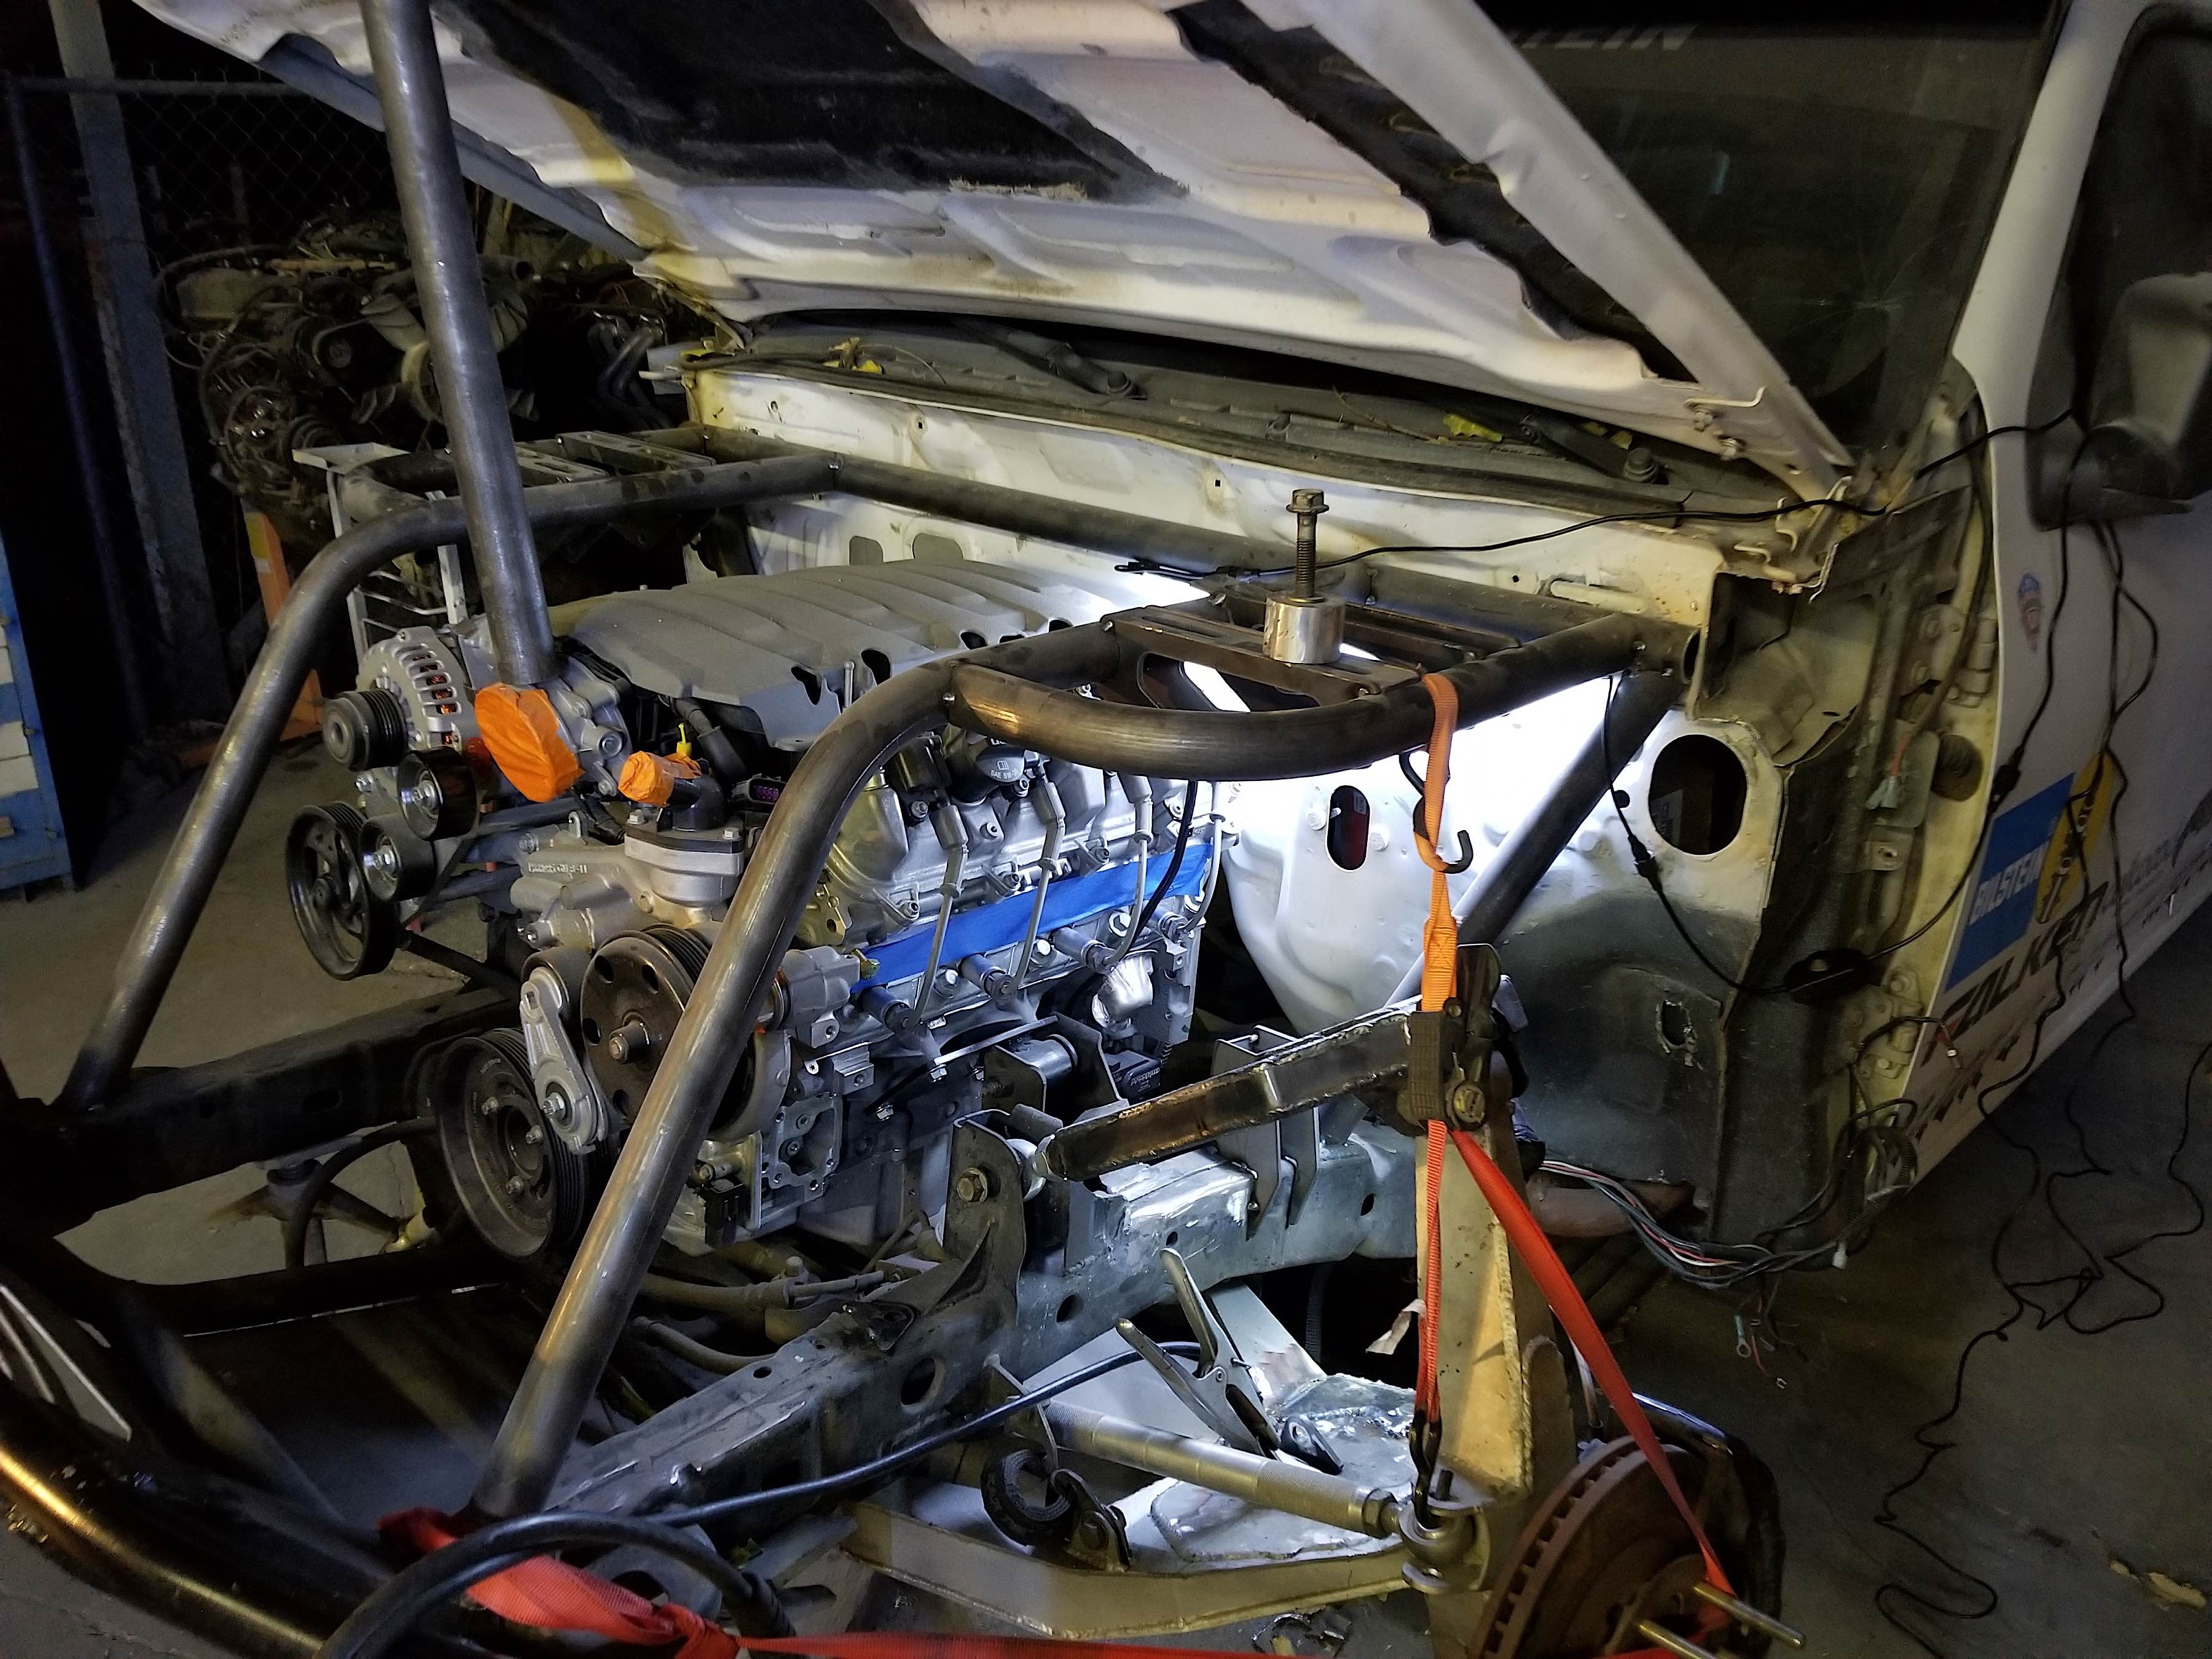
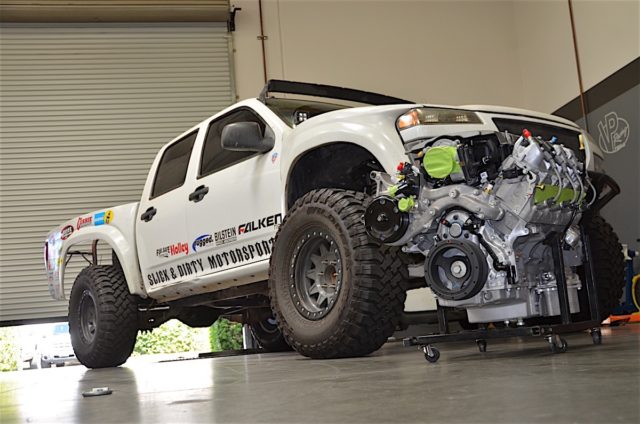
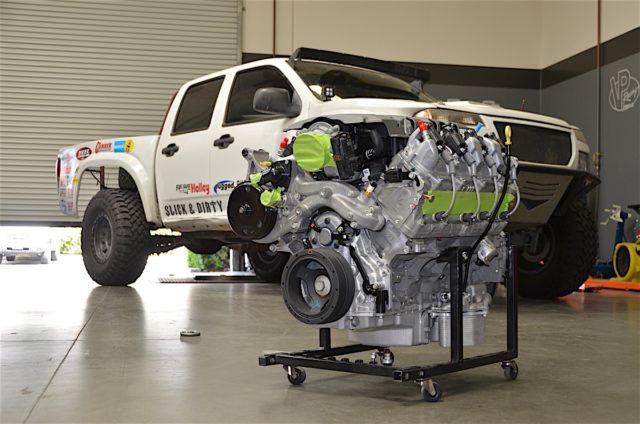
She is in! The LT376/535 is sitting in the truck and is just the start of all the work that is going to be done. There are going to be many long and late nights in our future to get it ready for racing.
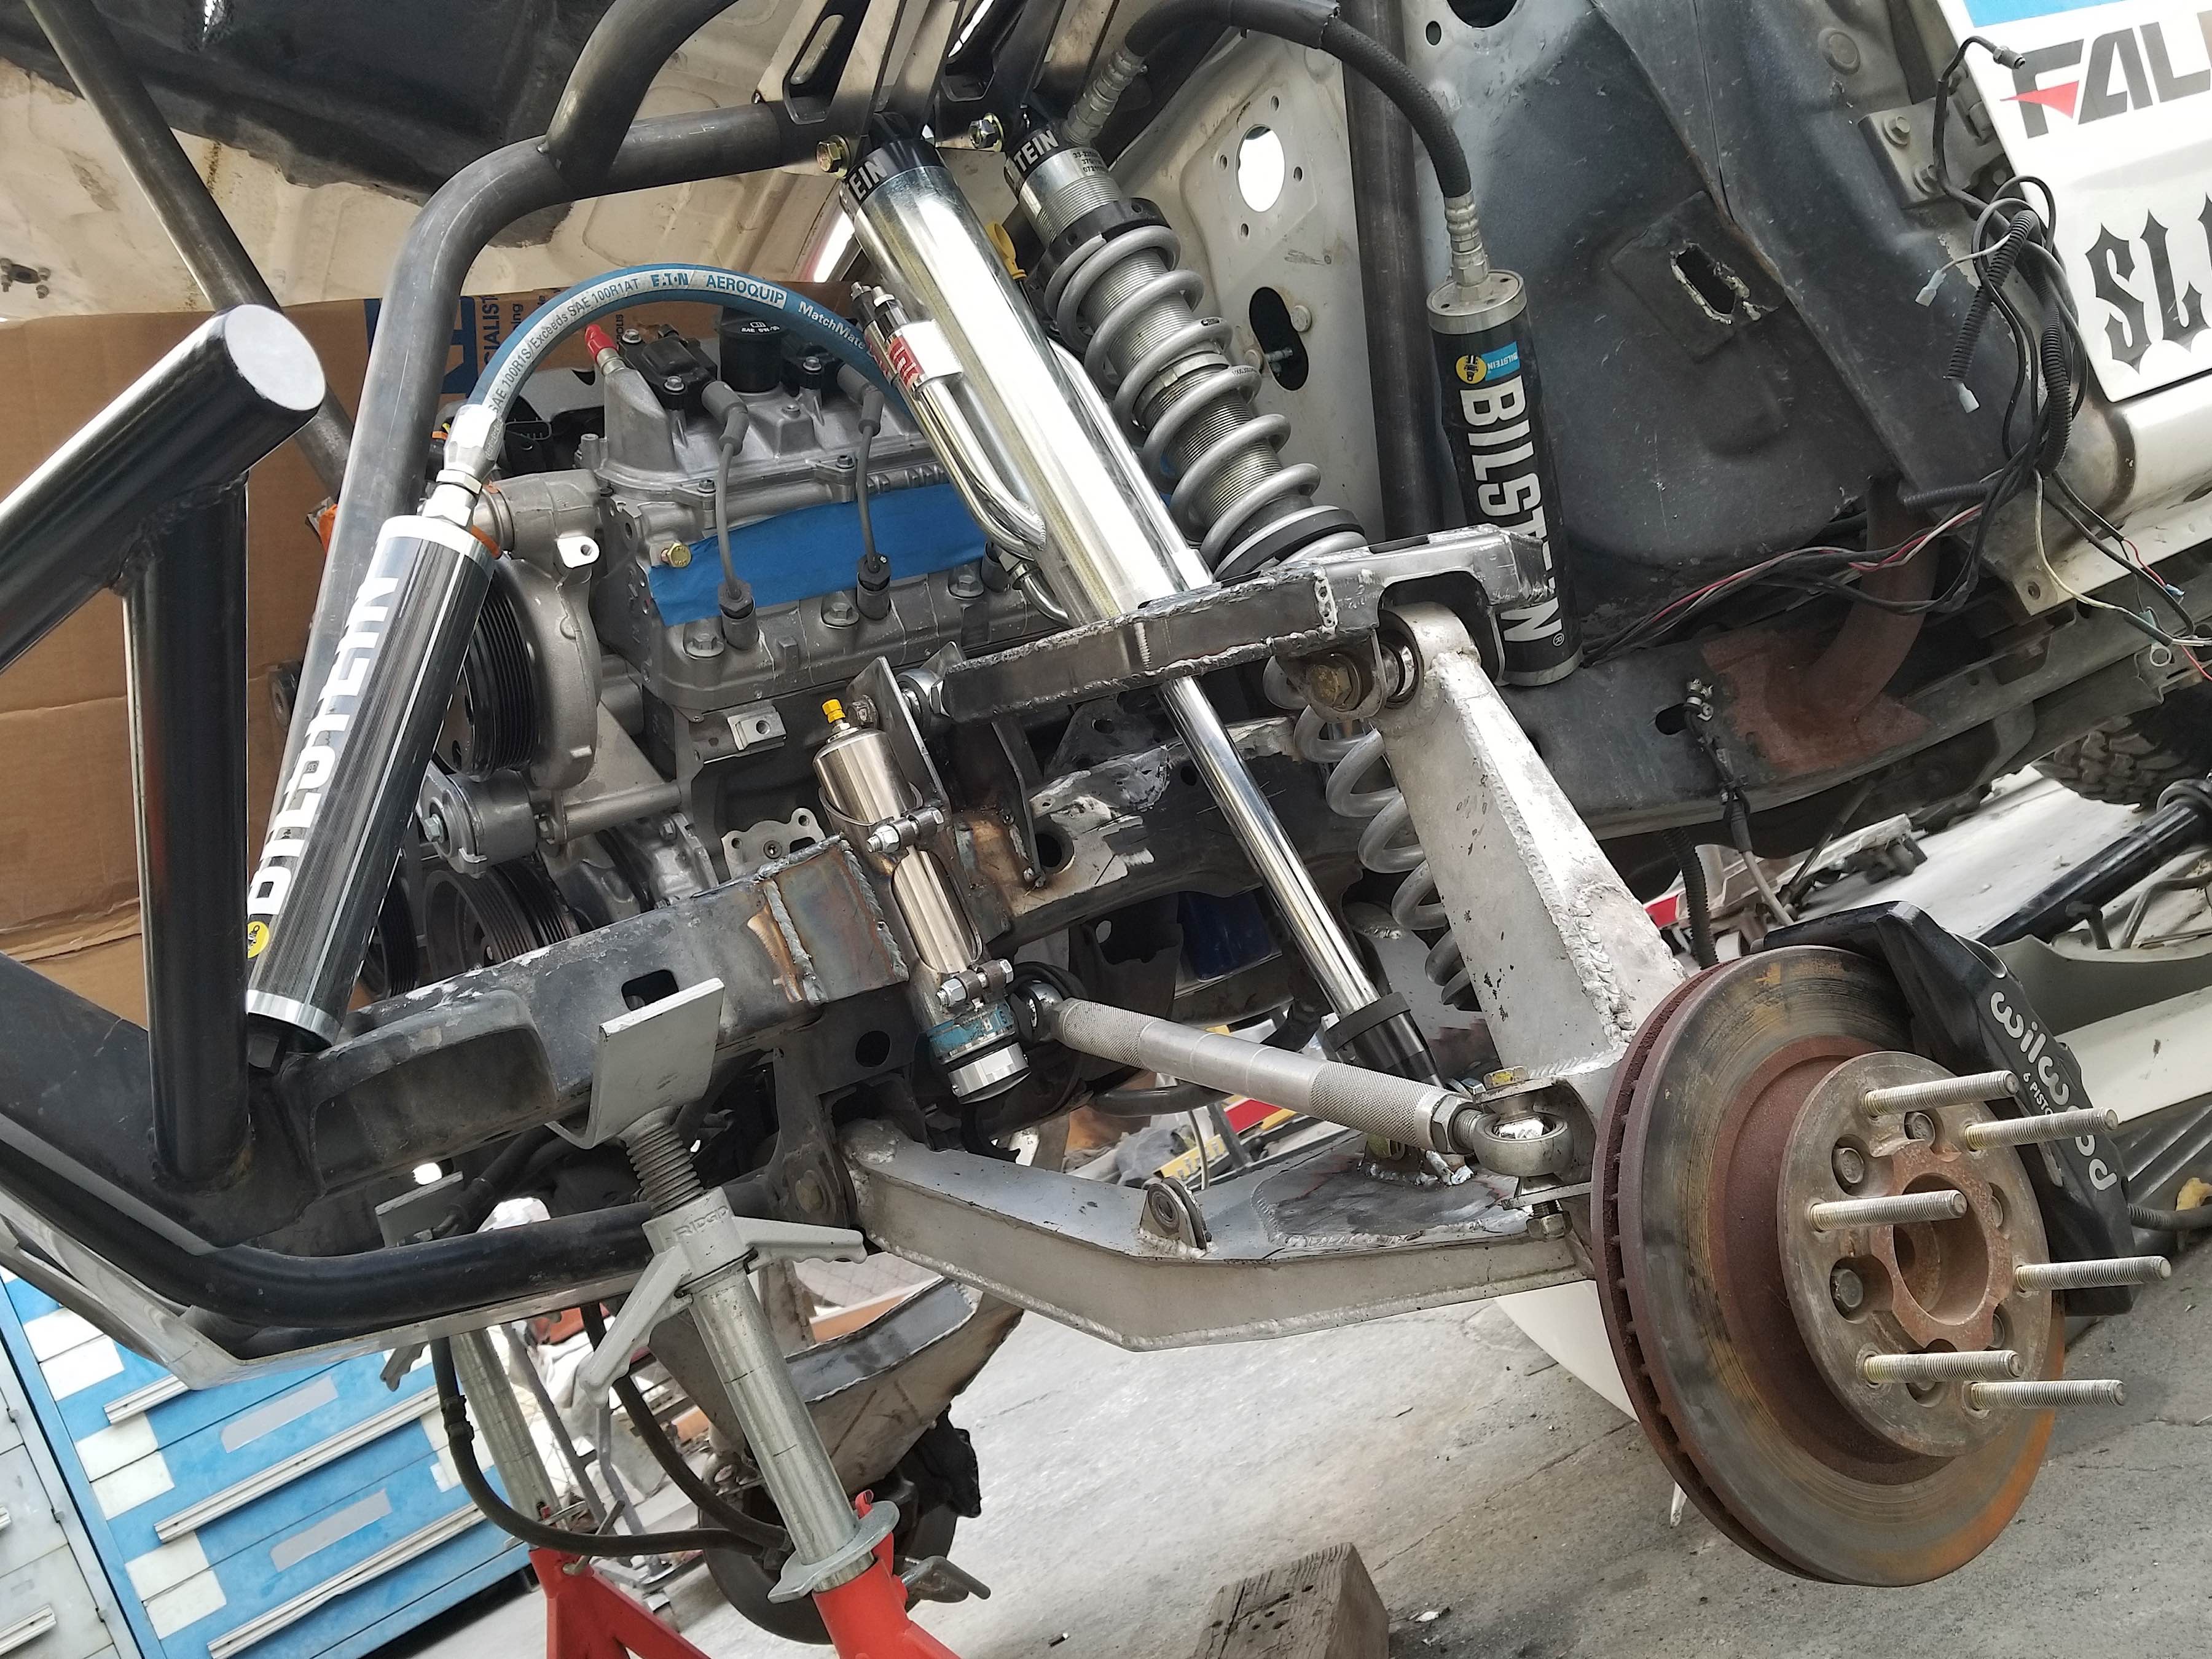
With the front cage taking form and the new upper control arms in we could finally see what the truck would look like. The upgrades are not only adding strength to the truck, but it is starting to look more aggressive.
Bouncing back and forth to different projects on the truck, one thing we needed to figure out was our mount for the radiator. It would be relocated to the rear of the truck. Mounting it and making everything still work and function properly was our top priority.
Plenty of hours have been spent welding, and plenty more will still be in our future. The truck is finally taking shape and will be back on all fours here shortly. Stay tuned for more updates and fabrication on Project Storm Trooper.
10/26/2017 – Digging Deeper: Converting An Axle From Semi-Float To Full-Float
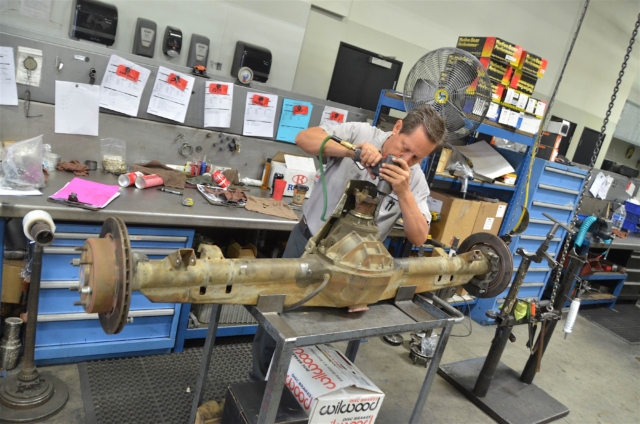
We would be using with the same F9 axle as before, just upgrading it from a semi-float axle to a full-floating axle. Doing this would save us time getting the axle reinstalled after the conversion; we would not need to tab everything out again.
Since the truck was taking a more serious build direction, we wanted to make sure the third member was up for the challenge. To do this, we removed the differential in the housing and installed a Motive Gear 35-spline spool. The spool would asure that both tires received equal power at all times while in the desert. It was simply one less thing for us to worry about while racing. With all of the pieces complete, we could start assembly.
The great part about reusing the same housing is the fact that it will bolt back in. All of the work that went into installing the semi-float housing made reinstalling the new axle smooth. With the help of a friend, we get the axle slid over the leaf springs and into position. The truck handled and stopped, which meant it was time to get started on the next part of the project.
10/12/2017 – Electric To Hydraulic: Adding Power Steering To Chevy’s LT376/535
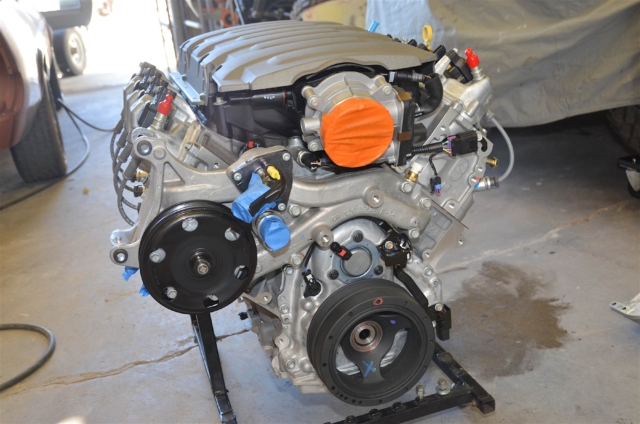
To help with the swap and install, we headed out to RSO Performance in San Jacinto, California. We would be completing the install and fabrication with the help of a shop that specializes in LS-swapped Toyotas.
ICT Billet helped us get our power steering pump mounted to the LT376/535 with the help of its Gen V bracket kit. The kit included new mounts for a power steering pump and alternator. ICT Billet's power steering bracket came with all of the required hardware. It is best done in stages, as some parts need to be attached prior to being fitted to the engine.
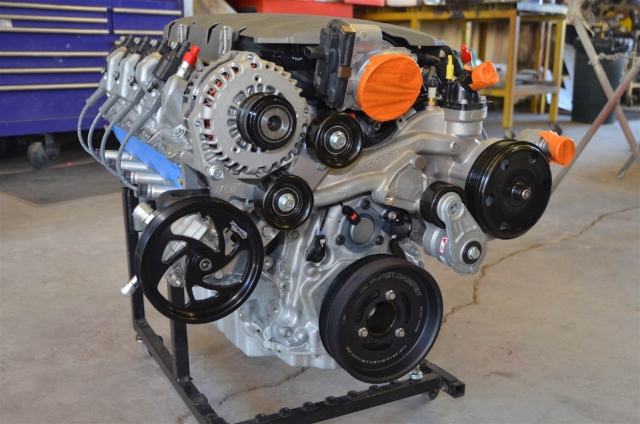
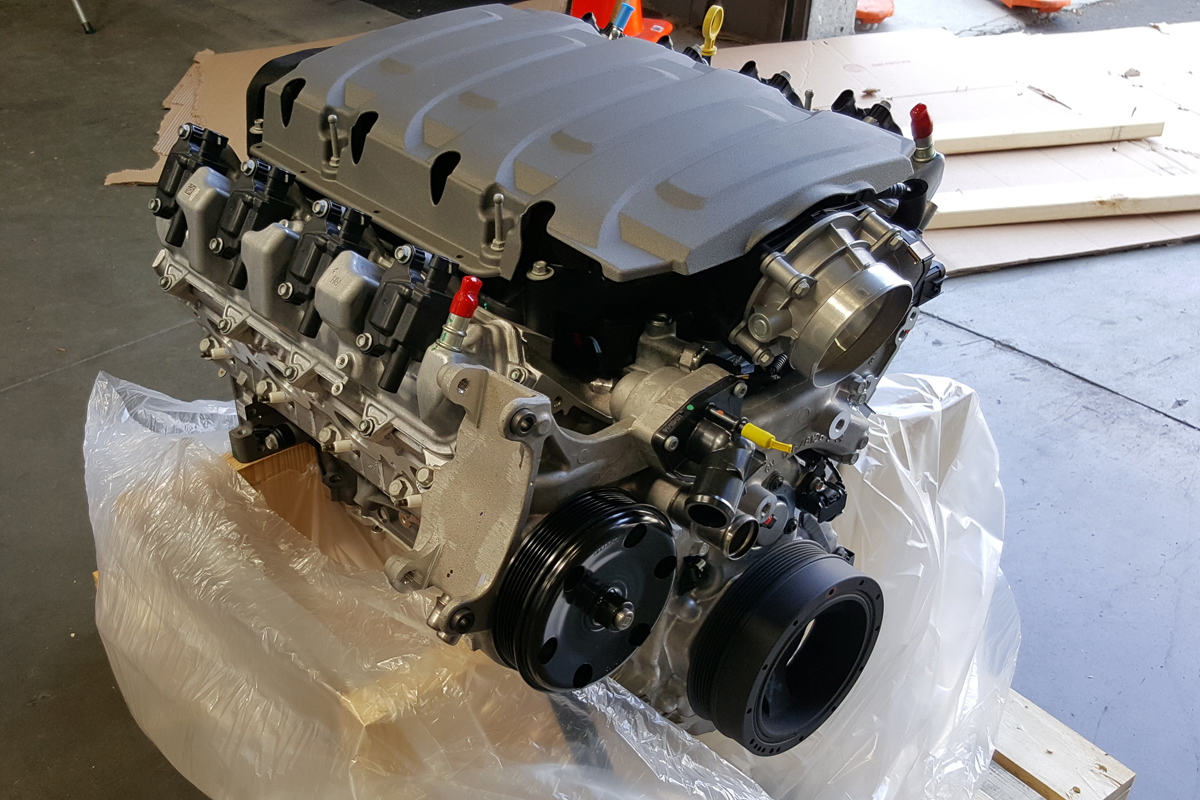
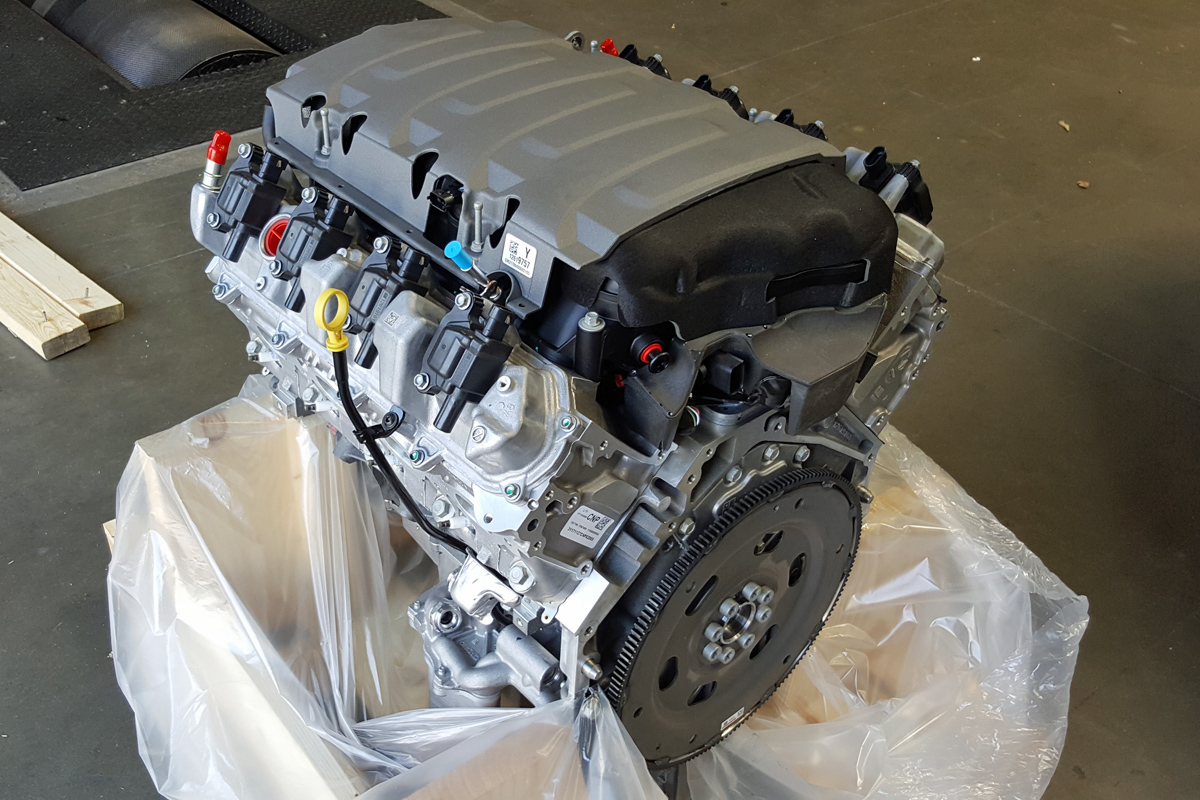
Chevrolet Performance’s LT376/535 looked like a piece of art before we put the FEAD on. Afterwards, it looked like it belonged in a museum. Soon we will mock up the engine in the truck. We will also discuss how we are going to wire everything up with Chevrolet Performance’s Connect and Cruise system. Be sure to stay tuned, you won’t want to miss the next part!
8/31/2017 – Change Of Heart: Swapping In Chevrolet Performance’s LT376/535
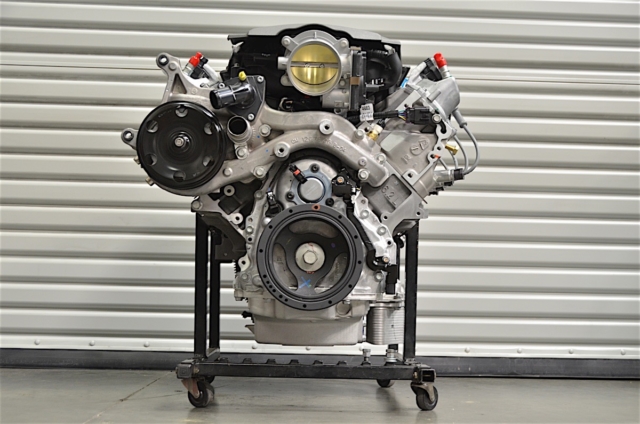
For the project, we decided to go with an ICT Billet accessory kit that used the L83 (basically the truck version of the LT1) water pump, tensioner, truck damper, and alternator. We decided to stick with the factory L83 water pump, but decided to go with an ATI Performance Products damper, Powermaster alternator, and Turn One power steering pump.
In addition, we chose C&R Racing for the radiator, Derale Performance for the external oil coolers, Racepak for the gauges, Wilwood for new master cylinders and brake pedal, Current Performance Wiring for motor mounts, and Holley for the fuel system. We are still in the planning stages for the headers and exhaust. The truck’s going to be getting a complete makeover, not just the engine swap. We are installing a custom race-legal roll cage, Mastercraft Safety 3G suspension seats, Impact Safety harnesses, and a McNeil Racing fiberglass dash. We will be busy with plenty of work, but were looking forward to the finished project.
7/7/2017 – A Heart Transplant Fit For A King
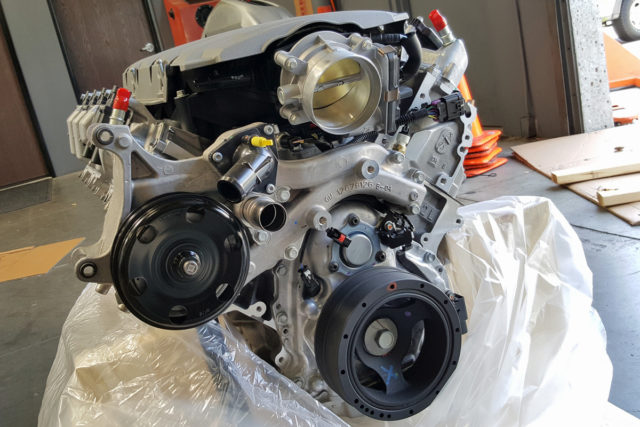
The cat is out of the bag! We have some big plans for Project Storm Trooper with swapping in Chevrolet Performance’s LT376/535 6.2-liter V8 which is rated at 535 horsepower. This will be a big improvement over the factory five-cylinder.
We will be running Chevy's 4L75e transmission in addition to doing a power steering conversion using a Turn One pump, ICT Billet conversion brackets, ATI damper, Powermaster alternator, and C&R Racing cooling system. This is one swap you are not going to want to miss!
5/18/2017 – Falken Wildpeak M/T Tire Review
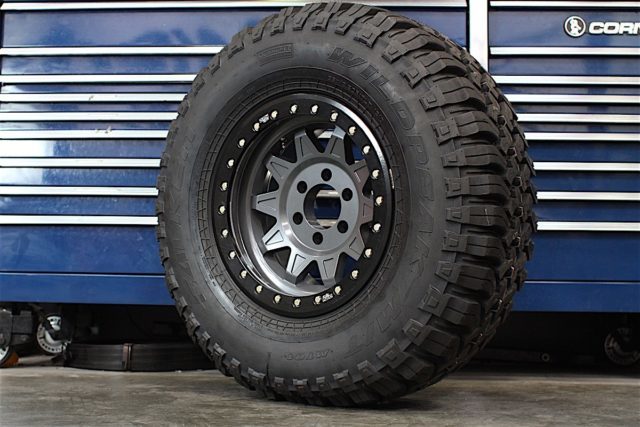
At first glance, the Wildpeak M/T is an aggressive tire that is built to handle all types of off-road terrain.
Within the SVRA, we were able to test the tire out on many different types of terrain, as well as see some beautiful landscape.
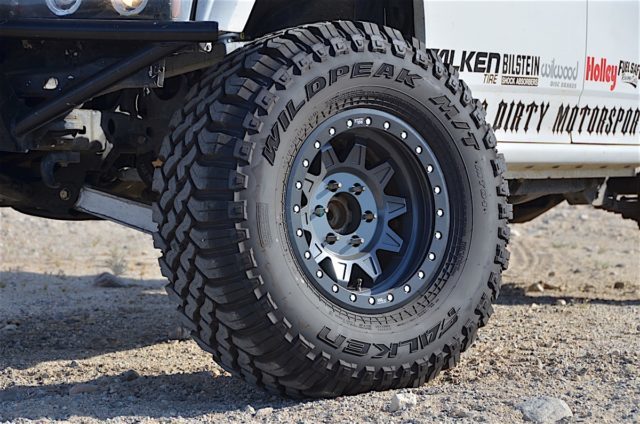
Overall, we were surprised at how much the Wildpeak M/T could handle. By the looks of the tire, we thought we would be in store for a loud hum while driving, but we received just the opposite.
3/9/2017 – Wheelin’ Safely With ARP Bolts And Longer Studs
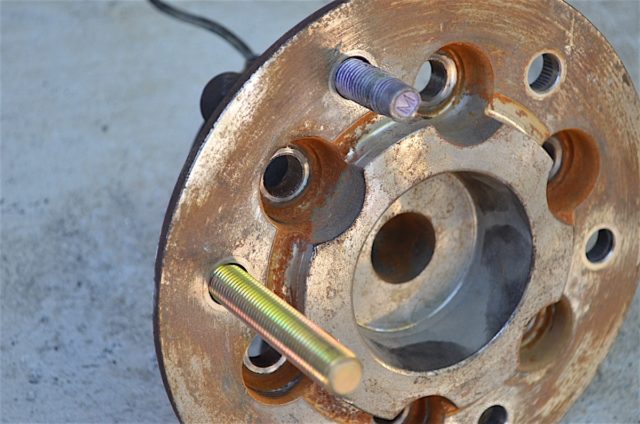
It took us more time to pull the hub off the spindle and unbolt the rotor from the back of the hub than it did for us to install the wheel studs.
Before (left) and after (right) comparison between the factory wheel studs and ARP's.
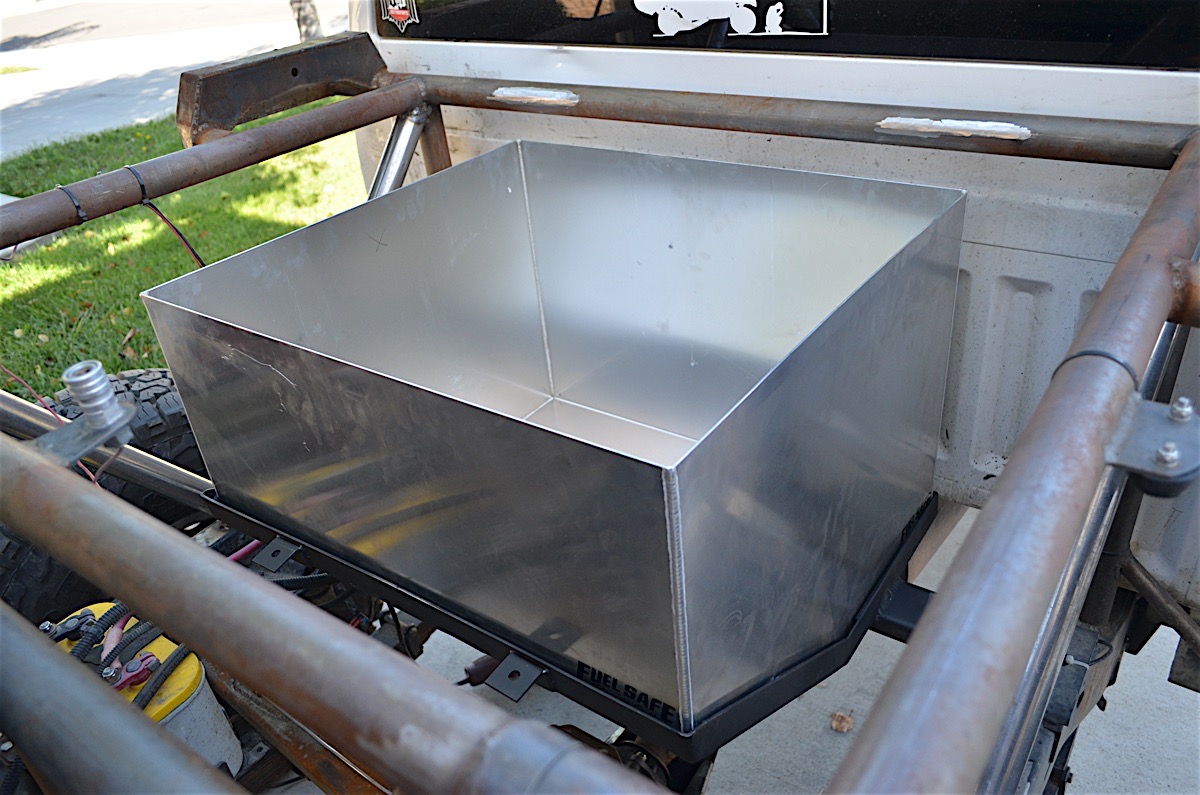
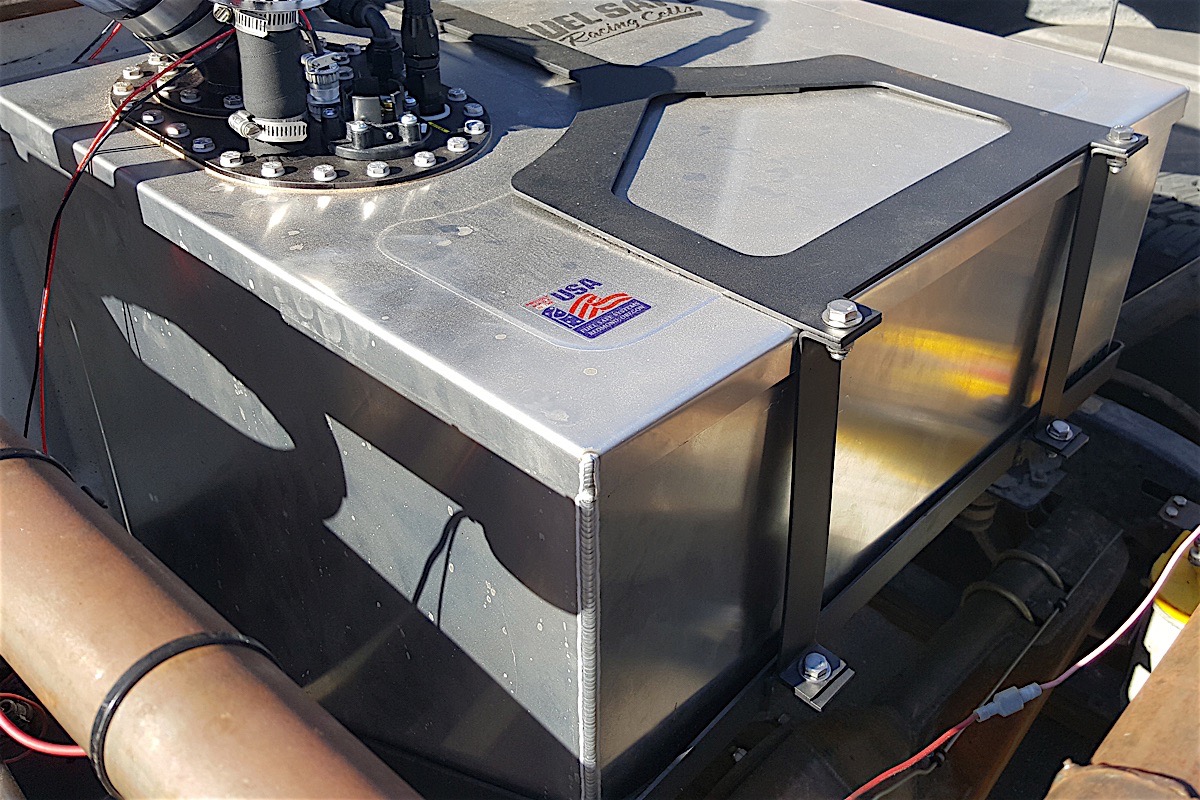
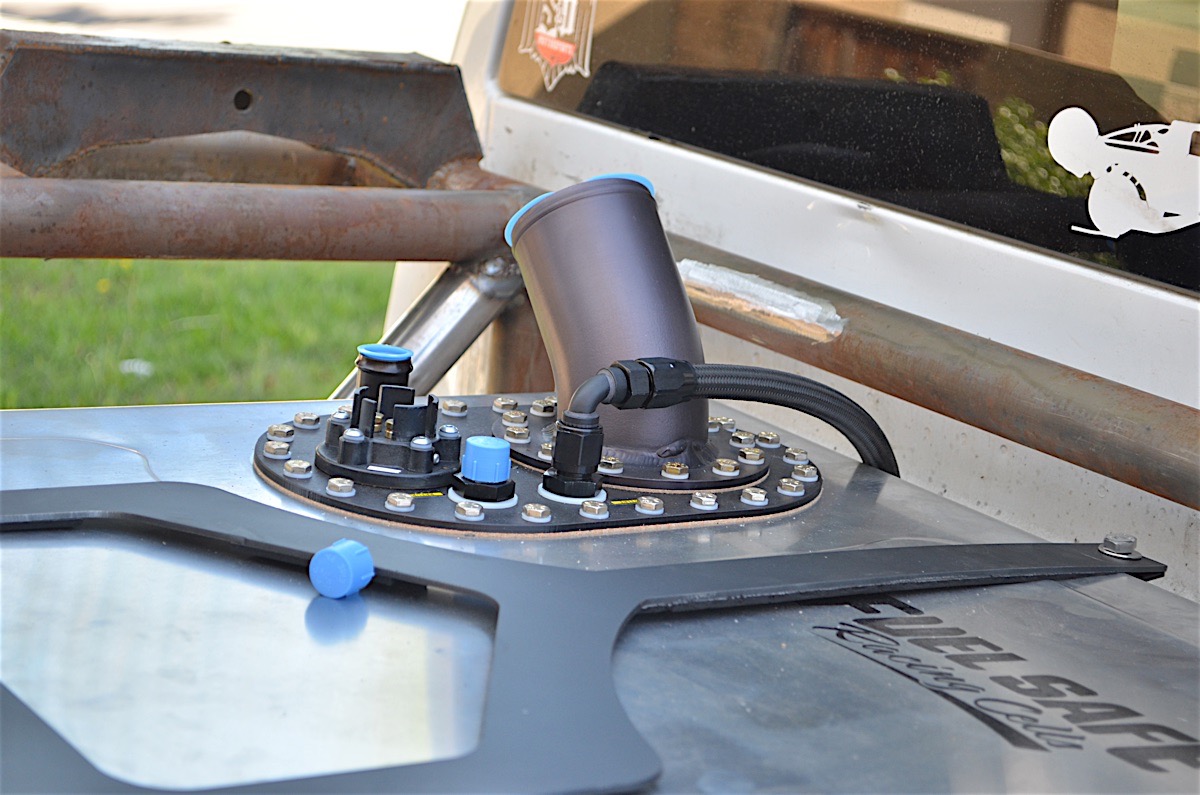
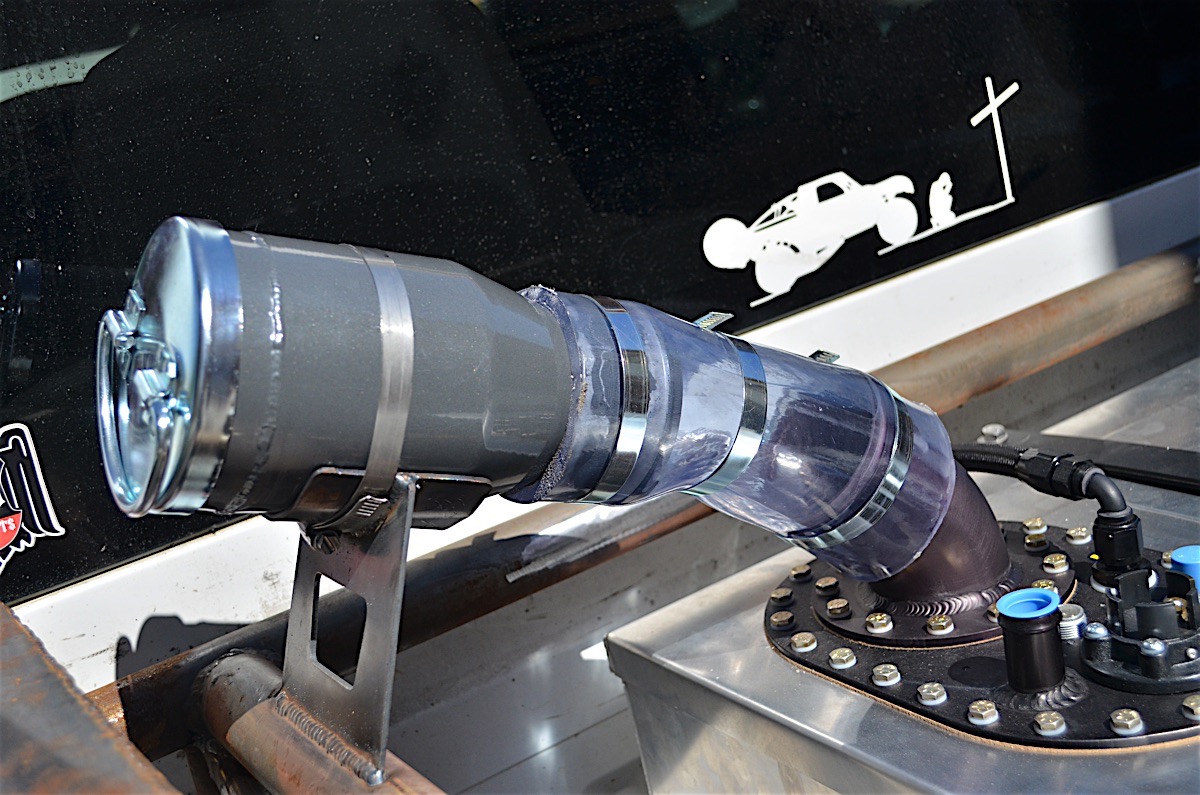
1/27/2017 – Building The Ultimate Off-Road Fuel Cell

Before getting to the cell itself we had to get the right components for inside the cell. The combination of Holley’s Hydramat and there dual pump, we knew that we would not be stranded.
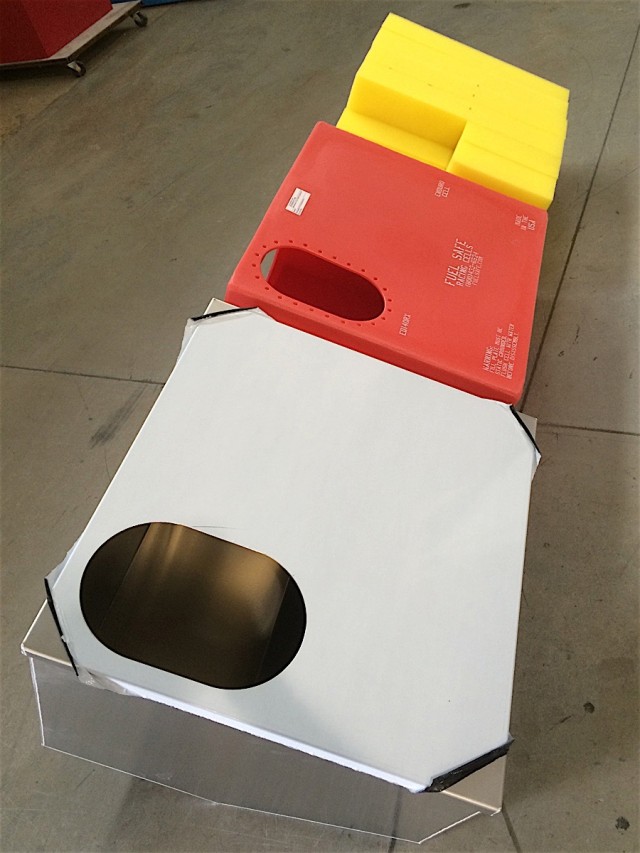
A fuel cell has many components, all of which help keep the driver safe. The outer aluminum shell is just the first layer of defense.
The lid of the fuel cell is attached to the bladder, which makes it easy to service the pump and the interior of the cell.
Every fuel cell needs a tray to sit in and a way to be secured to the vehicle. We made our tray out of 1.5-inch angle iron and got the fuel cell into position.
Once everything was connected, it was time to add some fuel and fire up the truck. Stay tuned for more updates as we have some big plans coming for our prerunner/race truck.
1/10/2017 – New Wheels And Tires
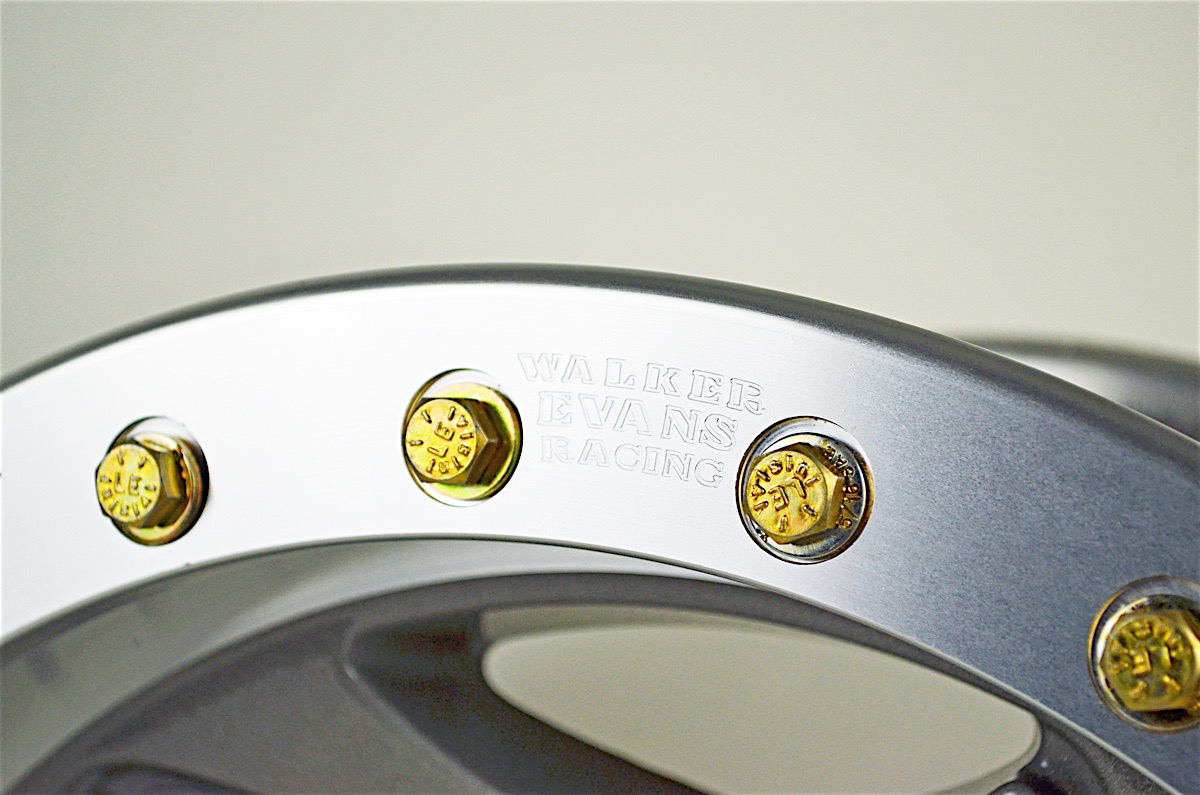
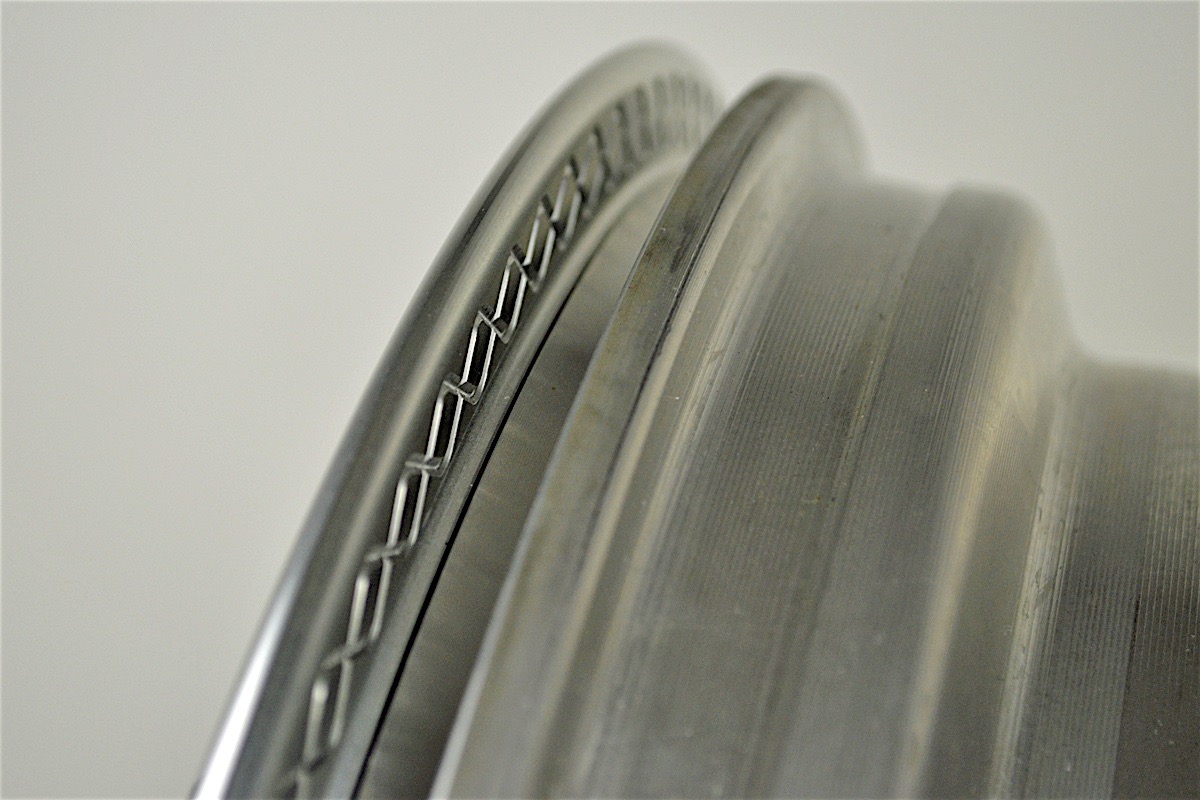
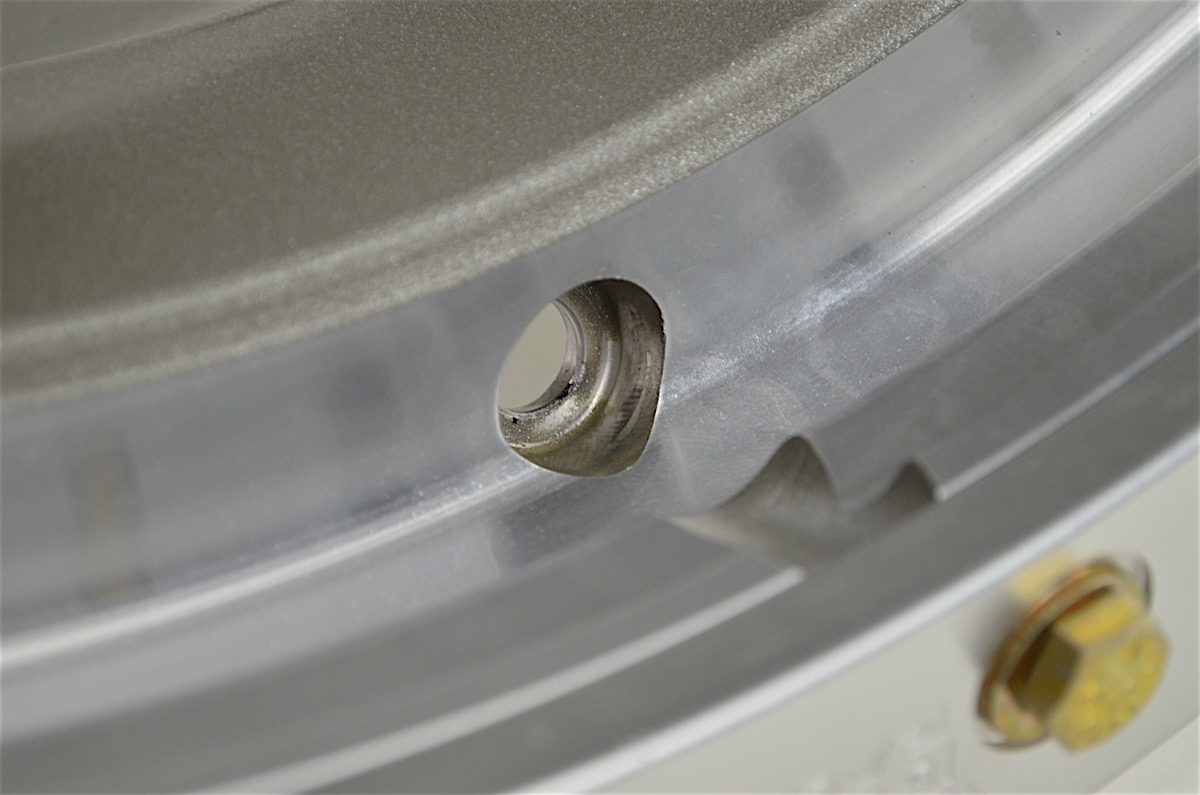
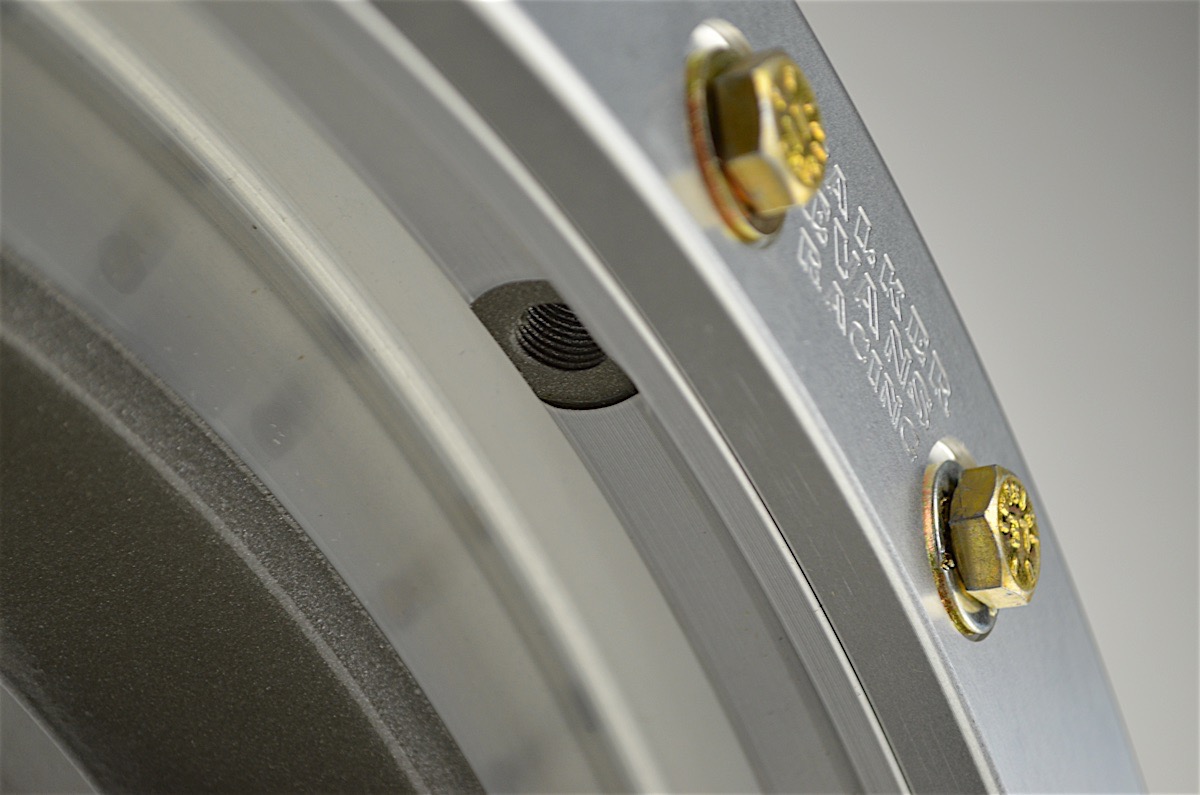
These are true racing beadlocks. One nice thing that Walker Evans has on its wheels is a traditional valve stem (bottom left), with another spot (bottom right) that can be drilled out if you are running a tube.
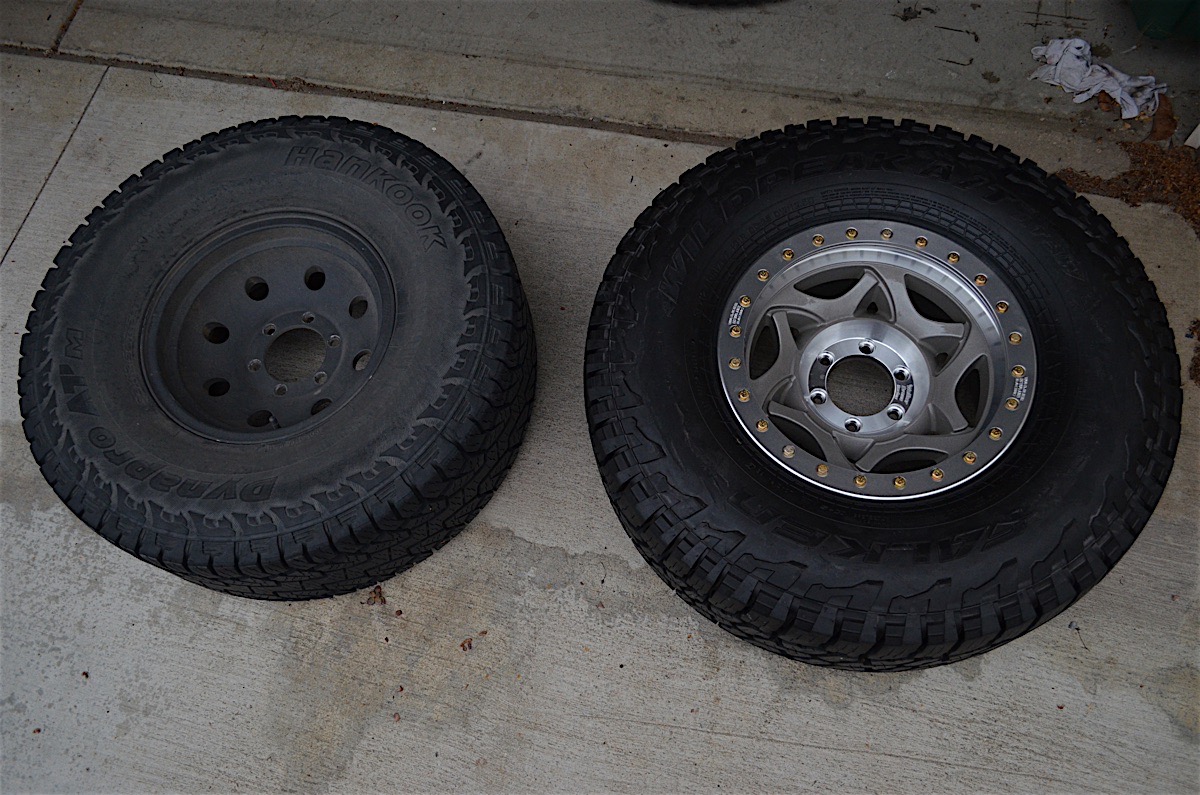
Before and after on Project Storm Trooper. Not only did we change wheels and tires, but we also went from 33-inch tires to 35-inch tires.
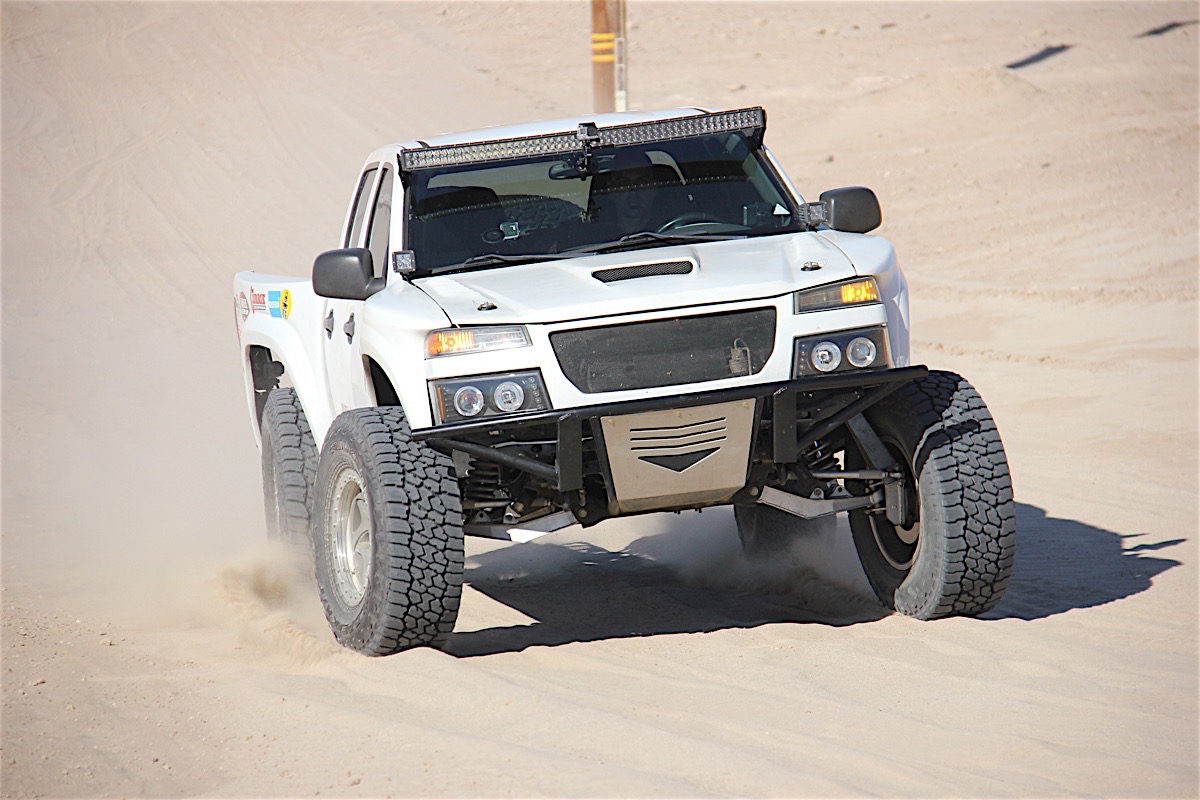
We did hit some sandy sections, but the tires maintained traction. Even though the truck is two-wheel-drive, we did not get stuck once.
12/29/2016 – Building A Rear Cage To Suit All Our Needs

To start any fabrication project it is very important to make sure that everything is square and right where you want it.
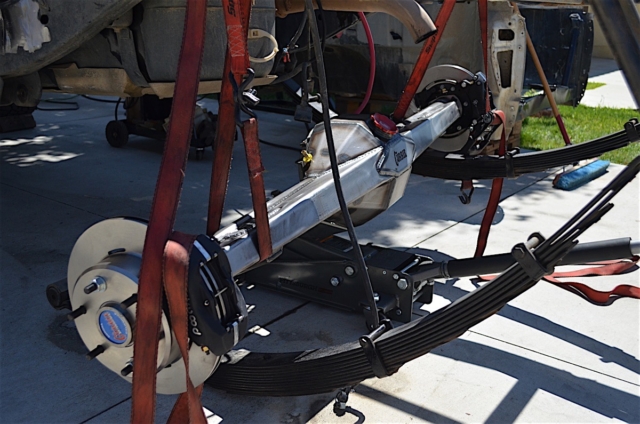
It may look a little unconventional, but it works. We used ratchet straps to get our housing into place.
Patience is key when building a cage. Time needs to be taken to make sure that everything lines up the same on both sides.
Why give the prerunner a trunk? We wanted to make sure that we could utilize every inch of storage we could.
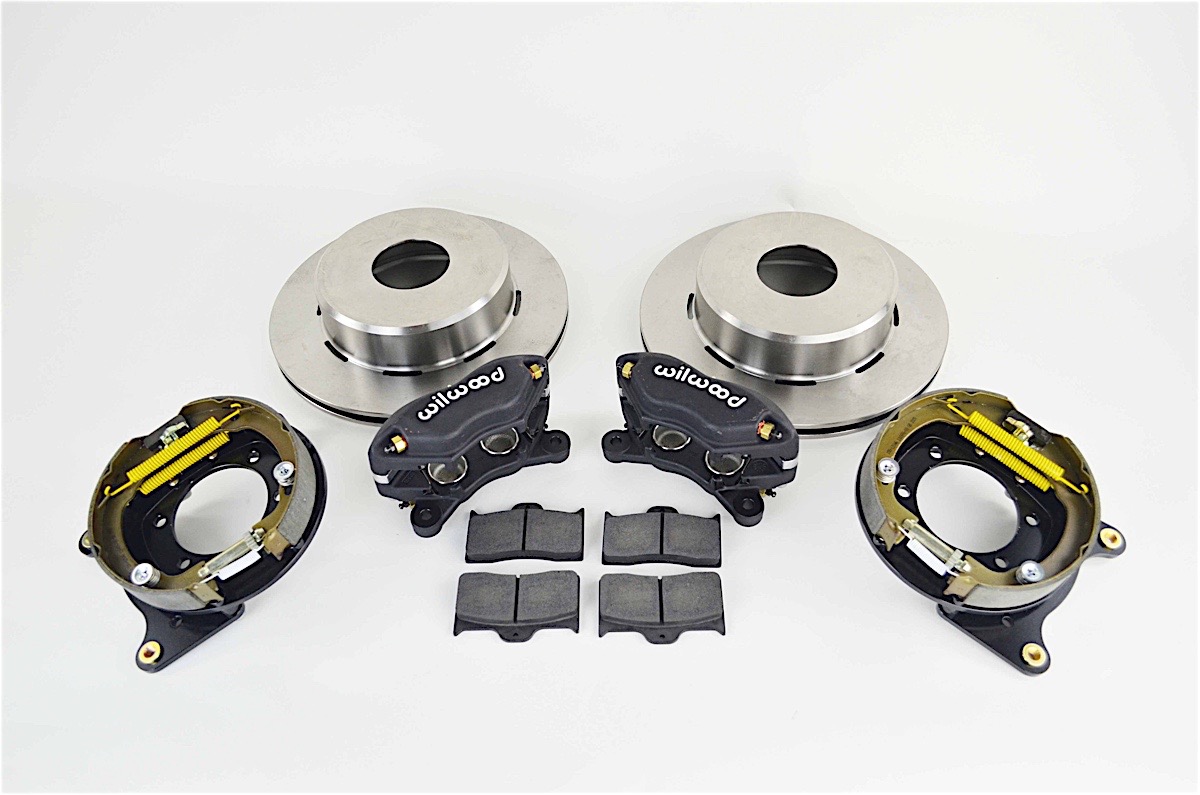
11/29/2016 – Stopping In The Dirt With Wilwood

With the added weight of the truck it is important to make sure that we can stop on the pavement or in the dirt.
The front kit (left) with the six piston calipers, along with the rear Ford big bearing kit (right).
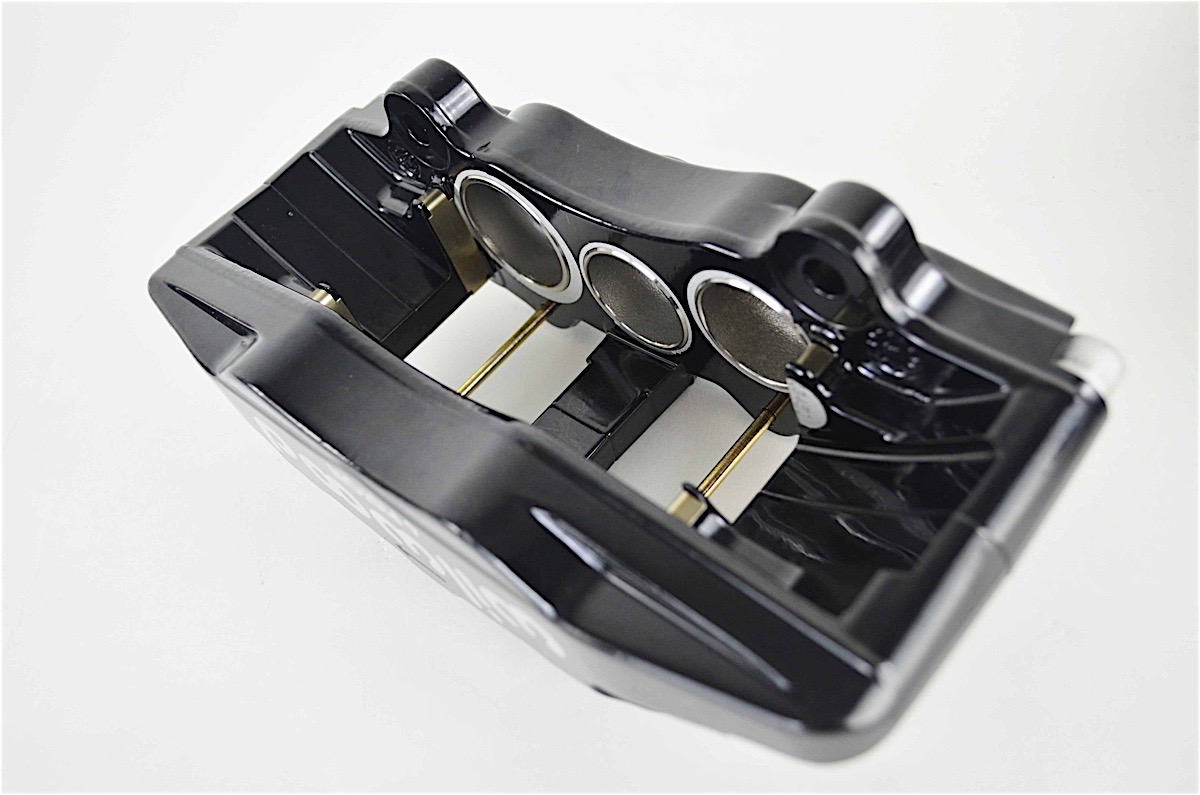
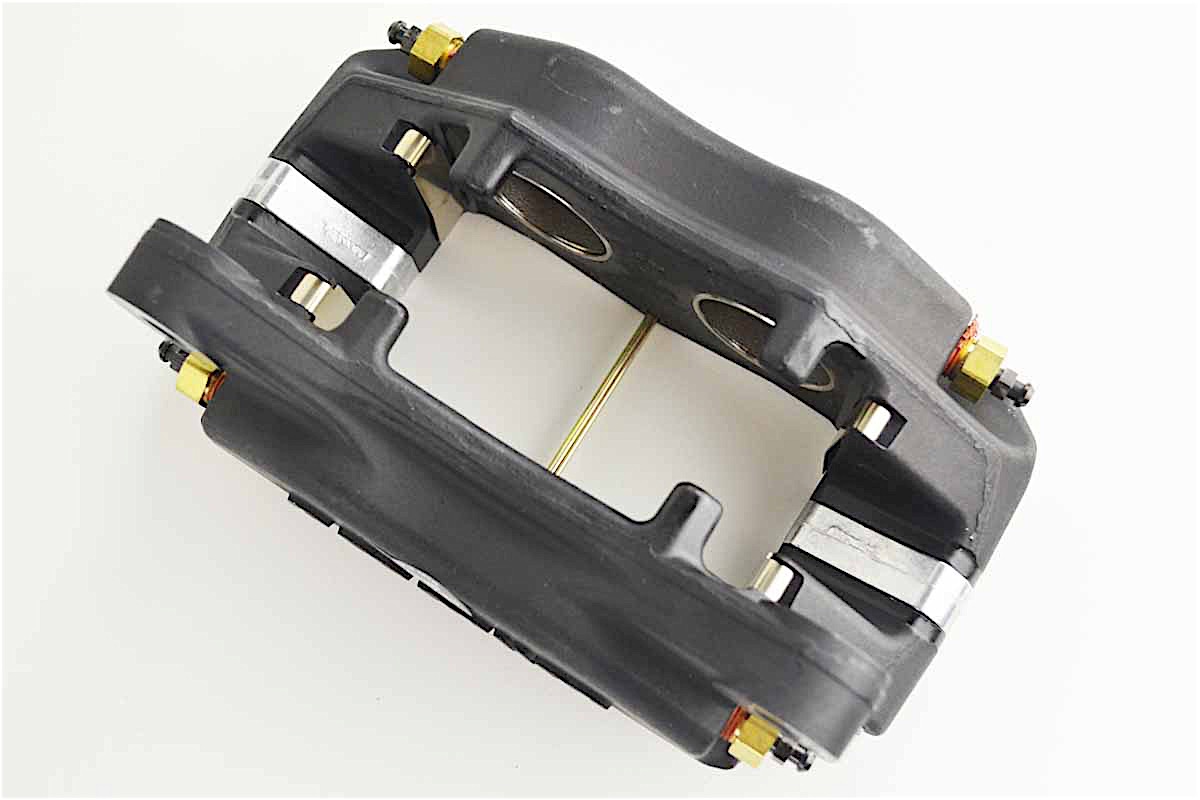
Knowing the correct application Wilwood brakes can help match up the right calipers. For us, the six-piston fronts and four-piston rears.
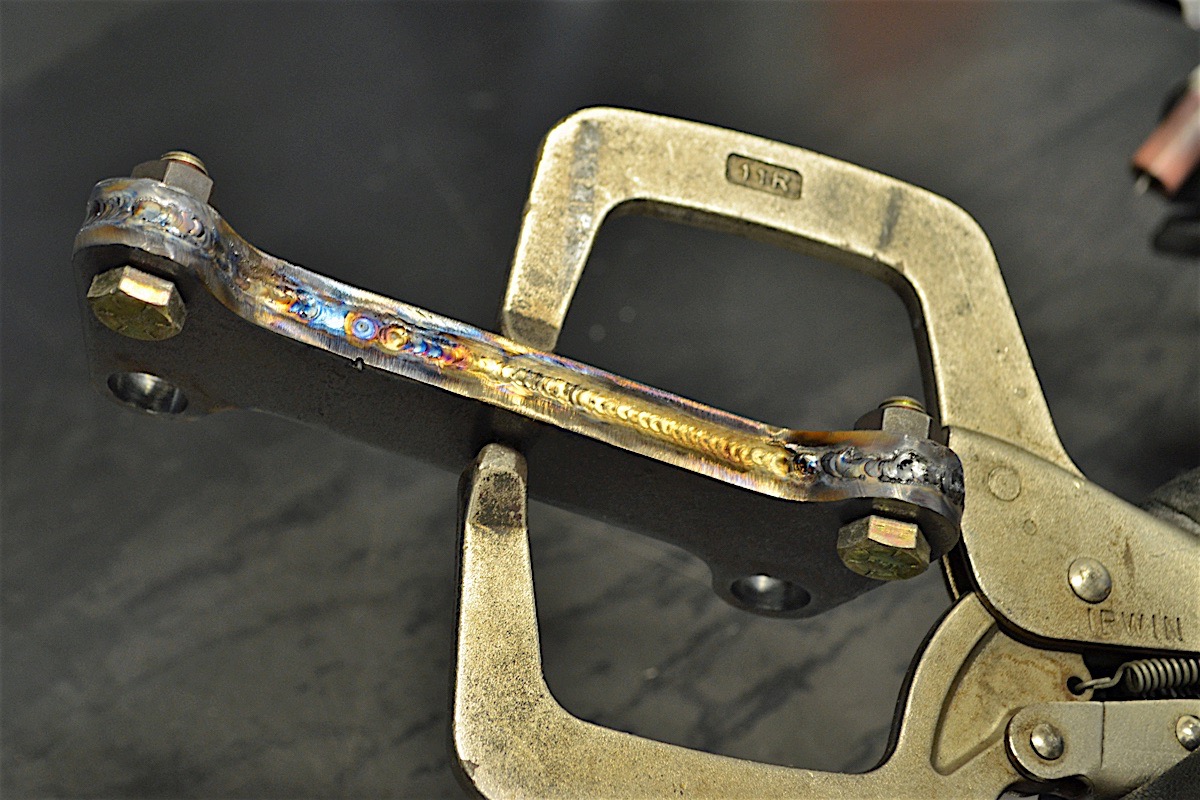
Things got tricky when we got to the front of our GMC Canyon. We used the 2009-2012 rotor for the truck as they increased the diameter. We also fabricated our own bracket to mate the caliper to our spindle.
8/6/2016 – Off Road Nights – Temecula, CA
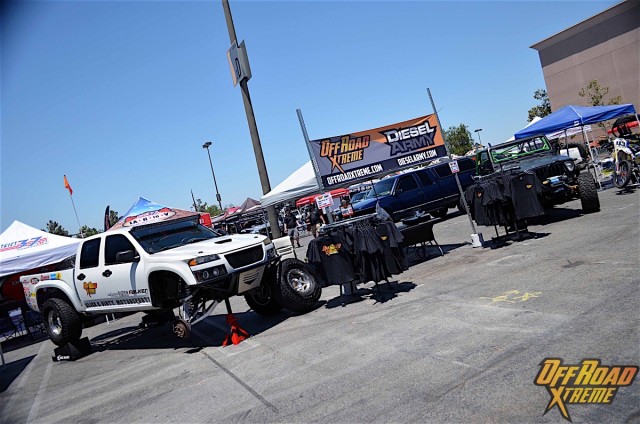
We recently headed out to the Temecula Promenade Mall for Off Road Nights 2016. The show featured everything off-road in the ultimate dirt lifestyle event. The show gave us a great spot to show off our project vehicles and all the hard work we have put into them.
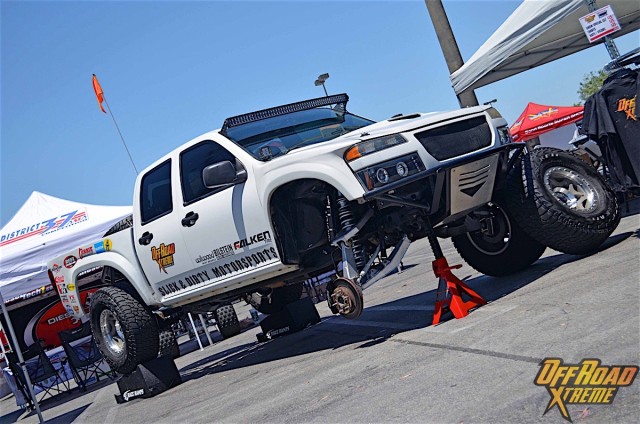
To showcase the suspension that we created we pulled the driver side wheel off the truck. This gave everyone an easy view to see all the work that went into it. The rear of the truck was placed on ramps to show all the rear cage work that had been completed prior to the show.
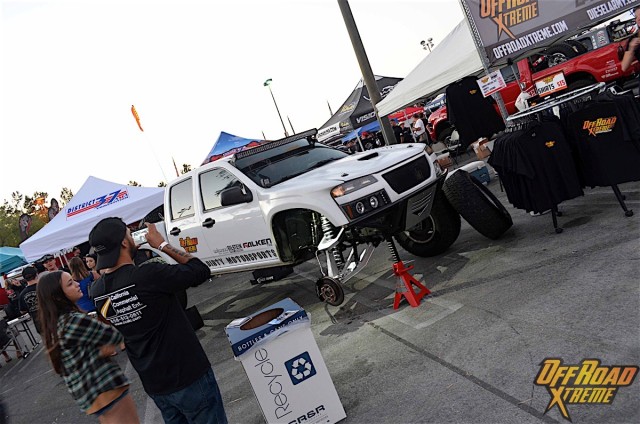
Both of our project vehicles drew plenty of attention for their uniqueness. Not every day do you see a long travel Colorado driving down the road.
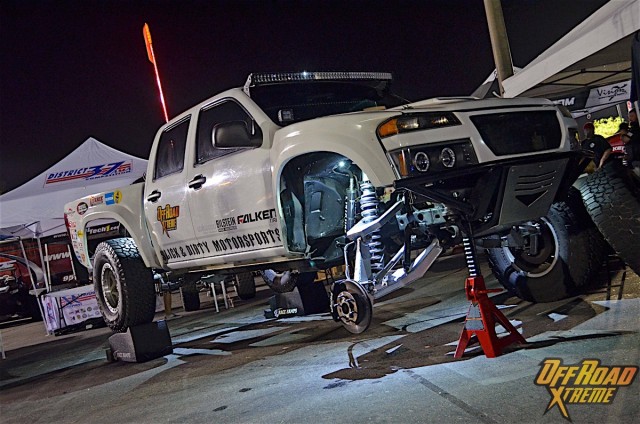
It would not be called Off Road Nights if there were no night pictures. The truck and the show are a whole different animal than during the day. The LED lights come on and light up the night.
7/28/2016 – Getting A New Rearend
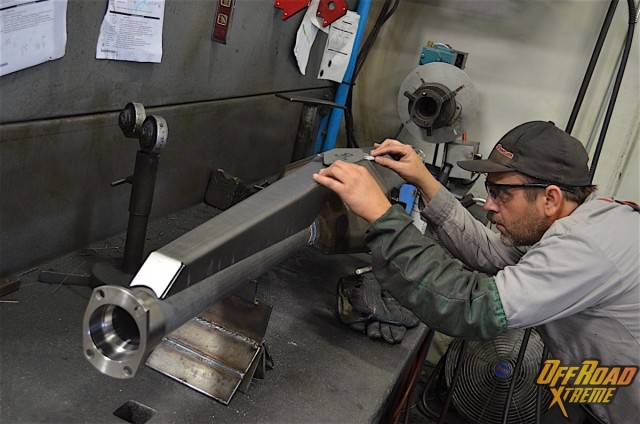
We were able to watch all the pieces of the puzzle come together right in front of us. We will be mocking up the housing, tacking on spring pads and shock tabs, setting up pinion angle, and bringing it back to Currie to finish welding it all together.
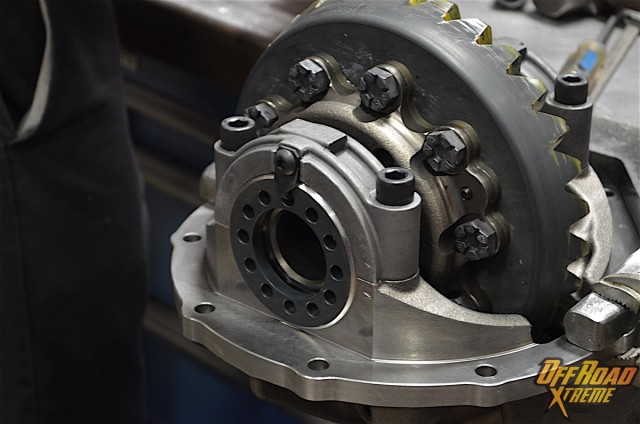
Currie Enterprises put everything together for us. They installed our Eaton Truetrac and Motive 4.57:1 gears into our third member. We would be using 35-spline axles on our setup.
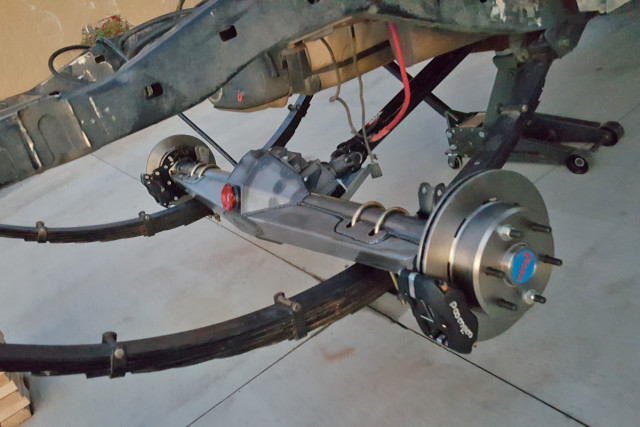
Another long weekend project took us from removing our factory axle and installing the new rearend with Wilwood brakes and a JE Reel driveshaft. With all the prior steps we were able to make sure the housing fit into the truck with no problems.
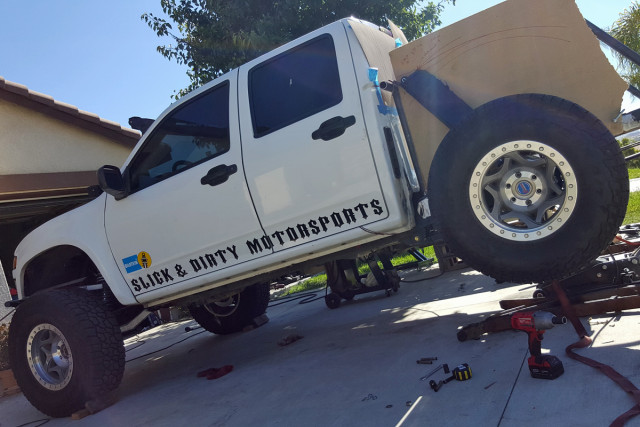
Got wheel travel? We cycled the rear of the truck to make sure that everything worked correctly. We ended up cycling 18 inches of wheel travel with the bypass shocks. Bilstein sent us a set of 9100 series shocks to make sure everything would match up.
4/23/2016 – Stretching Our Legs: Installing Our Custom Long Travel Suspension
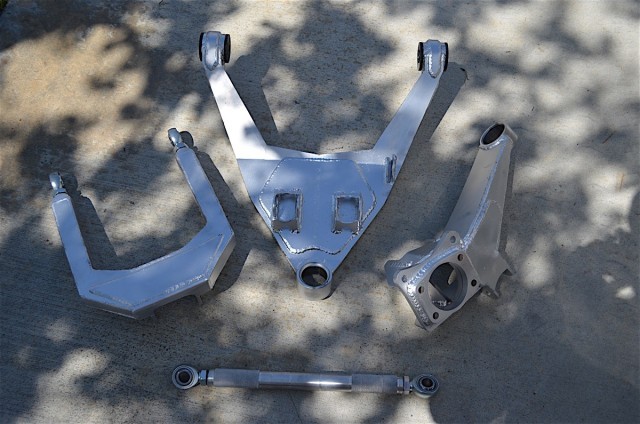
Not every vehicle is treated to a silver platter of hardware for off-road use. There are times when you need to get creative with your project. Rangers, Silverados, and F-150s all have a wide range of off-road parts. However, since the first generation of the Chevy Colorado and GMC Canyon were neglected by the performance off-road market, we took matters into our own hands.
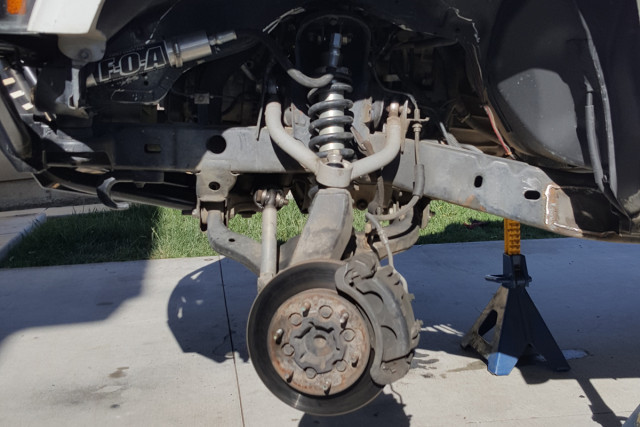
The old suspension was not going to cut it anymore, it was time for a major upgrade. We can tell you now that the install is complete, that this is not a one day project, but rather a very long weekend project if everything goes as planned. It is also not for the faint of heart, as you will be cutting and removing a lot of your precious baby.
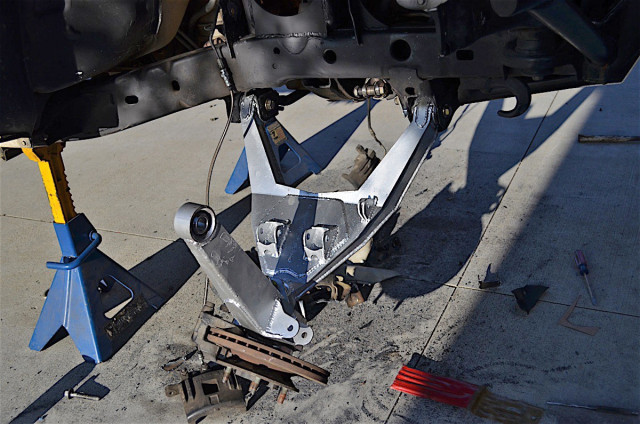
With the welder still out, we added a gusset for the upper control arm mounts. A new plate connected the left and right sides, and each side had their own individual triangular plate. Next, the lower control arms, spindle, and upper control arms went in with a fair amount of ease.
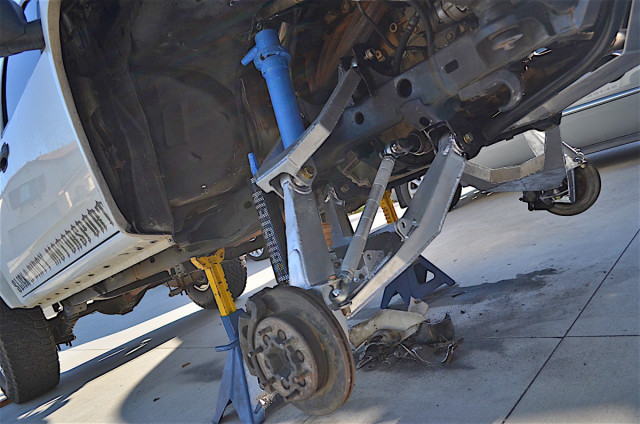
Our 10-inch stroke 60 mm 8125 series Bilstein coilover would not fit in the factory location as they were larger than the previous coilovers, which is why we cut out the old mounting location.
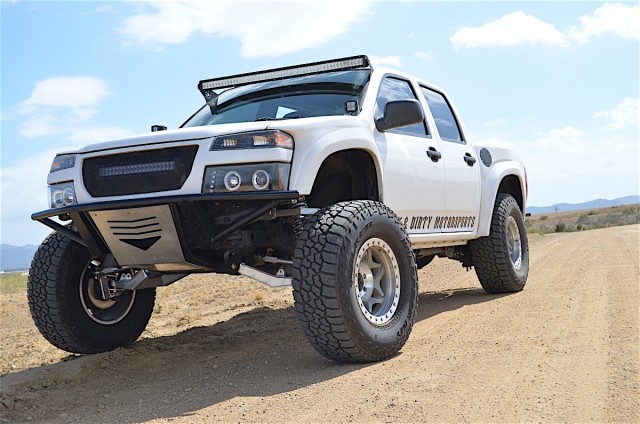
The truck turns great in the dirt and maintained traction. We can tell driving around that the rear of the vehicle was trying to play catch-up with the front. The rear is still stiffer than the front which gave the truck a bucking feel when going over whoops in the desert or speed bumps on the street. A set of Walker Evans beadlock wheels, and Falken Wildpeak tires set off the new look for Storm Trooper.
3/7/2016 – Major Change Up Front
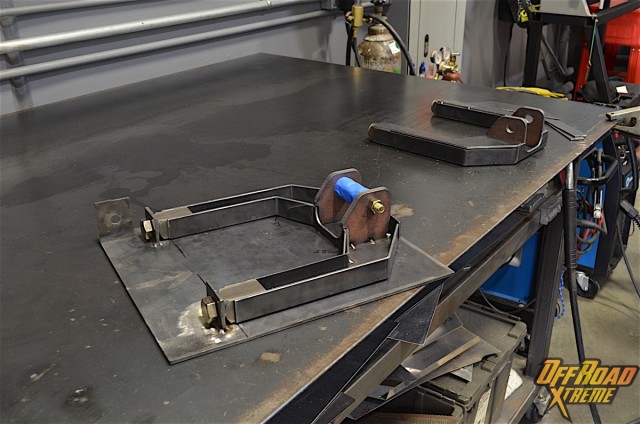
It is time to stretch our legs, and Project Storm Troopers as well. We are fabricating a long travel suspension for the front of the truck that should cycle near 18 inches everything is all said and done.
This kit starts in the digital form. We design and draw the suspension in CAD before we send it over to our plasma table to cut it. In a matter of a couple minutes we have the beginnings of control arms.
With everything cut, and fit together it is time to make it final. We welded the arms together and give us the final look.
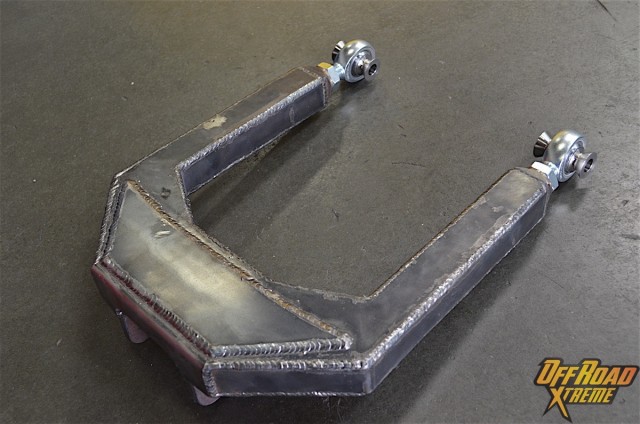
The completed finished product. One down, one more upper control arm to go and then on to the rest of the suspension.
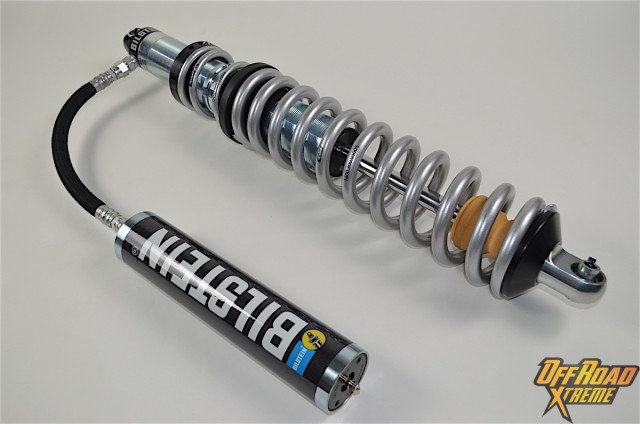
With all this suspension talk, we have gone with Bilstein 8125 series 60mm 10-inch travel coilovers and Eibach springs to help Storm Trooper soak up the whoops in the desert.
1/25/2016 – Finishing The Front Bumper
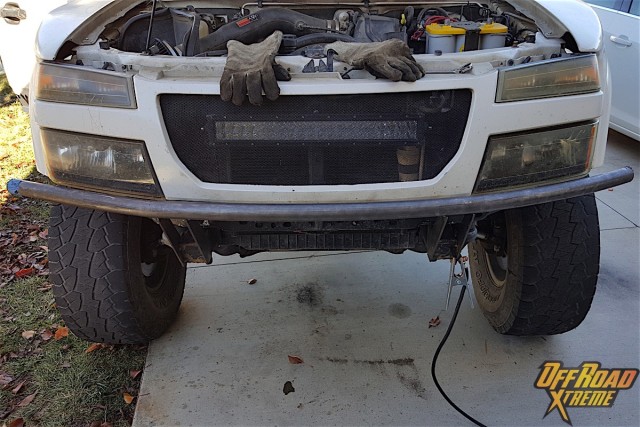
We had two main goals when we started fabricating this bumper. We wanted the bumper to mirror the front end of the truck and to increase the strength of the front of the truck. The front curve of the truck fit our radius rolled main tub perfectly. The whole bumper is made out of 1.75-inch DOM tubing and 3/16-inch steel plate.
All the support tubes were added next along with completely boxing in the frame horns. The boxed frame horns will give the bumper added strength as well as an aggressive appearance. The down tubes tie into the front crossmember and will provide the angle we will match with the skid plate.
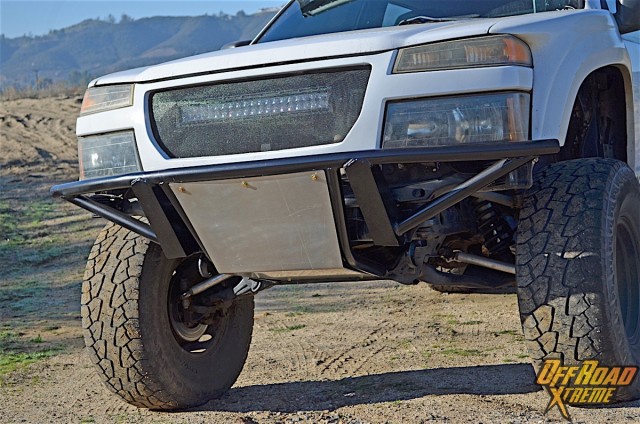
With everything painted and the skid plate mounted it finished off the front of the truck. One thing we also did was relocate the LED light bar to behind the grille. We wanted to keep the bumper nice and simple. With the off-road lighting world changing so much, we did not want to design the bumper on today’s trends because who knows what the future holds.
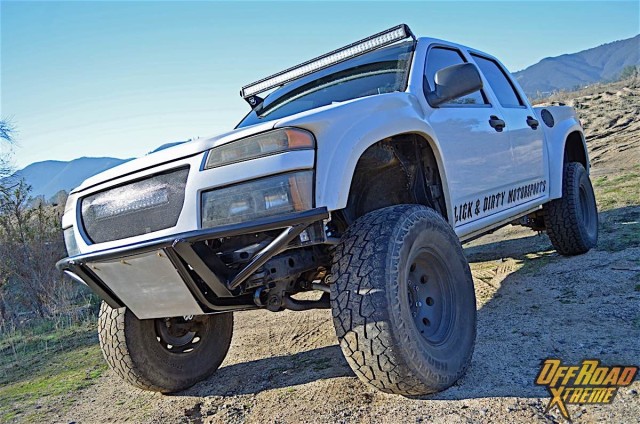
The bumper complete and ready to protect the front of the truck out in the desert. This bumper will be able to protect the front of the truck a lot more than the last one.
12/15/2015 – Time For A New Bumper
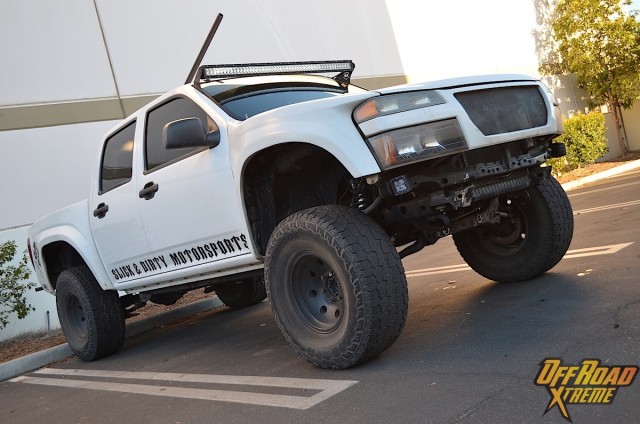
The old bumper that was built years ago, more as a lesson on how-to build a bumper. It did its job, but it was time for a stronger upgrade.
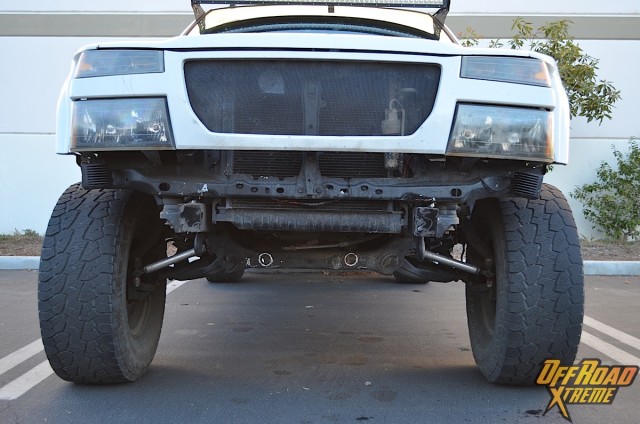
The old bumper came off easily with a sawzall and a grinder with a cut-off wheel. Once the bumper was cut off it was time to grind down what was left of the frame horns.
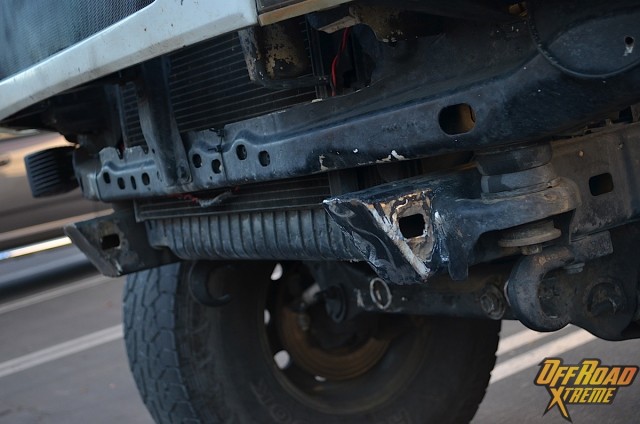
Grinding continued until we had a flat surface to take accurate measurements from. The new bumper will be something much stronger than before with all the main tubes being 1.75-inch .120 wall DOM. The old bumper was made from only mild steel.
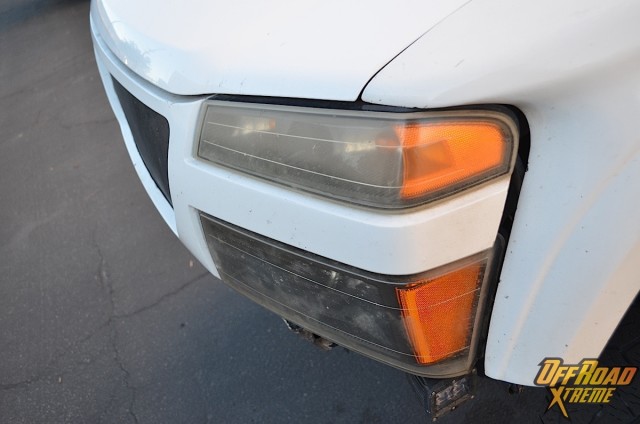
The new bumpers design is going to have 3/16-inch plate boxed frame horns. This alone will add plenty of strength and durability. We are also going to attempt to roll the main tube to follow the front curve of the vehicle. This will make for a much cleaner appearance than using bends to make it fit close to the body.
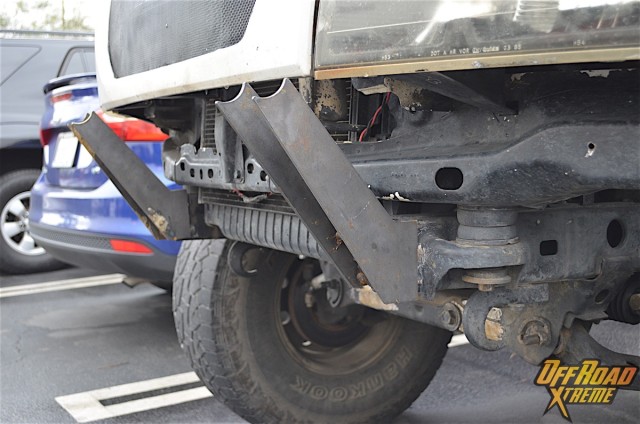
Making sure this bumper will be able to withstand anything in its path we opted for doing boxed frame horns. This will strengthen the overall bumper allowing for plenty of nerfing. Stay tuned for more updates on the bumpers progress in the next couple of weeks.
11/16/2015 – Optima Battery Test
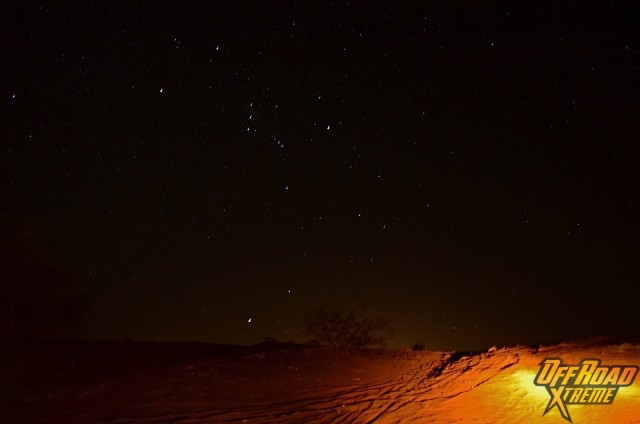
We headed out to Ocotillo Wells SVRA, in Southern California to begin the night portion of our Optima battery torture test.
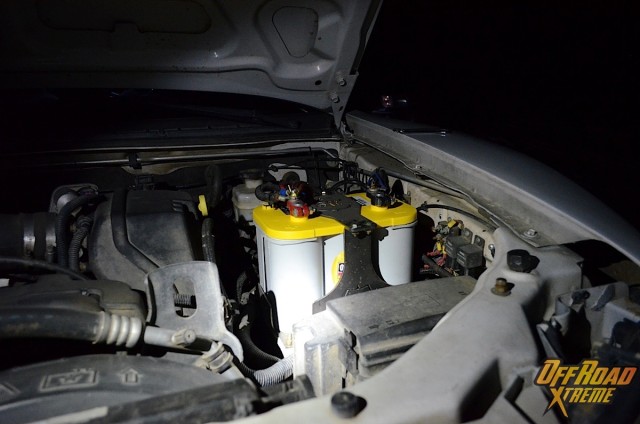
We got our D34 Optima YellowTop battery installed and did a little off-roading before we camped out for the night to test the battery.
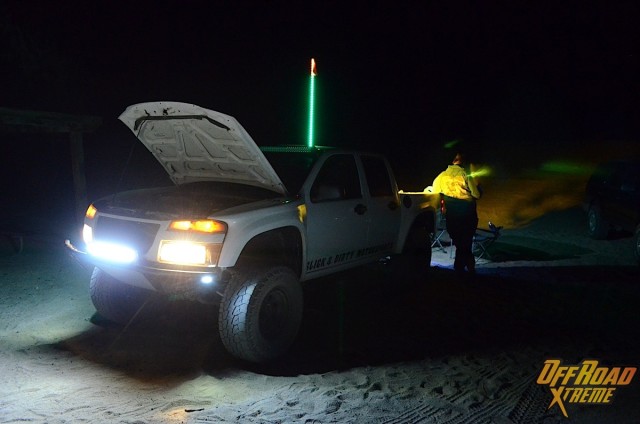
We turned on everything we possibly could to drain the battery. The headlights, lightbars, dust light, whip, radio, and more were all turned on to kill the battery.
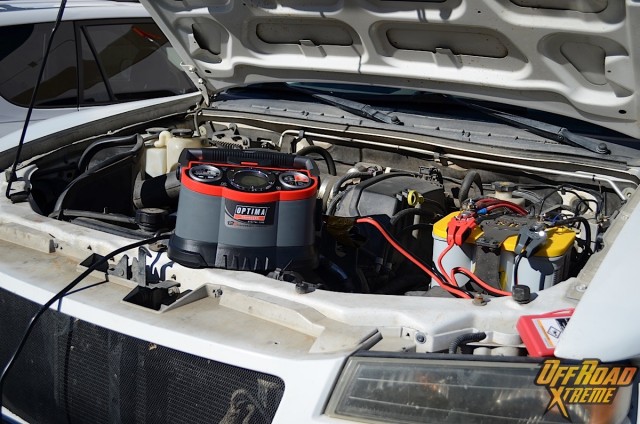
More testing continued in the daylight. We turned all the lights on, and once again killed the battery. We used our Optima Digital 1200 charger to get the battery back up and running. Stay tuned for our complete torture test on the Optima D34 YellowTop battery.
10/17/2015 – Bed Clearance
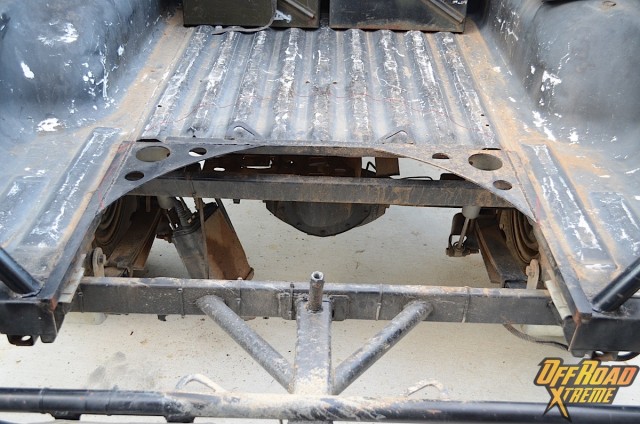
Project Storm Trooper will be getting a brand new set of wheels and the Falken Wildpeak A/T3W tire in the coming months. The all-new Wildpeak tires are 35×12.5R17, which are larger than the 33-inch tires currently on the truck.
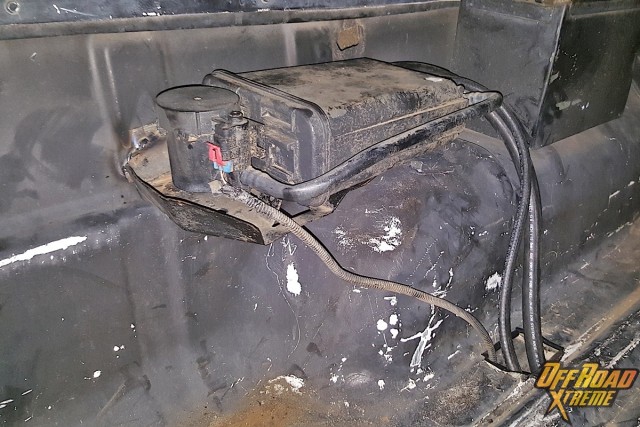
Longer hose and a quick weld made sure that it was not going to be going anywhere. With the canister removed the tire could clear in its new home. To keep the tire from getting cut up against the metal, we finished the hole off with some plastic pinch molding. All that is left now is to add a tire mount to secure the tire and keep it from moving.
With creating the larger hole we decided to push the tire closer to the cab to allow us to put the tailgate back on.
10/6/2015 – Trip To Cougar Buttes

We headed out to Cougar Buttes on a recent photoshoot for an upcoming vehicle feature and with some downtime we were able to get a couple pictures of Storm Trooper.
Storm Trooper waiting pertinently for its turn go out and have fun in the dirt.
9/30/2015 – Power Steering Troubles
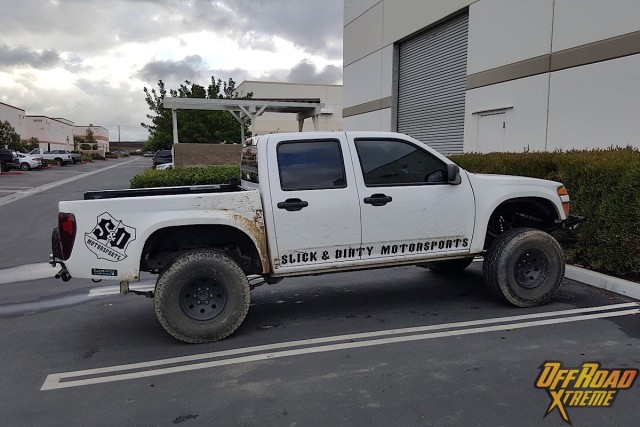
Driving the truck today the power steering went out completely. No 90 degree turns and two hands on the wheel until the problem was solved. The first thought running through our head was the pump had gone out, but with it being recently replaced that was the last thing we would have thought. We re-bleed the lines to make sure all the air was out, and to our disappointment there was still no power steering. It was time to dive back into the engine bay and put back in our old noisy pump. With the old pump back in its original home, the power steering had came back.
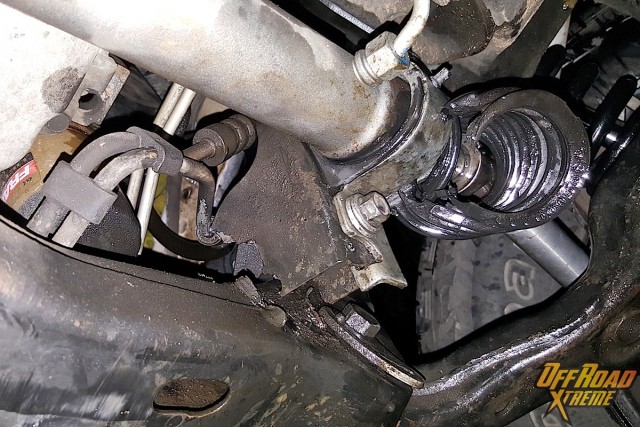
A quick drive around the block reveled that was not the only issue we would be dealing with today. Climbing under the truck we immediately saw our steering rack mount had been sheered from the frame, which allowed the passenger to almost do what it wanted.
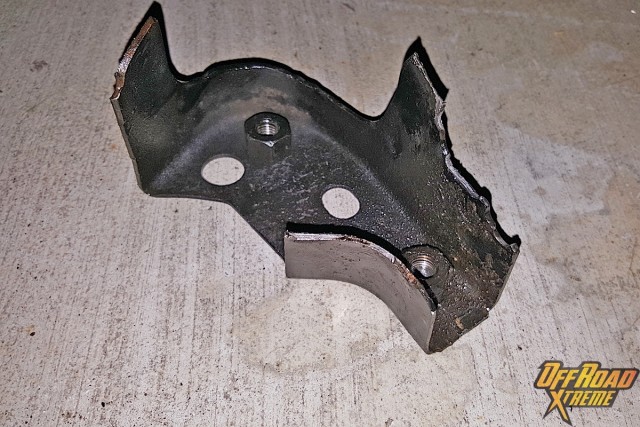
The mount was taken out and cleaned, so we could begin the process of rebuilding. Most people would of seen dollar signs and a tow truck, but we took out our grinder, wire wheel, and welder and went to work. The factory mount could not hold up to the abuse the truck was getting off-road.
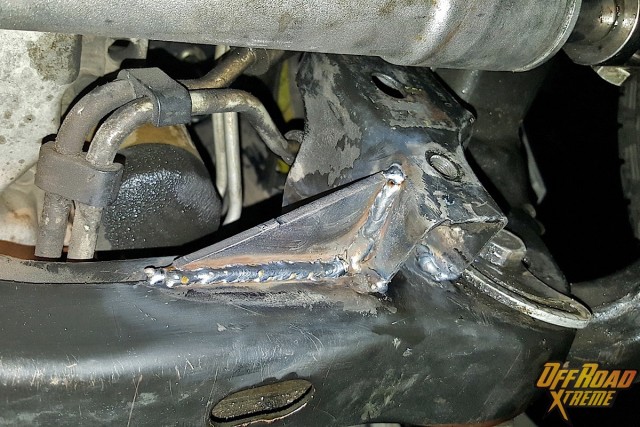
Whenever something like this happens it is easy to just fix it back to the way it was, but in our case we did not want the mount to fail again. We decided to reinforce the mount to help prevent the damage from occurring again. We cut a gusset and welded it do the mount and frame, this mount is not going anywhere now. The rack was reinstalled and secured to the new and improved mount. The test drive confirmed that it was back to normal, now to reorder a new power steering pump.
9/26/2015 – Power Steering Maintenance
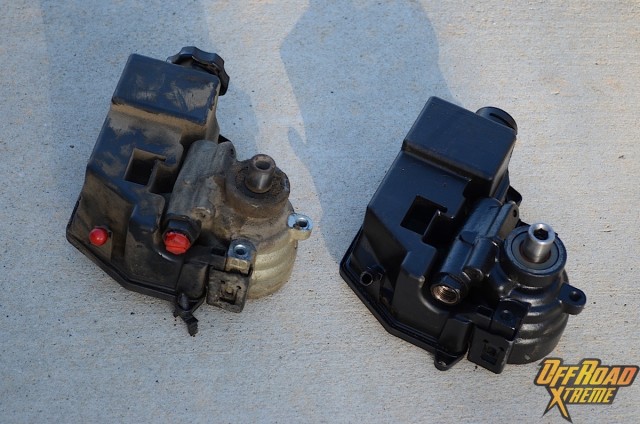
With the truck reaching over 150,000 miles it was time to do some preventative maintenance. One part that has been neglected over the years has been the power steering pump. The whining and noise needed to come to a stop. We picked up a new pump from Rockauto to help solve this issue.
9/13/2015 – Introducing: Project Storm Trooper
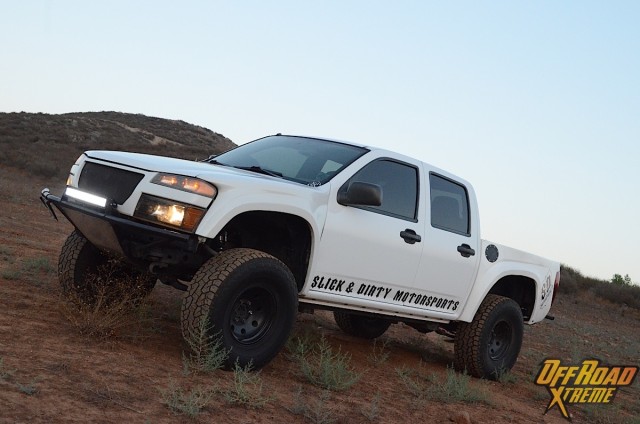
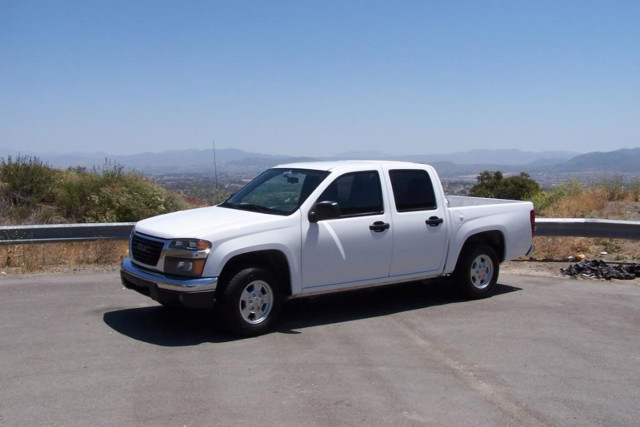
The truck started out completely stock and has taken on many different faces over the course of the project’s life. Some make you wonder how the truck even made it to where it is today, while others make you remember where the truck started.
Some of the stages the truck has been through make you wonder how it got to where it is today.
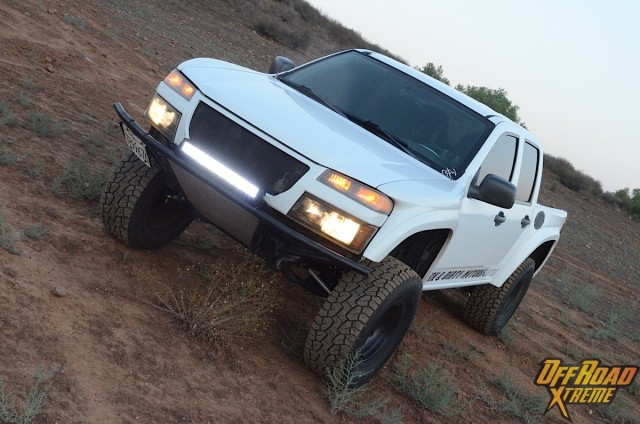
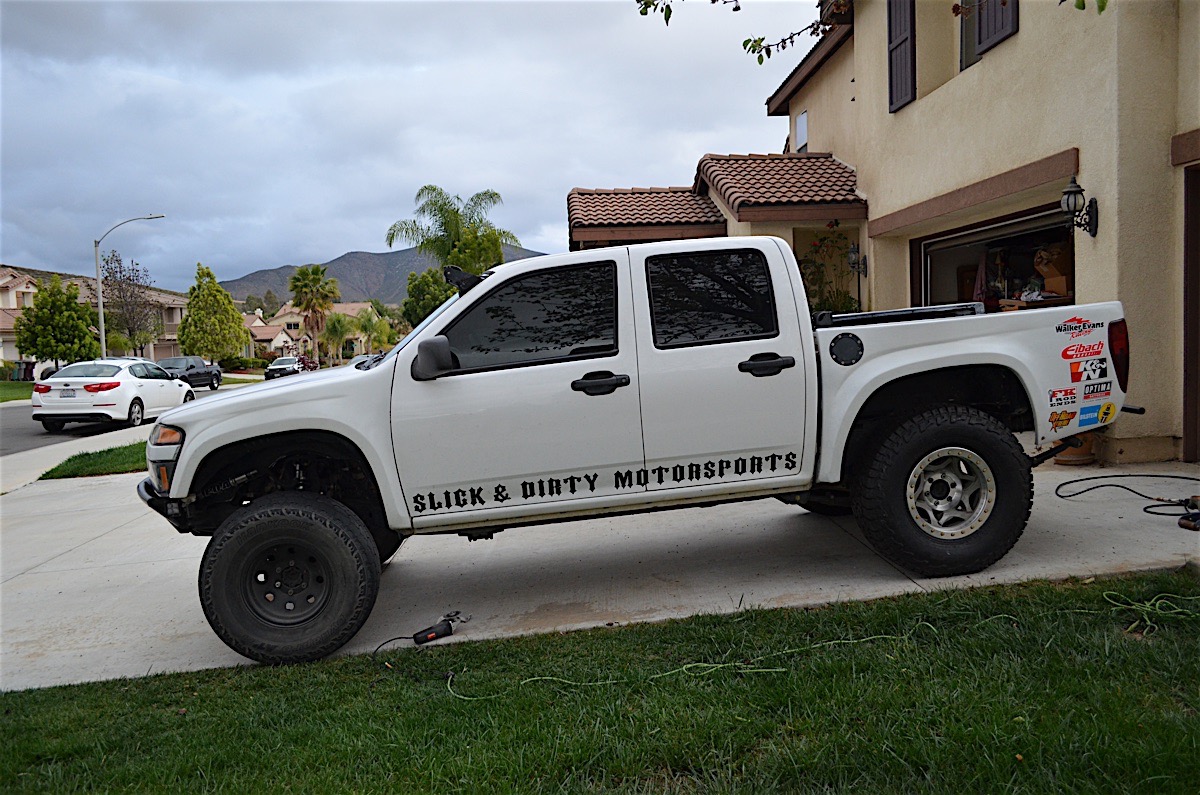
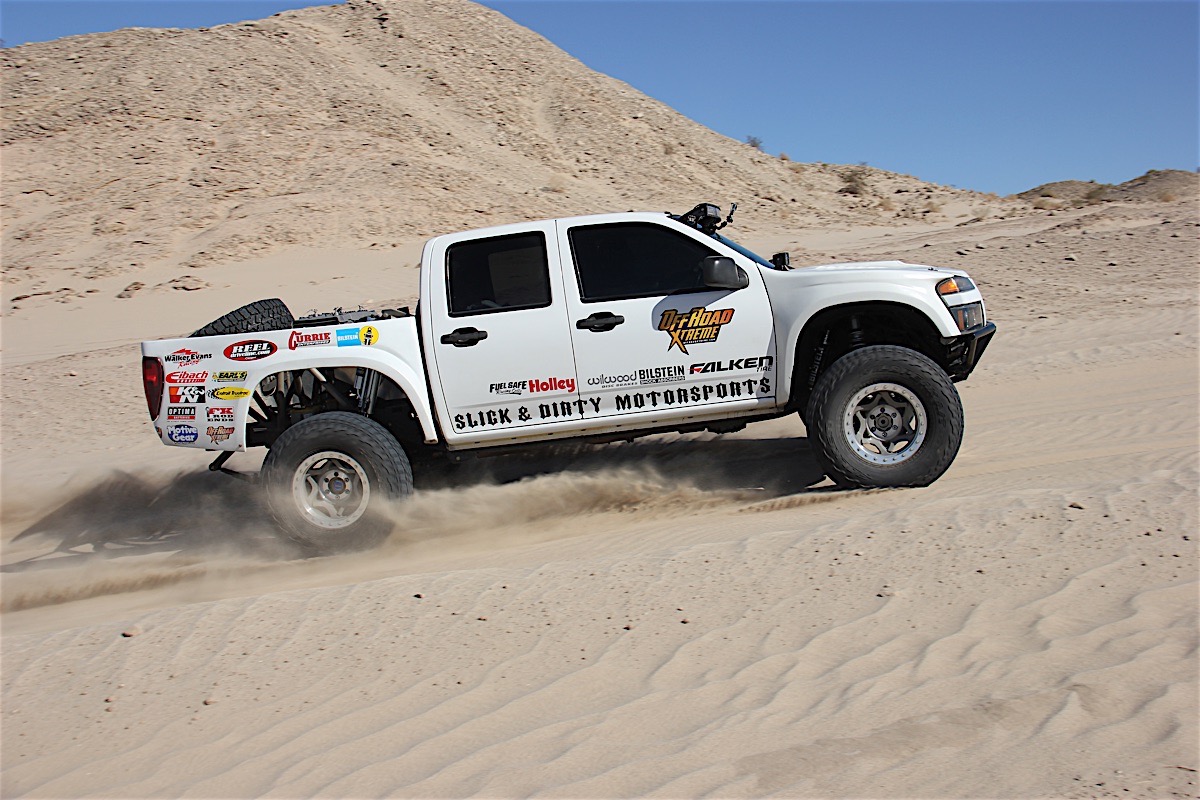
Now on to the good stuff; what the truck actually has had done and where we are taking it. The truck is a two-wheel-drive mild prerunner with a mid-travel suspension kit up front. The truck is running heim steering, which eliminated the weak factory tie rod set up. The truck does have a wider body thanks to McNeil Racing fiberglass front and rear fenders. Completing the exterior are fabricated front and rear bumpers that give the truck more durability to push anything out of its way.
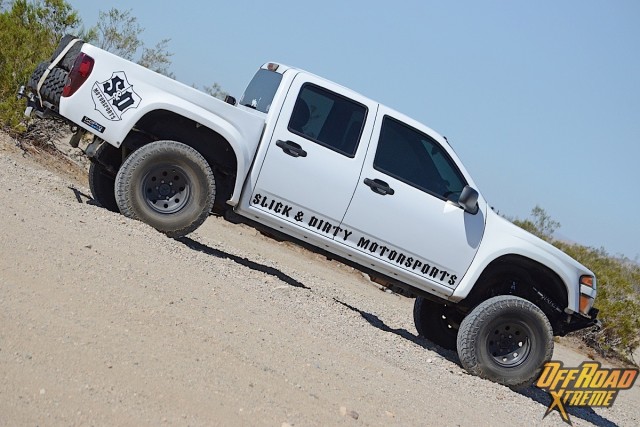
We will show every step of the build, and what it will take, to make this the ultimate desert prerunner. There are plenty of plans for this vehicle to get it to where we want it. We know there will be challenges along the way, and want to demonstrate how we overcome them, so you take on a project like this and have a better understanding on what to do.
Whenever we get ready to start a project vehicle, there is little to nothing done to it already. That was not the case with our newest truck, Project Storm Trooper.
Project Storm Trooper came to us with plenty of off-road additions to get this build headed in the right direction. The build had already taken on the feel of a mild prerunner, but it was time to take it up to the next level.
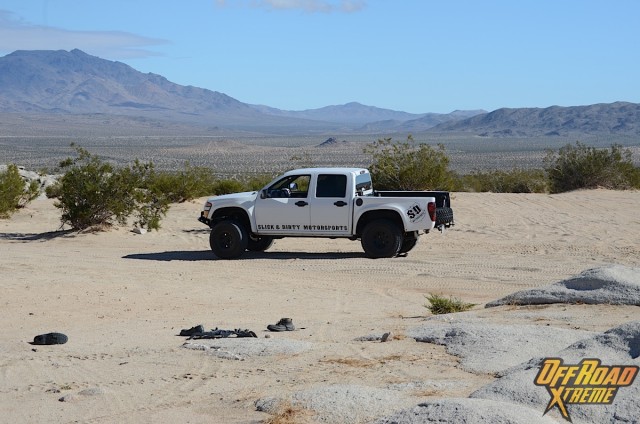
Project Storm Trooper is a 2005 GMC Canyon, with the 3.5-liter inline-five-cylinder, and yes, we did say five-cylinder. The first generation GMC Canyon and Chevrolet Colorado may have been neglected from the pickup market, but we will surely find anything and everything to turn this into one extreme prerunner.
 Complementing the mid-travel, and keeping the truck riding nice, is a set of six-inch coilovers mounted in the factory strut location. The rear of the truck has retained much of the stock parts, with the addition of some shackles and an add-a-leaf.
Every project has to have a purpose behind it, and Project Storm Trooper is no exception. The truck was, and will be, designed to take on the desert landscape while keeping all of the conveniences of an everyday vehicle.
This means the truck will retain all the creature comfort’s; air conditioning, radio, and dash. We want to be able to maintain the driving experience on and off-road. The ultimate goal of this project is to continue to keep it a street legal vehicle in the state of California.
 We will show every step of the build, and what it will take, to make this the ultimate desert prerunner. There are plenty of plans for this vehicle to get it to where we want it. We know there will be challenges along the way, and want to demonstrate how we overcome them, so you take on a project like this and have a better understanding on what to do.
Project Storm Trooper will get a wheel and tire upgrade, ditching the 33-inch tires and jumping to 35-inch tires. Additionally, a long travel front and rear suspension will also be added. With the mid-travel kit up front the truck has 10 inches of wheel travel, which is better than the five inch travel from the factory.
The desert has all types of terrain such as flat sections, whoops, and jumps, all of which Project Storm Trooper will need to be prepared for. The new suspension we will look to double the amount of wheel travel–around 18 inches in the front and over 20 inches in the rear with a new long-travel leaf spring setup.
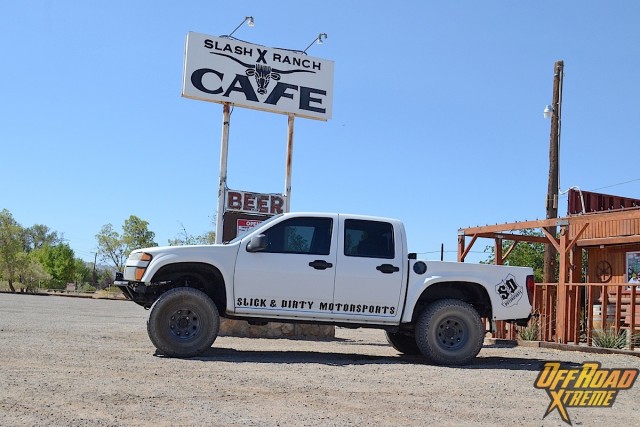 Longer front coilovers and rear shocks will also be added, giving the truck a functional, yet comfortable ride. Linking the rear of the truck was tossed around and is not completely out of the question, but we will see where the cards land.
All of the extra weight will put plenty of stress on the drivetrain and rear axle will need a complete overhaul. The stock axle will not be cut out for the work it will be put through, and an axle that is wider will increase track width in the rear to match the front.
Project Storm Trooper has a great start and we have a solid plan on where this will go. Here at Off Road Xtreme, we want to make this as awesome as possible, and will be making sure everything that is added to the project fits the final goal, creating a street-legal desert prerunner.


