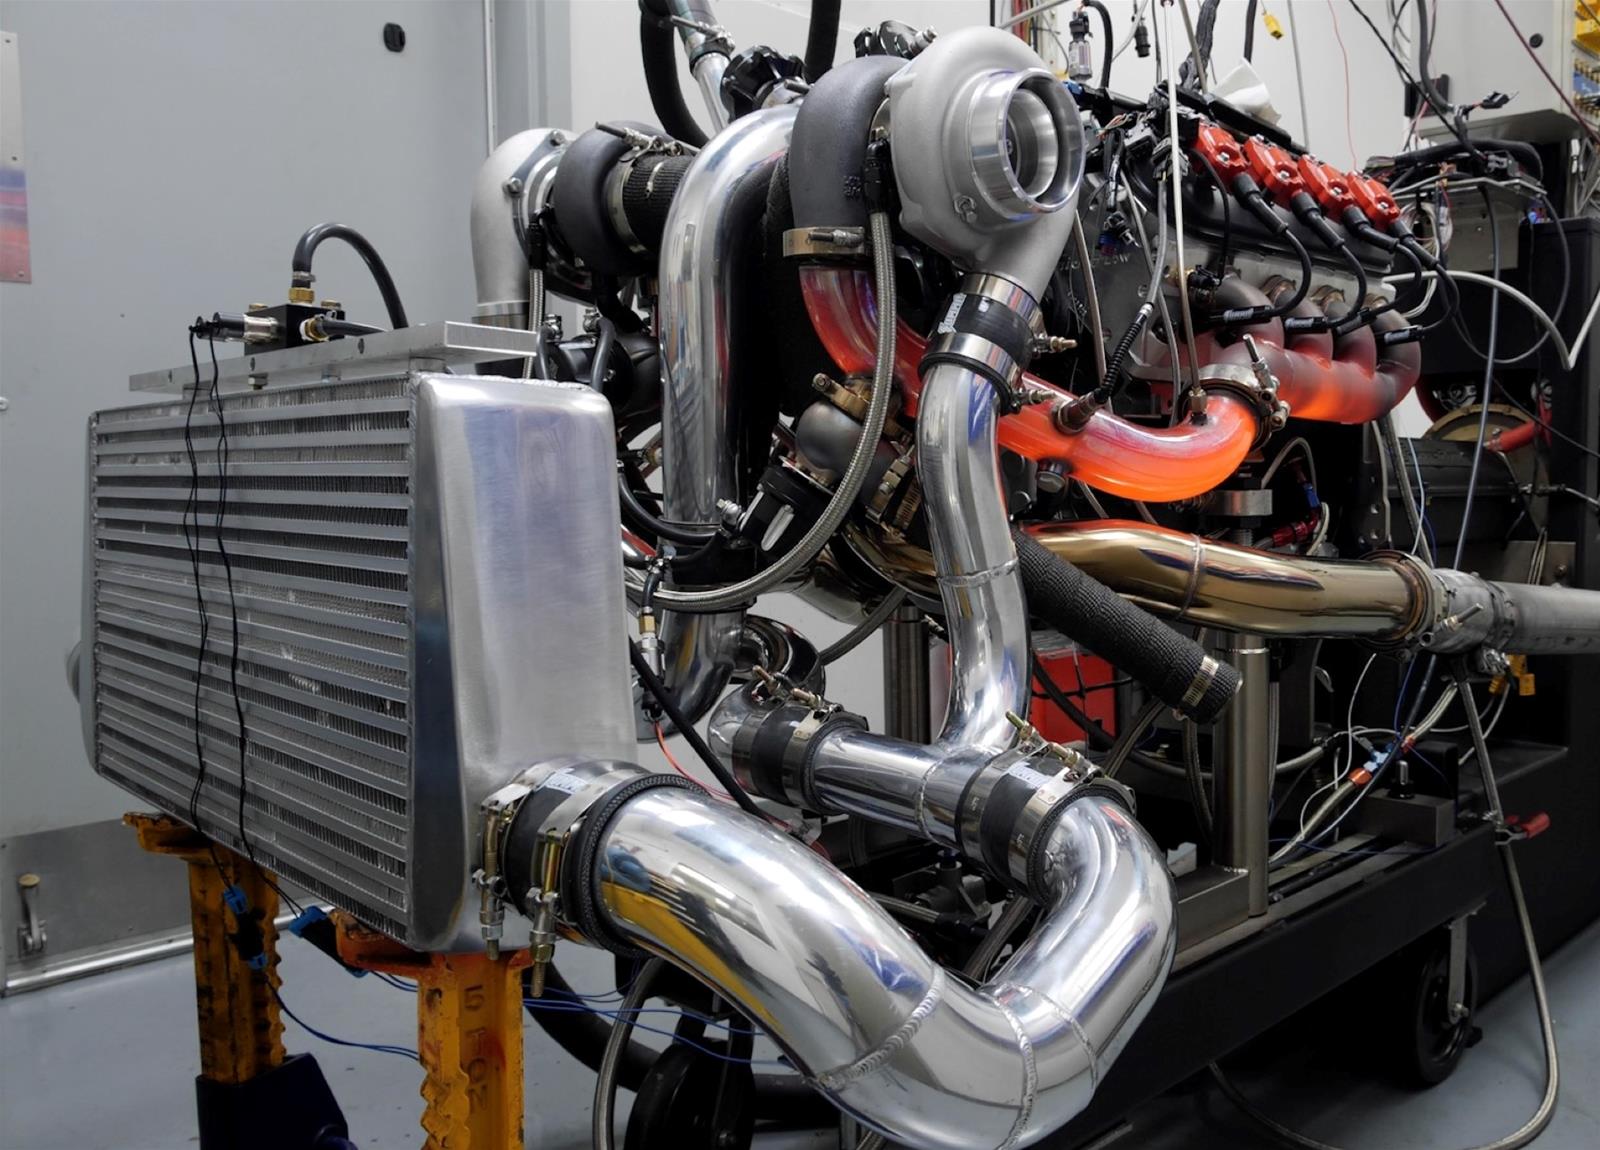
It is almost commonplace for a street car to produce 1,000 horsepower nowadays. Even some factory muscle cars are pumping out this magic number. With more and more hot-rodders turning to turbochargers to reach these lofty goals, we thought it would be a good idea to learn more about controlling all that boost using aptly named boost controllers.
Turbo Basics
Turbos connect to the engine on the exhaust side to take advantage of the unused energy. As the engine revs up, the exhaust gasses that would typically be wasted out of the tailpipe are instead used to drive a turbine wheel before making their exit. The turbine wheel is connected directly to the compressor wheel via a common shaft, causing the exhaust gasses to spin the compressor wheel. The spinning compressor wheel compresses the intake air before delivering it to the intake manifold.
The turbine and the compressor wheel are two sides of the same coin. While the exhaust side is referred to as the turbine, the intake side is called the compressor. So, the question is, how do you control the amount of pressure a turbo generates? This is what we want to dive into further with help from our YouTubing friend at Driving 4 Answers.
In D4A’s “Boost School” video, he breaks down the many ways of controlling turbo boost into essentially six parts, or levels, if you will. The video looks at the most basic boost controllers all the way up to the most extreme four-port solenoid boost controllers and dives into detail about how each configuration works.
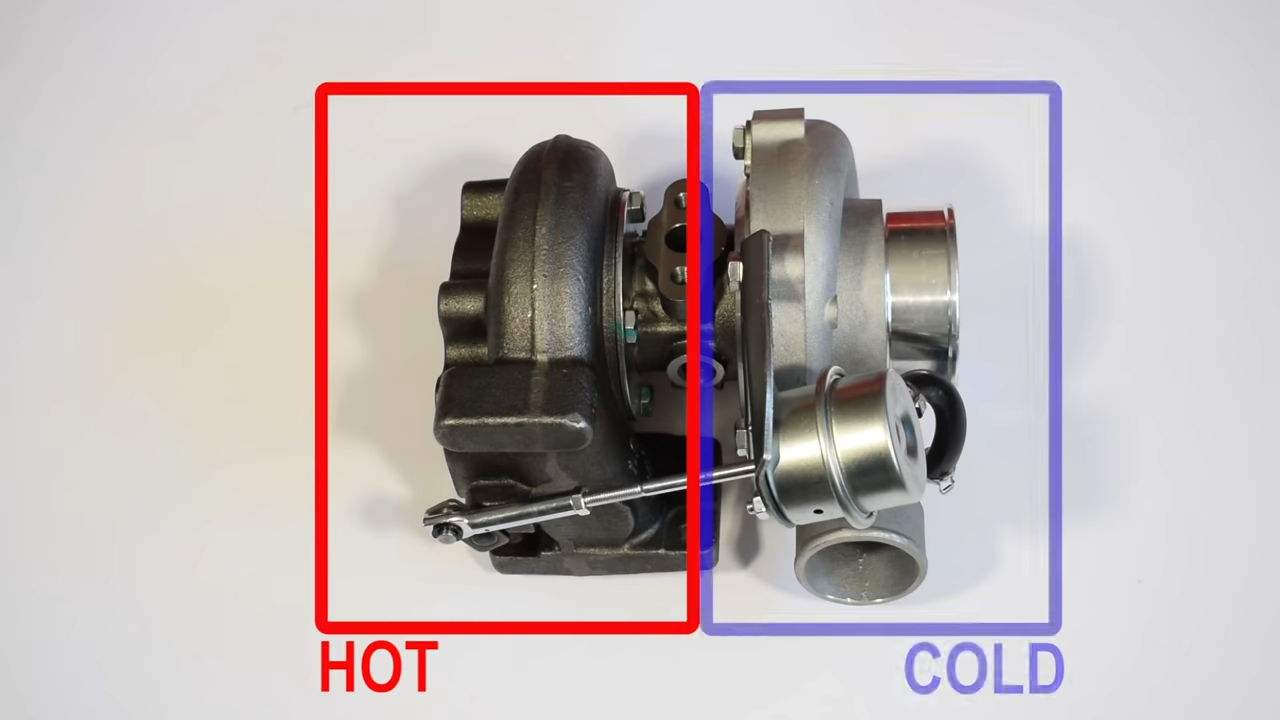
The most basic way to describe a turbocharger is that there’s a hot side and a cold side. The exhaust spins the turbine on the hot side, which transfers that energy through a common shaft to the compressor wheel (cold side). A mechanical actuator opens the wastegate on the hot side when the pressure overcomes the spring. Clear as mud?
A Basic Wastegate
The first level is the most basic wastegate and actuator setup. At this stage, standard on many early OE turbo applications, there’s a boost reference line connected from the internal wastegate to a boost source, and that’s it. D4A says this setup is fully mechanical with zero electronics tied to how boost pressure is exerted onto the spring and diaphragm inside the wastegate actuator. “Once boost pressure gets high enough, it compresses the spring and opens the wastegate.”
According to D4A, getting the turbo to spool up fast with this setup is next to impossible because the spring inside the actuator is constantly exposed to boost pressure. “Your wastegate will be fully opened when you hit the boost the spring is rated for, but your wastegate will actually start to open way sooner than the target boost.” This is not ideal when you’re going for maximum power. To add boost you must manually add a heavier spring to the wastegate.
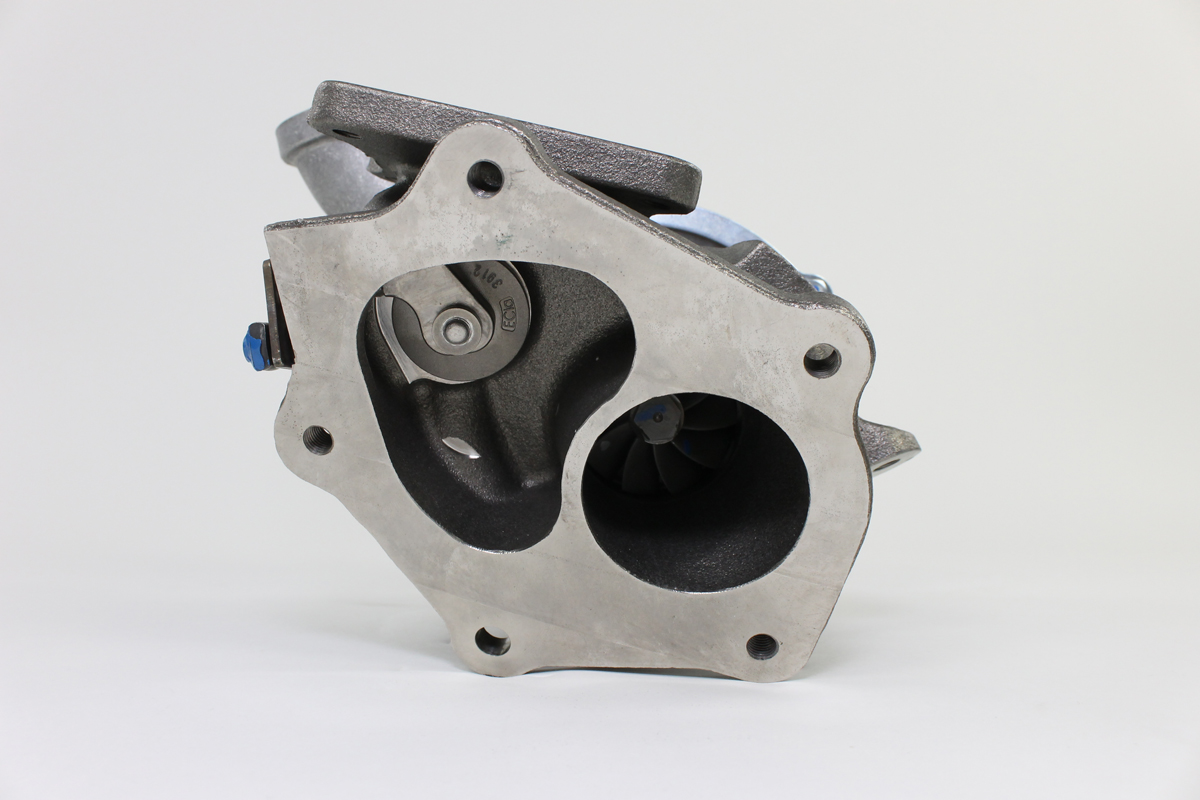
Looking at this internally wastegated turbocharger, the wastegate is fully open as the spring compresses at a set pressure, but the wastegate will actually start to open much sooner than the target boost.
The next way to alter the boost is with a manual boost controller. A manual boost controller allows you to delay the opening of the wastegate spring in one of two ways. First, is the bleeder type that works by creating a calibrated boost leak going through the reference line. Second, there is the type is made up of a spring and a ball, blocking the boost reference signal. Adjusting a knob on the controller changes the spring pressure on the ball. Lifting the ball from its seat requires more boost pressure than compressing the wastegate spring so that the turbocharger will generate more boost.
“Although the manual boost controller is very simple to install and increases boost pressure, it doesn’t do anything else,” says D4A. “It’s dumb, just like the Level 1 setup, and references nothing but boost. It has no idea about your throttle opening, intake air temperature, etc., which can result in full boost at half throttle or a setting that needs readjustment for different weather or altitude.”
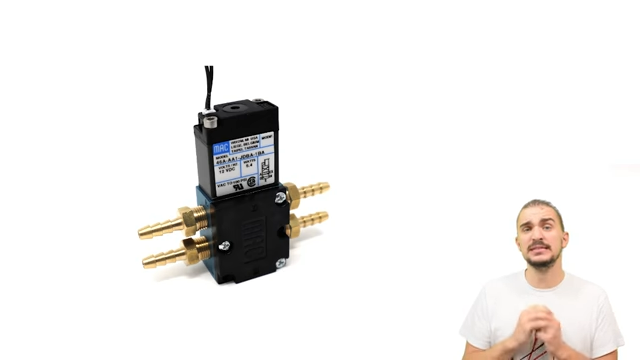
The benefit of using a two-port boost controller over a manual boost controller is that the solenoid is connected to the ECU to manipulate the duty cycle based on throttle opening, air temperature, coolant temperature, etc.
Two-Port Electronic Boost Controllers
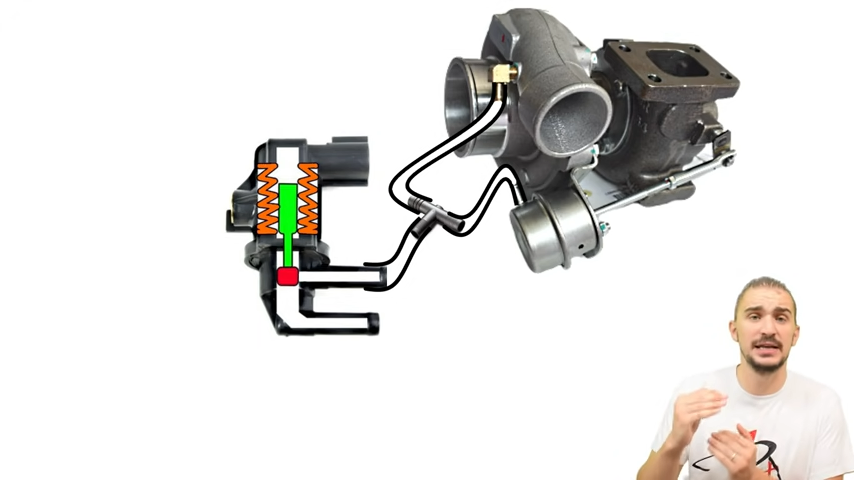
The most straightforward electronic setup involves using a two-port boost control solenoid. When a two-port solenoid is connected to the boost reference line with a T-fitting, it bleeds off an electronically commanded amount of pressure from the line between the turbo and wastegate actuator. “The two-port boost solenoid is essentially lying to the spring in the wastegate actuator by making it ‘think’ there’s less boost being made than actually is.”
The benefit of using a two-port boost controller over a manual boost controller is that the solenoid is connected to the ECU to manipulate the duty cycle based on throttle opening, air temperature, coolant temperature, etc. “You’ll never get full-boost at half-throttle again,” D4A adds. The drawback is the spring still sees boost pressure all the time with the t-fitting, so it still can’t prevent the wastegate from being slightly opened before it needs to be.
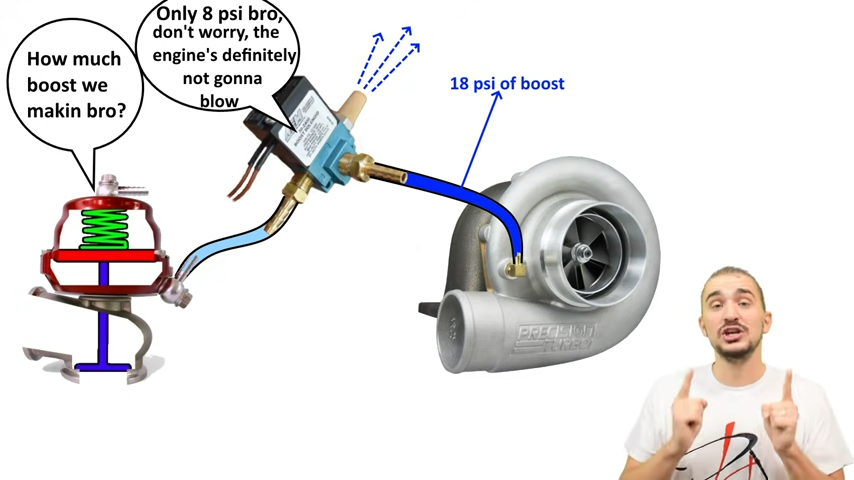
Unlike the two-port solenoid installed with a T-fitting and constantly putting pressure on the actuator spring, the three-port boost control solenoid is installed directly into the boost reference line.
Three-Port Electronic Boost Controllers
Unlike the two-port solenoid, which is installed with a T-fitting and is constantly putting pressure on the wastegate actuator spring, the three-port boost control solenoid is installed directly into the boost reference line. “It [completely] interrupts the boost pressure going from the turbo to the wastegate actuator.” With an additional port, it can control boost more accurately and with less duty cycle compared to a two-port solenoid, resulting in better turbo responsiveness, quicker spool up, and more power, as well as more room to increase boost later on.
Adding In An External Wastegate
When hooked up to an external wastegate, a three-port solenoid can be used to direct boost pressure to the top port of a two-port wastegate, helping to reinforce the spring pressure and keeping it closed, even in high-boost situations. D4A says this is a superior setup to “lying to the spring,” resulting in better turbo responsiveness and more aggressive spool-up.
With a three-port boost controller, the boost can be managed based on engine RPM, throttle position, manifold pressure, intake air pressure, flex-fuel content, and so on. It can also control boost based on gear and vehicle speed.
D4A imagines pairing this powerful setup with a very powerful ECU with many boost control strategies. “This setup can control boost based on RPM, throttle opening, manifold pressure, intake air pressure, flex fuel content, you name it,” he says. “But it can also control boost based on gear and vehicle speed, which means that if you provide it with an input of vehicle speed in the form of an ABS sensor or a transmission speed sensor, this thing can limit boost in lower gears. That means it can help very high horsepower or front-wheel-drive vehicles retain traction even in the lowest of gears, drastically improving drivability.”
D4A continues, saying that a powerful aftermarket ECU with a good three-port solenoid and an external wastegate “is a combo that’s pretty much perfect for any application out there.”
Four-Port Boost Controllers
Using a four-port boost control solenoid can do something a three-port setup cannot do, according to D4A. With a four-port setup, it can control the top and bottom of a two-port external wastegate at the same time. A three-port solenoid can make twice the boost pressure of your base spring, but a four-port solenoid can make five to six times that amount of pressure. That means it’s capable of producing some extreme boost pressure.
Using a four-port boost controller can do something that the 3-port controller can’t. It can manipulate the top and bottom of the wastegate spring when it’s energized and at its maximum duty cycle.
D4A says that you have to remember that the spring inside your external wastegate or internal wastegate actuator is always going to be the lowest amount of boost you can make. “There is no boost control setup on earth that can help you make less boost than what your spring is rated at, so let’s imagine you want to make 60 psi of boost — that’s 4.1 bar! You grab your ECU and your three-port solenoid, and since you want 60 psi of boost, you need a 30 psi spring. You grab your 30 psi spring, install it inside your wastegate actuator, and you feel really good about yourself. You take your car out and try to get off the starting line, and all it does is spin the tires. Why is this happening? Because 30 psi is the minimum boost you can make, your setup is making it in first and second gear too.”
How do you fix this? This is where the four-port boost control solenoid comes in. D4A explains that it can do something that the 3-port solenoid can’t. “It can manipulate the top and bottom of the wastegate spring when it’s energized and at its maximum duty cycle. It will send boost pressure to the top of the spring, helping it stay shut, and, at the same time, it will vent pressure from the bottom of the spring, which means that the chances of it getting cracked open are pretty much zero. When de-energized, it will send boost pressure to the underside of the spring and vent from the top of the spring, ensuring it instantly opens the wastegate when needed. This allows getting rid of the 30 psi spring and replacing it with a 10 psi spring to regain traction in all gears.”
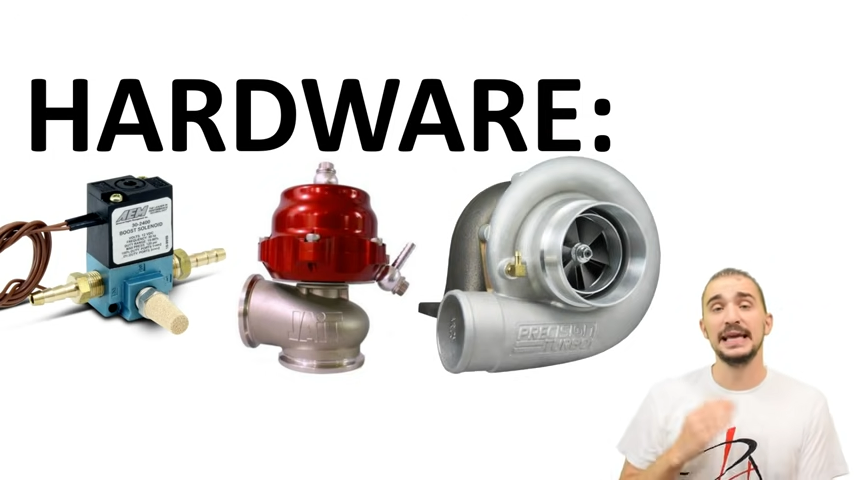
There are a lot of aftermarket options for boost controllers, blow-off valves, and larger turbos, so it is important to know what boost level you’re targeting and build a system around that.
The only downside to a four-port setup, notes D4A, is poor resolution. “Changing a four-port solenoid duty-cycle by just one or two percent can result in 3-8 psi of boost pressure change. You can use two three-port solenoids to correct a bumpy boost curve generated by a four-port solenoid, but this will require a very capable ECU and some pretty complex tuning.”
Whether you’re working with a factory turbo and wastegate actuator or installing an aftermarket three- or four-port controller, the more you know about how it all works, allows you to gain a little more control and make a bit more boost pressure. No wonder 1,000 horsepower is so commonplace these days.