Just from the title alone, we know that someone out there is already triggered and ready to comment before actually reading the article or watching the video. So first, calm down. Watch this video with as few preconceived notions as possible — about either measuring tool — and try to ingest the information being provided by our friend Jeff Huneycutt at Horsepower Monster in the spirit intended.
A quick note: unless you like watching heavy equipment at the junkyard, skip to 3:42 in the video. Huneycutt decided to give the much-bemoaned Plastigauge a shot, and compare rod clearances as measured by the inexpensive Plastigauge to those gleaned using a much more expensive set of tools, including a Fowler dial bore gauge and Anytime Tools 2.0-3.0-inch outside micrometer.
Dollar For Dollar
First, let’s look a the cost of the two items being compared. Using Amazon.com as a baseline (mainly because Huneycutt includes links to Amazon for the tools he’s using), you’re looking at about $80 for the dial bore gauge (some can be had for as little as $50) and $140 for the complete micrometer set, ranging from 0 to 6.0 inches (a 0 to 4.0-inch set of the same brand is also available for right at $100 as well). So all-in, let’s call it $200.
Step one is to measure the journal diameter. This isn’t so much to determine, but rather to set a base on which to measure the ID of the connecting rod’s big end.
If we use Amazon pricing for Plastigauge, the results get a little skewed, but with a street price ranging from $3.00 to $7.00, let’s split the difference and call it $5.00 for a package of red and green, which should be enough to do both the rod and main bearings for the whole engine.
Obviously, price is the largest and most referenced factor between the two methods of measurement. While everyone’s budgets are different, the difference between $5.00 and $200.00 is significant. If we make the comparison ad absurdum, it’s the difference between a base model Kia Rio (the least expensive car Kia makes) and a brand-new Ford GT, with $100,000 cash in a shoebox sitting in the passenger footwell.
However, if we were to insert a bit of our personal outlook into it, at the end of the project (or two, or ten), with the bore gauge and micrometer set, you have something that you can sell to recoup some of your initial investment. Plastigauge is a one-and-done affair, especially if you have to measure more than once and didn’t buy extra. Of course, the best deal in the world, isn’t, if it can’t perform, and that’s what Huneycutt set out to find.
Using the Tools at Hand
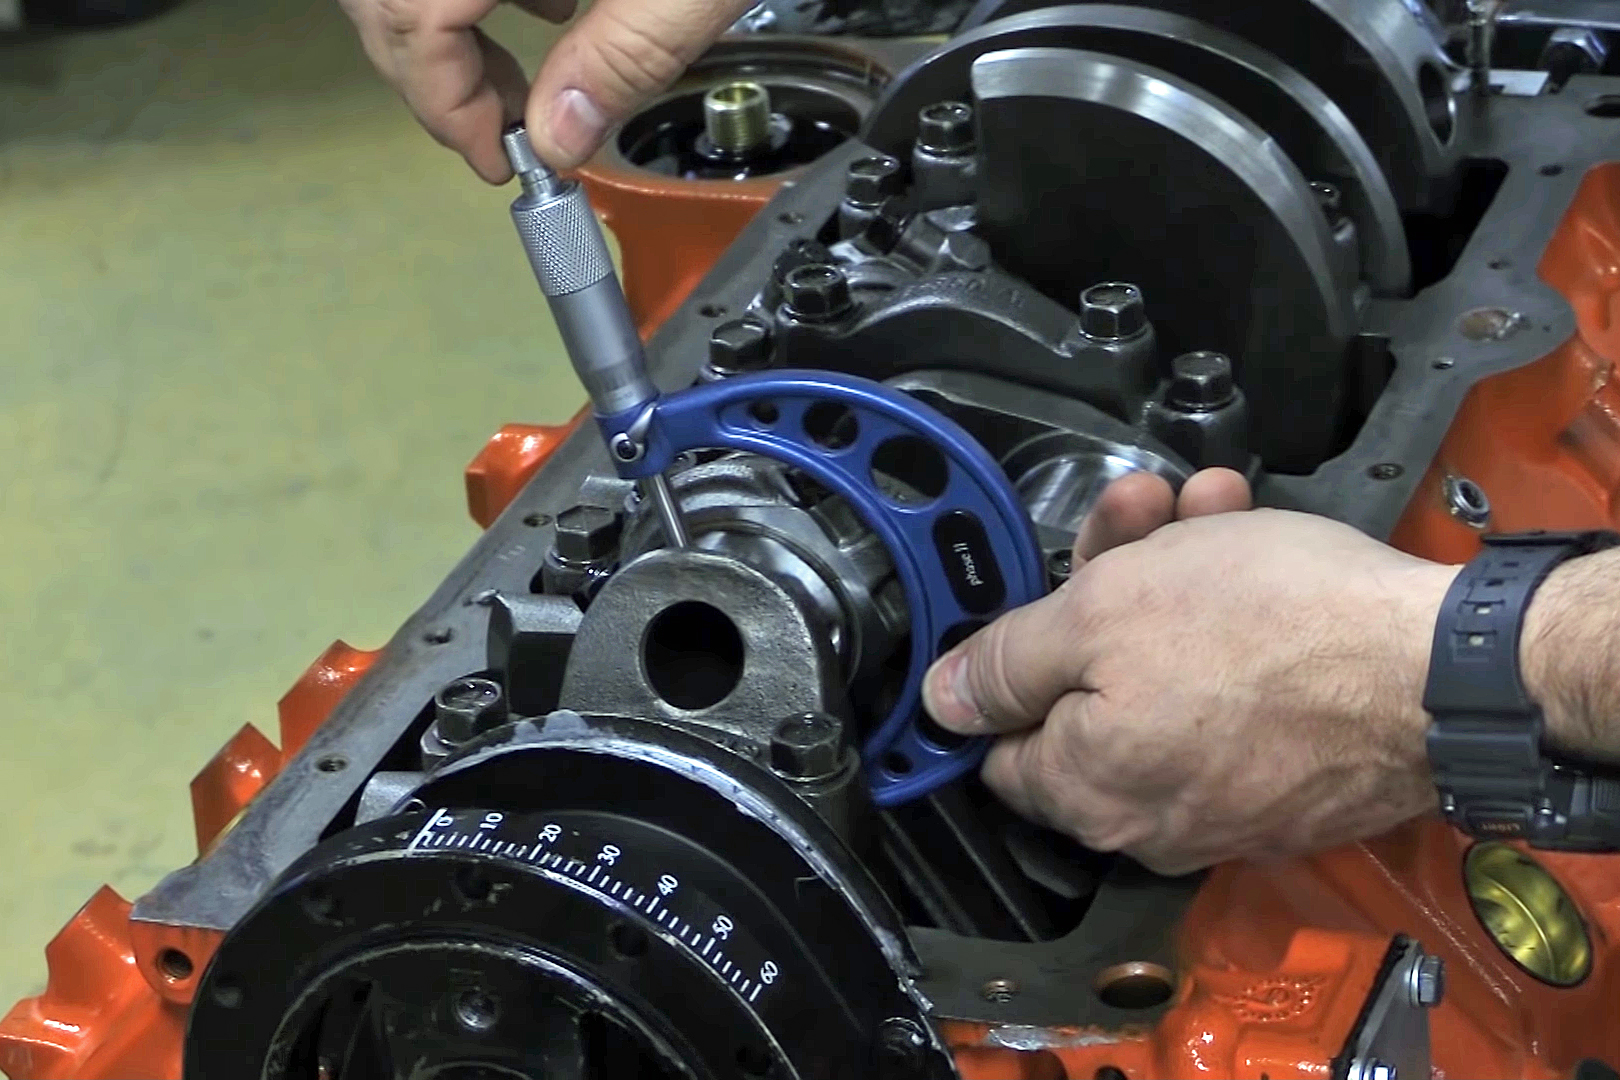
For the test, Huneycutt removed three rods (cylinders 1, 3, and 4) from a standard small-block Chevy short-block. The crank has standard 2.100-inch rod journals, and the target clearance is the standard rule of “.001-inch per one-inch of journal diameter,” or .0021-inch of clearance. This is important, as Plastigauge comes in three colors, each denoting a different measuring range. .0021 is smack in the middle of the green Plastigauge’s stated range of .001 to .003 inches.
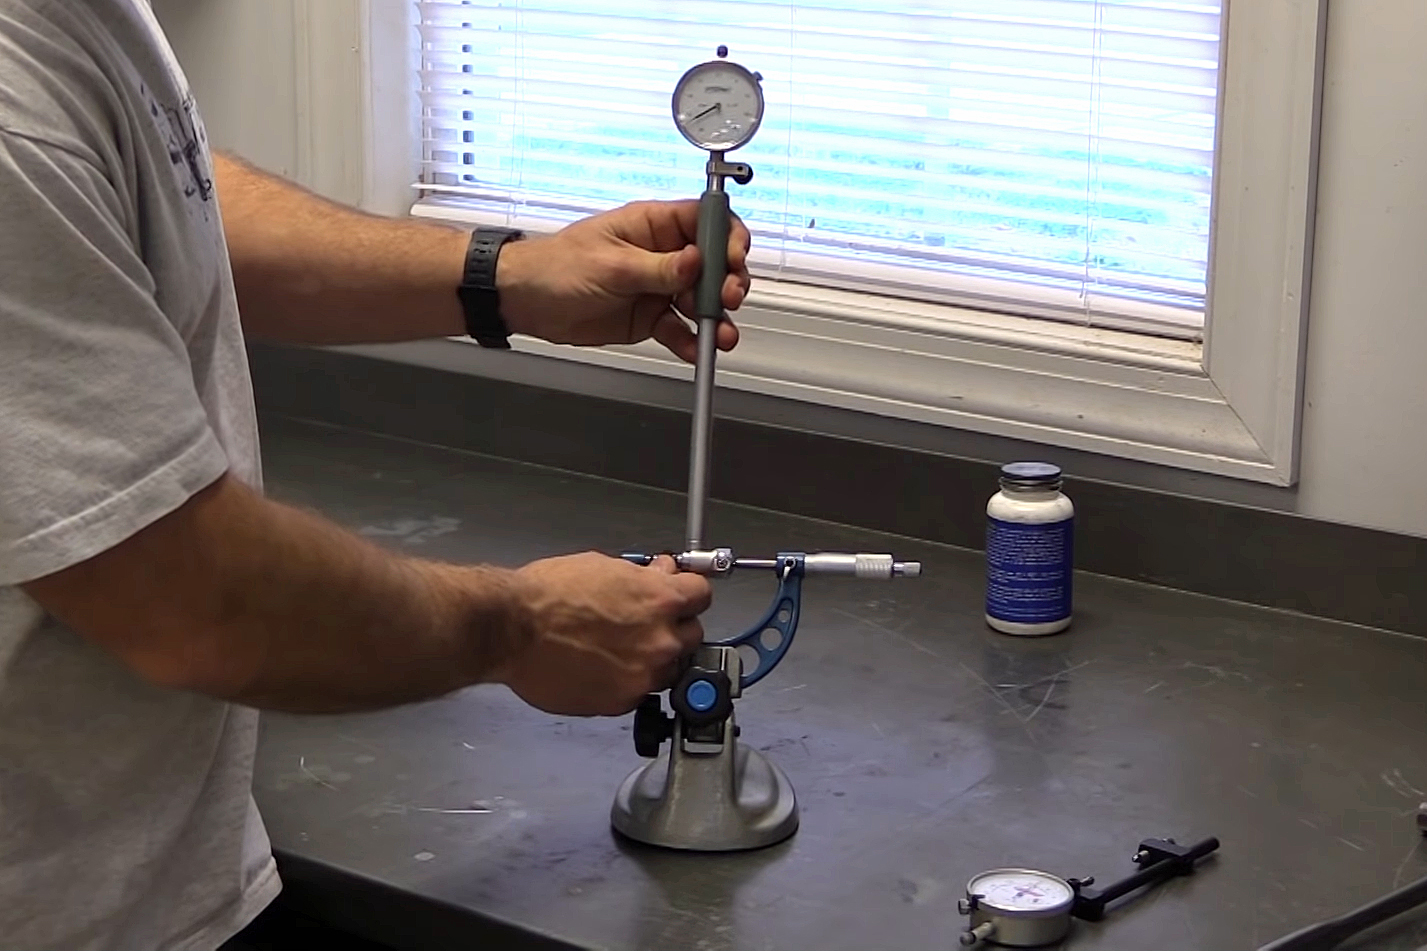
First, after cleaning the journals, Huneycutt measures the exact outside diameter (O.D.) of the journal, to the ten-thousandth of an inch, using a 2.0 to 3.0-inch outside micrometer. With the mic locked at the measurement, he then zeros the dial bore gauge to that measurement. That means that a reading over zero is the amount of rod bearing clearance, and anything under would be interference.
He then uses the dial bore gauge to measure the inside diameter (I.D.) of a connecting rod with the bearing in place, that has been torqued to spec. He measures clearances of .0022 inch, .0021 inch, and .0022 inch. Now, he can use those measurements to compare with the Plastigauge readings.
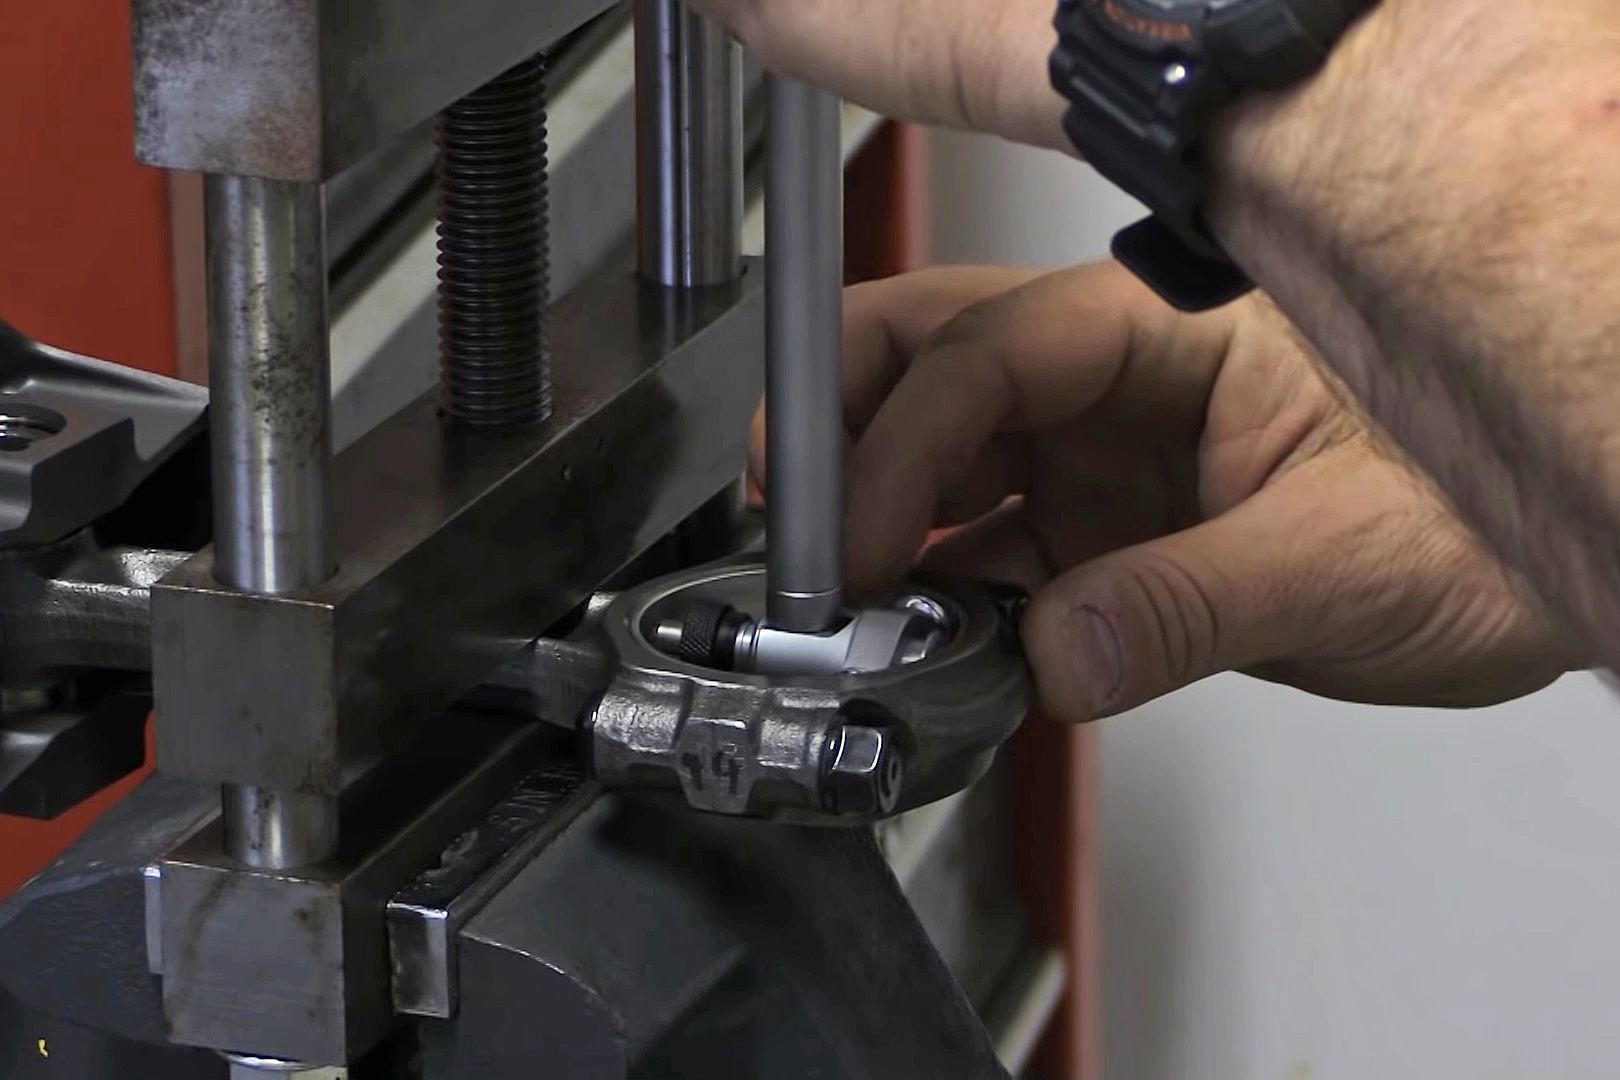
(Left) Using the locked micrometer as a base, the dial bore gauge is zeroed out. (Right) The dial bore gauge is then used to measure the ID of the rod and bearing assembly after being torqued to spec. The gauge will give a reading in (hopefully) a positive measurement, in thousandths of an inch. That is the amount of clearance for that journal/rod/bearing combination.
Putting On the Squeeze
Plastigauge works by taking a piece of plastic thread, of a calibrated size, and essentially smashing it between the rod bearing and journal, as the rod is torqued down. Then, you disassemble everything and measure the width of the smashed thread against the calibrated scale on the packaging, and you can find your clearance. While not as precise as a dial gauge, with a little practice, it shouldn’t be hard to determine a clearance to the nearest .0002 inch.
However, the results here aren’t challenging the precision of the Plastigage measurement, but rather the accuracy, as all three of Huneycutt’s Plastigauge measurements came in under the measurements from the more expensive tools. The Plastigauge indicated readings in the .0018 to .0019-inch range
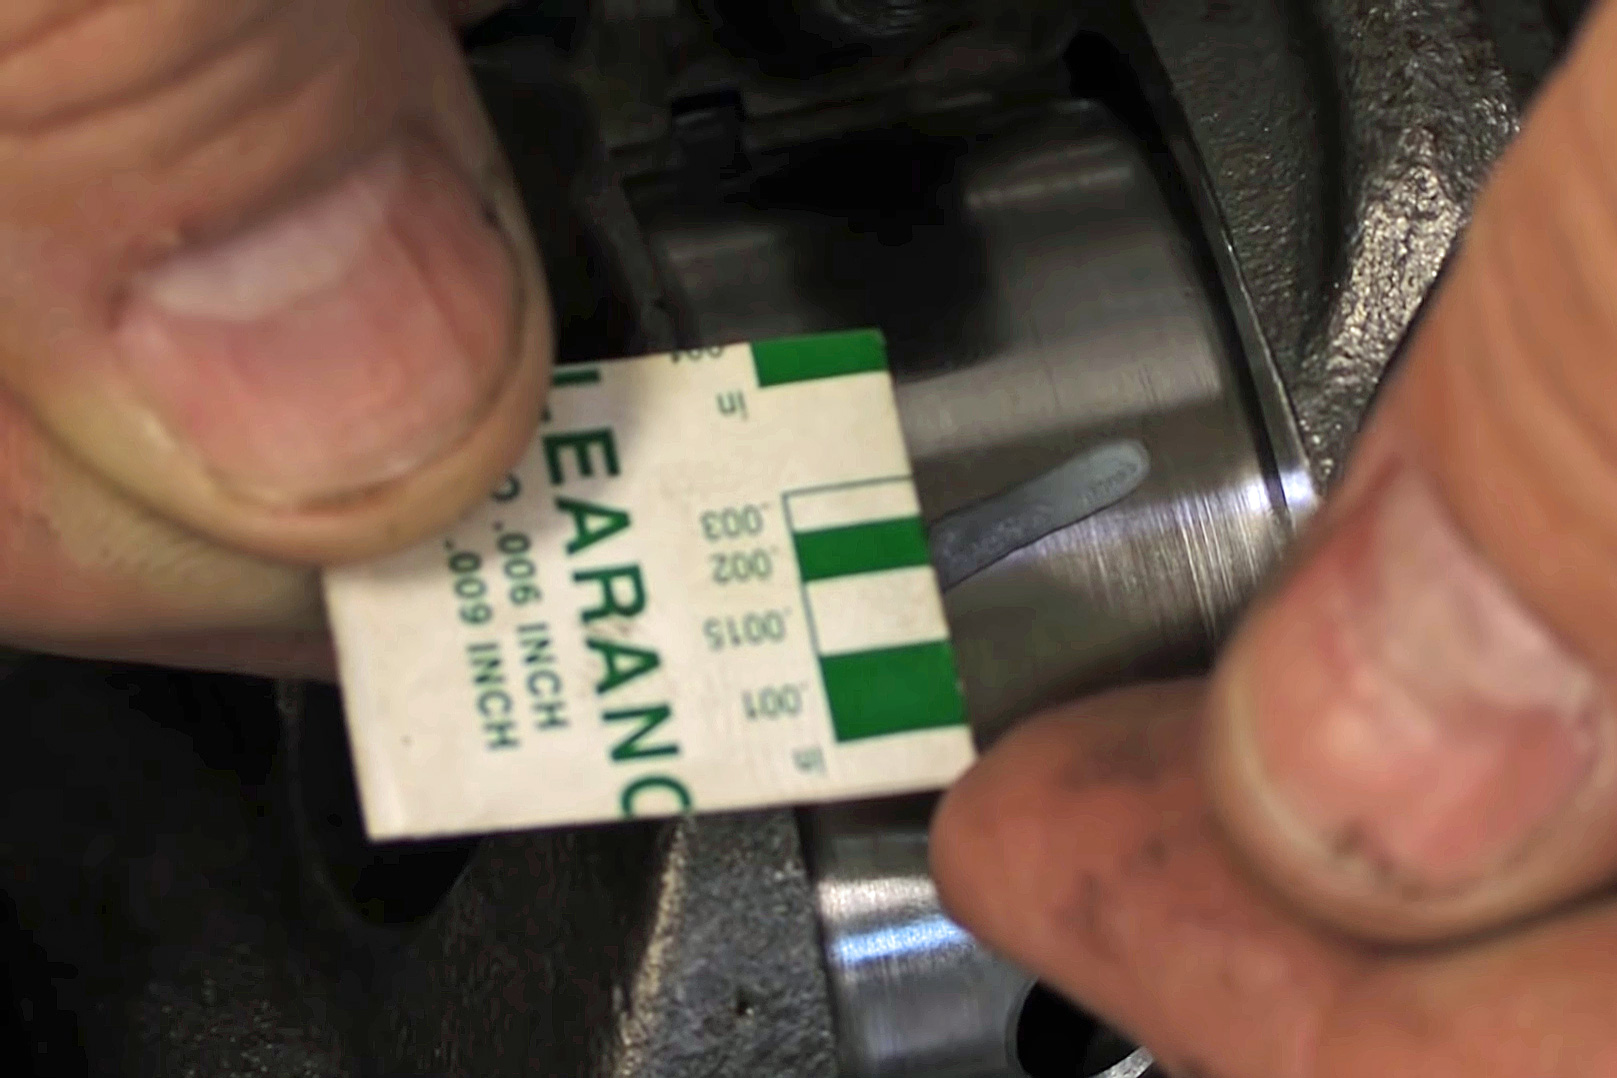
Plastigauge’s readings are measured by comparing the width of the strand of plastic to the size chart on the packaging. While not the most precise method of measurement, you can measure within about .0002 inch with a little practice.
What’s that mean? Well, Plastigauge will get you in the ballpark but isn’t as precise as using “proper” measuring tools. On paper, a .0002 to .0004-inch difference doesn’t sound like much, but that is a 9- to 18-percent difference in accuracy. The questions you need to ask yourself are: “How much precision is needed in my build?” “How critical are my bearing clearances?” and most importantly, “Is the precision offered by $200 in tools worth the $195 premium over Plastigauge?”
Ultimately, only you can answer those questions and make those decisions. But, hopefully, after reading this and watching Jeff’s video, you are better equipped to make an informed decision, instead of just blowing off one option or the other, just based on price alone.