Naming a project vehicle can be tricky…
We’ve done a lot of project builds over the years, but as experienced as we are, every time we go to christen one, it always takes longer than we expect. In fact, when we went to name our new project fourth-gen Camaro (which is getting some boost and running on E85), we reached out to you guys on Facebook to help. A lot of you had some fantastic names, just to name a few of our favorites: corn fish, maize runner, methanol missile, and ZE85.
And while all of those names were fantastic, the winner officially came from long-time LSX Magazine reader Landon Spendlove who suggested the name Corn Star. Needless to say, we were smitten by the name and the endless possibilities it would lend itself to article titles, merchandise, and overall laughs.
So, without further ado, we present to you Project Corn Star.
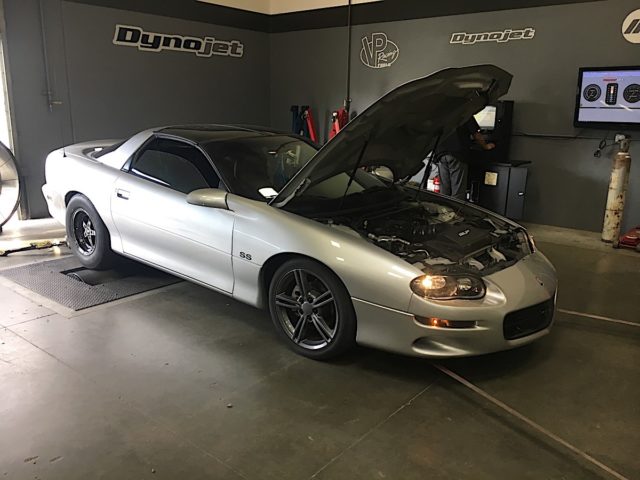
Now, if you’ve been following along, you will have seen Project Corn Star in some of our past articles. To refresh your memory, this 2002 Camaro SS came to us by way of a new higher around the office. The car had the usual assortment of bolt-ons—it had a set of SLP long-tube headers, an SLP lid, 85 mm SLP MAF, Magnaflow exhaust, and a mild TR230 reverse split pattern camshaft. Like we said, your standard “cam only” LS1.

Our project Camaro right before it hit the rollers to find out what it put down before it goes turbo.
From that point, and in the pages of LSX Magazine, we gave it a set of drag wheels from JMS Chip, drag radials and skinnies from Mickey Thompson, and a clutch from SPEC. All of that was good enough to take the car to low-13s with the struggling stock clutch before we swapped in the unit from SPEC. Not bad, but far from good. It was at that point that we decided something drastic needed to be done to get the Camaro the proper street cred that a fourth-gen rightful deserves.
Goals
And that’s when Project Corn Star took on new life. Any good project, however, starts off with well-defined goals—which means we had to come up with some. We knew we wanted to push the stock LS1 as far as it would take us, just to find out what it was capable of. Since it was staying stock displacement for the time being, we knew that meant some sort of power adder would need to be used. We also knew we wanted the car to be an all-around performer. While it will likely see a lot of quarter-mile action, we want it to still be capable of an autocross day here or there, we want to see what it has in the half-mile, and above all we wanted it to turn heads.
Now that we had some goals in mind for the car, we started to think about how to get it there. The first question on everyone’s mind was what power adder we should use. The first thing thrown on the table was nitrous. In case you haven’t noticed, we love nitrous around these parts. It’s simple to install and can add a butt load of power to any car for relatively cheap. It was a viable option and frankly one we’ve explored a lot before. Nah, we wanted to do something new, something fresh.
Supercharger? Again, we love superchargers. Roots, twin screw, centrifugal, you name it we love it and have probably have used it on a project or 12 before. And while they are capable of making serious power, we wanted to try something new. Which leaves us with, yup you guessed it, the turbocharger.
Turbo Boost KITT
Call us late to the game, but we’ve been seeing some serious turbo LS builds going around and we wanted in on the action. We knew the car was headed for E85, so it made a lot of sense to take advantage of our new fuel source with a little (or a lot, depending on how frisky we get) of boost. Not only does it mark the first E85 build we’ve ever done here at LSX, it makes it the first turbo build we’ve ever done as well—and we just need to get our hands dirty with a turbo for once.
Not only would it allow us to easily hit our power goals—hopefully somewhere north of 600 rear-wheel horsepower—but it would give us the chance to see why everyone is raving about turbos these days, firsthand. Along with making a lot of fun noises, turbos are extremely efficient at making power—which is exactly why they are being used on just about everything these days. Not to mention, a turbo system is usually easily upgradable, which meant it could grow with our project and its needs.
The Goods
While we knew we wanted to go turbo, the question of how was still wide open. There are a lot of options out there when it comes to turbocharging a fourth-gen and though we want to keep the project affordable, we weren’t willing to compromise on quality either. These days, there are a lot of cheap, Chinese parts and kits out there claiming to do amazing things, but we’ve heard more than our fair share of horror stories with them as well.
That left us with two options: buy a quality pre-fabbed turbo kit from a reputable dealer or fabricate our own. And while we definitely have the capabilities to do a custom turbo build here, we thought it would be best to stick to something you (the reader) could easily follow along with and replicate—and even possibly do right from your own garage—which is why we turned to Huron Speed for one their pre-made turbo kits.
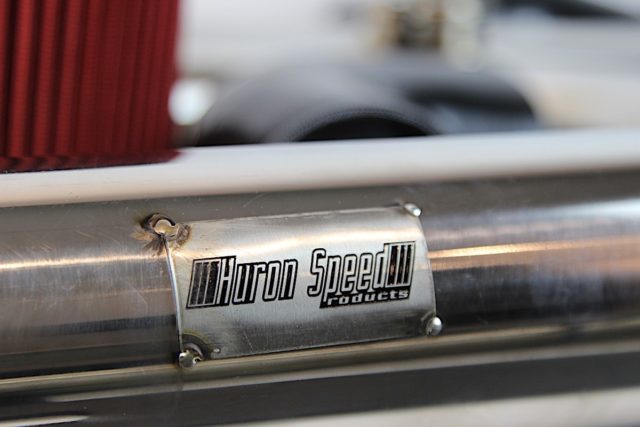
In case you haven’t heard of Huron Speed, they are purveyors of some seriously high quality turbo kits for everything from a C6 Corvette to a late-model GTO—and of course all manner of F-bodies. Their kits are manufactured right here in the U.S.A. of 304 stainless steel, making them not only extremely durable but wonderful to look at. All of the connections on the hot side are V-banded as well, making for easy install and repair should it need it down the line.
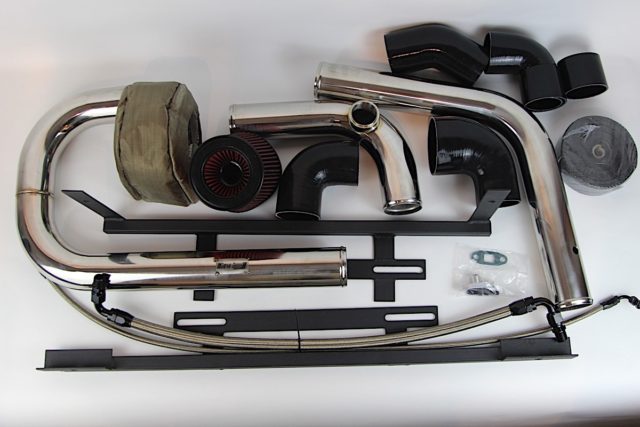
The welds on our Huron Speed turbo kit are gorgeous as is the 304 stainless steel. It's almost a shame to cover them up with the hood, but they're going to a good home.
One of the best parts of their kits is the configurability of them. We chose to go with the V3 T4 single turbo kit that retains A/C. The car will be raced frequently, but it will primarily see street duty, so A/C retention was a must. Huron Speed’s kits can be as basic or as complete as you want. If you are just starting the build and funds are low, you can pick up the standard kit—sans blow-off valve, wastegate, turbo, and fuel system—for $2,149. And, if you’re a frequenter of LS1tech.com, you can find these kits in group purchases for even better prices.
We reached out to Jon Ojczyk, owner of Huron Speed, to find out just what sets their kits apart.
“We are constantly improving our kits,” Jon said. “Not only when jumping to a new kit but with popular older kits as well. We’re constantly looking for feedback from our customer and the market in general to hear what they want and make improvements from there. Improvements can include everything from upgrading the hardware included to changing the finish on the piping or improving wastegate exhaust flow. In our business, reputation is everything and that means constantly improving and updating our designs.”
Thanks to Jon’s considerable experience with turbo systems, he’s well aware of the challenges these systems can present and has designed the kits with this in mind. That’s a big part of why they choose .120-inch piping for all hot side piping.
“We back all of our turbo kits with a lifetime warranty, to the original purchaser, against any issues with the piping or craftsmanship,” Jon said. “With that being said, only the best materials can be used, which is why we use stainless steel tubing and piping for the hot-sides and now all aluminum piping for the cold-side tubing. This warranty really gives the customer peace of mind when ordering knowing that they will be receiving a quality kit with quality components that is backed with service by those who care about their product and customers. To date, we’ve yet to have a single weld fail.”
It’s Turbo Time
Turbo Kit Specs
- Huron Speed Products V3 A/C turbo kit
- Precision Turbo & Engine PT7675 Gen II CEA turbo
- Turbosmart HyperGate 45 wastegate
- Turbosmart Race Port blow-off valve
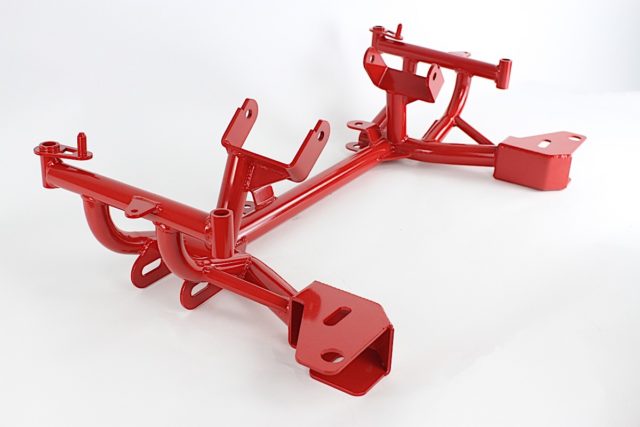
- BMR Suspension turbo cross member
- Derale pusher cooling fans
- FIC 1,000cc fuel injectors
- ASNU twin 340 LPH fuel pumps
For the turbocharger, we turned to the guys over at Precision Turbo and Engine who recommended their PT7675 Gen II CEA turbo for our setup. It features a 76mm inducer wheel CNC-machined from 2618 forged aluminum and incorporates Precision’s Competition Engineered Aerodynamics (CEA) technology, making it one of the most aerodynamically advanced turbos around.
“By machining a compressor wheel out of 2618-forged aluminum, we are able to get aggressive with the compressor wheel design due to the exceptional strength of the material that we use,”said Joseph Krivickas of Precision Turbo. “The material is significantly stronger than a standard compressor wheel made from a casting, and other “billet” wheels that are made out of a lesser quality aluminum.”
The exducer is 75mm and is housed in an investment cast 310 stainless steel V-banded turbine housing that features a .96 A/R—giving our LS1 enough room to breath.
“The Gen 2 7675 unit is a great turbocharger for smaller displacement LS engines, specifically under 350 cubic inches,” Krivickas said. “By running them on a smaller CID engine, you will be able to run a higher pressure ratio (boost pressure) which will allow the turbocharger to really shine. While this turbocharger performs well at all pressure ratios, it really shines at higher pressure ratios above 1 bar.”
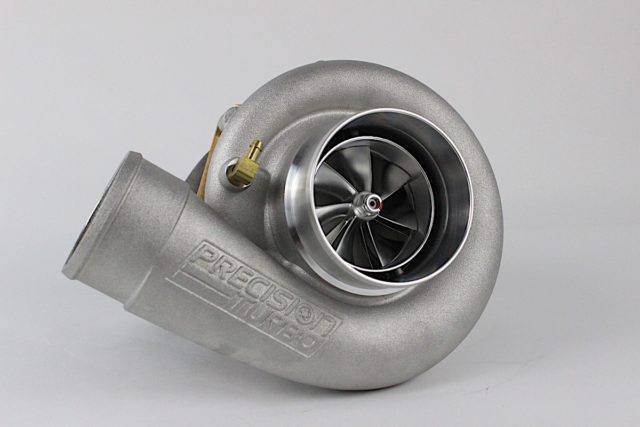
Here you can see the CEA technology that Precision has implemented on the forged 2618 aluminum impeller that has been CNC machined.
The compressor housing features a 4-inch inlet and 3-inch outlet that has been ported and designed to help alleviate compressor surge. The center section is an air-cooled housing with dual ceramic ball bearing Center Housing Rotating Assembly (CHRA) which will lead to quicker turbo spool, less turbo lag and improved thrust capacity.
Dual air-cooled ceramic ball bearing keep everything moving along and will help with transient response times when the car is up and running.
While the turbo is capable of supporting almost 1,300 horsepower, on our application it should easily support up to 900 before we need to think about stepping up to something a little larger—which should be plenty…at least for now.
Under Pressure
For the wastegate and blow-off valve, we turned to Turbosmart who sent over their Race Port blow-off valve and HyperGate 45 wastegate. The Race Port blow-off valve is known for its light weight, relative low size, and huge flow capacity. When fully open, it can move up to 330 cfm—more than enough to ensure that all the boost we will be making has somewhere to go if and when the throttle blade slams shut. Turbosmart’s component quality is second to none and that’s because they don’t take short cuts according to Marty Staggs of Turbosmart.
“We strive to make the finest products on the market while at the same time, giving the best customer service and support possible,” Marty said. “This is why we still do all engineering, development, manufacturing, and testing in house. In addition, we have three facilities spread around the world to provide an unmatched level of customer support and inventory availability.”
Staggs tells us that that biggest mistake a lot of people make these days is selecting components solely based on price. This can be a costly choice, especially when your engine is on the line.
“You generally pay more for the best quality, and we aim to make the highest quality, most reliable parts available in the market,” Staggs continued. “If all of our attention was on lowering our price, it takes away our ability and focus to provide the best quality to our customers; and our customers know that. You will see a lot of businesses rise and quickly fall when they pursue this model. They start skimping on their manufacturing process, or they outsource work to low-quality manufacturers with limited regulations and the products start to suffer to meet the falling retail price. We don’t want that for our customers, our business, or the industry as a whole. After all, as the old adage goes; ‘you get what you pay for.'”
Our 50 mm blow-off valve and 45 mm wastegate will help keep our Camaro at the appropriate boost levels and keep our turbo living and making good power as long as possible.
Our 45mm HyperGate wastegate will ensure that our new PT7675 is constantly at the desired boost pressure and will help eliminate surging. Again, the compact size of the HyperGate is often misleading to the fact that this wastegate can flow some serious air. It features a unique locking collar design that help keep it compact and will allow for quick spring changes in the future (more on that later).
If you’re not quite sure if these components will work for your setup, Turbosmart actually now offers an app in the Apple Store and Google play that allow you to input the parameters of your build and spits out recommendations on component sizing. It can be found by searching “Turbosmart.”
Give Me Fuel
Before starting our project, we had already converted Corn Star over to E85. You can read all about it here. But in case you don’t want to read the whole story, here is the highlights: we used two ASNU 340 liter per hour E85-compatible fuel pumps in the stock tank and sender. We had to modify the stock bucket to get both pumps to fit and it required a little wiring, but it was a pretty straightforward process.
After our pumps were in place, we used a Racetronix hot wire kit to feed both pumps and wired up a relay and trigger to a Hobbs switch that will activate the second pump at 5 psi. This was done to prevent the fuel from heating up and aerating by running both pump continuously. We are using the stock fuel lines and pressure regulator to get the fuel to the engine.
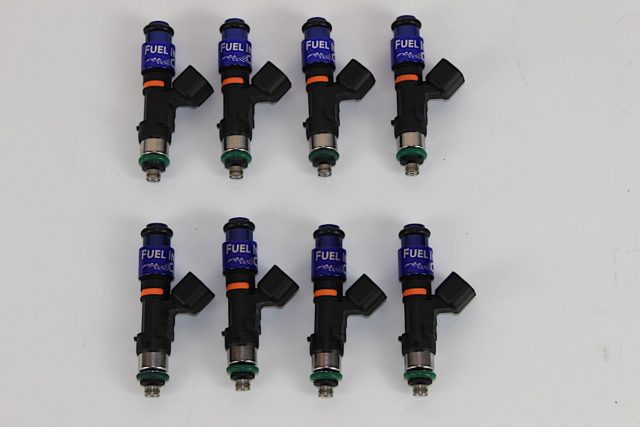
At the motor, 1,000cc fuel injectors from Fuel Injector Clinic ensure that our mill is getting enough go-juice. The lines will eventually need to be upgraded in the future if we decide to turn the power up on Corn Star, but they should do for now.
Knick Knacks
To finish off the kit, we turned to BMR and Derale who provided us with a crossmember and cooling fans respectively. The BMR turbo crossmember will free up a lot of space for us and allow us to retain our A/C system by allowing the down pipe to pass through the crossmember on the driver’s side. While it requires dropping the stock crossmember, we decided it would be worthwhile to not eventually sweat to death in the car.
On the cooling side, the stock fan would interfere with the turbo placement so they have to be move to the other side of the radiator and condenser. This requires two low profile fans that will be pushing the air through the coolers rather than pulling as in stock configuration. That’s why we selected two Derale pusher fans to help keep our relatively high horsepower build cool.
Working Hard For The Money
Everything else we needed, from oil feed and drain lines to cold side tubing and intercooler, all came with the Huron Speed kit. Checking out the kit, it’s almost a shame to hide it under the hood as the welds and finish on the stainless steel are nothing short of gorgeous. But alas, we need the boost and this kit is how we are going to get it.
With all of our parts lined up and ready to go, we were ready to get to work on Project Corn Star. Stay tuned as we take our fourth-gen Camaro from mild to wild and get some boost in this beast.


