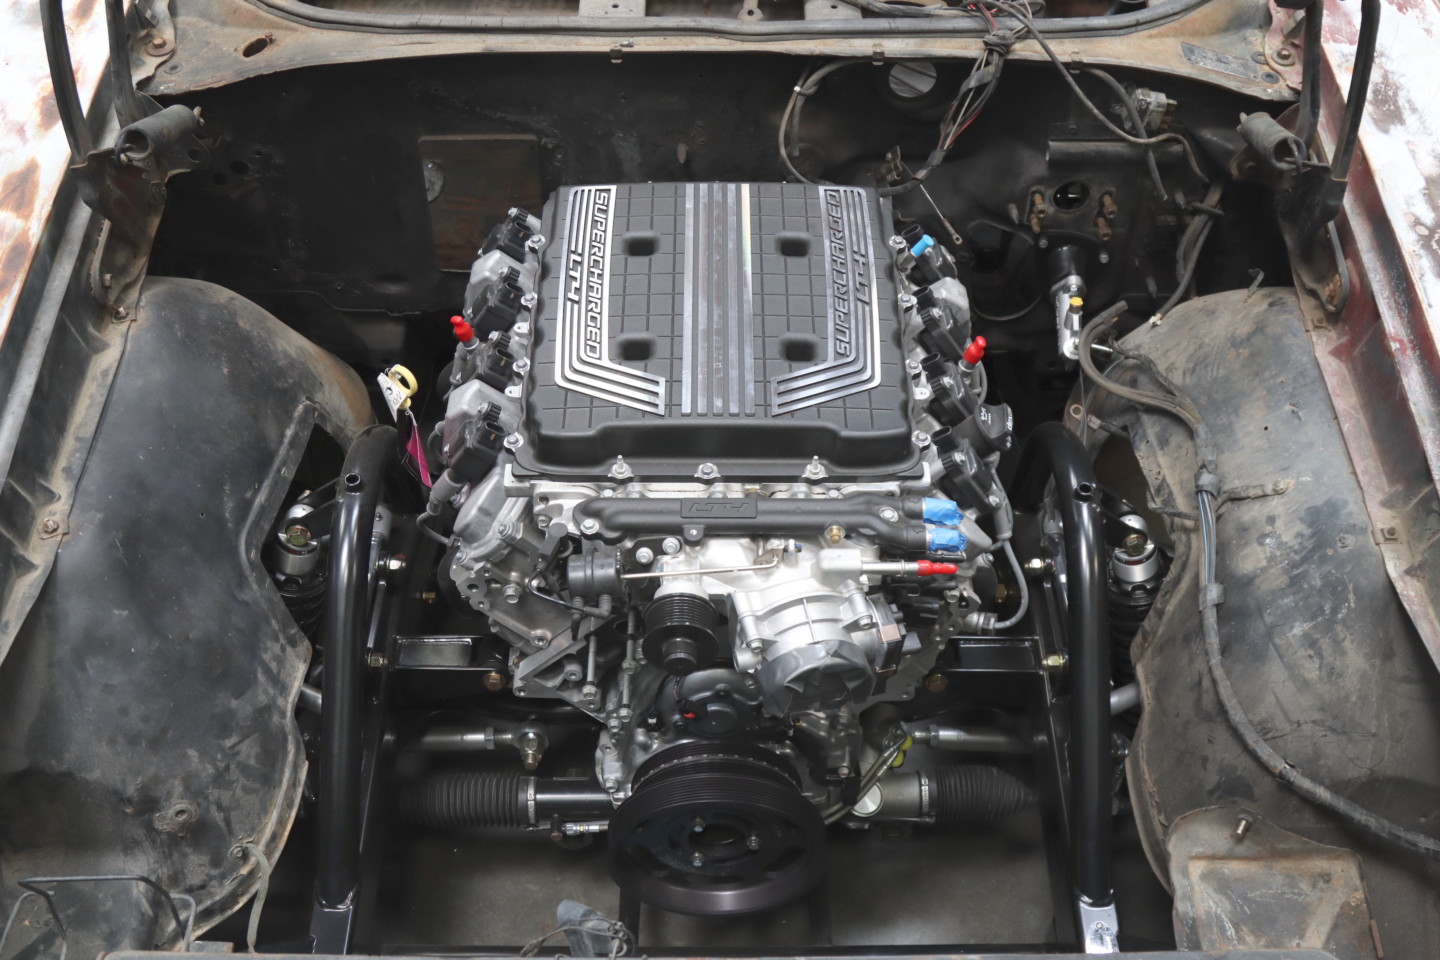
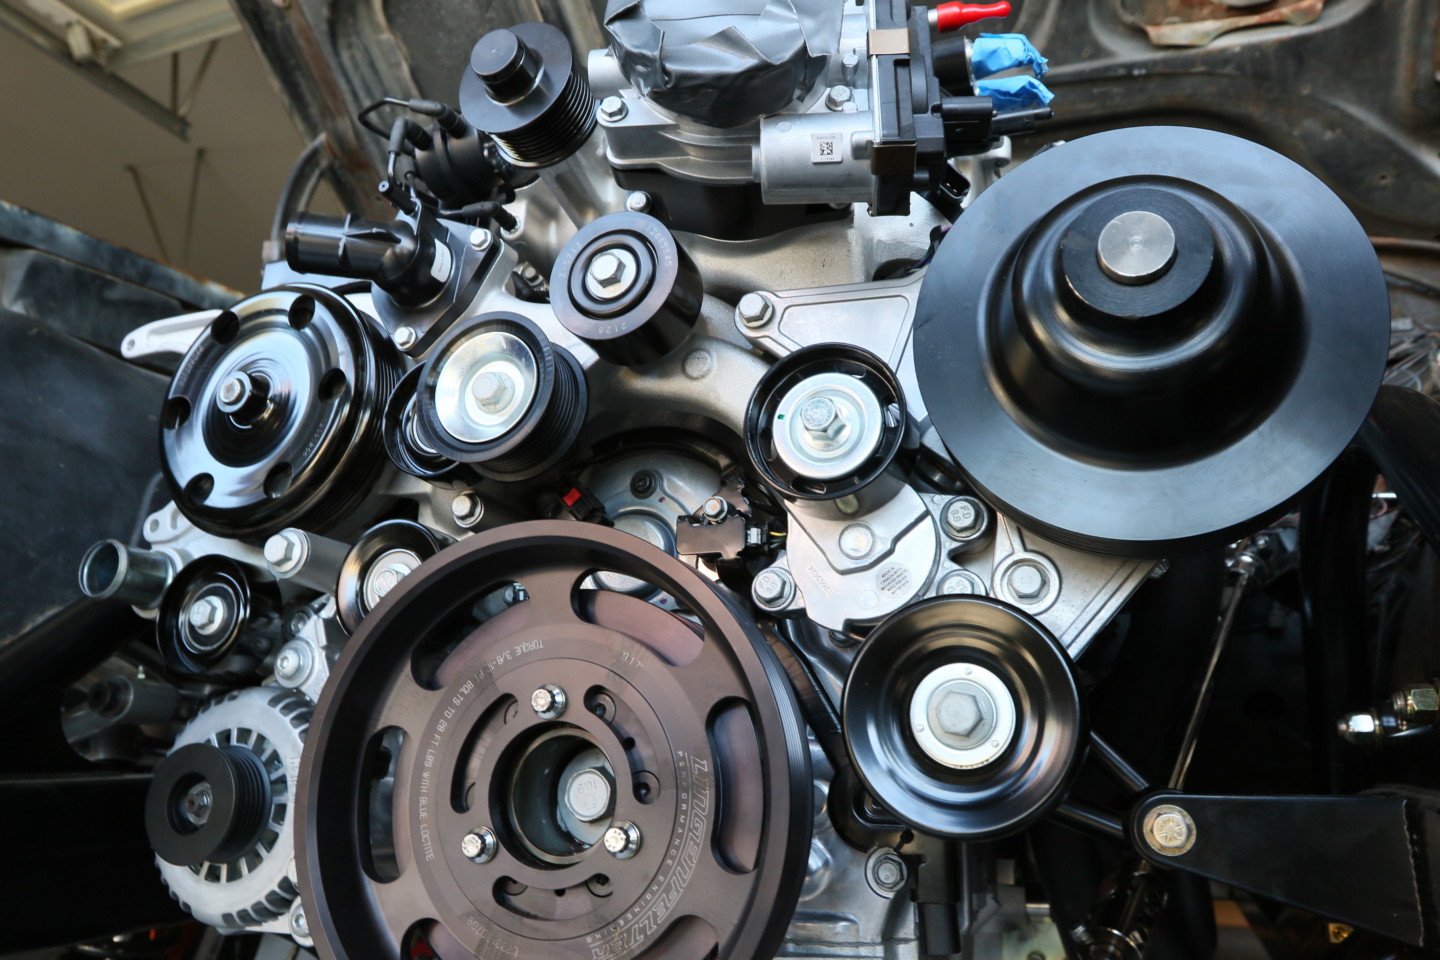
Sure, the Pontiac had plenty of engine bay space, and those models are known as having some room to grow under the hood, but we were pushing the limits. Adding a modern LS crate engine with a supercharger and tons of modern accessories under the hood meant that real estate was at a premium.
Added to the space limitations was a beefy custom-built performance chassis with massive cross members and a solid perimeter frame. This effectively shortened the supply of aftermarket parts we could use in this build. Fortunately for us, Holley Performance is staffed with engineers that are true “car enthusiasts” that build kits based on their own personal experiences.
If this sounds like an issue you are having or could have in the future, we are going to explain the problem fully, tell you what our solution is, then show you the installation in the paragraphs below. In fact, we will even label the major subheadings as “The Problem,” “The Solution,” and “The installation.”
The Problem
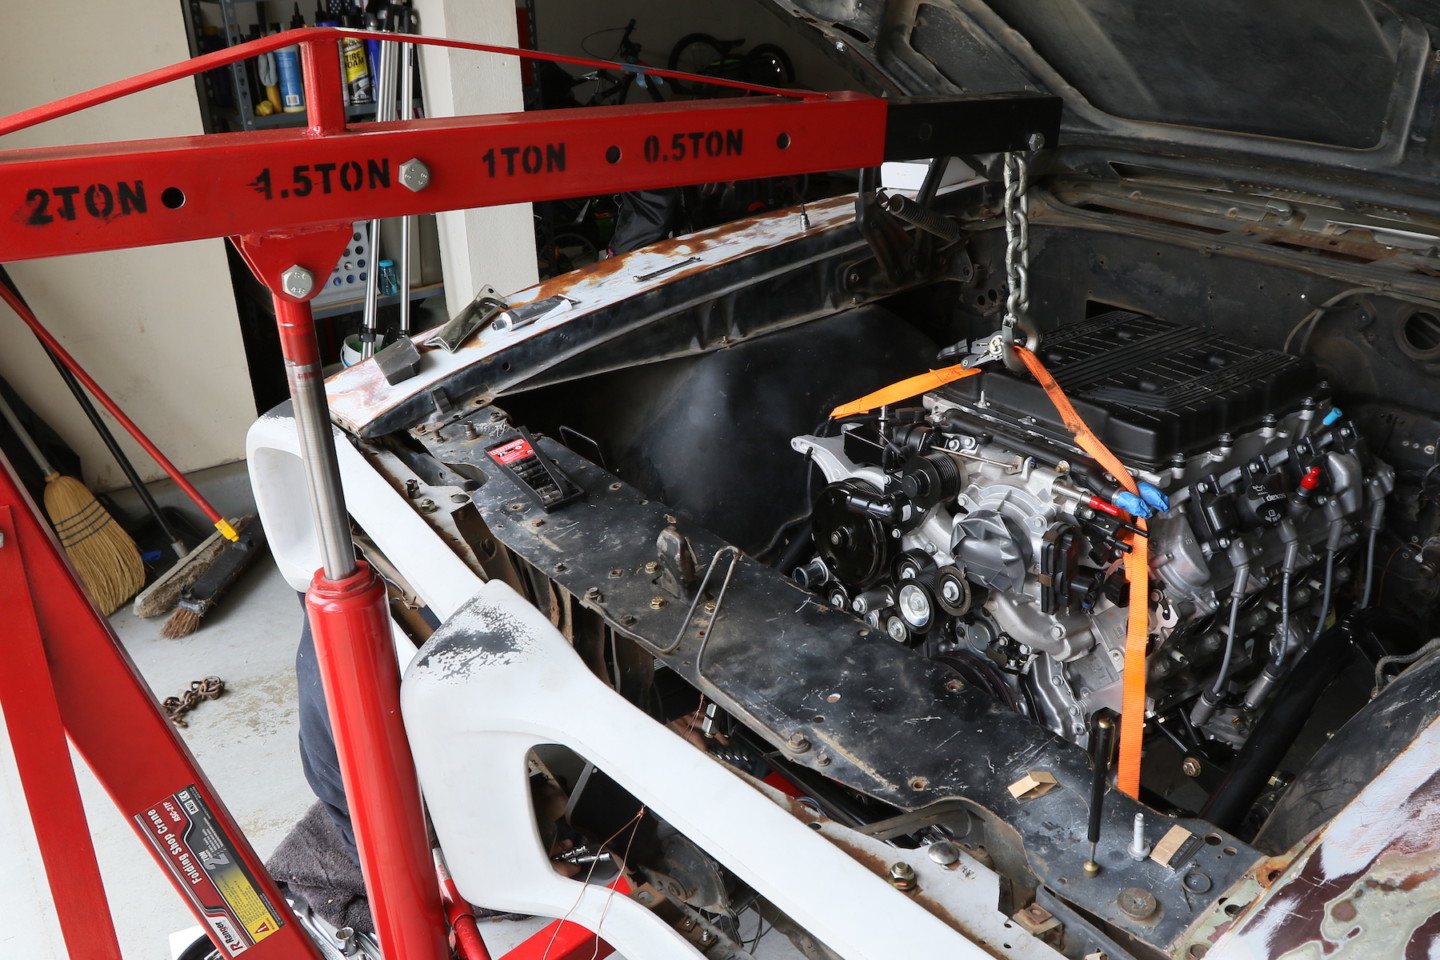
Our 1968 Pontiac GTO rolled off the factory floor with a two-barrel 400ci Pontiac V8 and Turbo 400 transmission. As large as that drivetrain platform was, we were going to shoehorn a modern 640hp LT4 crate engine – complete with supercharger – and some much-needed accessories.
Trust us, when it gets into September in the Inland Empire region of Southern California, you need an A/C unit. We are talking stupidly hot temps with the warm desert Santa Ana winds making life unbearable.
Trying to fit all of this into the stock engine bay was going to be a trick. Keep in mind this car is being built to autocross with the best. So paying attention to the weight, and where it goes is another issue altogether. This car needed to be well balanced.
If you don’t think that accessories can change the balance that much, pick up a GM Air Conditioning compressor then hold it directly out to your right side. Change it over to your left side. See how much of an impact it made? Now imagine the alternator, power steering pump, water pump, A/C compressor, with all the brackets and belts added to the mix.
Finally, it all had to fit. It had to fit under the hood. The accessories had to fit the engine we are using. And it had to fit in the purpose-built chassis we selected for performance reasons. See the problem? Have no fear … there is an answer to those issues.
The Solution
We checked around and found that Holley Performance makes several different accessory kits for the LT4/LT5 crate engines. “Sure, we got what you need,” said the Holley crew. “What engine do you have and do you want a low, mid, or high mounting accessory system?”
Explaining that we had an LT4 wet sump connect and cruise drivetrain in a Schwartz Performance chassis, the Holley engineers guided us to their Premium Mid-Mount Complete Accessory System for GM Gen V LT4 Wet Sump Engines (Part #20-220).
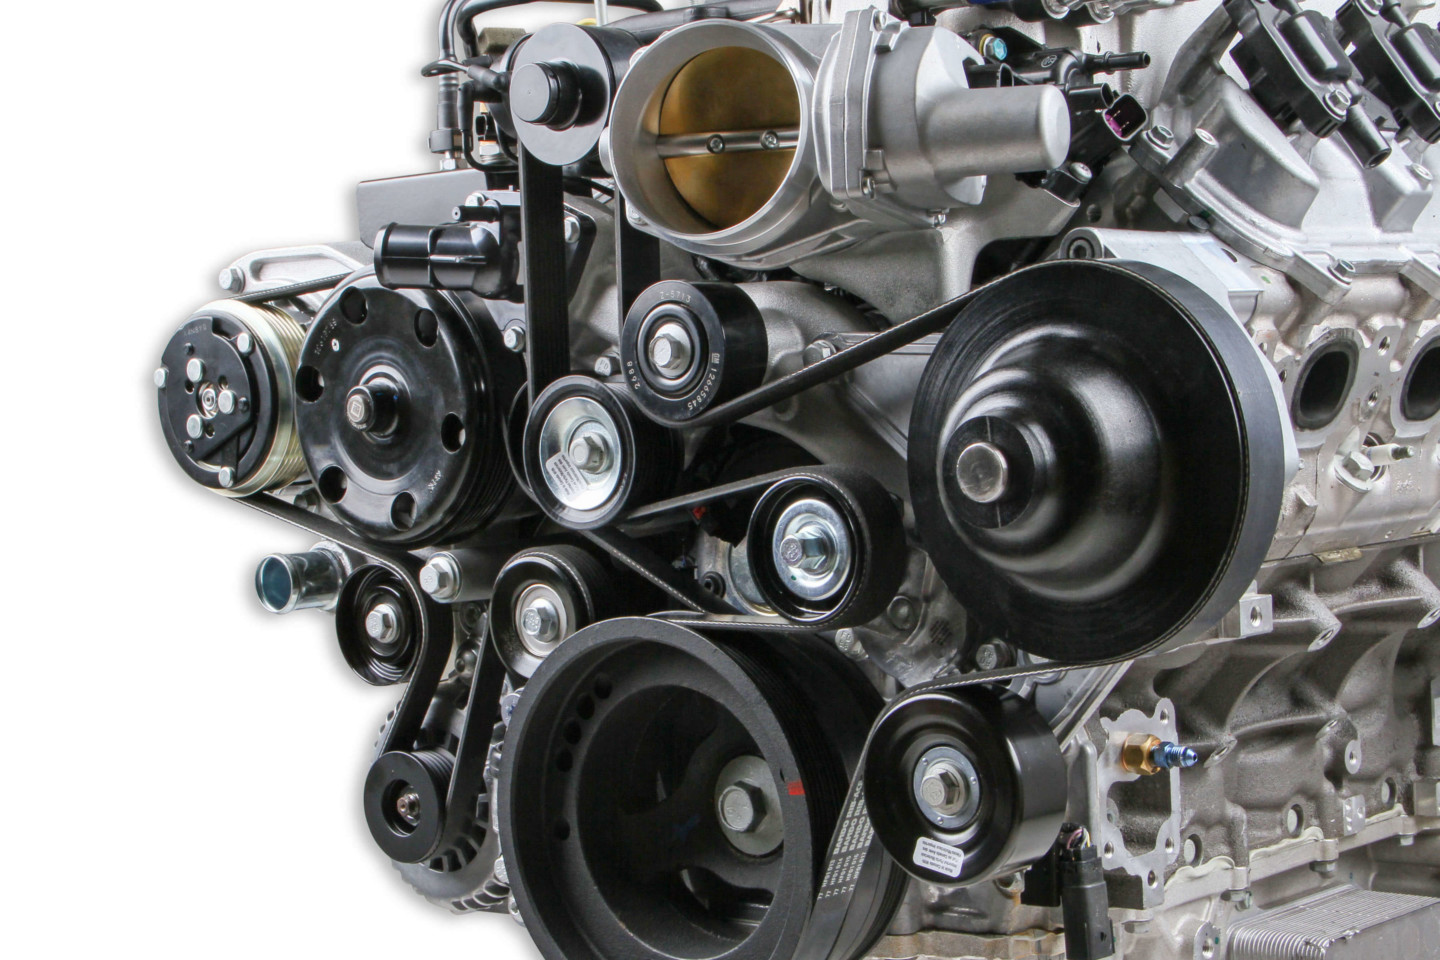
This system is complete, and we do mean a complete, GM Gen V LT4 Accessory Drive System. It includes the alternator, power steering pump, air conditioning compressor, water pump, drive belt, and all hardware. “We have a really great engineering department here,” said Holley’s Even Perkins. “These are real car guys that design these kits the way they would want them as enthusiasts.”
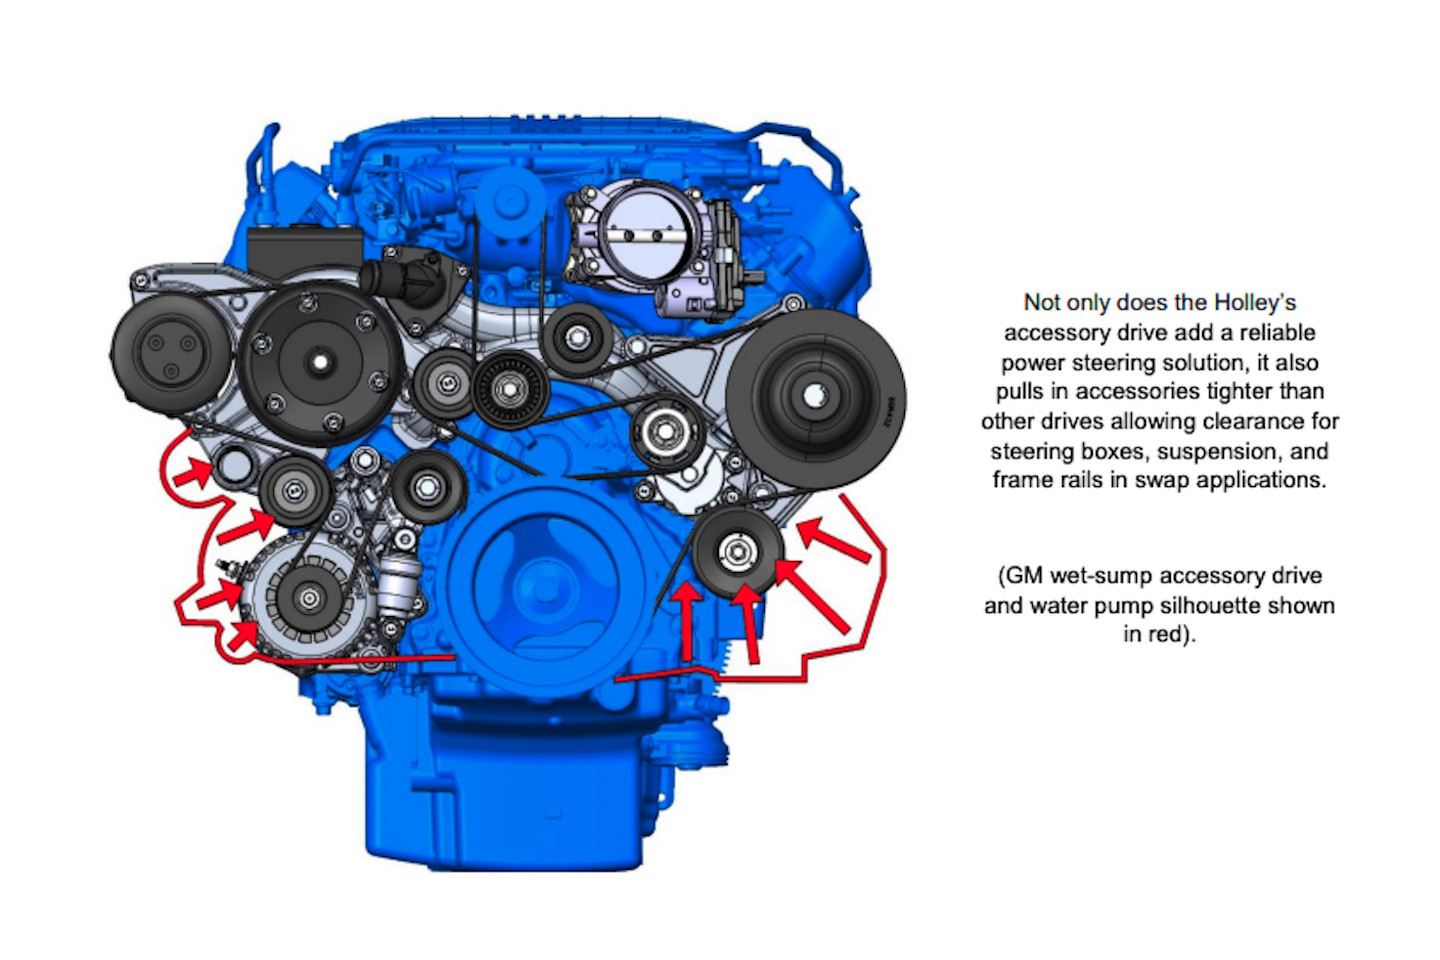
We found the Holley mid-mount accessory kit engineered to put the accessories up and in tight to the engine for a solid center of gravity. “The engineers have based the mounting around the water pump,” said Perkins. “All the other accessories mount to the pump so we can keep it functional our way. It will mount on all the LT4 and LT5 platforms and work correctly.”
Features Of The Holley Accessory System
- Adds power steering without any belt load on the power steering pump
- Notably more clearance to swap applications than other options
- Original equipment look
- LT4 style premium alternator
- LT4 style water pump design
- Compact SD7 A/C compressor
- A/C line adapters included
- Type II power steering pump
- Power steering hard line adapters included
- Bottom outlet swivel heater hose options for swap application clearance
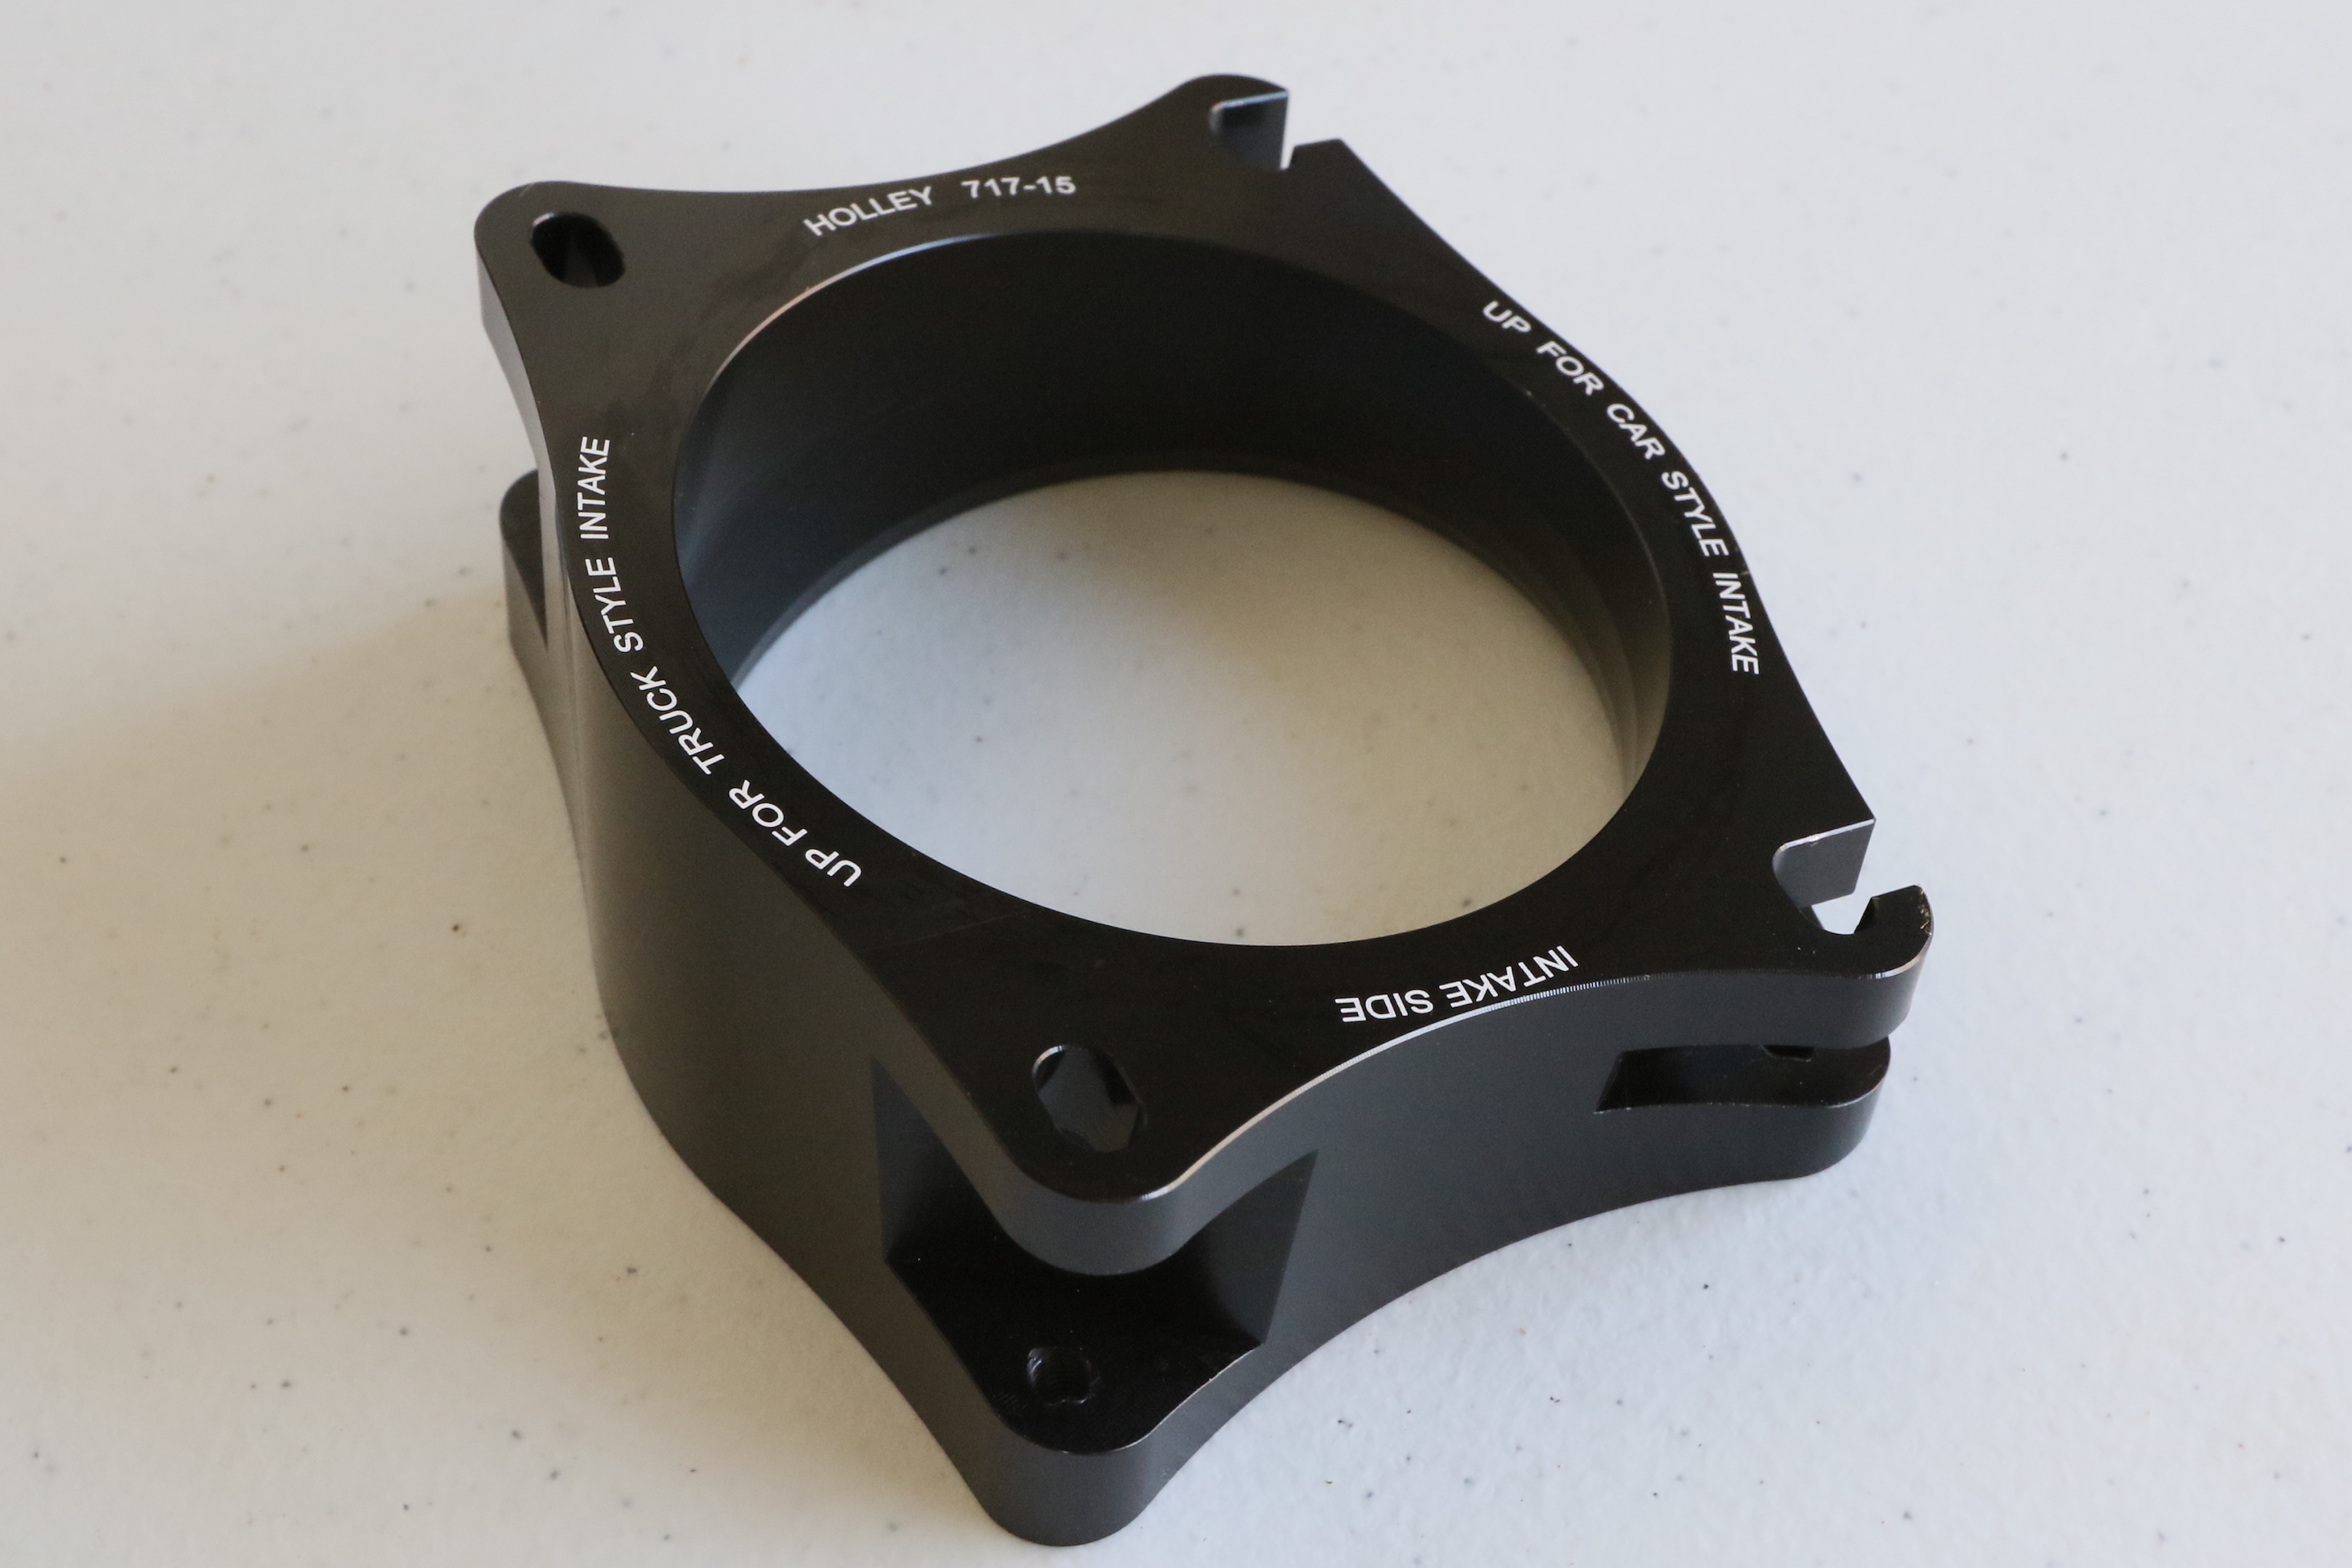
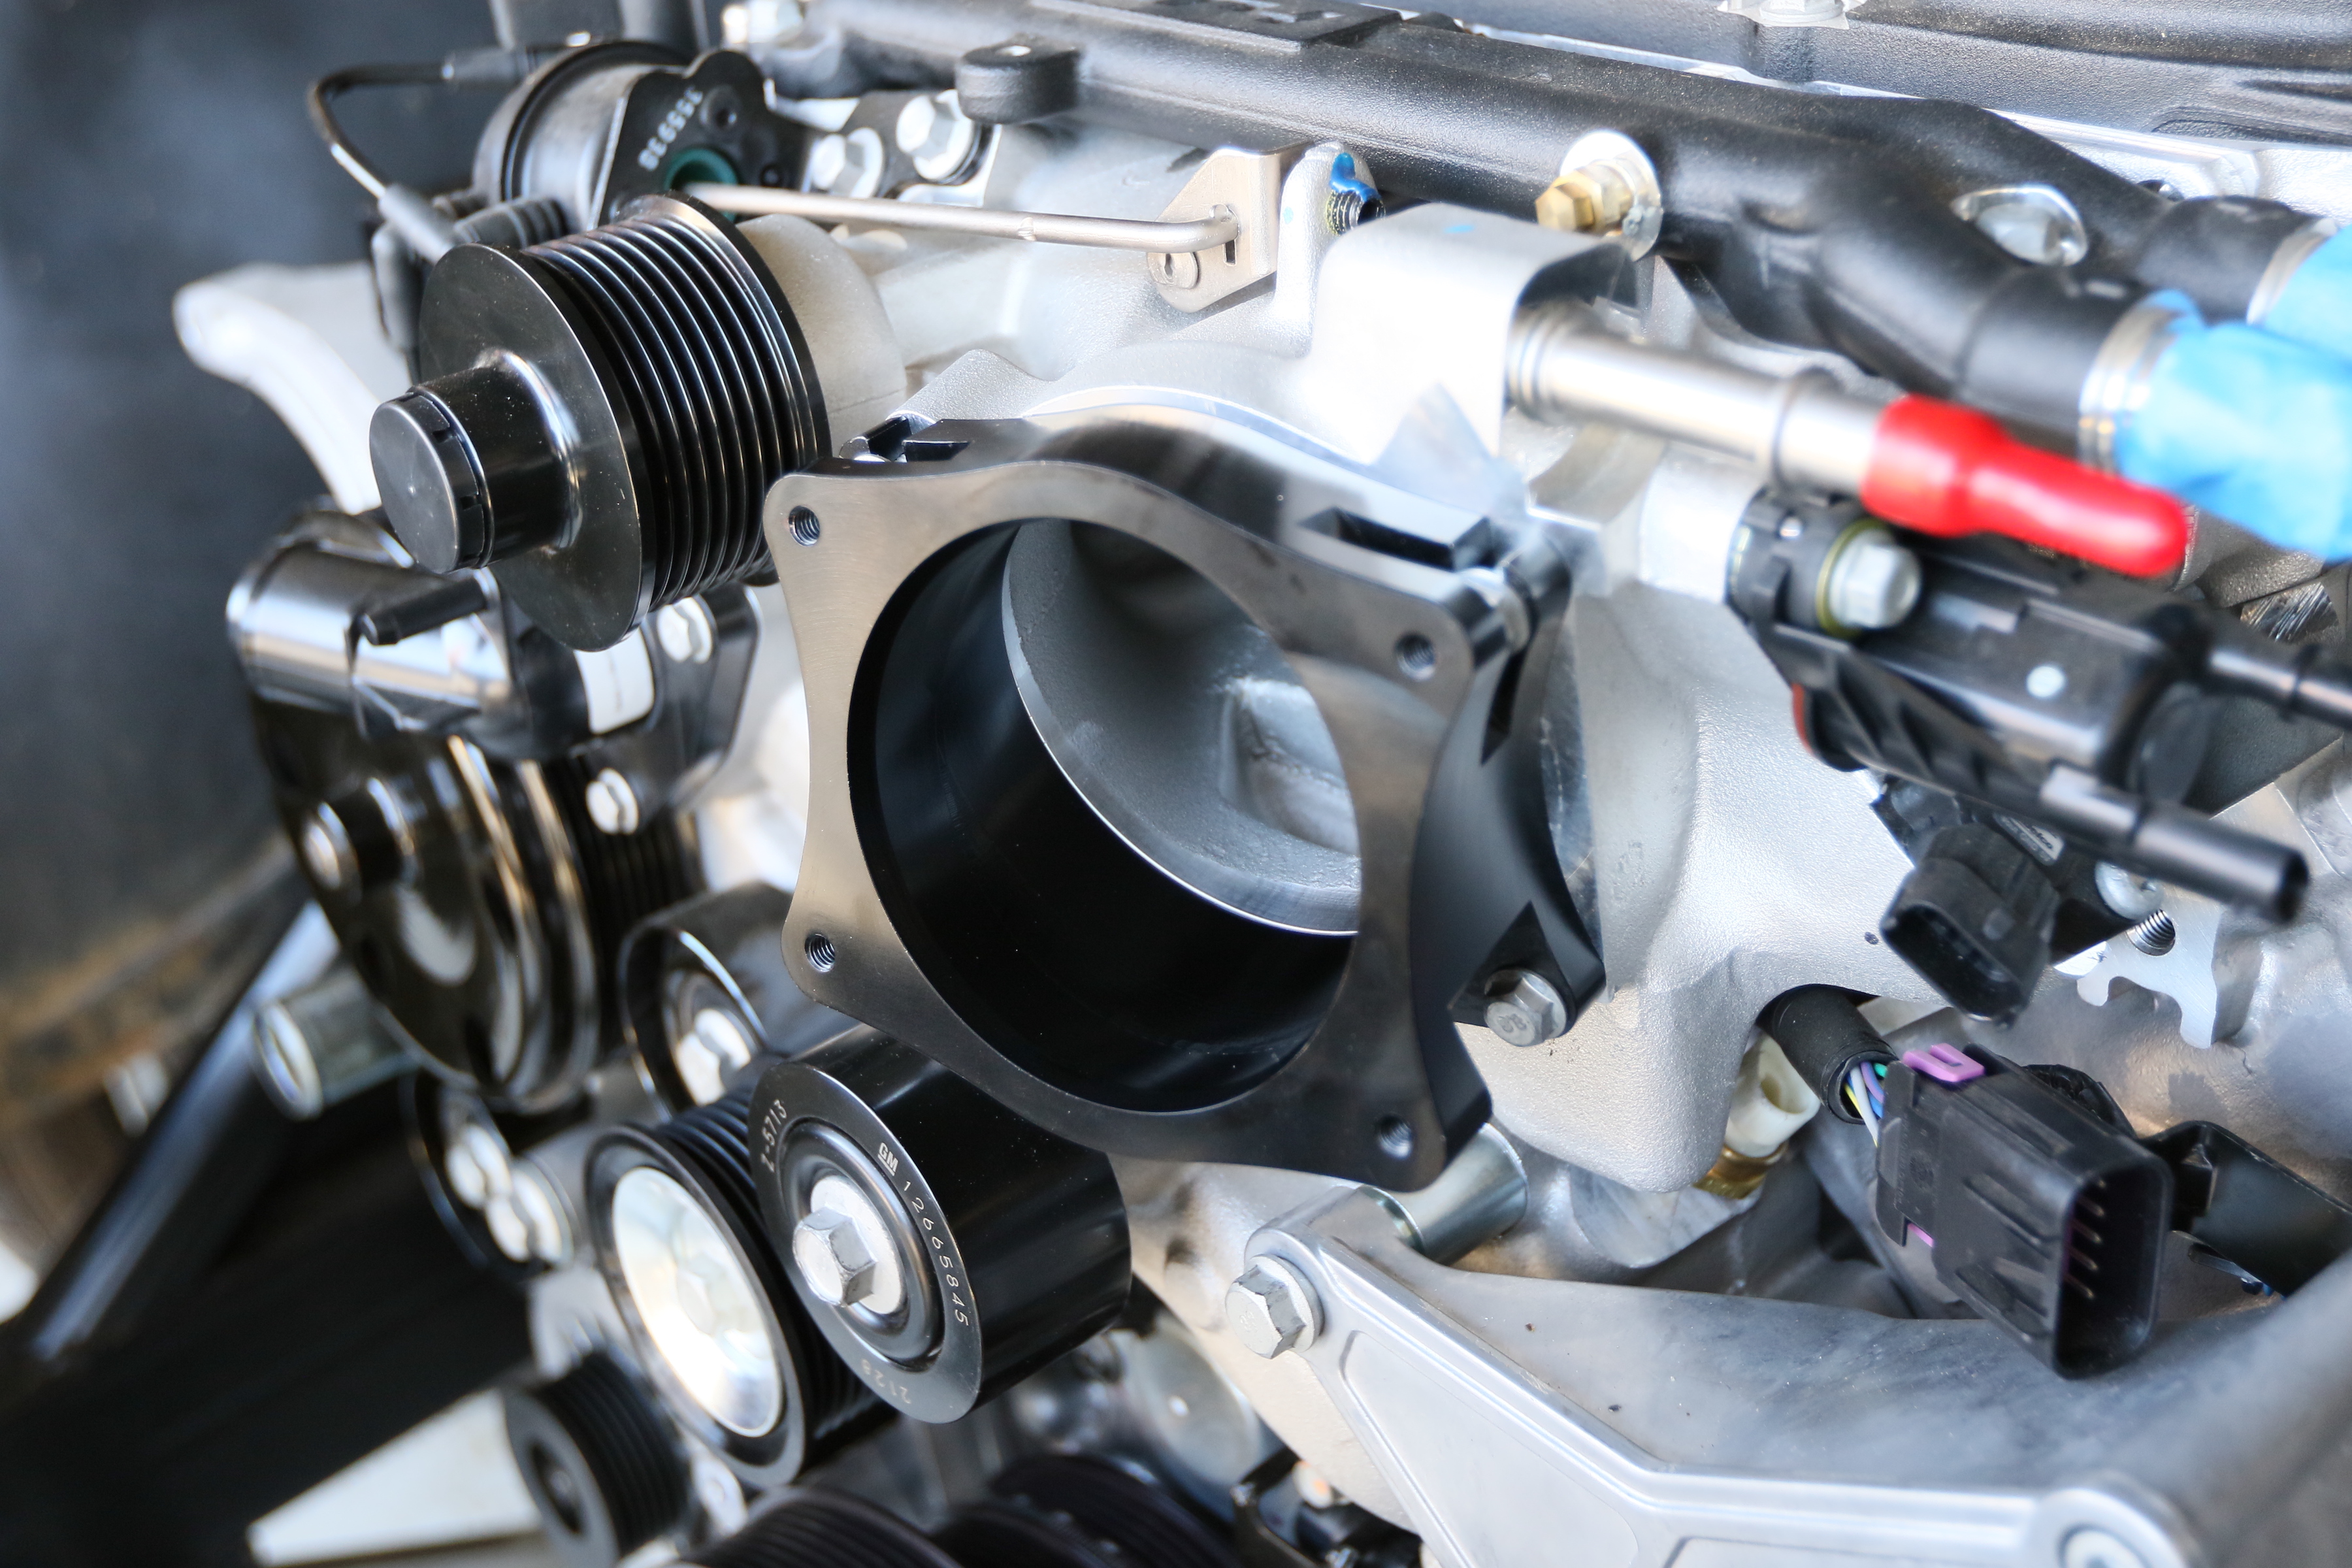
- Throttle body angle correcting adapter for easier intake tube routing on swap applications
- OE pulley ratios for optimal accessory performance allows for larger supercharger crank pulley
- Available for LT4 wet-sump application
- LT4 specific accessories available for plumbing the oil cooler and PCV oil separator OE system
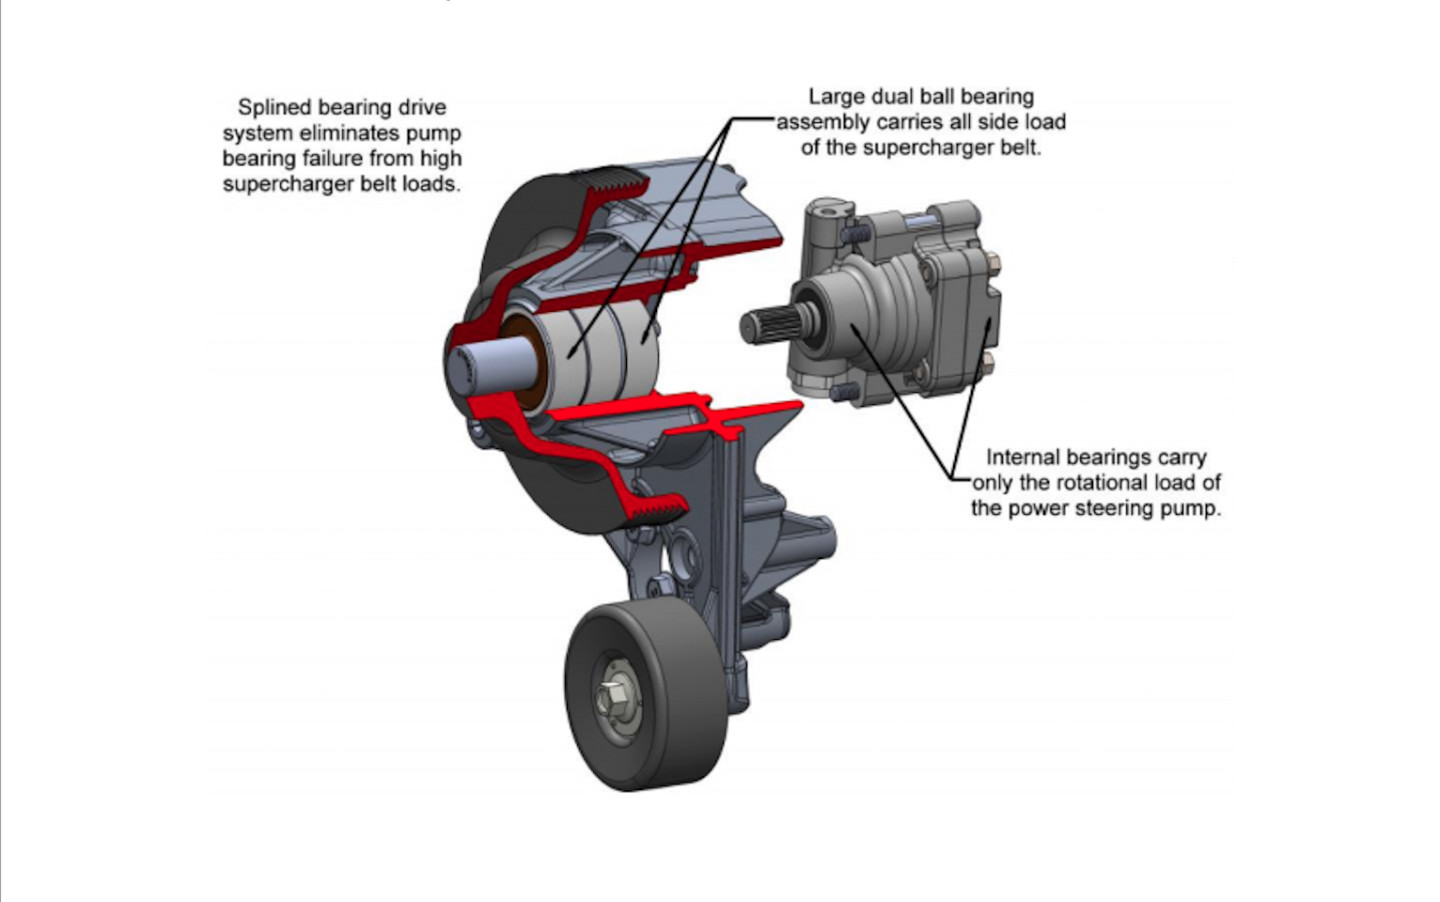
Perhaps the biggest feature of this accessory kit is one that isn’t even promoted in Holley’s published features and benefits of the kit. Stress from the drive belt can cause bearing wear on accessories, especially when belts are adjusted by the user.
Power steering pumps are especially prone to wear under high tension conditions. Holley’s use of a tensioner in the system helps avoid too much belt tension. While using a tensioner is common these days, Holley also incorporates an internal splined dual bearing system in the power steering pump to assure a long life.
GM’s basic engine design lends itself to aftermarket part swaps while maintaining an optimal belt path, even with a supercharger drive. The Holley design maintains that belt path. They also provide a throttle body angle correcting adapter that positions the throttle body for swap applications as opposed to the aggressive angle intended for the original application. It is important to note this system is available for wet sump or dry sump applications.
The installation
Putting together an easy-to-install kit is difficult when you are trying to cover every possible misstep a mechanic can take. This is where having bonafide mechanics as your engineering team helps Holley Performance put together a pretty foolproof assembly package. Granted, as mechanics, we can mess up even the best-laid plans but even if you follow only the illustrations, this assembly can be performed effortlessly.
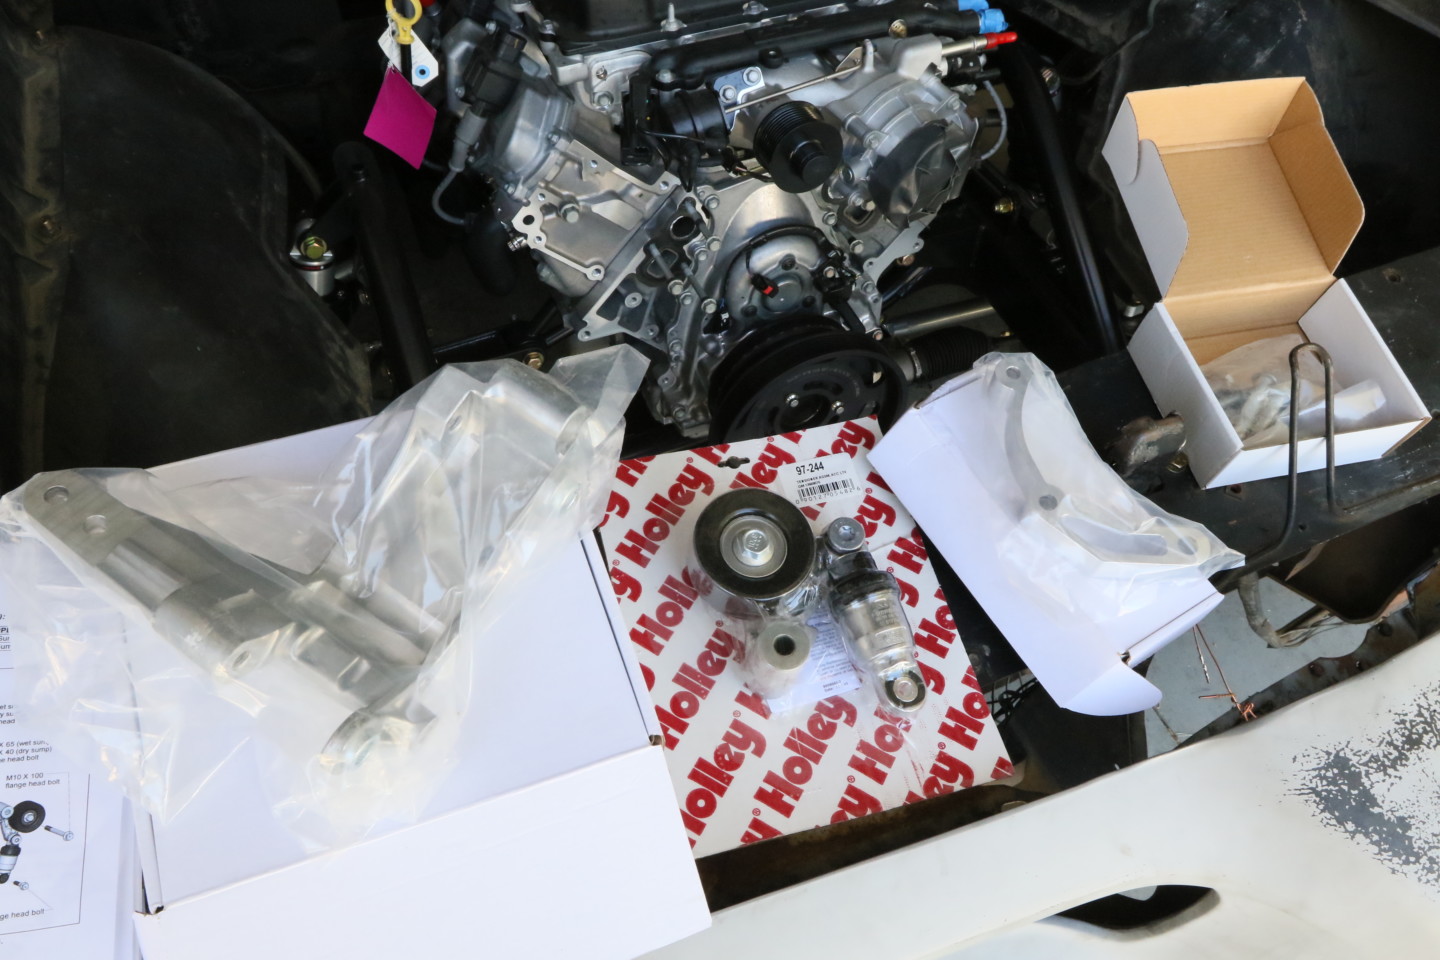
The kit is packaged in a “modular” fashion with each accessory packaged with a box of hardware that is identified for that accessory. A welcomed feature instead of a huge bag of bolts, washers, nuts, and screws.
There is one important point to consider for those engine builders that focus on every detail of the build. Setting out the components and painting each bracket and component to match its surroundings may sound like a great idea. There can be a drawback to painting every square inch though. The mating surfaces on the alternator and water pump manifold must all be bare metal to allow a ground path from the accessories’ mounting feet to the engine block and ultimately the negative terminal on the battery.
Before any installation could begin, there were a couple of items that needed to be removed from the crate engine. A small bracket that was designed to support the engine wiring harness to the block and a water feed line for cooling would no longer be needed. The instructions have a clear illustration of which parts to remove. Because you will be installing a new Holley water pump, removal of the stock water pump will be required.
Modular Installation
The design of this front accessory drive kit makes it a modular kit in-so-far-as the easy assembly, simple arrangement, and overall use. Placing one component system on at a time until the entire unit is completed. Each component comes with its own independent parts box, which greatly simplifies things.
The alternator assembly will need to be installed first as access to the mounting points is easier with the water pump assembly out of the way. Even with the clear-cut hardware kits, paying attention to the correct bolt placement is essential to proper installation the first time.
Pro Tip: The rear alternator housing can be rotated relative to the front housings. If desired, this will allow the charge wire and harness plug to be rotated or away from possible interferences.
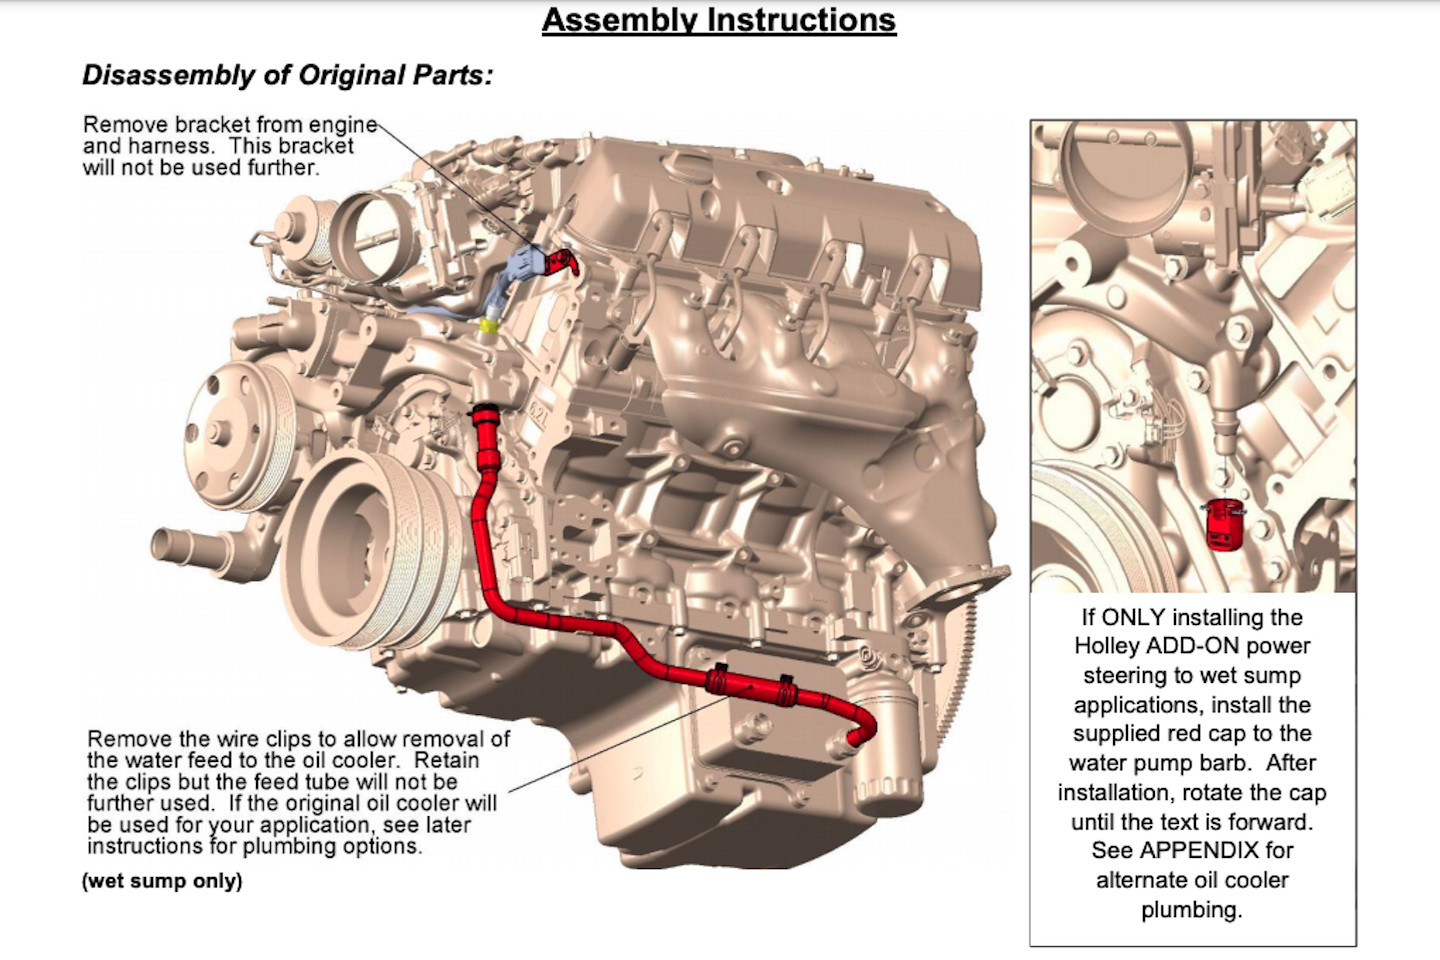
The kit’s assembly actually begins with the disassembly of the stock components. Some parts of these will be reused in the installation of the new components.
Water Pump
The water pump installation is key to the entire kit because every accessory is indexed or mounted to the unit. Prior to bolting the assembly onto the engine block, reinstall the water temperature sending unit that was removed from the original stock pump.
If you are using the optional oil/air separator tank for wet sump engines, it must be installed on the pump before bolting the assembly on the block. Don’t forget to install the heater hose barbs on the pump at the same time to make things go smoother. If for some odd reason you are not using a heater core, simply run a short length of hose as a jumper from the outlet barb to the inlet barb.
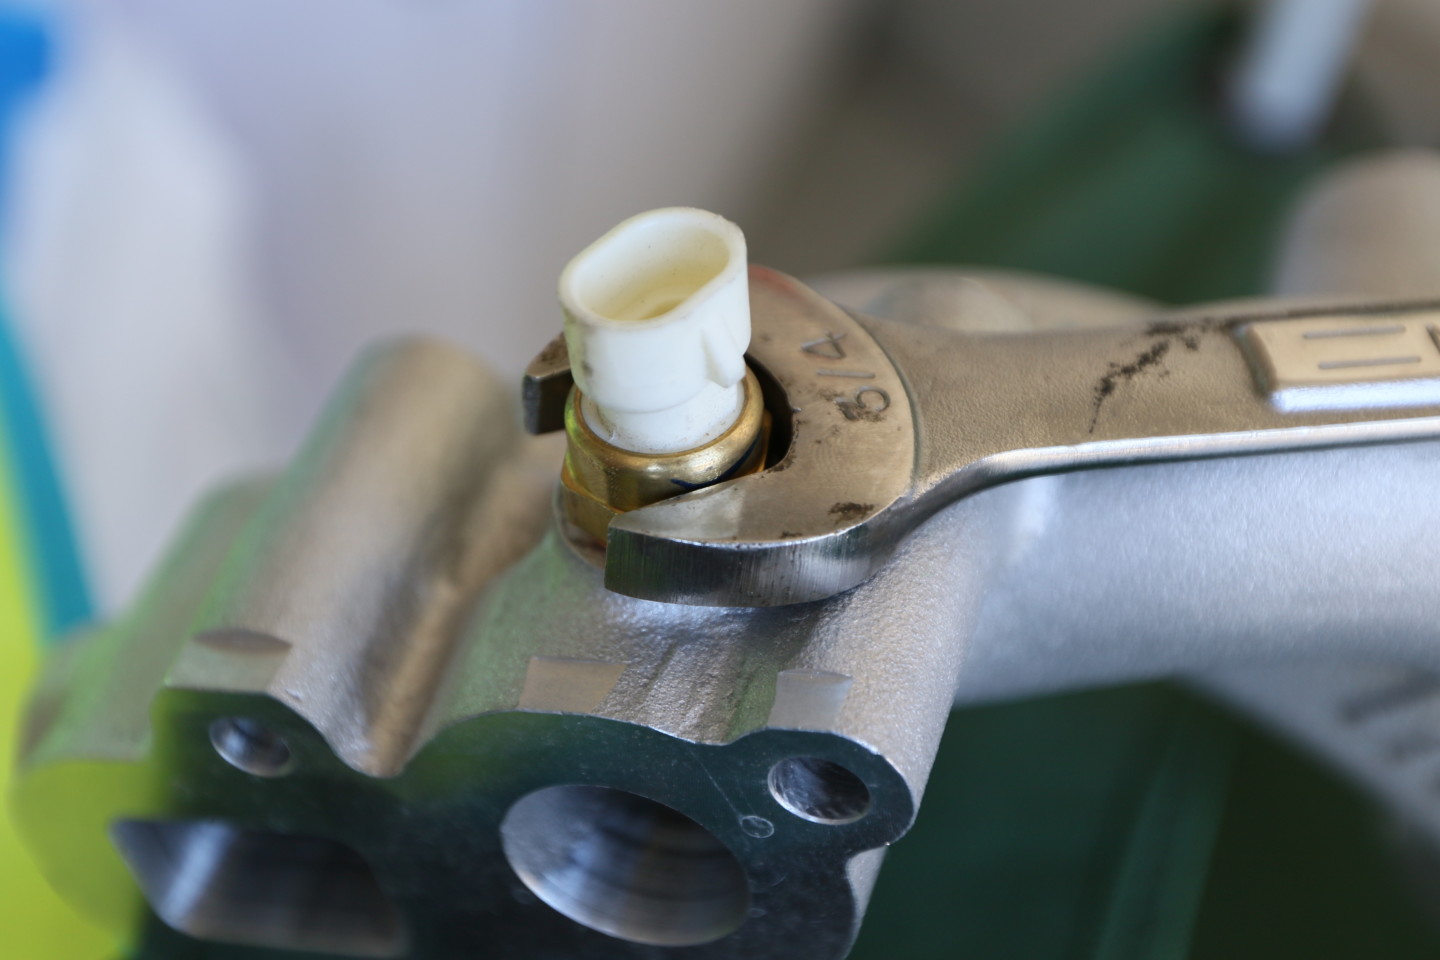
Swapping over things like the water temperature sending unit will need to be performed before the water pump can be bolted to the engine block.
As we have already discussed, the other accessories are bolted to the water pump. If you have decided not to use the power steering pump or have other provisions for an EPS or other power assist, there are different mounting bolt requirements for the water pump installation. The shorter bolts are included in the hardware kit.
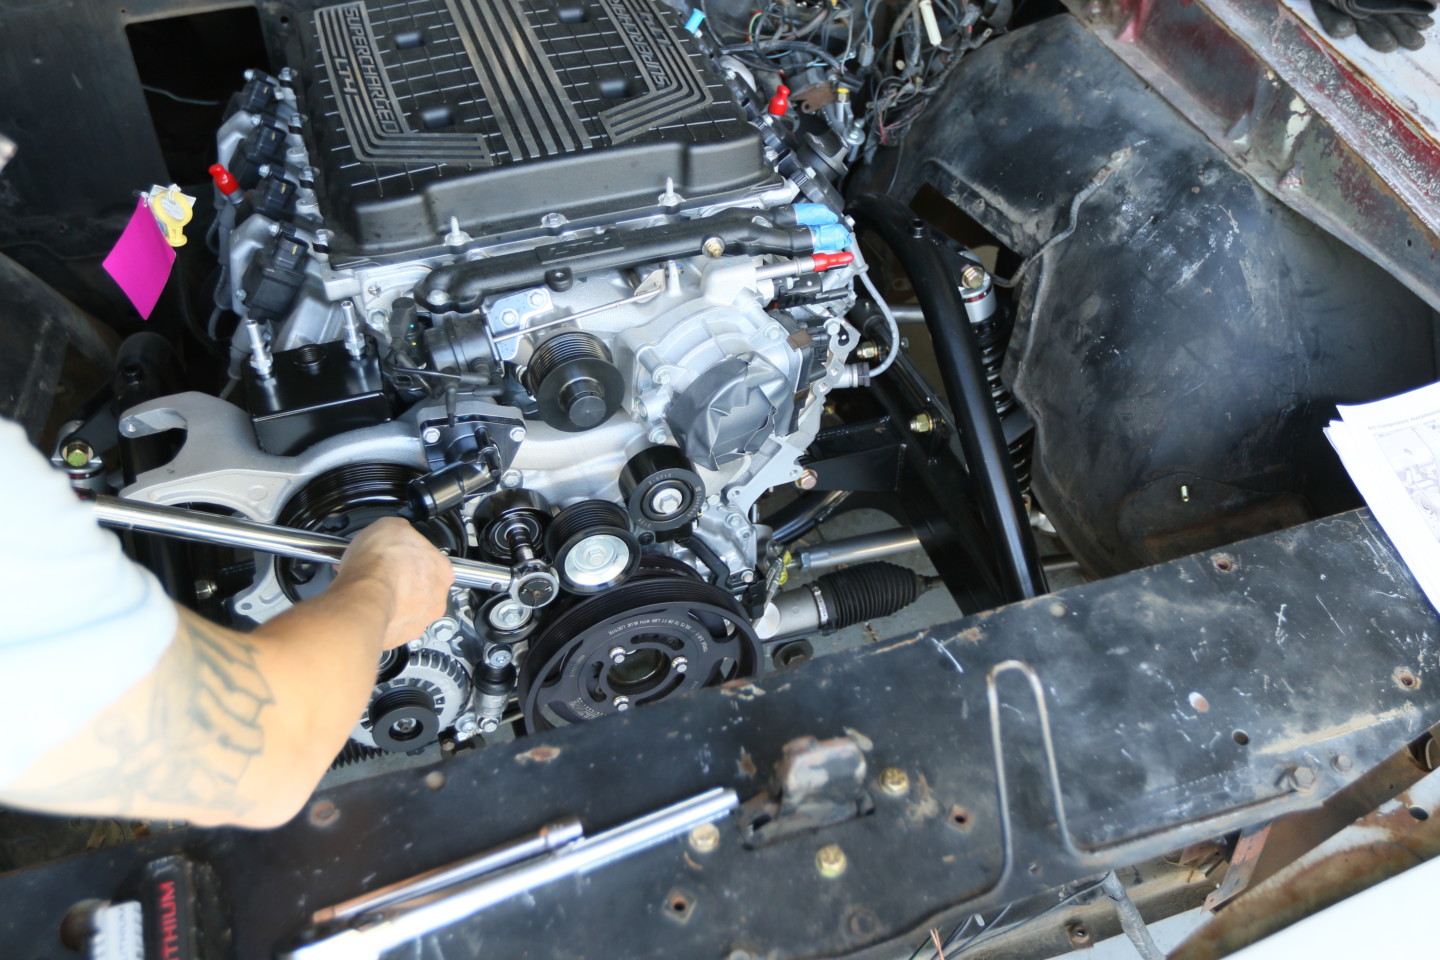
Once the water pump assembly is mounted on the engine, four idler pulleys for the belt drive are installed. Some of these pulleys are smooth to provide the maximum surface area to the belt’s smooth side. One of these pulleys is grooved to fit the grooved side of the drive belt. Of the four pulleys, this pulley should be installed last because it offers the easiest access after the others are bolted in place.
Coolness Denied
In every build, a little rain must fall. Our nurturing shower show came when it was time to install the A/C compressor. Holley has taken great efforts to ensure their front accessory drive kit fits almost any LT4/chassis combination, but we pushed the limits with our choices. In a previous article, we discussed in detail why we chose to base our build around the Schwartz Performance A-Body chassis.
Because the Schwartz Performance chassis sought to eliminate power-killing chassis flex, it is a beefier chassis – built that way on purpose. The larger cross members and shock towers make some of the other components involved a more limited choice. A fact we found out when attempting to install Holley’s A/C compressor. The upper shock mount brace prevents us from using the supplied component.
That didn’t mean that there was not a Holley solution to the problem. We are currently working with their team to use an electric compressor from another application. Currently, the Tesla compressor seems to be a logical replacement. Until we get a resolution, we plan on driving without A/C until the desert heat becomes too unbearable. Hopefully, we have a solution by that time.
As far as Holley’s compressor, this kit fits most classic GM platforms and fits the stock A-body chassis as-well-as many others. So there should be no problems for most enthusiasts using this kit.
Power Steering Pump
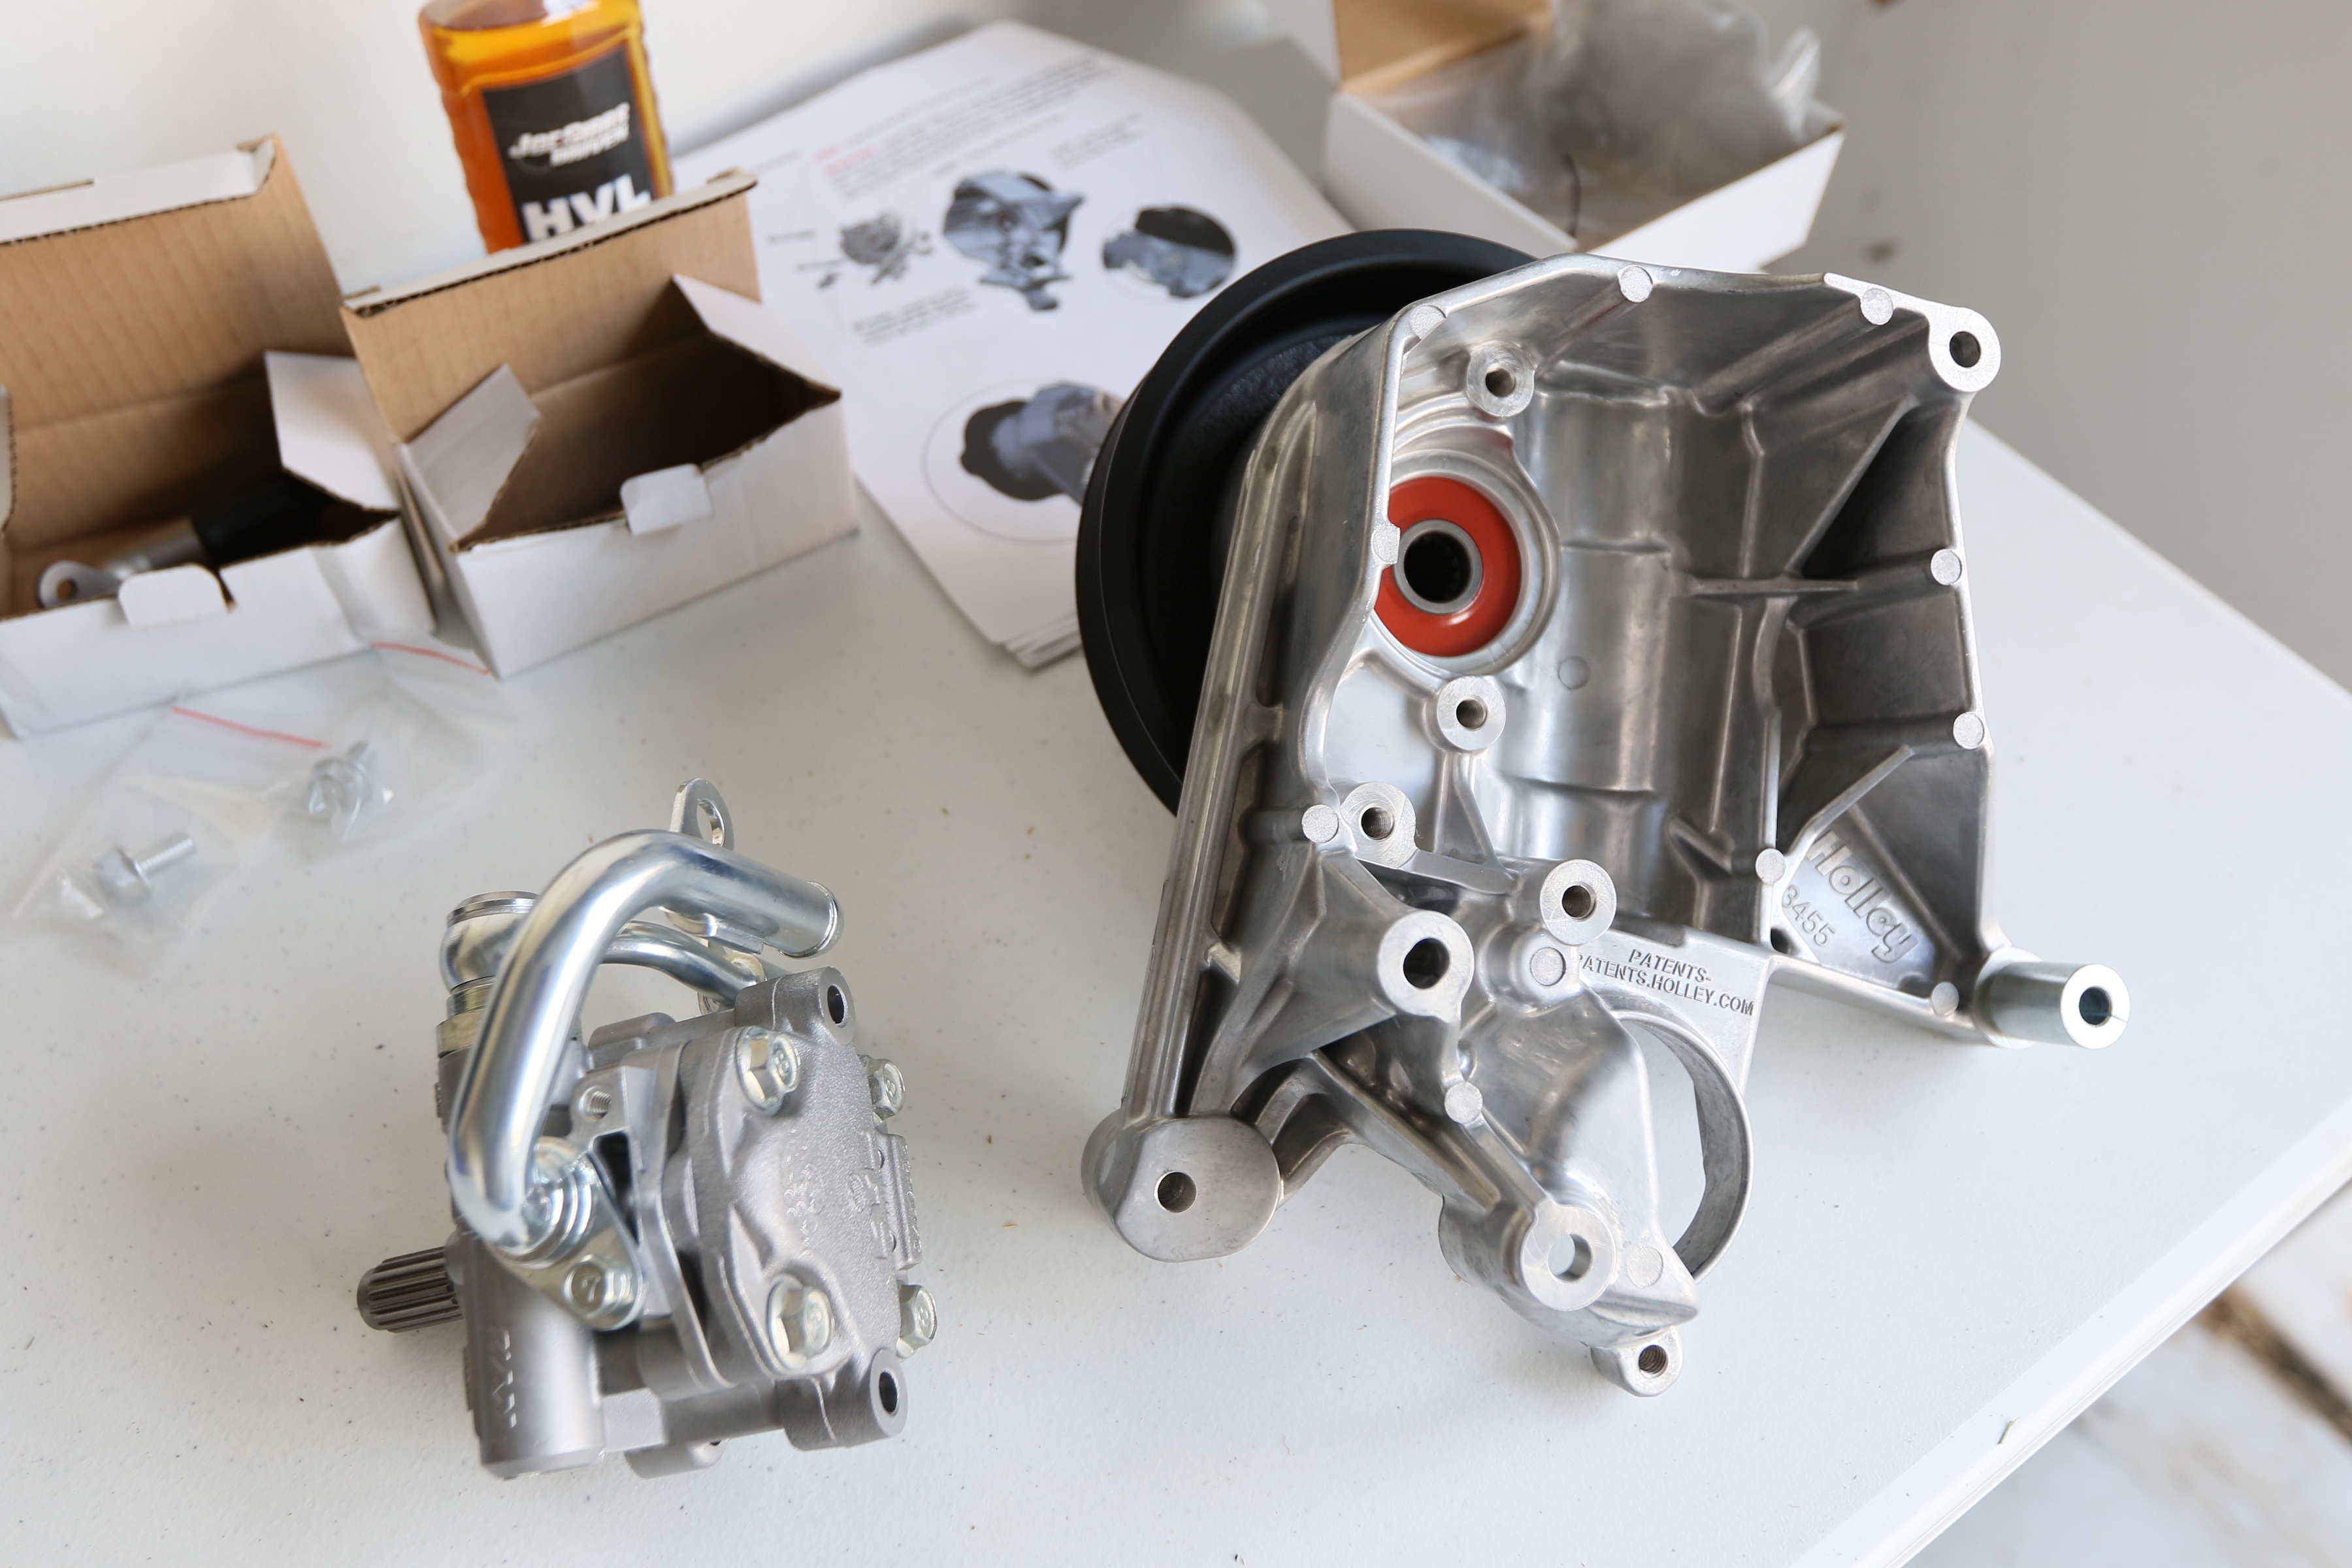
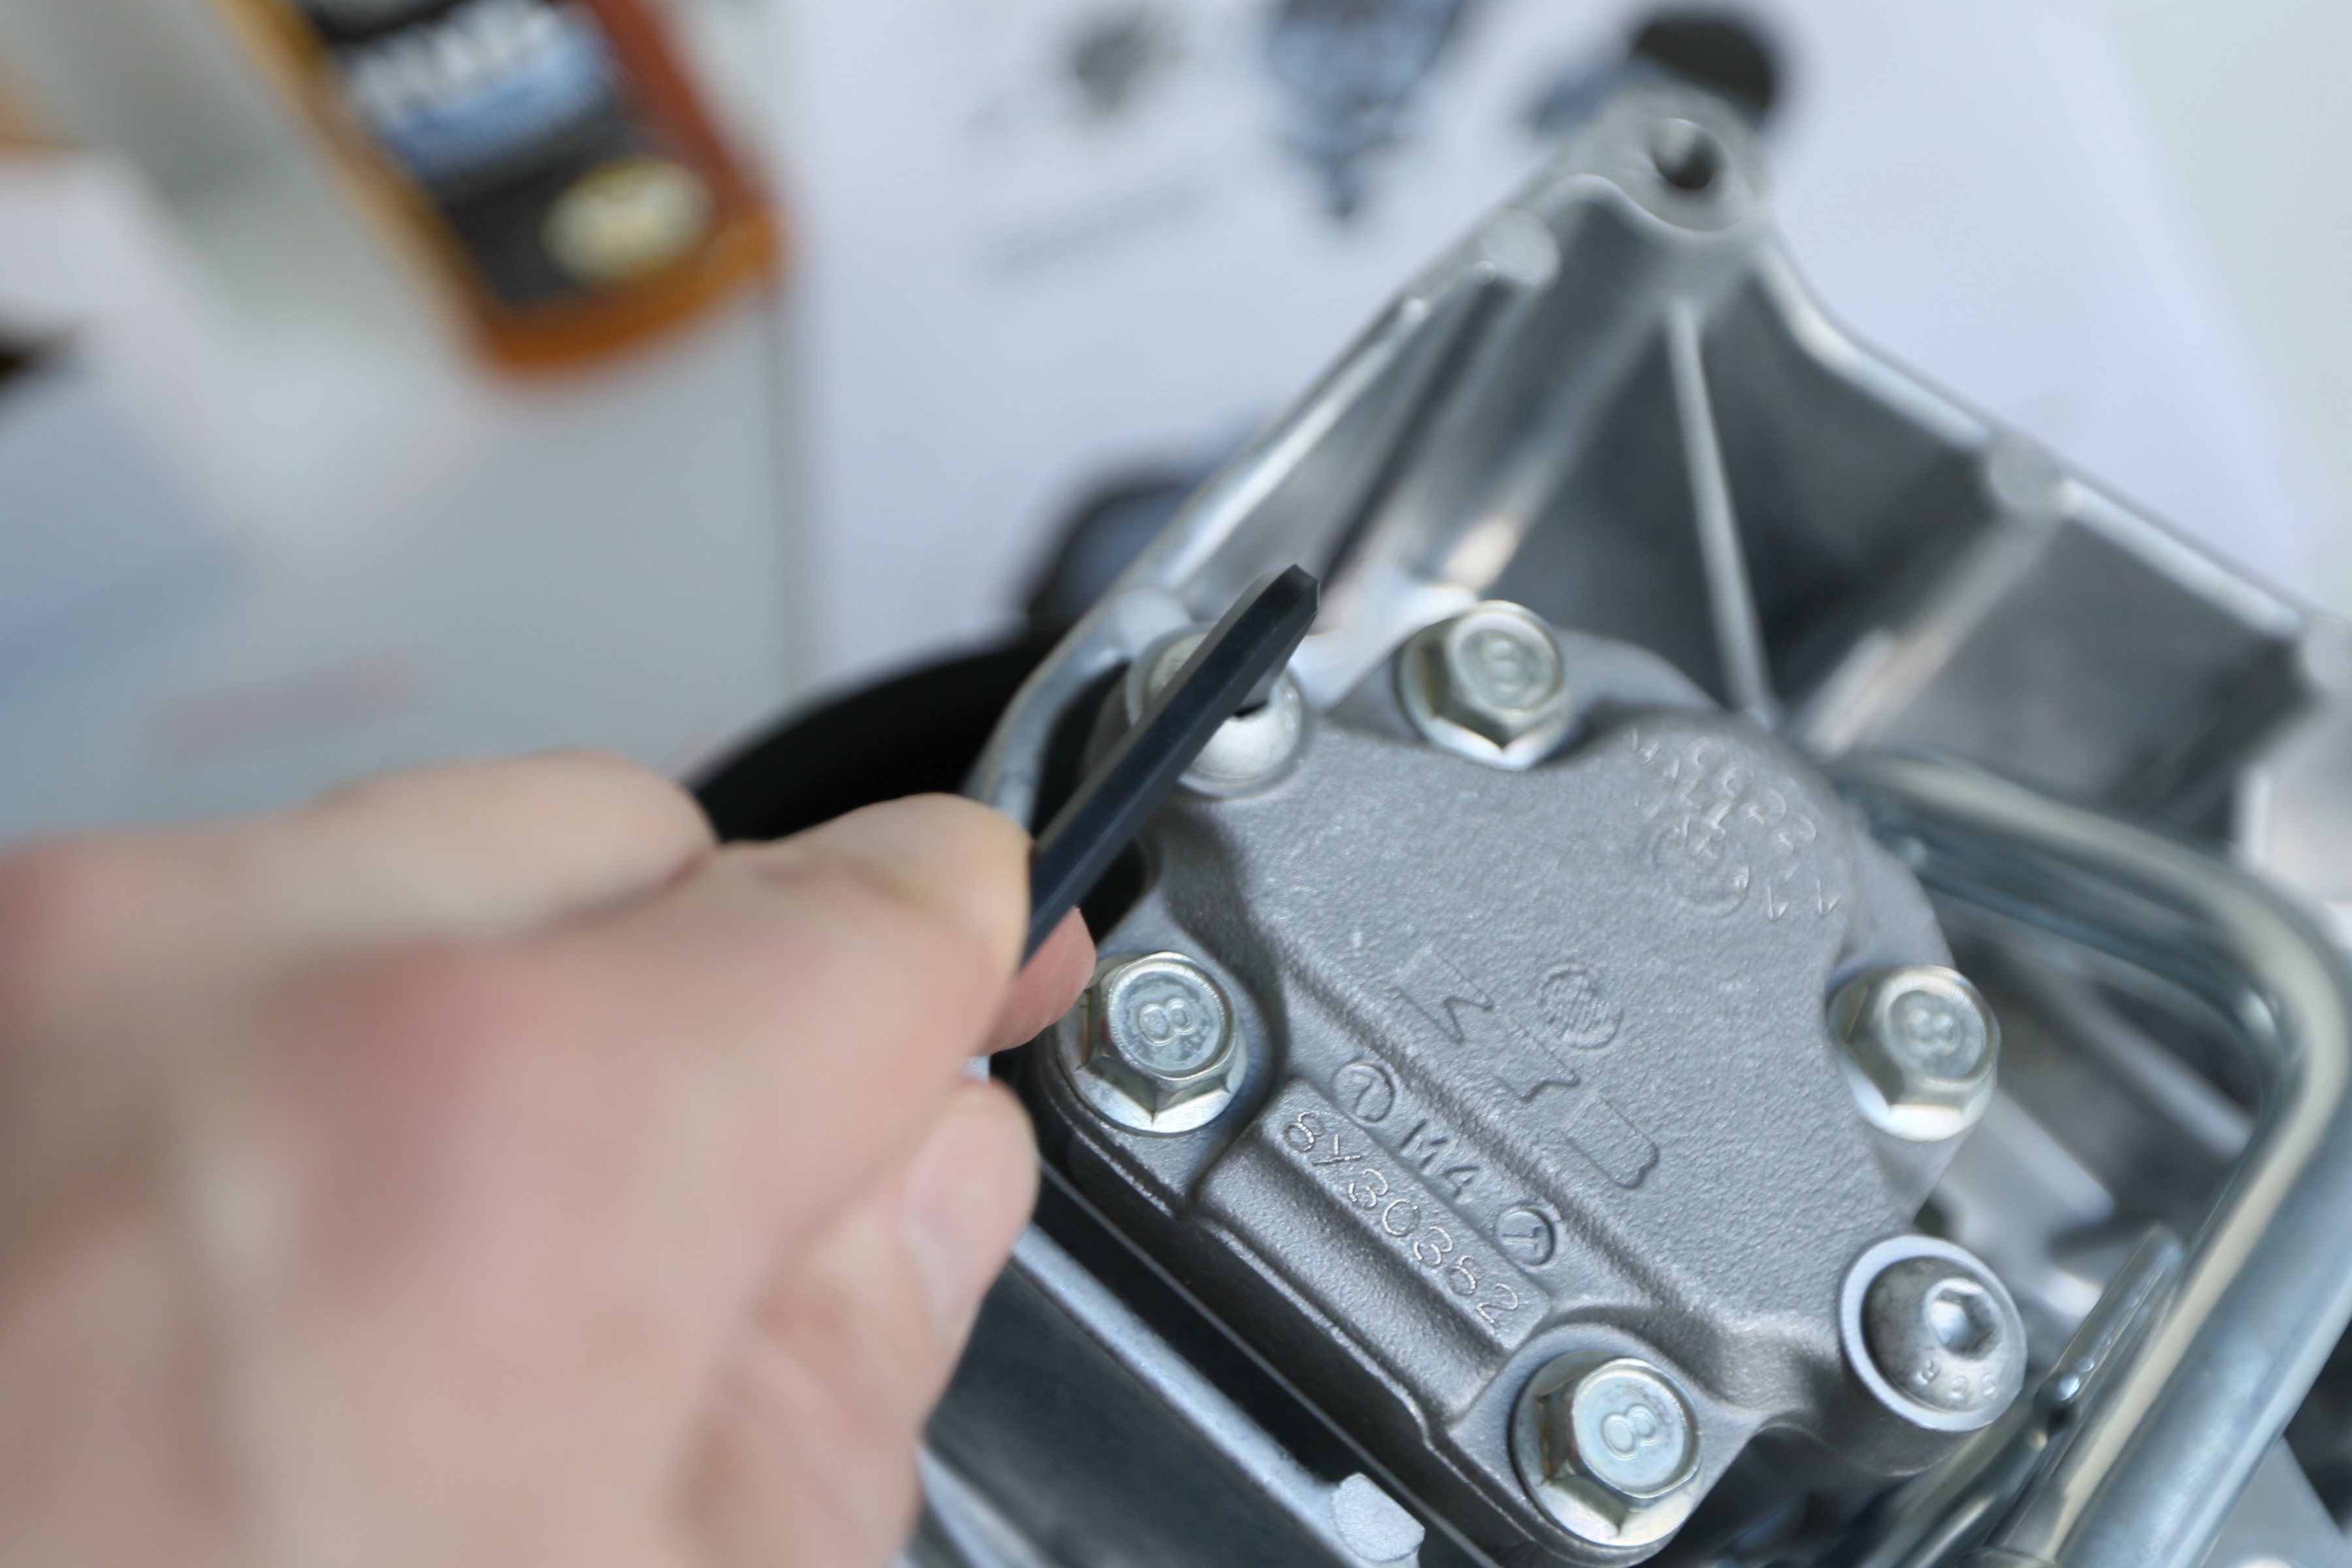
The power steering pump and supporting bracket were a snap to install. The pump actually bolts into the idler arm bracket and that entire assembly bolts to the engine block. There are three spacers that are used for the top mounts of the assembly – all are the same size but one is different shaped – but the installation is almost foolproof.
The power steering pump actually mounts inside the power steering bracket/pulley assembly.
The final part before putting on the belt rested with the power steering reservoir. Holley engineers reminded us the best shape and mounting location for the power steering pump reservoir varies for each swap application. Many times it is better esthetically to mount the reservoir to the fender or wheel well than to the engine.
Holley, and other aftermarket suppliers, offer several reservoirs to fit individual build needs. One good option is GM part #15285644. This reservoir is well matched to the Holley-supplied power steering pump and has substantial baffling. This reservoir will likely require custom mounting for each application.
Finishing It Up
In many kits, there are a couple of cosmetic covers that dress up the alternator and air compressor pulleys that many enthusiasts will use. In our case, we could skip the A/C compressor pulley cover for obvious reasons.
The last supplied part that should not be considered cosmetic is the angle adapter for the throttle body. Holley recommends using the adapter to increase the clearance of the throttle body to the supercharger belt. This adapter is probably a must when using a larger aftermarket throttle body.
As shown in the photos, we opted to use a Lingenfelter/ATI balancer and supercharger drive pulley, but that is not an issue with belt alignment on the kit. A major selling point of the kit, which is becoming a larger issue of late, this kit is legal for sale or use on emissions controlled vehicles, uncontrolled (non-emissions controlled) vehicles, and racing use only vehicles because it does not affect vehicle emissions and is not covered by emissions regulations.
Lastly, our shop crew gave the Holley accessory drive kit two thumbs up for great directions. Every section was supported with a hardware package designed for that specific section. According to our team, “We’d rather put this kit together than Ikea furniture any day.”
For more information on this kit or other Holley Performance products, visit them online at www.holley.com.


