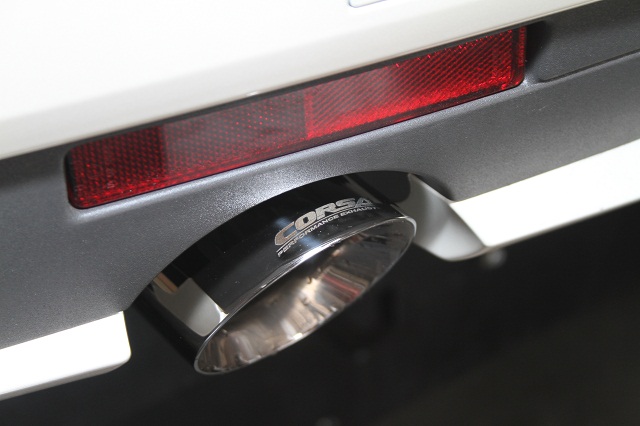
 The Cadillac CTS-V holds its own as a powerhouse straight from the factory. Whether its on the street or at the track, this four-door luxury sedan can switch from errand-runner to a street-legal drag car. While we respect the amount of power the stock supercharged LSA produces at 556 horsepower, we wanted to give our 2011 a bit more spice. To do this, we decided to open up the exhaust using a Corsa Axle-Back Exhaust System, and the intake of the boosted engine by switching out the stock intake for an AIRAID Intake System.
AIRAID Intake System:
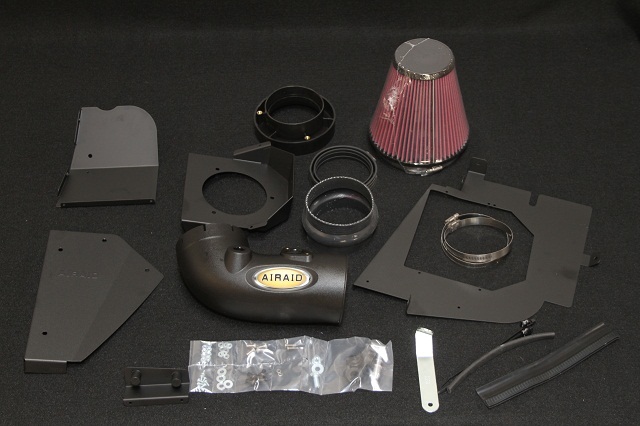
The AIRAID Intake System came with everything but one bolt that was needed for installation. For the one bolt, we used the factory hardware!
We talked to David Edelman and Rodney Bertram from AIRAID to get a better understanding as to why the AIRAID Intake System was superior for our CTS-V application. According to Edelman, the CTS-V is rather choked up from the factory due to the same intake being used on all models, from V6 to CTS-V! In order to increase the engine’s ability to breath and overall efficiency, a high-flow intake system was in order.
“Our intakes use only the highest quality materials, made in the USA,” Bertram stated. “Airaid intake systems are designed for unrestricted airflow, improving overall performance, offering a good balance of airflow and filtration.”
In addition to airflow, performance and filtration, the AIRAID Intake System offers two different finishes, a no hassle warranty, a direct bolt-on application and two different filter options. According to Edelman, the 5-layer, oil base filter is more popular for performance applications while the new 2-layer, non-oiled filter is known for easy maintenance. For our CTS-V, we decided to go with the 5-layer, oiled filter.
2009-2011 Cadillac CTS-V 6.2L System – Part #250-253
- Premium filter, filter adapter & intake tube
- MAF, rear and adapter panels
- Top cover & OEM cover bracket
- GM coupler & silicone “hump hose”
- Weather strip & packet of hardware
Pulling out the Old System:
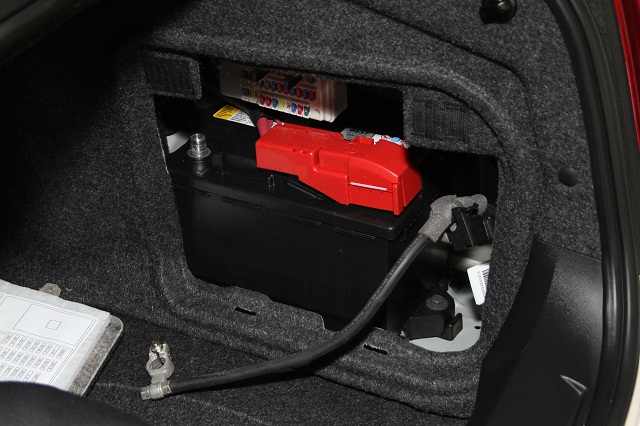
We had to pull out the stock CTS-V intake system before we could put the new AIRAID system on the car. Before we started removing parts, we disconnected the negative battery cable from the battery found in the trunk above the rear passenger side wheel well.
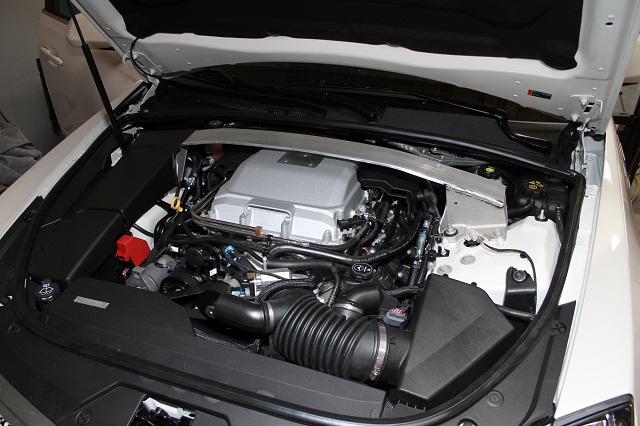
Once the electrical system of the car had been disabled, we removed the shock tower covers from the engine bay by pulling them up and sliding them out. By removing the covers, we were able to access the stock intake system and start removing it from the car.
First, we disconnected the mass air flow sensor. By squeezing the two grey buttons on the PCV fitting and pulling, we were able to remove the PCV breather line. We then removed the stock intake tube by loosening the clamps holding the intake tube to the airbox and the throttle body.
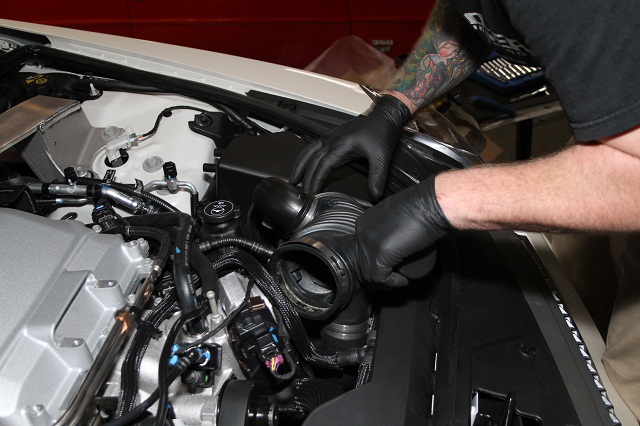
Twisting the factory air system toward the front of the vehicle was the key to removing it from the engine bay after we unscrewed everything.
To remove the airbox assembly, we removed the fender bolt holding it in place and pulled the coolant line off the top of the box. The airbox was then able to be rotated out of the engine bay, making certain that we didn’t lose the factory core support grommet.
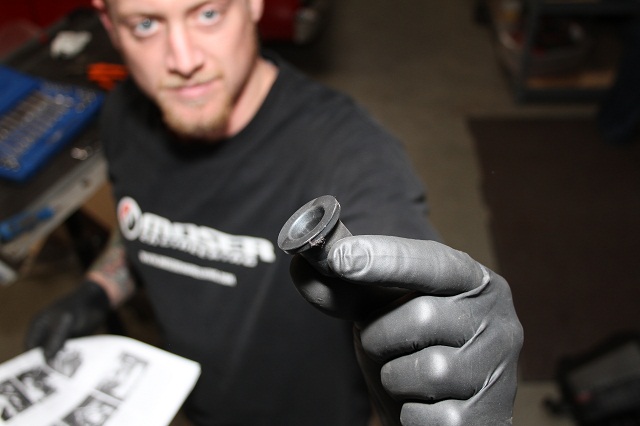
We made sure to not lose the factory core support grommet when removing the factory airbox. This grommet is important to keep for the installation of the new AIRAID system.
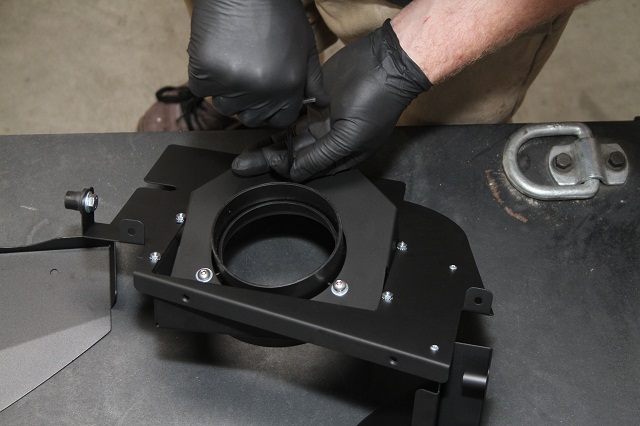
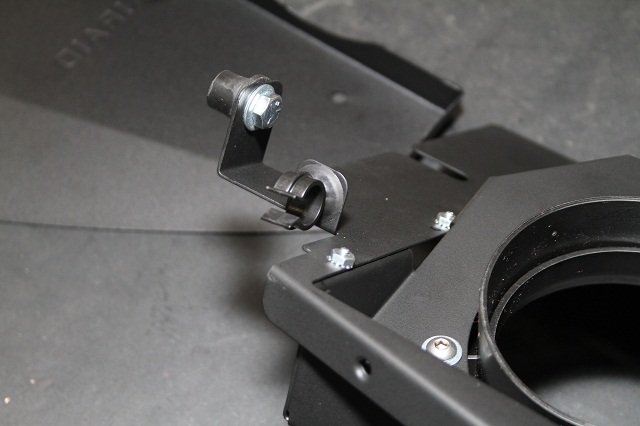
In order for the AIRAID system to work properly on the CTS-V, we had to install an adapter panel to the MAF panel that came with the new system. To do this, we attached the adapter panel to the MAF panel with four 6-32 screws and Kep nuts as well as the flat washers that came with the system. We then attached the rear panel to the MAF panel using two more included 6-32 screws. Using the two remaining sets of 6-32 hardware, we attached the OEM cover bracket to the rear panel. We then attached the 5/8-inch well nut to the vertical MAF panel tab using the 5/16-inch hex bolt and flat washer combination.
To install the filler adapter, we attached it to the MAF panel using three 1/4-20 button head screws and 1/4-inch flat washers. We then attached the weather strip around the curved edge of the MAF panel. Two hose anchors were included in the hardware and we placed these in the two horizontal tab holes on the MAF panel.
We transferred the MAF sensor from the stock airbox into the AIRAID intake tube and secured it in place using the included 8-32 screws and lock washer. Then we installed the GM coupler onto the throttle body side of the AIRAID intake tube. On the filter side of the intake tube, we installed the hump hose. We then placed the grommet that came with the AIRAID hardware into the hole on the intake tube. We followed that by inserting the barded end of the PCV fitting into that grommet.
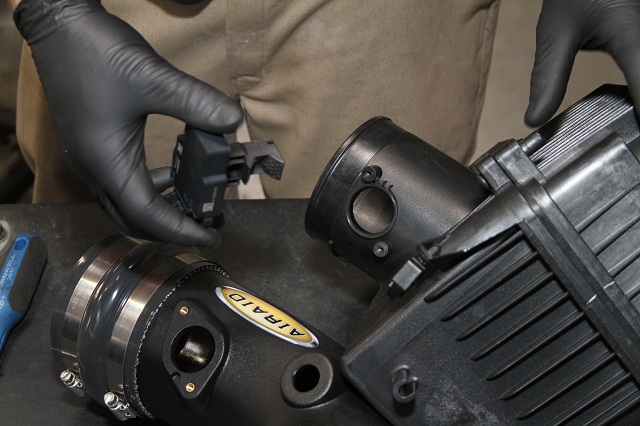
For our new AIRAID Intake System to work properly, we had to remove the MAF sensor from the factory intake and transfer it to the new intake tube.
We installed the bracket onto the rear panel using one 1/4-20 button head screw, a 1/4-inch flat washer and 1/4-inch serrated nut. To complete the assembly, we attached the AIRAID Premium Filter to the filter adapter.
The stock ground strap bolt had to be removed from the chassis so that the AIRAID Performance Airbox could be lowered into the engine cavity. The well nut was inserted into the core support grommet before we rotated the assembly toward the rear of the car until the bracket rested on the shock tower. We then made sure that the lower tab hole on the MAF panel lined up with the chassis bolt hole. The assembly was secured in place by reusing the stock chassis bolt.
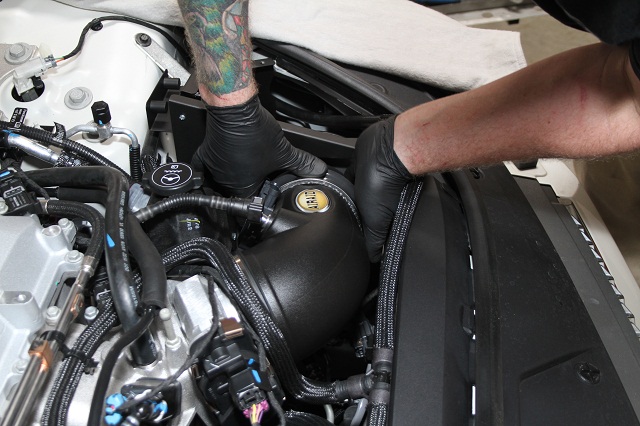
The new intake system was easily put in the engine bay after the factory ground strap bolt was removed. With a little bit of wiggling, we were able to finagle the new system into its proper place.
We installed the intake tube onto the filter adapter before we slid it onto the throttle body. After making sure it fit properly, we tightened the three hose clamps on the assembly. We then reconnected the breather line to the MAF sensor. Sliding the edge clip cable ties about 6 inches apart along the fender pinch weld, we returned the coolant line to its location and secured it using the ties. We then clipped the excess off of the end of the ties.
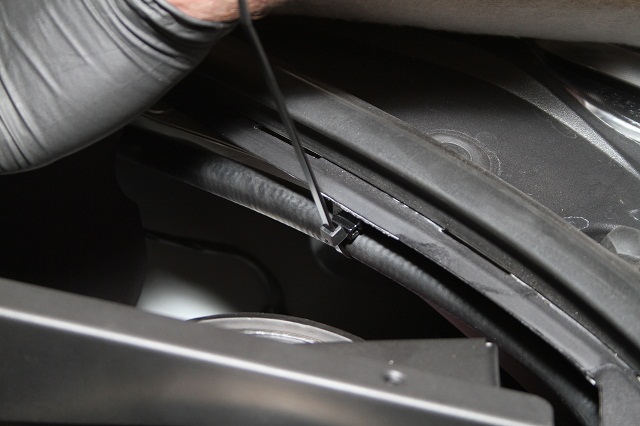
So that the coolant line was not in the way of the new system, we secured it along the fender pitch weld using cable ties.
After we attached the edge trim to the system cover, we put placed the cover in place and attached it using the four black 1/4-20 Phillips Head screws. We then aligned the bracket with the fender bolt hole and attached it using the factory hardware.
After double checking our work to make sure that all hoses were hooked up and all clamps, bolts and screws were tight, we reinstalled the factory engine and shock tower covers. We checked the hood clearance as soon as everything was in place, completing our AIRAID Intake System modification.
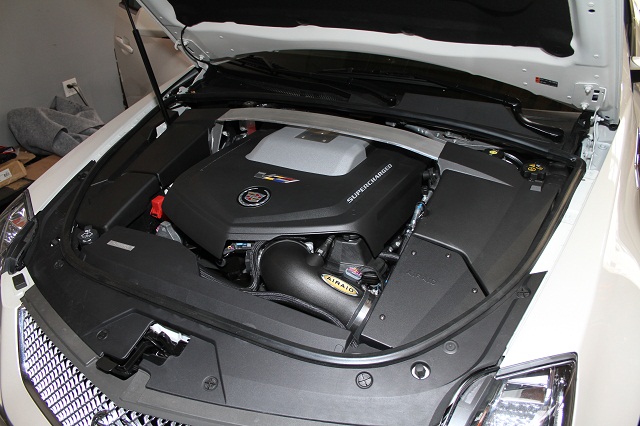
The new AIRAID Intake System cleaned up the engine bay of the CTS-V a bit and looks better than the stock system.

Our "Before" pull on the Dynojet chassis dyno netted a peak of 448.01 horsepower and 457.94 foot-pounds of torque from the stock LSA powerplant.
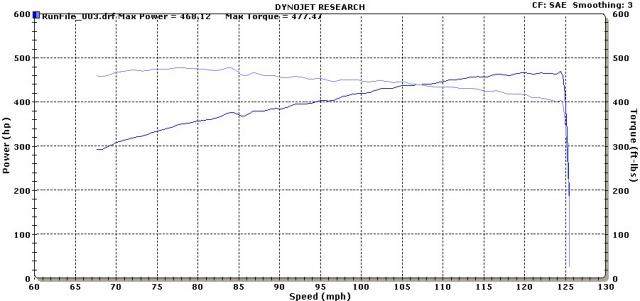
With the new AIRAID intake installed, we saw 468.12 peak horsepower and 477.47 foot-pounds of torque, a gain of more than 20 horses and almost 20 foot-pounds - pretty good for "just an intake!"
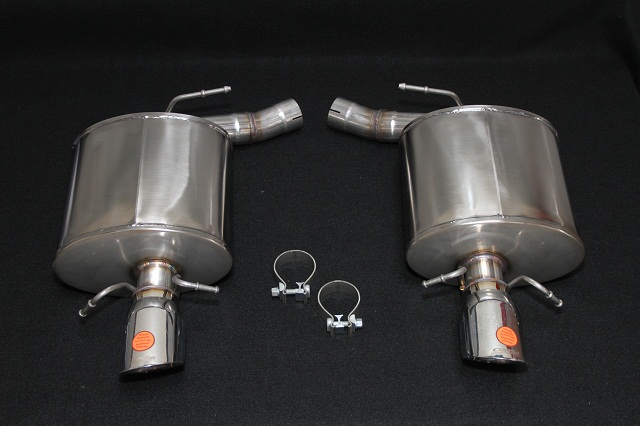
The Corsa Exhaust System came with the passenger and driver side muffler assemblies and clamps. The factory hardware was used for the rest of the materials needed for the installation.
2009 CTS-V Axle-Back Exhaust System – Part #14941
- Driver and Passenger Side Muffler Assembly
- Hardware Kit
- Packet of Anti-Seize
We talked to Craig Kohrs at Corsa to get a better idea on why the Corsa system was a good fit for our CTS-V exhaust. “Our claim to fame at CORSA is the ability to deliver a drone-free environment during cruise, a performance sound outside, and premium level workmanship,” he explained.
Two different axle-back systems are offered through Corsa for the CTS-V. For our application, we decided on the Sport system as opposed to the Touring system. According to Kohrs, the difference between the two systems is the exterior sound from the exhaust. “Sport products add a more pronounced performance tone upon initial start up and through the gears,” stated Kohrs.
Removing the Stock Exhaust:
Before we could install our new Corsa exhaust system on the CTS-V, we had to remove the old mufflers and stock exhaust piping. First we measured 6.5 inches from the inlet weld of the rear muffler on the passenger side and marked it. We then cut the exhaust pipe at the mark using a pipe cutter. We did the same on the driver’s side.

The stock exhaust pipes must be cut at 6.5 inches from the inlet weld for the muffler assembly of the Corsa Exhaust System to fit properly. Fortunately it's an easy job with a reciprocating saw or cutoff wheel.
Using pliers, we pulled the front passenger side muffler hanger from the rubber isolators. The inner and outer rear hangers were then removed from the rubber isolators at the rear of the muffler. This freed the passenger side muffler assembly from the car. We removed the hangers on the driver’s side as well, allowing us to pull off the driver’s side muffler assembly. The old mufflers and piping were set aside since we didn’t need them for the new exhaust modification
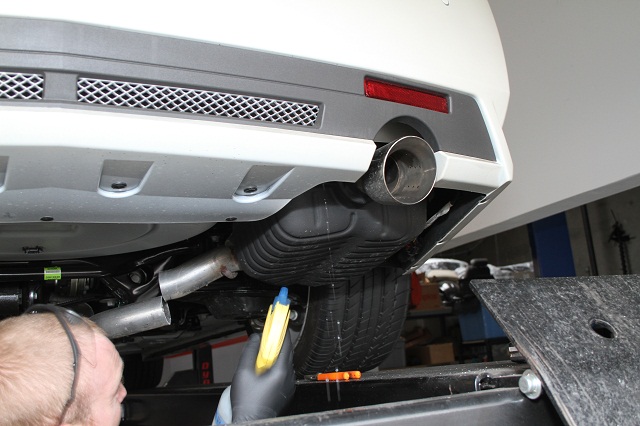
In order to aid in our removal of the hangers from the rubber isolators, we applied a soapy water solution on the connection points, allowing the hangers to slip out more freely.
To make the installation of the new assembly easier, we filed the cut edge of the retained factory pipe on both driver and passenger sides.

Filing the cut end of the stock exhaust pipe gets rid of all the burs and metal fragments left from the cutting process.
Installing Our New Exhaust:
After taking inventory of the components for our new system, we set to work installing it on the car. To start, we applied anti-seize lubricant to the threads of all the clamps and flange bolts.
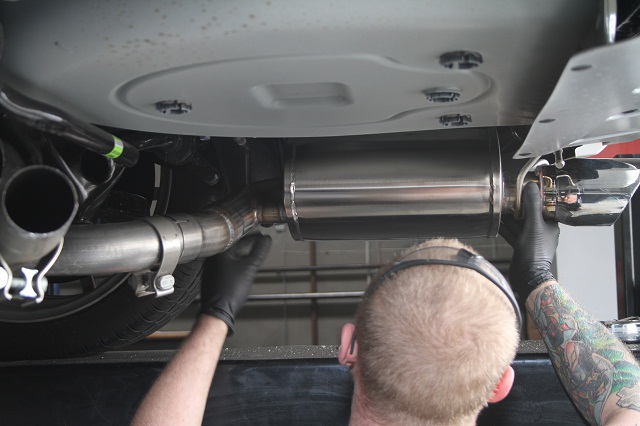
When sliding the muffler inlet over the stock exhaust pipe, we made sure that the inlet was positioned deep enough that no gap could be seen through the pipe notch. This insured the proper placement of the muffler assembly.
We wanted the exhaust tips to be flush with the rear end of the car like that factory tips were, so we adjusted the overlap between the inlet pipe and the factory pipe to get this result. We then tightened the clamp on the muffler inlet pipe to keep the muffler assembly in place. The same process was done on the driver’s side, completing our exhaust modification.
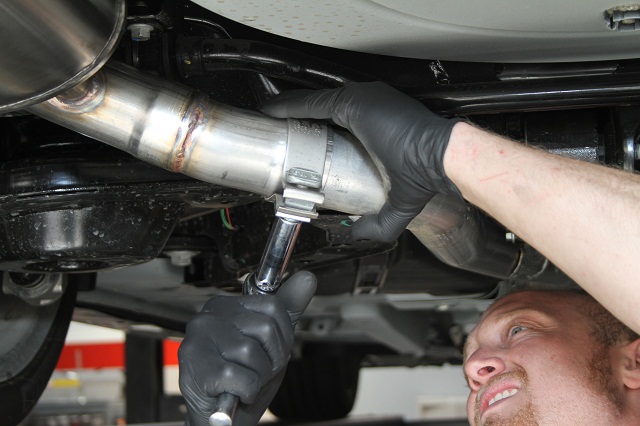
In order to keep the muffler assemblies in place, we tightened up the clamp on the muffler intake pipe.
We wanted to make sure that everything was in place, so we did a final visual inspection- checking the exhaust and tip positions, pipe clearance and clamp orientation. We then tightend all the clamps on the system, torquing the nuts to 45 foot-pounds.
Dyno Pulls:
Before we started our modifications, we put the stock CTS-V on the DynoJet to see what kind of power it was producing. Upon running it, we came up with 448 HP and 458 foot-pounds of torque. After we completed each stage of our project, we put the CTS-V back on the dyno to see what kind of power gain resulted from our modifications.
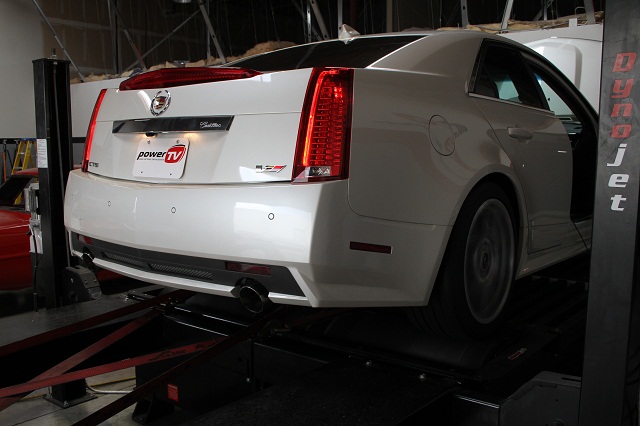
By running the CTS-V on our DynoJet chassis dynamometer after every phase of our project, we were able to track the horsepower and torque increases that the modifications created.
For as simple as our modifications were, the end results were rather significant. After we installed the AIRAID Intake System, the CTS-V produced 468.12 horsepower and 477.47 foot-pounds of torque on its dyno pull. After we completed the installation of the Corsa Axle-Back Exhaust System, we did one last dyno pull with the CTS-V, resulting in 473.03 horsepower and 466.44 foot-pounds of torque.
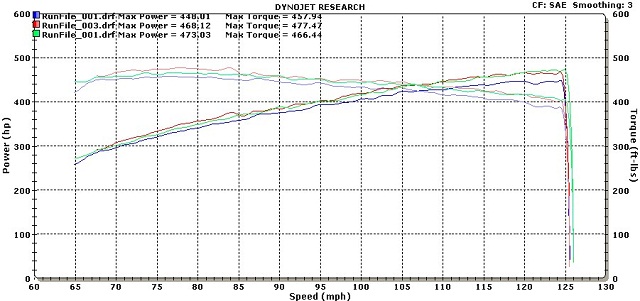
A summary of our dyno results shows that we gained 20 horsepower and 20 foot-pounds over stock with the AIRAID intake system, and an additional 5 horsepower with the Corsa exhaust.
As is the custom here at PowerTV, after we completed our modifications, we took the car for a test drive. As promised, the exhaust system produced minimal sound in the interior at idle. Upon stomping on the throttle, the CTS-V responded quickly with a bit more aggression than before. Even as the car accelerated hard down the street, the exhaust was very quiet in the interior of the car thanks to Corsa‘s RSC Technology. While our modifications added noticeable power, the CTS-V was still able to maintain its luxury Cadillac feel – a great combination for anyone looking to add an edge to their CTS-V while maintaining its posh feel.
At the Track:
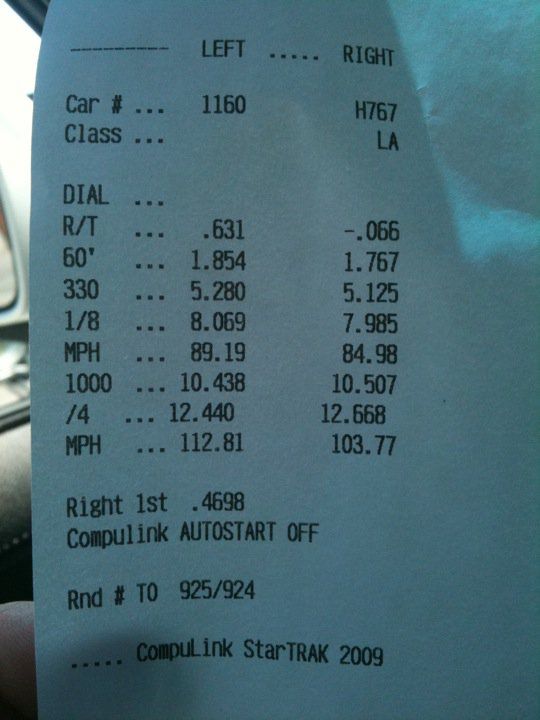
While we didn’t get a chance to run our Caddy down the 1320 before we dug into the modifications, we couldn’t resist the opportunity to see how we could do with our new-found horsepower. On street tires, at full weight, our best pass was a 12.440 at 112.81 MPH, and a 1.854 60-foot time. It’s astonishing that a car with this much comfort and luxury (not to mention curb weight) can be so quick.


