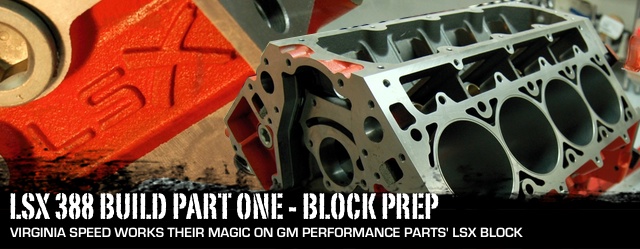
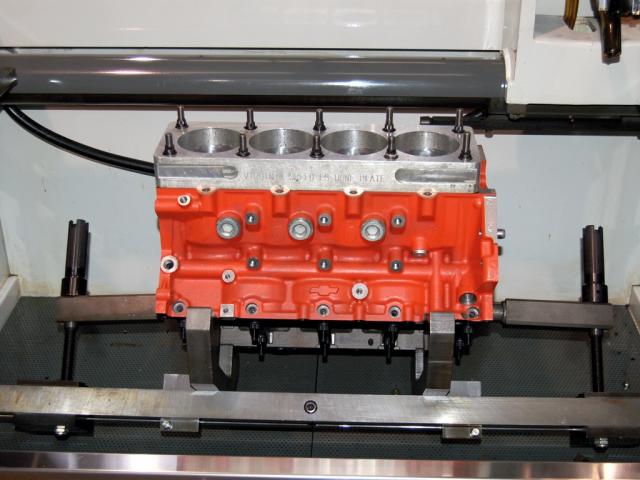
The foundation for any performance engine build is the block, and our LSX-based race motor being built by Virginia Speed is no exception. Before any of the sexy hardware from Trick Flow, ProCharger, Holley, Lunati, JE, GRP, and a host of other partners in the build can be added, we first need a solid framework to bolt it to, and that’s where we find ourselves now.
In our project introduction, we outlined our goals – competitive, reliable power for the PSCA’s Limited Street class – and our game plan – building a 388 cubic inch LS fed by a ProCharger F1-C. In this first of many installments as the engine comes together, we’ll take a look at what Virginia Speed has done to get our GM Performance Parts LSX Bowtie block ready for combat. With race engine builds (and even for the street) details will make or break the project, and VA Speed’s Shawn Miller will take us through it step by step.
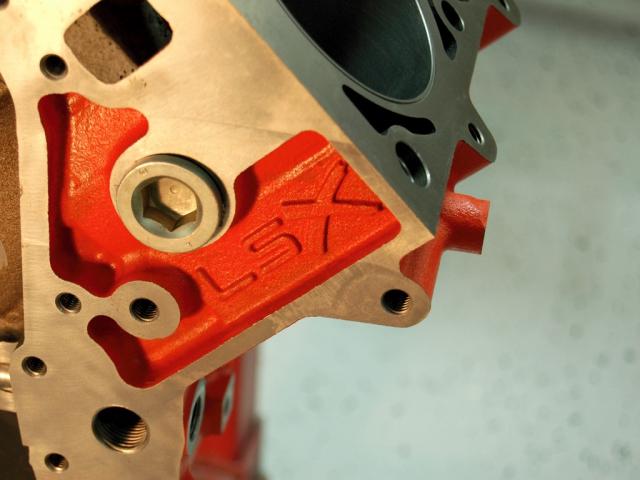
The raw material Virginia Speed is starting off with is a LSX Bowtie block, an iron casting that GM Performance Parts developed to offer race-worthy strength at an affordable price. The block features 6 head bolts per cylinder, LS7-style 6-bolt dowel located billet main caps, and a bunch of other performance-oriented features not necessarily found on production LS blocks:
- True priority main oiling
- Extra-thick siamesed cylinder bores with standard 4.400″ spacing
- Wet or dry sump oiling capability
- Production style deep skirt head bolt holes
- Front motor plate mounting holes
- Additional material cast around cam bearing holes
- Cam bores machined for supplied bearings
- Main web bay-to-bay breathing holes
- Threaded water plugs
The LSX block is available in both standard (9.260″ semi-finished, ready to be decked) and tall (9.720″ semi-finished) deck heights – ours is standard – and as an LSX376 or LSX454 finished block, as used in GMPP’s crate engines.
Block Prep Before The Block Prep…

Mmmm… delicious! To help support the cylinder walls, the first step in Virginia Speed’s block prep process is mixing up a batch of block filler.
While the as-supplied block is totally appropriate for a high-horsepower street build as-is, when you’re going for 1200-plus supercharged horsepower in a race build, you can’t be too careful. To help keep everything in line when the pressure is on, Virginia Speed started off by using block filler to reinforce the cylinder bores.
“Filling the block is the prerequisite before we do any machine work,” Miller explains. “What we’re trying to achieve is stiffening the block as much as possible. The downside is that the more material you put in, the less cooling capacity you have. You have to balance out how much cooling you need versus how much strength. I would love to fill the block all the way up, but realistically in a gasoline drag race application, I need to have a certain amount of cooling capacity left in the block.”

“On LS engines, what I generally do on a drag race application is fill the block halfway up the square water pump hole,” says Miller. “That gives you about 3/4 of an inch of coolant at the top of the cylinder. Most of your heat is at the top of the cylinder anyway. Through years of experience, we’ve learned that’s about the optimum amount.”
For non-race applications, cooling capacity has to take precedence over absolute block strength – per Miller, “What we would do on a street engine is usually down below the water pump hole by about a quarter inch or so. The biggest thing you have to remember in a street application is that the coolant cools your oil as well, and the coolant at the bottom of the cylinder helps keep the oil temperature down. What generally happens is that your oil temperatures end up a lot higher, so if you’re running an oil cooler, you need to run a bigger one, and if you’re not running one, you need one.”

Per Miller, this level of block fill will only add approximately 4-5 pounds to the dry weight of the engine. Keep in mind that it will also be displacing water, which reduces the overall weight gain to some extent.
Miller also explains that the chassis the engine will live in also has an influence on the total heat-rejection capability the engine will need. “The LS engines with cast oil pans don’t dissipate heat as fast as the old small block Chevys running a tin oil pan, and new cars don’t get air under them like the old cars did,” he points out. “Generally LS motors run high oil temperatures to begin with – 200-plus degrees. Once you add block filler, you’ve raised the oil temperature another 30 degrees or so.”
The bottom line is that for a street-driven C5/C6 or 4th Gen F-body, a short fill like our LSX block received probably isn’t necessary. “The only time we fill a street car motor is if we really have to. Even up to 12-1,300 horsepower you don’t need it. If you’re doing some crazy 1,500 horsepower engine, that’s when you need to start strengthening the block up,” Miller advises.
Establishing a Baseline
With the block filled, it’s time to begin removing metal, and in order to do that accurately, you first have to establish a frame of reference. That benchmark will be the crankshaft centerline, the camshaft centerline, and the plane drawn between the two. Miller explains, “The next thing that needs to be done is to line bore the block to get the mains straight in the block and exactly where we want it. Everything in the engine is based off of the crankshaft and camshaft relationship. The crankshaft is your zero point, and drawing a straight line through it and the cam will give you your centerline to come off of at 45 degrees to either side to put the bores in the right location, and lets you put the decks at the right angle.”
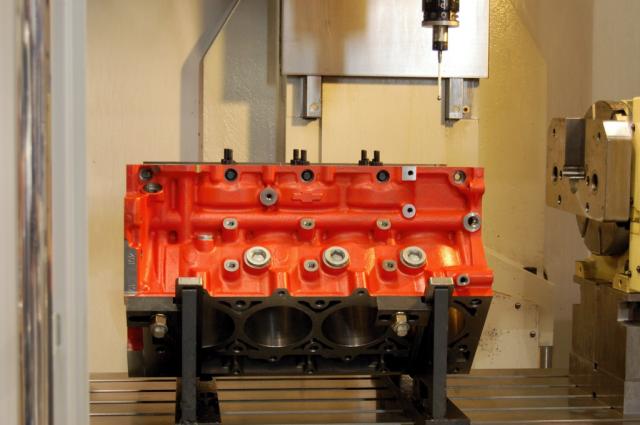
To maximize the accuracy of every part of the machining process, Virginia Speed uses their CNC mill to first measure the dimensions of the block before any shavings are generated.
The main bearings are align-bored first to establish a reference point for every other machining operation. The LSX block is supplied with extra material in the mains to allow them to be bored exactly in line without going oversize.
With the mains machined, a steel rod becomes the pivot point for the remaining CNC measuring and machining operations.
Once the crank and cam bores are accurate, the rest of the work on the block can begin in earnest, but not before establishing where to start. “Now, we go in and put it in our CNC and measure the bore locations, deck heights, and other dimensions,” Miller continues. “That tells us where everything is relative to the crank centerline, everything about the block.” Because even the most carefully cast block is subject to some variation, this measurement step is critical in determining how close reality is to the blueprint, and what the machining limits are for each individual engine.

The CNC readout tells the tale – per Miller, “What that shows is bore diameter, and you’ll see where it says “Print X” – that’s where the blueprint says it should be in the X axis, which is front to rear of the block. The number in parenthesis is where it should be, and the number beside it represents the actual location of the bore. The Y location is the center of the crankshaft, and the bore should always be dead on that line. In this case you can see where it was 20 thousandths off. That printout also shows our deck height at the front, middle, and back of the block, and side to side across the deck. That’s our initial readings on where everything is.”
Let The Chips Fall Where They May…
With the measurement complete, the game plan for the engine comes together. “You take that information and say, “I want to bore this thing – can I bore it where it belongs on the blueprint location, or do I have to bore it where the cylinders currently are?” I have 24 thousandths I am off, so that means I need to bore it at least 60 thousandths over to clean that up. Luckily for us, with this 388 we wanted to take it to a 4.125 bore, so we have over 200 thousandths we need to take out anyway.”
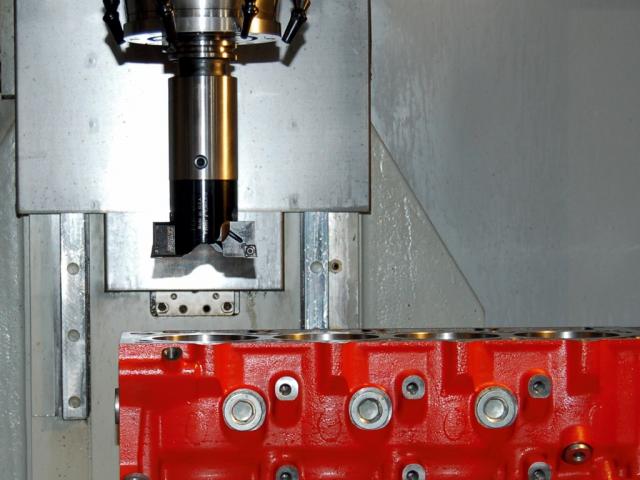
“Our first step is that we are going to bore the block, and because we’re going over 200 thousandths out, we will rough bore it first,” Miller explains. “It has two cutters on it, and you can take a lot of material out with that head. You get it close to where you want it – I probably took it to 4.100 bore with the rough cutter. Then you put the finish bore head in, which is a single bit cutter that spins really fast and gives you a nice finish. With that, we machine it to within 5 thousandths of our final bore, so that would be 4.120. The final hone will take all the tears out.”
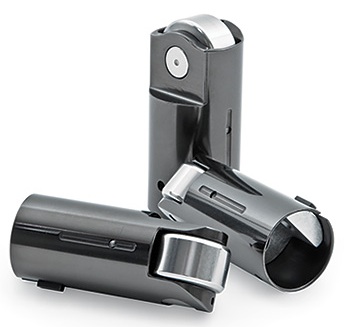
The lifter bushings must be machined to accept Jesel’s keyway lifters, which provide precise cam-to-roller alignment without the added weight of tie bars or tall bodies for dog-bone retainers.
Once the bores are cut, the CNC process moves on to the lifter valley. “The next step will be boring the lifters out. We take our lifter boring tool and we machine it out to 1.060, which is the diameter of our keyway lifter bushing,” says Miller.
The Jesel mechanical roller lifters we will be using on this build are a keyway type that doesn’t require a dog bone or tie bar to keep in alignment with the cam lobe – instead, a key on the lifter body engages a slot in the pressed-in lifter bushing.
“We bore all those out, and put a thou-and-a-half press fit on those bushings,” Miller explains. “Then, we press the bushings in, and there is actually a tool on the CNC machine that pushes them in. With the keyway bushings, you have to make sure they go in straight, because if they’re not, the lifter will be crooked on the cam and wear the lifter and lobe out.”
The lifter bores are machined to accept the bronze keyway bushings.
Per Miller, 'The tool that goes on the CNC is perfectly in line with the Y-axis off the mains of the block, and it pushes them in to a predetermined height. After that we go in and bore out the bushing to within 0.0002 of the size we actually want, and we will hone it to the final size. If you try to hone more than that, you can actually get the bushing to have a banana shape to it - you can measure it with a dial bore gauge and it will say it’s OK, but we’re not measuring for straightness. What we have to do is get it as close as we can with boring, then just do a cleanup with the hone.'
Details like the lifter bushing boring and honing sequence, while seemingly minor, can have a big impact on the longevity of an engine. Miller says, “That’s something that if you’re not paying attention to detail, you can measure everything and it will all look perfect, but when you put the lifter in it can get tight because of that banana shape.” Builders who are careless or in a hurry may overlook items like this, to the racer’s detriment.
“They’ll put it together anyway, then go out and race it and just tear up the lifters and bushings, and not even understand what’s happening. You can’t measure it, so you have to make sure it’s right the first time.That’s where the level of precision and the machinery you use makes the difference. Bushings usually come five thousandths smaller than the lifters, and a lot of guys will say, “Well, I can take out five thousandths with my hone – that’s no big deal.” But you can’t, and get a straight hole, especially when you’re honing the bronze material they make the bushings out of, because it’s so soft and it hones so quickly – it usually doesn’t hone straight.”

“The height of the bushing is very important,” Miller asserts. “You have to make sure that the oil hole in the side of the bushing that feeds oil to the lifter itself is in the oil gallery. With a keyway bushing, you have a key on the side of the lifter and a keyway in the bushing. Now, the key doesn’t go all the way up and down the bushing, so you have to know what base circle camshaft you’re going to use so that when you put those bushings in, they go in deep enough so that the lifter will be able to reach the base circle of the cam. If you don’t put the bushing deep enough, it won’t ride on the cam. If you put them in too deep, one, you might not be able to get the key in because the bearing journals won’t fit in there, or worse, the lifter will come up out of the bushing and the oil band will be exposed and bleed oil pressure.”
Into The Home Stretch – Cylinder Deck Prep
With the lifter bushings installed, attention turns to the cylinder decks. The LSX block comes with provisions for 6-bolt-per-cylinder heads, but to upgrade our engine for the severe duty it will endure, Virginia Speed made a few tweaks. “Because we use half-inch head studs, the next thing we do is drill and tap for them. Just a basic program, nothing major. Because it’s a six-bolt block, the bottom row of four holes come standard as 8mm, and I take them up to 3/8-inch,” says Miller.
Now, we’re on to Virginia Speed’s work on the critical deck surface itself, which needs to be exactly right to keep combustion and cooling separated and contained when the engine comes together. “The second to last procedure is to deck the block to the correct height,” says Miller. “We have all the information on the piston height and the thickness of the head gasket we want to use, what quench height we want. We have a big milling head on our CNC, and the cool part about it is that it’s almost perfectly flat. You’ll find out that a lot of machines that deck blocks and heads, especially the older ones, because you have to tilt the wheel a certain amount so you don’t get a back cut, and the more angle that head has in it, it will actually cut a trough in the deck. Old school was way worse, and we learned with MLS head gaskets that the deck has to be perfectly flat because there’s nothing that’s going to compensate for it.”

“Our CNC milling head has about a thou and a half of tilt to it, and that gives us the flattest possible surface without having a back cut,” Miller explains. “When we are milling, we also have to be mindful of the speed of the cutter and the tool head, so that we are putting the right surface on for the gasket as well. Too smooth and the gasket won’t bite into the surface; too coarse and you end up with imperfections the gasket won’t fill, so it doesn’t seal. The surface is really critical for that reason, although it’s not as critical as it could be with this because we are running a copper head gasket. Because we have an O-ring, we don’t have to worry about sealing combustion with the gasket – we just have to worry about sealing water.”
With the deck milled to spec, one more operation has to be performed to allow it to accept the wire O-ring that will work in conjunction with the copper head gasket to provide a boost-proof seal. Once again, the devil is in the details – Per Miller, “If you put the O-ring too deep into the block or head, you’re not going to get enough crush on the head gasket. If you don’t go deep enough, the head gasket won’t deform enough and it won’t actually seat between the head and block. That depth is important.” The diameter of the O-ring also has an effect on how the whole setup works. “The O-rings aren’t the same diameter in the head and block,” says Miller. “They’re offset from each other. Experimentation with different thickness head gaskets and different degrees of overlap has let us determine what it takes to make it work.”

Miller says, “Our last operation on the CNC is cutting the O-ring grooves. We have a cutter that’s basically a mini boring bar with a square groove cutter, and it just goes around in a circle and creates that groove. It’s done off the bore centerline, just like if we were boring the block, but we’re touching the surface of the deck with that cutter. It’s a really simple deal – well, I call it simple, because we have this $200,000 machine that makes it simple! If you don’t have that piece of machinery, it’s not so simple.”

The depth and position of the O-ring grooves are based on years of experience and many, many Virginia Speed engine builds.
Honed to Perfection
With the heavy machining operations complete, the block preparation enters its final stages. “At that point we’re done in the CNC and we take it out and do a final cleanup to make sure we get all the metal chips out,” says Miller “Especially when we’ve done a lot of boring on a block, like we did with this one, we’ll put it in the ultrasonic tank, which gets all the metal out of all the orifices and makes it easier when we do the final cleaning. Any time you have a casting, there is sand trapped in it – that’s why we do the ultrasonic, to help get all that out of there.”
The cleaned block is then ready for the final machining step – honing the bores. While it’s long been industry standard procedure to use a torque plate on the deck to put the block under the same tension it will be when it’s fully assembled, Virginia Speed goes the extra mile. Per Miller, “We put the main caps back on and torque them all to spec, because we want to simulate the engine being all together as much as we can before we hone it. We torque the main caps down, we put our torque plate on the block… and this is the critical thing, because we use as close as we can to the actual fasteners we’re going to use for the cylinder head, and put them as close as possible to the torque spec we are going to use for the actual head. A lot of guys will just throw the plate on and use whatever fasteners they have sitting around. That will get you 50% there, but we are trying to simulate having the head on as much as possible without having the head on.”
Even the ambient air has a bearing on how the final product turns out. Per Miller, “When we hone, temperature is really critical. Our tolerances change as temperature changes, so what we do is try to hone everything at 70 degrees. We want the air temperature in the shop at 70 degrees, I take my piston out and let it sit for a couple of hours to let it settle at the shop temperature, then I measure it with the micrometer, then I will set my dial bore gauge to the size plus whatever bore clearance I want. I do a rough hone, and get it to within 2-3 tenths of a thou, and then I will let the block cool back down to room temperature, the same as where I started at, then go in and finish up each bore, and wait a little between each one to make sure that I don’t build up any heat in the block.”

Shawn Miller believes that a hone job up to Virginia Speed’s standards can’t be rushed. “It takes me three days to hone a block, just for the fact that I will work on it for a while, let it cool down, then come back to it. I try to always have a constant temperature on the block.”
The abrasives used for the honing process are also critical – rather than the more common (and less expensive) vitrified stones used by many machine shops, Virginia Speed once again takes a different path. “We use a diamond stone on our hone,” says Miller. “We did some work with the Navy on big block Chevys. We were doing some testing for them, working with Perfect Circle on cylinder finishes, from a standard vitrified stone which is what everybody uses for the last 50 years, versus the diamond hone. We found out some pretty crazy stuff. Because the vitrified stones wear down really fast, you have to keep after them. What happens is that they lose their shape and get low spots and high spots – those give you low spots and high spots in the cylinder, and it creates a lot more tear-outs.”
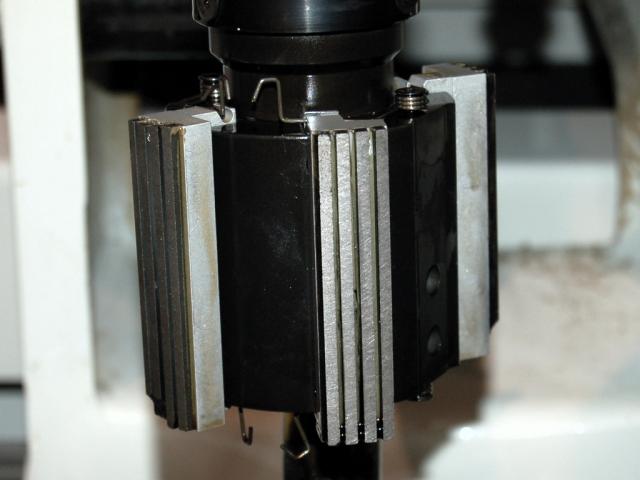
Miller is totally sold on the advantages of a diamond hone. “If you look at a cylinder wall under magnification, it’s amazing. You’ll see these big tear outs in a cylinder honed with a vitrified stone, where the ones done with diamond stones have almost none.”
While you might assume that the big advantage to a better finish would be in quicker break-in, per Miller, it actually makes significant power as well. “I had a 383 SBC package I was doing for years that was making around 475 horsepower – a pretty good street motor,” he recalls. “When we bought our new hone and diamond stones, I picked up 25 horsepower on that engine. I probably built 10-12 before I got the new hone, and about 20 afterwards, and there was a line drawn in the sand. With the first one, it was like, well, this was a good one. But then we did the second, and the third, and the fourth with the new stones, and they all gave the same exact numbers. When the only thing you change is the hone, you know exactly what it was that made the improvement.”
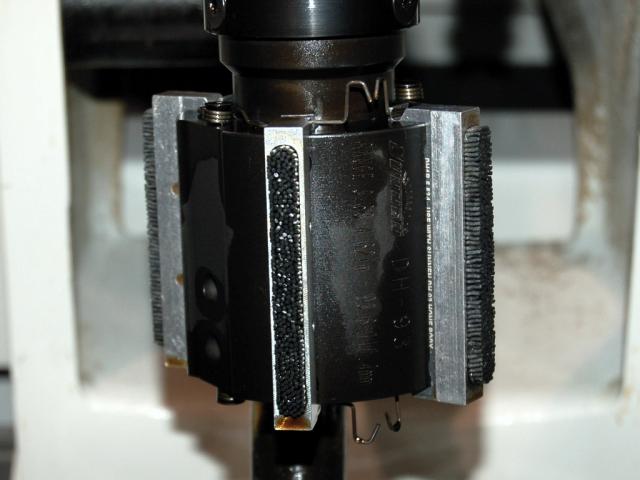
“After we’re done with the diamond hone, there’s a diamond brush that we run down through the cylinder,” says Miller. “What that does is take all the high points off. When you’re done honing, you still have little bristles and hairs that are microscopic, but they’re still there. It’s like a fuzz, and when you run the diamond brush through, it takes all that stuff off. What that does is makes it so ring break in is almost non-existent. They will be seated within ten minutes of running, not like the old days where you had to run it 500 miles before they were seated.”
The Foundation Is Complete
With the final hone done on our LSX block, the core of our race engine is ready to accept all the rest of the rotating assembly, which we will detail in our next installment on putting together the short block. There are no shortcuts when it comes to building a truly world-class race engine, and we think that Miller says it best: “I’m the worst critic of my own work – I am never happy.”
While he might not be, we can say that the work done so far has definitely made us happy, and we’re looking forward to bringing you Part 2 of our story, where we will watch Virginia Speed prep and install our Lunati Pro Series crankshaft, GRP rods, and JE pistons. If you’ve ever had questions about the pros and cons of aluminum rods, what kinds of things need to be done to prepare a crank for serious blower engine duty, or the intimate details of ordering custom pistons, all that will be covered and much more.

Our LSX block is complete, and ready for the next step in the build – getting the rotating assembly together.
In subsequent installments, it’s on to the cylinder heads, intake manifold, supercharger system, fueling and engine management, and of course dyno testing. We have a lot of hardcore race engine tech on deck with this Virginia Speed project, so keep your browser pointed in our direction for all the details!

Thanks to Virginia Speed, we’re all set to make 150-plus horsepower per hole. Now, we just need to fill them… Stay tuned for Part 2!


