 Our 2015 Z51 Stingray has come a long way. Project C700, as we’ve named it, has made substantial progress from where it began – not only in terms of horsepower but in handling and overall character as well. Between the aggressive exhaust, the attention to stance and handling, and (most recently) the addition of ProCharger’s exclusive i-1 Supercharger, we’re pretty happy with how our C7 is turning out.
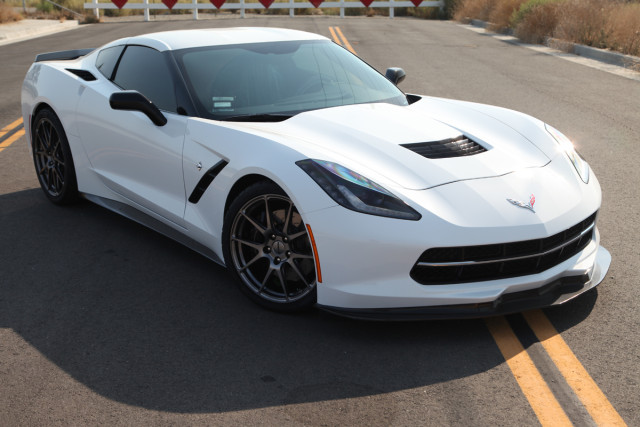 Lest you not forget, the “700” part of Project C700’s title is there to serve as a reminder of our end goal: 700 all-American horsepower at the flywheel. As is consistent with the very soul of the Corvette since its debut 63 years ago, we want our C7 to be the ultimate enthusiast’s car – able to hold its own at the strip, around a roadcourse, and as a daily driver. 700 ponies will fill that order quite nicely – enough to make the hair stand on the back of your neck, but not so much that things get unruly.
As we don’t have plans to pull the modified LT1 out of our ‘Vette and throw it on an engine dyno, we’re figuring just shy of 600 horsepower at the wheels will constitute completion of our 700-horse goal (when taking driveline-loss into consideration). As she sits now – with our last update being the ProCharger install – Project C700 is good for 571.2 horsepower and 599.4 pound-feet of torque at the wheels; do the math, and that’s 144.1 horsepower and 201.2 pound-feet more than we recorded when we first threw her on the dyno as a bone-stock car.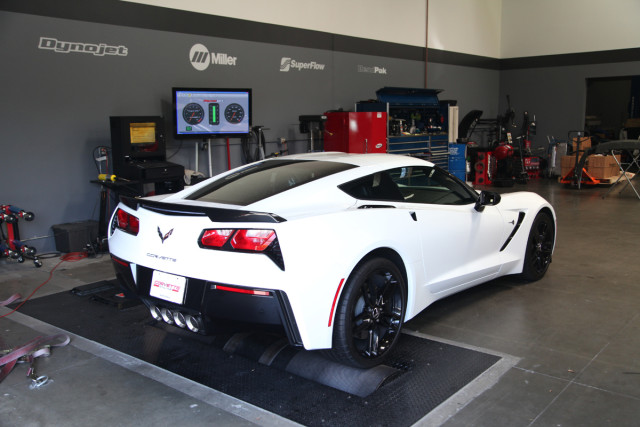 You don’t have to be an engineer to know that that’s a rather hefty jump – it’s something we’re certainly excited about. However, “With great power comes great responsibility,” as the saying goes. In gearhead terms, all that increase in power means that our next steps need to ensure that our ‘Vette stays healthy.
An increase in horsepower is synonymous with an increase in heat output, especially with our now-supercharged application. And, since drivability and reliability are two of the major aspects we’re going for with this project, it’s critical that we keep the blown-LT1 nice and refrigerated. We called our friends at C&R Racing and Chevrolet Performance and they were happy to help us out with some state-of-the-art cooling upgrades.
Getting To Know Our Radiator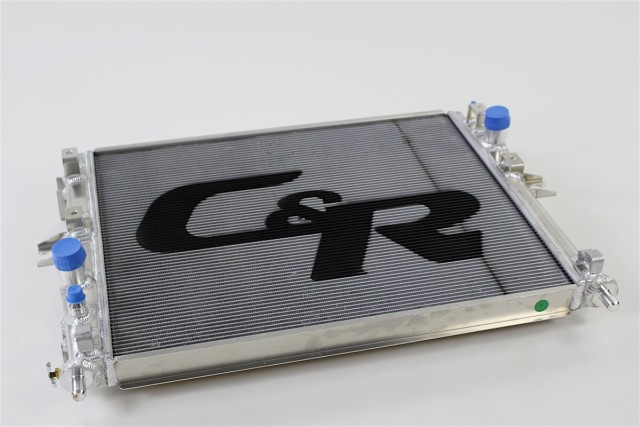 First up, C&R Racing offered us one of their really nice, high-performing radiators. C&R deals in the business of cooling down some the fastest, most powerful race machines in the world – from Formula 1 to Indy Car to NASCAR. All of the world-class engineering and craftsmanship that goes into these professional-grade radiators, intercoolers, and heat exchangers makes its way into the OE-fit and custom-crafted aftermarket pieces that appeal to enthusiasts.
The unit we chose for our Stingray (PN #20-00210) is a direct OE fit for the 2015-2016 C7 Z06 and Z51 Corvettes. To get the whole inside scoop on our badass new radiator, we got a hold of Paul Hammond at C&R.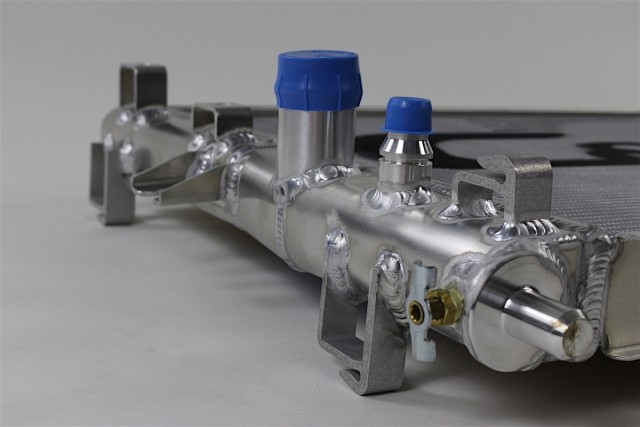 Hammond started off by telling us that our radiator was designed using GM CAD (Computer-Aided Design) data of the stock radiator. This ensures that all dimensions are impeccably accurate, and allows for a perfect fit. “We use four- and five-axis CNC machines as well as water-jet cutting to manufacture all the brackets and hardware, allowing for an extremely strong and visually-appealing part,” explained Hammond.
“For the core,” he continued, “we use the same 27 mm unit that we use in professional racing series’ like NASCAR. The factory brushless-fans produced by Spal will bolt right to the radiator, eliminating the need for any alterations.” 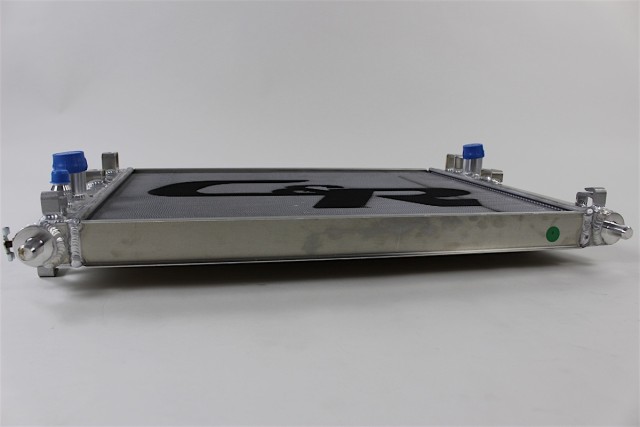 Hammond then spoke about the manufacturing and testing processes that C&R uses, stating, “We use the factory CAD data whenever it is available, allowing our parts to drop right in without any complications. When it’s not available, however, we have CAD programs developed so that each machine can produce our parts with extreme, consistent accuracy. We also have a wind tunnel in which we can test and develop radiators and coolers. We can often tune a core for its specific application, just as we do for professional racing.”
Even a few distorted fins or the slightest warp can hamper a radiator’s cooling efficiency, so ensuring that nothing is damaged in transit or during operation is crucial. Hammond addressed this, saying “Each radiator is TIG-welded by hand – lending it extra durability – and is then pressure-checked. Once passed and approved, every unit is then given protective cardboard sleeves to cover the core and is shipped in approved packing material and boxes, ensuring that it stays pristine throughout the shipping process.”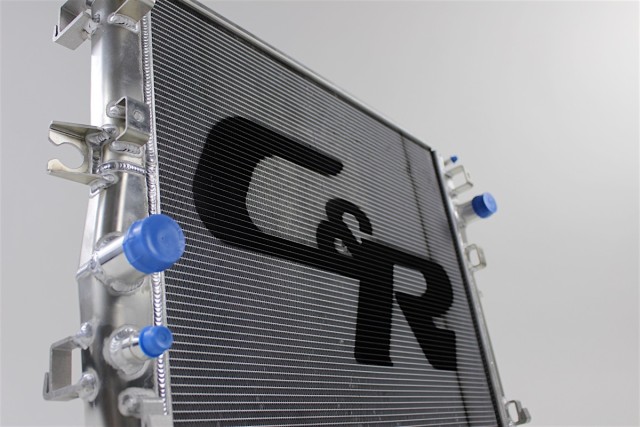 After giving us the whole story on Project C700’s new radiator, Hammond explained why upgrading the cooling system on a high-performance car like the C7 is always worth it. According to him, “Auto manufacturers usually only provide just enough cooling to get the job done. Generally with the C7, if a customer is going to track the car or add boost, better cooling is a must. Making the engine work around the race track will produce a lot of heat – especially with increased horsepower – and can exceed the factory cooling system’s limits.”
Hammond also addressed the concern of having too much radiator for a car – or in other words, having too much cooling efficiency. “With a C7, you can’t have too much”, he noted. “Modern thermostats are more than capable of properly maintaining engine temperatures.”
C&R recommends two other tweaks as well. They advise vacuuming the radiator to ensure the ratio of air-to-cooling fluids is heavily optimized in favor of the liquid, to avoid “steam lock.” Secondly, C&R also recommends considering an upgrade to an OEM Z06 fan for extra assurance in keeping the big ‘Vette cool under the collar.
Adding Some Z06 Flare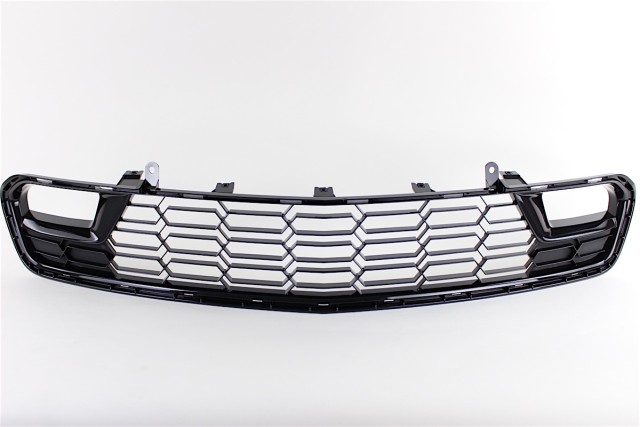 To complement the C&R radiator, we also decided to exchange the original Stingray grille for that of its more track-focused counterpart, the Z06. After all, what good is a high-performance air-to-water radiator if you’re not getting as much air to it as you possibly can?
The OE Z06 grille (PN #23387122) came to us through Chevrolet Performance Parts. Based on its own CFD (computational flow dynamics) analysis, airflow to both the radiator and through the front-brake cooling ducts is 17 percent greater than with the Z51 Stingray grille that Project C700 previously had.
In addition, we also opted for a pair of Z06 quarter-panel vents to show some love to the transmission and differential coolers out back. With all of the increased efficiency under the hood, we needed to pay attention to heat output from the rest of the driveline, as well, to keep the cooling system balanced.
These vents (PN #23373152) – also original Z06 equipment from Chevrolet Performance Parts – feature a larger, more coercive opening than do the standard Z51 Stingray vents. Consequently, they guzzle 25 percent more air at track speeds (based on CFD analysis).
However, the addition of the Z06 grille and Z06 quarter-panel vents served a dual-purpose. The Z06 pieces flow air better than the standard Stingray’s, but they also subtly contribute to the car’s aesthetics as well – providing a sharper, more aggressive look to the machine.
We’re concerned with making sure our Corvette both looks and drives phenomenally, and are of the opinion that our new Chevy Performance parts are serving both of those ends.
Dropping It In
As far as installs go, the radiator swap doesn’t rank too high on the difficulty-scale. Due mostly in part to C&R’s CAD-data-based machining and exact OE fitment, the install is simple and relatively intuitive. Basically, if you can take the factory radiator out, you can put the C&R radiator in.
The grille swap is an even simpler task, but may seem a bit daunting to the cautious owner as it involves meticulously pulling off the front fascia. The same story goes for the quarter-panel vent swap, which demands removal of the entire rear fascia. With that in mind, the benefits of both swaps are absolutely worth it if you plan on tracking your Corvette; however – depending on experience and level of comfort with handling precious, easily-marred body parts – many may want to look into having the swaps done by a professional.
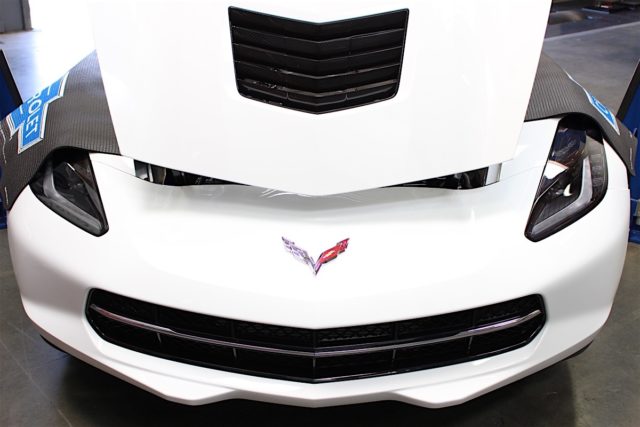
To begin our cooling-upgrade endeavor, we took care of the Stingray-to-Z06 grille conversion. As pictured below, the operation began by giving the car a little altitude with our Bendpak shop lift in order to remove the under tray and the carbon fiber front lip we received from LG Motorsports.
The next step was to get behind the front fenderwells to access and unplug the side blinker leads, which would otherwise tether the front bumper to the Corvette. After this, we pulled away the small trim pieces and splash guards in the engine bay, unfastened the bumper, and carefully unclipped the bumper from the fenders to pry it away.
From this point, removal of the bumper was as simple as delicately pulling the fascia away from the car. Of course, special care has to be taken to ensure that all relevant screws, clips, and fasteners have been removed, and that the bumper does not snag on anything during its journey off the machine. Obviously, a second set of hands makes this task quite a bit easier.
Once off of our ‘Vette, the grille swap was as mindless as could be. There are two screws and a series of clips that secure the grille to the bumper – all of which are easily tackled. Once unfastened, the standard Stingray grille can be set free and the direct-fit Z06 grille can make its entrance.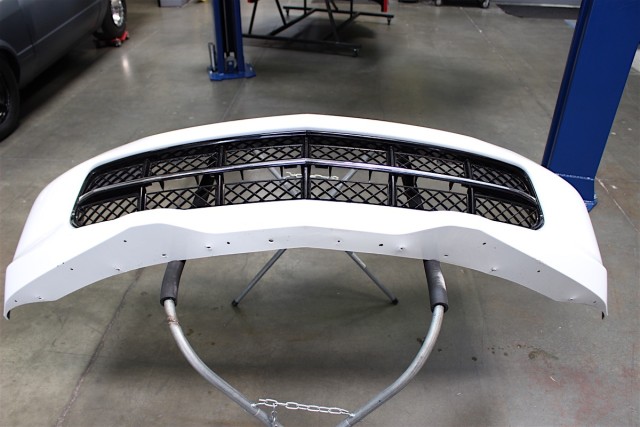
The task of swapping out your C7's grille is far less difficult than it might seem. As you can see, it really is a beginner-level modification – no fancy tools or engineering degree required.
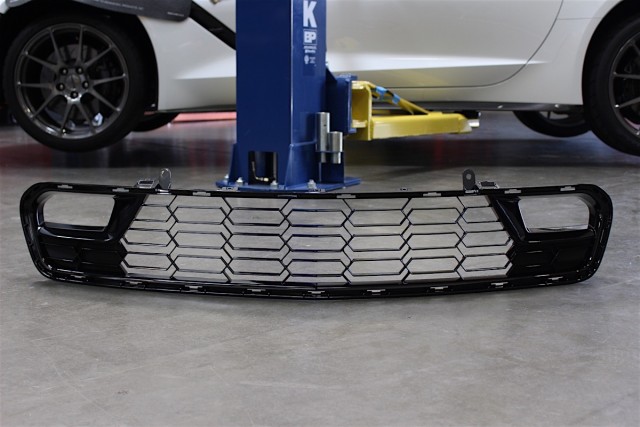
On the Z06 grille, the ports in either corner fit directly to the brake-cooling ducts and the honeycomb-type openings across the face are substantially larger than those on the Stingray piece.
Fitting the new grille in place was as easy as removing the original; with it fastened to the bumper, the entire assembly can then be replaced. Again, care should be taken to not strain the plastics or scratch the paint.
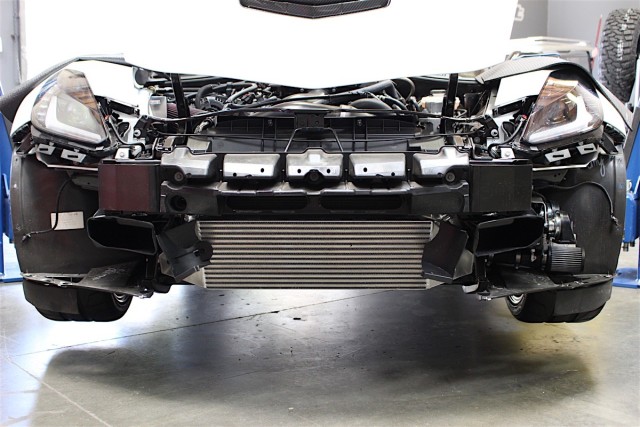
Of course, our job was not done here – we would leave the front fascia off for the time being in order to move on to the install of our C&R radiator. To begin, we removed the ‘Vette’s hood to free up a bit of working room, followed by the upper radiator support bracket and the hood-vent air baffling.
The dissection continued with the removal of our ProCharger filter and induction tube, unplugging and removal of the radiator fan, and draining of the coolant.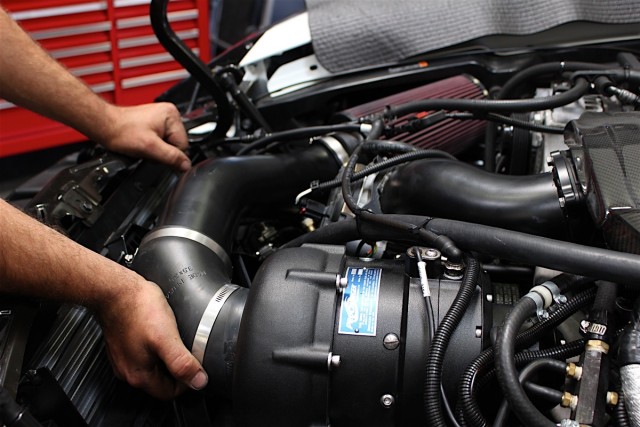
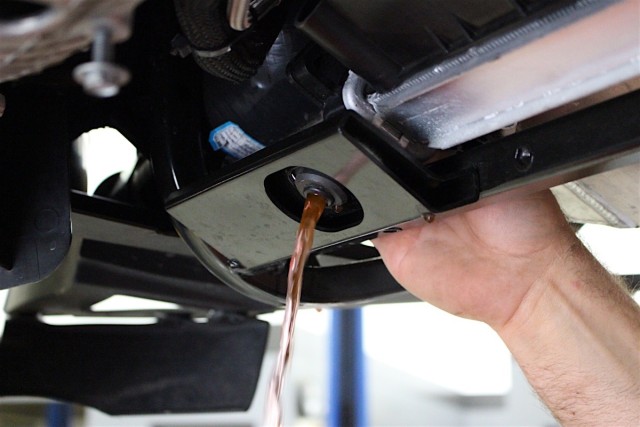 From this point, pulling out the radiator is as simple as disconnecting all of its plumbing, unclipping it from where it’s joined to the A/C condenser, and carefully guiding it out of the engine bay.
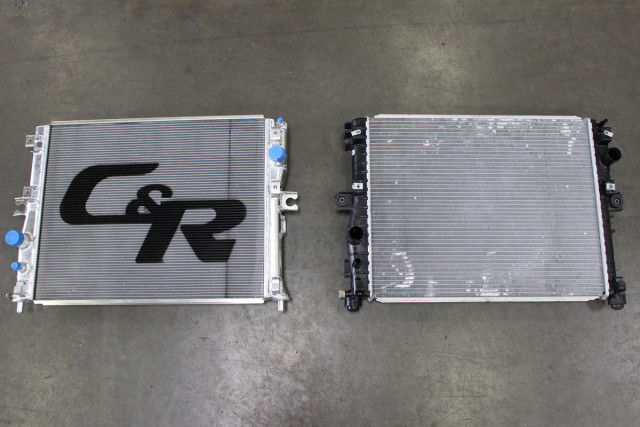 Since our high-efficiency C&R radiator offers an exact OE fit, swapping it in in place of the original is an absolute breeze. The only aspects to keep in mind when installing are to ensure that it properly clips to the A/C condenser, and that it fully seats into the lower radiator support bracket.
With the C&R unit in place, we began throwing everything back together in the reverse order of removal: re-attaching the hoses, re-introducing the fan, and returning the support bracket and air baffling. With these complete and the induction tube and hood back in place, we installed the bumper.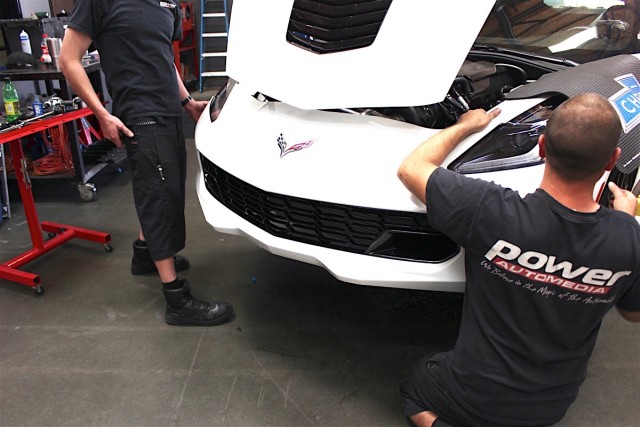
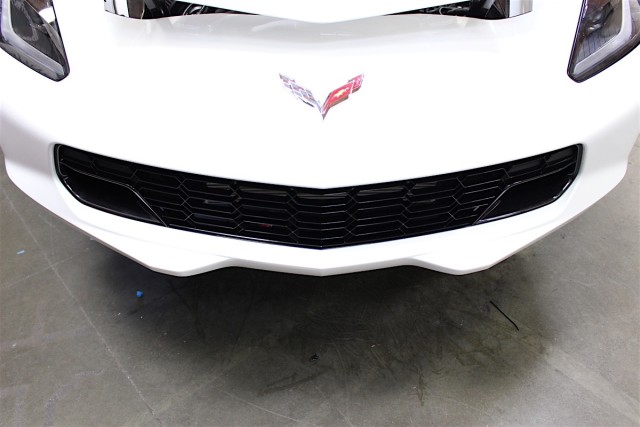
With all work on the front of the car (and all subsequent drooling over the new look) out of the way, we then moved to the Z06 vent install in the rear. Much like with the grille swap up front, the quarter-panel vent swap is a far less daunting task than it might first seem. To begin, the entire rear fascia needed to be removed before moving on to the quarter panels. This, like the front bumper, meant unplugging everything incorporated into it, such as the blinkers, taillights, and backup camera.
With the rear fascia unhooked and all of C700’s rear-most intricacies exposed, we set it off to the side to begin peeling off the quarter panels. To do so, the screws inside the fenderwell – which fasten both the fender well lining and quarter panel to the car – needed to be taken out. Beyond this, all we had to do was unclip the quarter panel and the piece was free.
Notice the air duct, which scoops the air gliding over the car and channels it down to the transmission cooler. The duct on the opposite side feeds air to the differential cooler in the same fashion.
With the quarter panel isolated, we then took care of the few screws keeping the original vent in place and the removal was complete. A side-by-side comparison of both the standard and Z06 units really highlights the differences; whereas the standard piece is more of a simple vent, the Z06 piece is a literal funnel – working to sweep in every bit of air it can.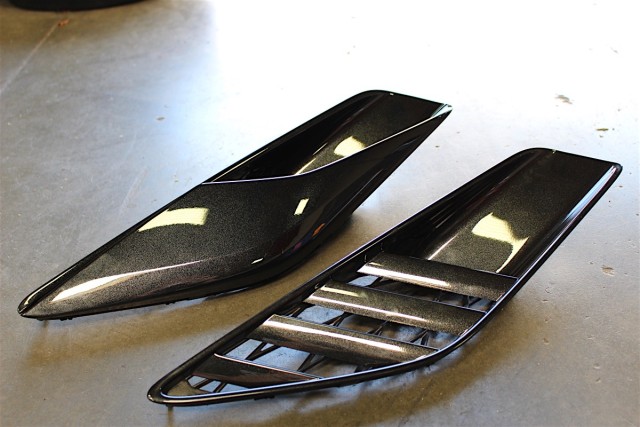
As with the Z06 grille and C&R radiator, the Z06 rear-vent seats in the quarter-panel exactly the same as the standard one. With the exchange made and the process completed on both sides of the car, all we had left to do was piece our Corvette back together. Again, since these components are simply a direct-swap – no alterations necessary – re-assembly is nothing more than clipping the body panels back together.
Obviously, it’s imperative that both the quarter-panels and the rear fascia are refastened by properly using each clip and screw; the last thing anyone wants is for something to be left loose and get shorn off at highway speeds.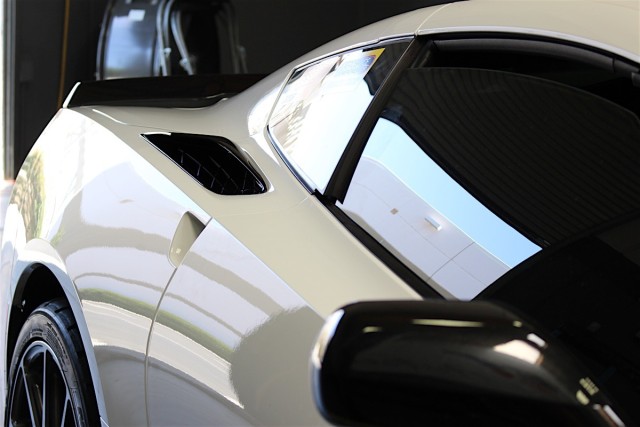
The Bottom Line
Now, with utmost confidence, we can drive our C7 the way that Tadge Jeuchter and all of the good fellas at GM intended – knowing that thanks to our fresh C&R heat exchanger and the higher-performing Z06 grille and vents, the ‘Vette won’t even break a sweat.
Before (left) and after (right) – the Z06 trim really adds an aggressive element to the front end.
If you’re one of the many owners that enjoys getting the most out of your Corvette – whether it’s laying down blistering quarter-mile times, carving cones and melting tires at an autocross, or simply enjoying some enthusiastic driving here and there – C&R’s top-of-the-line radiator units are one of your best bets at keeping things from getting too hot under the hood.
And what better way to compliment your high-performance cooling unit than by helping your ‘Vette pass more air through it? Short of peeling off the front and rear fascia altogether, we couldn’t think of a better way to up airflow than by implementing the already expertly-engineered vent and grille designs of the monstrous Z06.
Before...
... After.
Check out C&R Racing’s array of high-performance heat-exchanging hardware and Chevrolet Performance Parts’s line of Corvette components to outfit your own C7 ‘Vette with whatever it needs to dominate anywhere it goes.


