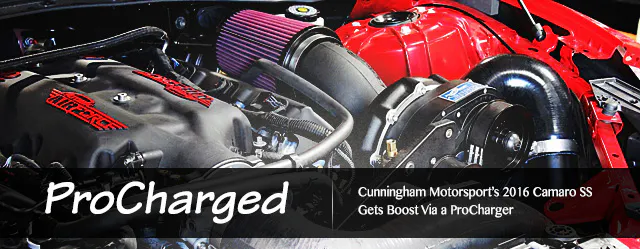
When it comes to making massive amounts of horsepower, there are more than just a few options to getting there these days. And while it seems like there are endless recipes to get something throwing down crazy horsepower numbers and quarter-mile times, there are few option more simple, scaleable and straightforward than installing a supercharger; which is why we turned to ProCharger for their brand new setup for the sixth-gen Camaro–and it just so happens to be one of the first to market.
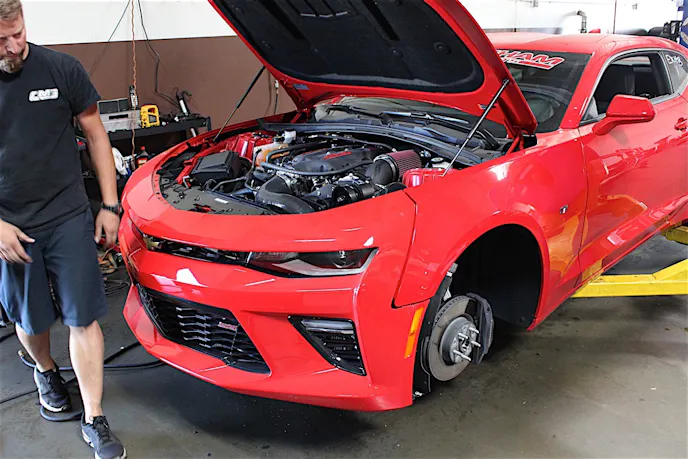
You may remember Cunningham Motorsports’ resident test mule 2016 Camaro SS from previous stories where we did mostly bolt-on modifications, including: Kooks long-tube headers and Green Cats, an MSD Atomic Airforce intake manifold, a 15-inch wheel kit from Carlyle Performance, Weld S77B wheels, and Mickey Thompson ET Street S/S tires. Some of these were added in the name of better performance and breathing, while the 15-inch wheel kit was selected with increased grip in mind. We expected the sixth-gen to need every ounce of traction it could get its hands on after this install—and we definitely were not wrong.

Why Choose A Supercharger?
Like we mentioned earlier, there are almost limitless ways we could have gone about improving the sixth-gen’s power levels, but one in particular seemed to make the most sense. Unfortunately, due to the Camaro’s newness, the aftermarket is still coming up to speed on all of the Gen V LT’s components. That leaves limited options for aftermarket power adding systems, and even if there were a wide selection, a couple of routes stood out as the simplest, most straightforward and scalable ways to go.
Currently, there isn’t even a turbo kit available for the sixth-gen Camaro, meaning we would have had to fabricate our own system if we wanted to go that route. Even if we did, the turbo would require a myriad of supplemental systems such as a boost controller, waste gate, blow-off valve, and—if we really wanted to go fast—a two-step or anti-lag system. If you’re not familiar with turbo setups, these things can get complicated very quickly and a two-step (or anti-lag system) is very hard on the catalytic converters.

Which brings us to another concern, emissions legality. While a custom turbo kit has it’s own share of headaches when it comes to implementation, they are compounded when you attempt to pass any form of visual or emissions testing. We wanted to stick with something that would retain the ability to pass most emission testing around the country and still allow us to make awesome power.
We also could have gone the nitrous route. And while a dose of laughing gas offers great bang for the buck, it also takes a considerable amount of maintenance and ancillary support. We’ve done nitrous setups in the past and have been more than pleased, but we wanted something that would be at our beck and call at the whim of our right foot and require minimal maintenance. Which is why we chose the ProCharger kit.
ProCharger’s system offered the easiest way to bolt on up to 170 horsepower without cutting, modifying or permanently altering any of the stock components—meaning we could easily put the car back to stock if we ever decided to do that (unlikely). It offers great efficiency when compared to other systems and ensures that we don’t have to run any supplementary components when running it. The amount of time needed to bolt on that much power is also considerable less than other power adder systems. Most kits can be installed in 8-10 hours in your driveway with basic hand tools; just install and go.
Designing The Kit
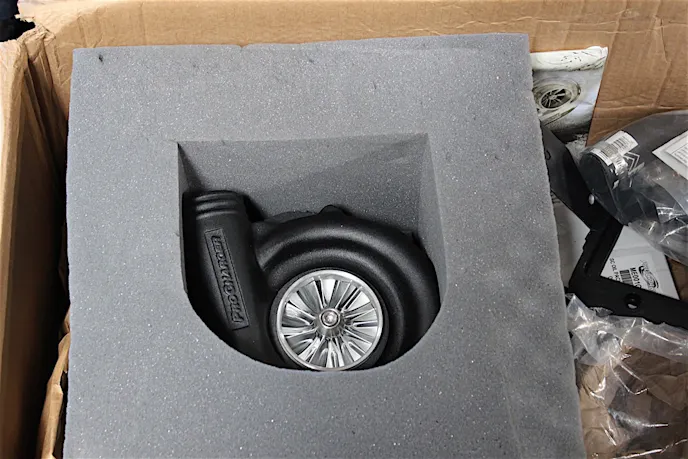
ProCharger builds all of their head units with billet impellers, ensuring a lifetime of trouble-free operation. Each unit is crafted from a block of nearly indestructible 7075 T-6 aircraft grade aluminum, which means the head units offered by ProCharger can stand up to almost anything you–or we–could possibly throw at them.
When it comes to shelling out your hard-earned coin on any one item, you want to know that a good amount of research and development has gone into the product to ensure longevity and proper operation in any conditions. This is an area where ProCharger really sets itself apart, sinking countless hours of not only development but on-track, real-world testing.
“We go the extra mile not only on dyno testing, but in our labs that can control almost any environmental factor imaginable, too,” said Erik Radzins, a marketing manager at ProCharger. “We also spend a great deal of time renting out tracks and deciding which intercooler setups are working best, what boost levels we think are safe, and testing different variations of fuel.”
Not only does ProCharger test its products in ideal conditions, it goes above and beyond to examine its components in the harshest environments. This help guarantee that your car will make good power in a myriad of situations.
“We were in the process of testing the kit for the sixth-gen Camaro, and we heard that one of the hottest days of the year was coming up,” Radzins said. “So we rented out the track so we could put our car to the test with 141-degree track temperatures—pretty much the worst conditions you could think of. It helped us collect even more data and refined the tune before we released it.”
Radzins said that they are aware that when new models, like the sixth-gen Camaro, release, people are chomping at the bit to get more power out of them. That’s why ProCharger strives to be, and frequently is, one of the first to market with their kits.
With the blower kit, you can bolt on a significant amount of power in just an afternoon. I’m not saying other modifications aren’t worth it, I just think bang-for-the-buck wise, it’s hard to beat a ProCharger.- Erik Radzins
Radzins also mentioned that by the time you are done spending money on bolt-ons that net you 20 horsepower here or there, that you realistically could have put that money toward a ProCharger kit that will allow you to add more than 170 horsepower.
“These days, you can pretty quickly rack up $4,500 in just basic bolt-ons,” Radzins explained. “Whereas, with the blower kit, you can bolt on a significant amount of power in just an afternoon. I’m not saying other modifications aren’t worth it, I just think bang-for-the-buck wise, it’s hard to beat a ProCharger.”
While making peak power numbers are always important, Radzins said that the hardest part is ensuring that the drivability and dependability of the system are as high as possible.
“We go through a lot of testing to make sure that everyone in general feels good about how the car drives with the kit on it,” Radzins said. “It’s a really dynamic aspect of how we say, ‘Hey, the kit is ready for release,’ making the power is the easy part, the rest is the drivability and dependability—we have to make sure it drives well and it’s really safe.”
The ProCharger Kit
What's included in the kit
- P-1SC-1 head unit
- Billet head unit mounting bracket
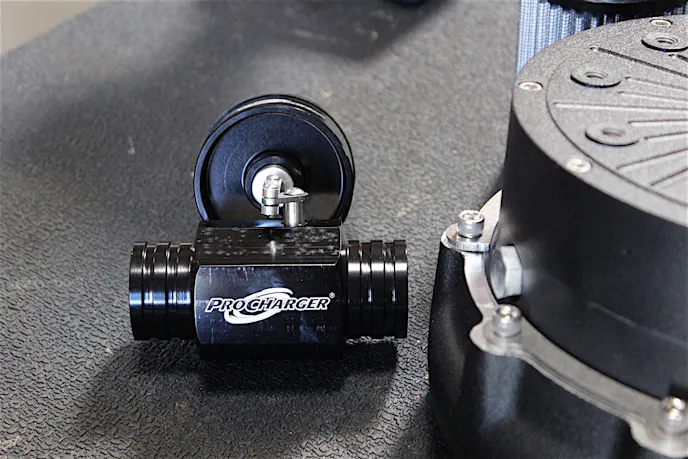
- Bypass valve
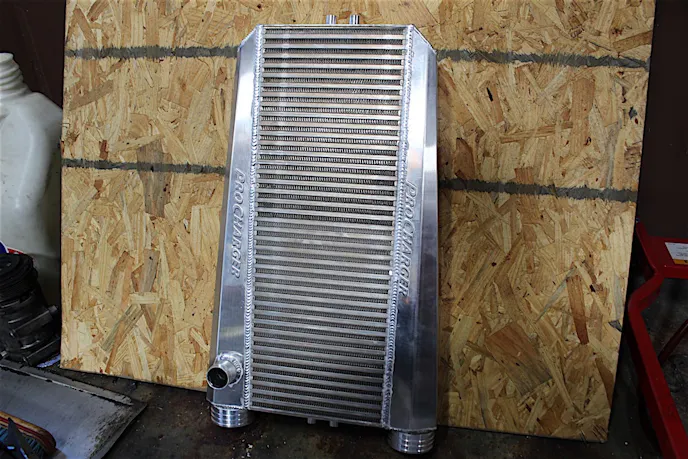
- Intercooler
- Main drive pulley, tensioner and belt
- Auxillary cooler relocation brackets
- All necessary plumbing and hardware
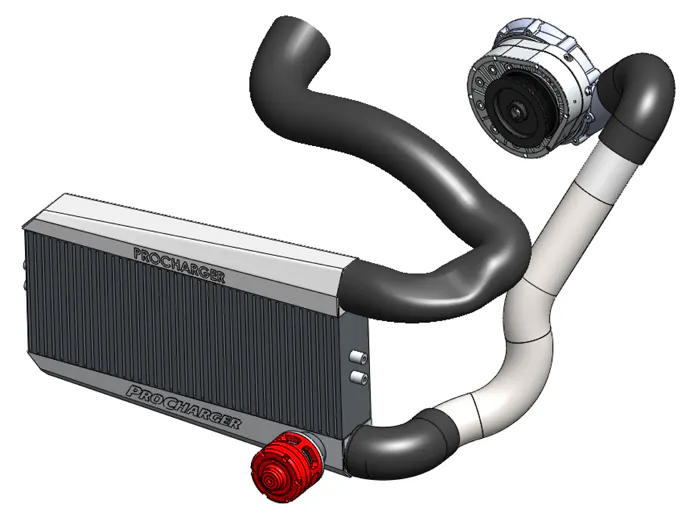
The kit we ordered from ProCharger comes with a P-1SC-1 head unit and the upgraded high-output intercooler. The larger intercooler will allow us to extract a few more ponies out of our setup and is a smart choice if you intend to increase the boost over the coming years. And let’s be honest with ourselves, that is going to happen sooner rather than later.
We chose the flat black upgrade option, but the kit is available in a satin finish as well. Some might be more partial to the satin finish, but we prefer the more subtle looks of the black finish— it’s easier to keep clean and blends in well with all of our under-hood components.
All sixth-gen kits come with a dedicated 8-rib pulley setup. It includes all of the mounting brackets to secure the head unit to the driver’s side head, as well as all of the plumbing to guide all that compressed atmosphere to the throttle body. The mount is a very robust design and is billet as well. It utilizes already available bolt holes on the LT1’s driver’s side head and is designed for maximum rigidity to keep the supercharger in line–even under high-stress operation.
The head unit mount will also accommodate larger huffers— all the way up to a F-1A-94— if you decide to upgrade it further down the road. That’s enough to support well over 1,000 horsepower with the accompanying modifications—in other words, with this one kit, the sky is virtually the limit.
The piping is a molded piece that helps it snake through the headlight bucket and sacrifices nothing in the way of performance while being very compact, according to Radzins.
“Our tubing from the intercooler to the throttle body is one piece” Radzins explained. “It’s a custom-molded silicon hose, it’s five-ply so it’s pretty rigid, and it actually molds and goes under the headlight but retains the same surface area, so you don’t lose any flow from pinching down— it ovals out and gets wider. That way you only have two clamps; one at the intercooler and one at the throttle body, meaning there are less hoses to blow off and things to rattle— it makes the fit and finishes real nice.”
Not only does this new addition ensure a clean install but it allows you to retain all of the sixth-gens auxiliary cooling radiators, which we’re told is not the case with some other supercharger kits.
“Some other companies eliminate the two auxiliary radiators to make room for their tubing,” Radzins lamented. “This may not make a huge difference, but GM put them there for a reason so we kept them there.”
Installation
We started our installation by removing the stock air box and intake tube. This will be where the supercharger will sit once it is bolted to the engine, so the first step here is to make room for it. Unplug the mass airflow sensor (MAF) and all related vacuum lines. Loosen the clamps and nuts that secure the intake tube and air box to the car and set them aside. With the intake out of the way, you can see how much more space you have to work with.
Next, we pulled the front tires so that we could access the pins, screws and bolts that hold the front bumper to the car. We removed all of the pins and bolts in both wheelwells, across the bottom of the bumper and the mounting screw in the engine bay area. You will have to pull the wheelwell inserts back to reach some of the mounting bolts further forward in the car that secure the bumper cover.


Once we were sure that everything securing the bumper to the car was removed, we began working the cover back and forth to loosen it. Sometimes it can bind up and act like there is still something holding it on. Be patient and work it side to side—eventually you’ll have enough of a gap to pull it right off. Once the bumper cover is off, find a place to store it where it won’t get bumped or scratched.


The next thing we did was remove the the lower tray that supports and pulls air through the transmission cooler. We also removed all of the plastic that channels air through the auxiliary radiator on the driver’s side. This plastic won’t be used again in the new kit, as you’ll have to relocate this auxiliary cooler with the supplied brackets, so feel free to discard it— or keep it as a memento if you’re sentimental like that.

The headlight was the next item to come out since the intake tube on the ProCharger snakes its way through the headlight bucket and into the engine bay. After the headlight came out, the radiator was drained of coolant and the cross bracing that connect the car’s chassis to the crash bar were removed.
Our mechanic, Mike Franz of Cunningham Motorsports, moved the stock vacuum pump out of the way in order to access the bolts to the auxiliary cooler mounting bracket. While it doesn’t say this step is necessary in the instructions, it makes the bolts and nuts vastly more accessible. Once the bracket is loose, you can discard it as well, since it will be replaced with the ProCharger supplied pieces. The auxiliary cooler was then disconnect from the vehicle.


Next, we pulled the radiator fan. This proved to be slightly more difficult than previously expected. The instructions claim that you don’t need to remove it, but it provides a lot more room to work with as you install the main supercharger drive pulley, which is the next step in the process. The crankshaft dampener bolt needs to be removed, which we used an impact gun to accomplish— hence the reason we removed the radiator to provide more space. We later decided that it may have been easier to just use a breaker bar and a flywheel holding tool, considering how difficult the radiator was to uninstall. 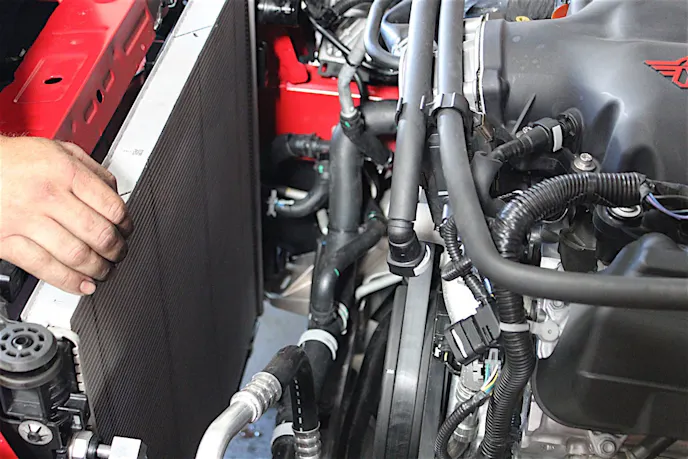


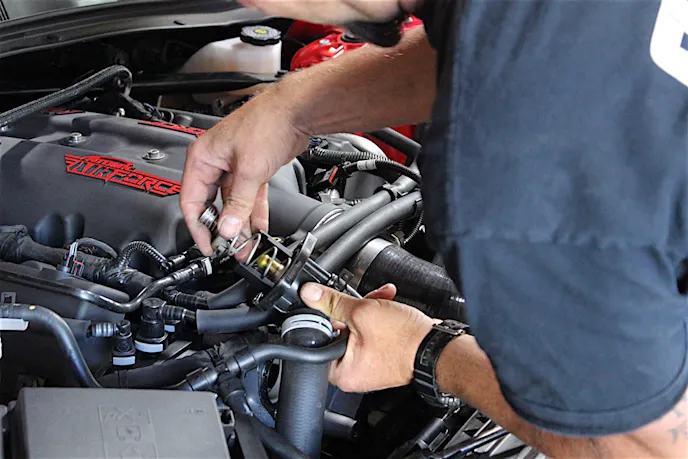
The main supercharger drive pulley was the next to go in. We placed a bead of RTV on the snout and then mounted it co-axially with the harmonic balancer. Six, what we’ll call, cam bolts key the new drive pulley to the harmonic balancer by sandwiching each of the balancer’s spokes which are then tightened down, locking themselves in place.
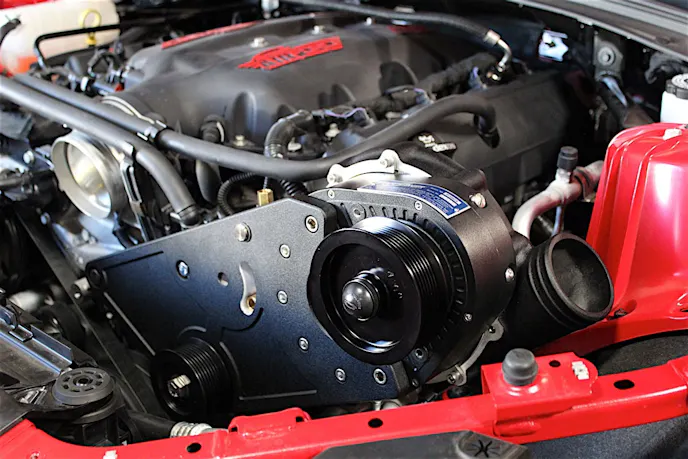
After slightly tweaking the routing of the A/C lines and securing them with the supplied bracket, we moved on to the assembly of the ProCharger mount and tensioner bracket. The head unit mounting bracket is a sturdy piece milled from billet aluminum. Once the belt tensioner is securely bolted to the bracket, it is ready to be to mounted on the front of the engine using four bolts, two spacers and the preexisting bolt holes.


At this point, we were ready to mount the head unit. It is secured to the mounting plate with six allen head bolts. The belt was installed and the tensioner was tightened down. Be sure to not over tighten the belt; leave enough “slack” that the belt can be moved in either direction an eighth of an inch— other wise you could cause premature bearing wear.
Next, we removed the crash bar and sandwiched the required brackets between the car’s chassis and the bar. These brackets allow the intercooler to be bolted between the crash bar and the car’s radiator. Keeping the radiator hold-down loose for this process will ensure that there is enough room for the intercooler to snake its way into place.


We then ran the hoses from the head unit outlet to the intercooler and from the intercooler to the throttle body. The horns and auxiliary cooler were then reinstalled using the supplied brackets to relocate them.


While we were at it, we installed a cooler 160-degree thermostat. Since the radiator was already drained, it made sense to go ahead and change it now. It will be beneficial, now that the car has a power adder, to help keep the car cool in any conditions it may encounter.
Before we bolted the bumper cover back on the car, we installed the bypass valve on the front of the intercooler. It functions much like a blow off valve in a turbocharged car— relieving excessive boost pressures when the throttle blade snaps shut or when the car is under light load conditions. A breather is installed on the end of the valve to ensure no contaminants make their way into the valve and damage it.


We also changed out the spark plugs with the set the kit includes. They are better suited to boosted applications and will provide better overall performance. This step could also be accomplished before the installation of the supercharger.
Finally, the intake tube is secured to the inlet of the ProCharger and the stock MAF is bolted to the new tube feeding the throttle body. Reinstall the bumper and you’re all set.
In most cases, the final step will be to upload the supplied tune. In our case, since the car has received other modifications, it was custom tuned by Ryne Cunningham of Cunningham Motorsports.
The Results
After we finished up the install, we headed to the dyno to tune the car and see what kind of power we were putting down. As a reminder, the car was already equipped with an MSD Atomic Air Force intake manifold, Kooks 1 7/8-inch headers and a Borla 3-inch cat-back dual exhaust. Before we did the installation, we placed the car on the dyno to see what it was putting down in its bolt-ons-only iteration.

What we found was a healthy 408.9 horsepower to the rear wheels. While it isn’t a massive amount of power, it was still good enough to take the car to an 11.67 at 118.35 mph (in 100-degree weather) after the installation of the Carlyle Racing 15-inch wheel kit— making it no slouch.

With the car strapped to the dyno, we spun it up to the tune of 565.8 horsepower and 497.2 lb-ft of torque at the rear wheels with the ProCharger. A whopping 156.9 horsepower gain over our baseline numbers! Needless to say, we were very impressed with the numbers the car was producing, and at only 7 pounds of boost.
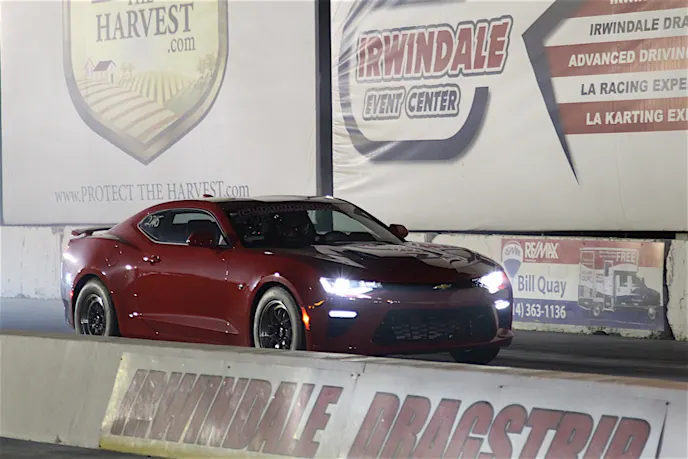
However, we wanted to see how those numbers translated to the real world, so we headed for Southern California’s famed Irwindale Speedway to see what kind of times this beast would turn. We showed up for one of their NHRA Thursday Night Thunder events and were welcomed by a throng of other enthusiasts looking to prove their mettle on a humid summer night.
By the time we hit the track, the sun had gone down—rewarding us with slightly cooler air temperatures. However, as we previously mentioned, the air was humid, displacing oxygen and bringing the density altitude to 1,150 feet for the test hit.
After the Mickey Thompson ET Street S/Ss were aired down to 17 psi, we hit the track, performing a nice little burnout to bring the R2 compound up to temperature. But even with the capable Mickeys trying to put as much of the 565 horsepower to the ground as possible, we were still experiencing slight traction issues—understandable considering the massive grunt we now had at our disposal.
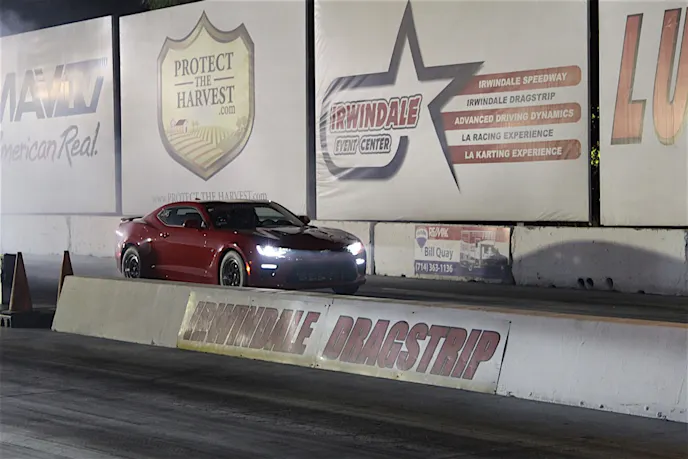
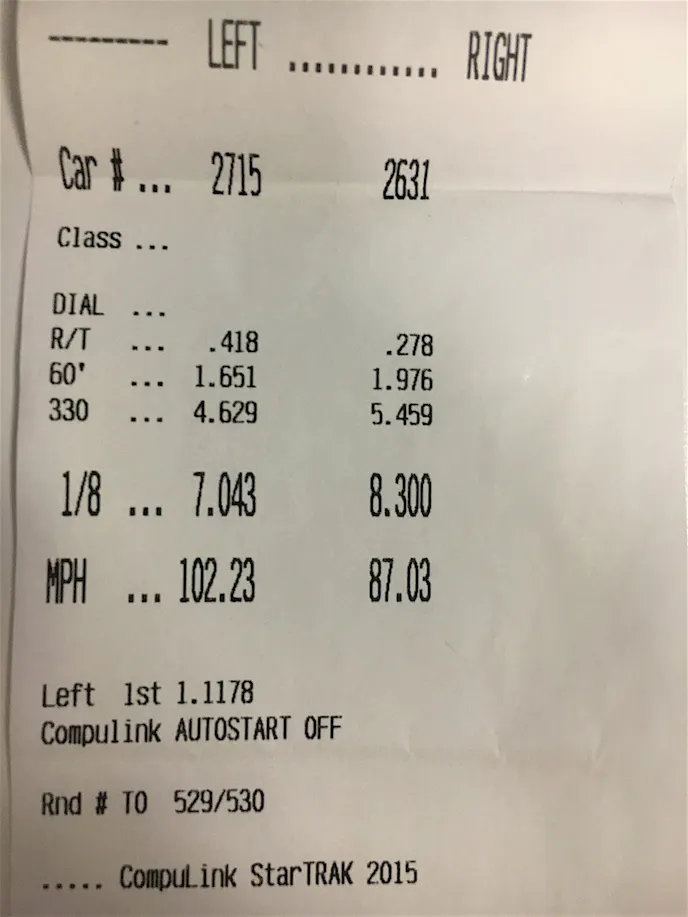
The same procedure was followed for a second run and rewarded us with our best time of the night—a 7.043 at 102.23 mph in the eighth-mile. Needless to say, we were thrilled with the outcome. For all those bench racers out there, that should put the car in the ultra-low 11s, if not in the high-10s in the quarter-mile–especially when you factor in the mile-per-hour number. That means we knocked roughly .67 seconds off the car’s ET (previous best was 11.67 at 118 mph at a quarter mile track) and brought the 60-foot down to 1.65 seconds from a previous best of 1.69 before the ProCharger kit–all while fighting for traction out of the hole. This car definitely has a faster pass in it, but we were thrilled with how it performed.
Not only did the ProCharger kit add a massive amount of power to the CMS sixth-gen Camaro, the drivability on the car is just as good as it was in factory trim, making it the perfect combination of go-fast and economical.
You might also like
Tornado Devastates Mid America Motorworks, Destroys Priceless Corvette History
A tornado devastated Mid America Motorworks, damaging rare Corvette prototypes, museum artifacts, and decades of history.