A Genuine American Success Story
The team at Street Muscle recently sat down with Dustin Whipple of Whipple Superchargers. He was the perfect person to talk to about our latest project, the Daily Camaro. That’s the high-mileage daily driver we’ve been modding with CARB-legal parts for the past year. A 2.9l Whipple supercharger is the perfect piece to wrap up our street-legal performance modifications.

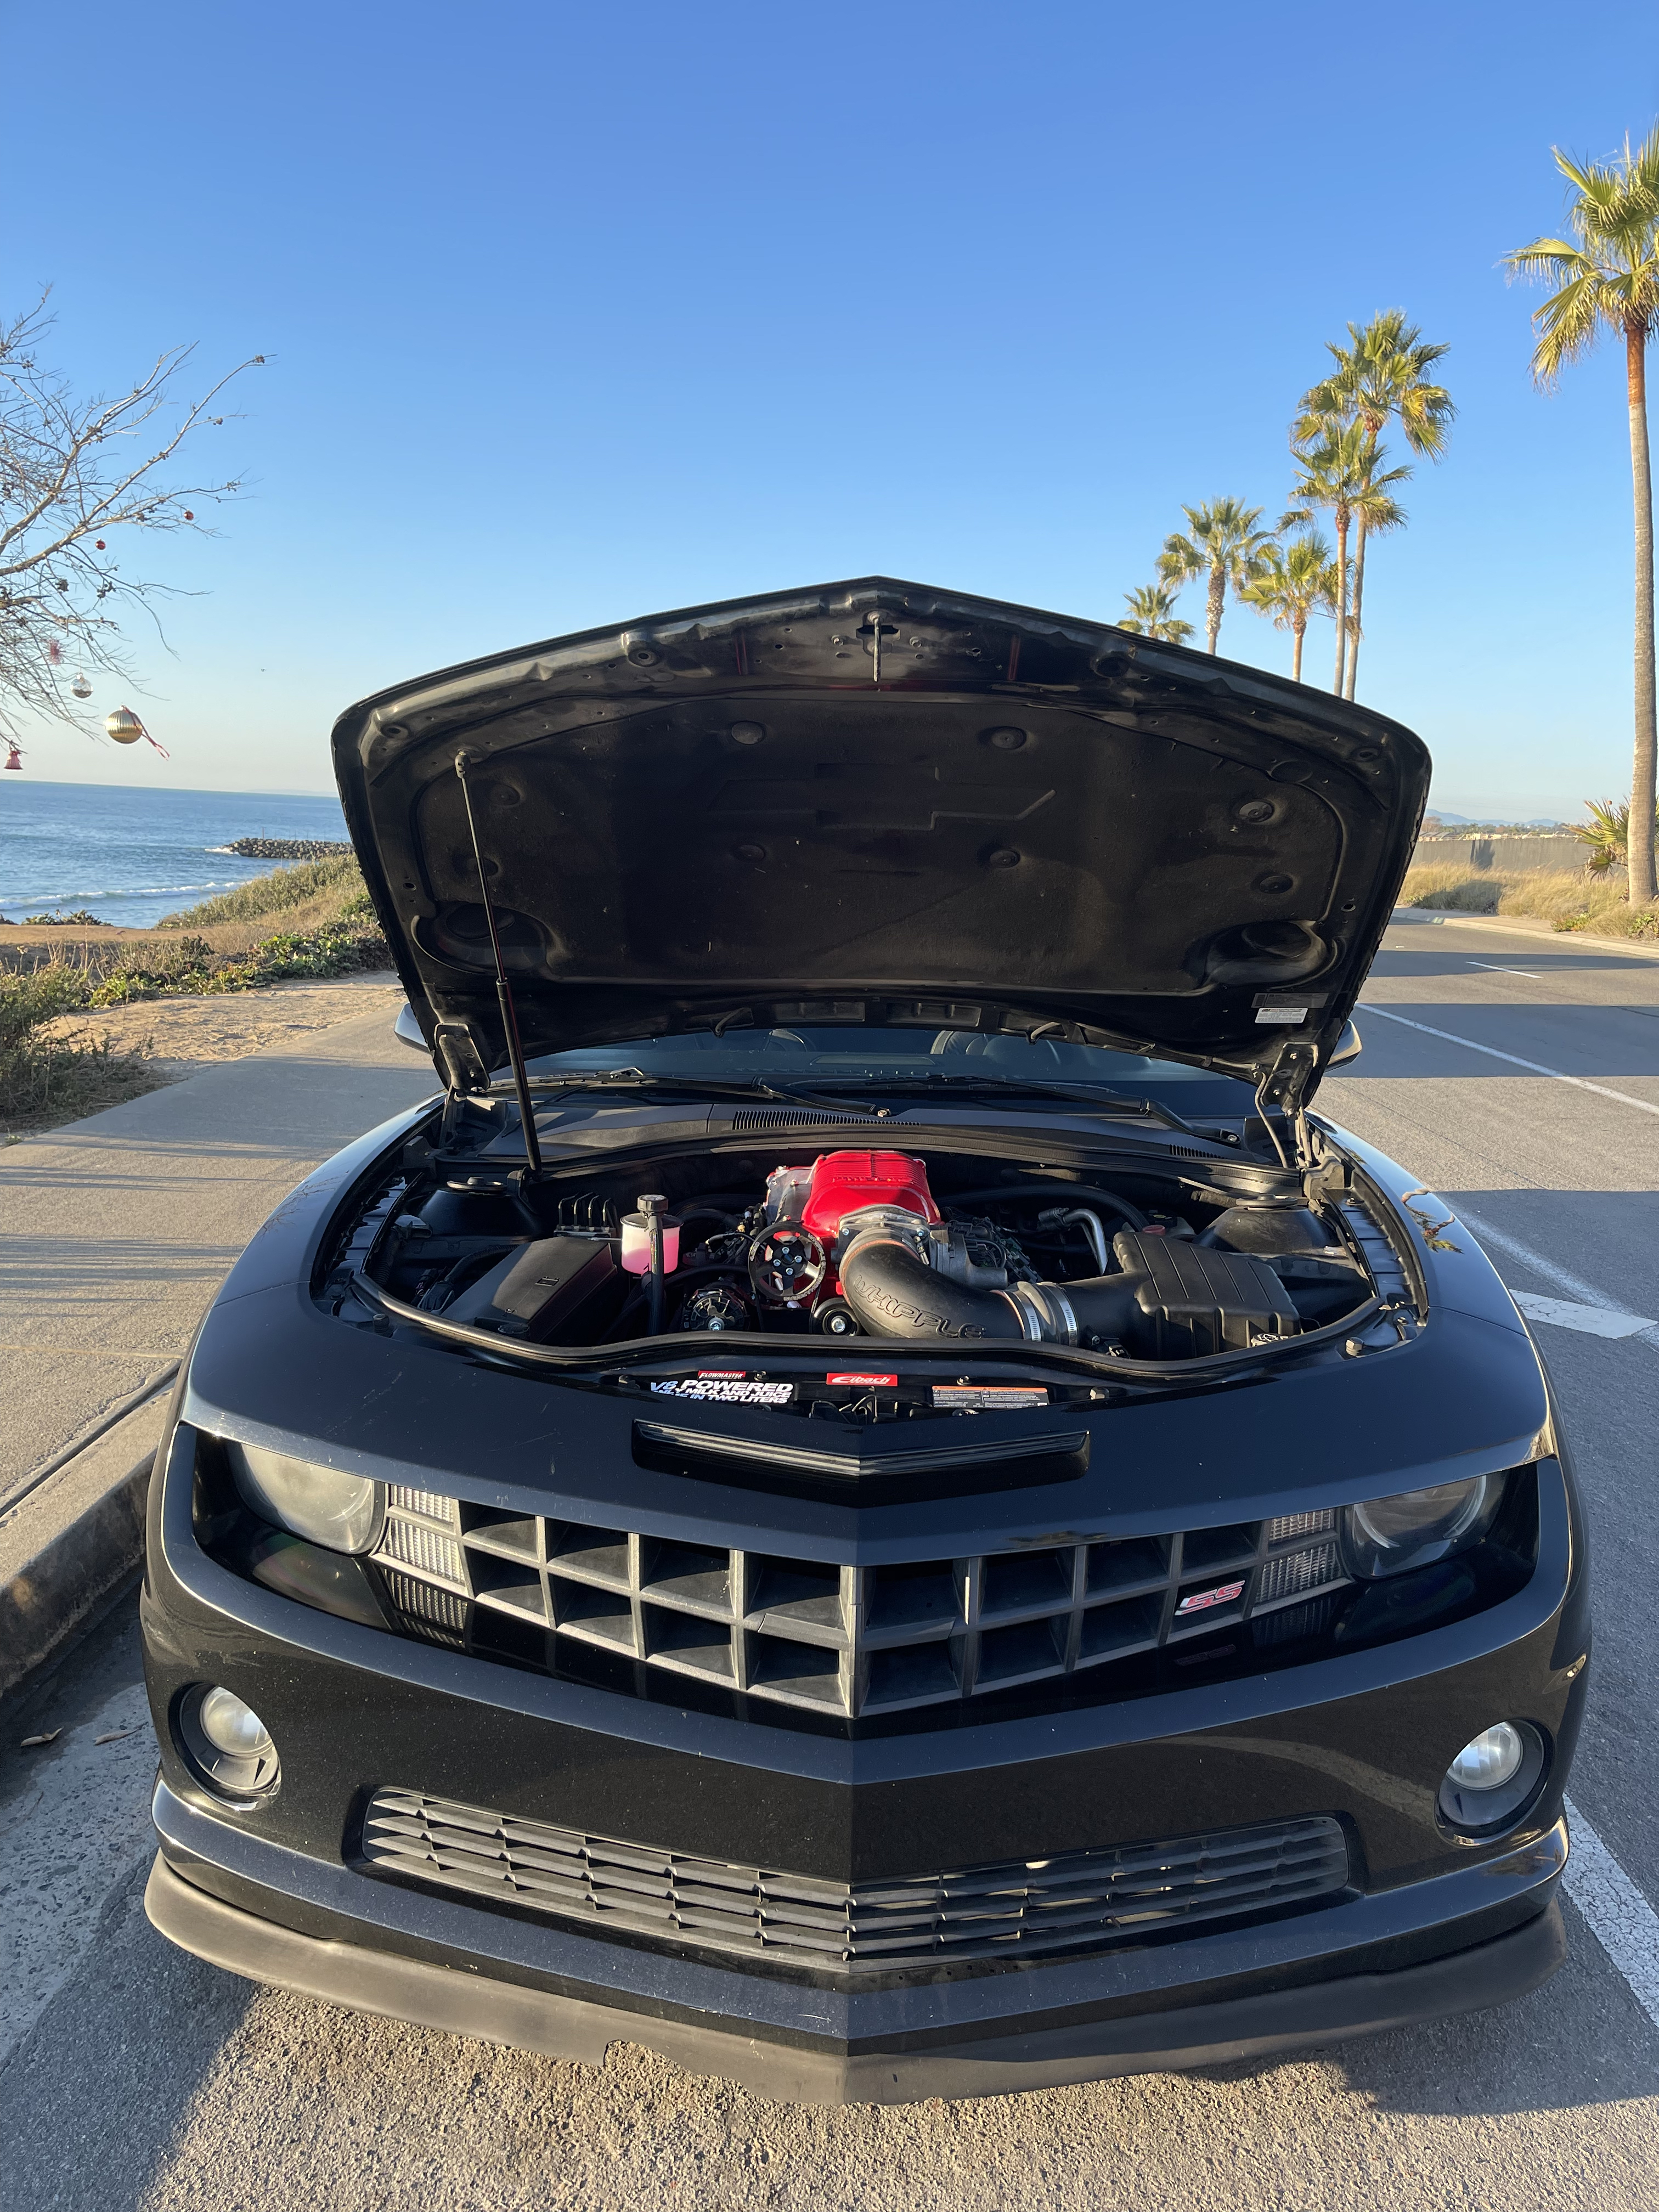
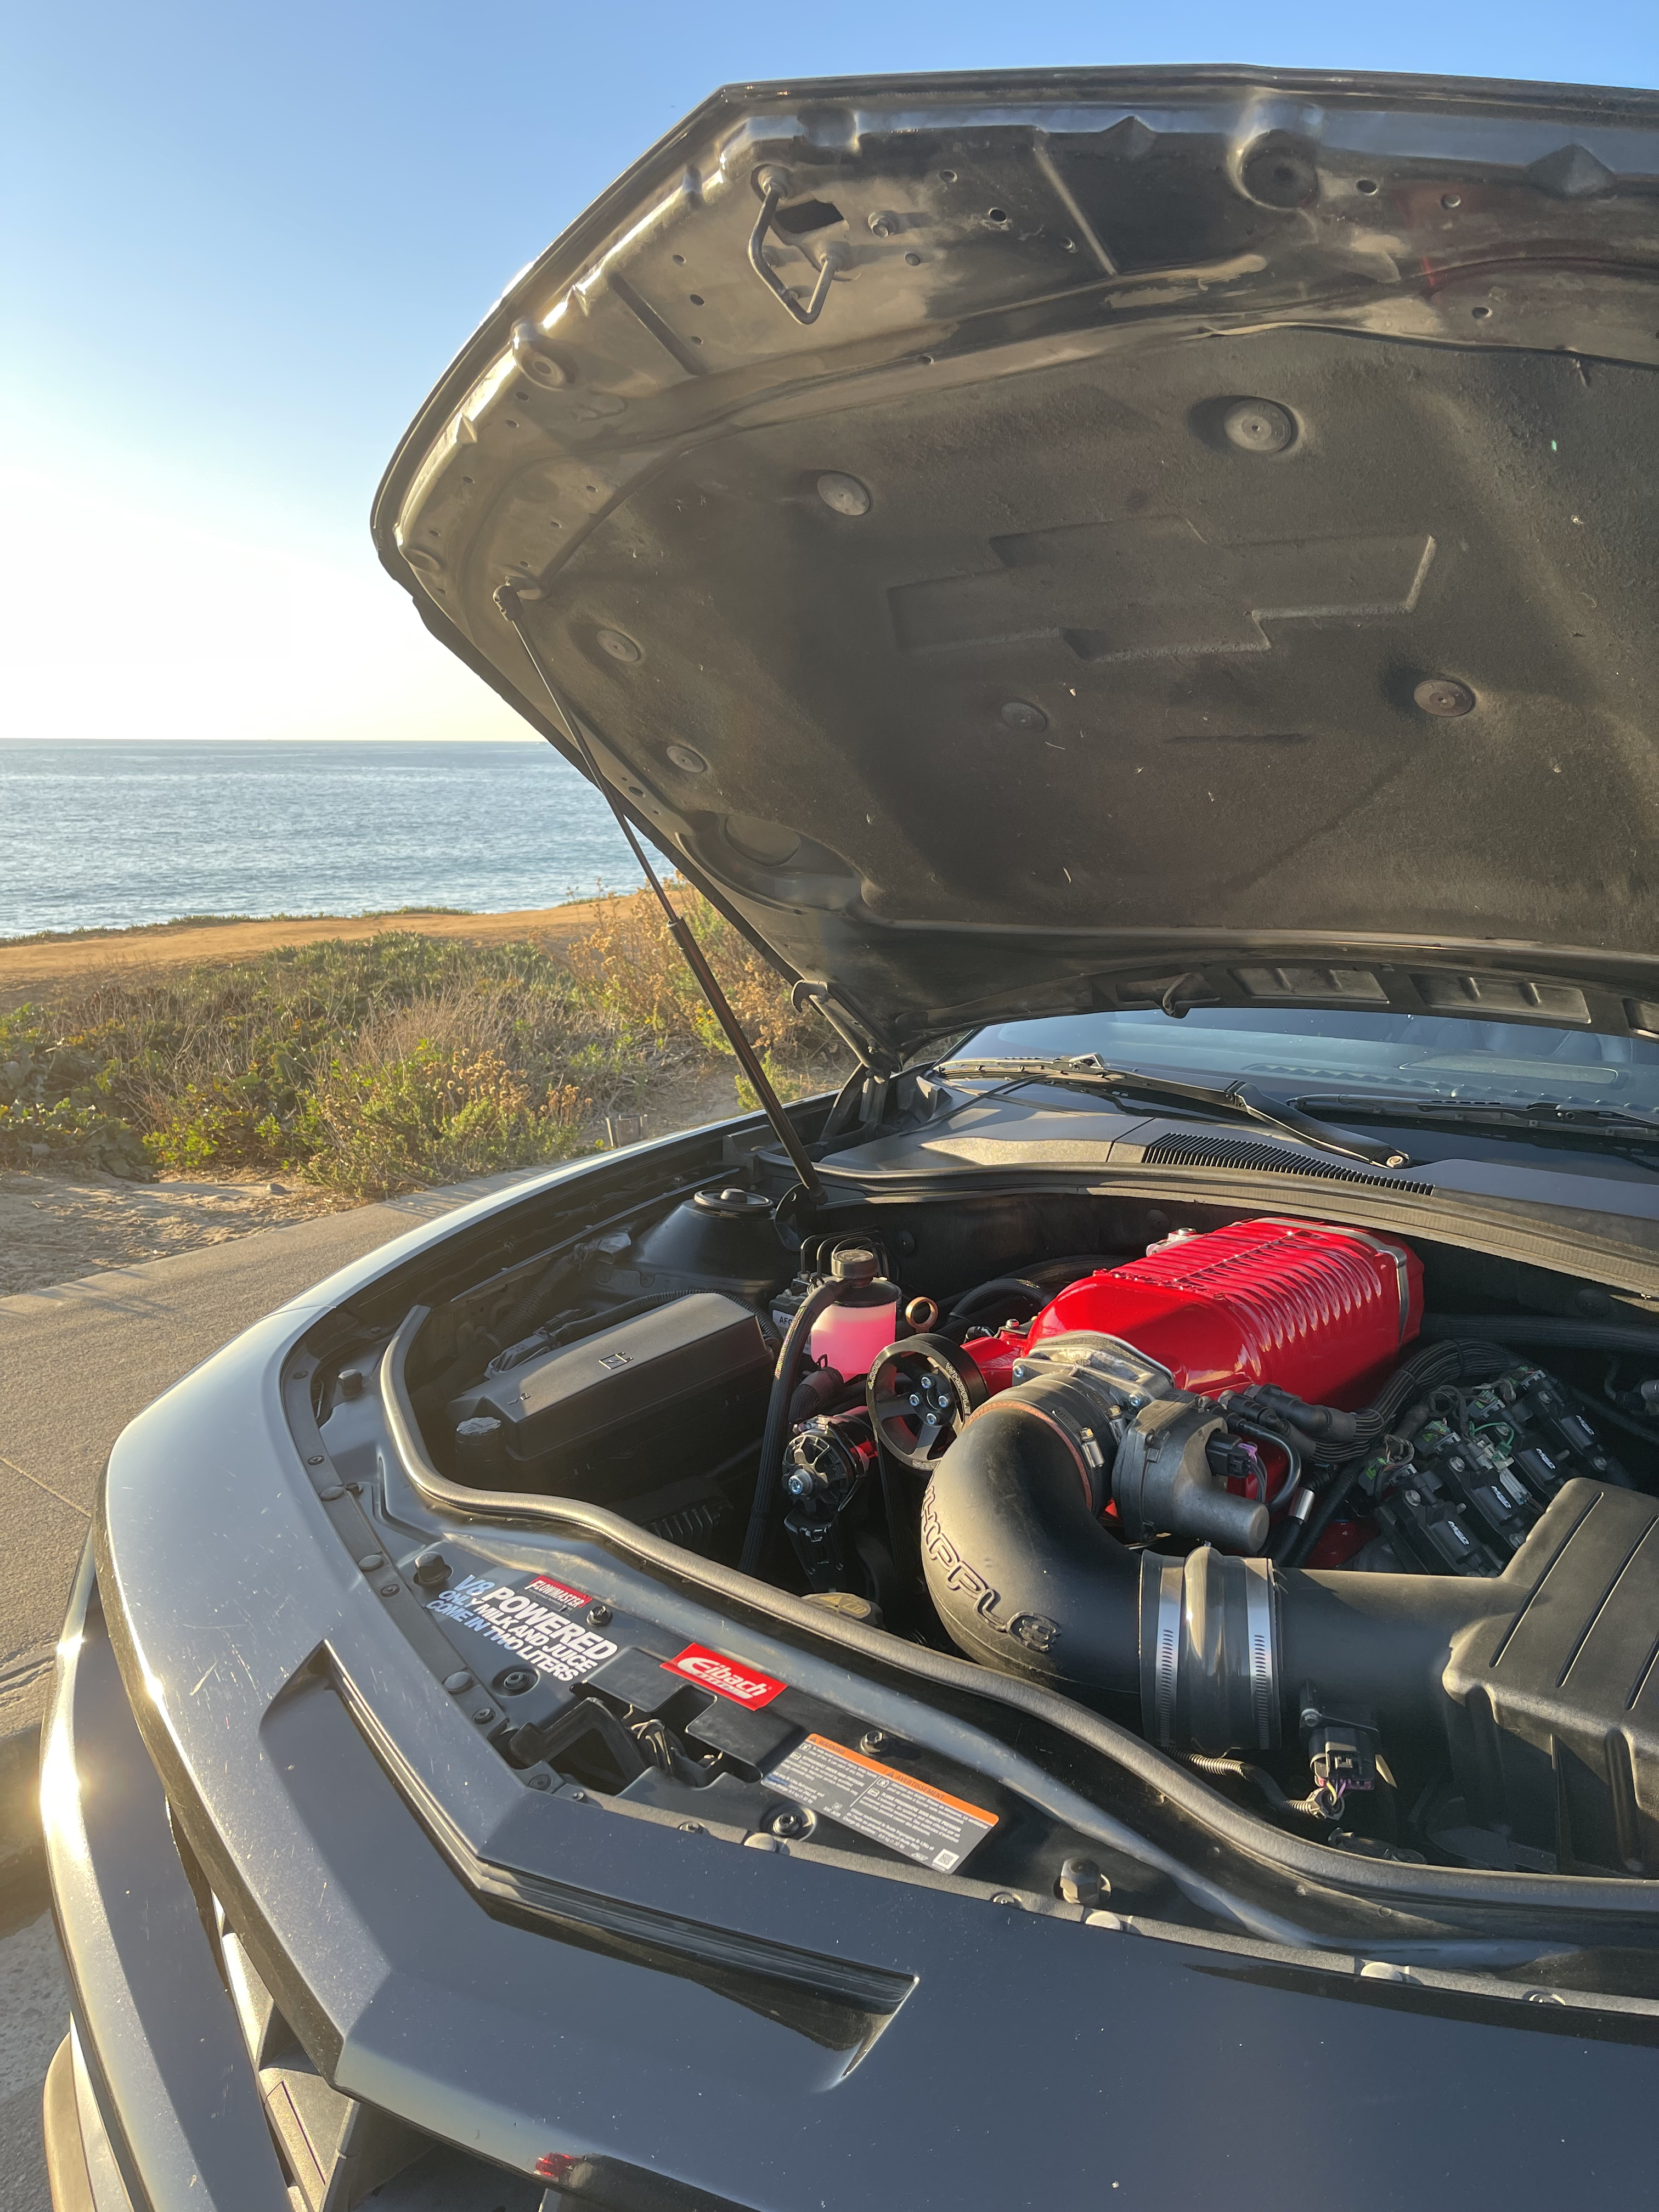
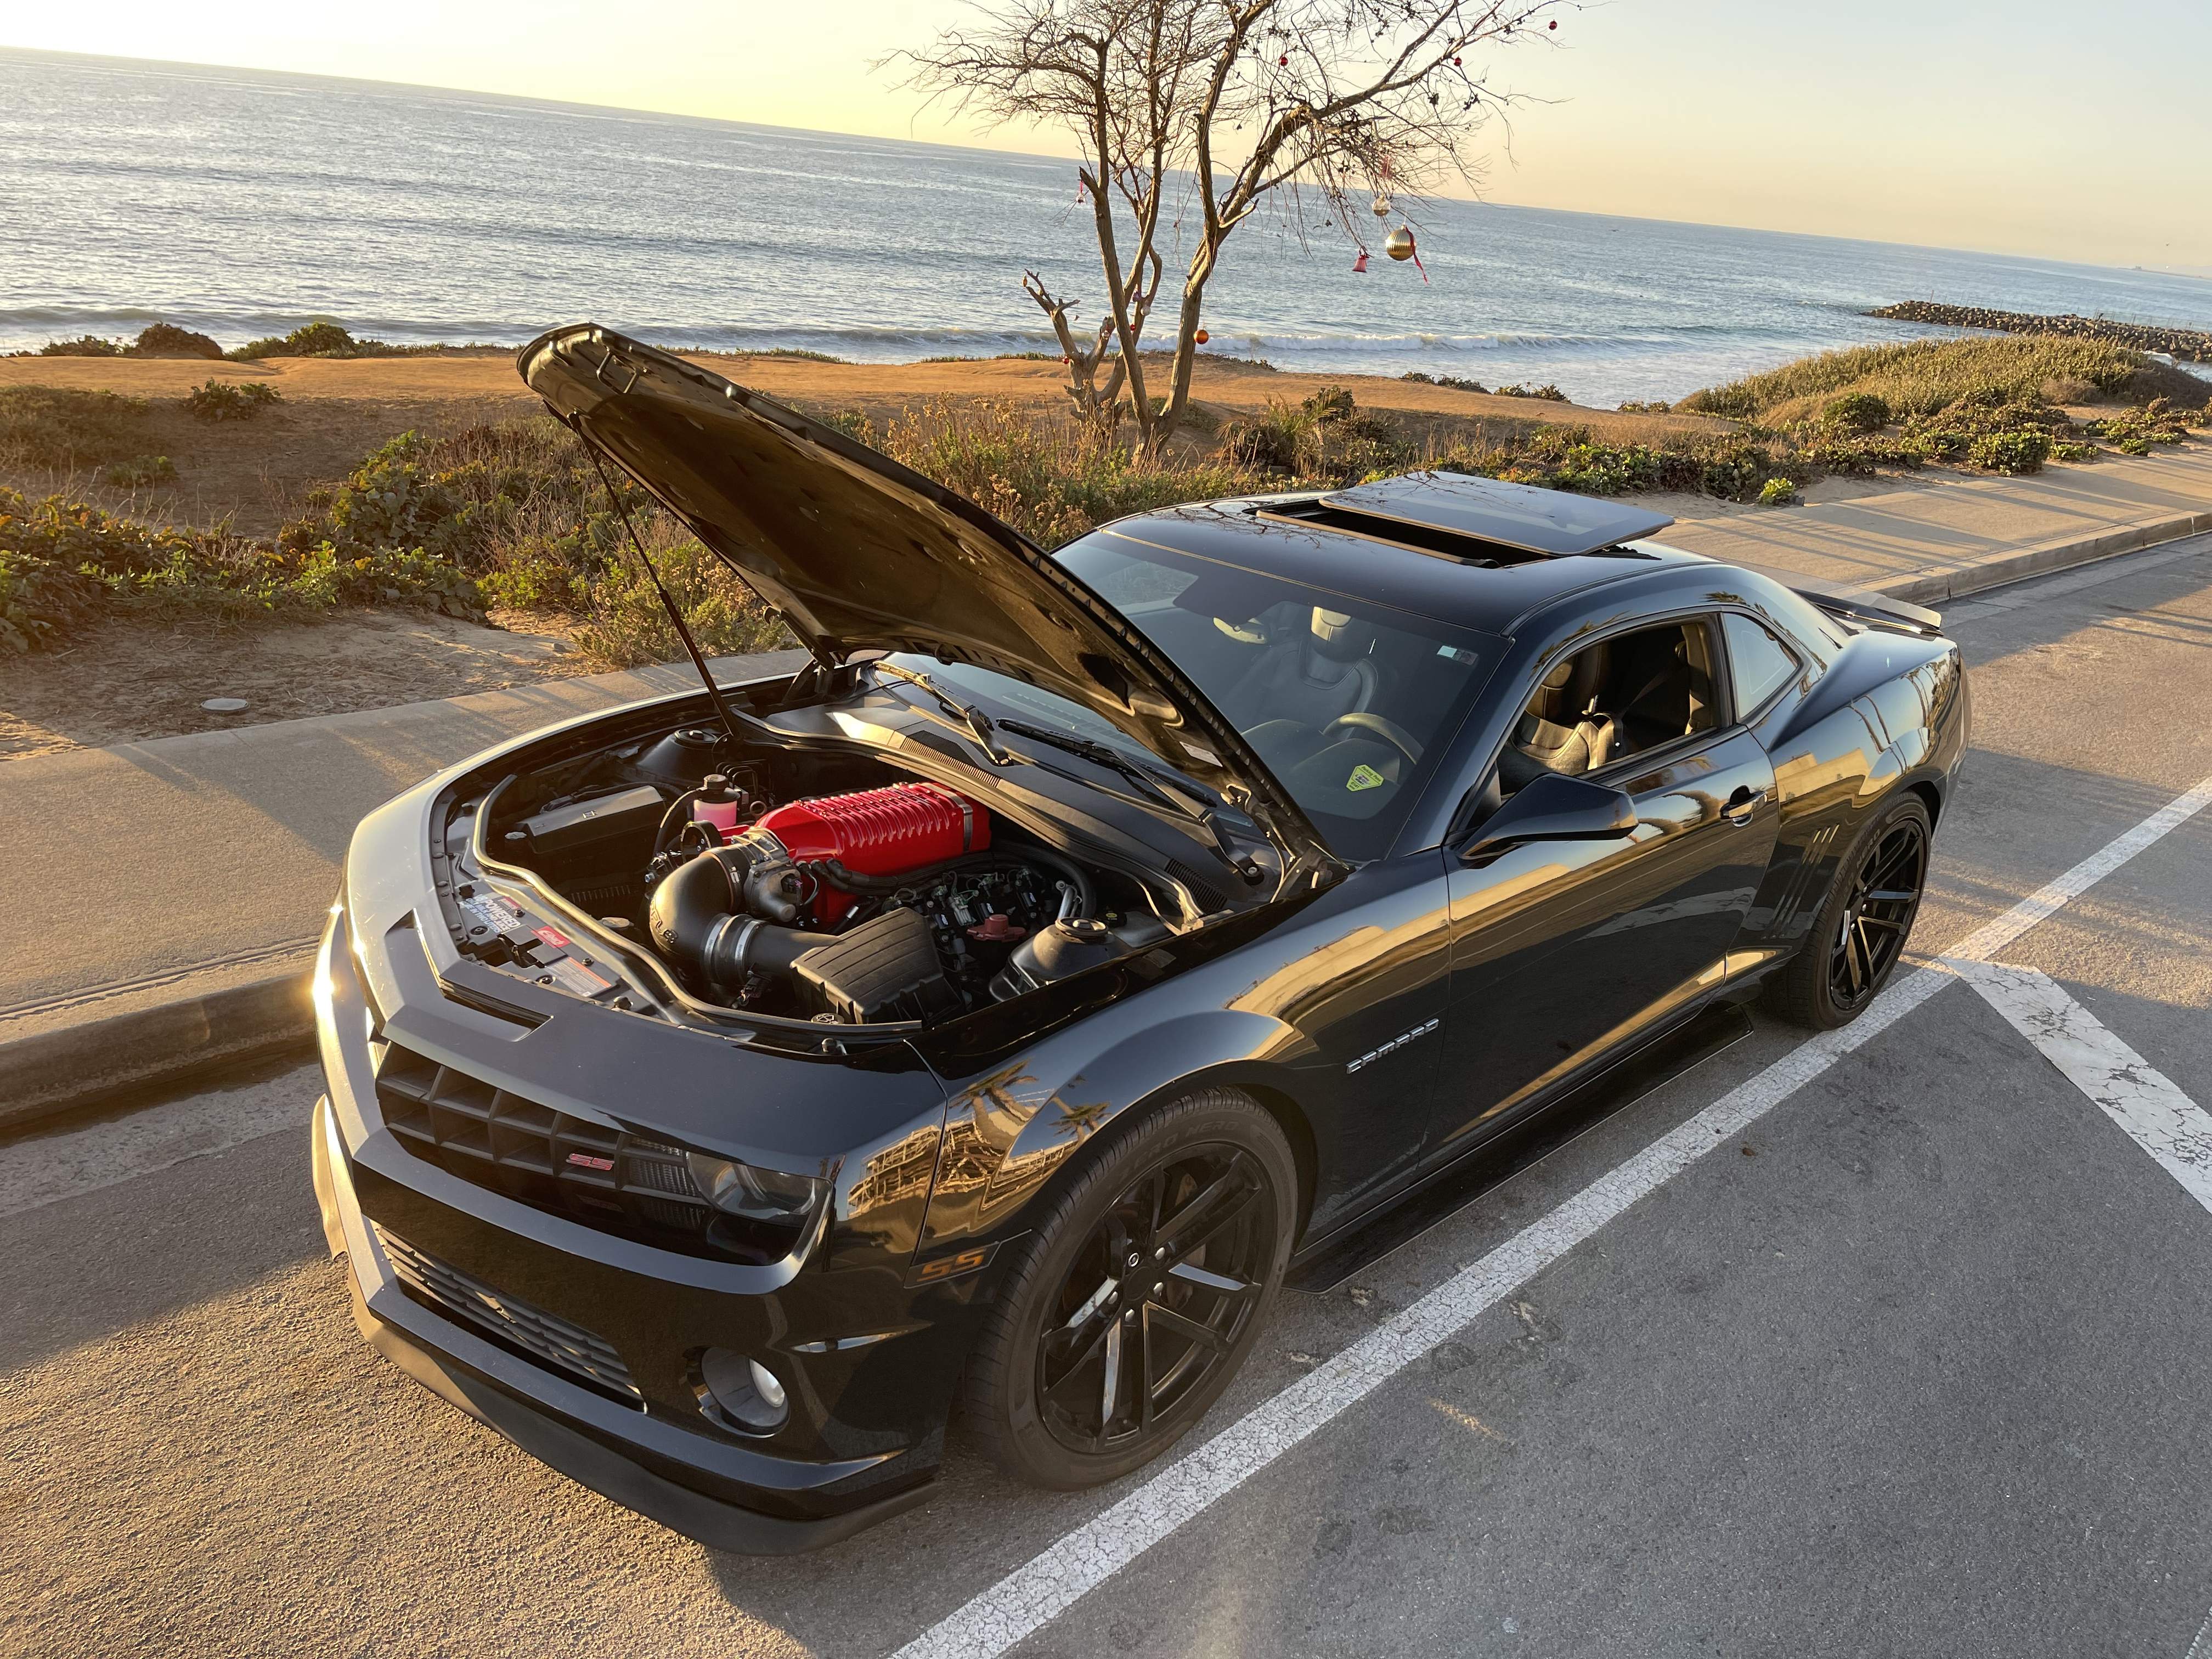
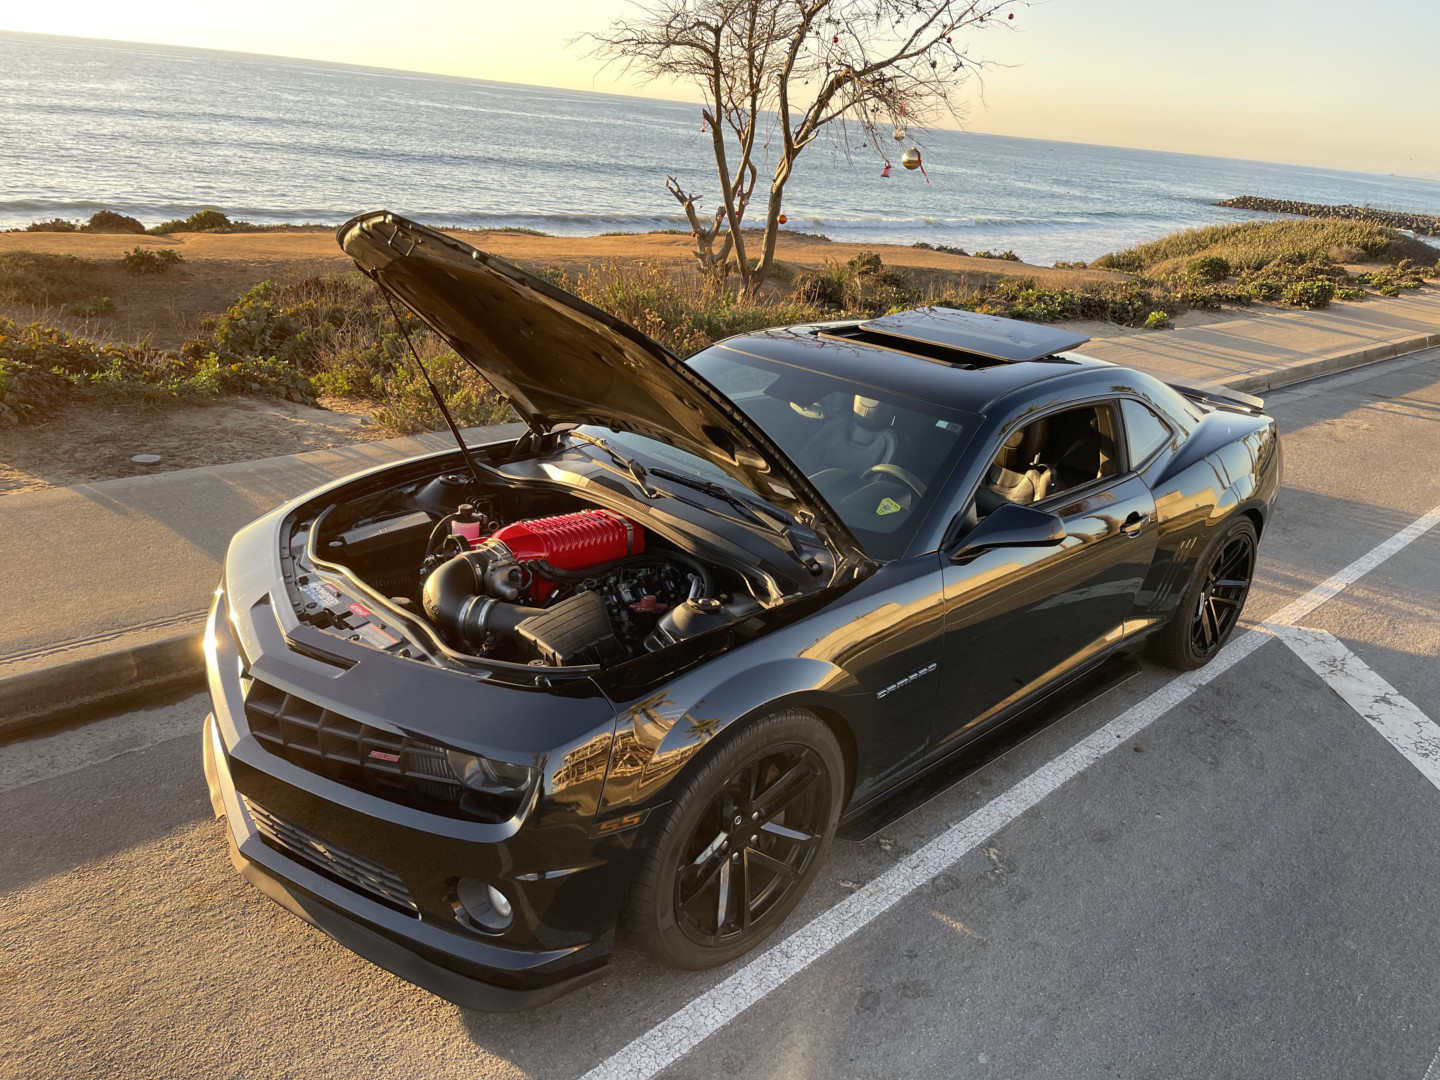
Ready for her close-up. The Daily Camaro has come a long way since we first got our hands on it, but it’s time for boost!
The Grand Tour
The first day we spent at Whipple, Dustin gave us an in-depth tour of the entire facility.
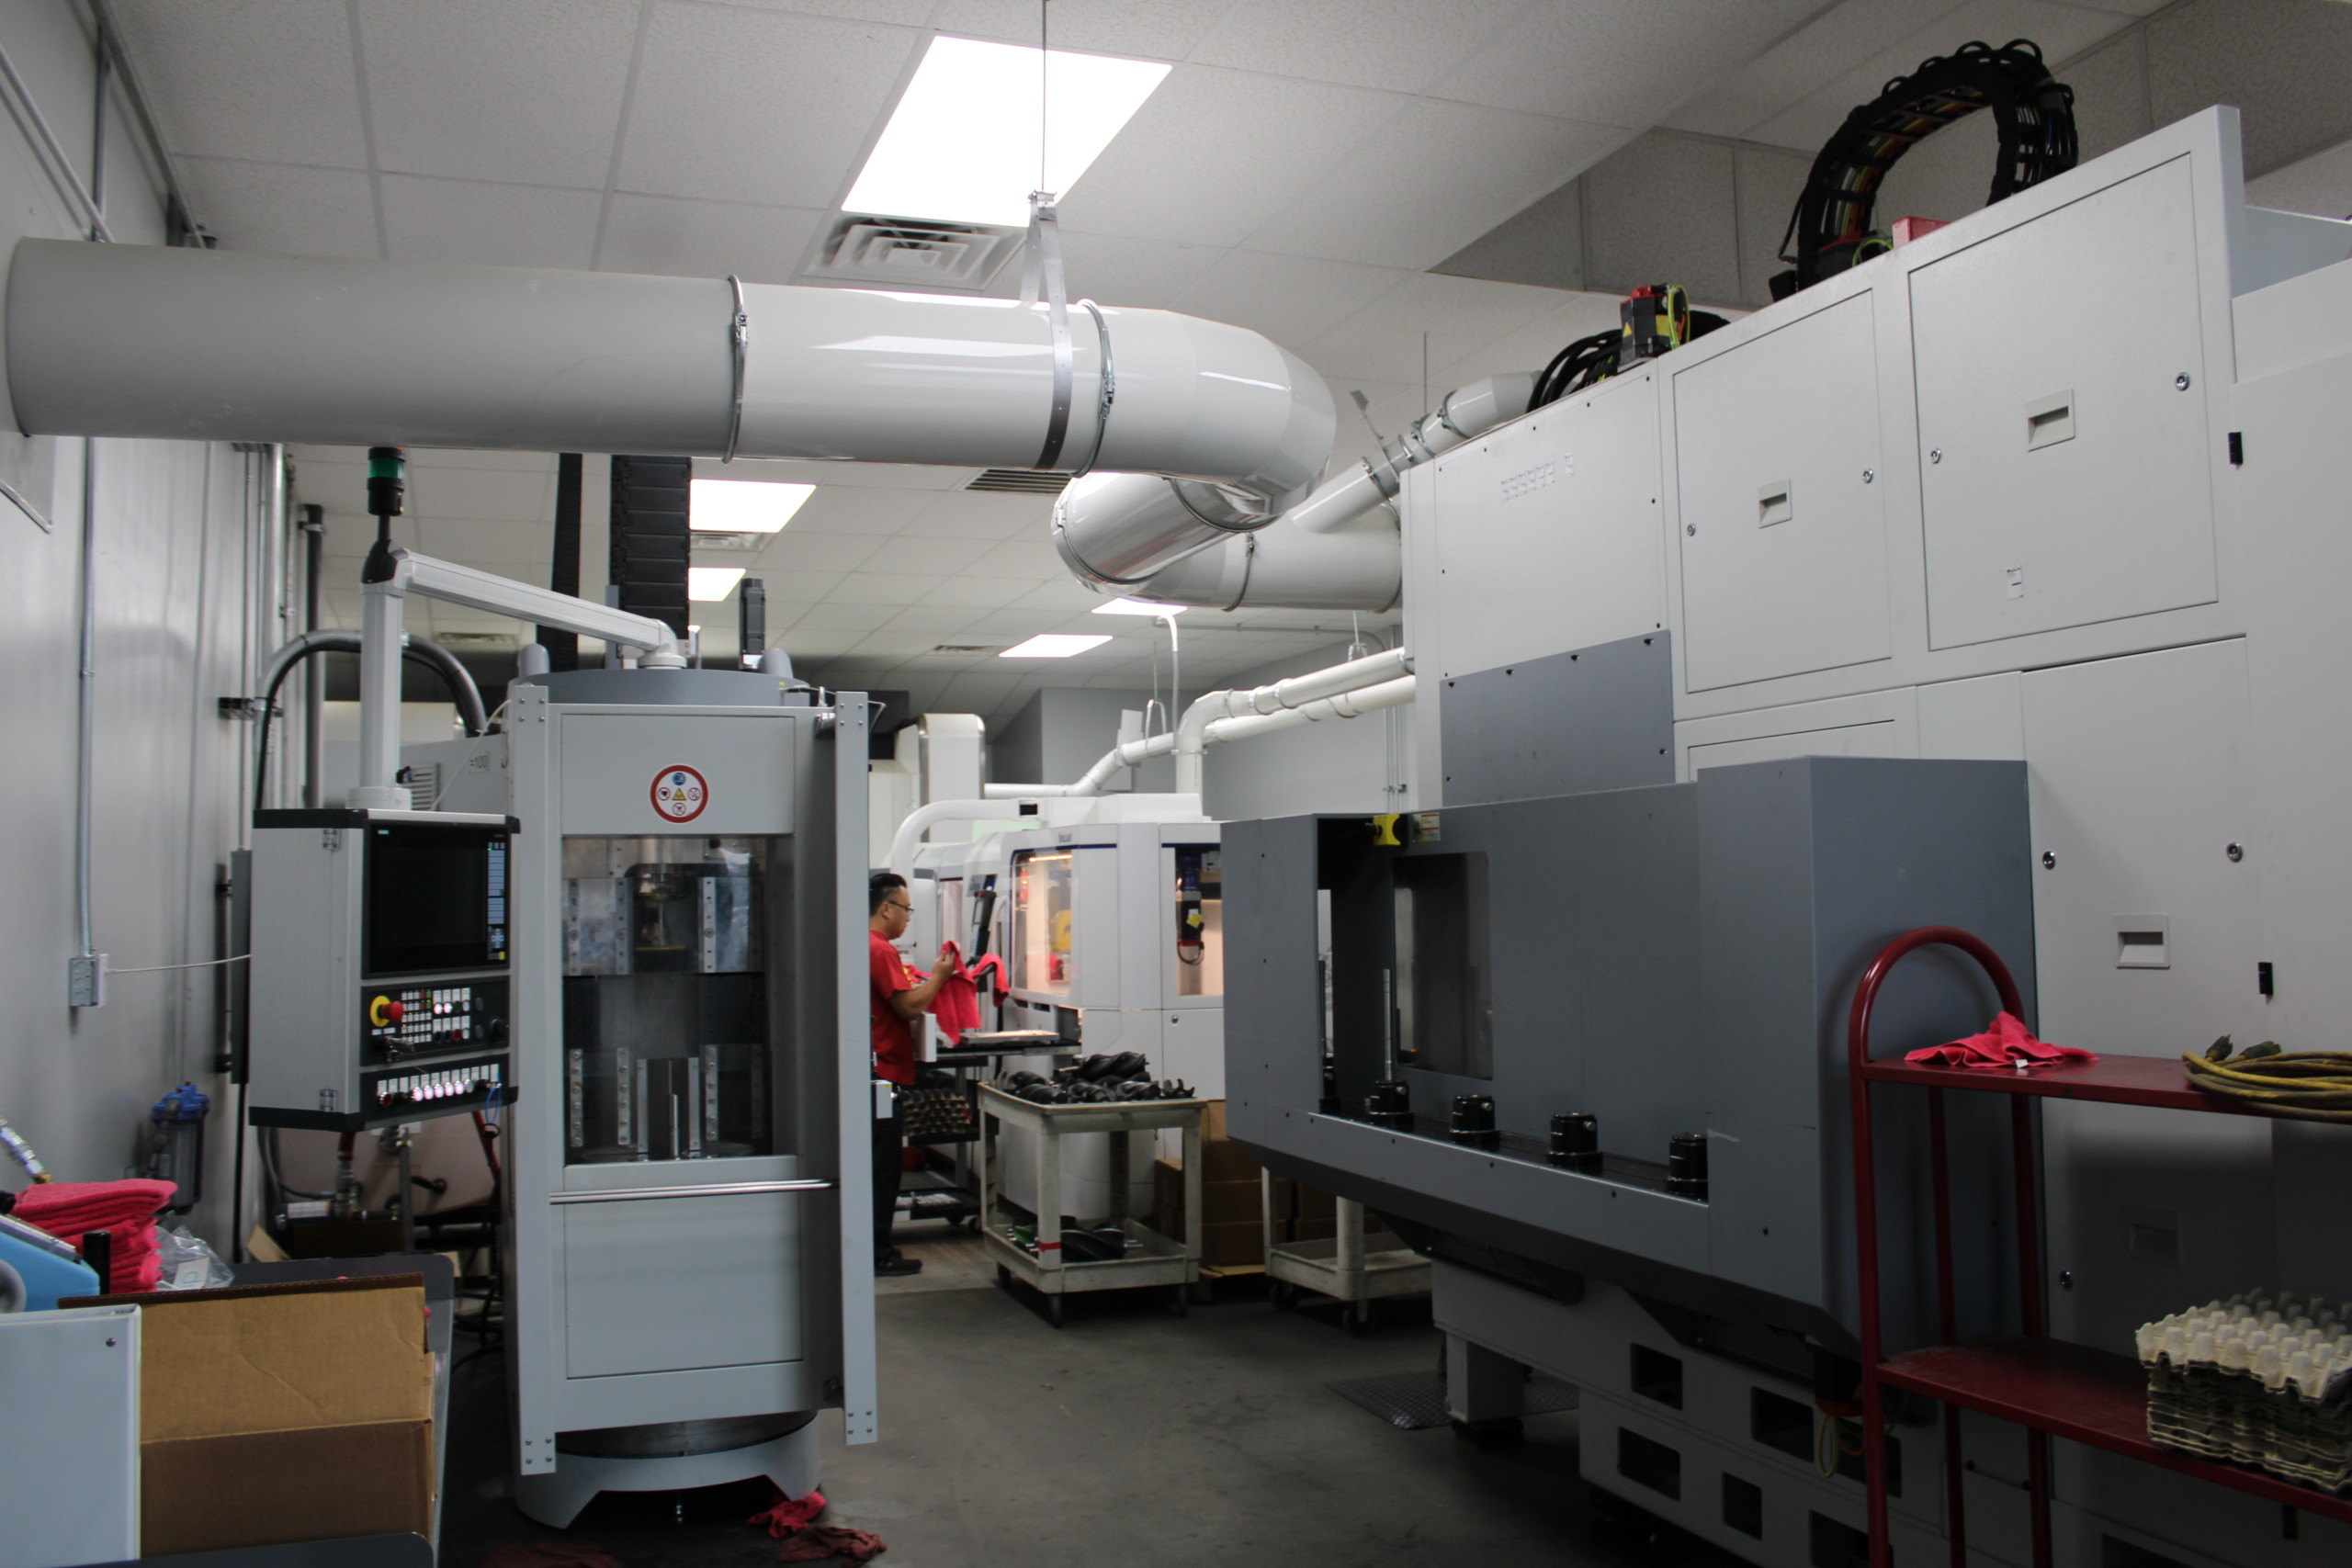
Housed in several buildings on a fairly large-sized lot in Fresno, California, the Whipple operation runs like a well-oiled machine – no pun intended. Frankly, we were blown away by what we saw. The “small company” based in the heart of California’s agricultural valley is truly a titan in the performance aftermarket industry.
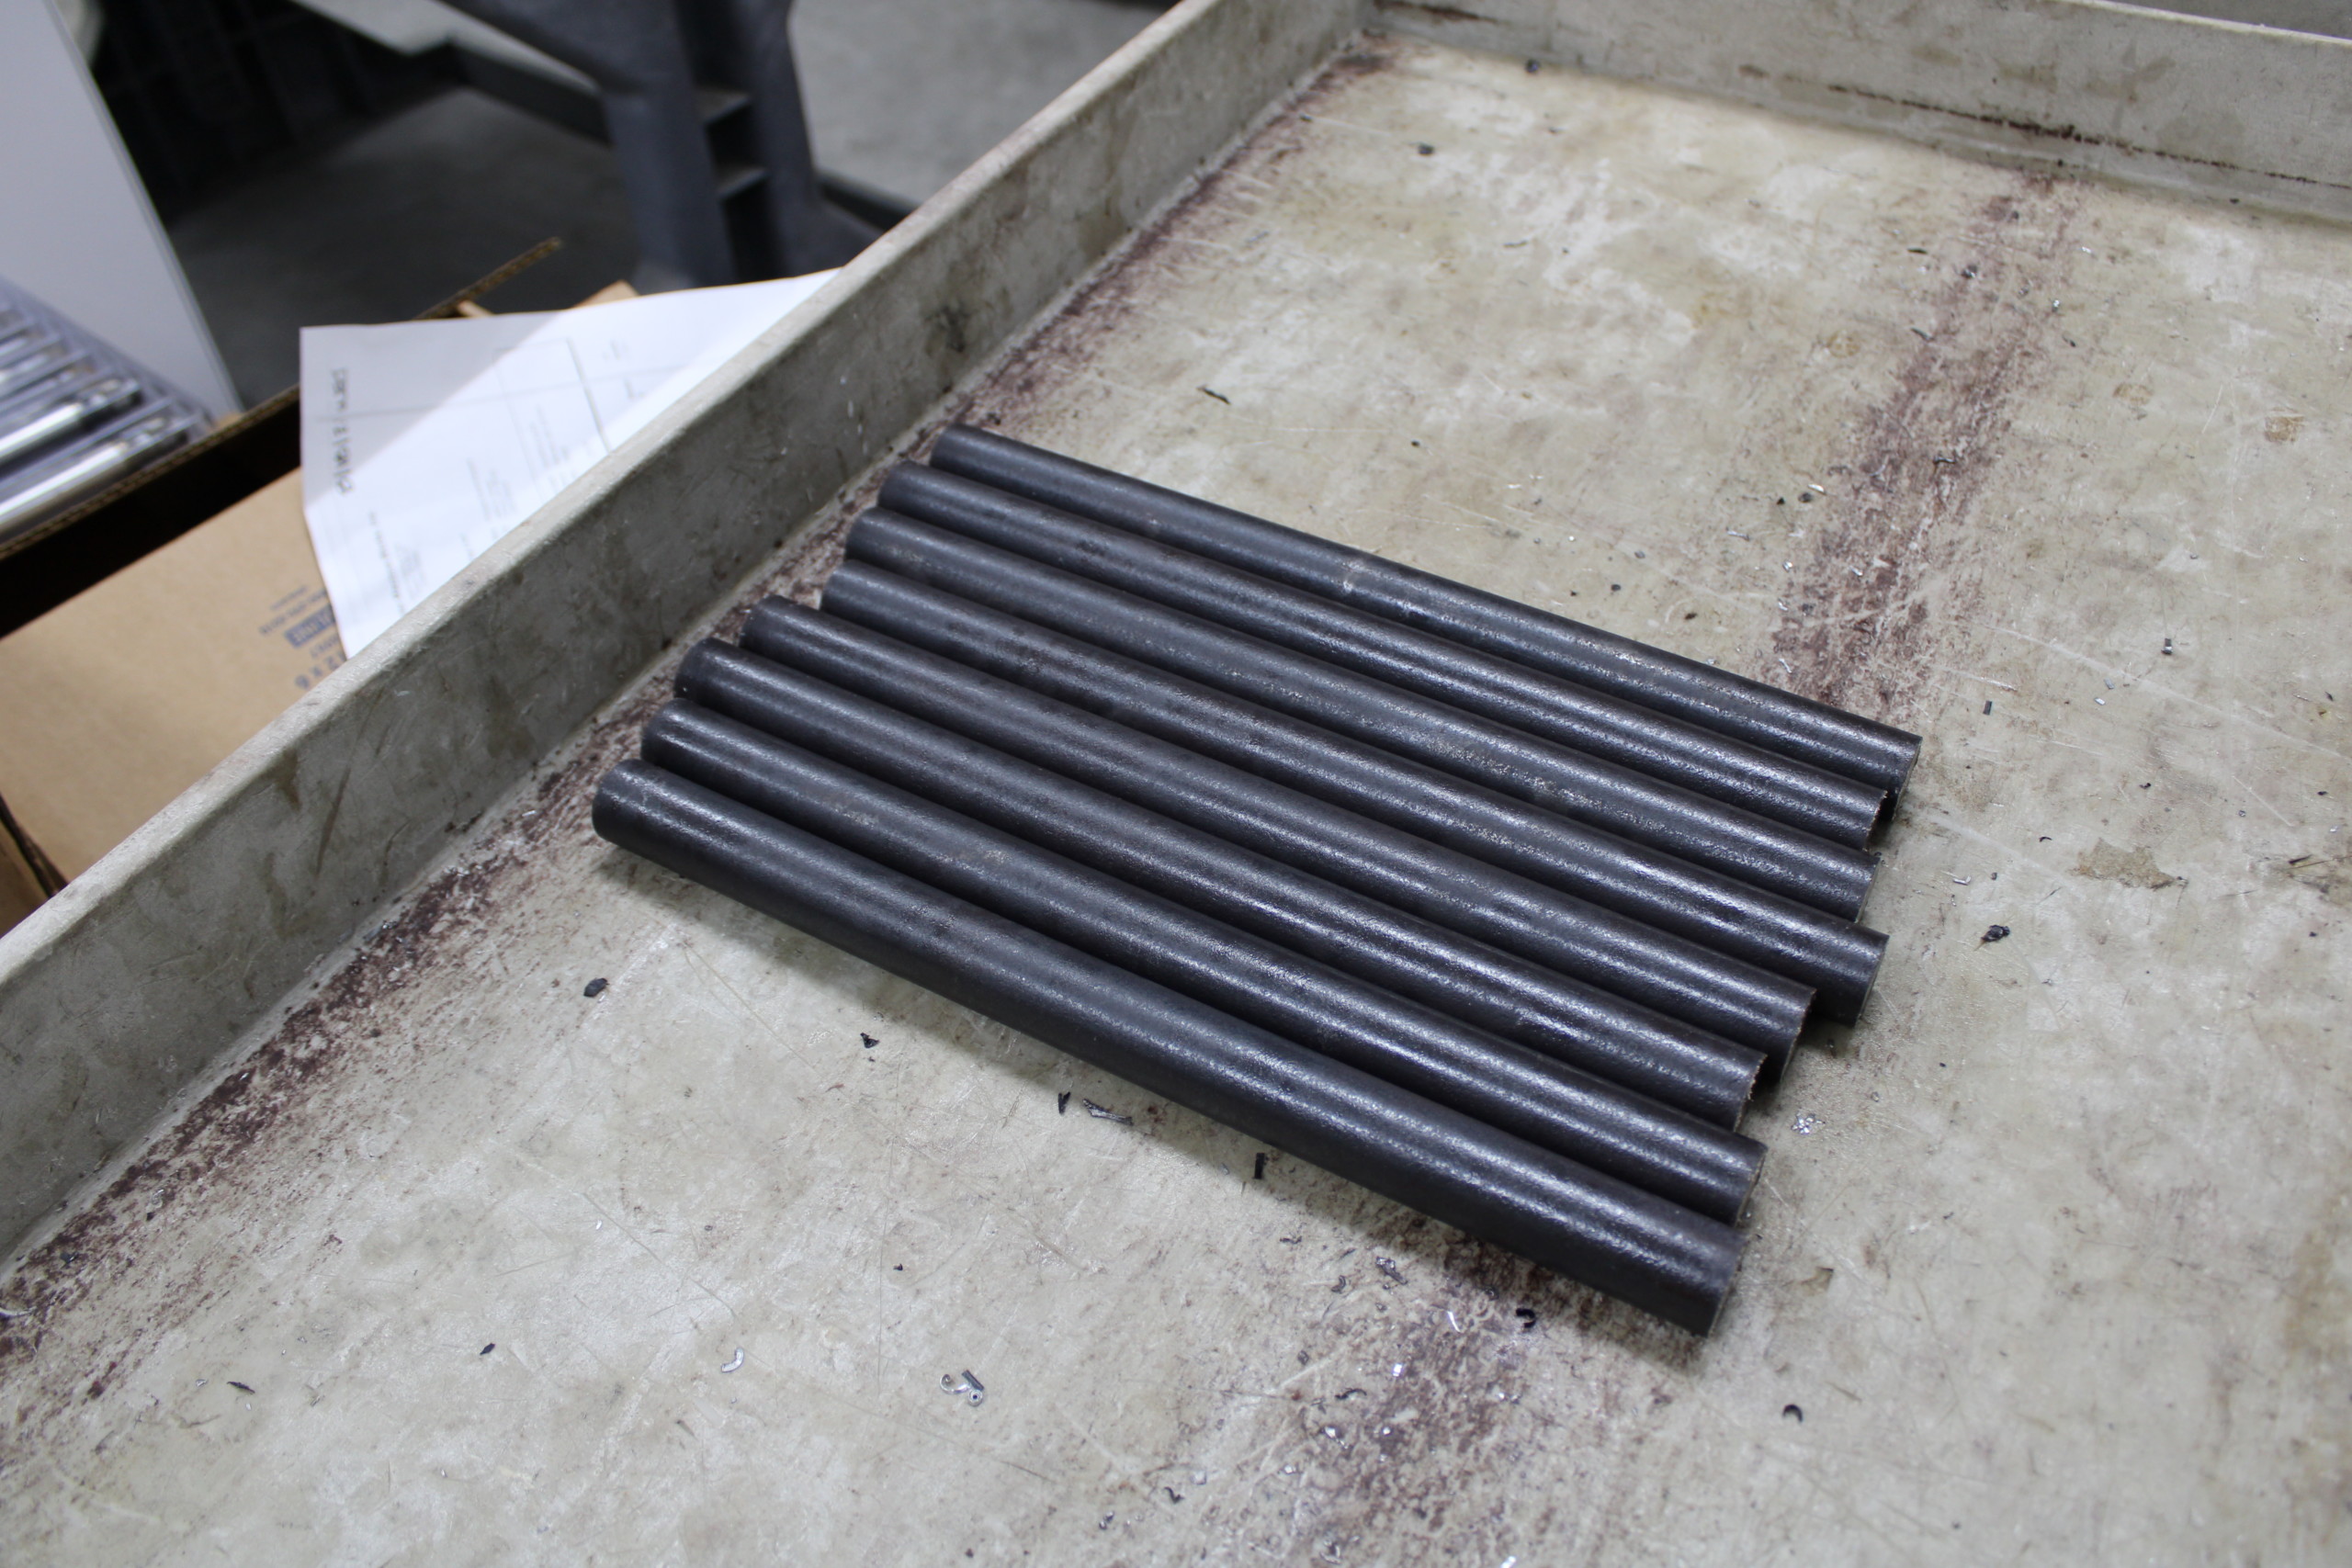
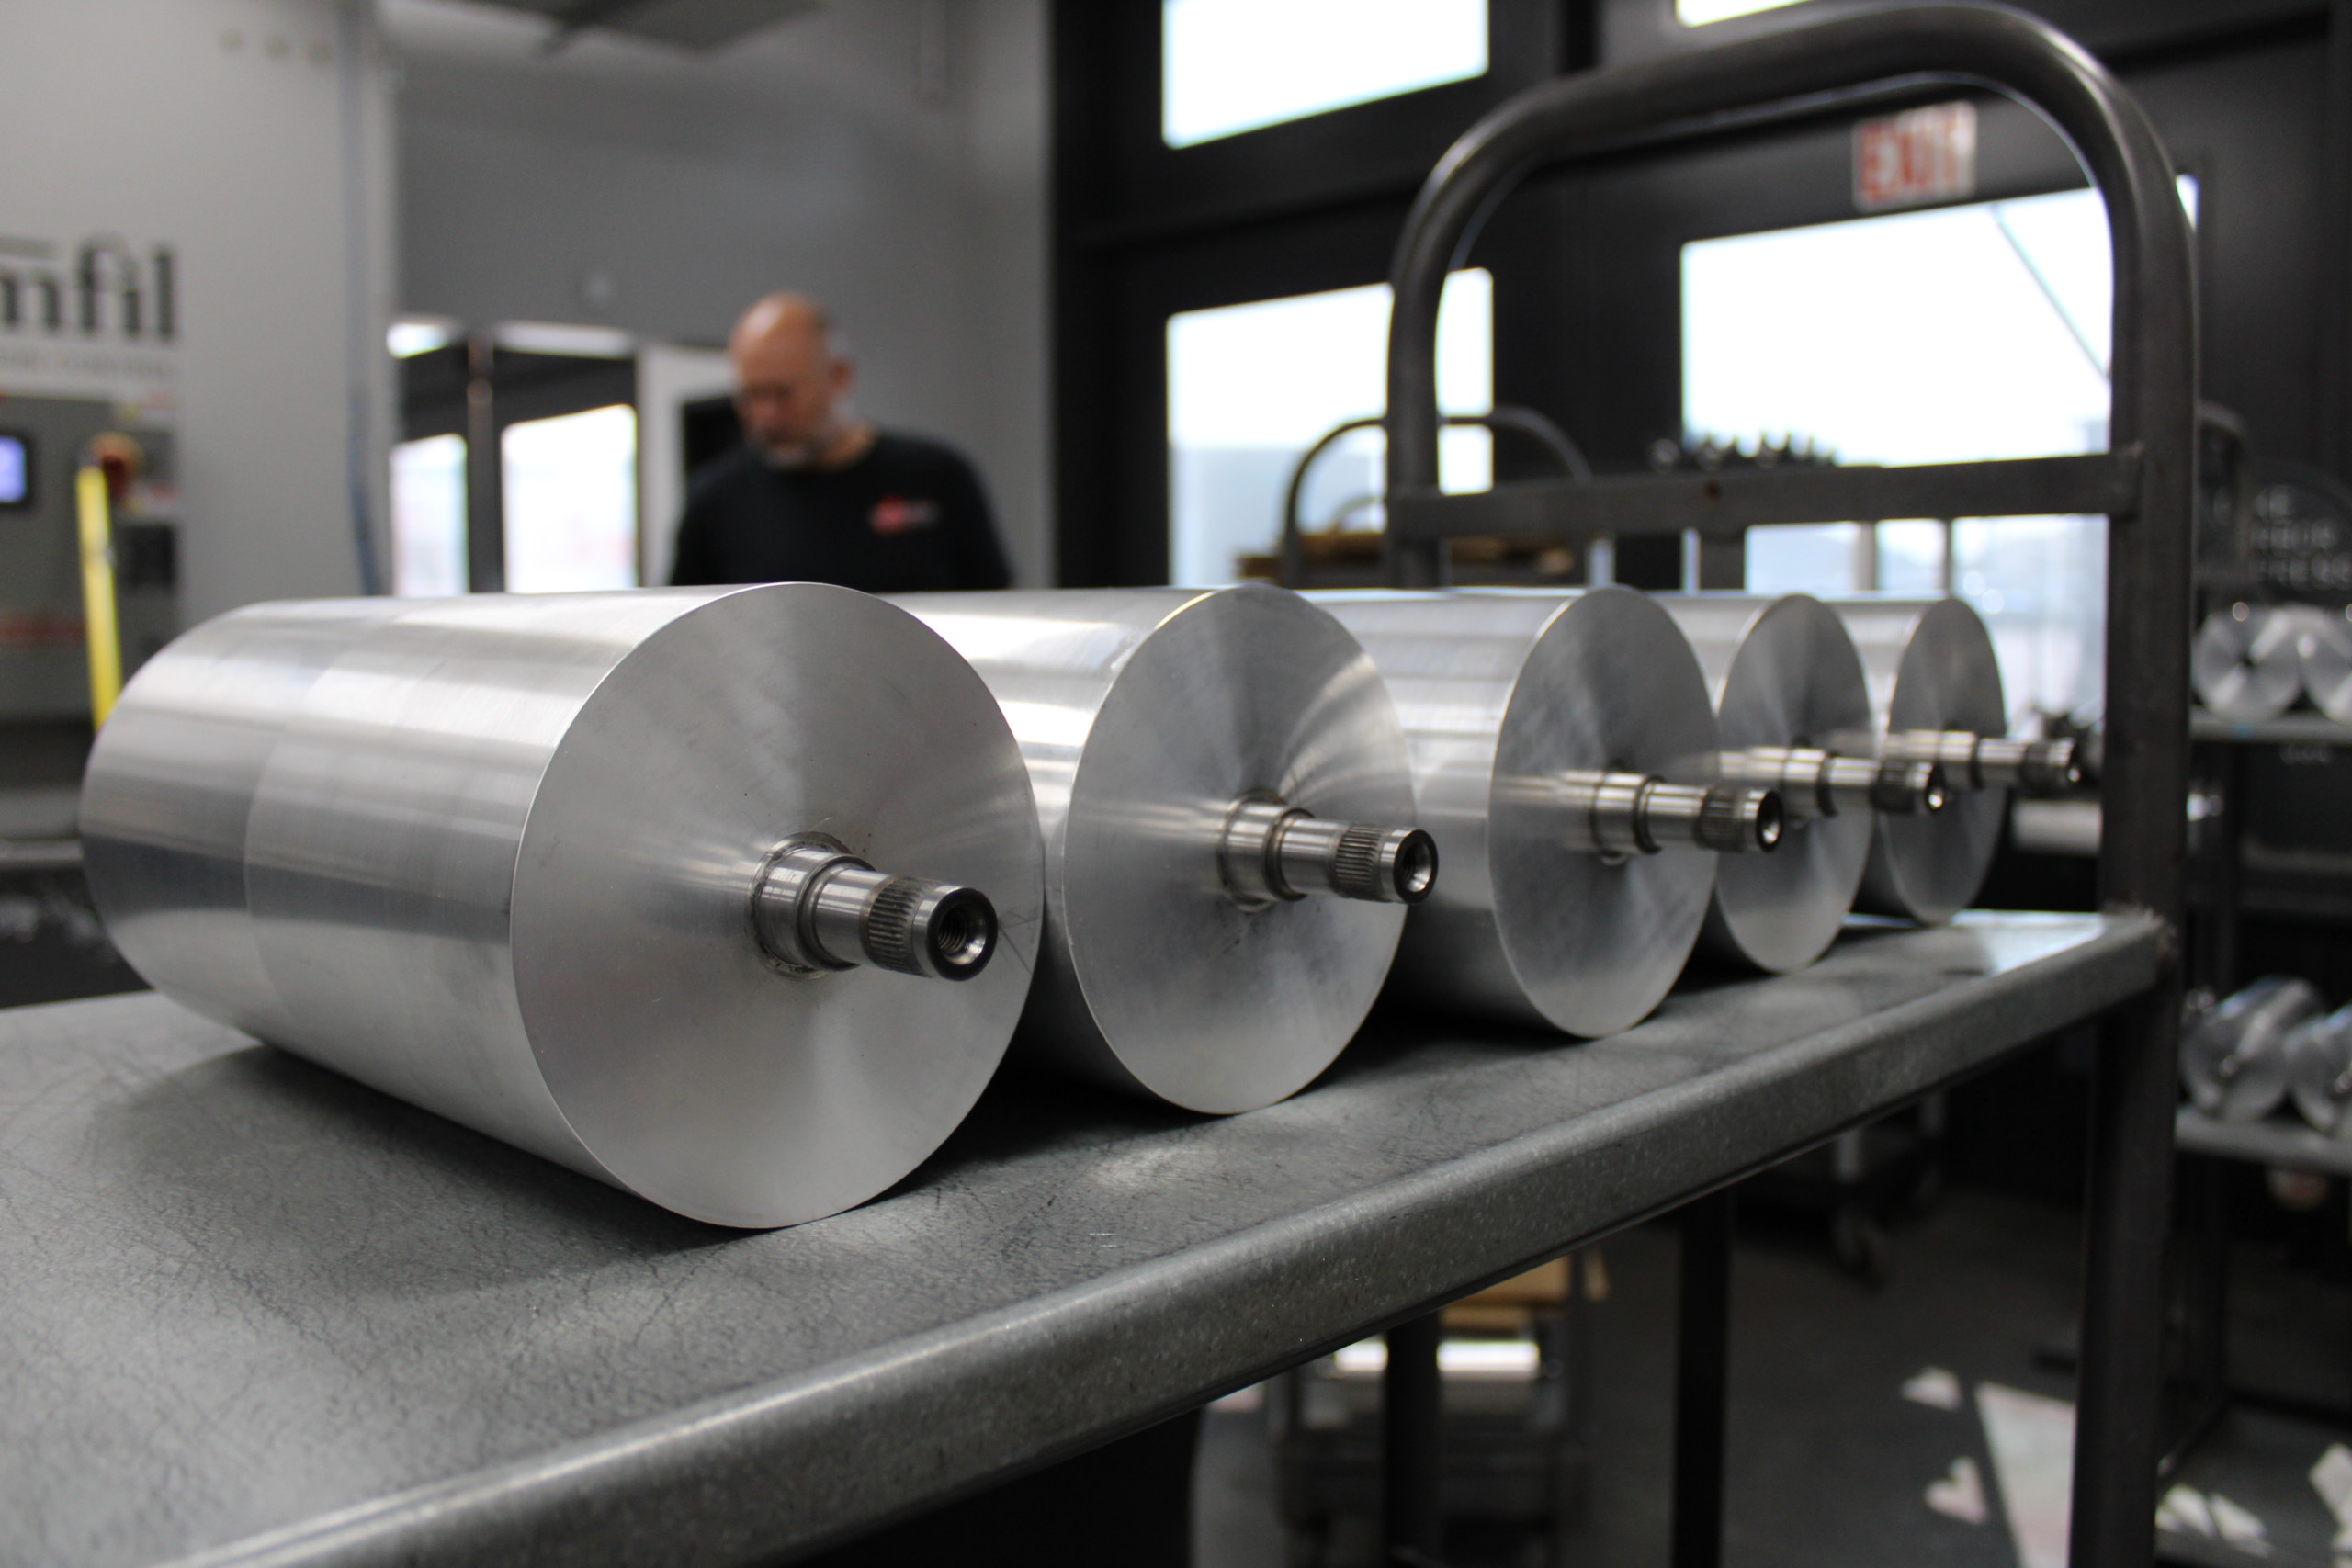
Raw blanks for the rotor shafts are heat-treated and milled by state of the art machinery.
The multiple SEMA Manufacturer Of The Year award-winning company came from blue-collar beginnings, after all. Dustin’s grandpa built the foundation a few decades ago with a rebar company and racing under the famed Mr.Ed top fuel hydro and nitro funny cars. Dustin continued, “My Father also drag raced across the country with the famed Whipple and McCulloch funny cars. He later retired from racing and went to work for my grandfather, running the trucking portion of the company. During that time, my father ran the Mr. Ed race cars and boats. Eventually, he started his own trucking company and retired for good from racing. From that, my father wanted to make a new supercharger for drag racing to prove the concept of the screw compressor. We started with small superchargers and tested on our own trucks. That is where the first SC kits came from, originally just a proof of concept.”
Fast forward, and it has ultimately become the product that’s made the company one of the leading supercharger manufacturers in the world.
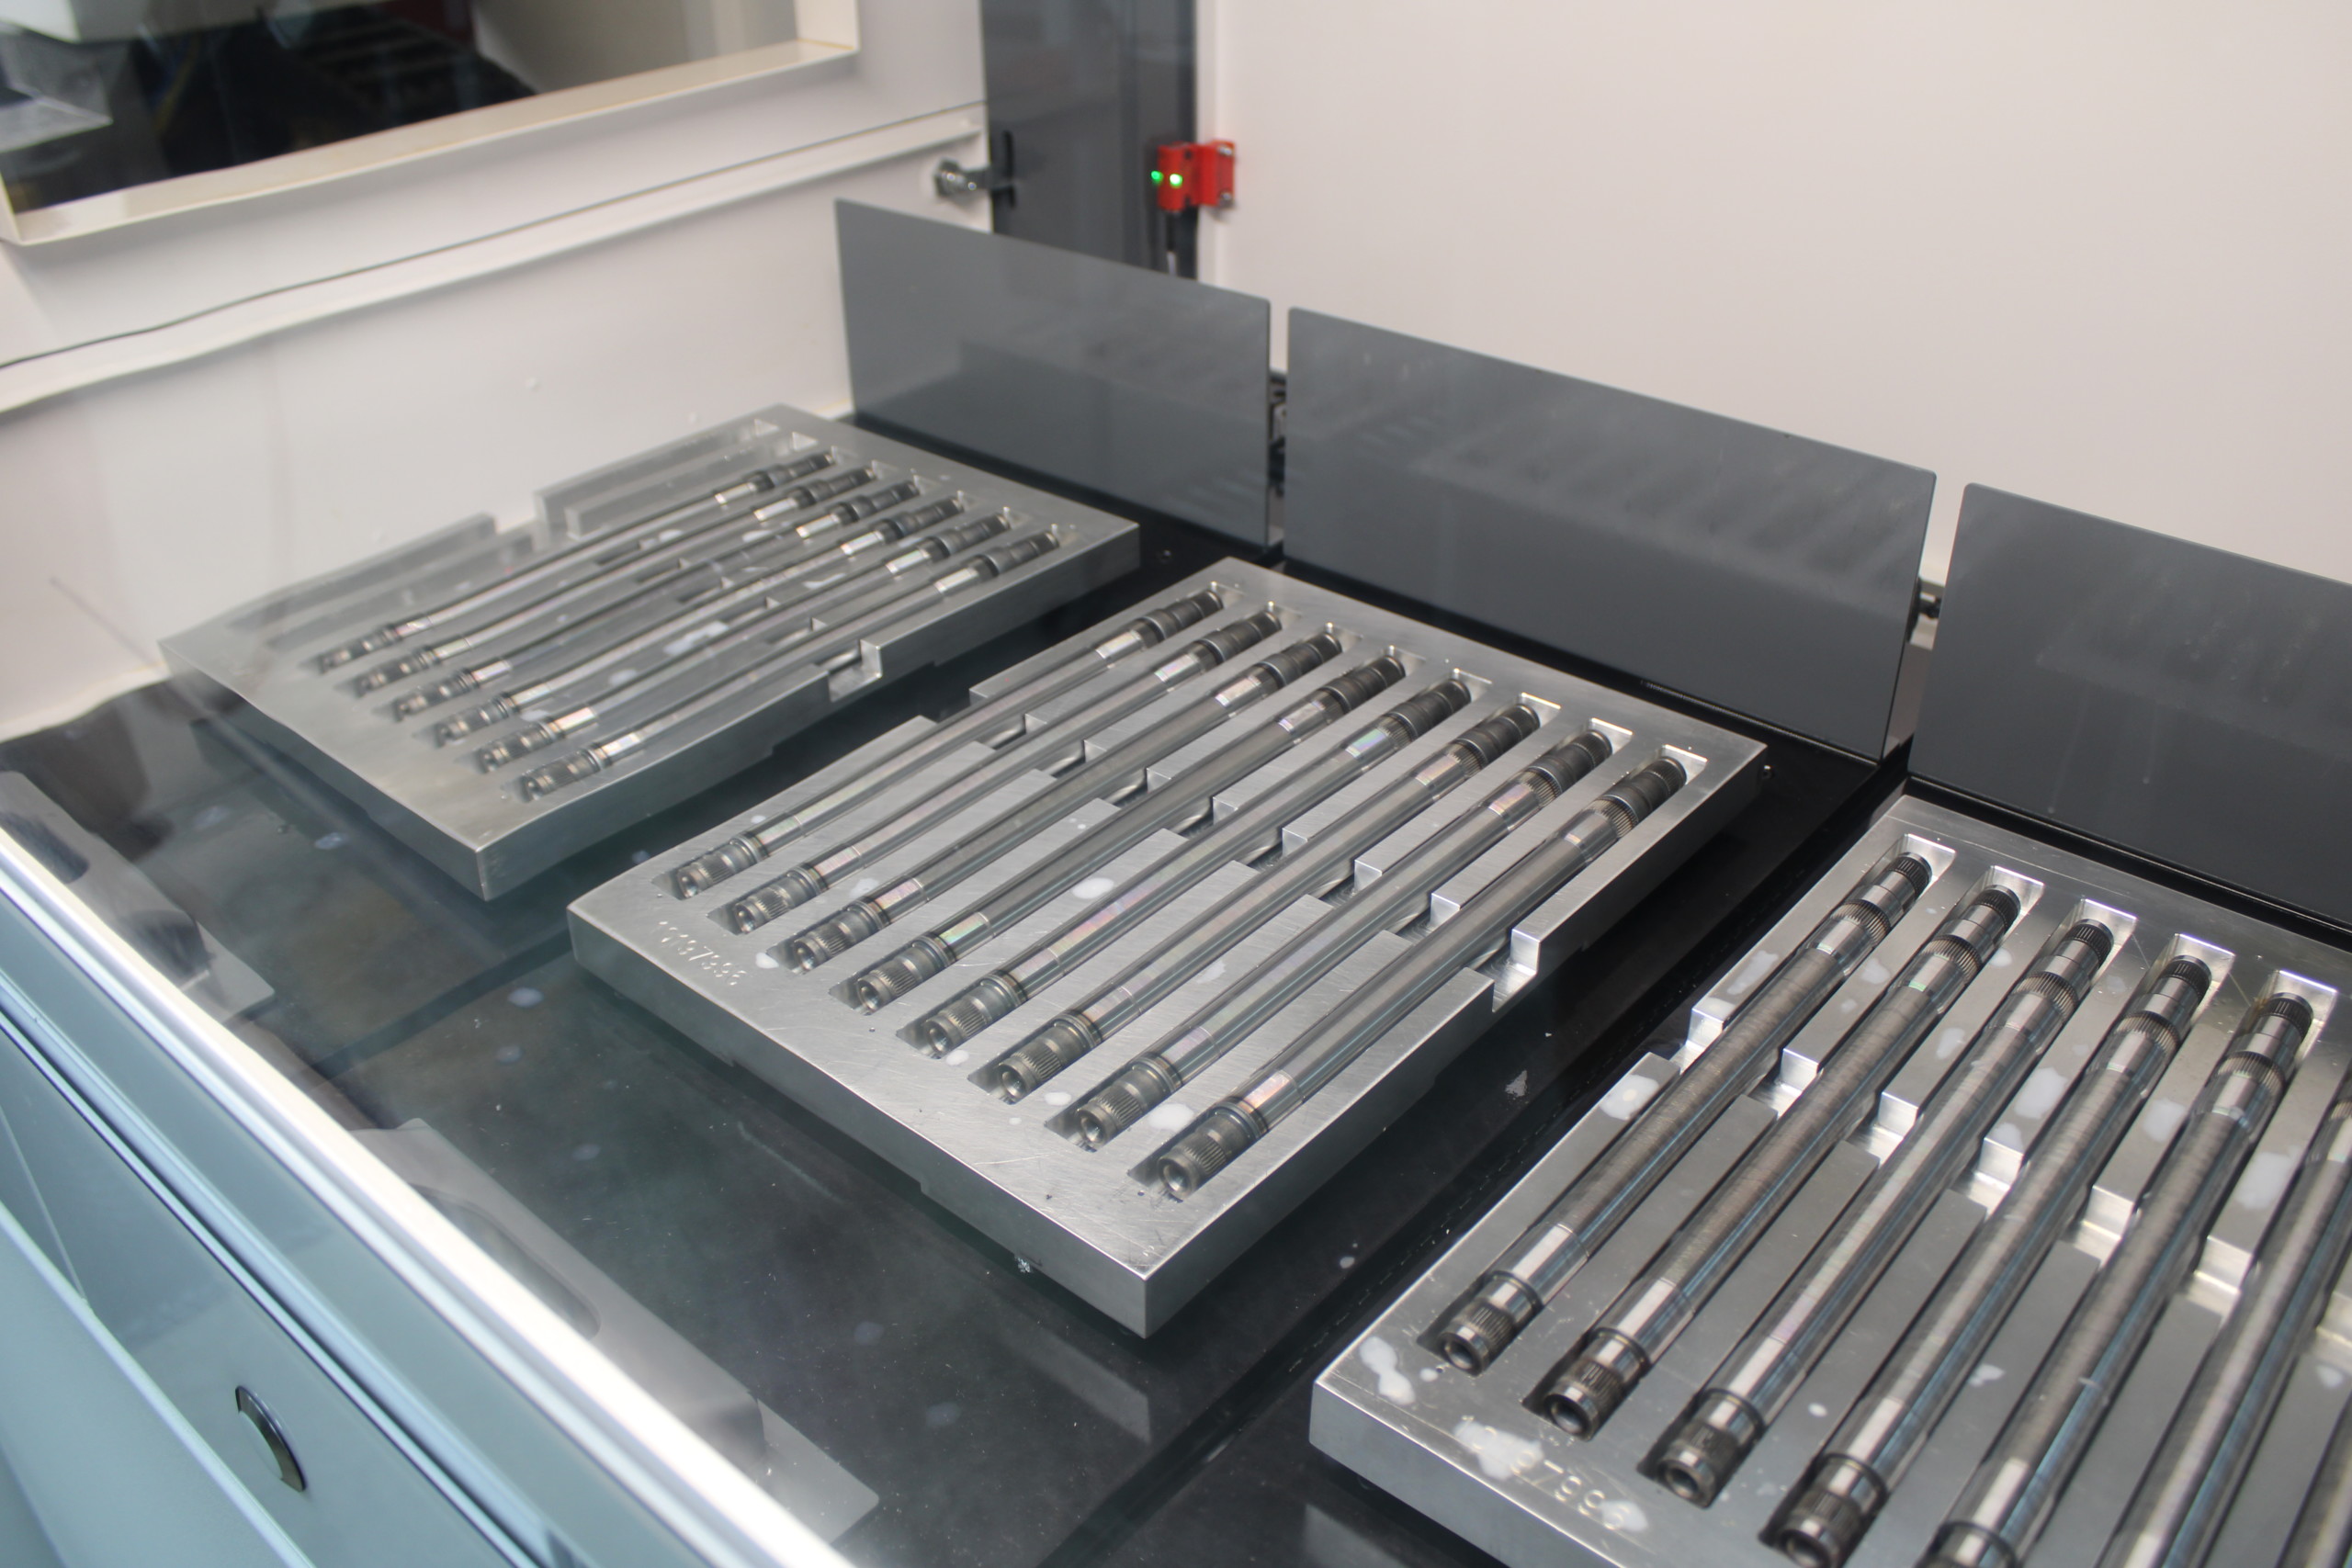
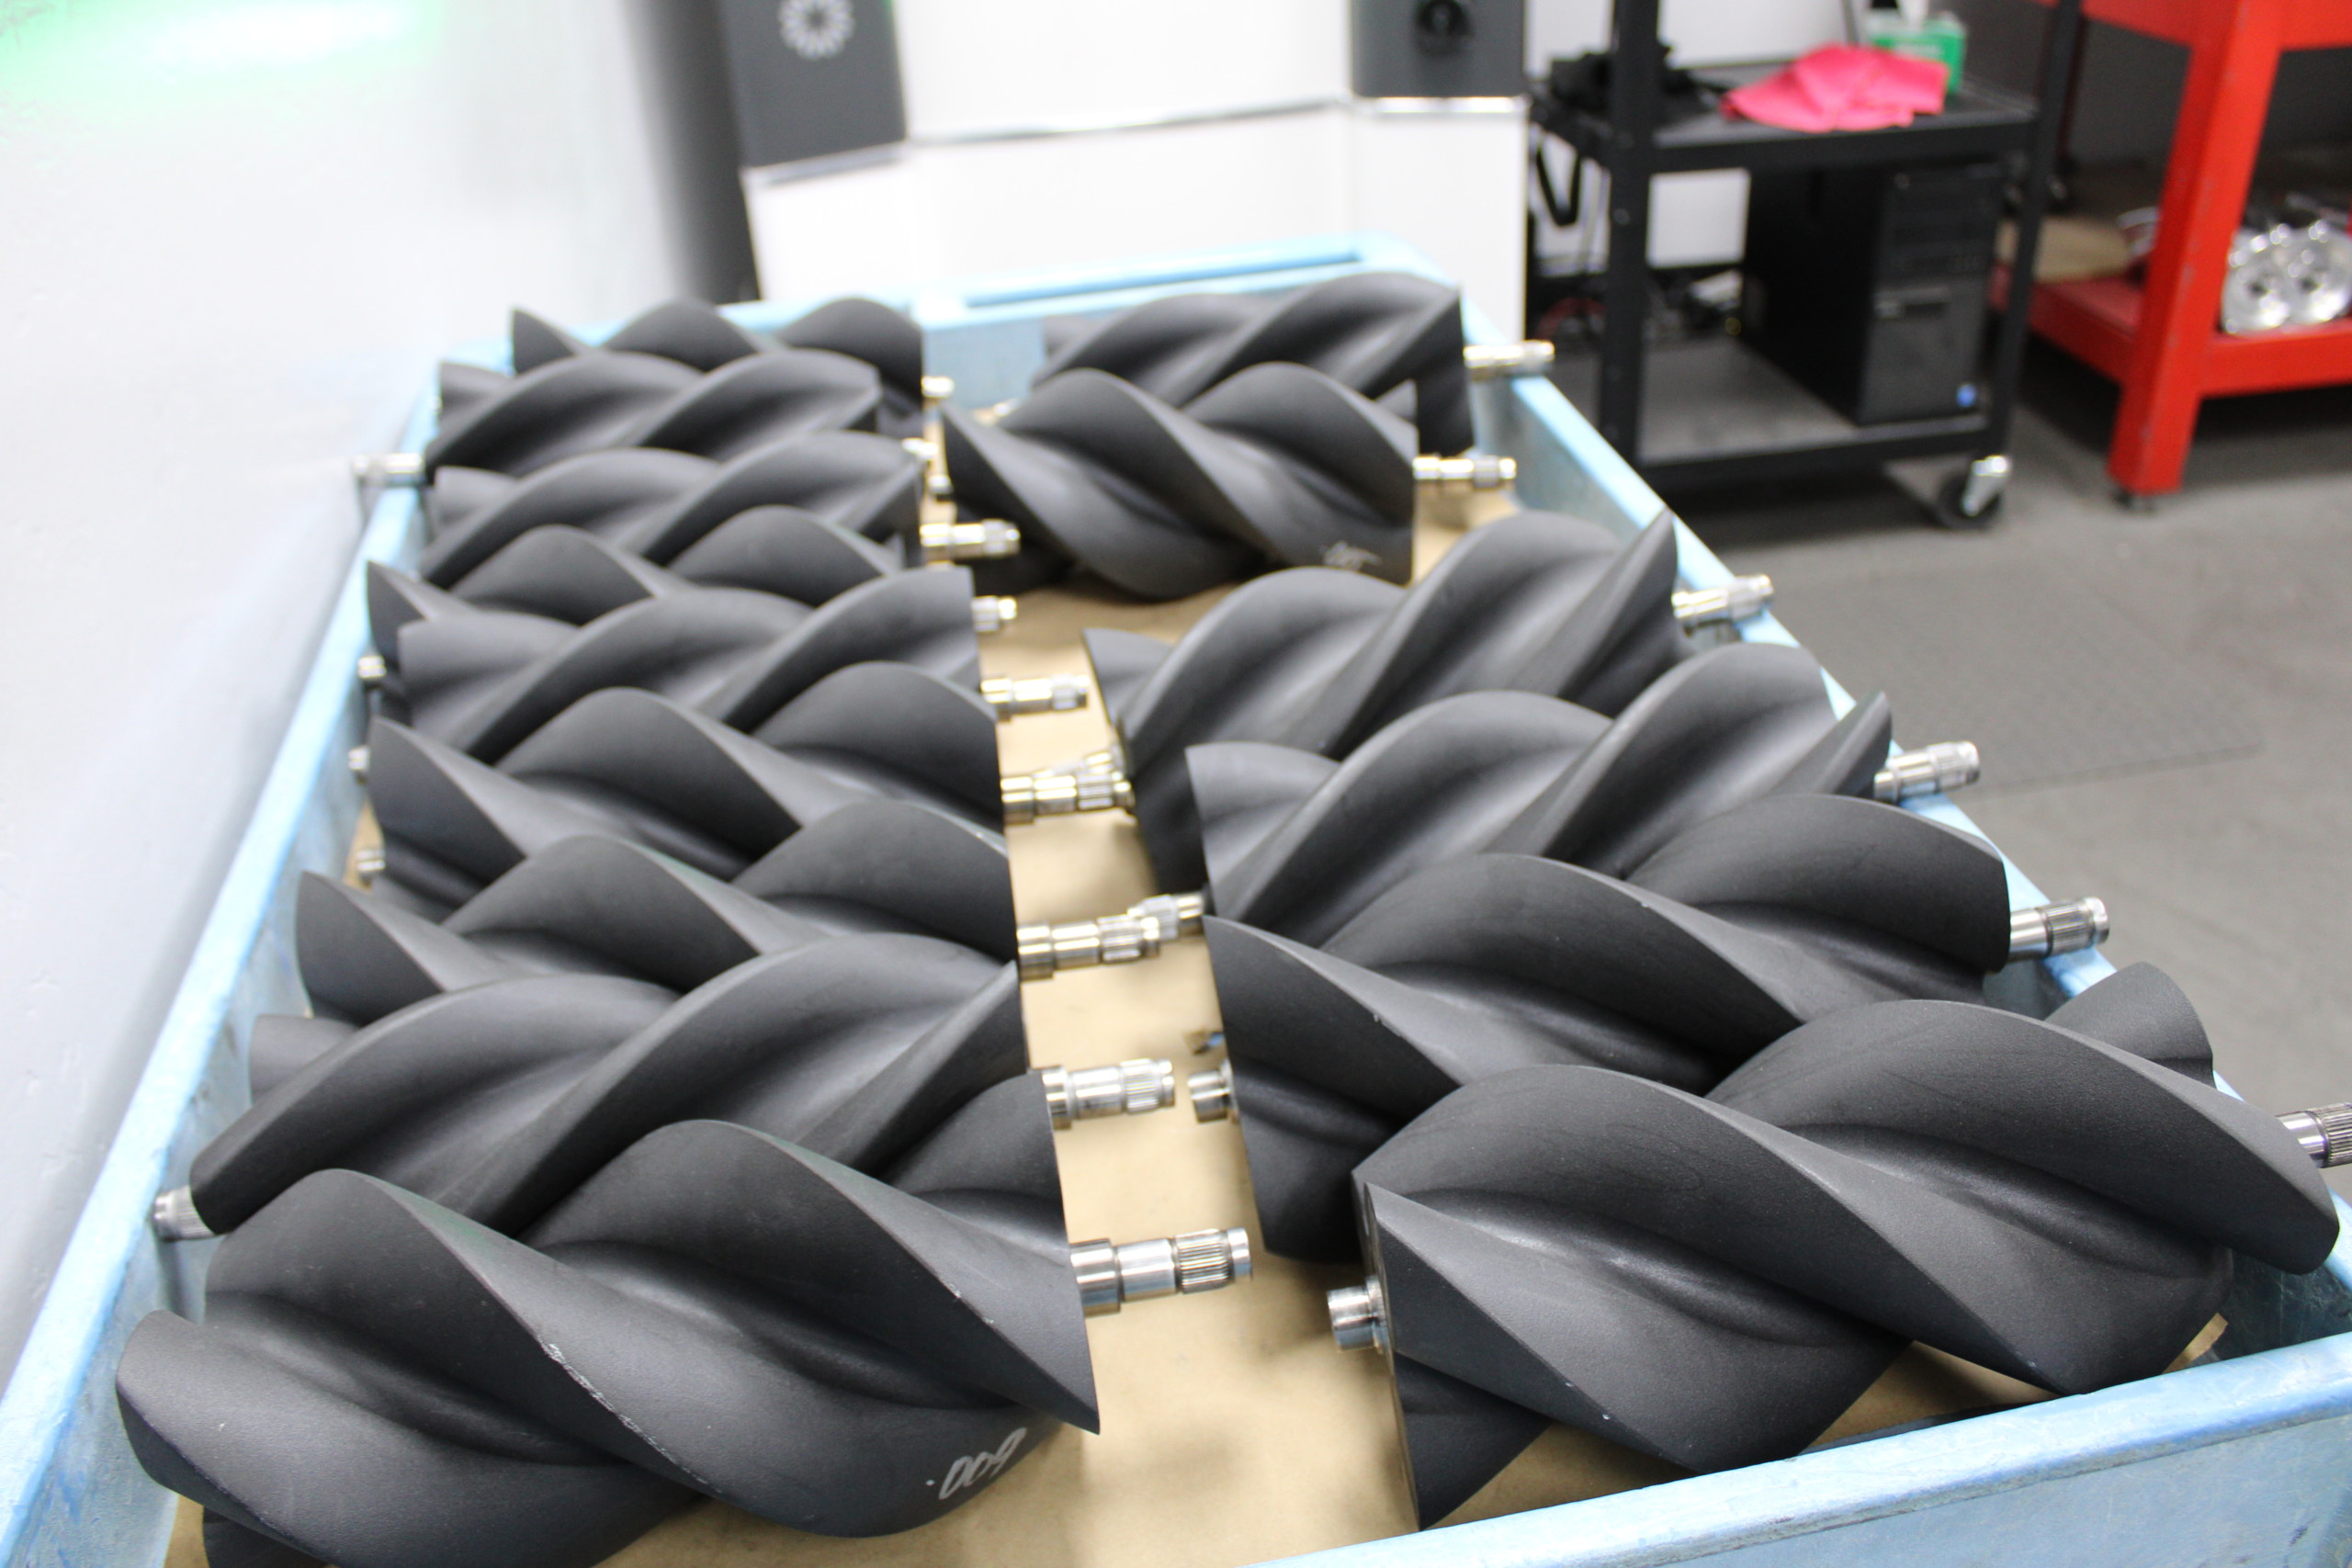
The famous Whipple rotors begin life as massive blanks of aluminum before they are precision-machined and coated.
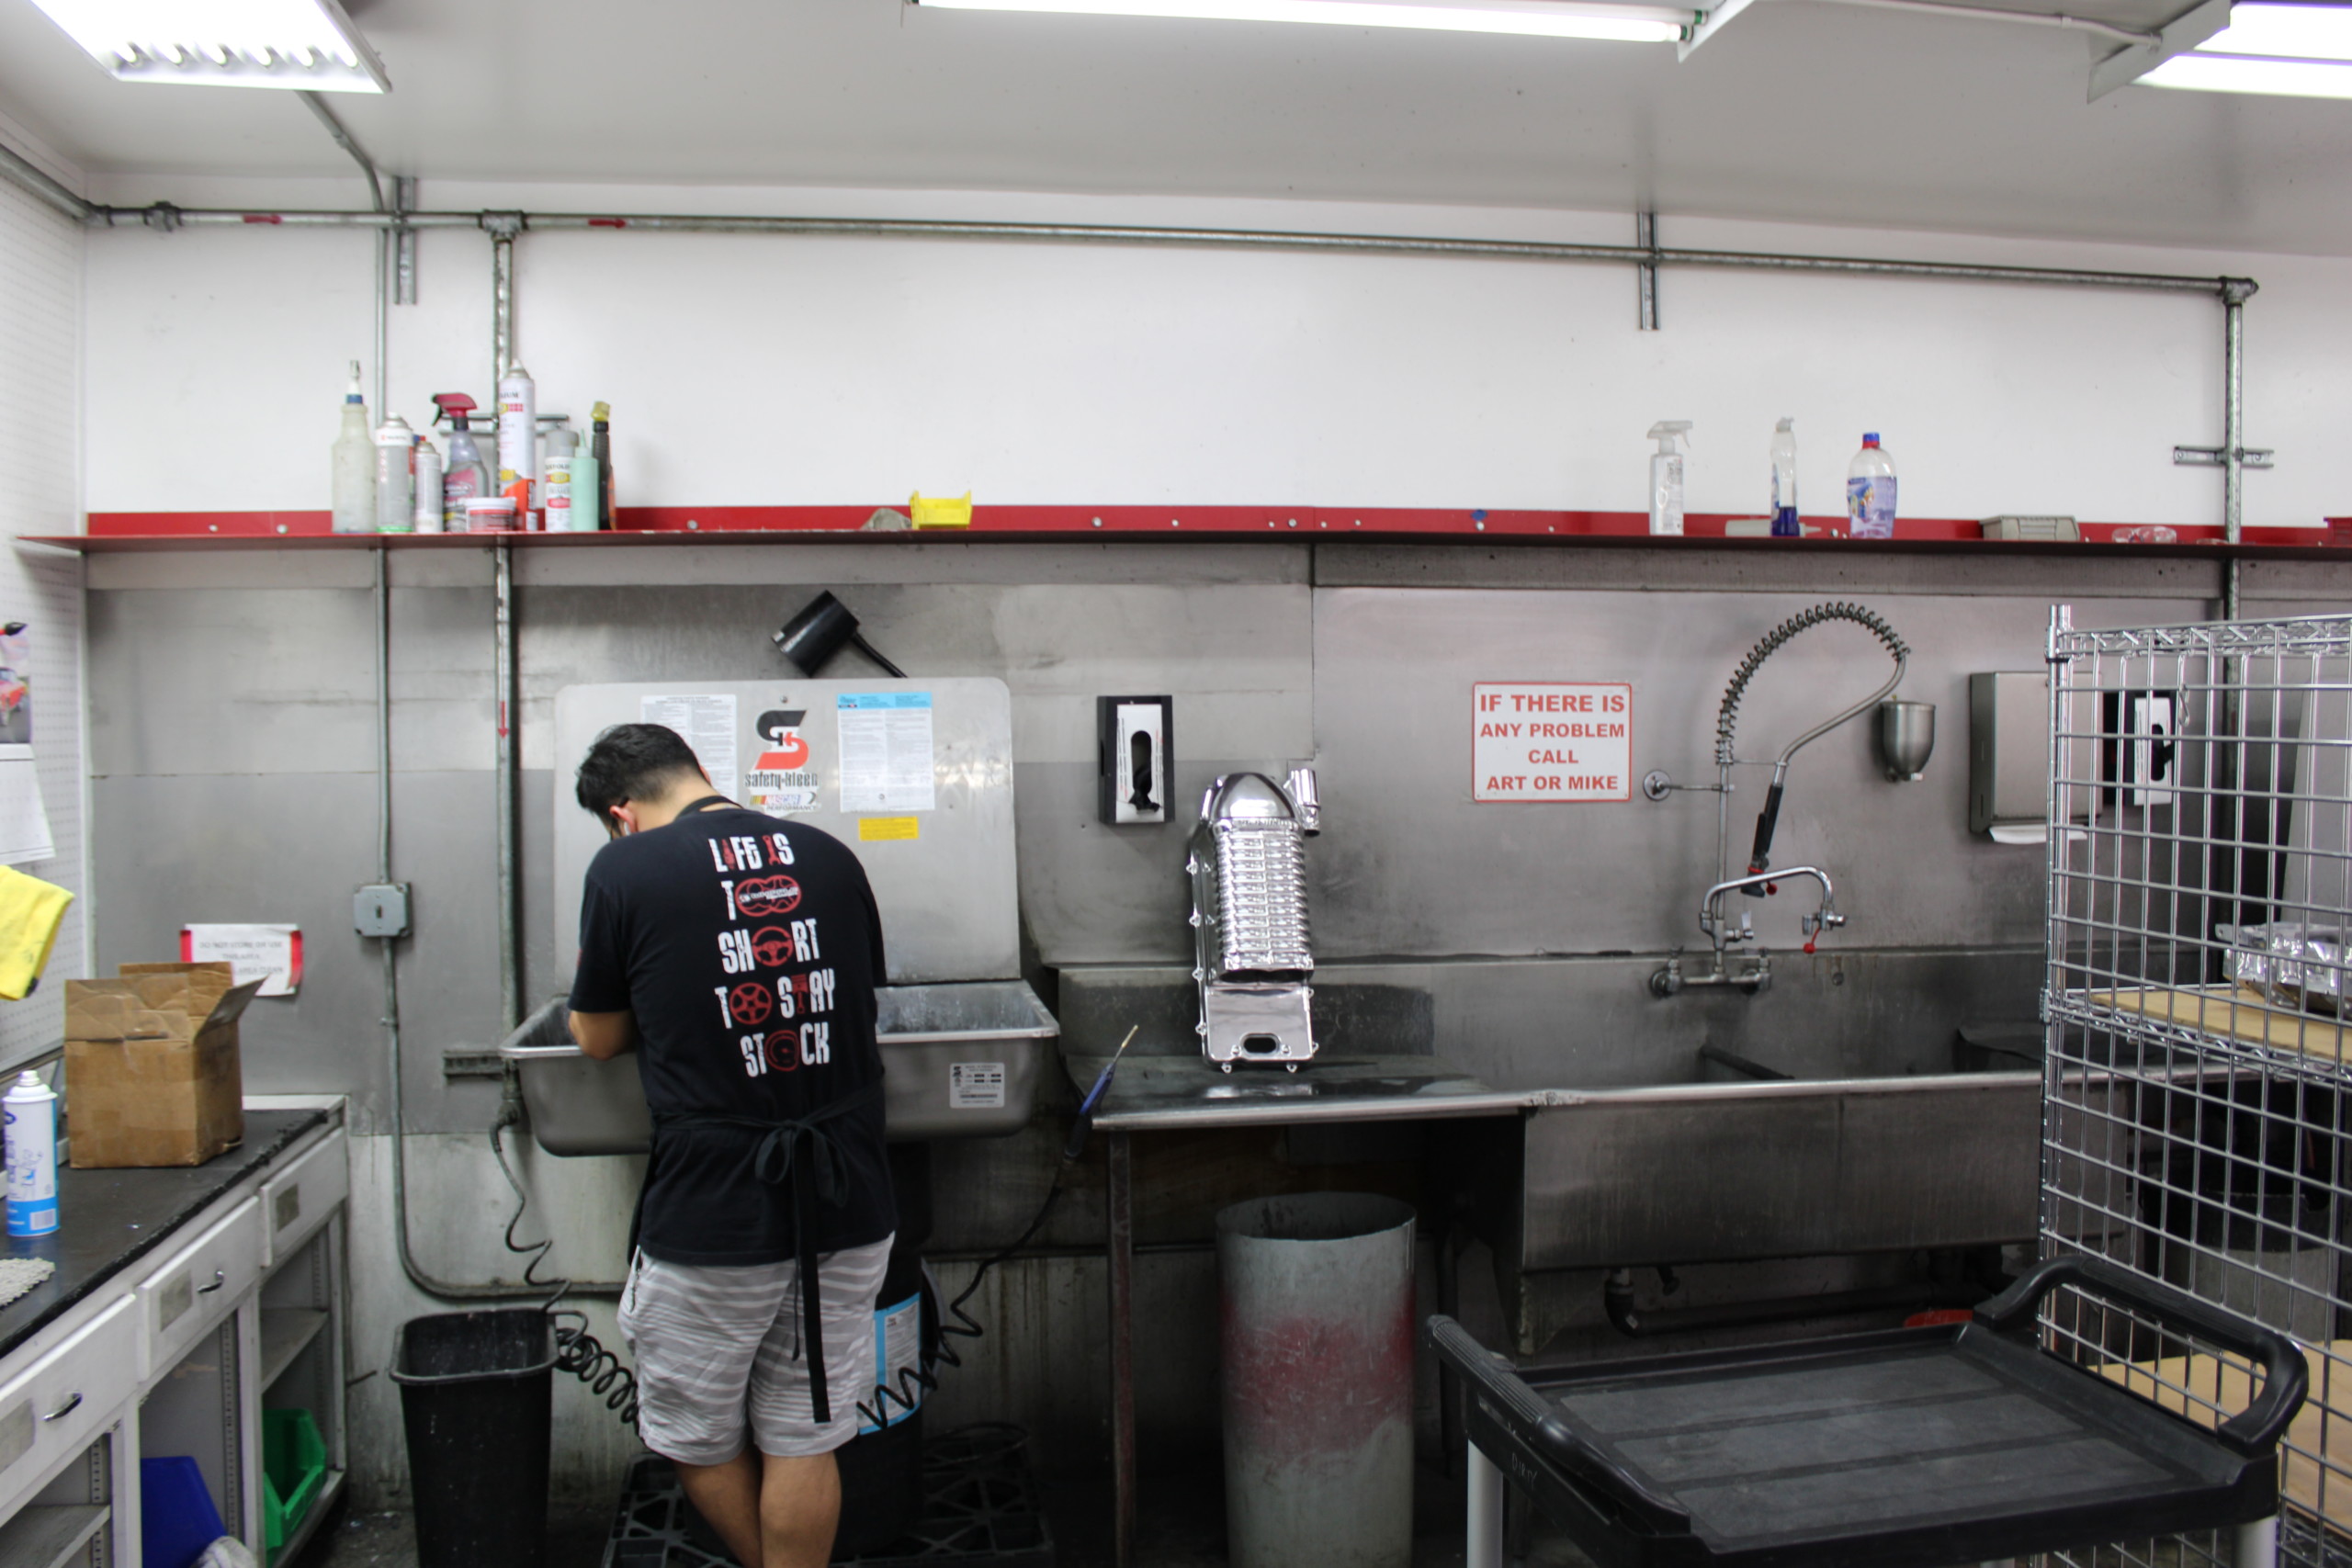
The company has now grown into a pillar of its community, not only in Fresno but in the automotive sector as well. The team has accomplished this through uncompromising innovation and a will to be the best – both hallmarks of what makes America great. But what truly impressed us, more than anything – even more than the state-of-the-art equipment that goes into crafting the superchargers themselves, are the dozens of employees working on new designs, operating the mills, lathes, 3d printers, driving the forklifts, pushing the pallet jacks, assembling the superchargers, sorting through countless fittings, connectors, and hoses, and finally packaging and shipping the kits.
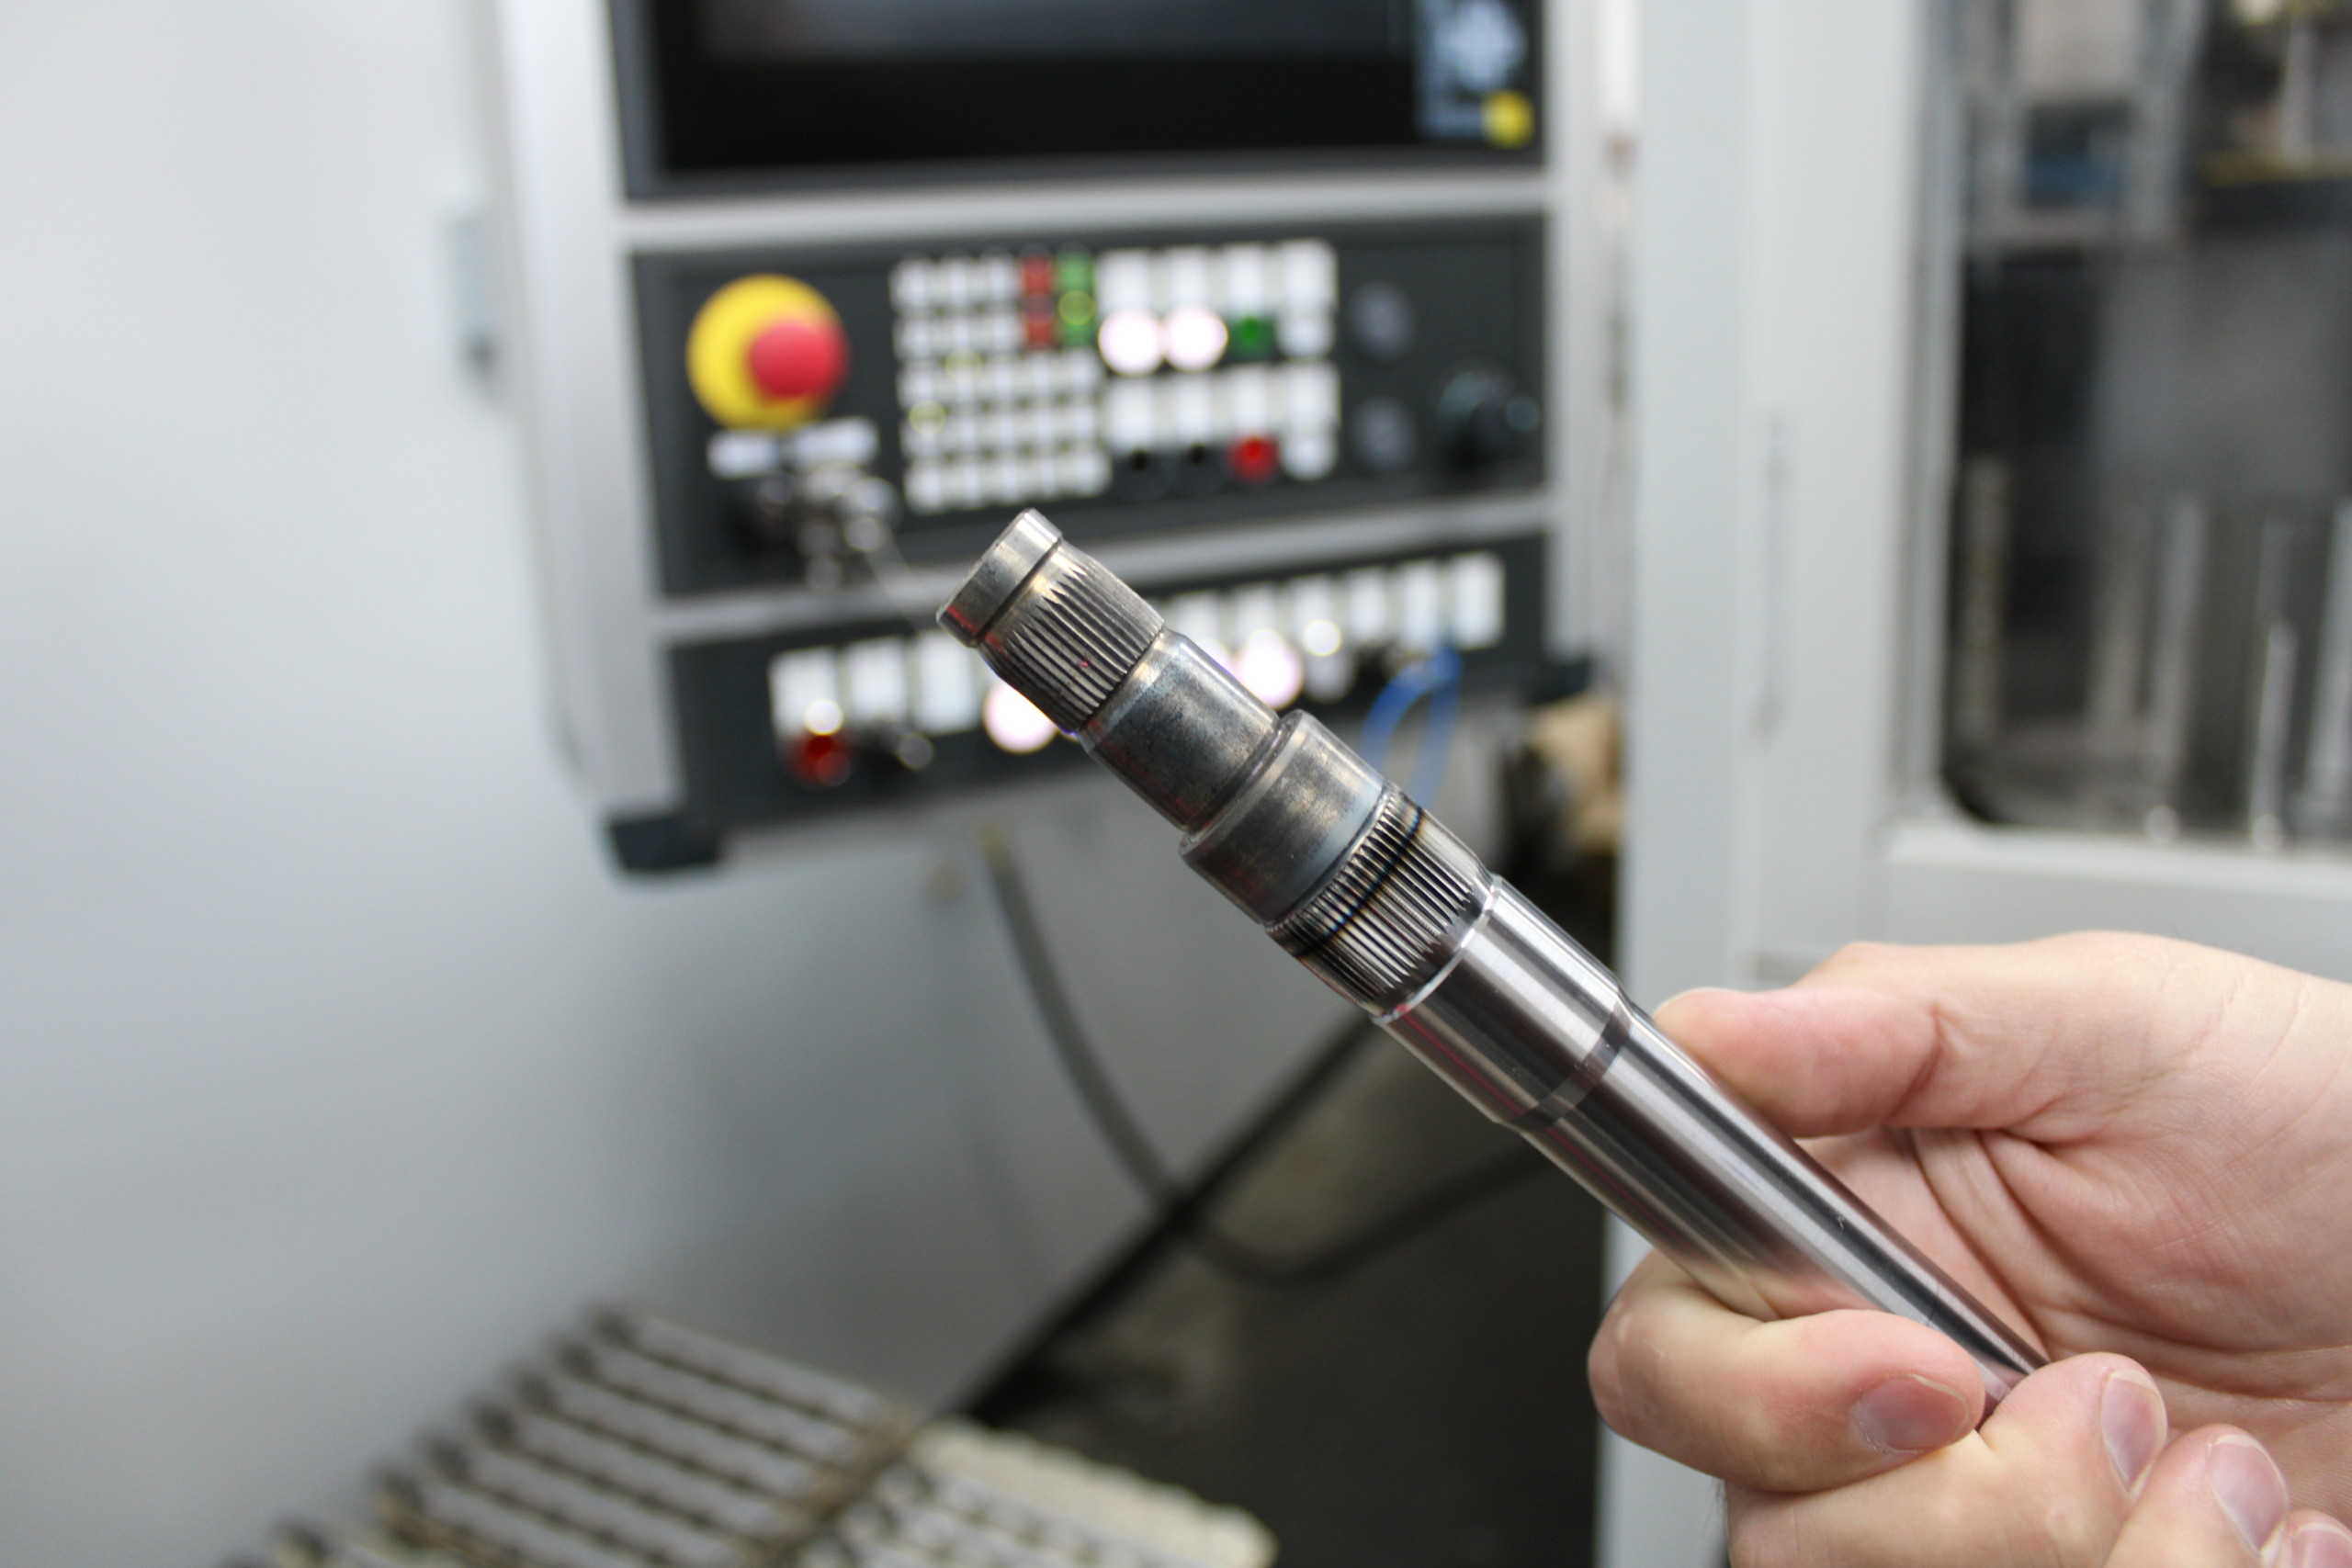
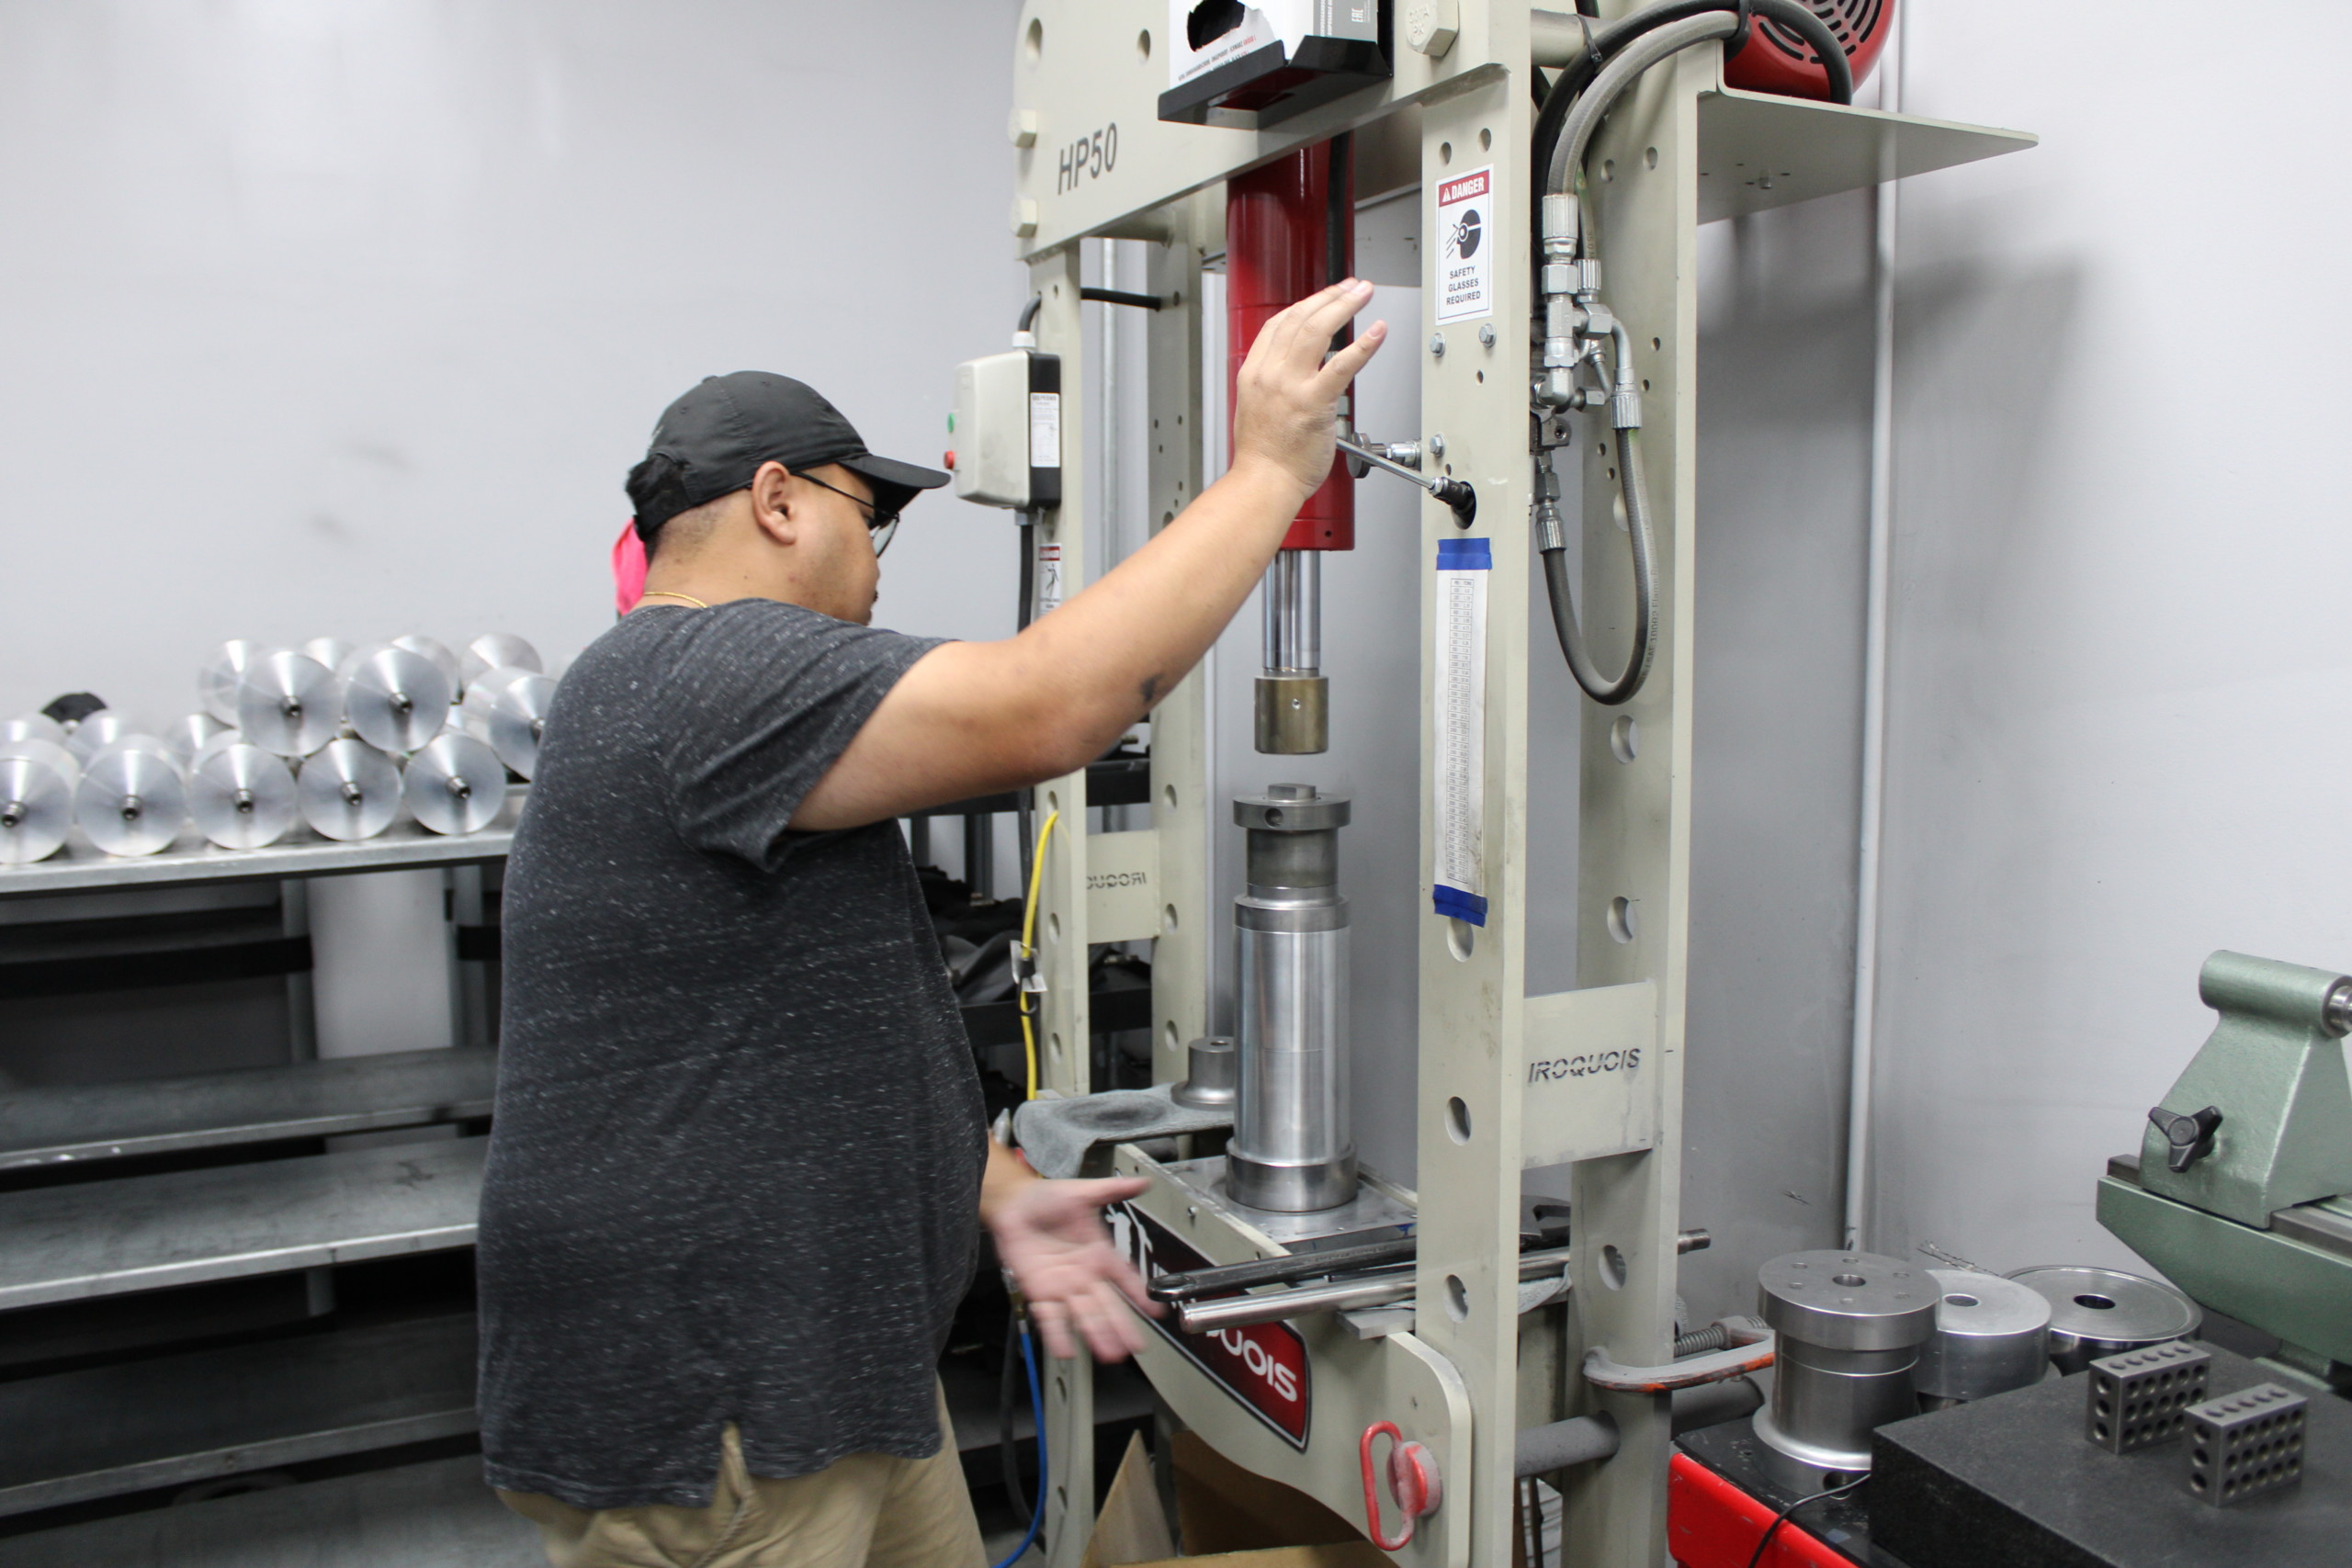
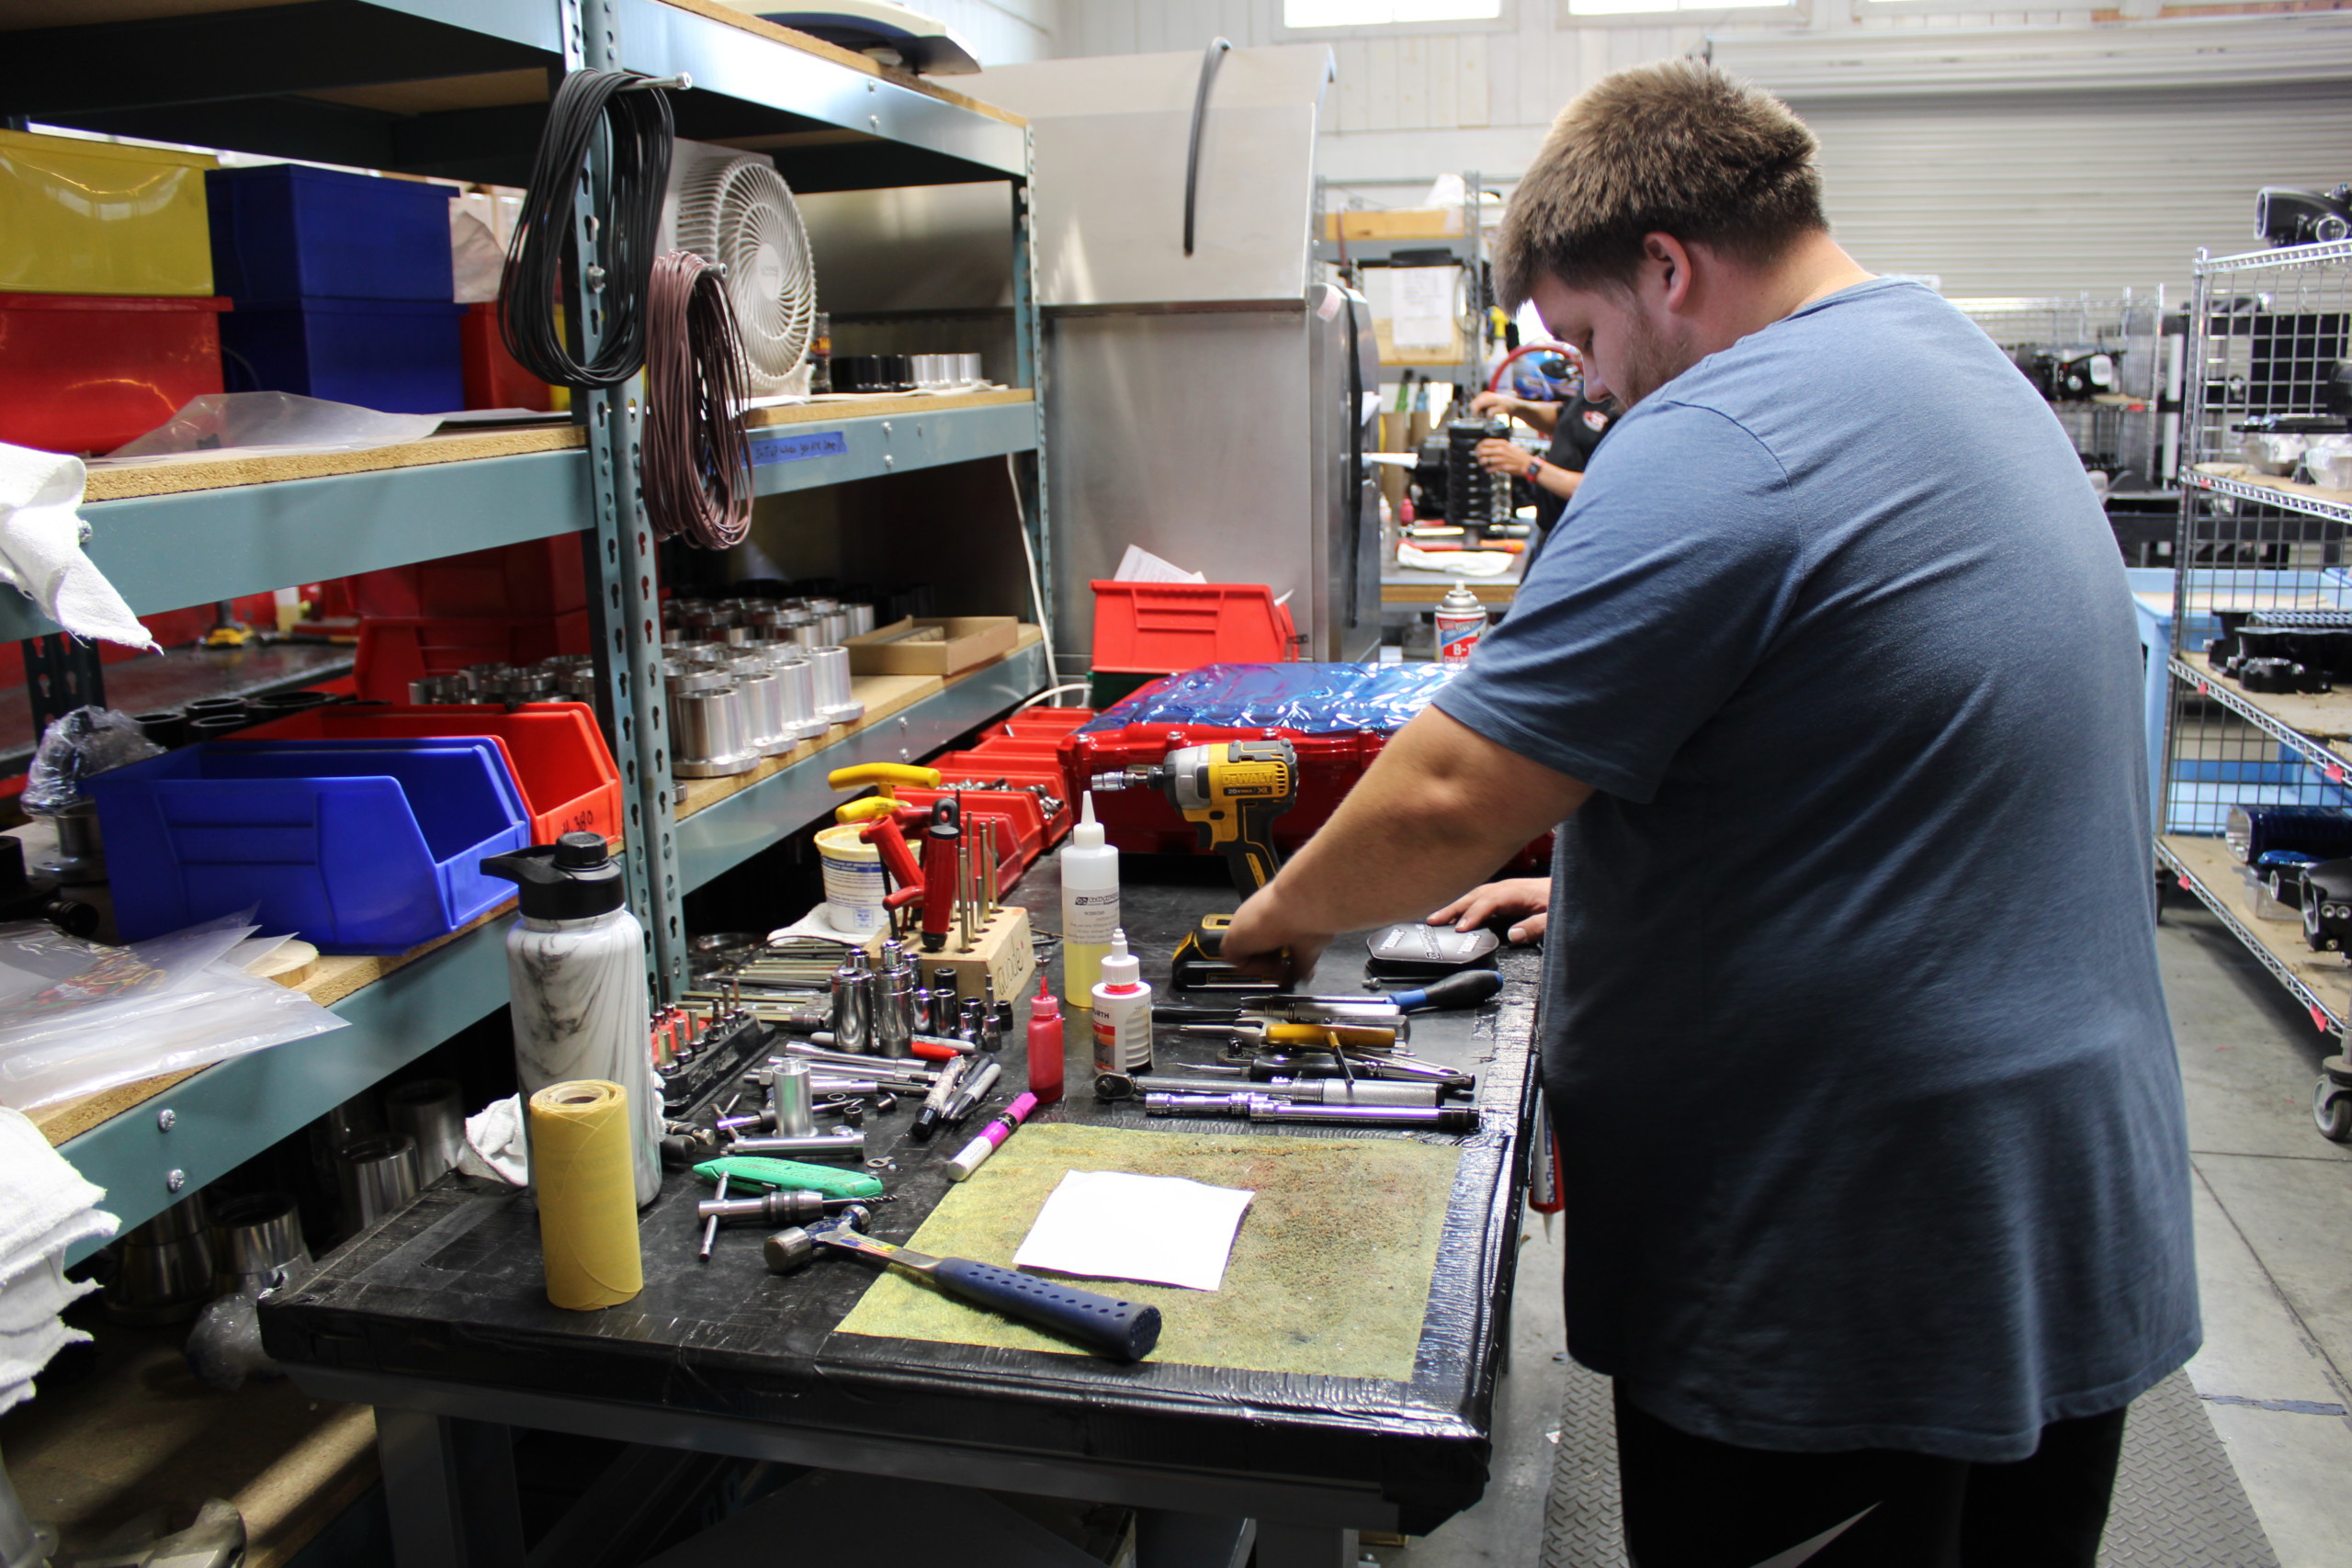
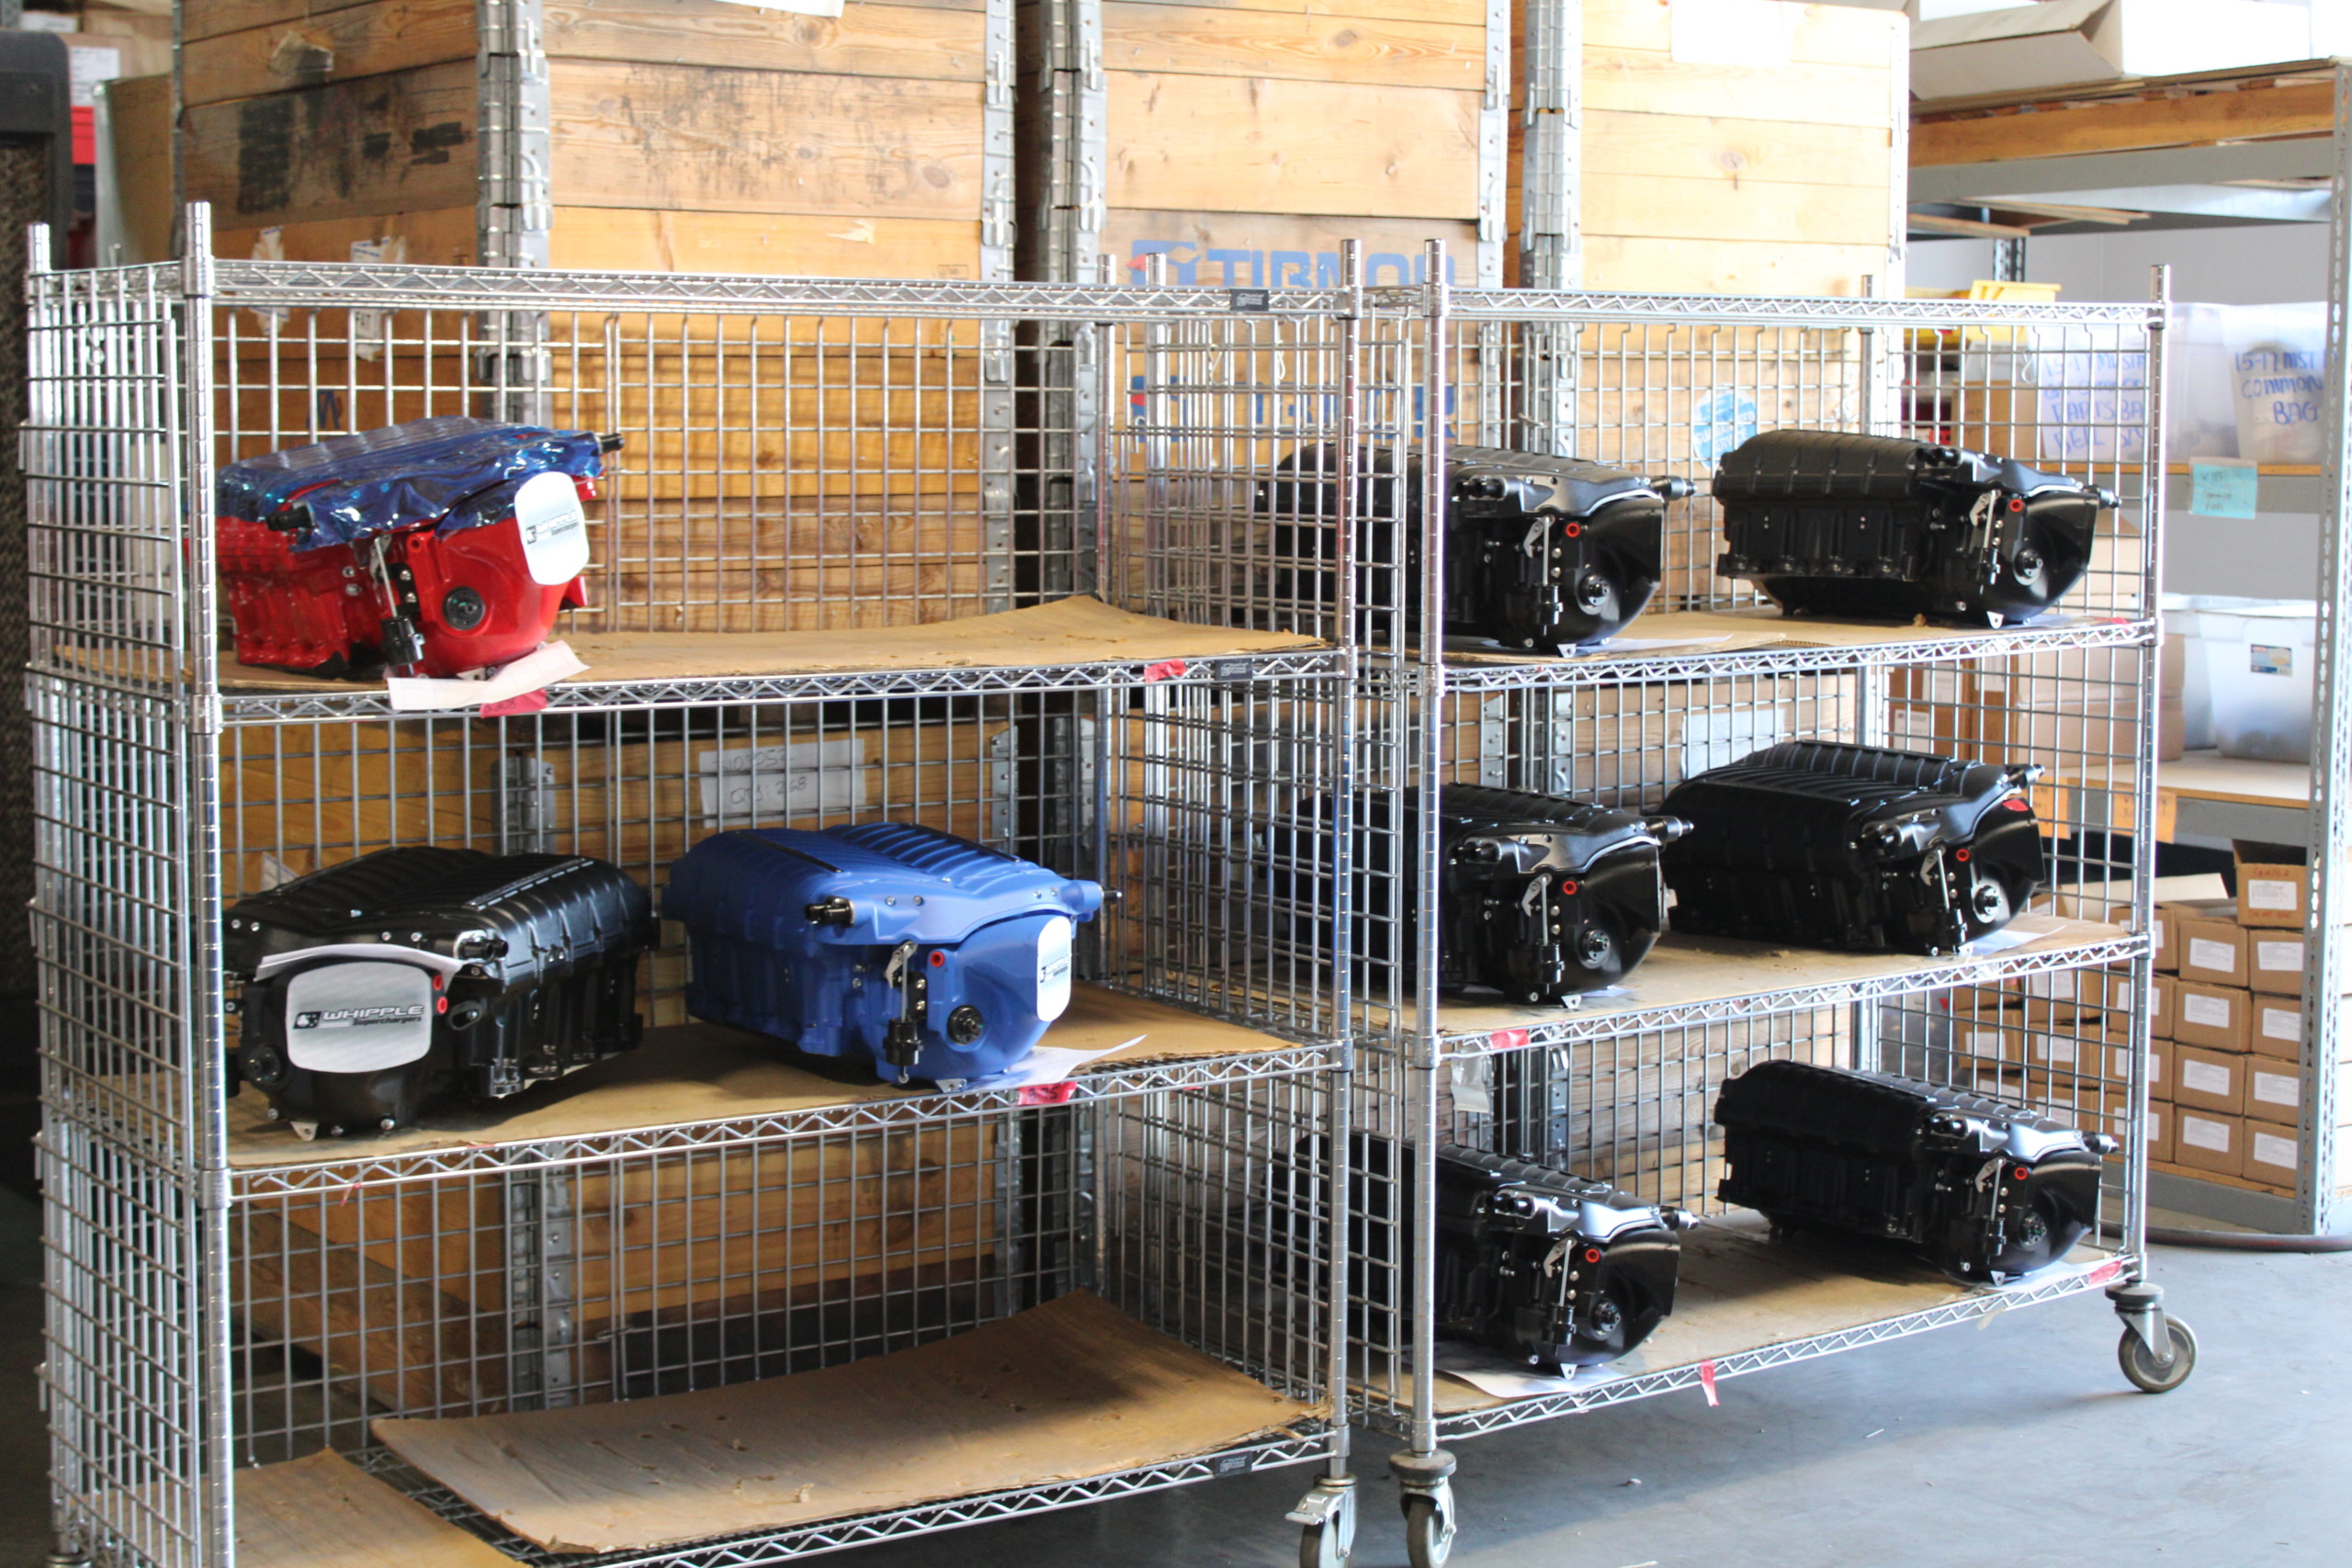
Once all the components are made, technicians assemble the superchargers.
Whipple exemplifies all the best things we love about this hobby. The family-owned business has grown to employ countless people in its own community and provide the market with a superior product that continues to push the envelope. Constant improvement was a recurring theme we noticed there.
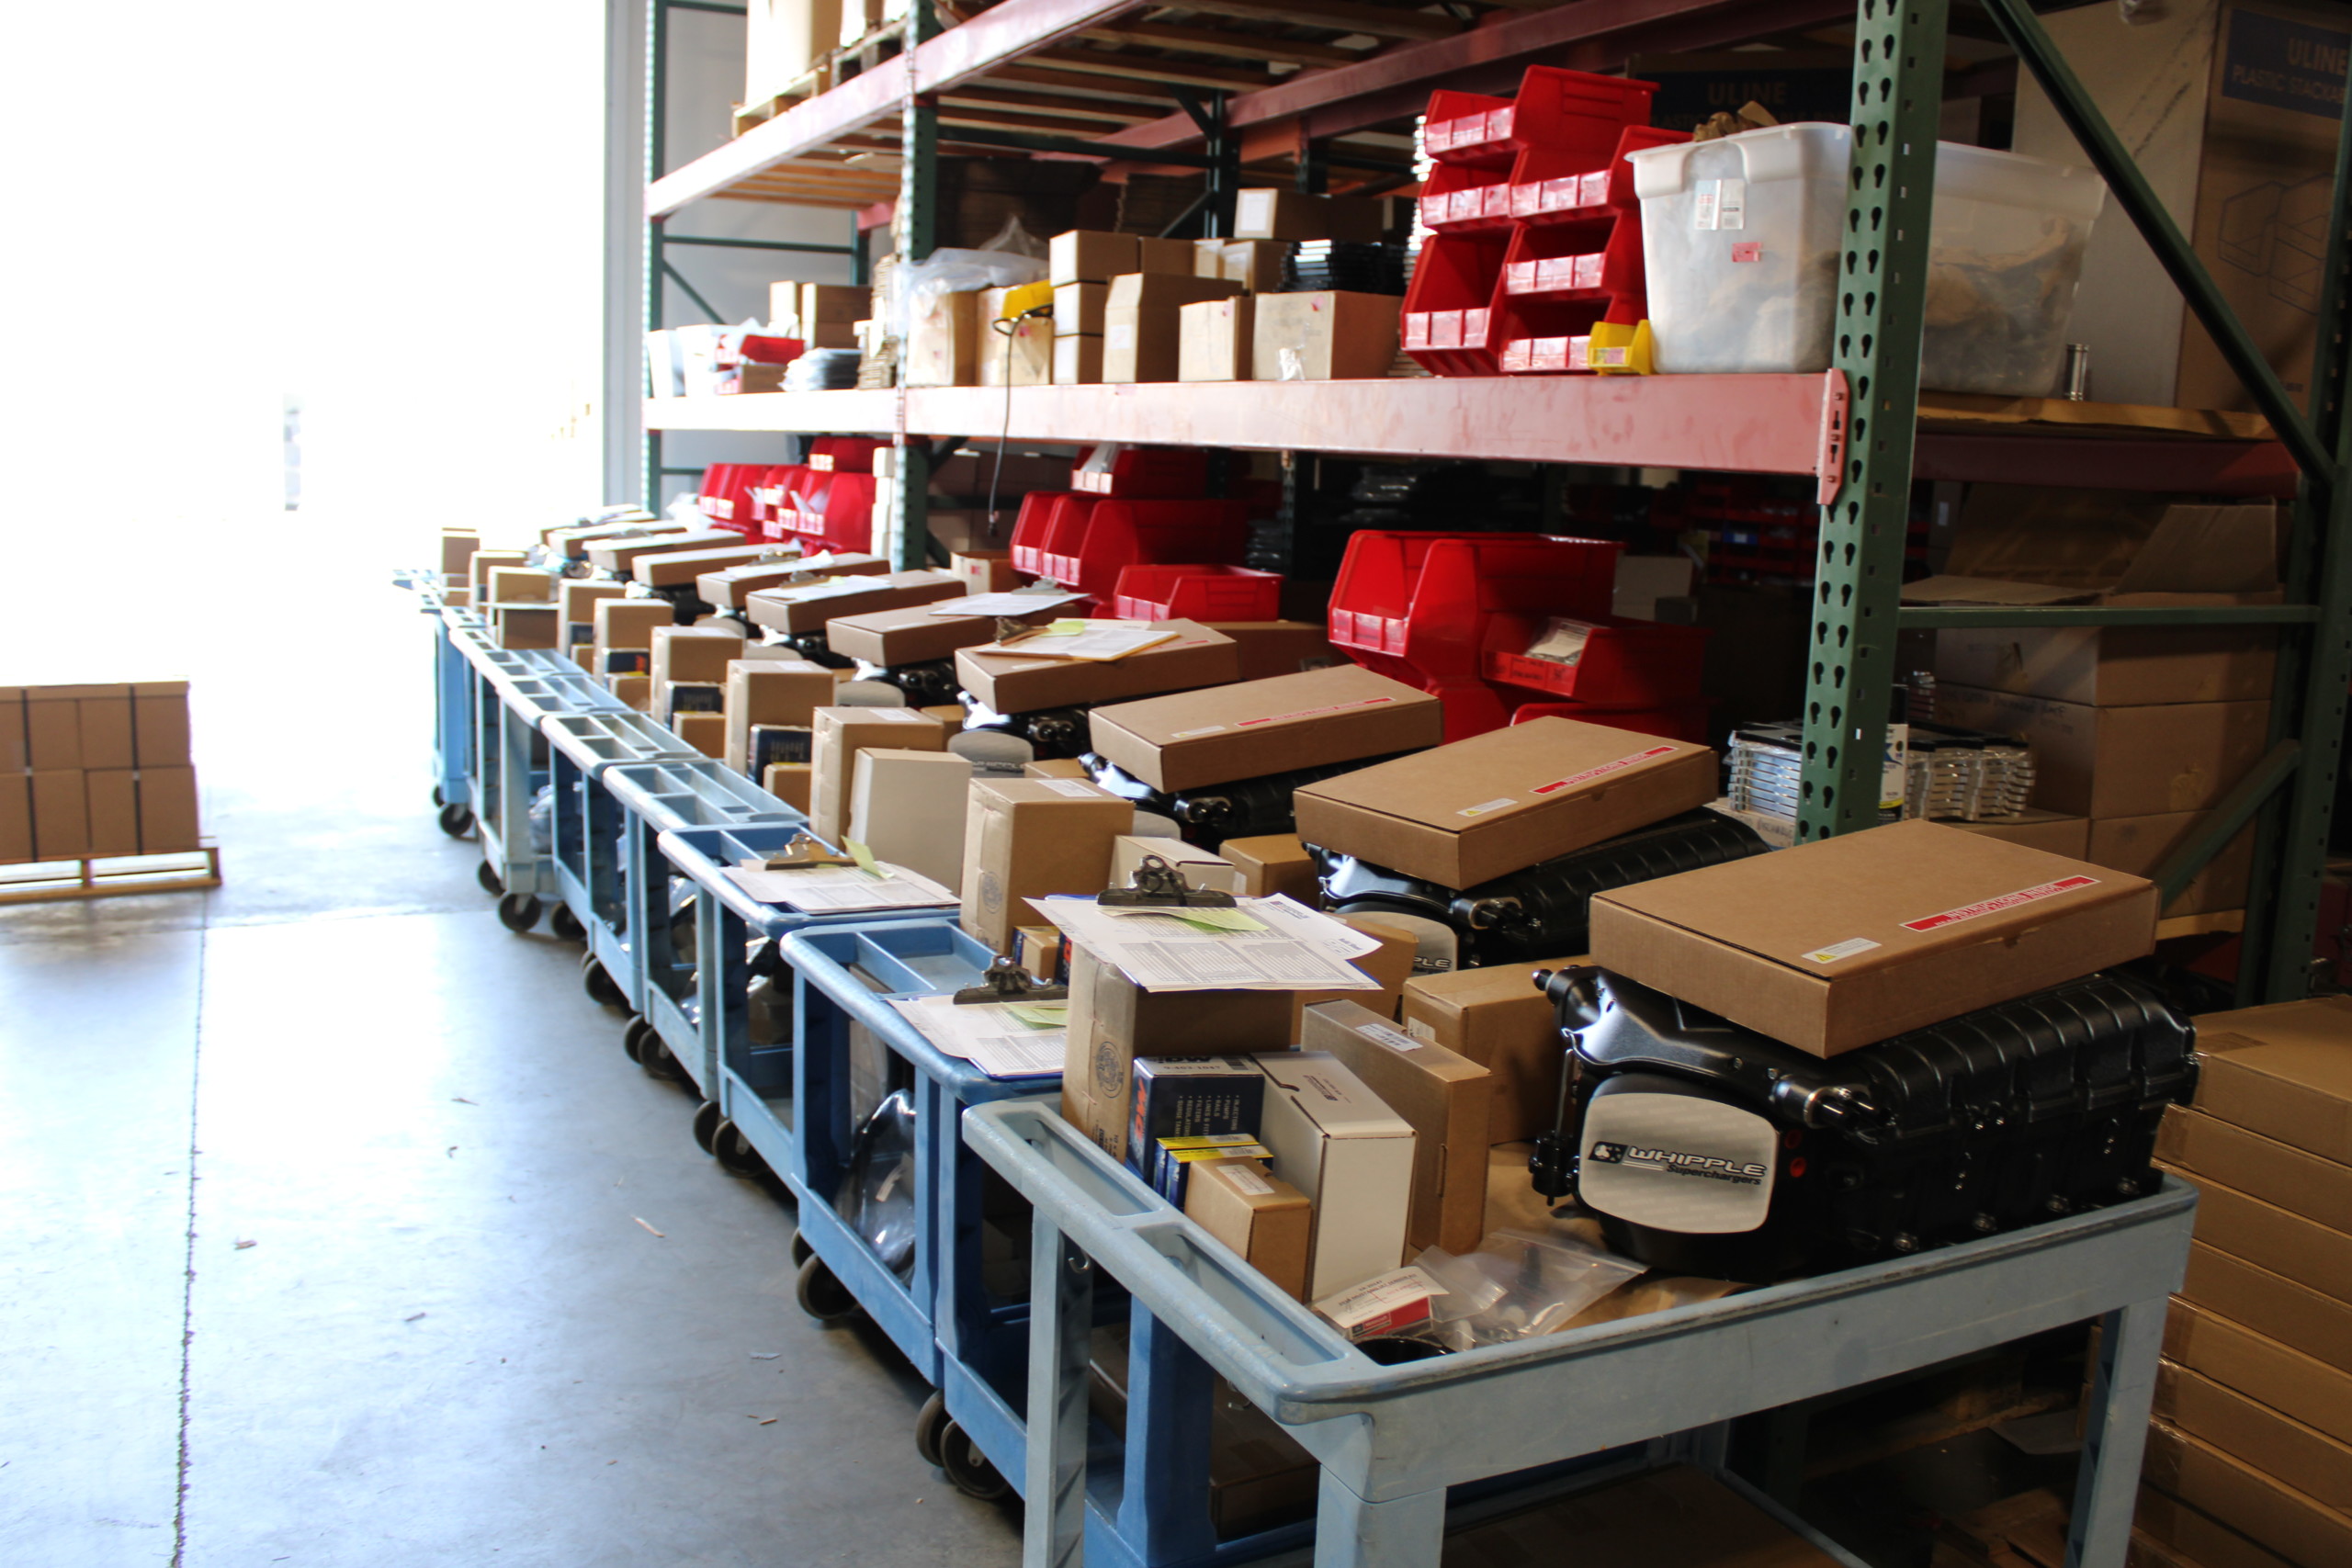
With the superchargers assembled, the Whipple crew pulls the rest of the kit parts from the warehouse to box everything up and ship out. The last photo shows all the kits that were boxed up and ready to ship that day.
Uncompromising Designs
Dustin dove into some of the things that set the Whipple product line apart from others in the space. Whipple as a company has a reputation for pushing limits without compromising in areas where others might. This can come at a considerable cost to the company in terms of time and financial resources invested in product development.
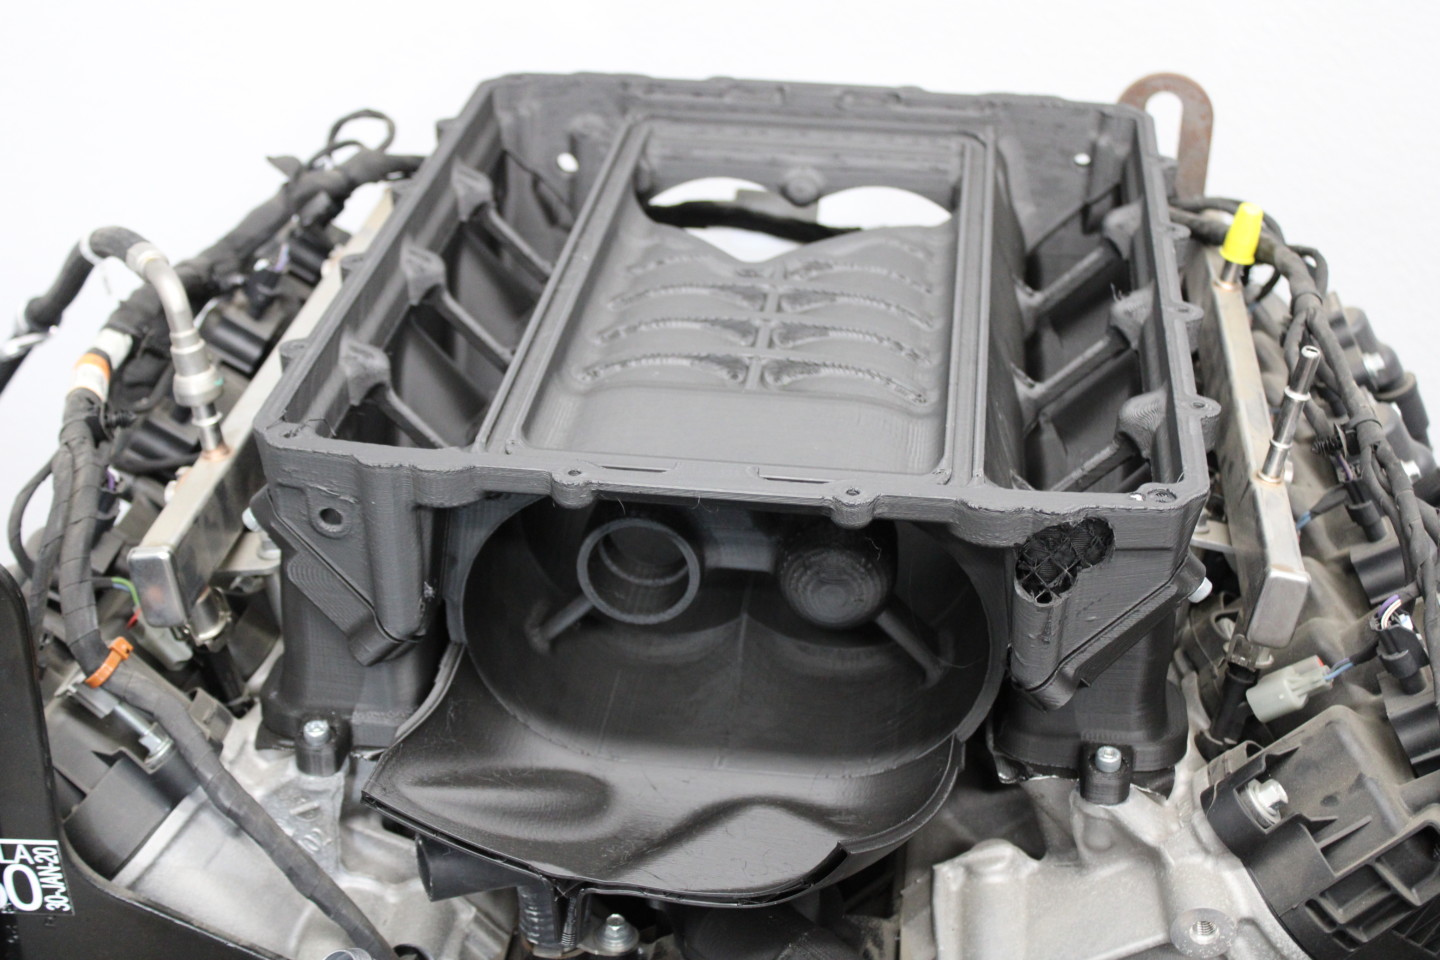
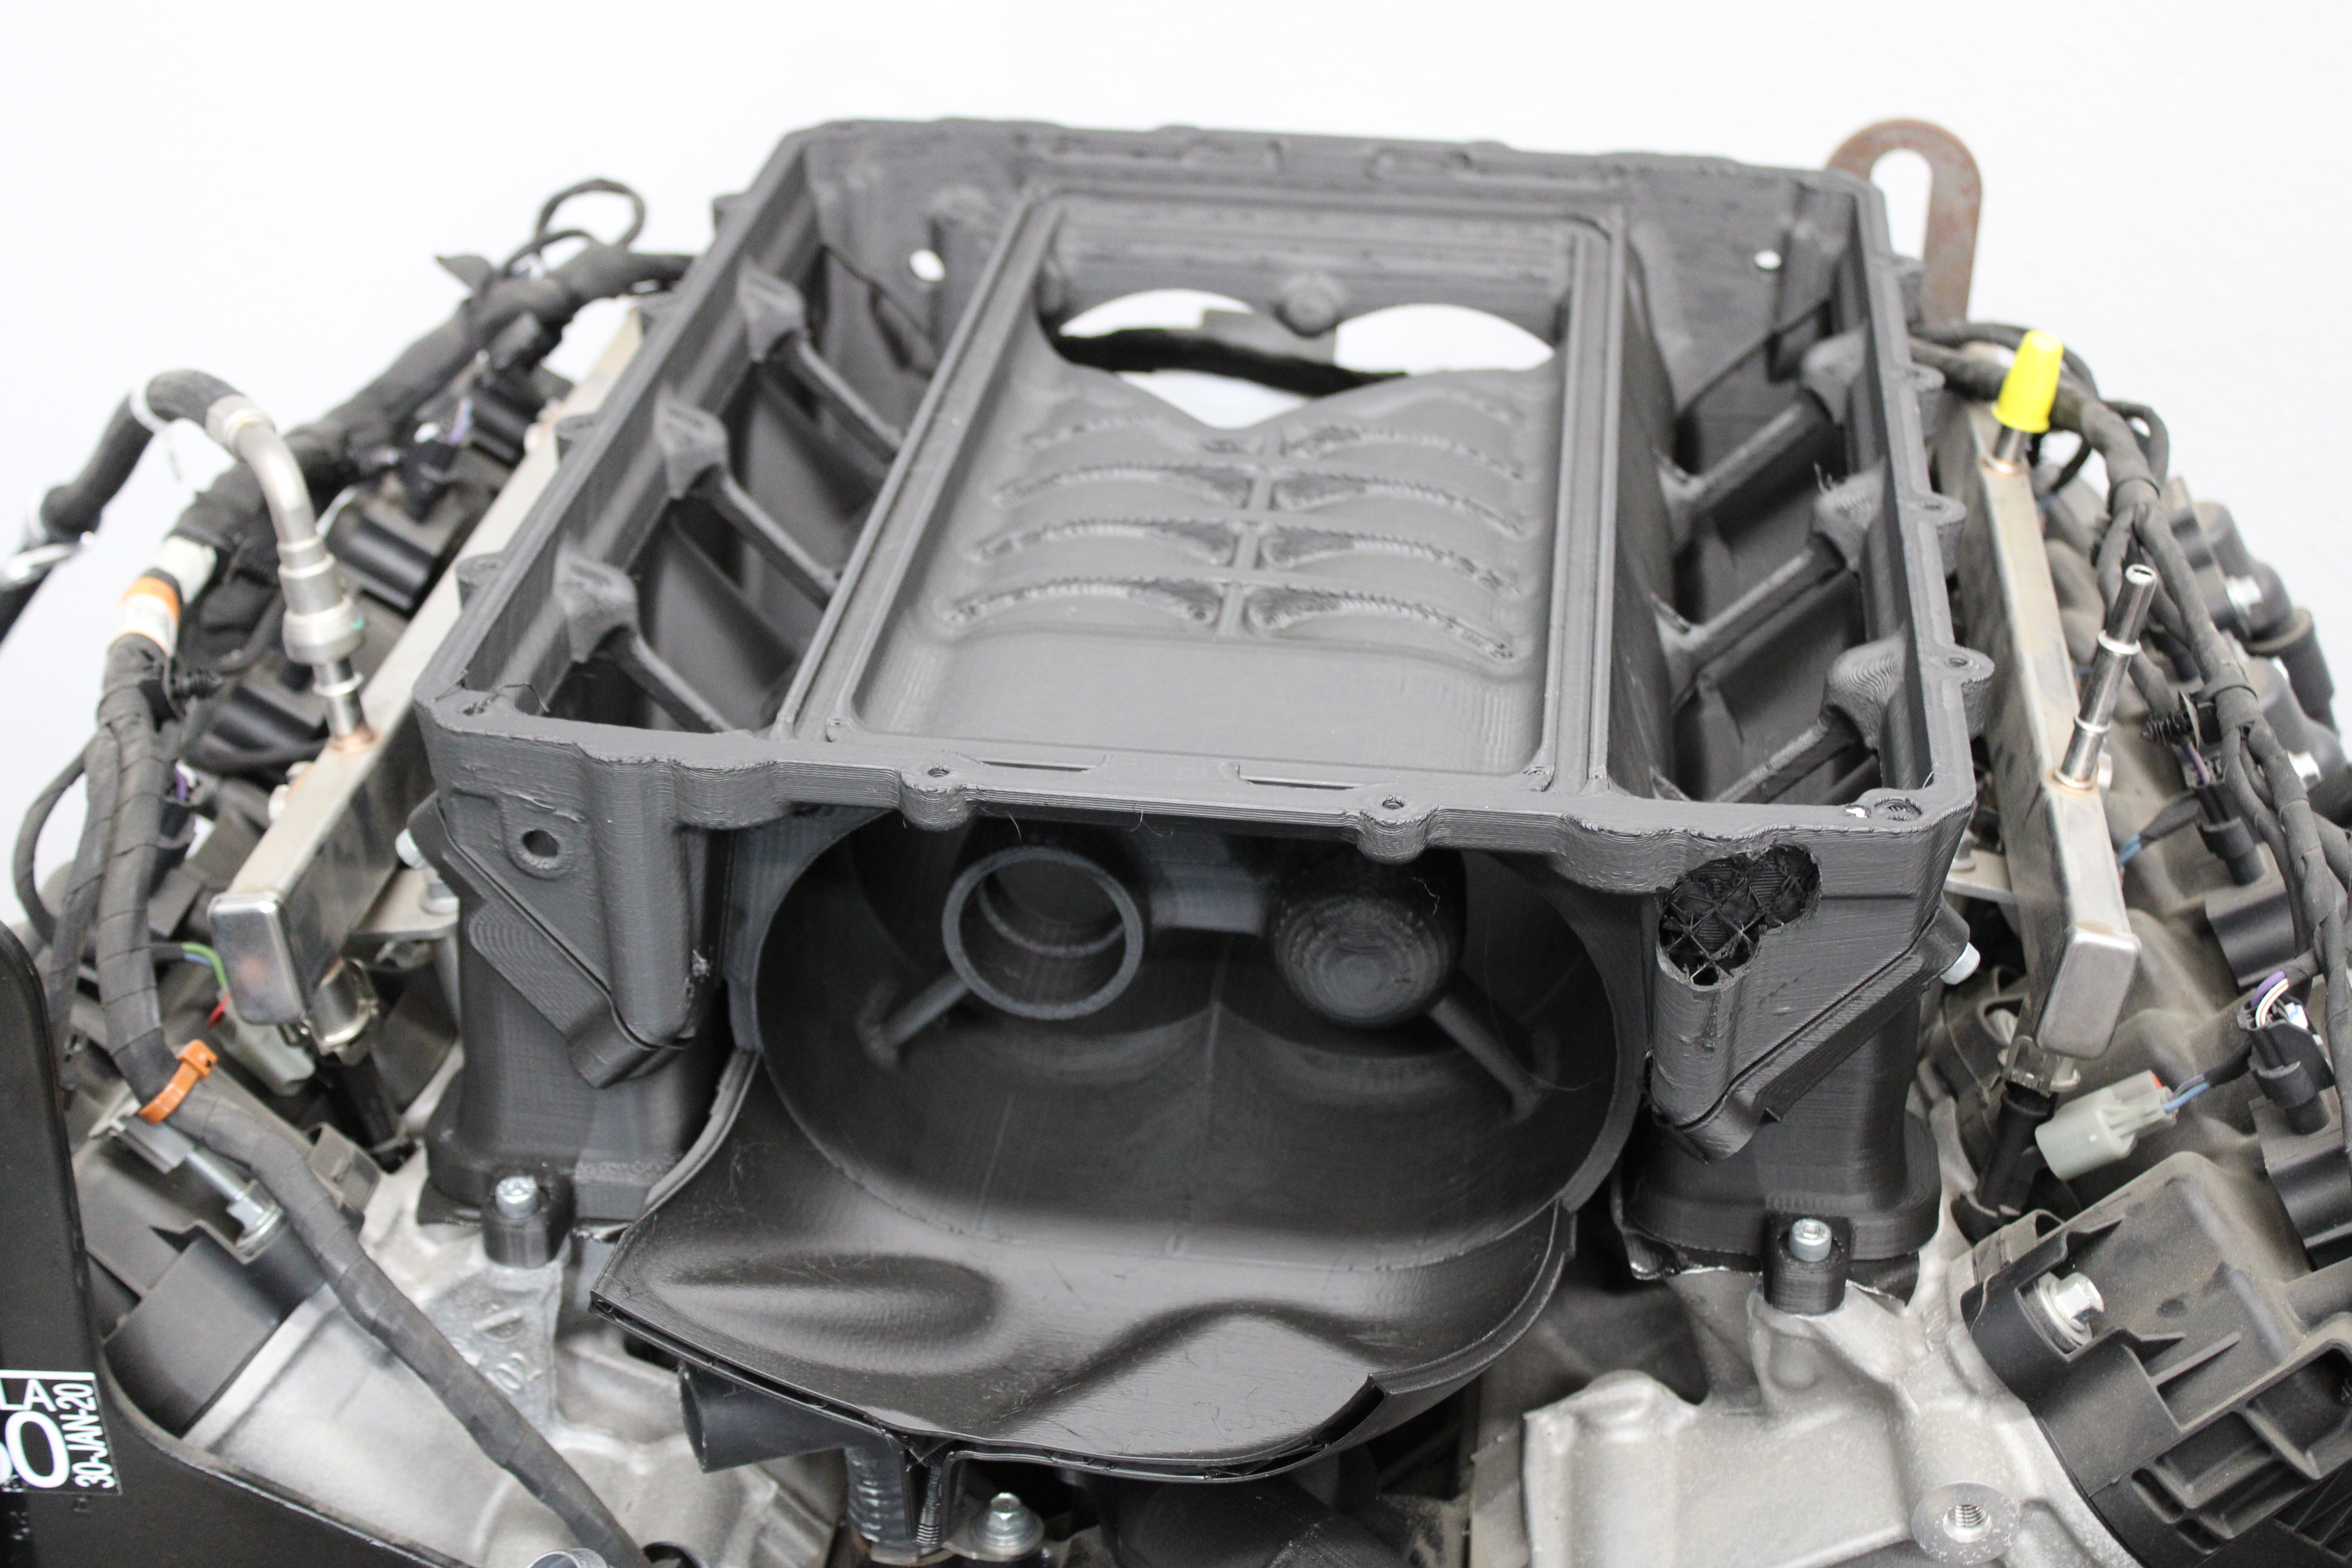
In a room full of test mule engines, Dustin showed us a 3D-printed prototype featuring modular runners to accommodate various platforms.
But, the cost of being the biggest and the baddest is just that. For example, when we started working on the installation of the fourth-generation Whipple 2.9l supercharger on the Daily Camaro, Dustin and his team of engineers took a copious amount of measurements and spent some time test fitting the new fifth-generation supercharger because they are still working on that kit’s development. Meanwhile, the Dodge and Ford equivalent kits are already available.
The research and development team used the Daily Camaro to take measurements for the newest generation blower.
This is due to the fact that the Camaros’ LS or LT engine is comparatively shoehorned into its engine bay. Whereas, its Dodge and Ford counterparts can accommodate a larger blower (insert Challenger boat joke). In spite of this, the team refuses to make concessions with regard to the supercharger’s design simply for space savings’ sake. They have a product that works extremely well. It’s been proven on those HEMI and Ford applications, and there’s no reason to re-engineer it. Especially when it’s already modular in the first place.
The key takeaway here is – they aren’t interested in rushing something to market when it isn’t ready. The crew would rather spend time figuring out how to make the car fit around the blower, not the other way around.
For now, the fourth-generation blower is still available for purchase but Dustin assures us, the fifth-gen Camaro kit will be offered soon.

Camaros have notoriously tight engine bays, but the team at Whipple finds ways to stuff massive blowers under the hood.
The Daily Camaro Gets Smog Legal Boost
If that isn’t reason enough to want a Whipple blower on the Daily Camaro, perhaps the fact that the company goes to great lengths to provide its customers with smog-legal options is.
Take the fact that they were among the first supercharger manufacturers to provide a 50-state smog legal kit for a bolt-on blower for example – a feat not easily accomplished.

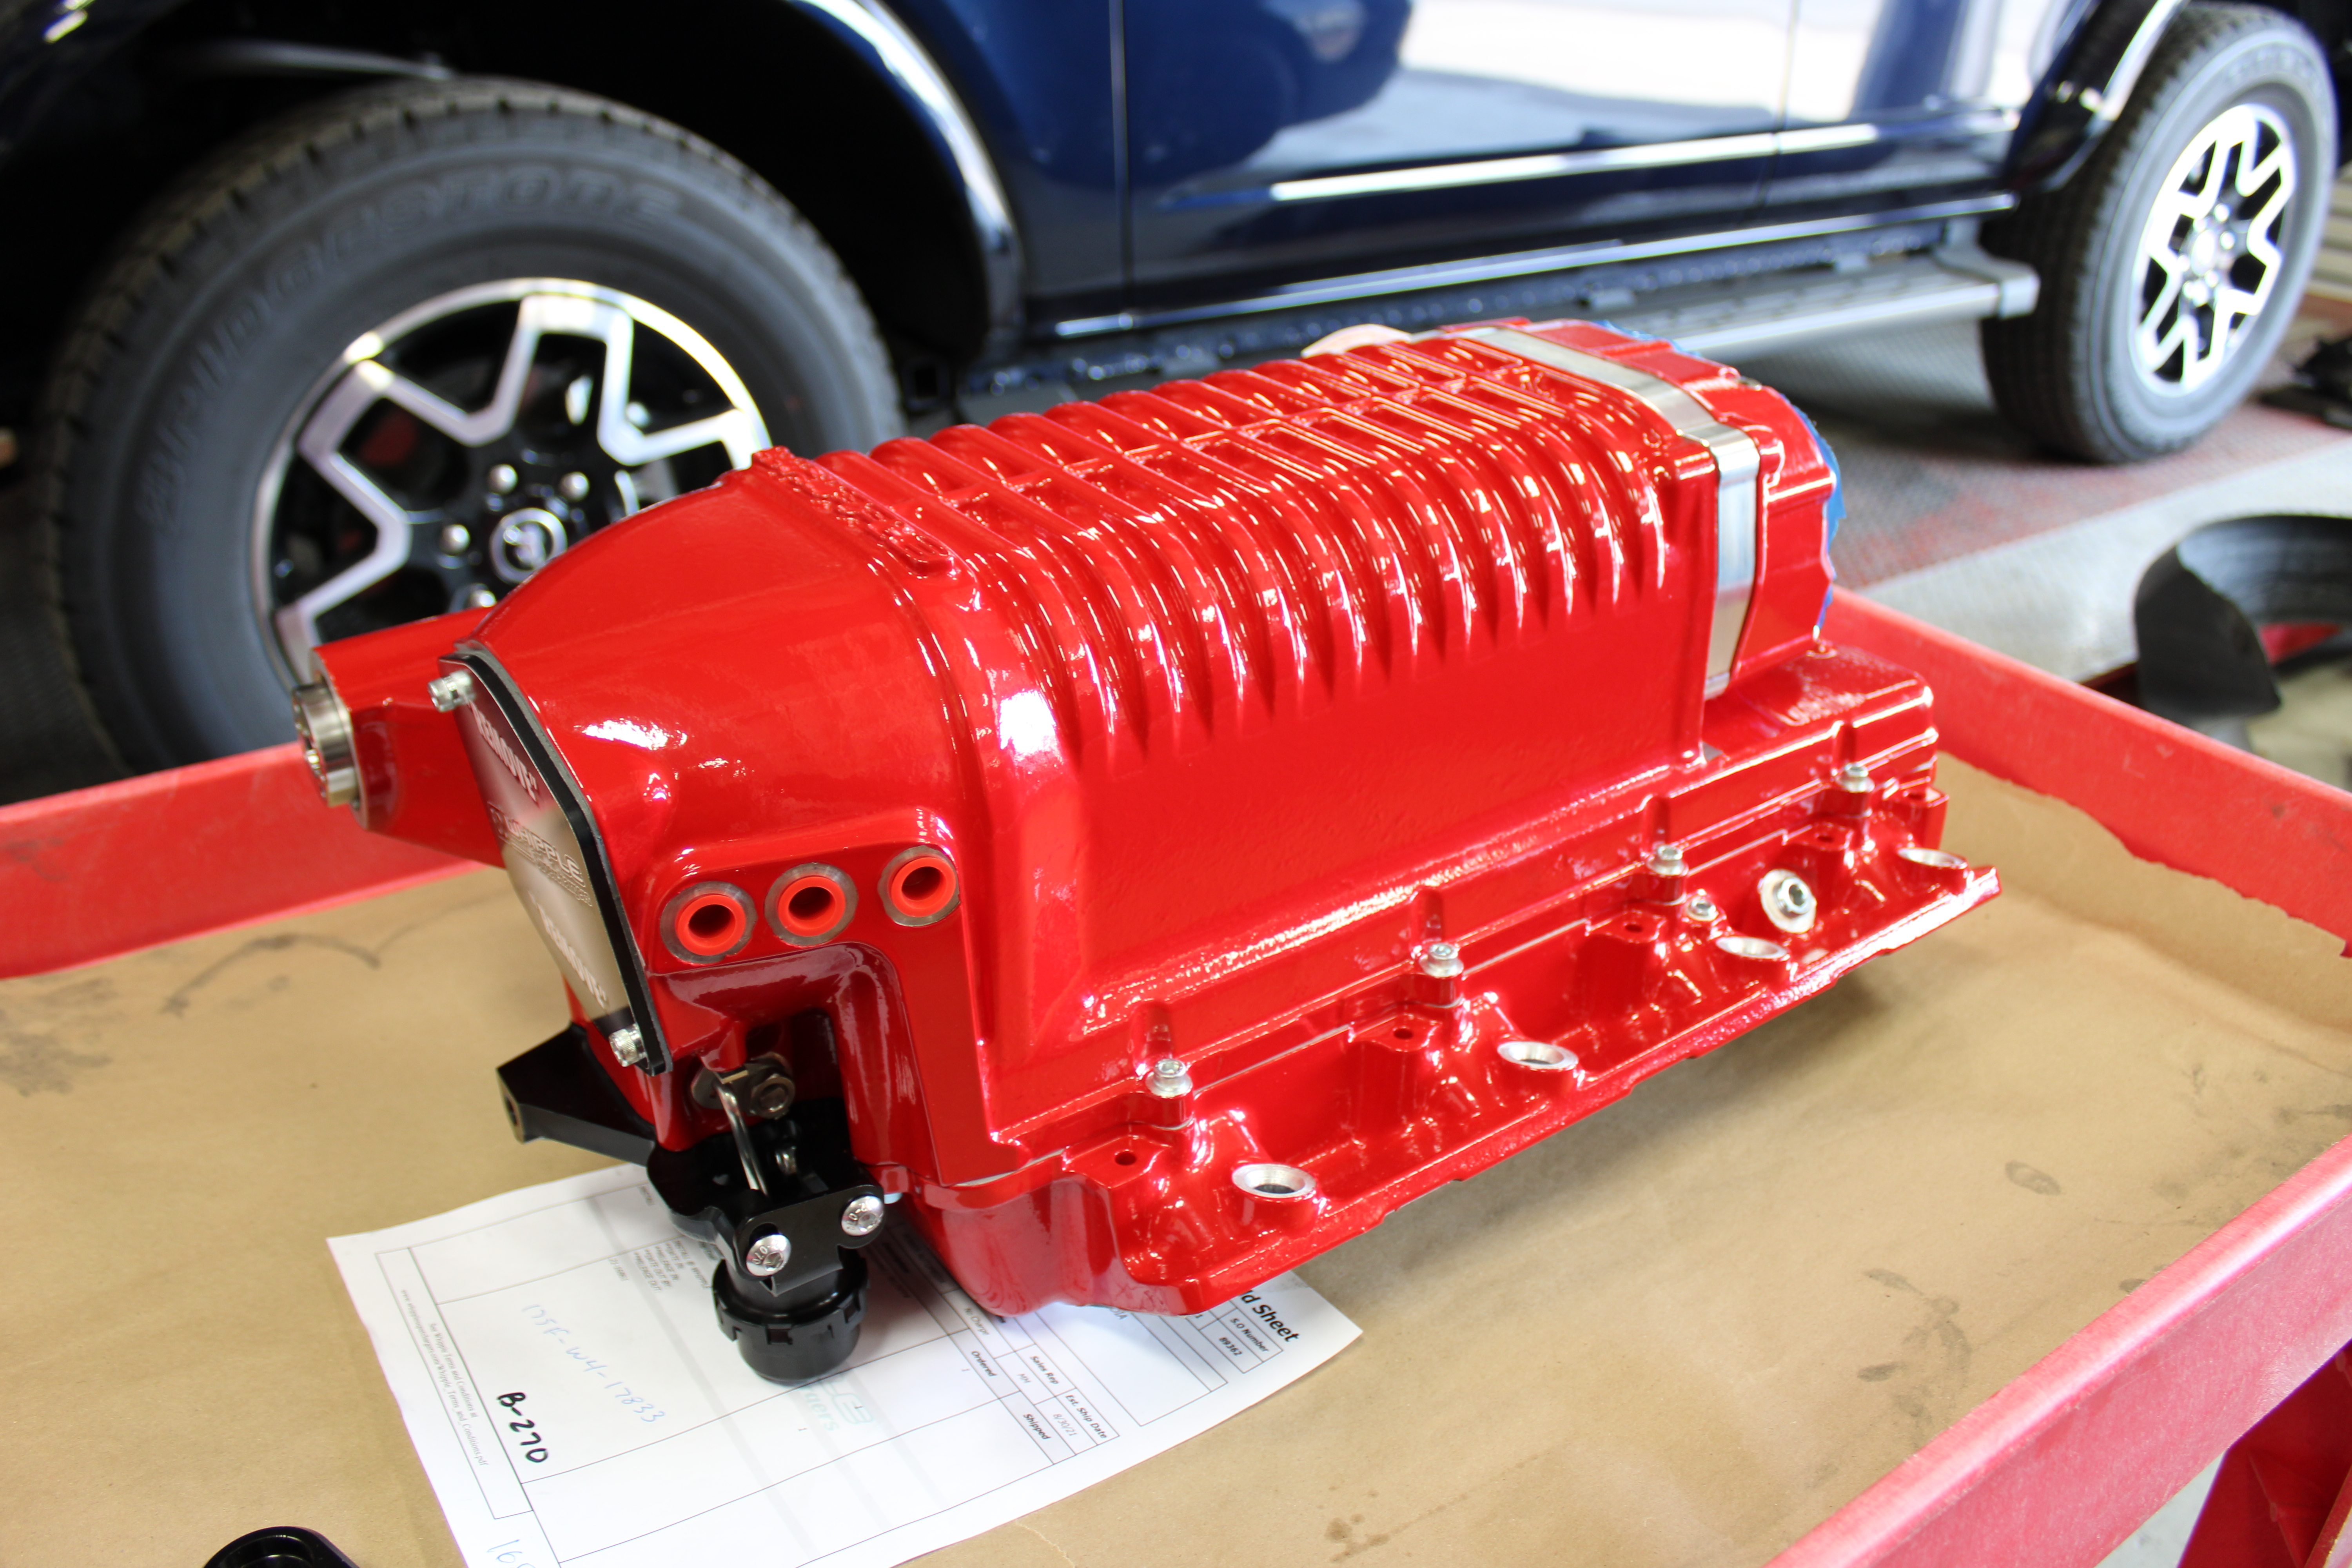
We went back and forth on the color, but we’re glad we landed on this fantastic red powder coat.
The company was founded in the Golden State, after all. So, it was just the luck of the draw that they’d have to contend with CARB law and provide a product to the wanting masses that filled the needs of the street enthusiast – lest they only offer an “off-road-use-only” product, but what fun is that?
Dustin told us, “We really try hard, we’ve been here in California for 32 years, so we try to do everything we can to be legal and work with CARB. We feel that they’re a partner and it allows us to do some of these things that they otherwise might not if we didn’t play nice.”
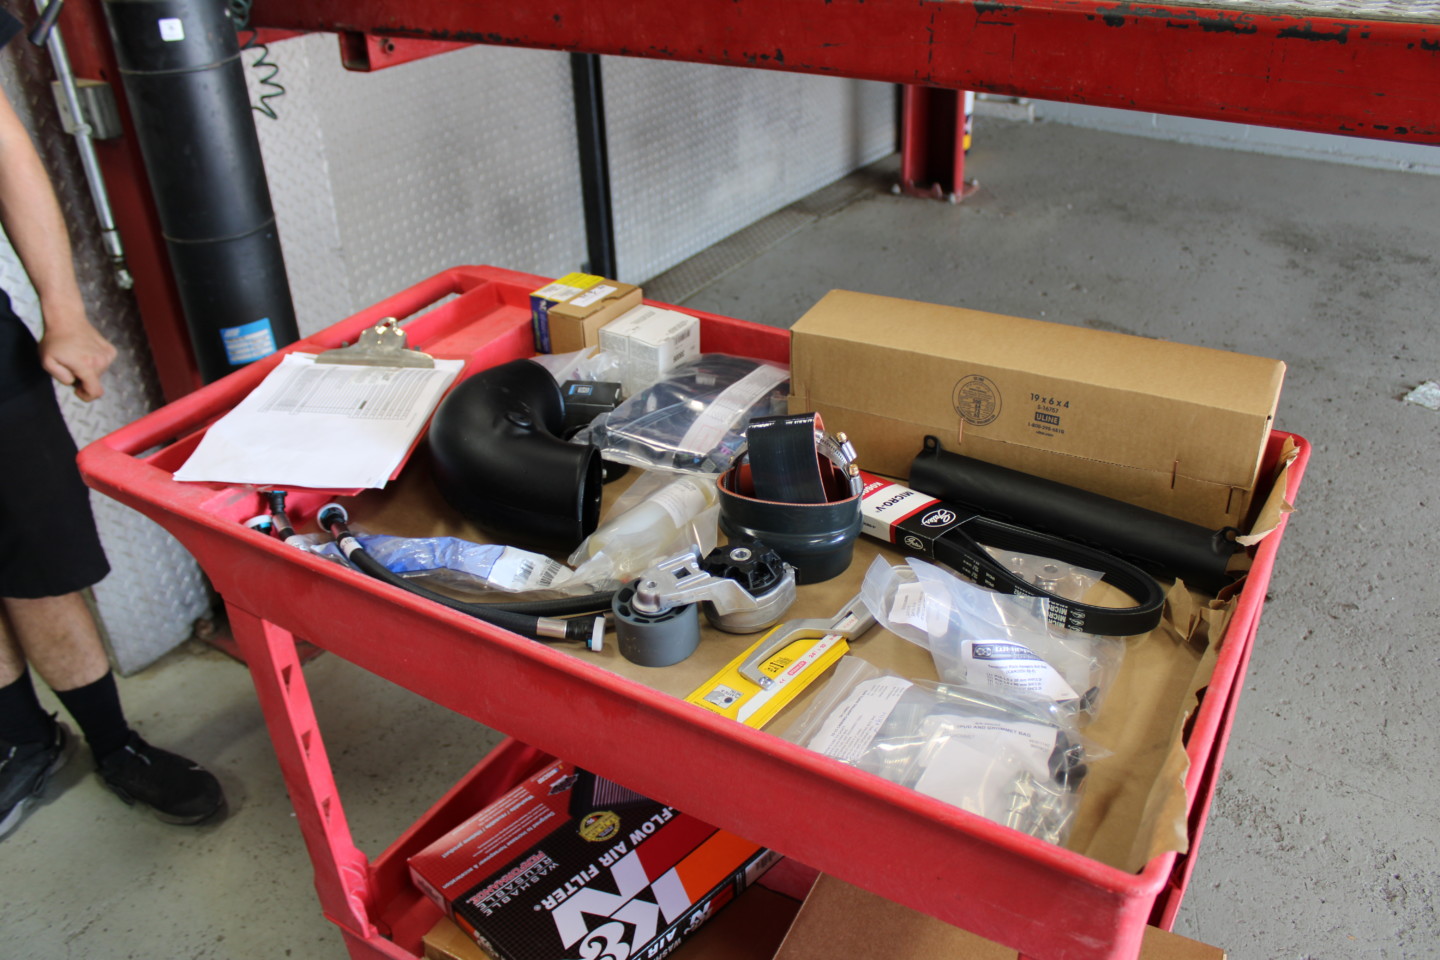
Most of our accessories prepped for install.
The Gen-4 kit we installed on the Daily Camaro utilizes some creative engineering to work around some of CARB’s stringent compliance standards.
Because the rigorous testing required in order to include a proprietary air filter with their kits isn’t worth it, the kit utilizes the factory air box. The same performance or very close to can be had with a high-flow filter and a cutout in the factory air box.
All of this results in a package that not only meets the standards set before it but does so while making incredible power gains for the end-user, as we will see in the dyno results at the end of this article.
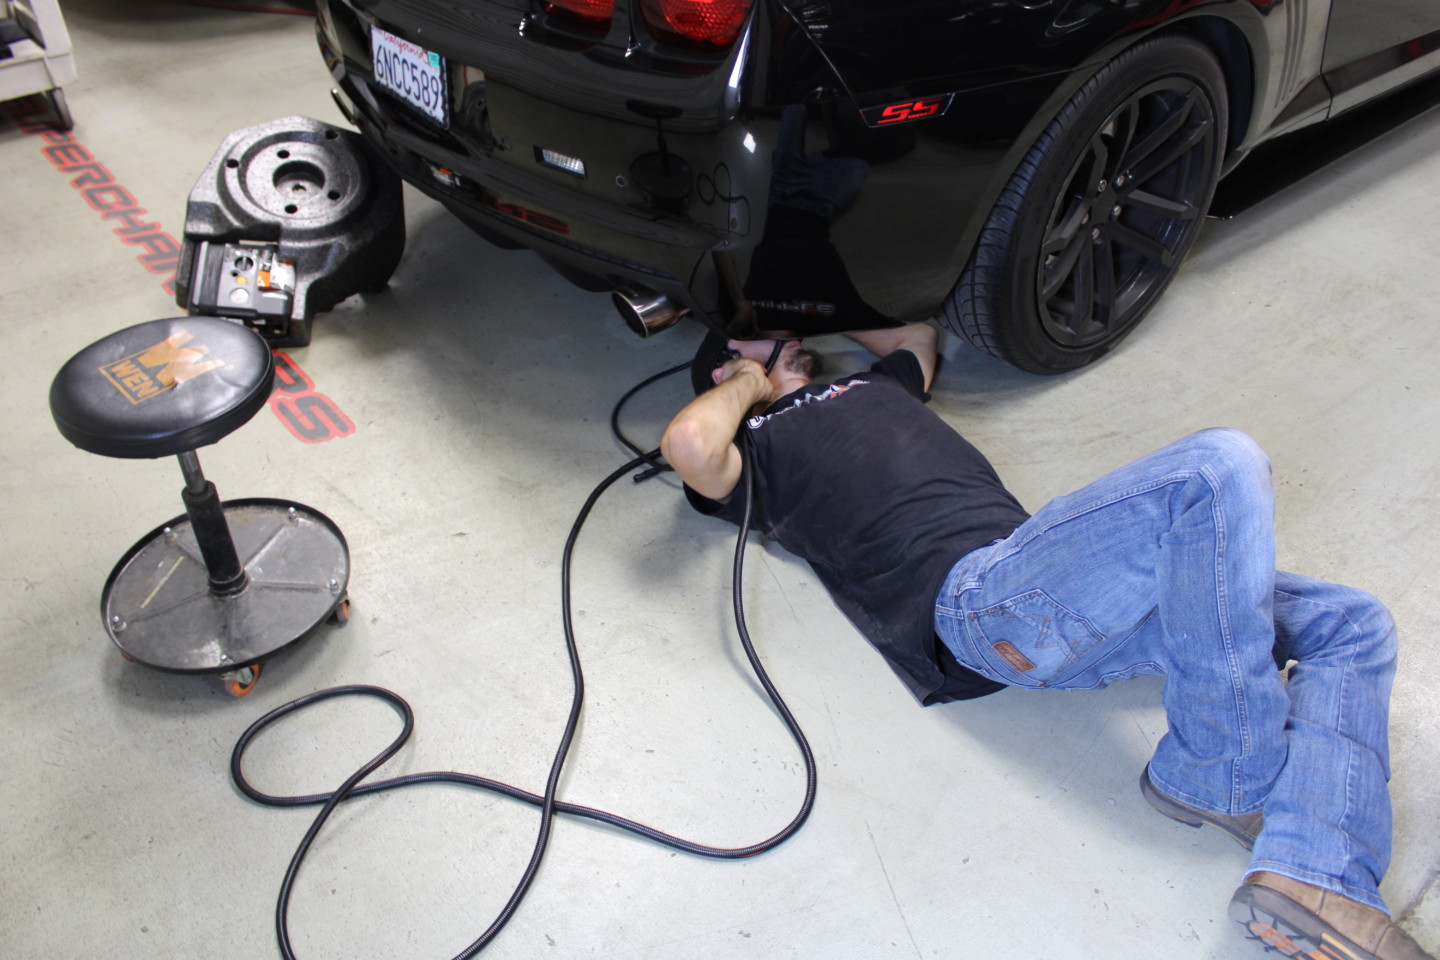
The Install
The process went smoothly. There are usually hiccups during an install as involved as this, but not with the Whipple. Dustin commented on the whole thing, “The installation is all doable in a garage – everything about it It doesn’t require any special tools or welding or grinding or a cherry picker or something. If it’s just you and your buddy – you can get it done over a few beers on the weekend. That’s how we started, we didn’t have a lot of dealers when we first started, so we tried to make everything ourselves – from the instructions to the actual kit, so the customer could just bolt most of the parts on. We removed a lot of the complex part of the process by doing it before it ships out – we’ve sold a lot of these kits.”
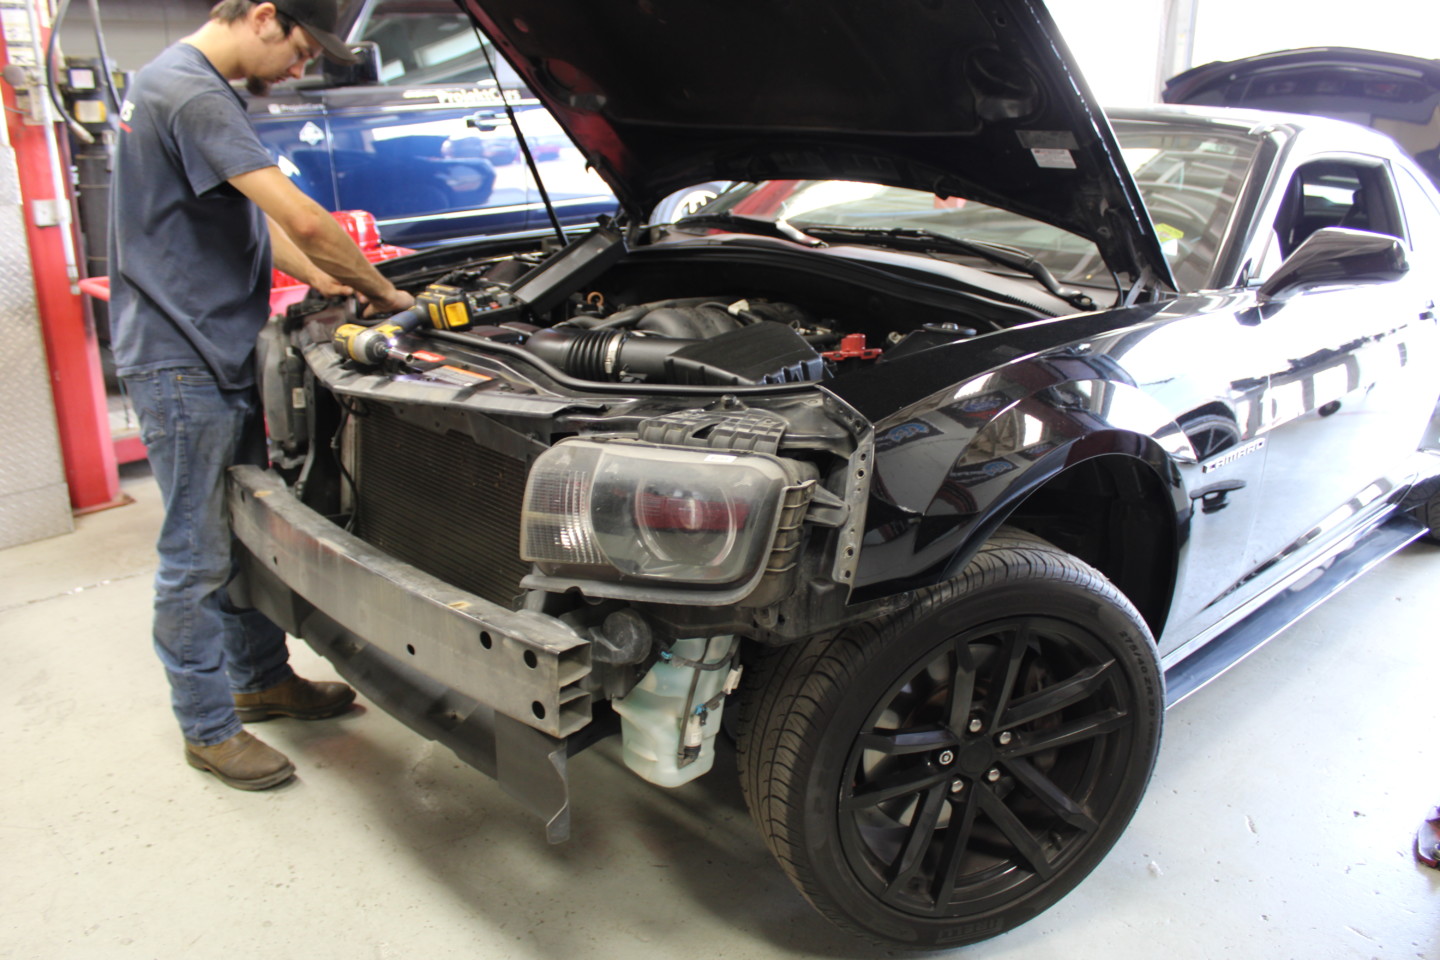
After the battery was disconnected, the front bumper and fender liners were removed.
While they aren’t as comprehensive as those included in Whipple’s instructions, we documented the most important parts of the install with the photos below.
Heat Exchanger
The installation consists of eight main steps, the first of which is tackling the heat exchanger and accompanying plumbing. The supercharger’s heat exchanger’s job is to lower the coolant temperatures as it enters the supercharger’s intercooler. Thereby cooling the charged air and creating the most efficient combustion.
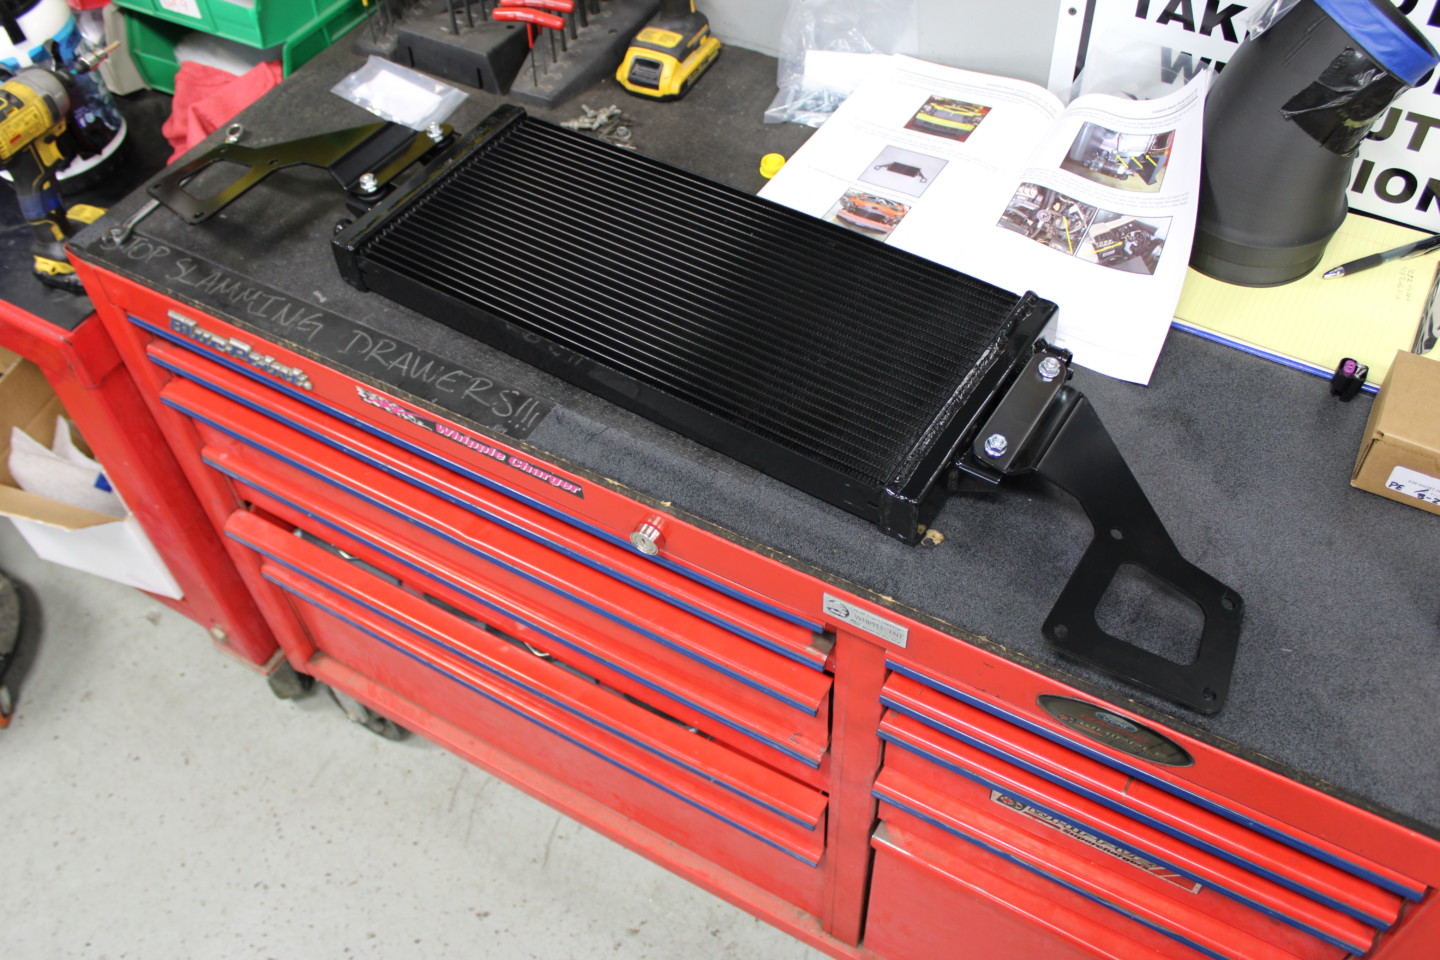
Time to install the heat exchanger.
We started our installation by working in the trunk and disconnecting the battery. Once that was taken care of we moved back to the front of the car.
After removing the front wheels, front bumper, and fender liners, we were afforded unimpeded access to the heat exchanger’s mounting location in front of the radiator. Of course, all the necessary brackets are included in the kit.
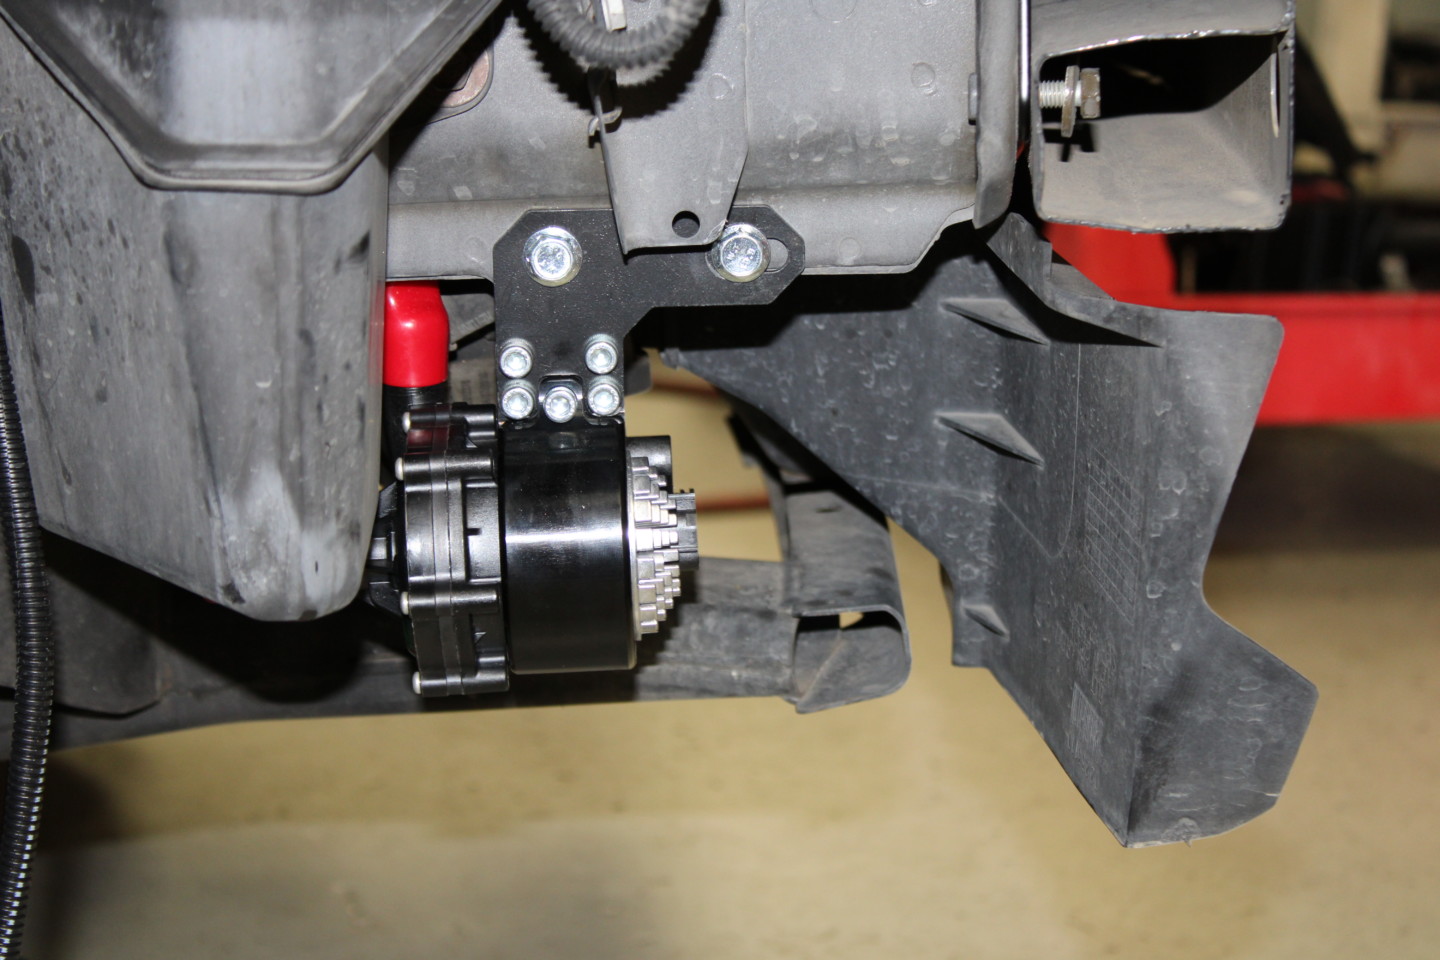
The pump for the heat exchanger is mounted behind the passenger fender.
This was also when we installed the necessary intercooler pump on the side of the front frame rail and began wiring it to the factory fuse panel.
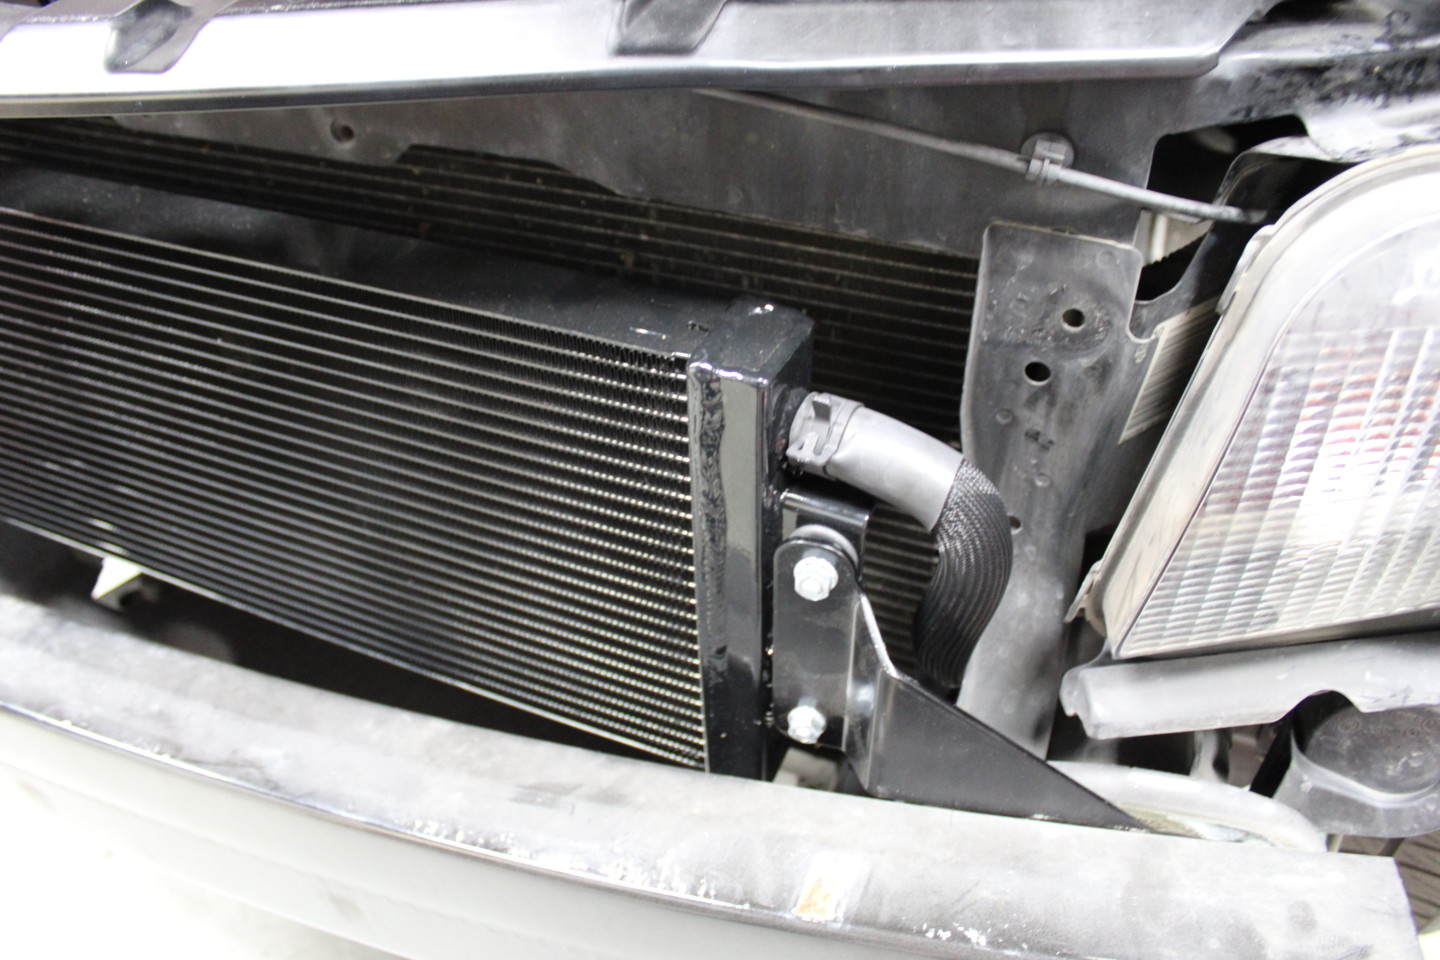
The lines for the heat exchanger come pre-cut and loomed in a protective sleeve.
All of the hoses that are routed from the pump, heat exchanger, and intercooler are included in the kit and pre-cut to the proper length.
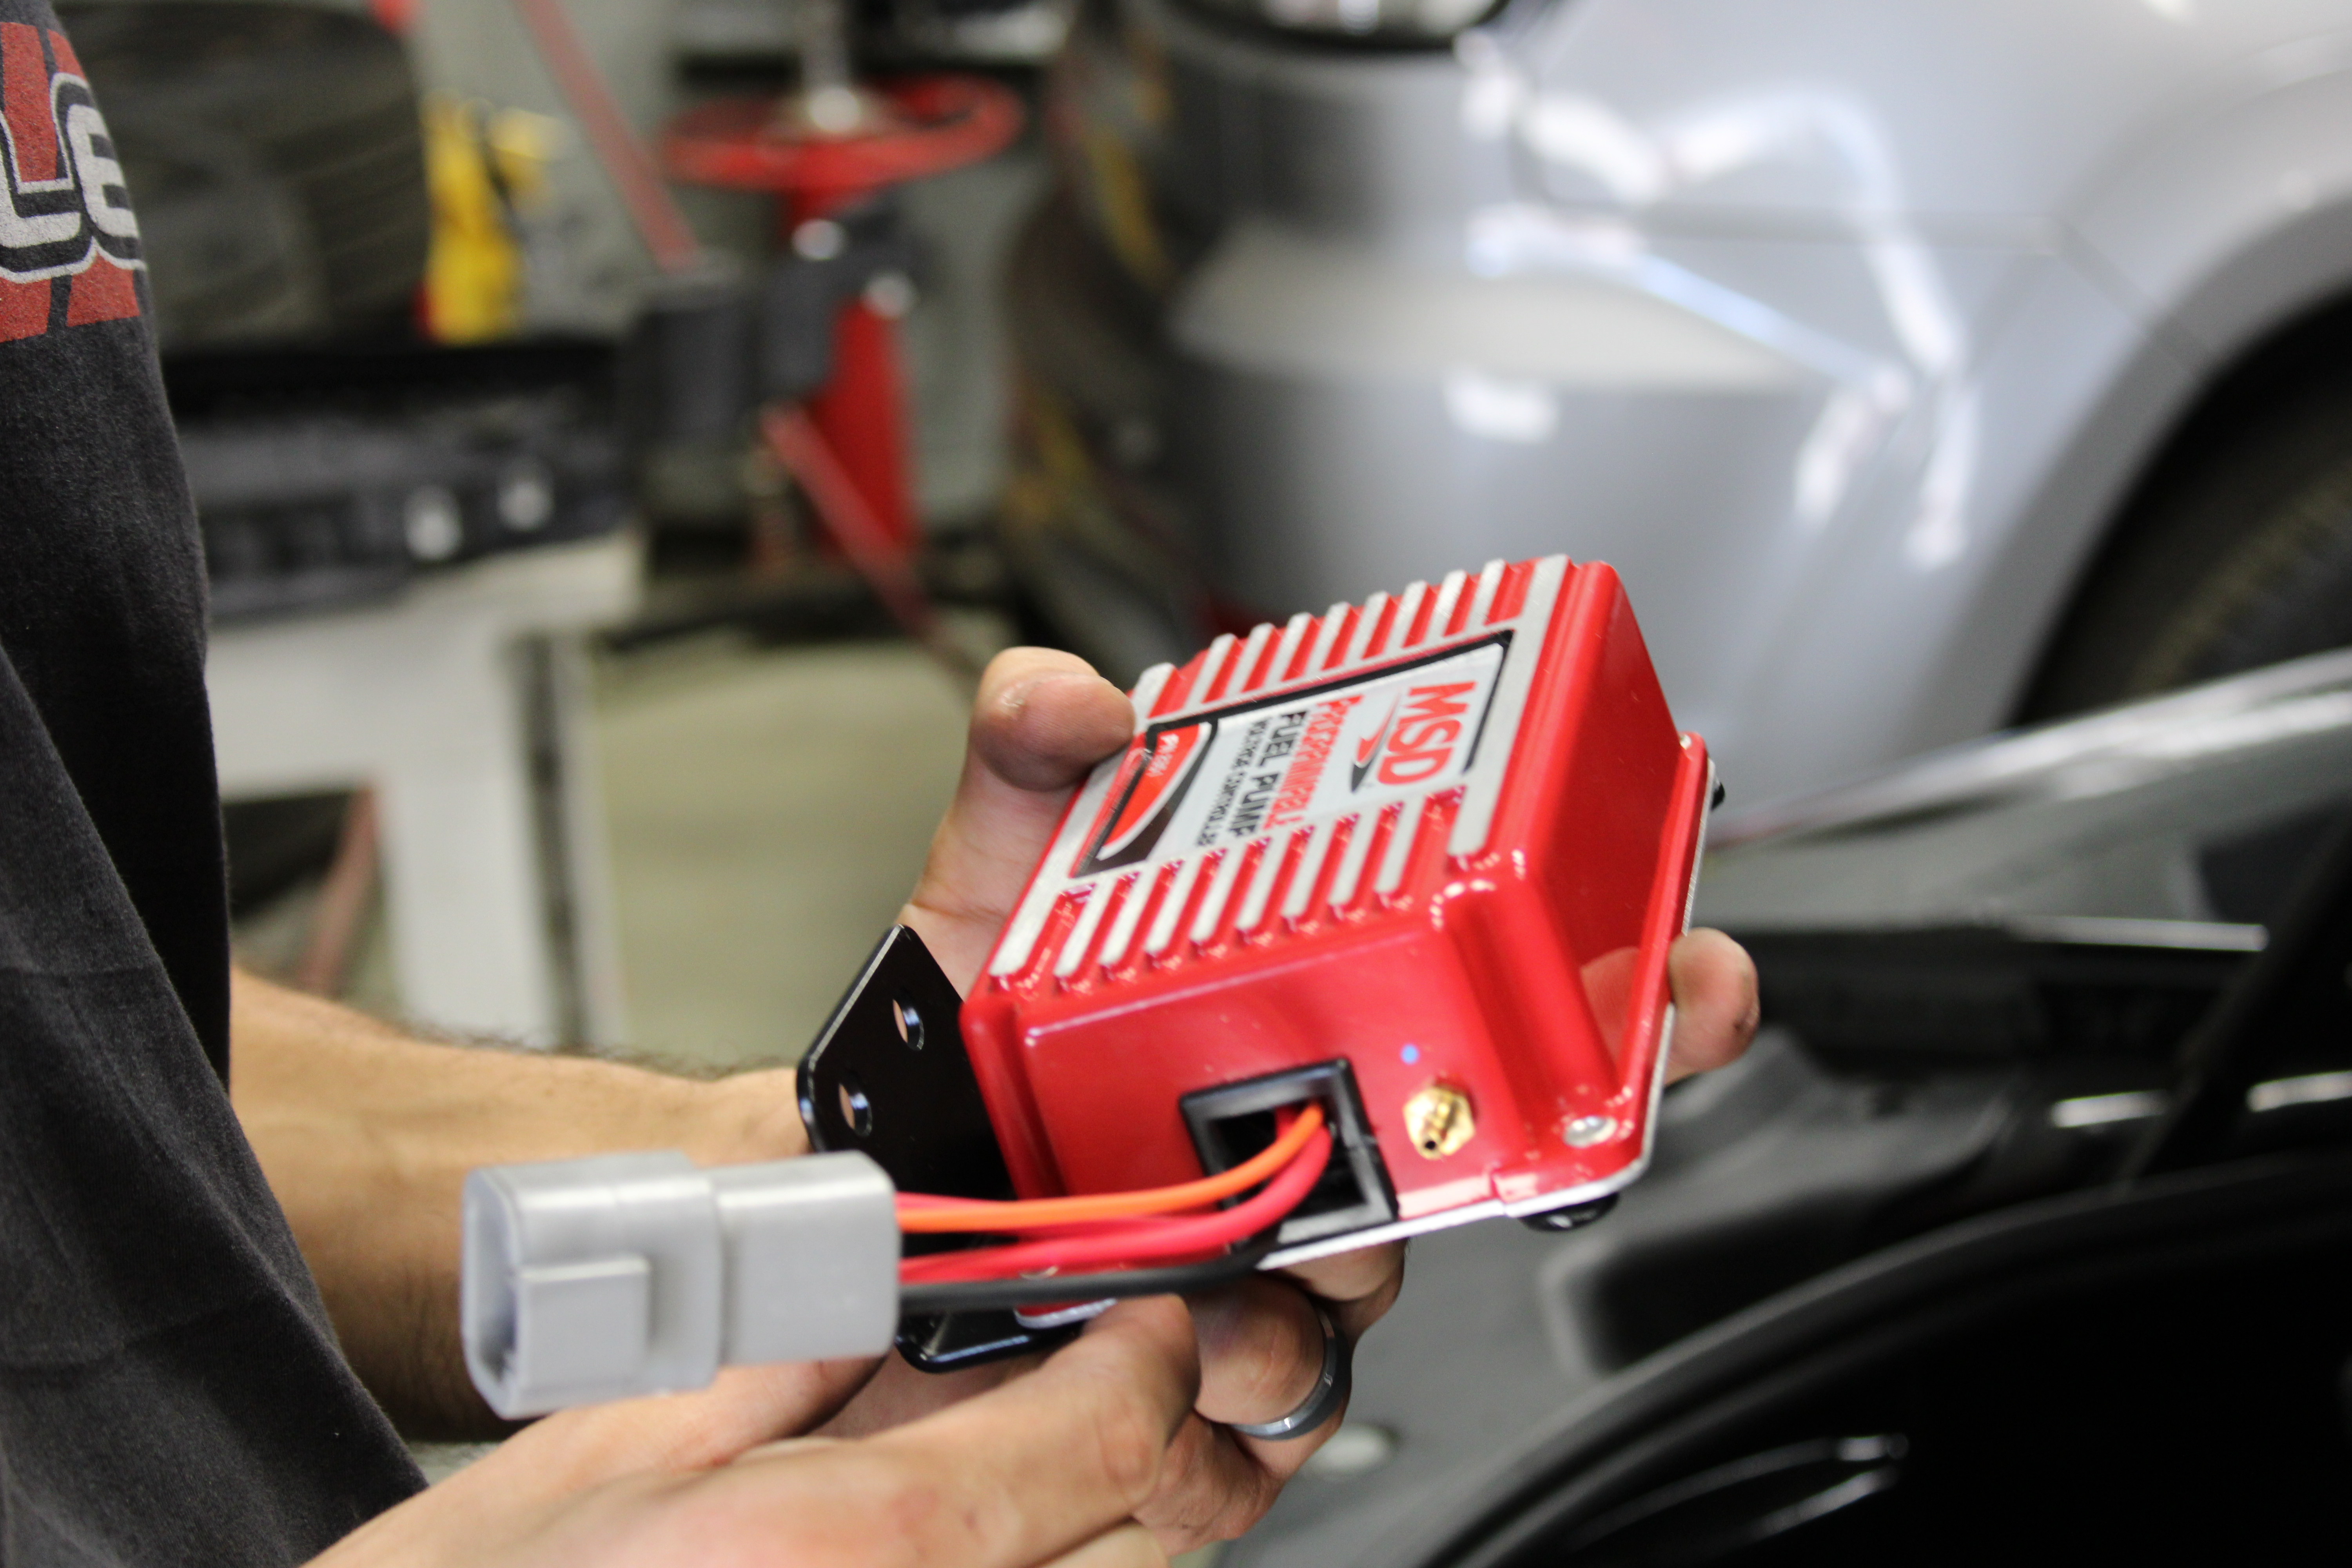
MSD Fuel Pump Voltage Booster
We made quick work of the heat exchanger and moved on to address the fuel needs of our powerplant. To feed the mighty blown LS3 requires a lot of fuel. This is why Whipple includes an MSD Fuel Pump Voltage Booster with the blower kit.

The MSD voltage booster was a simple installation. The most difficult part was running the signal wire and vacuum reference to the front of the car.
According to the folks at MSD, “The updated Fuel Pump Booster is an easy way to maintain the proper fuel pressure on a car after adding a power adder such as a turbo or supercharger. The Booster ensures that the engine receives the fuel it needs to make up for the increase in air being pumped into the intake manifold.”

Mounting the voltage booster was easy because we utilized the factory battery hold-down.
“It will increase the voltage to the factory fuel pump in proportion to manifold boost pressure in order to maintain the proper fuel delivery. The amount of increase is adjustable from a range of an additional 1.5 -22 volts and up to 30 psi which can all be set and adjusted from your PC with MSD’s easy-to-use Windows-based software. The MSD Booster will wire to the factory fuel pump relay or with a secondary booster pump.”
Plumbing the relay signal wire and vacuum reference line was tedious but at least they were protected using the supplied loom.
We elected to use the supplied relay Whipple includes in the kit and mounted it to the battery hold-down bracket on the trunk floor. This made things easy when it came to wiring the power and ground wires. It was a bit tricky to route the vacuum line and trigger wire from the trunk all the way to the engine bay for the manifold boost reference, but we made it happen.
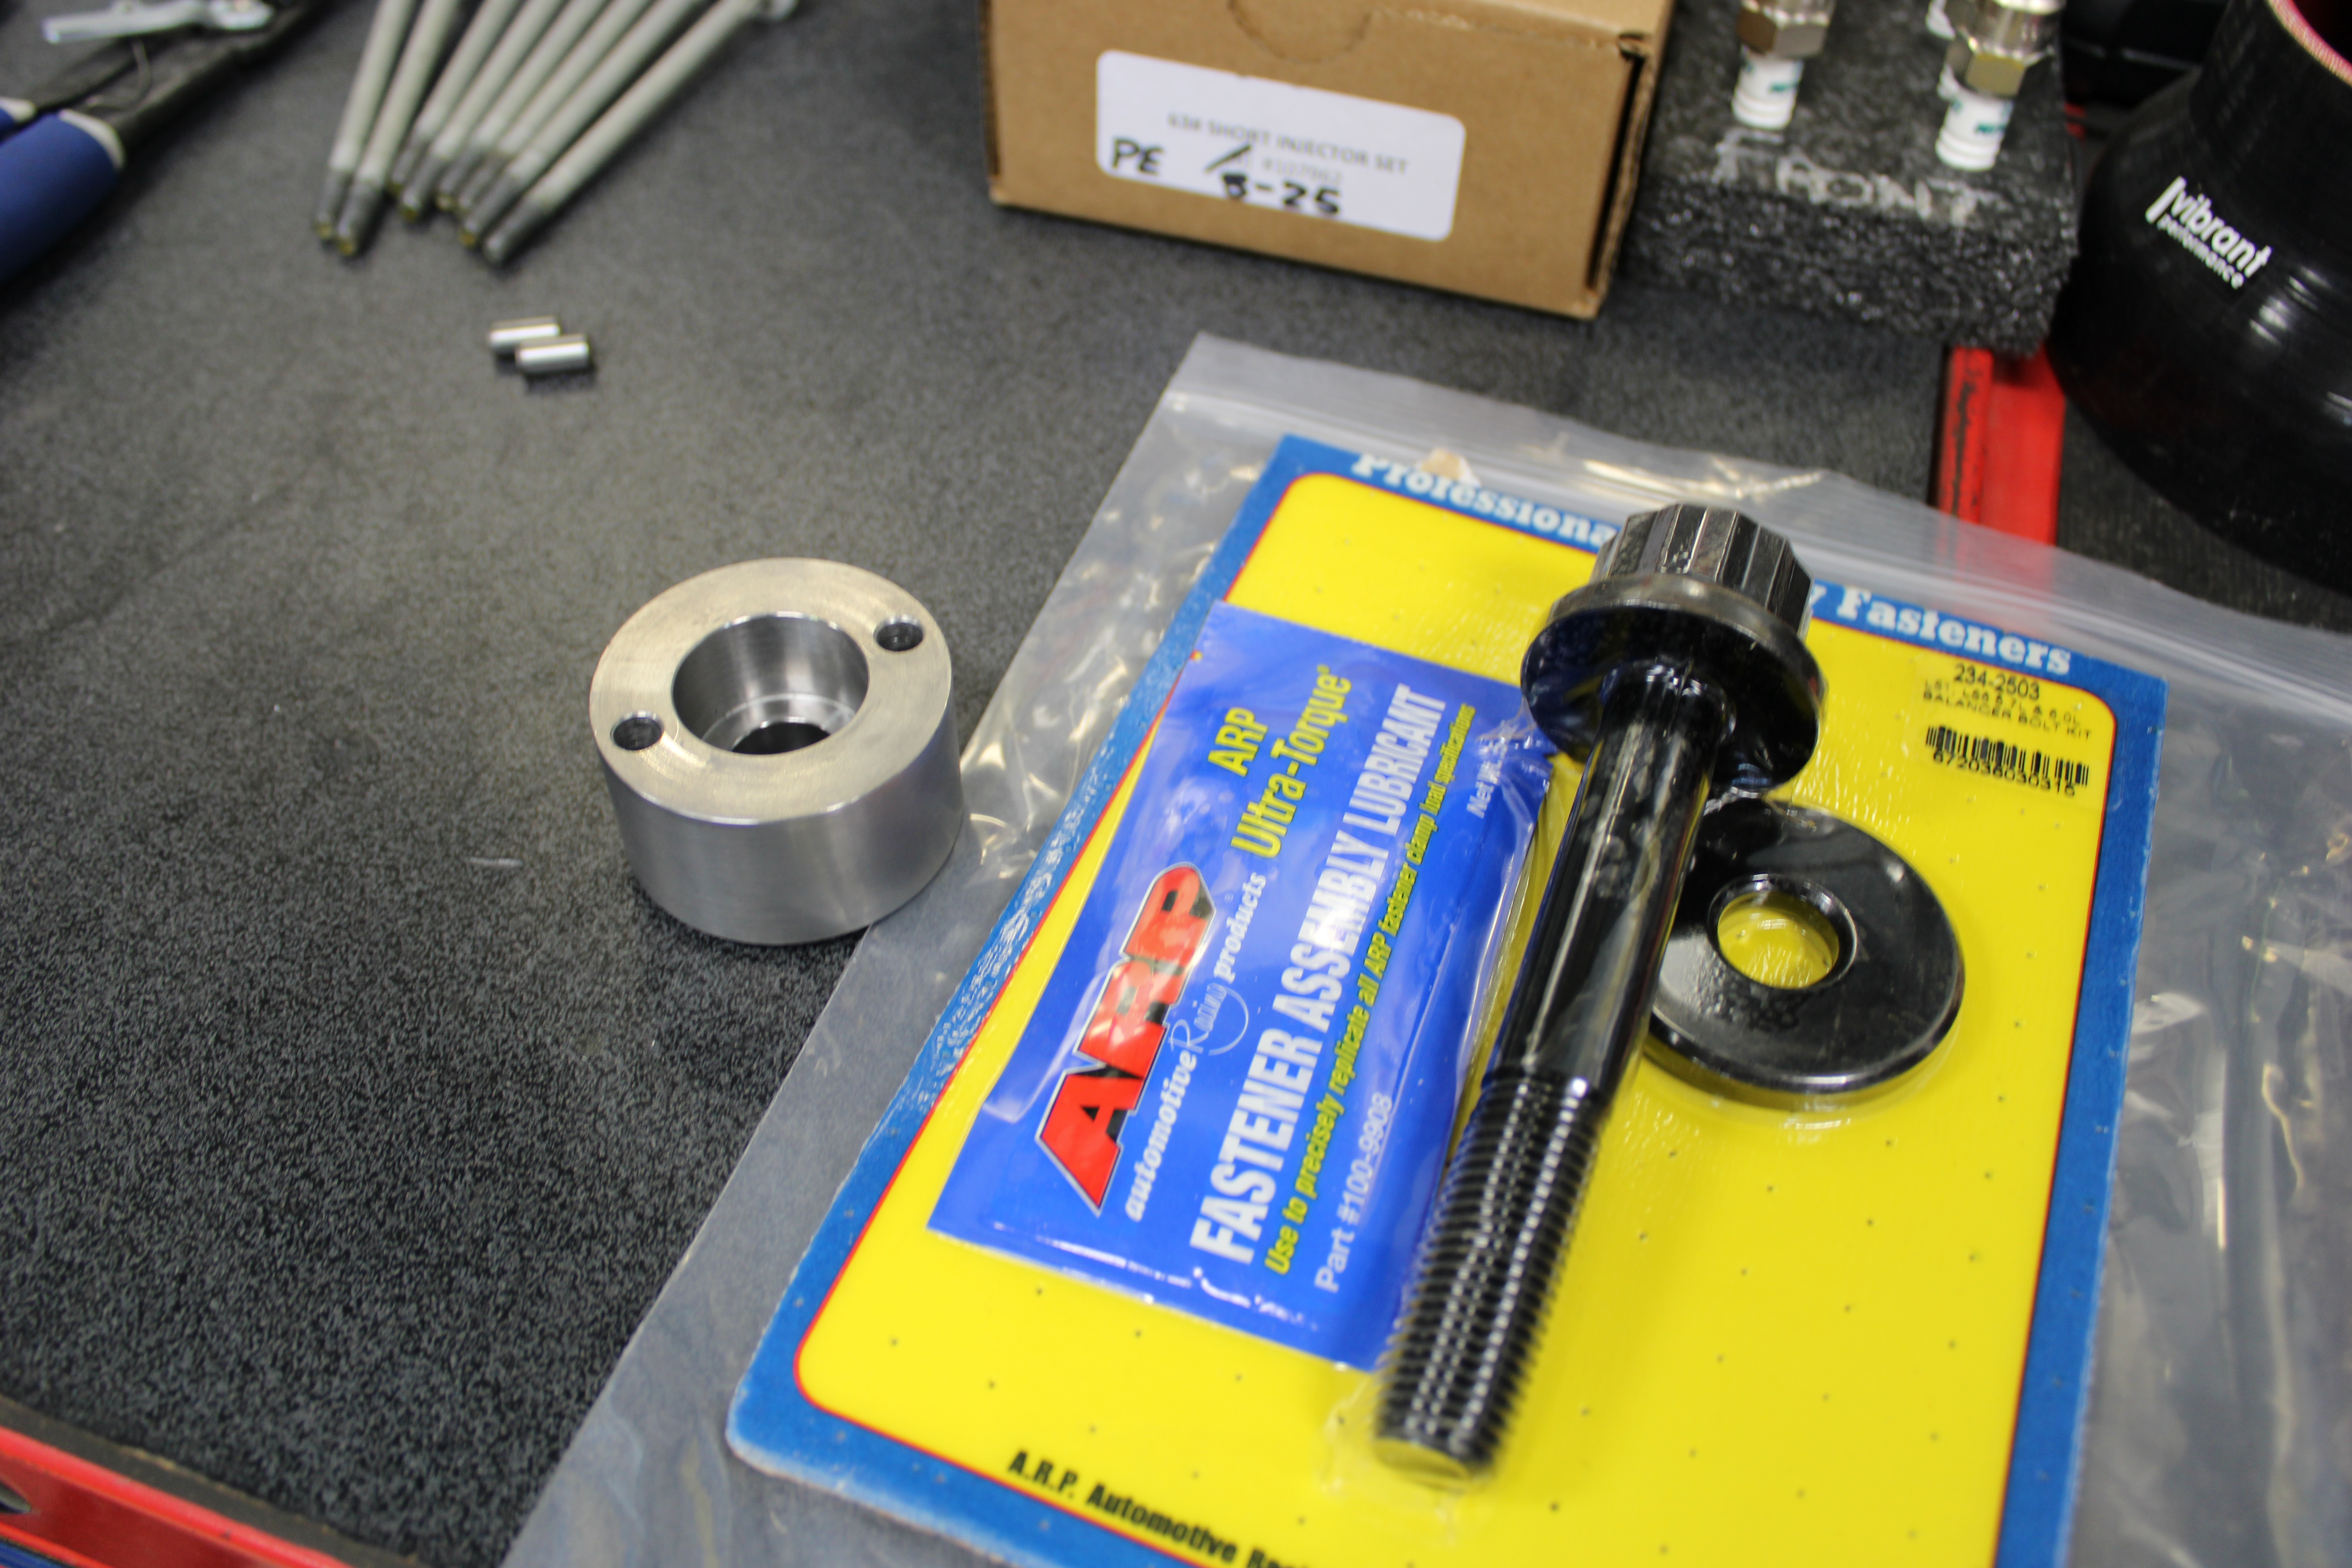
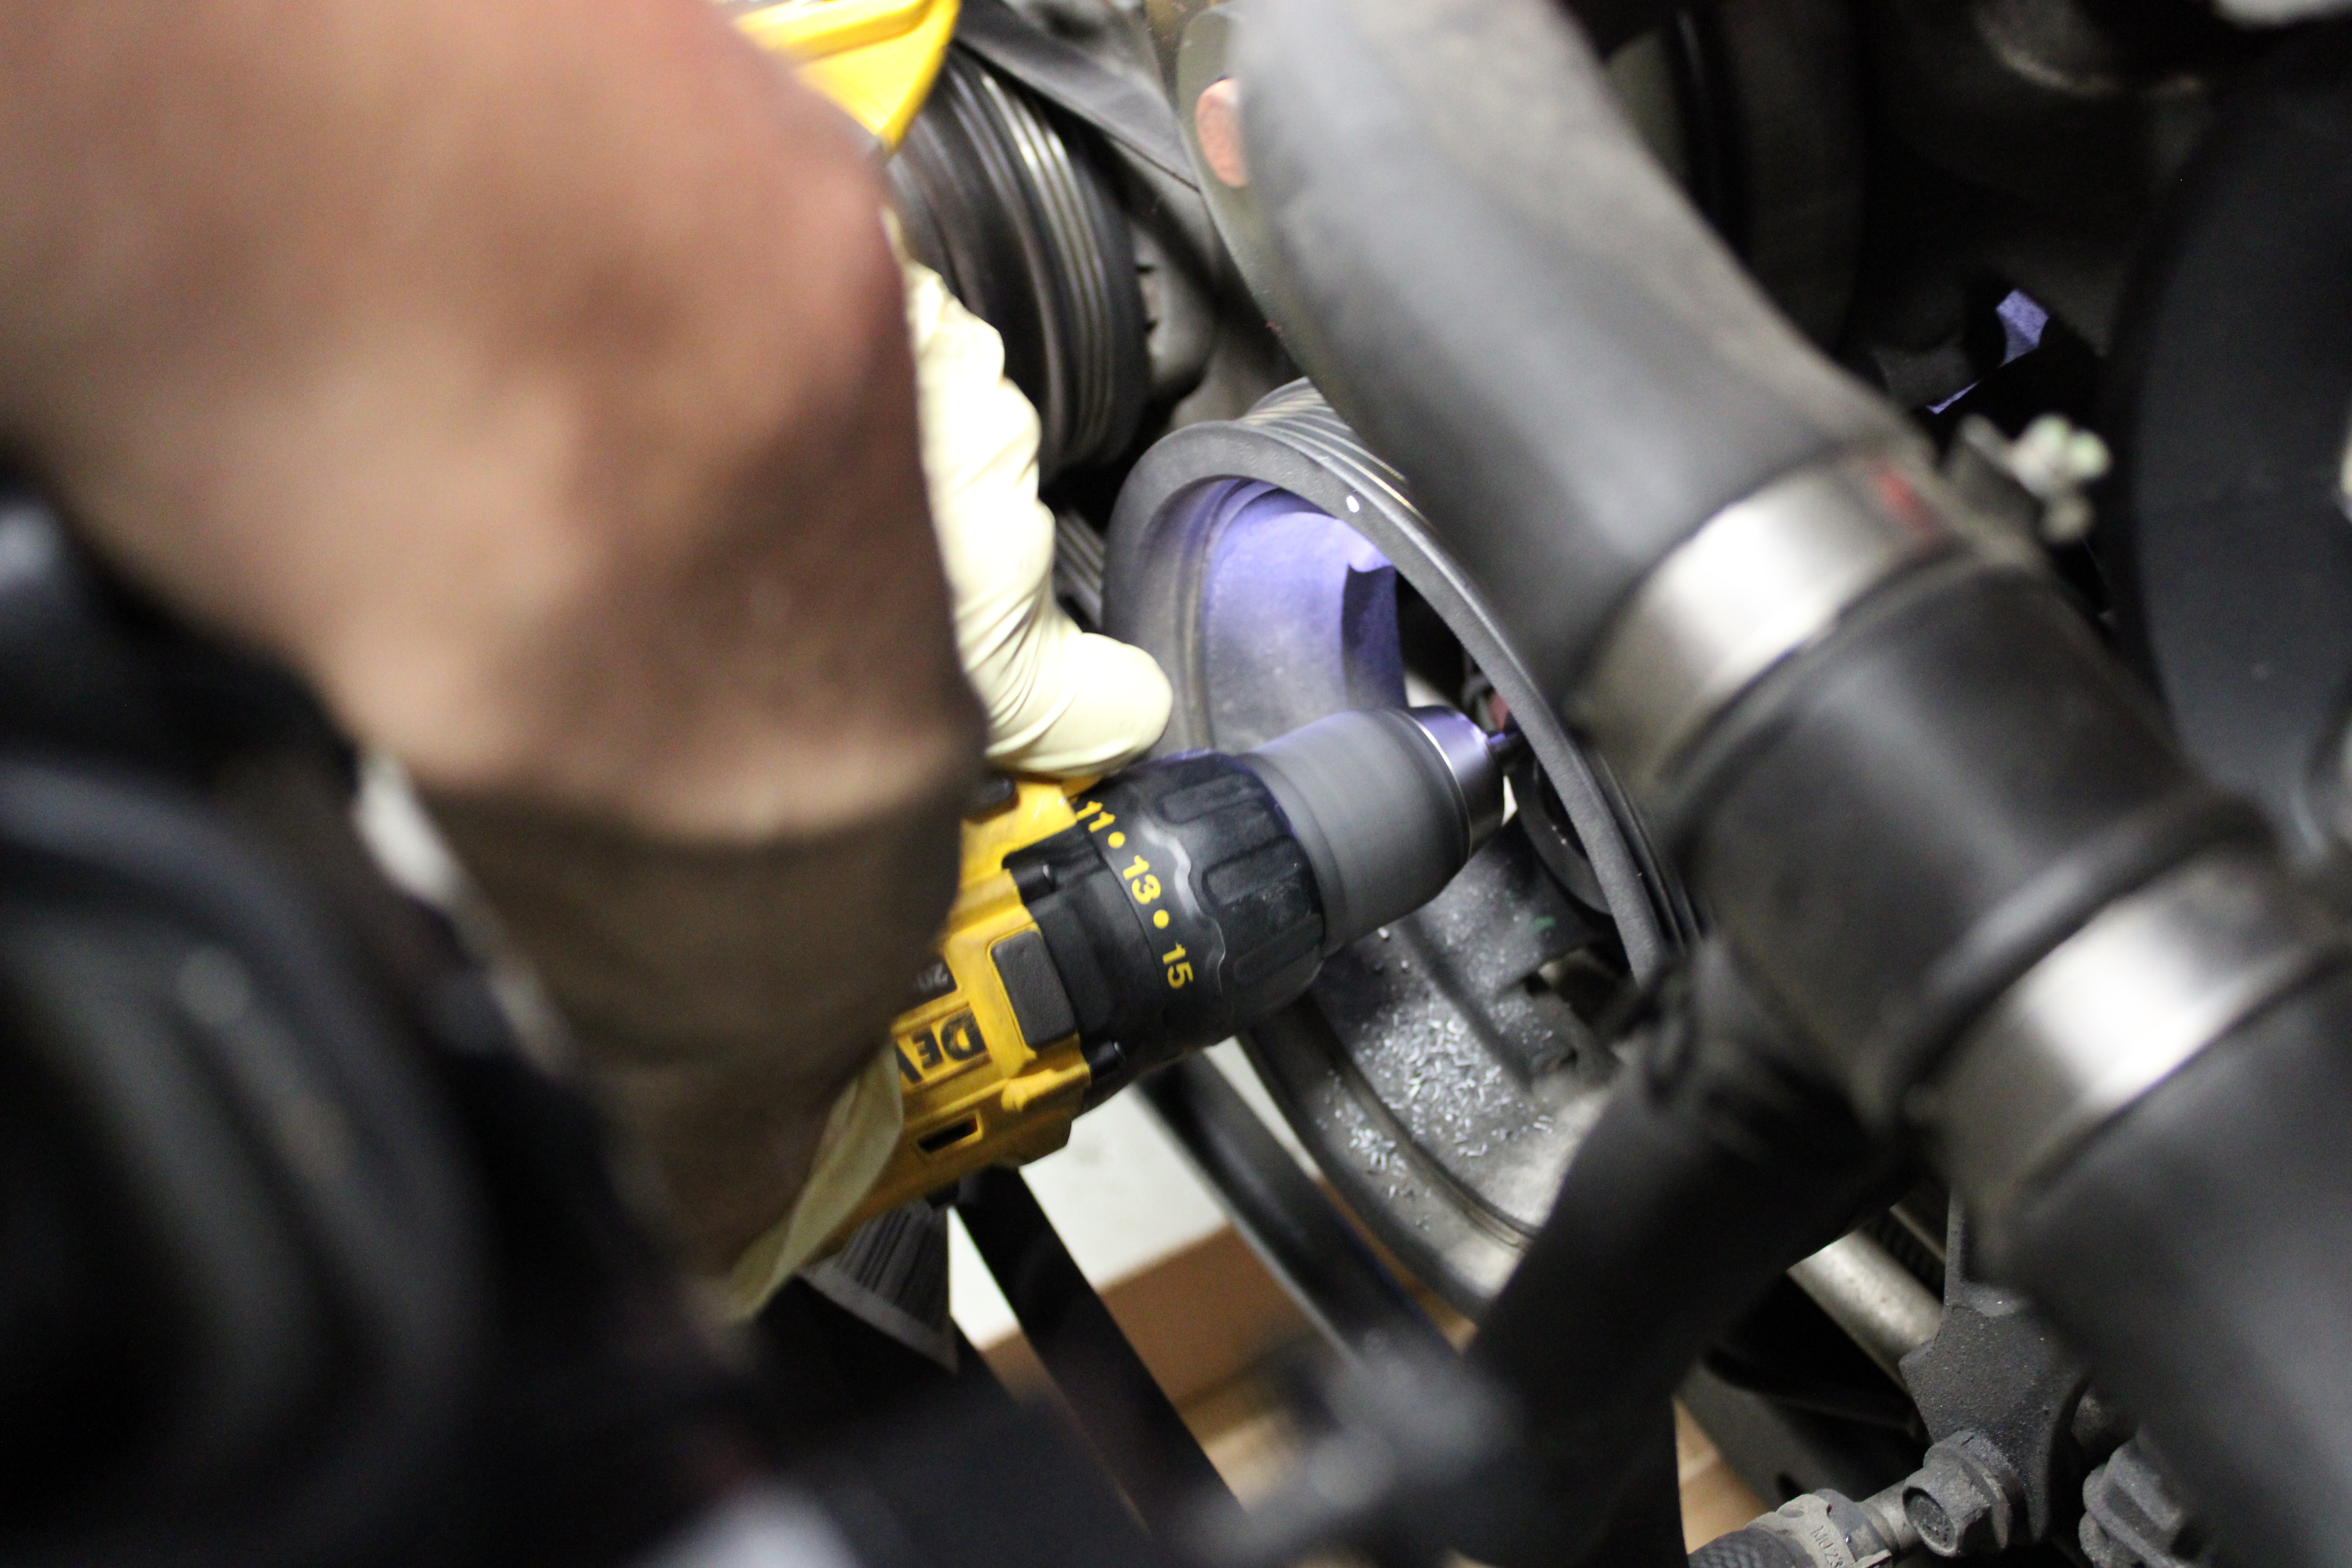
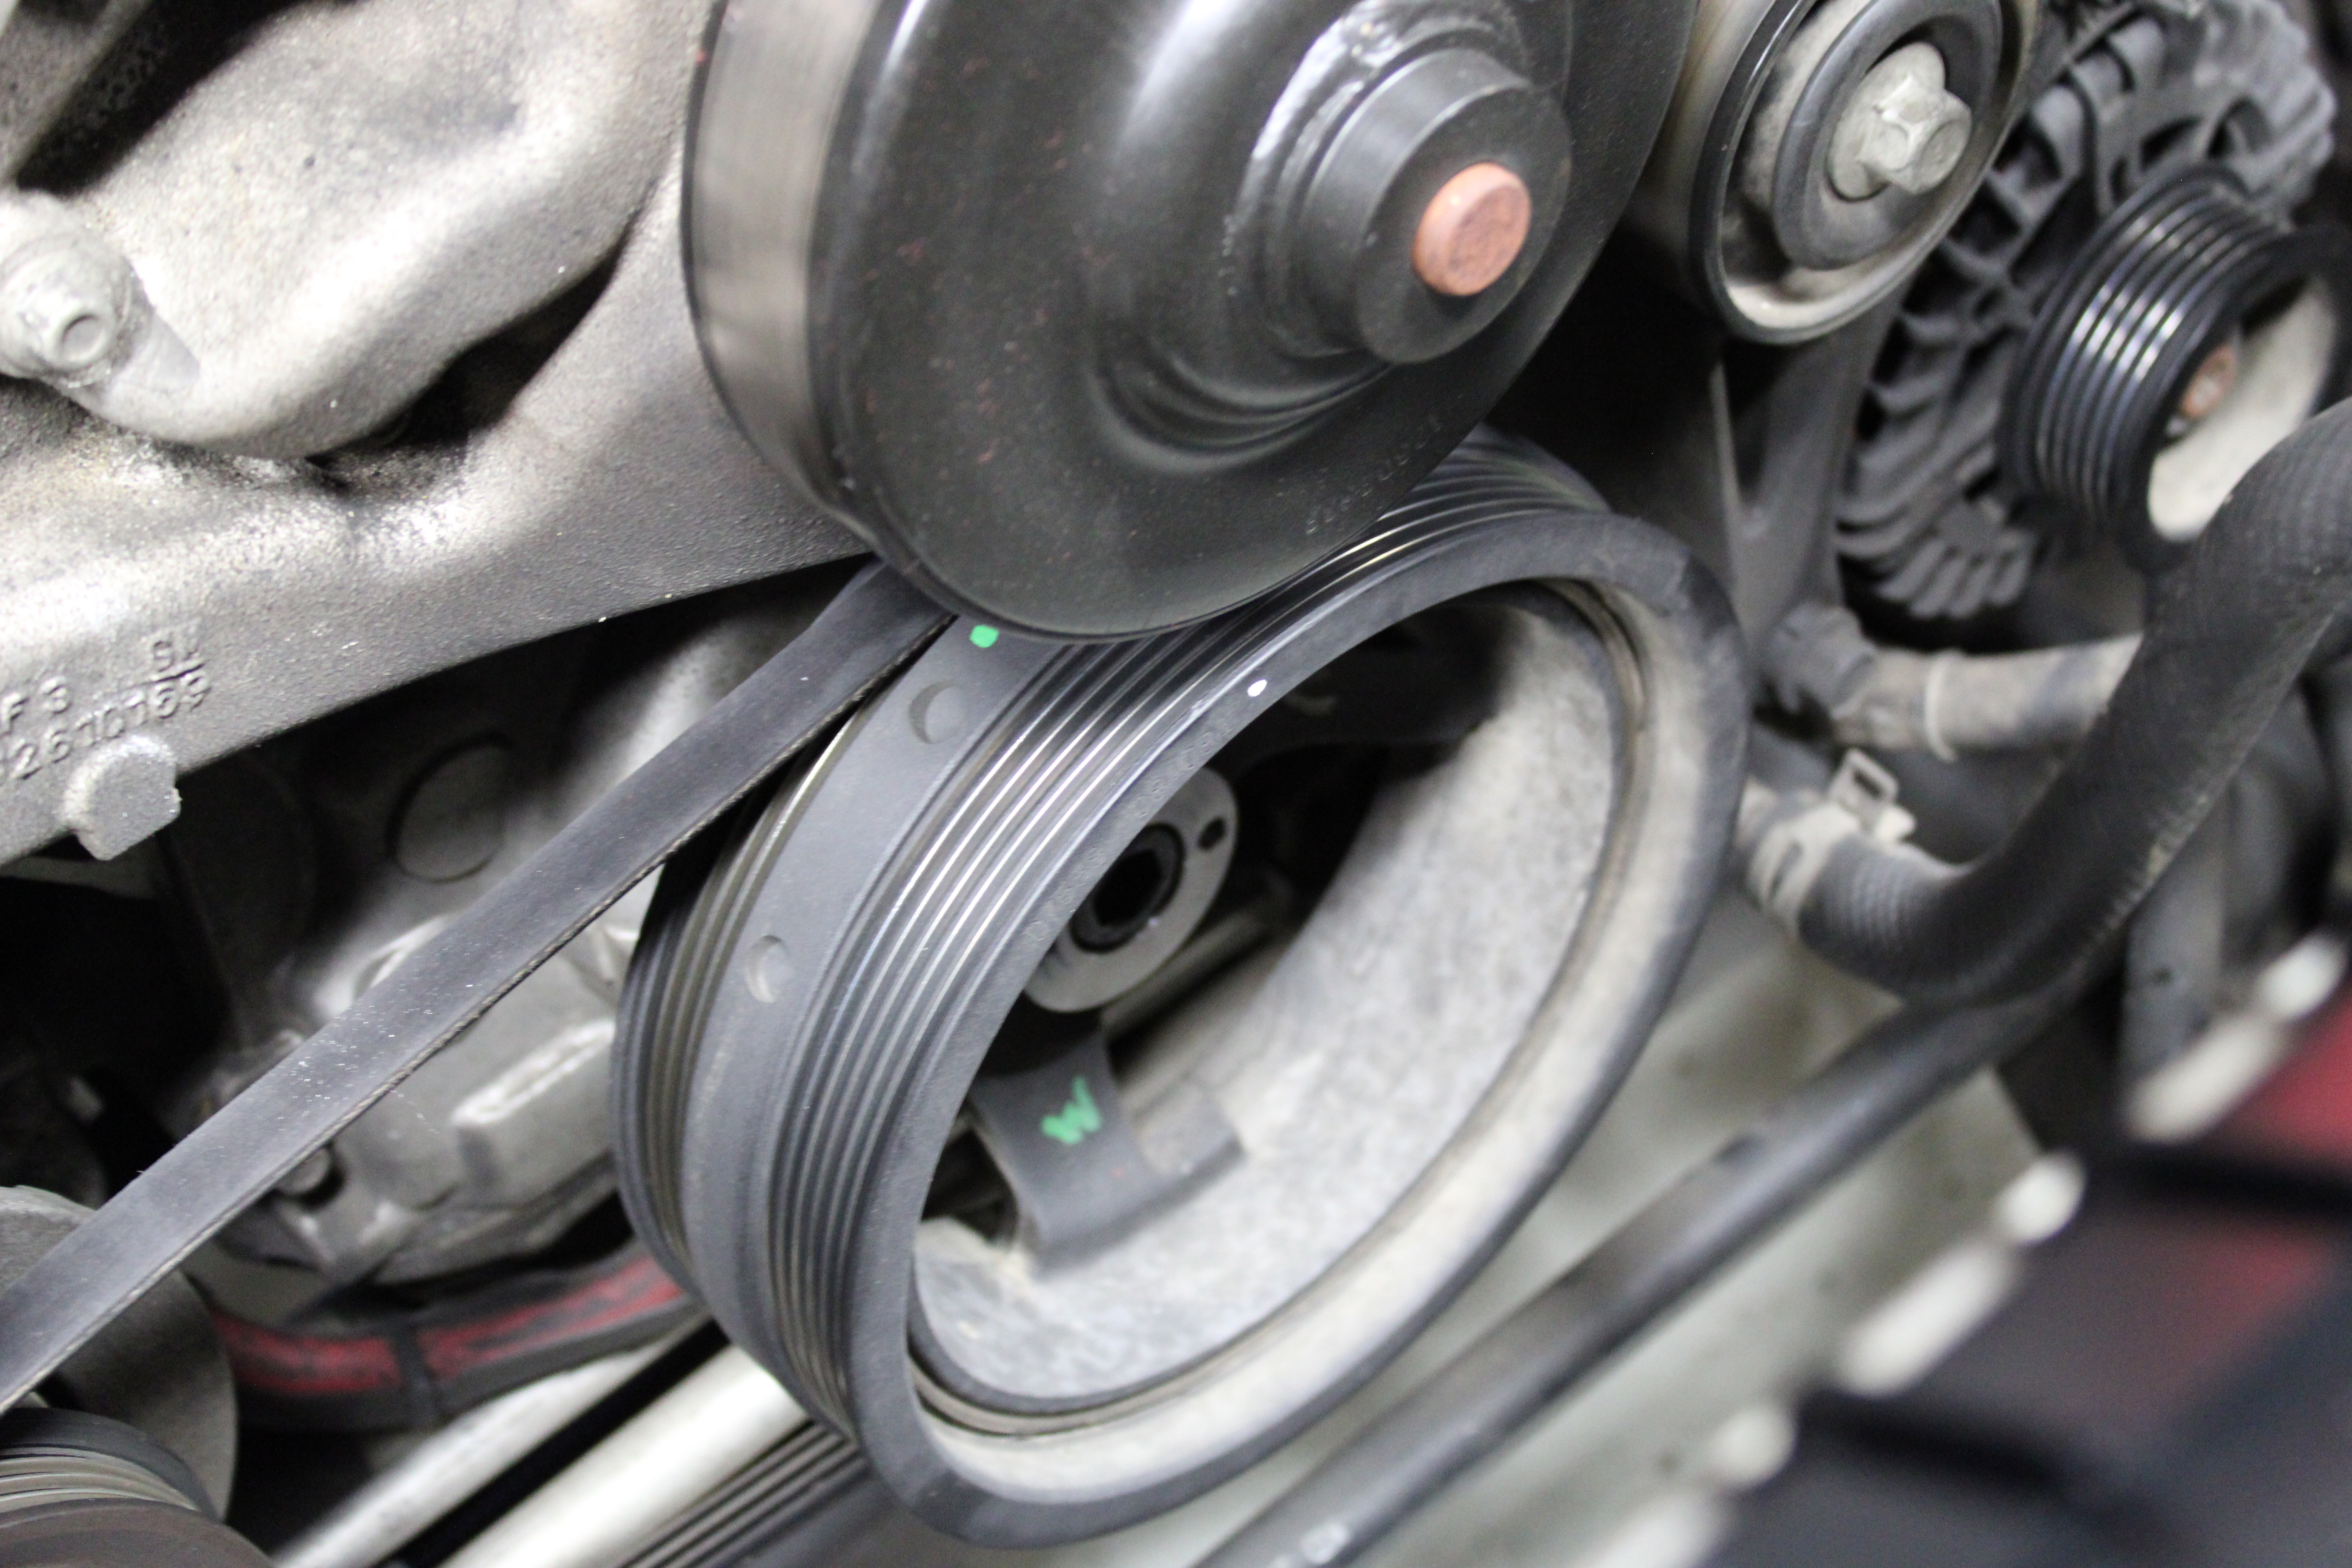
Crankshaft Pulley Pinning
To prevent the harmonic balancer pulley from spinning on the crank due to the added force it will be subjected to, we needed to drill and pin the crank pulley.

The crank pin kit includes a new ARP crank pulley bolt and washer.
We began by removing the factory crankshaft pulley bolt. Luckily, we didn’t need to apply any heat to the bolt to get it out, although, that is a method Whipple recommends utilizing in the event of a stubborn fastener.

The kit makes drilling into your crank pulley a relatively stress-free endeavor.
Once removed, we installed the supplied drill guide using the factory pulley bolt, and drilled the harmonic balancer to accept the new dowel pins.

The last step is torquing the new pulley bolt to spec.
Once we’d drilled the holes and inserted the pins, we installed the new ARP balancer bolt and washer with Loctite and torqued it to spec.
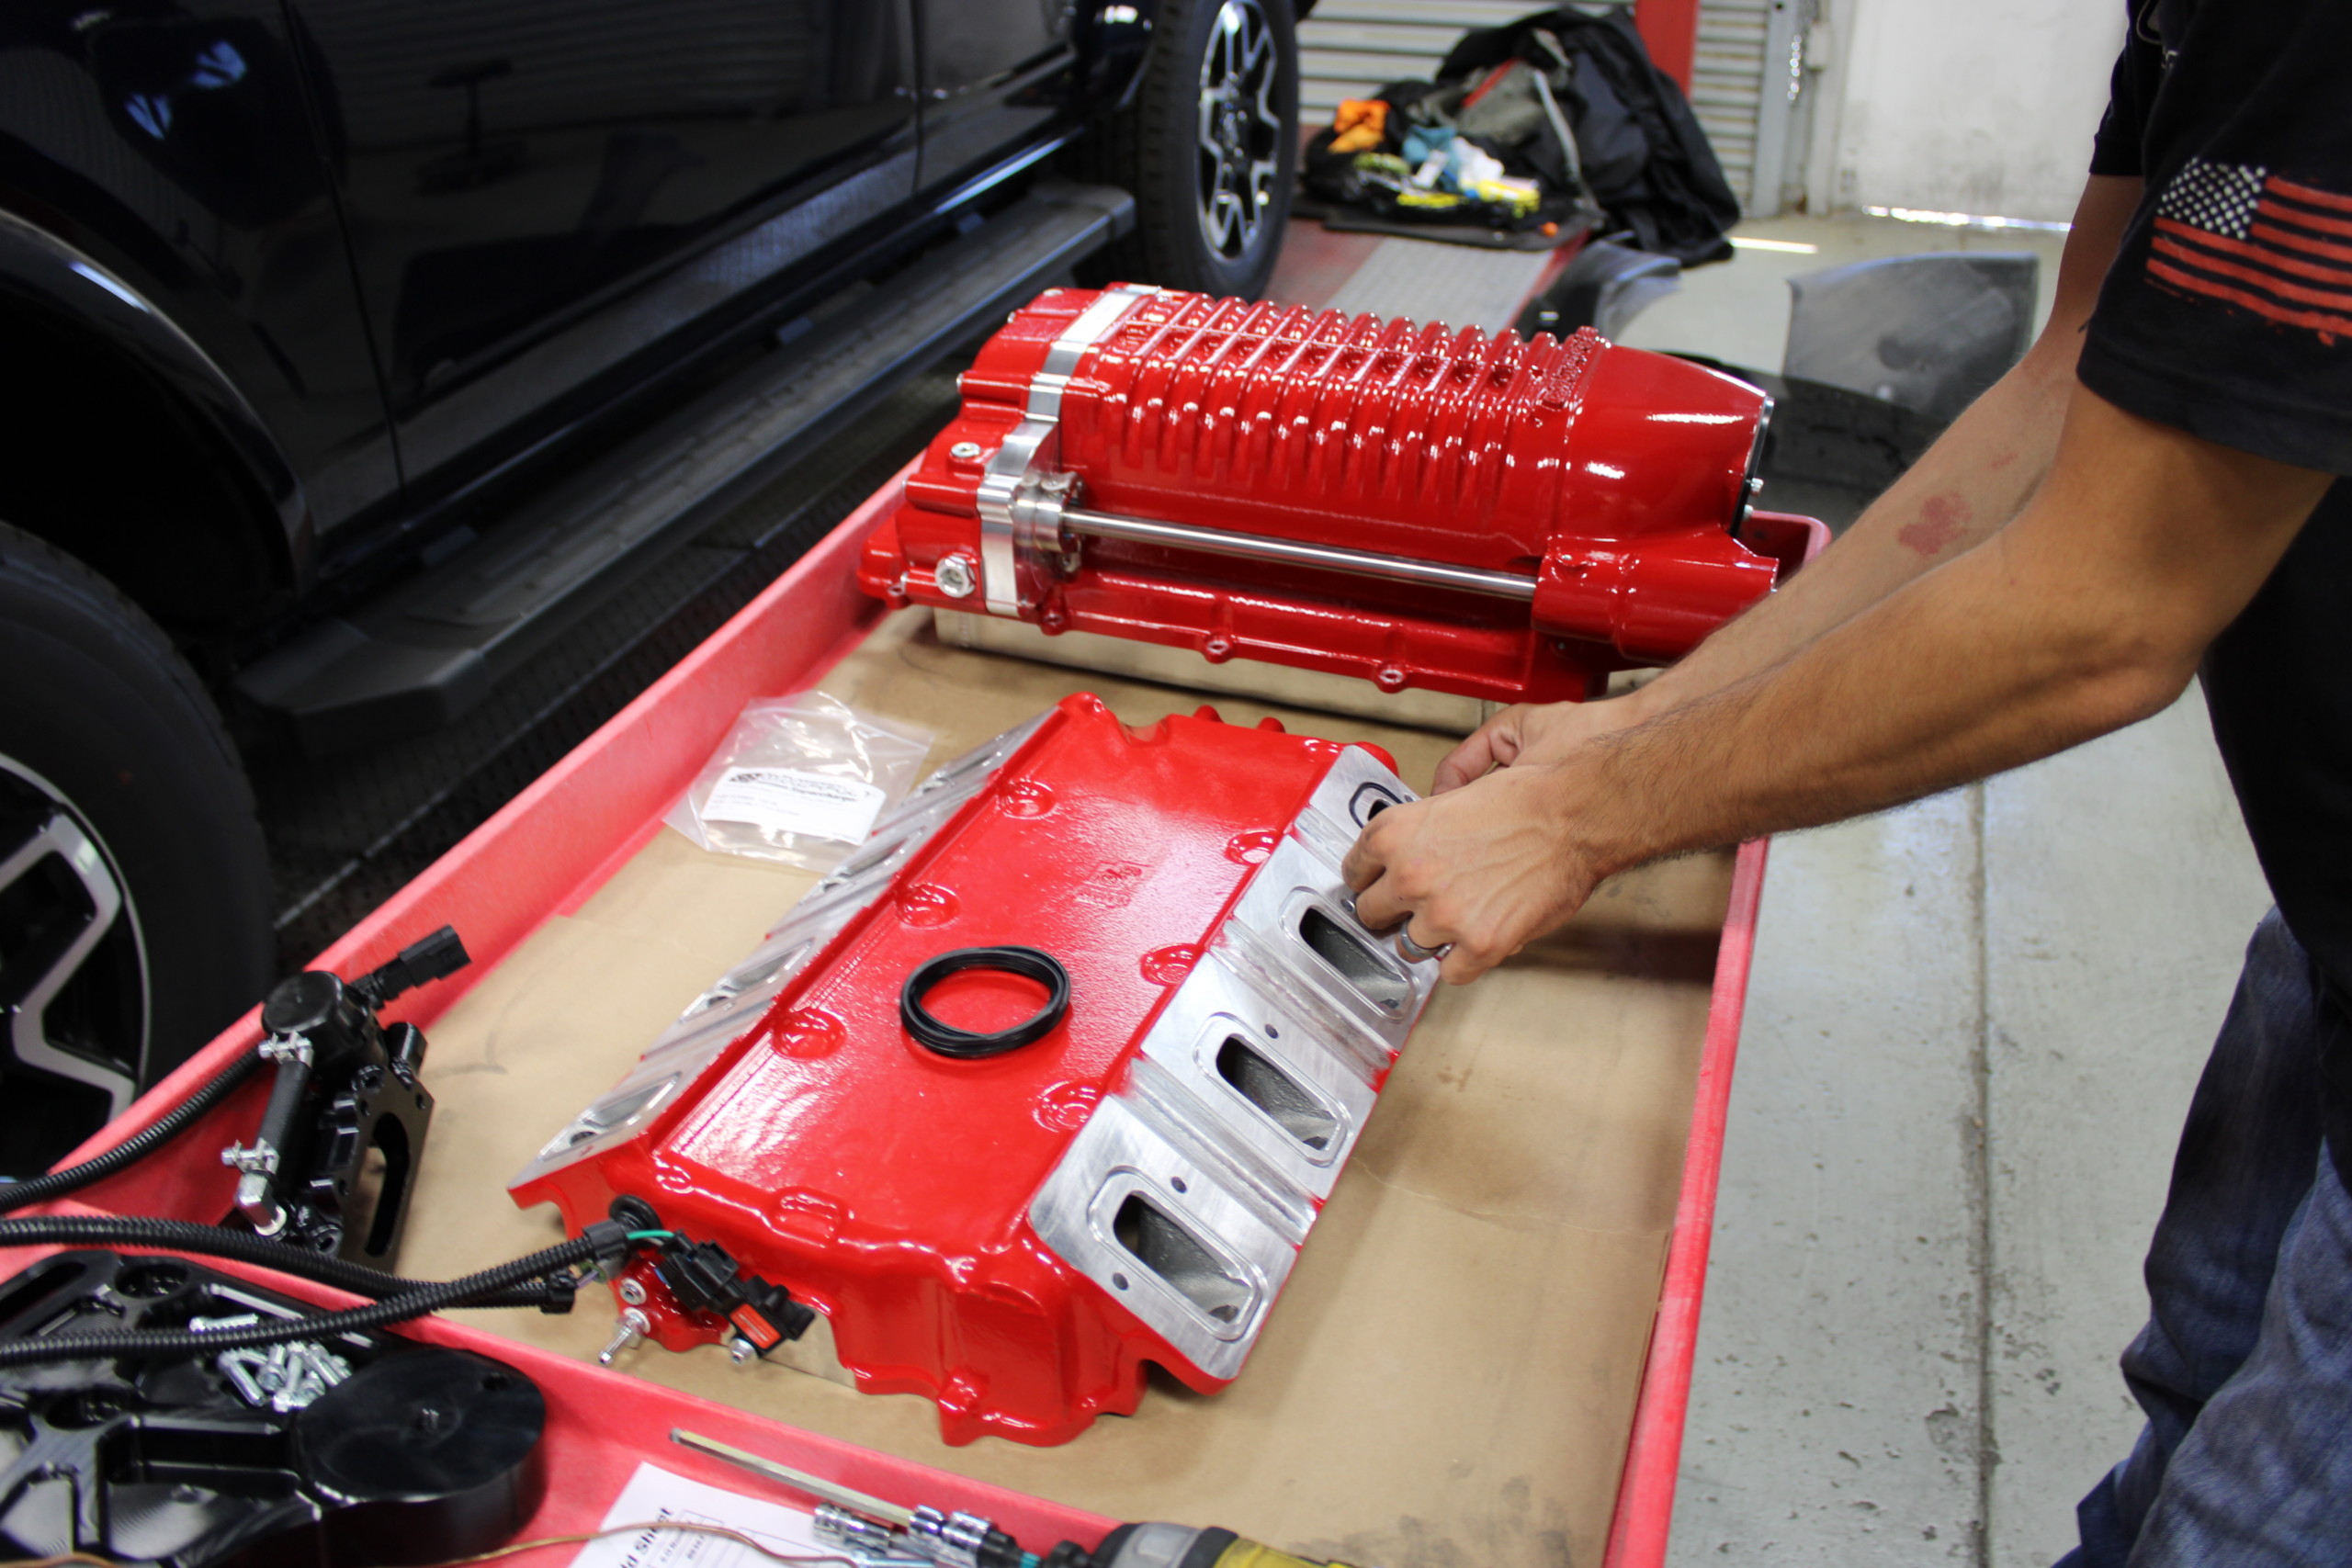
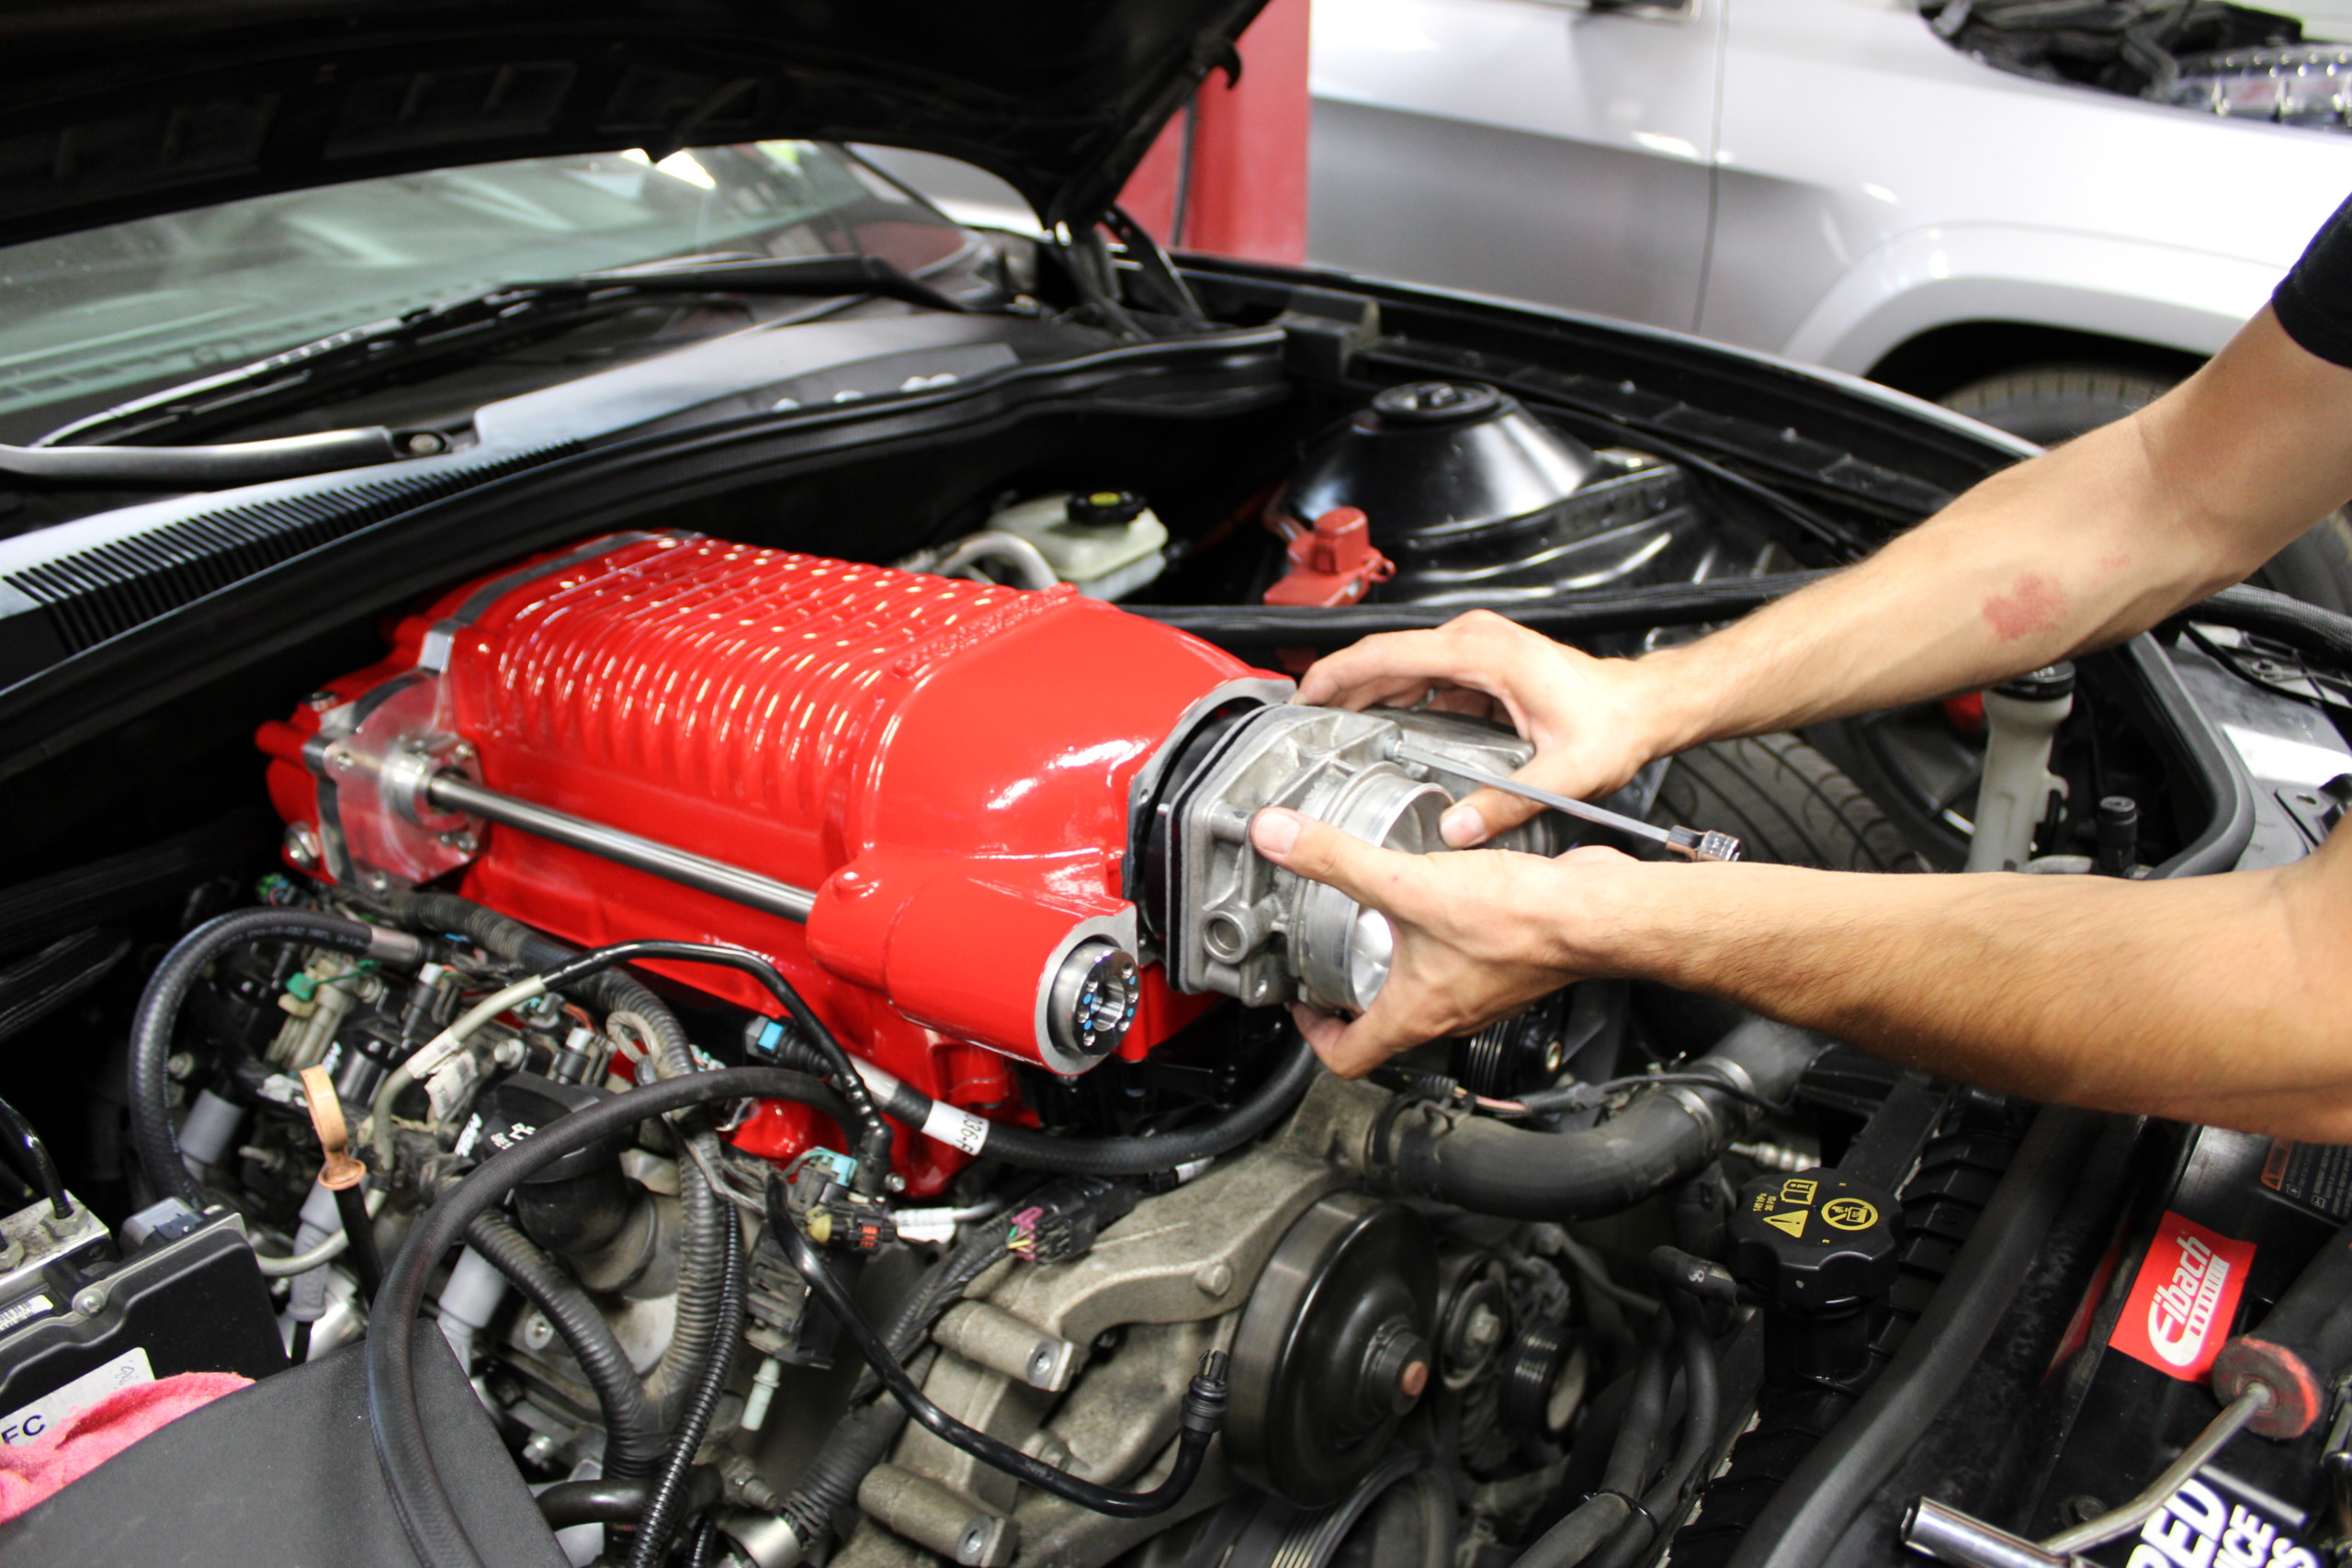
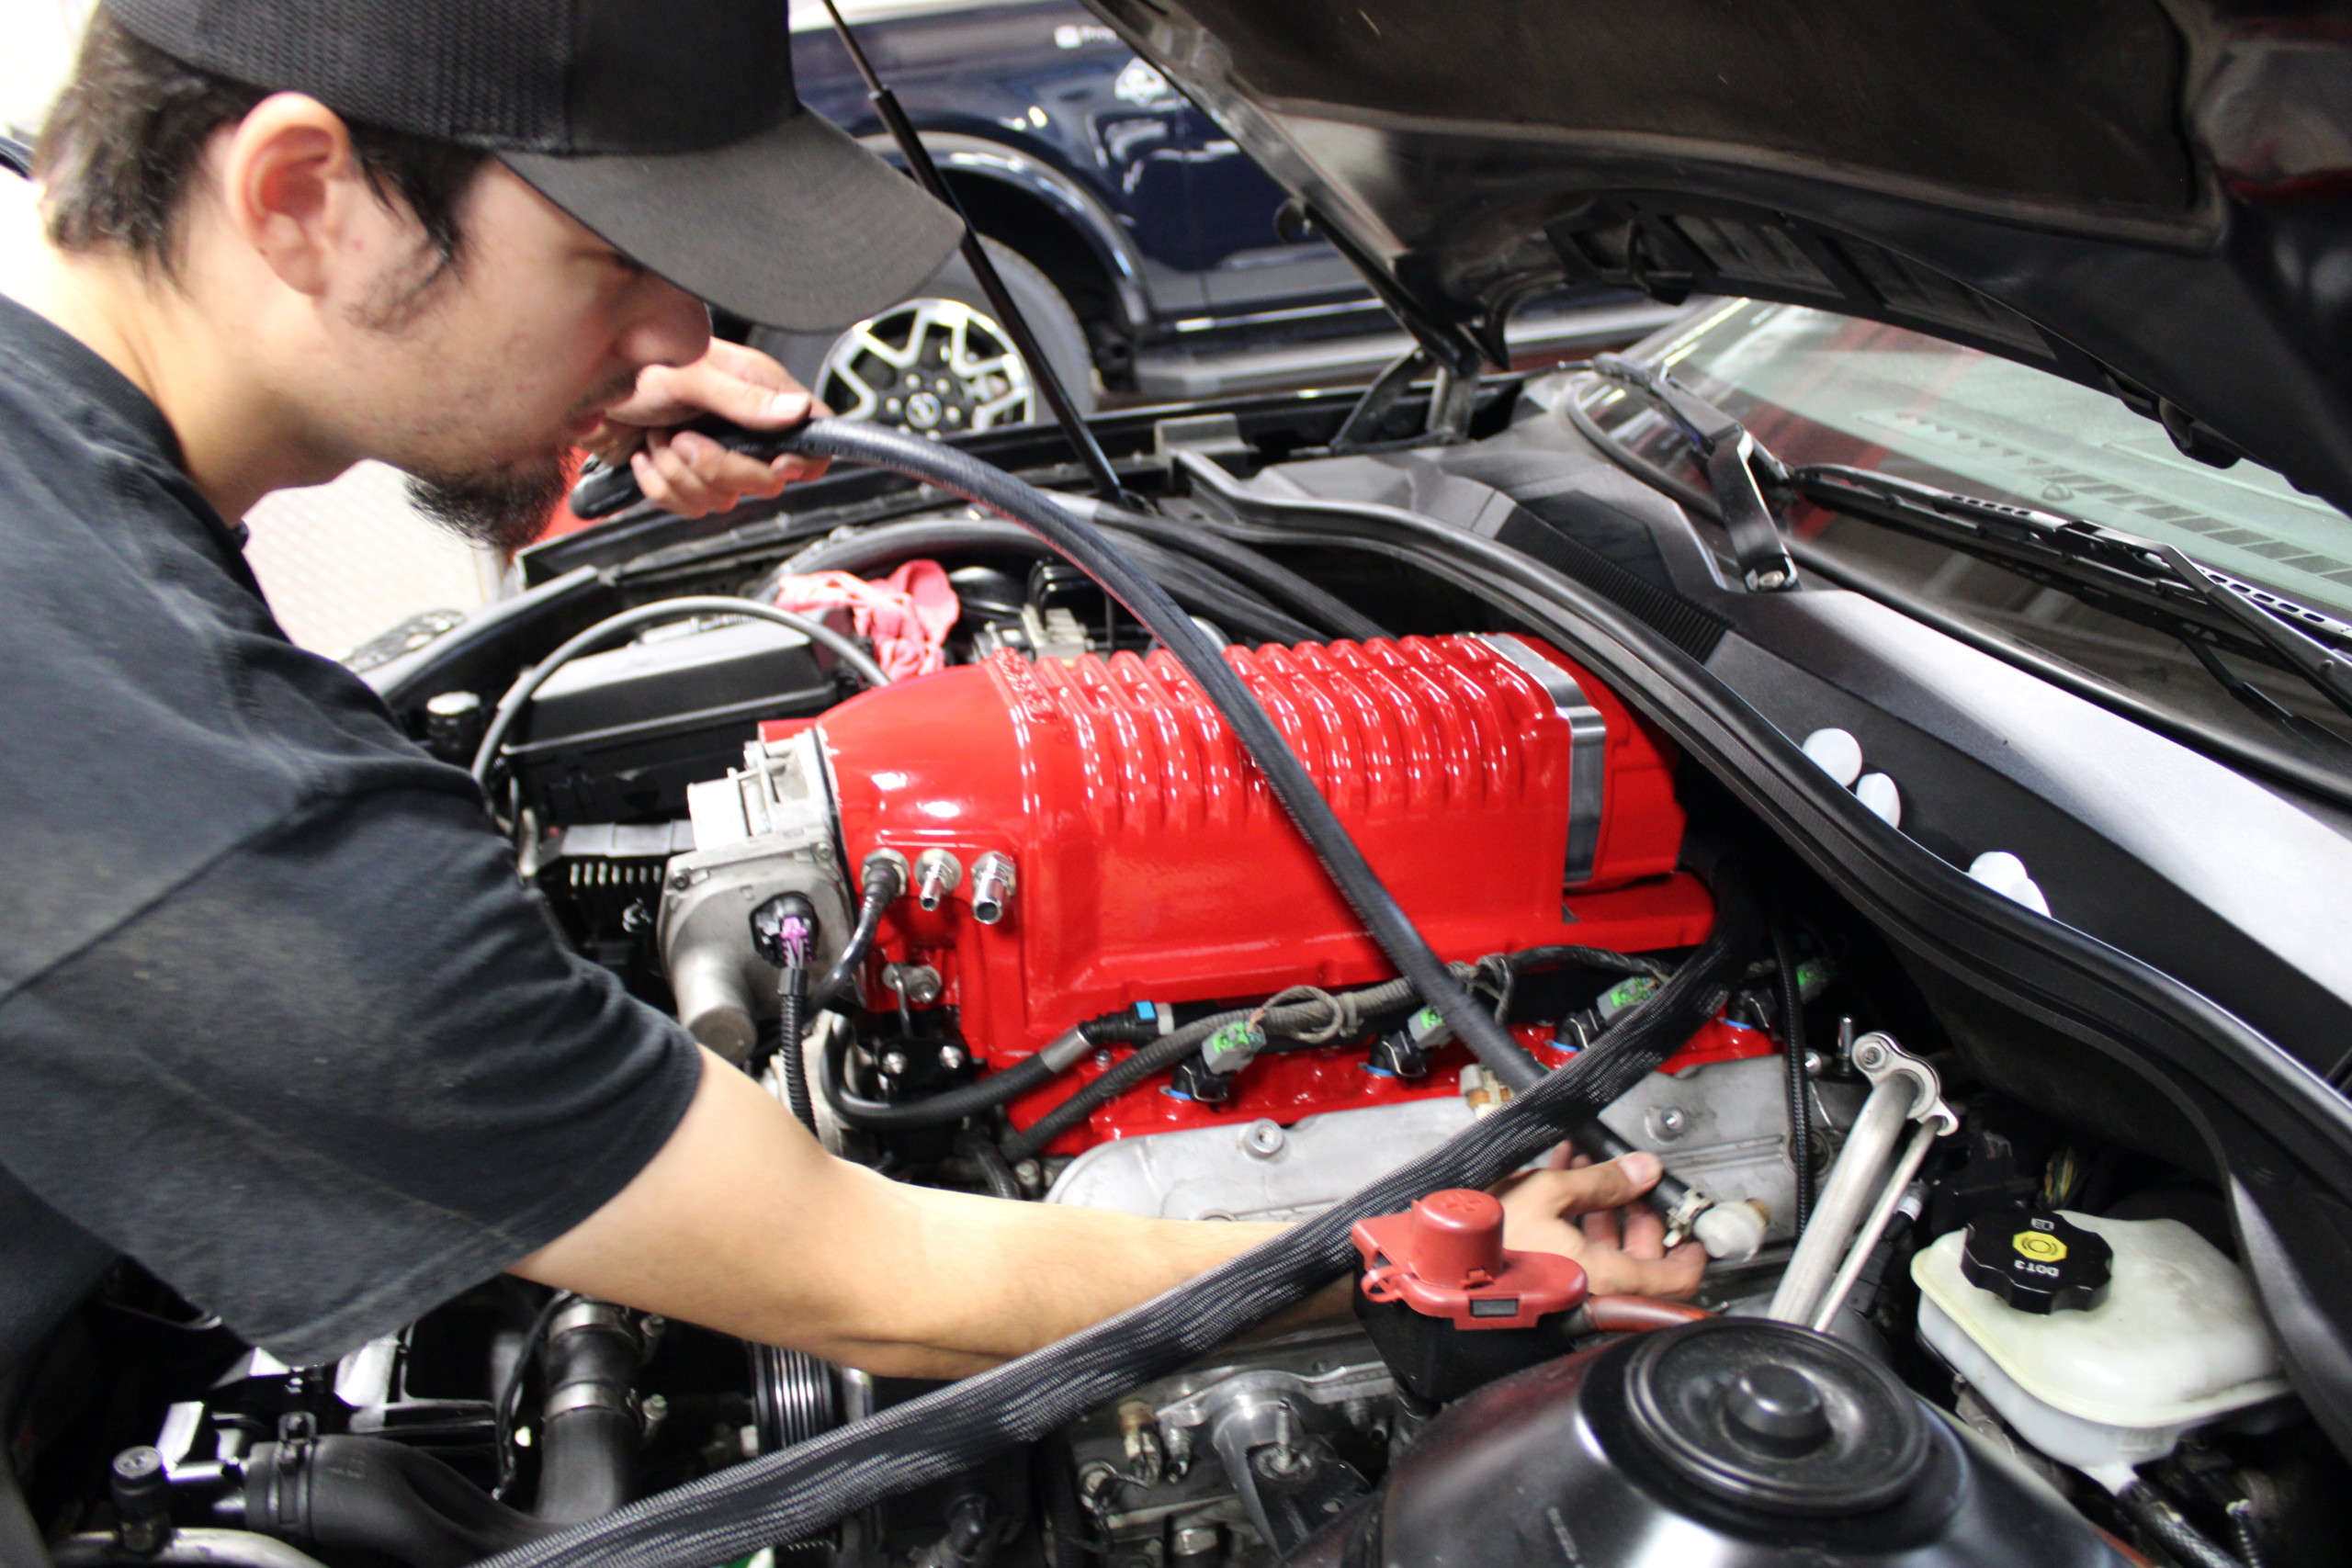
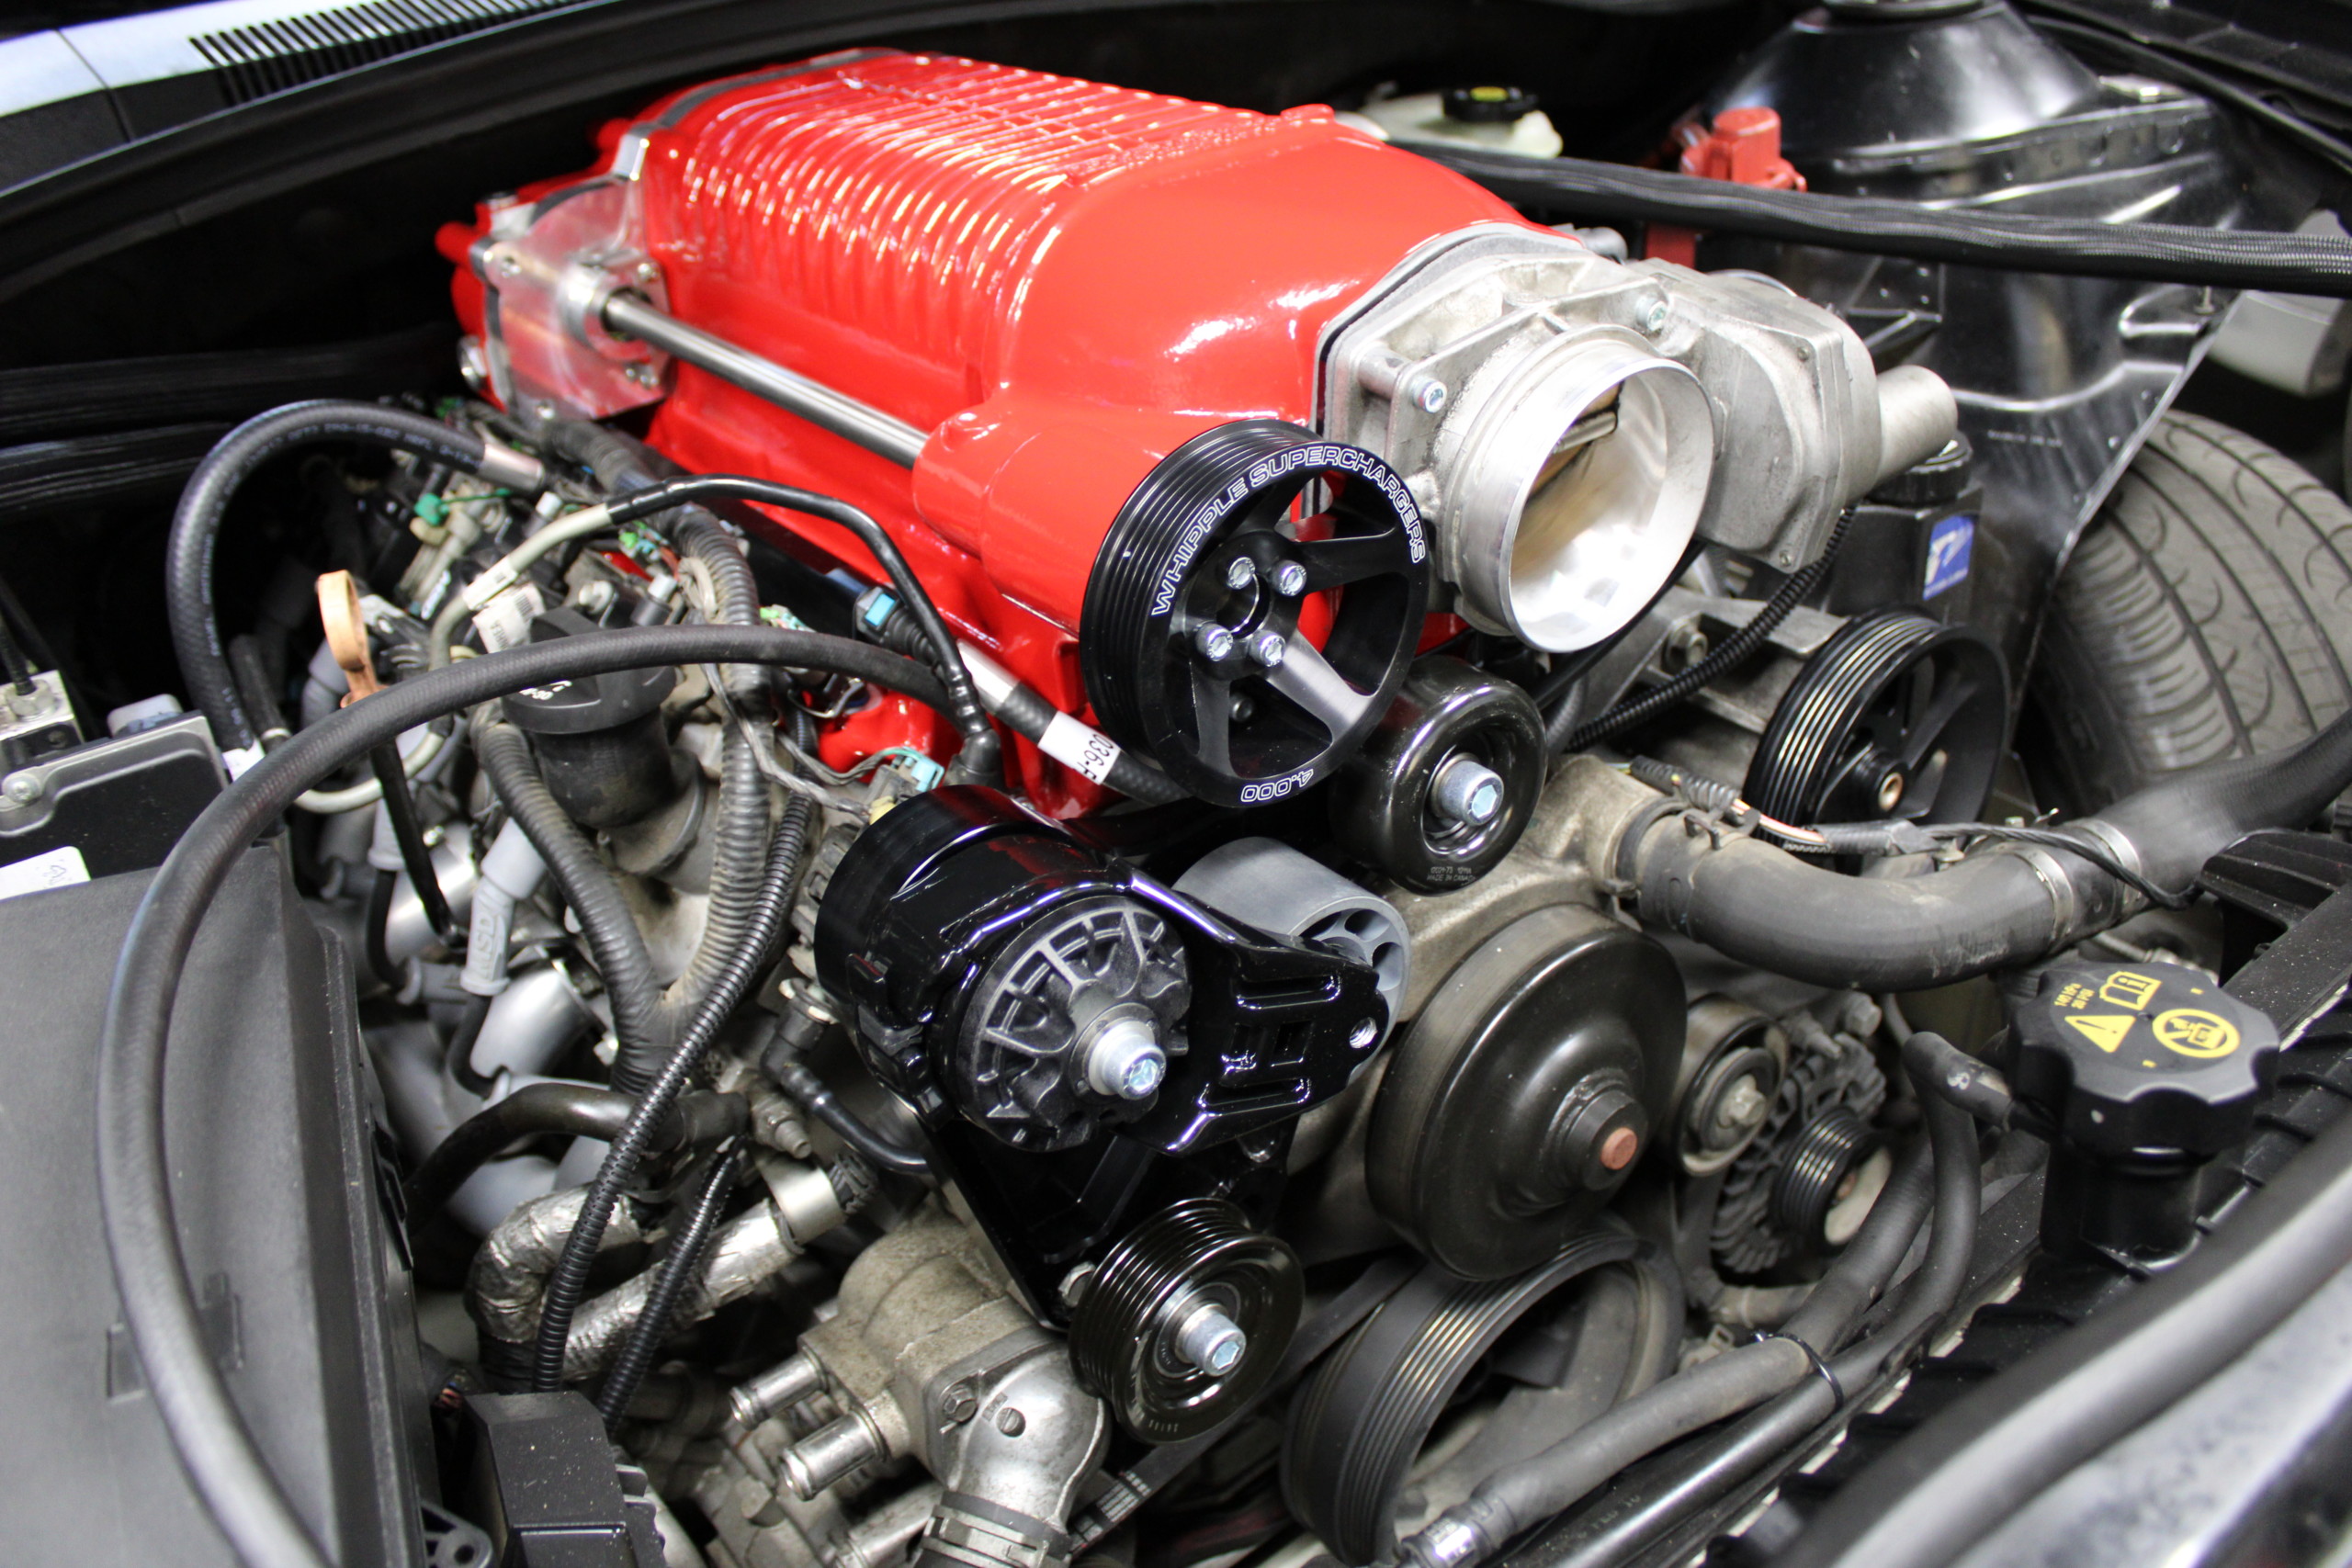
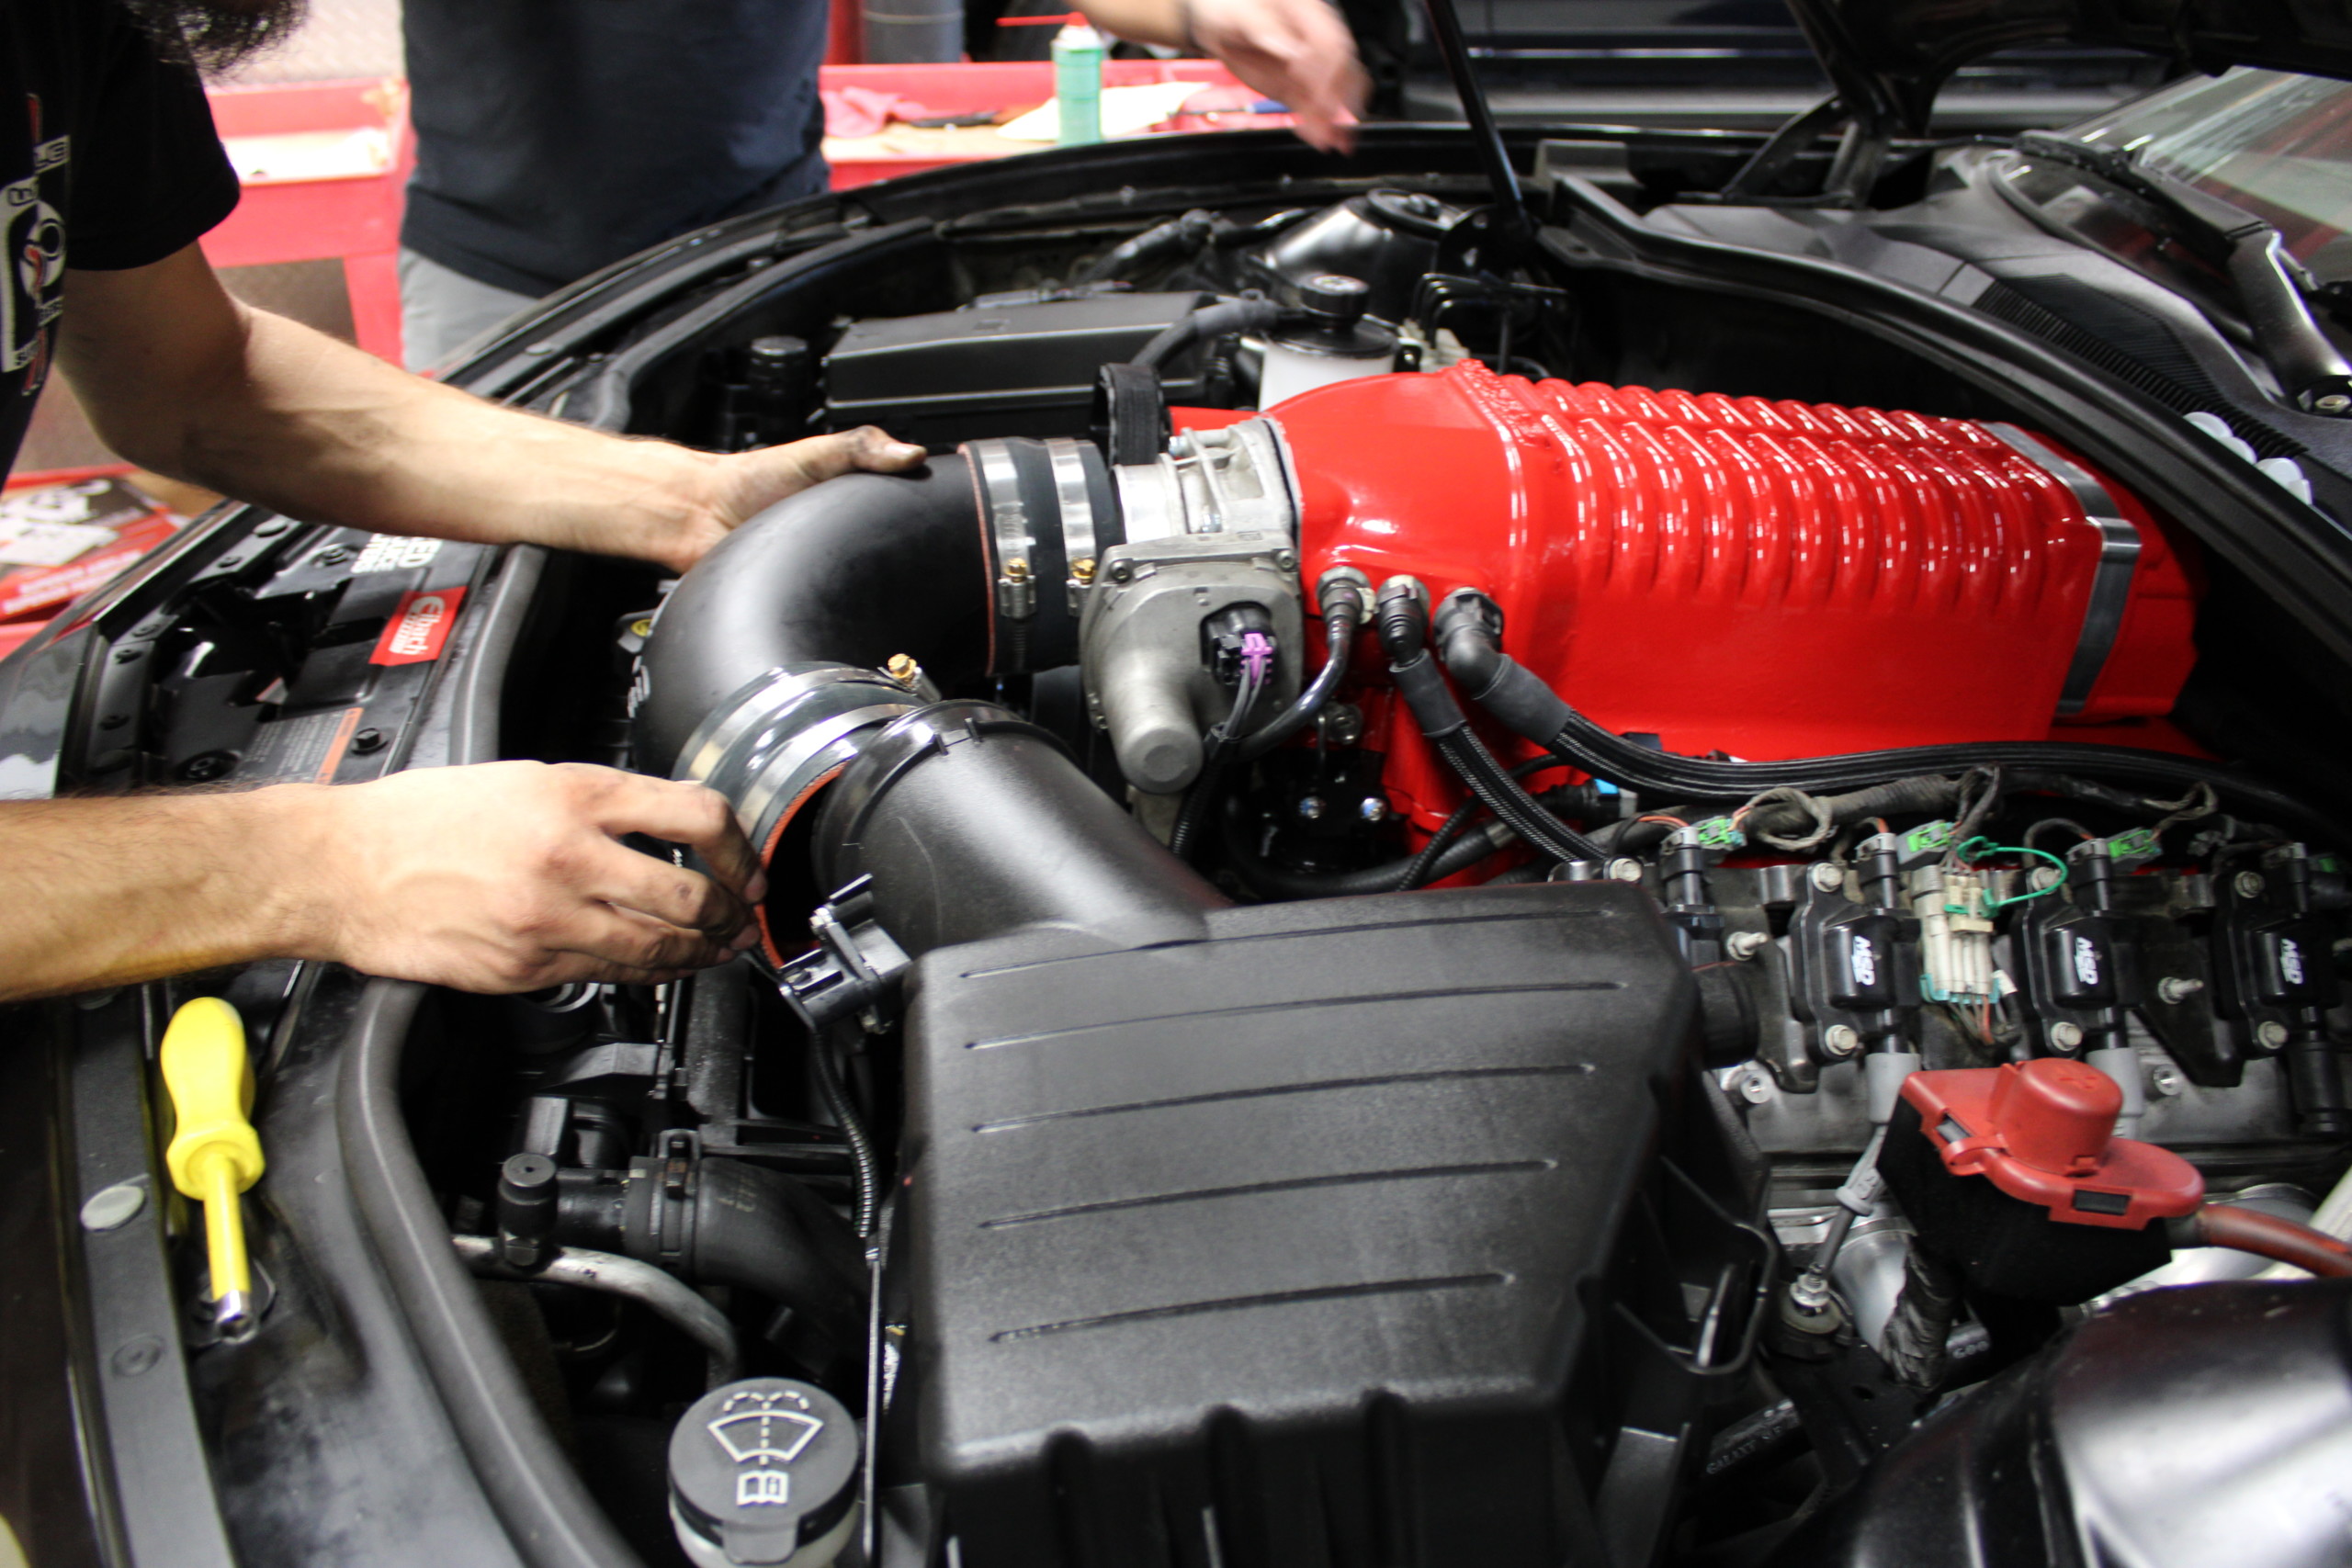
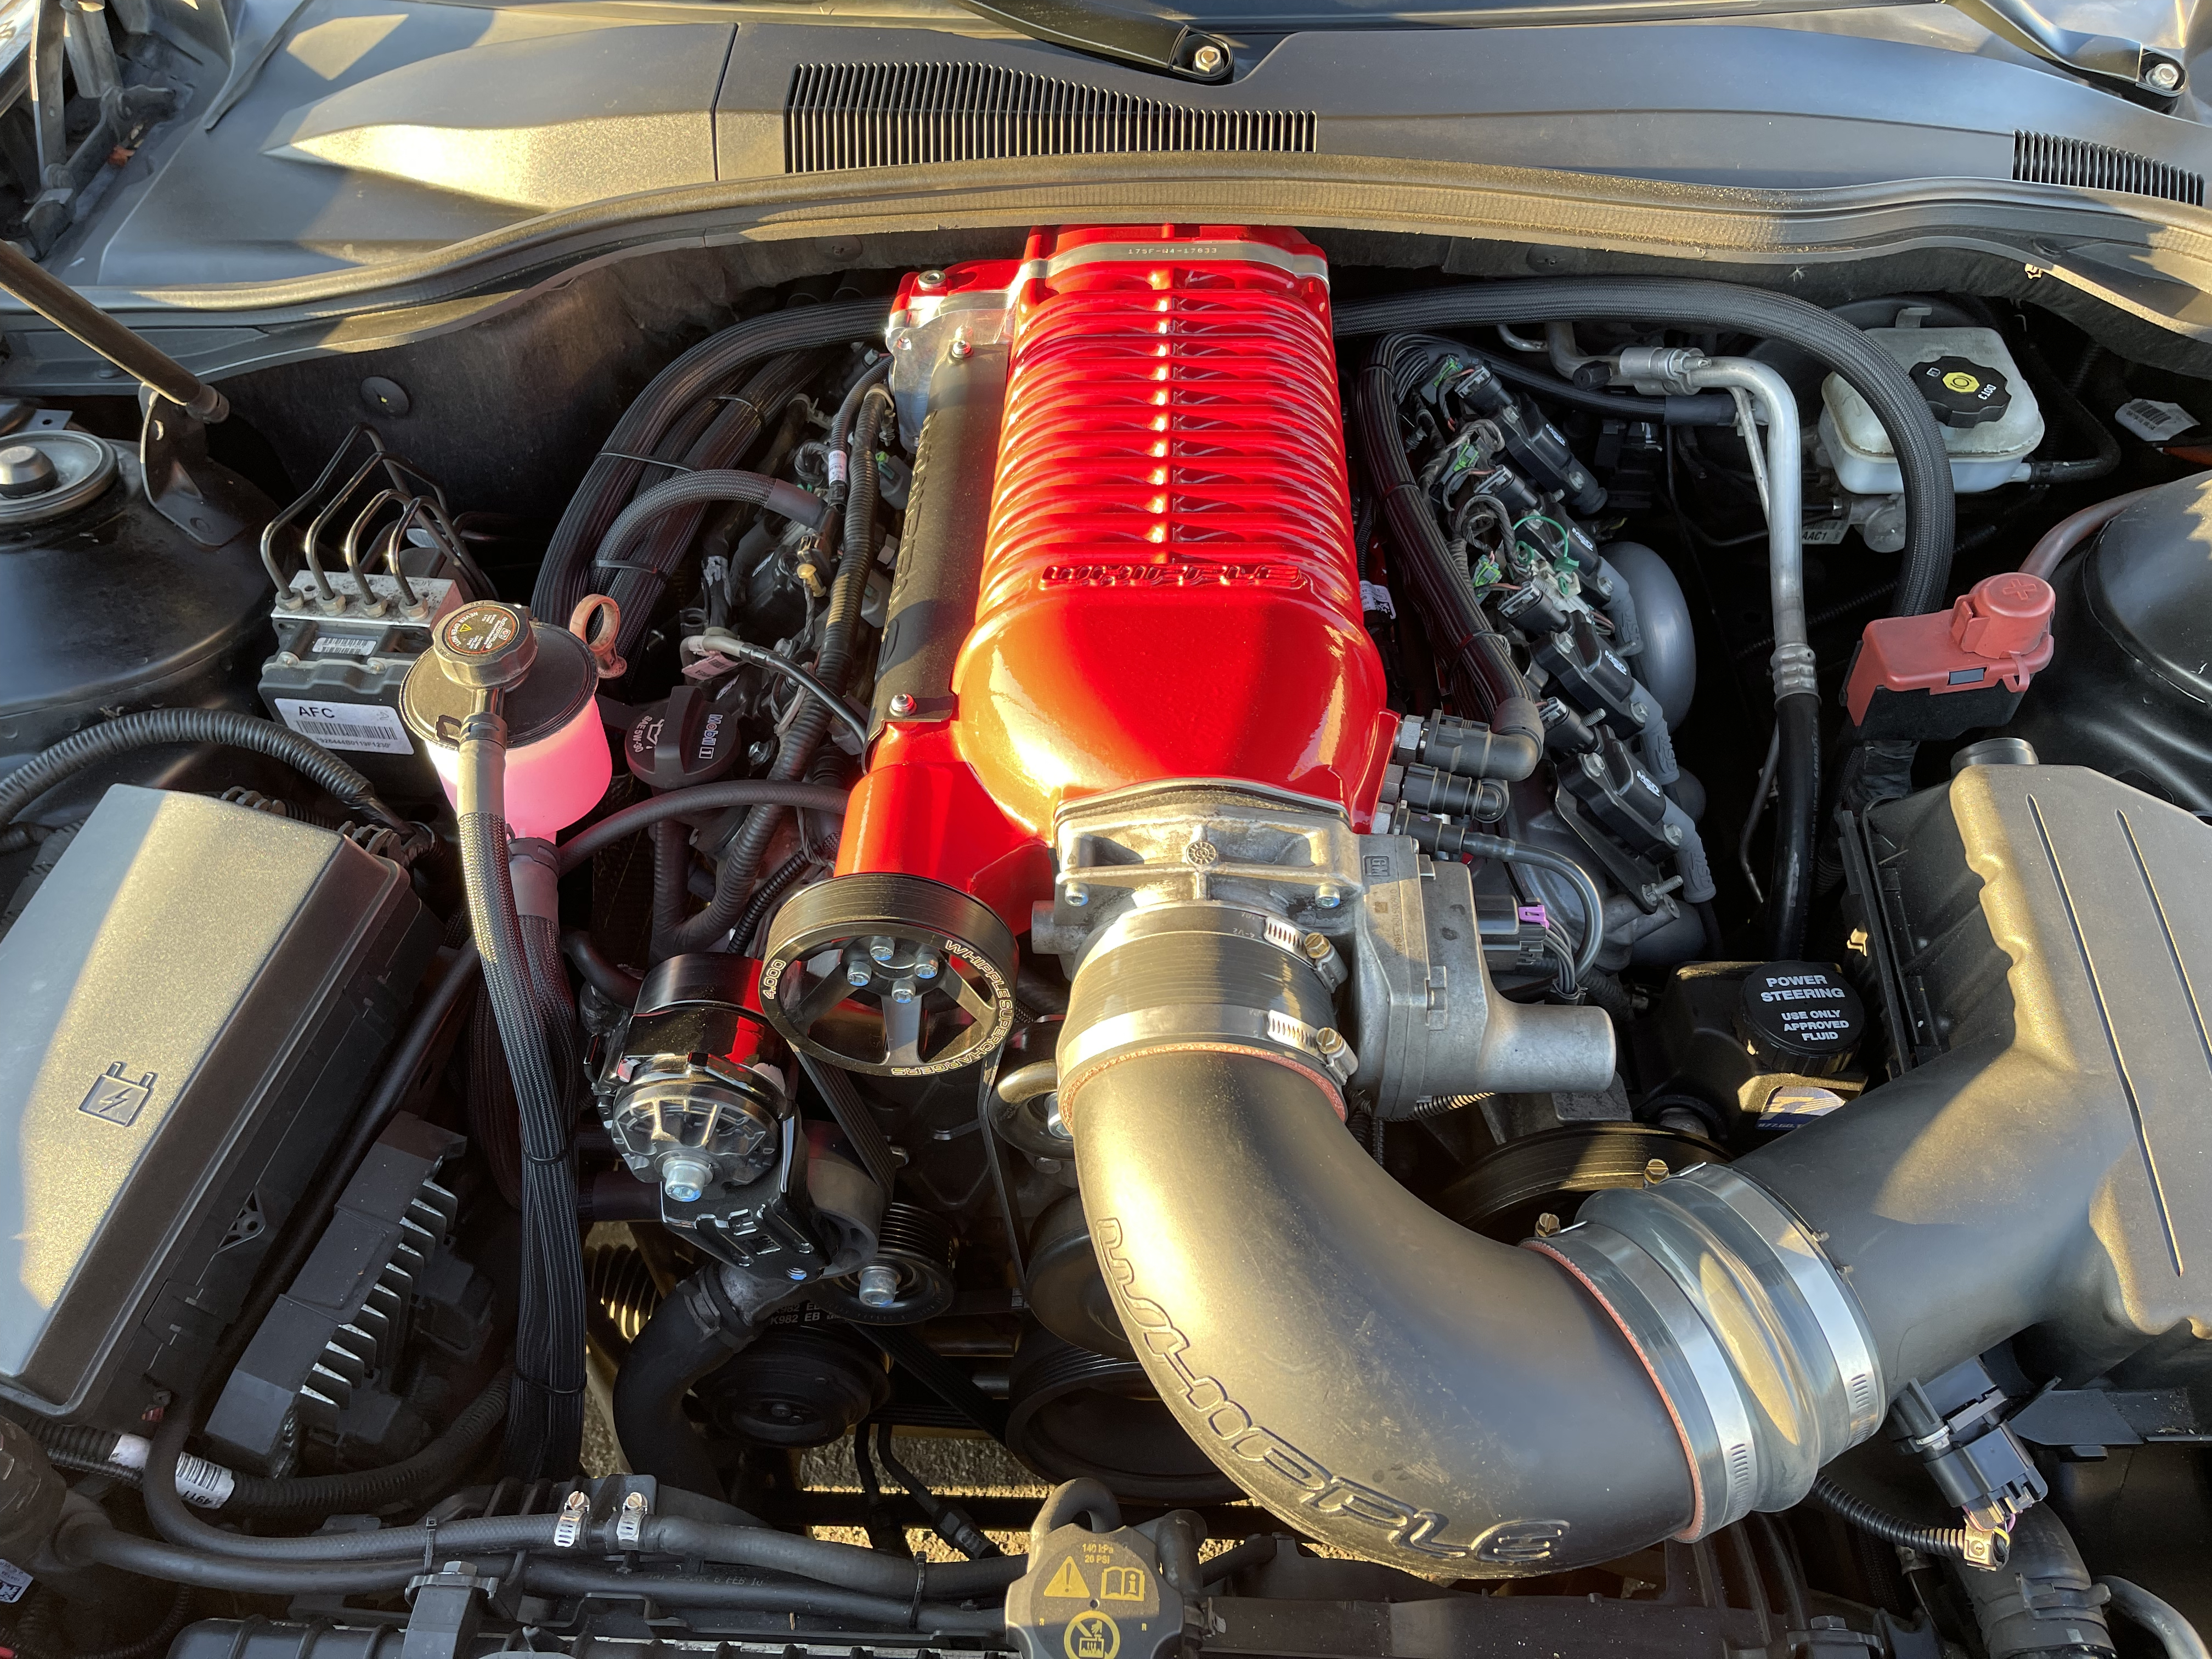
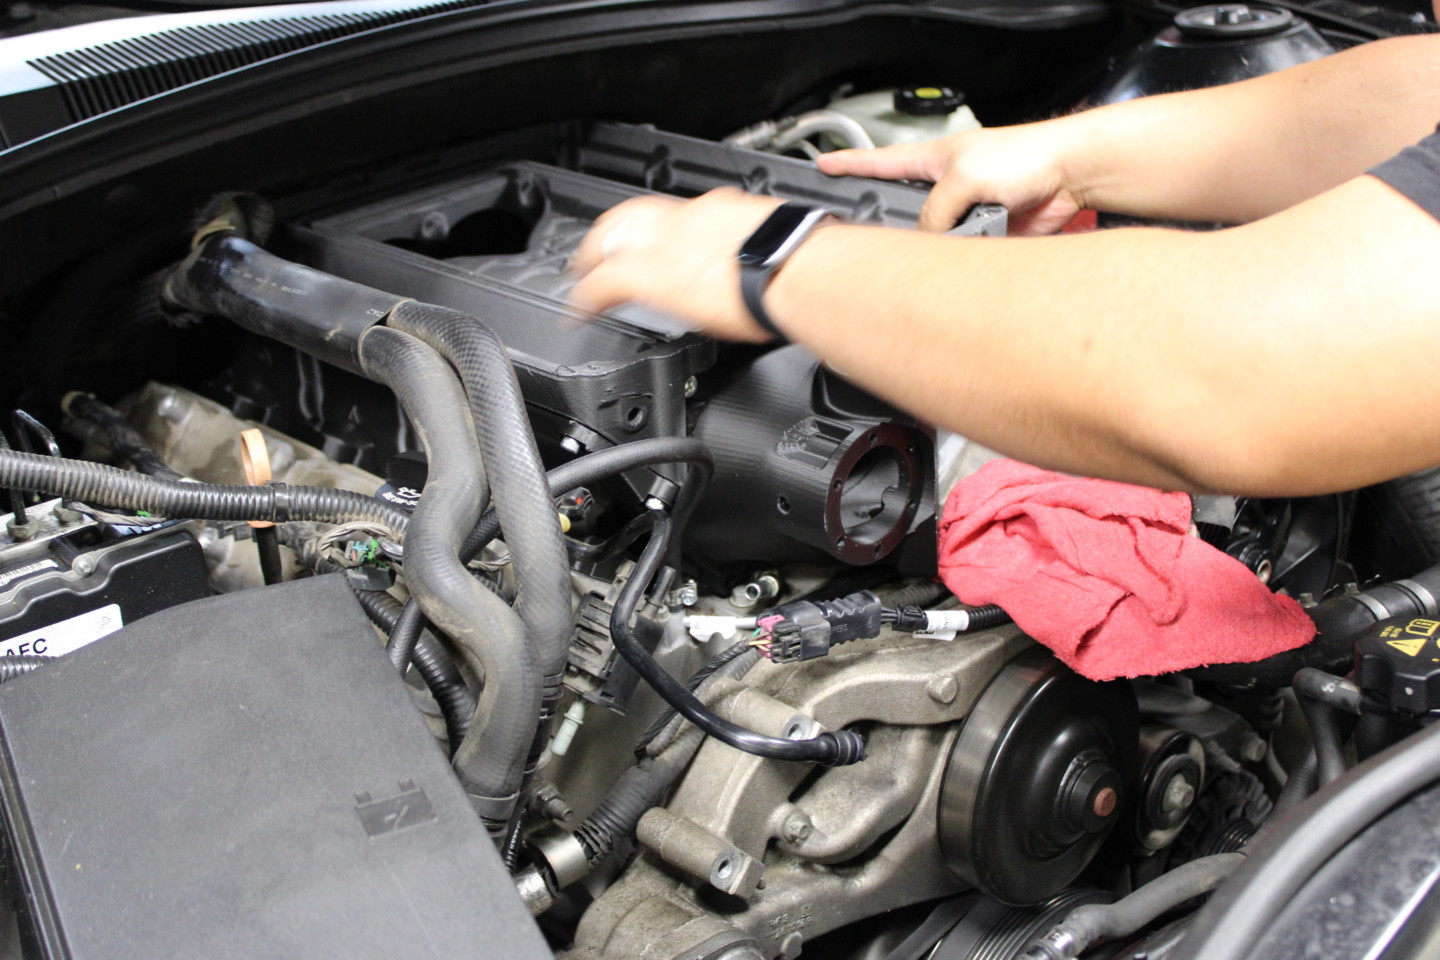
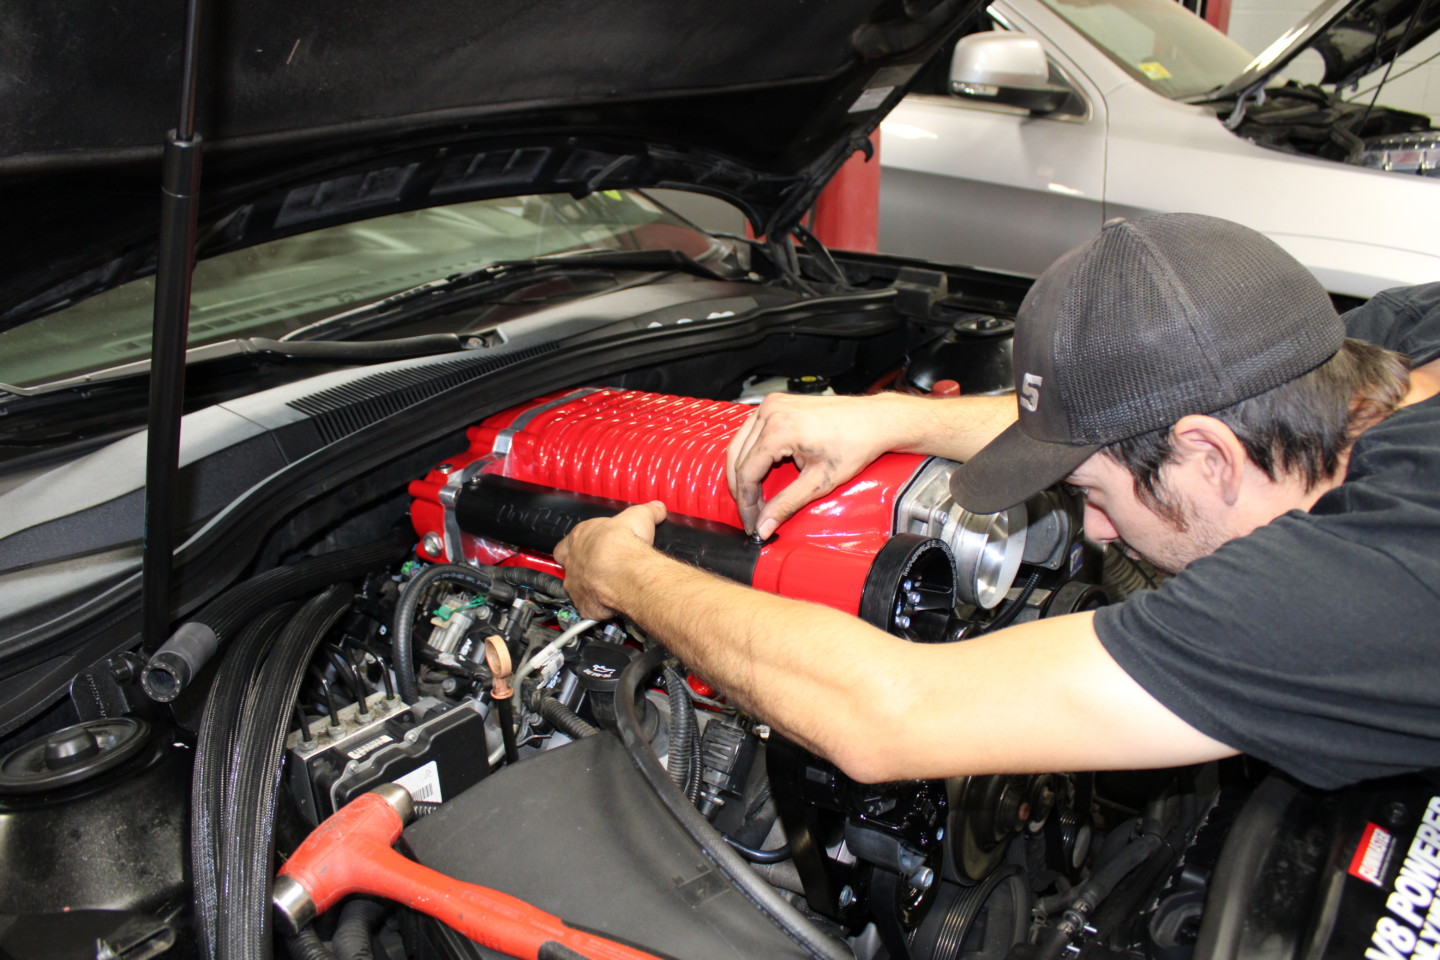
Supercharger Assembly
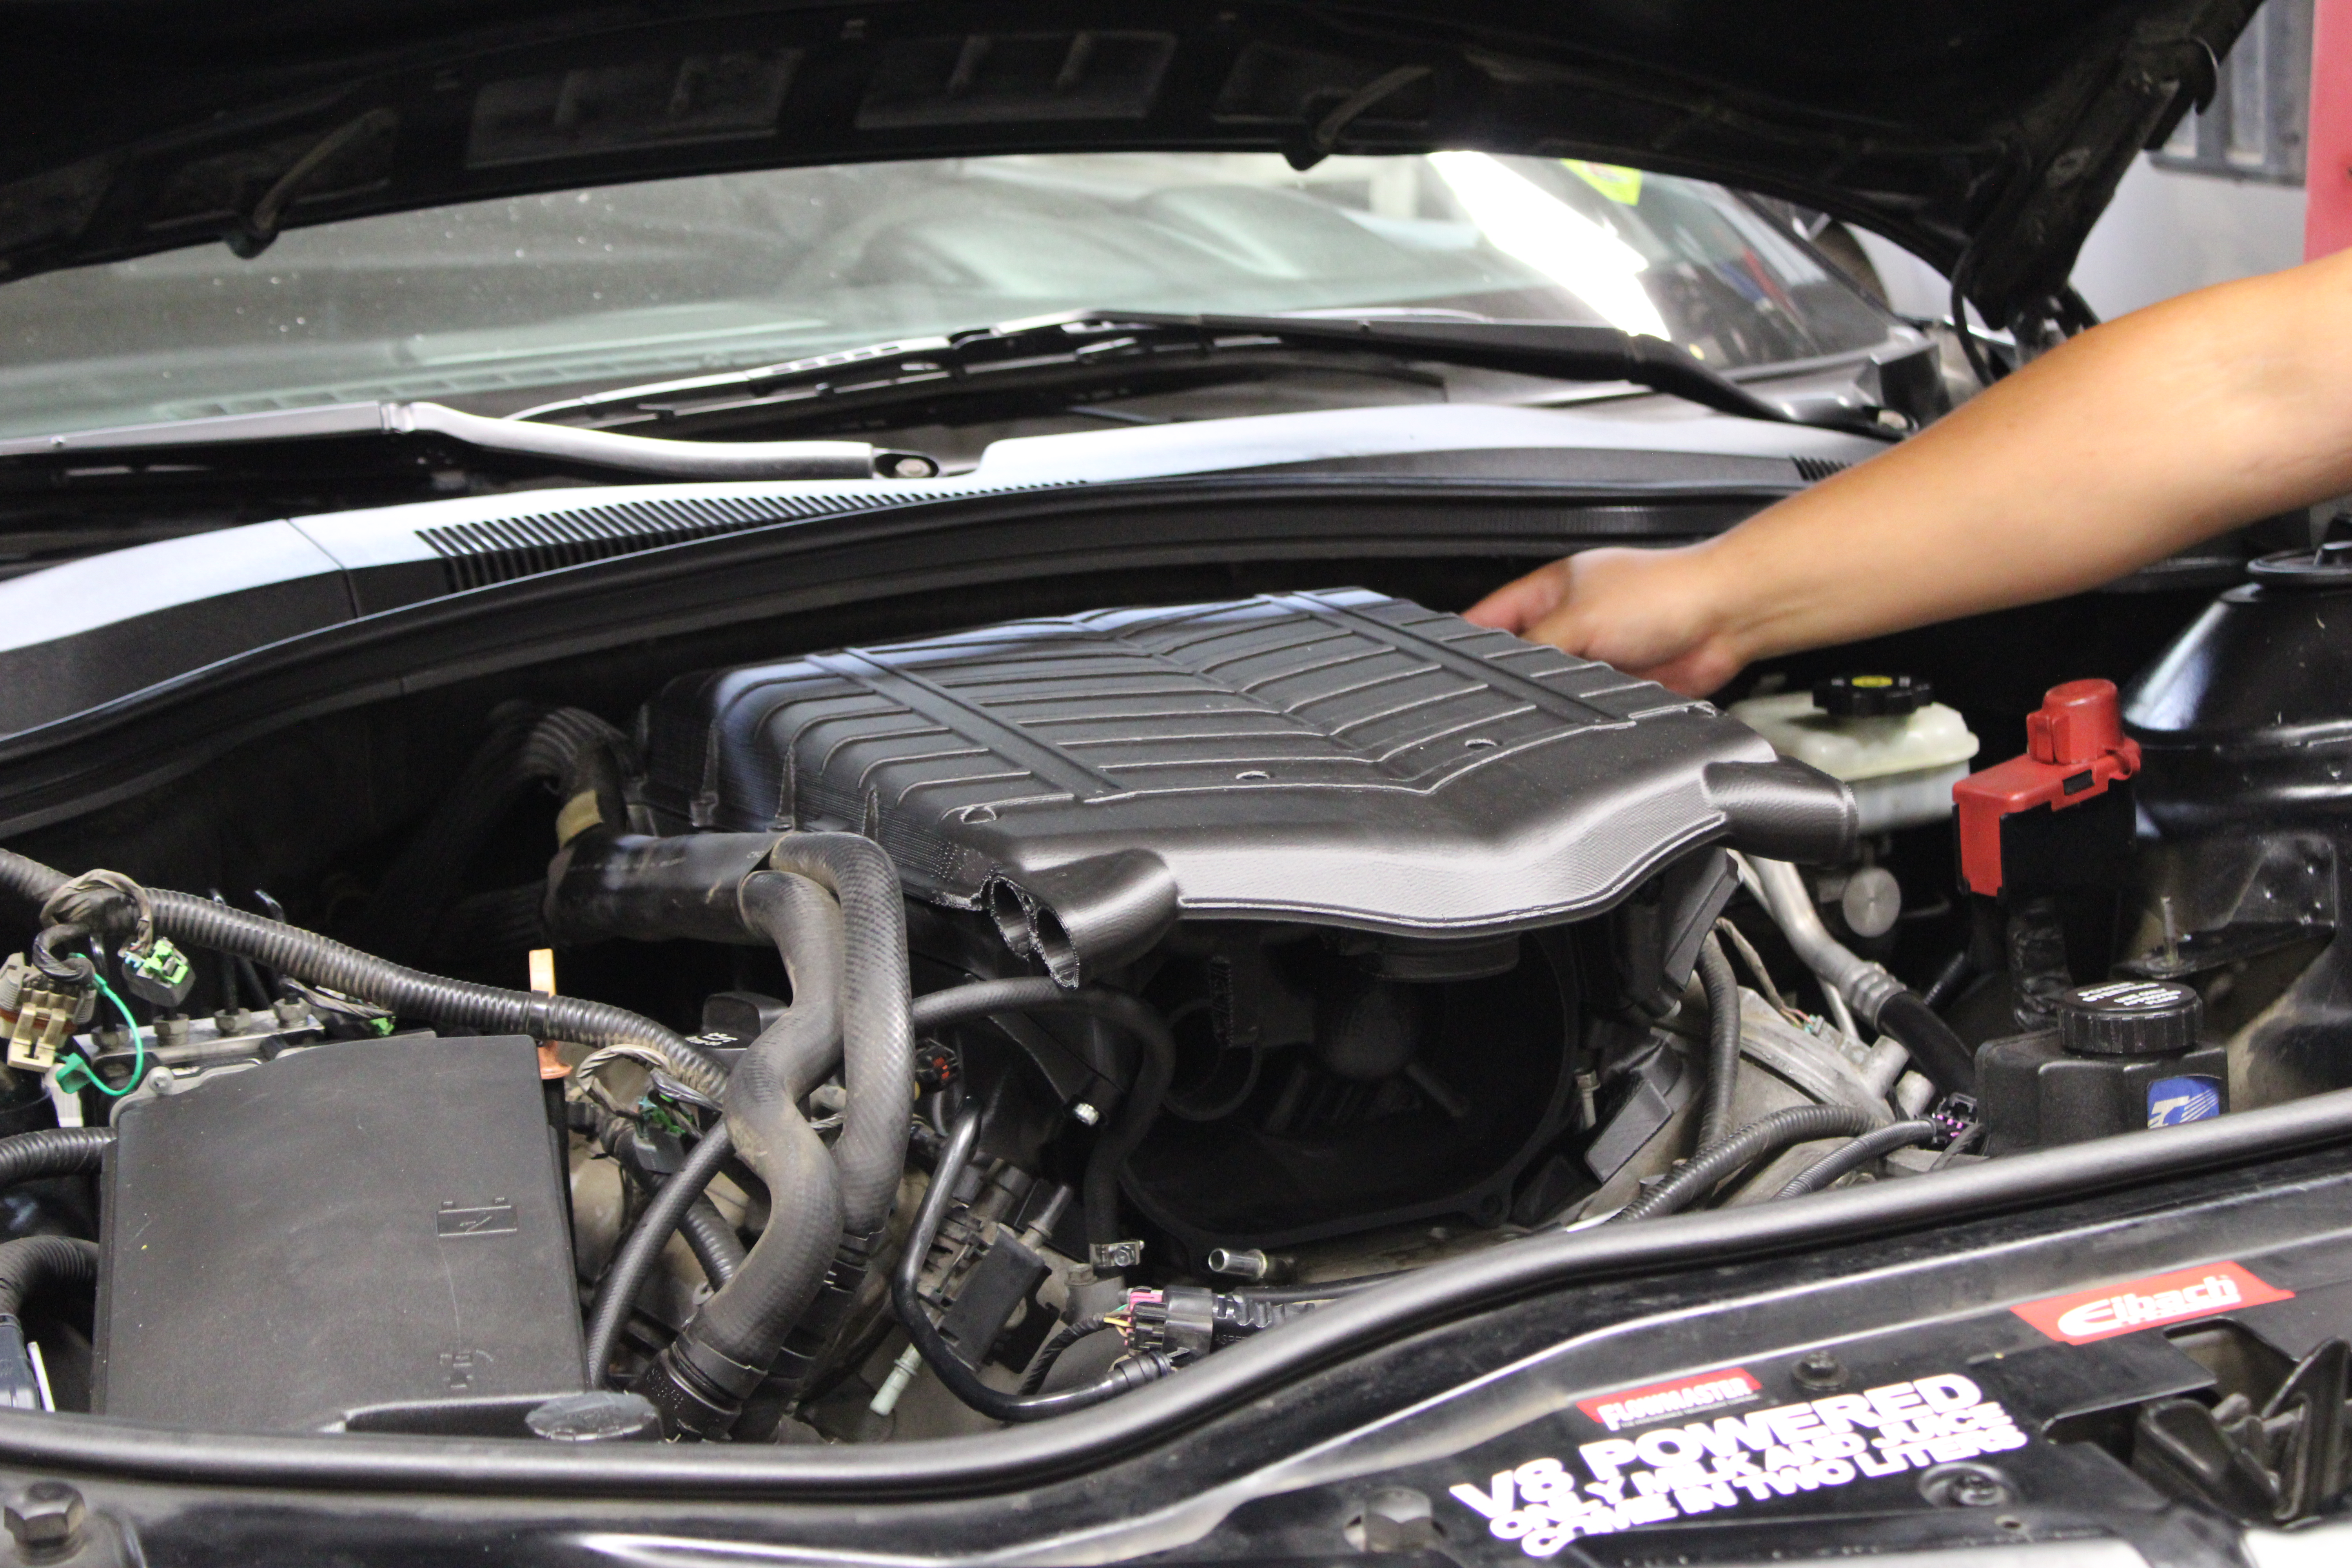
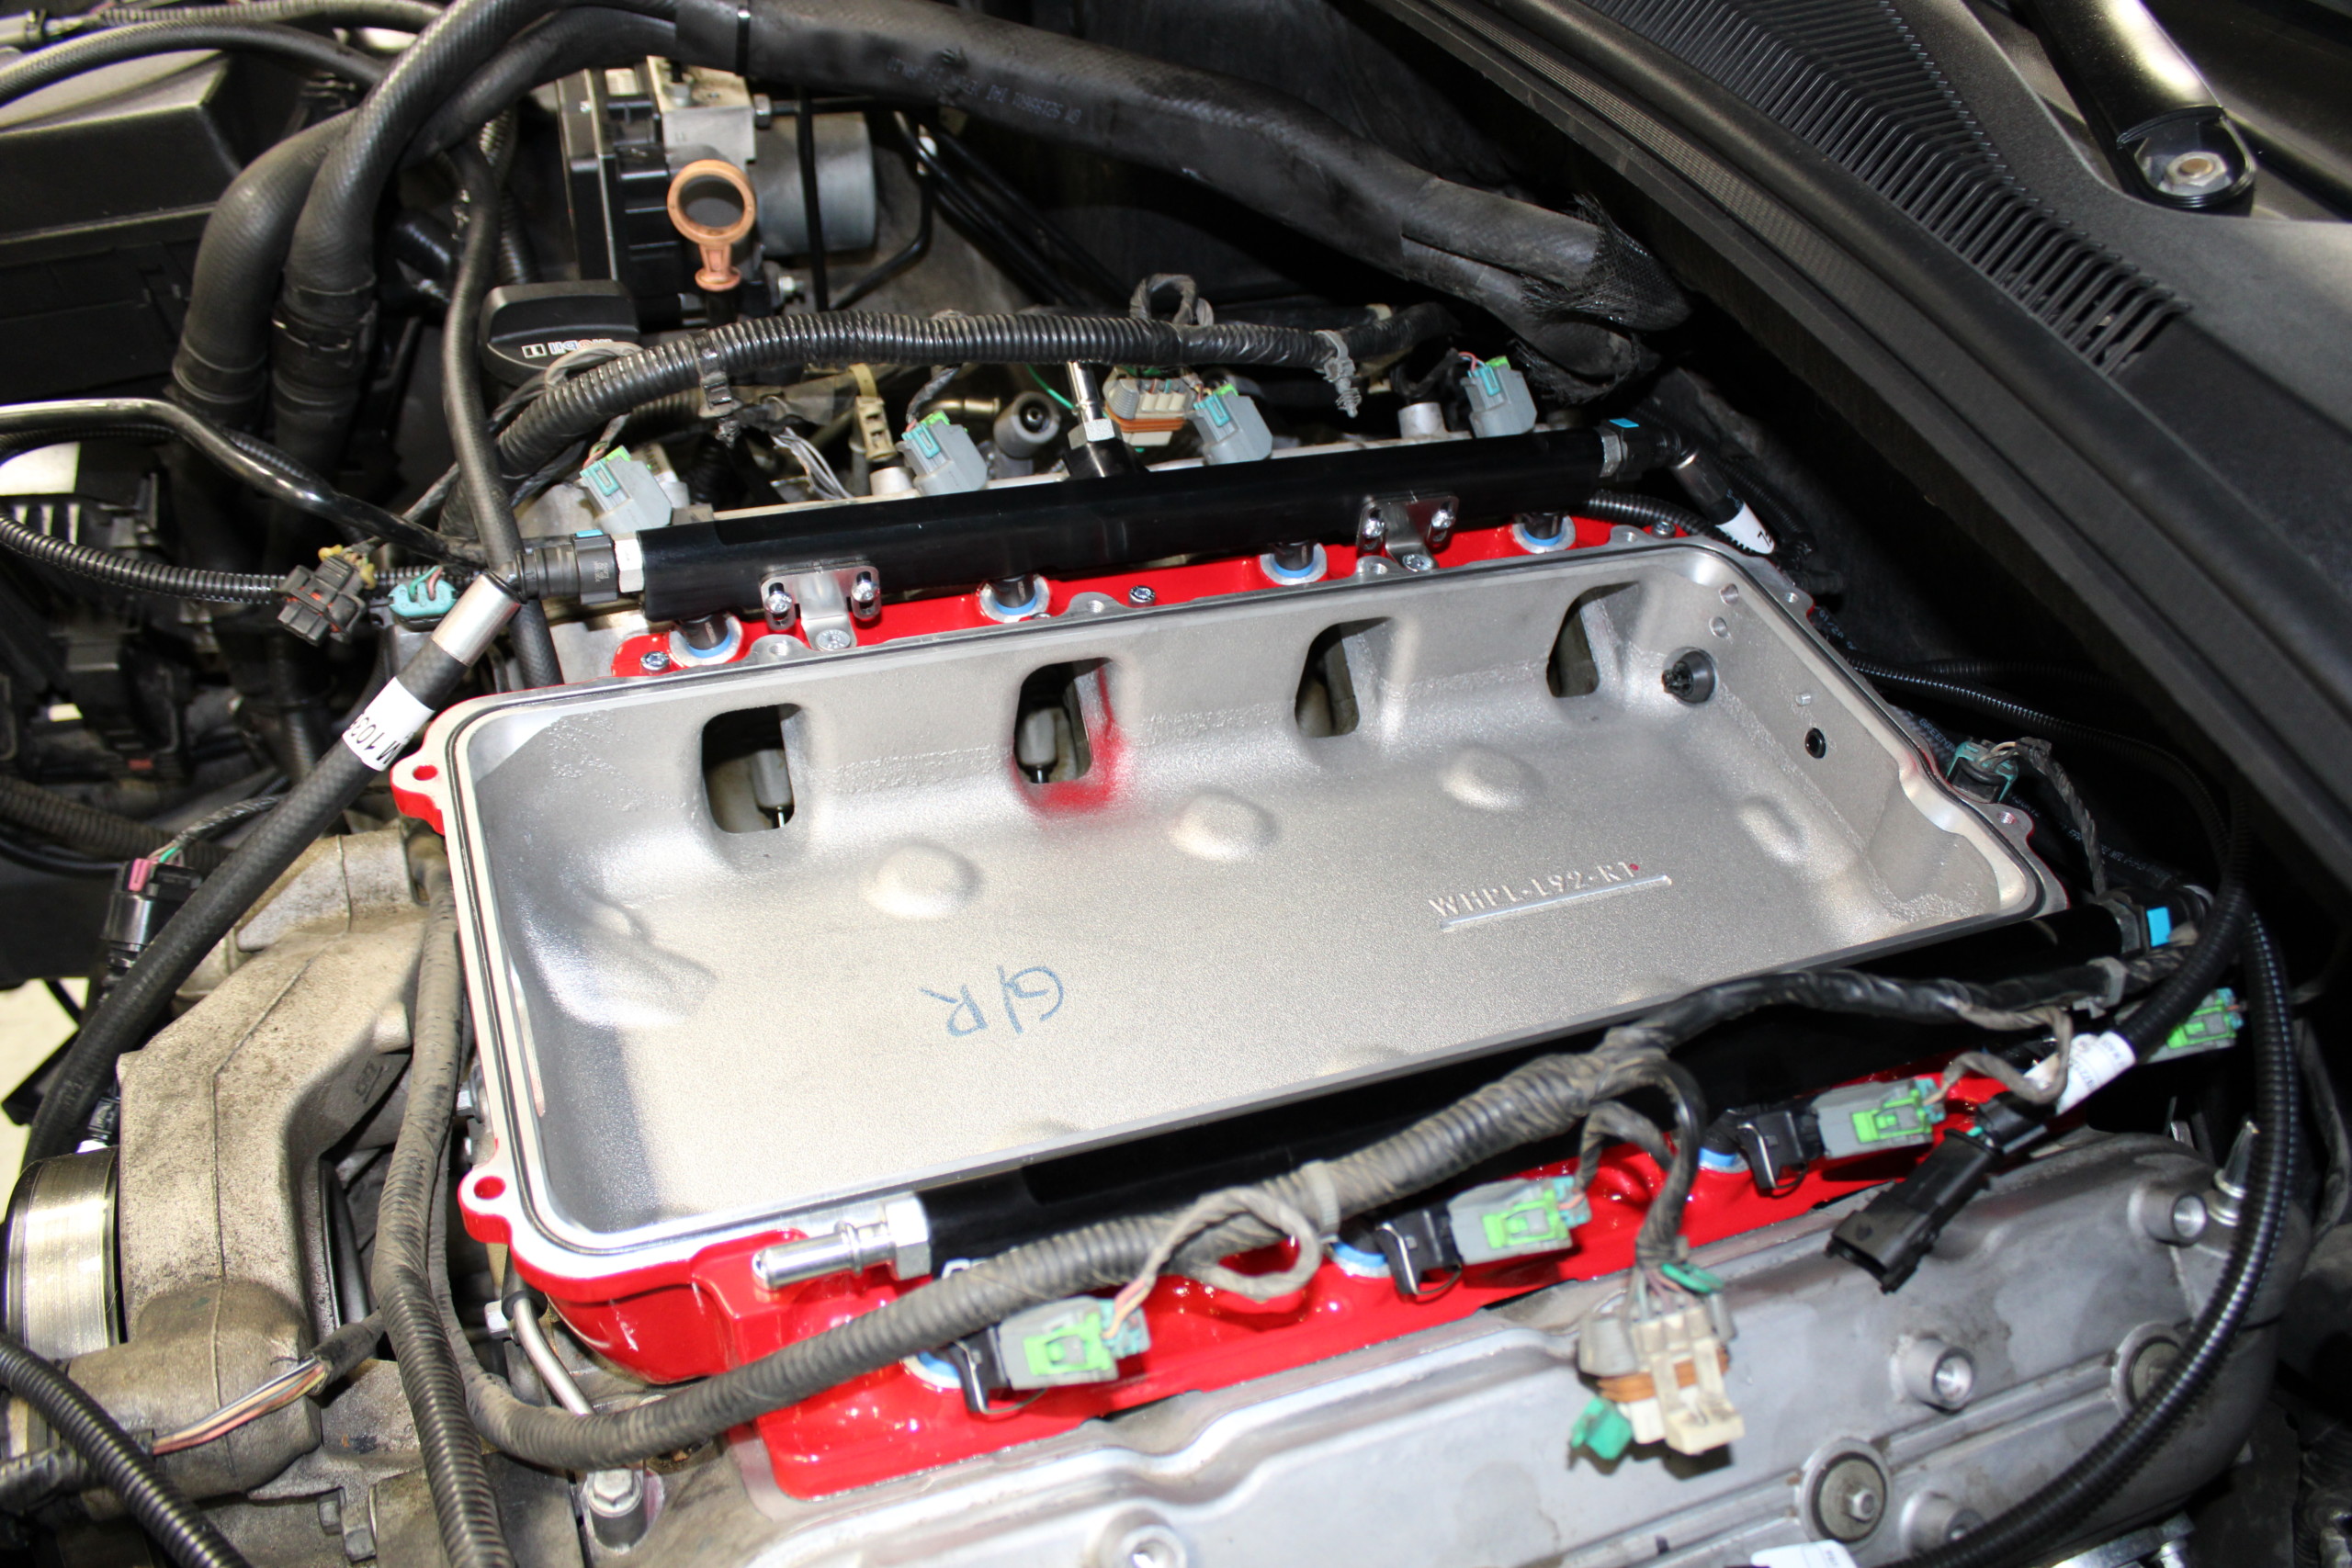
We started the installation of the actual 2.9L supercharger unit by removing the factory air box, throttle body, fuel rail, injectors, and intake manifold. All of it almost came off as one assembly.
Before we could set the red monster on, we had to install some of the necessary accouterments such as the coolant air bleed line to a coupler located near the top of the radiator, just to the right of the factory overflow.
After disassembling the blower and lower manifold, we installed the supplied o-rings sensors. Then we set the manifold atop the 6.2 LS3.
We also took a moment to install the supplied electronic throttle control extension cable to extend the factory connector to the driver side.
The moment of truth came when we set the blower in the center of the GM lump and began bolting it to the cylinder heads. But we didn’t set it on in one piece, mind you. We began by bolting the intake manifold on first, followed by the blower unit itself.
But we still needed to install the supplied O-ring gaskets, the supplied MAP sensor, and our boost-a-pump’s vacuum line.
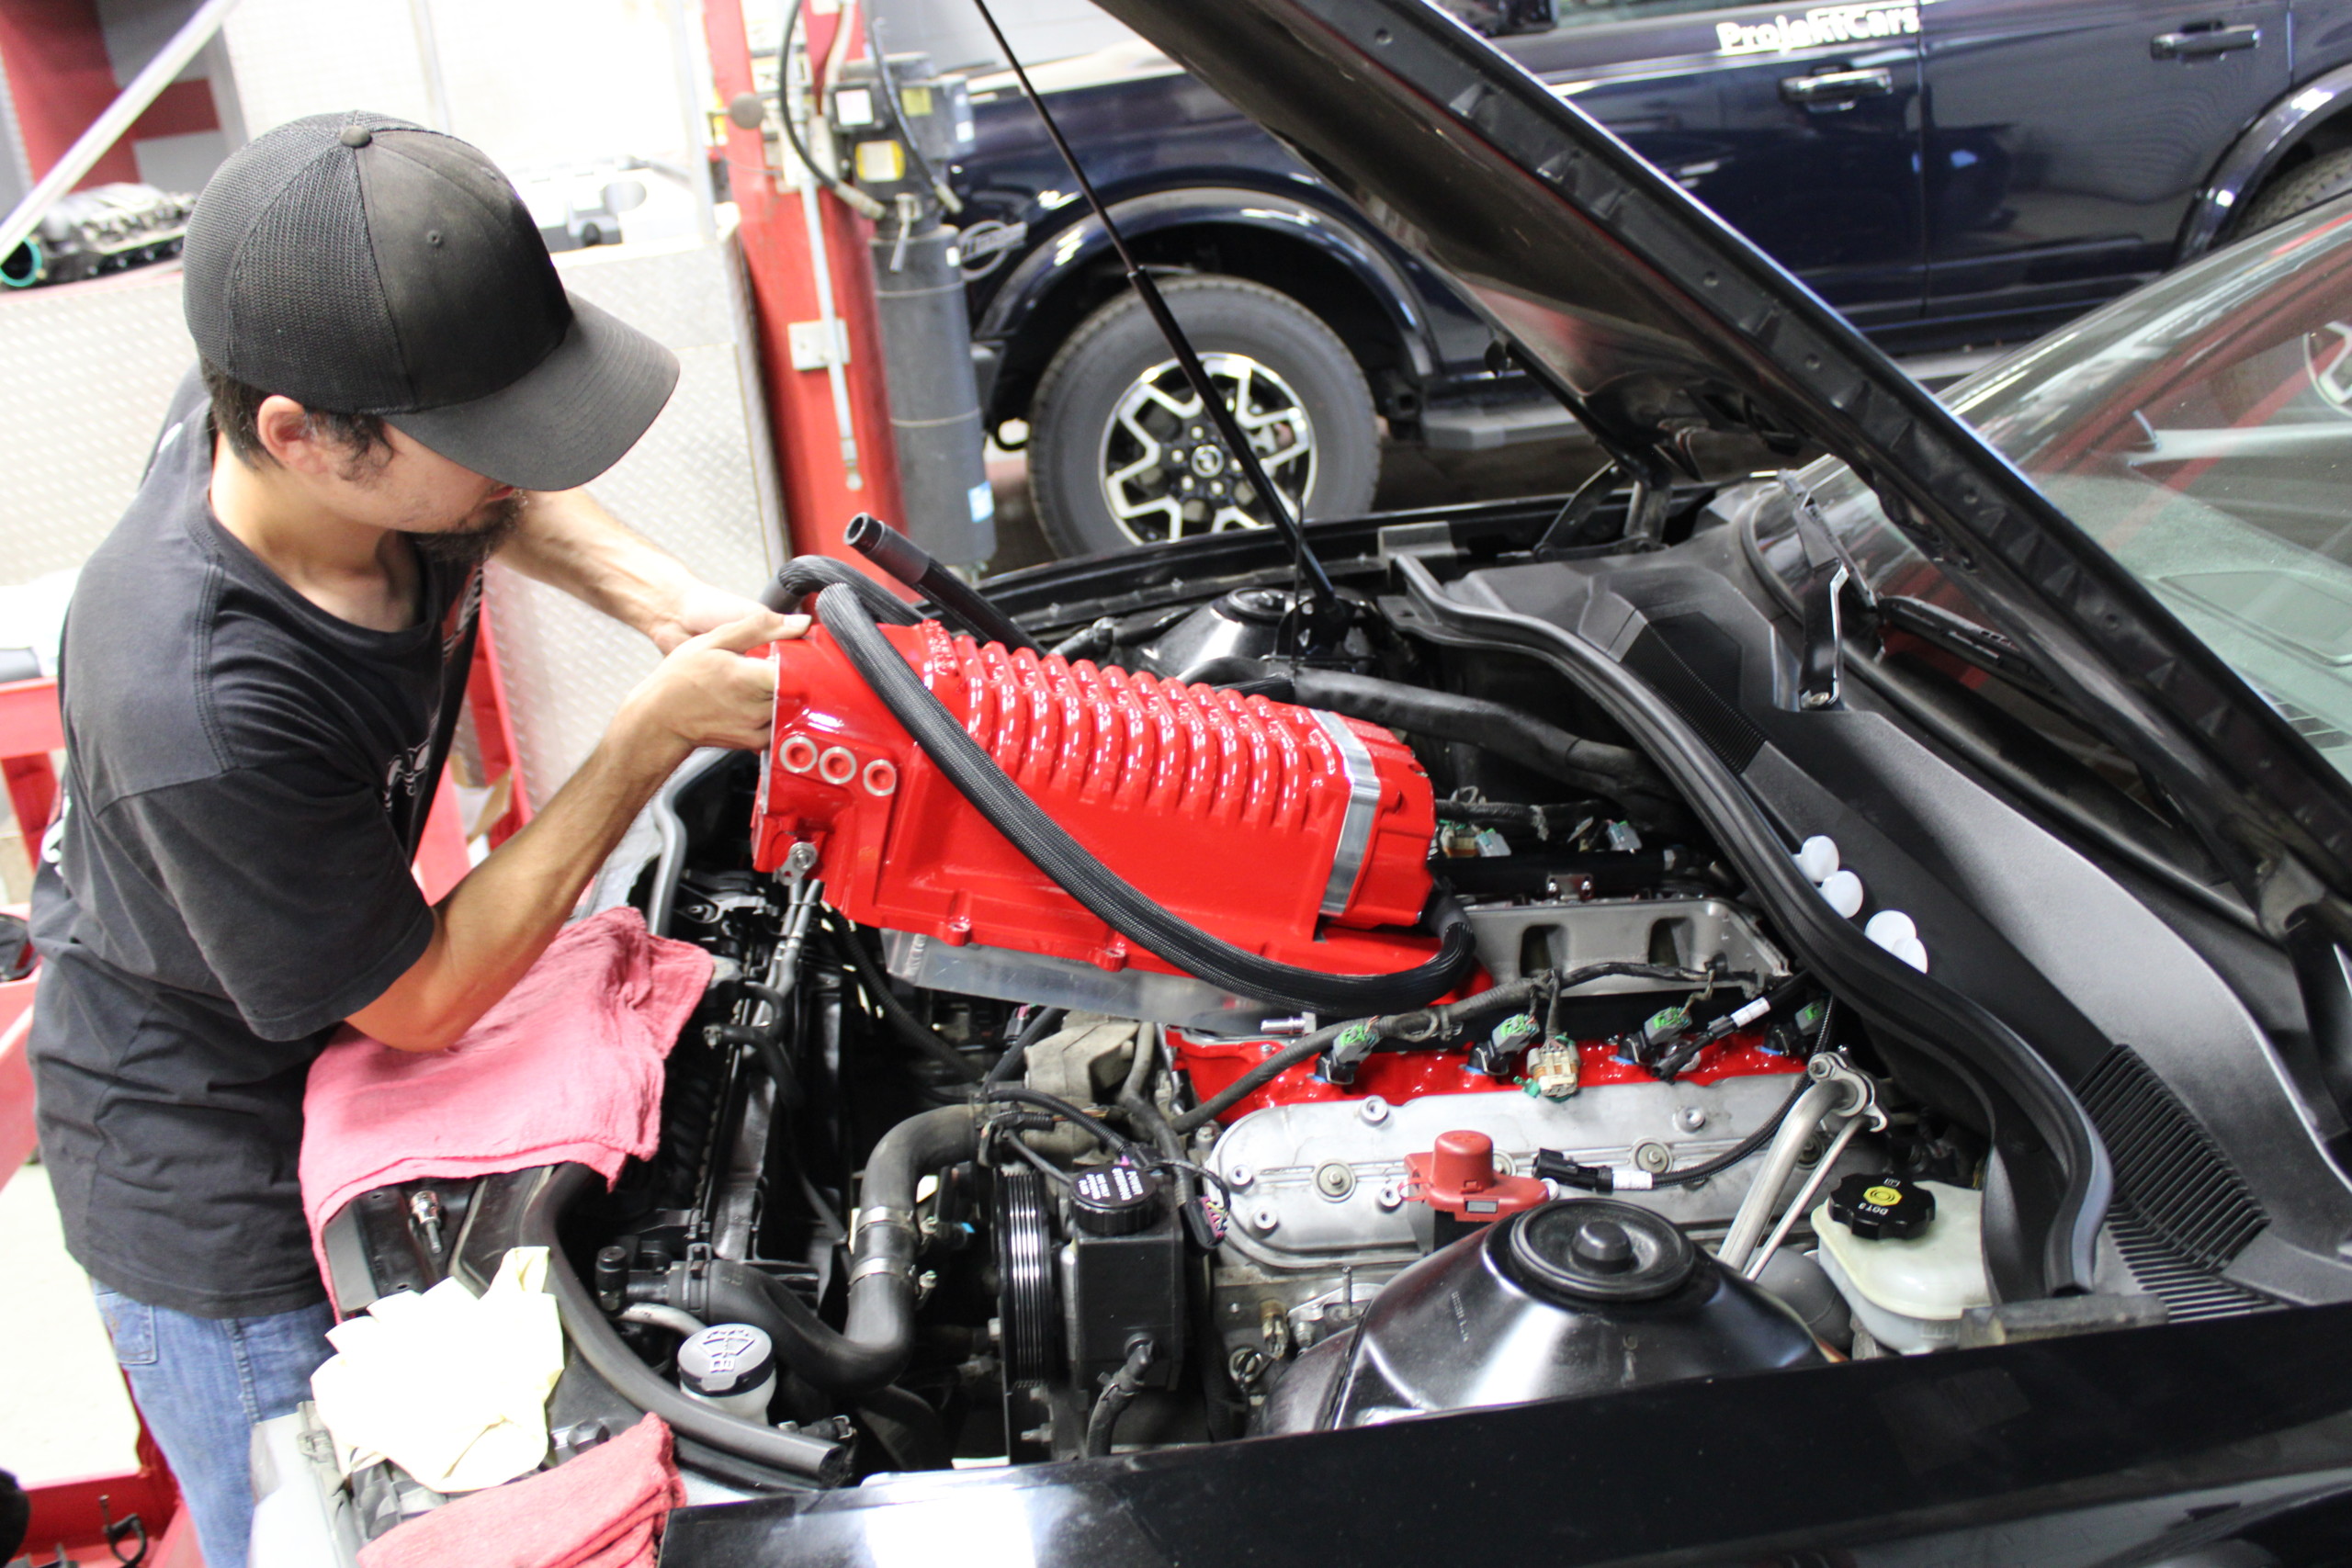
Finally, it was the big moment to bolt the blower in place and connect all the accessories.
After that, it was as simple as following the torque sequence while securing the new fasteners. Then we were able to bolt the supercharger on, but not before filling it with oil. It did involve a tricky process of setting the supercharger assembly on the front of the manifold and attaching the cooler lines, but that was accomplished with the help of an assistant which made it much easier.
Luckily we didn’t have any interference issues with the Camaro’s plastic underhood cowl, but Whipple’s directions state that some people may experience that and can easily push it out of the way while sliding the supercharger into place underneath.
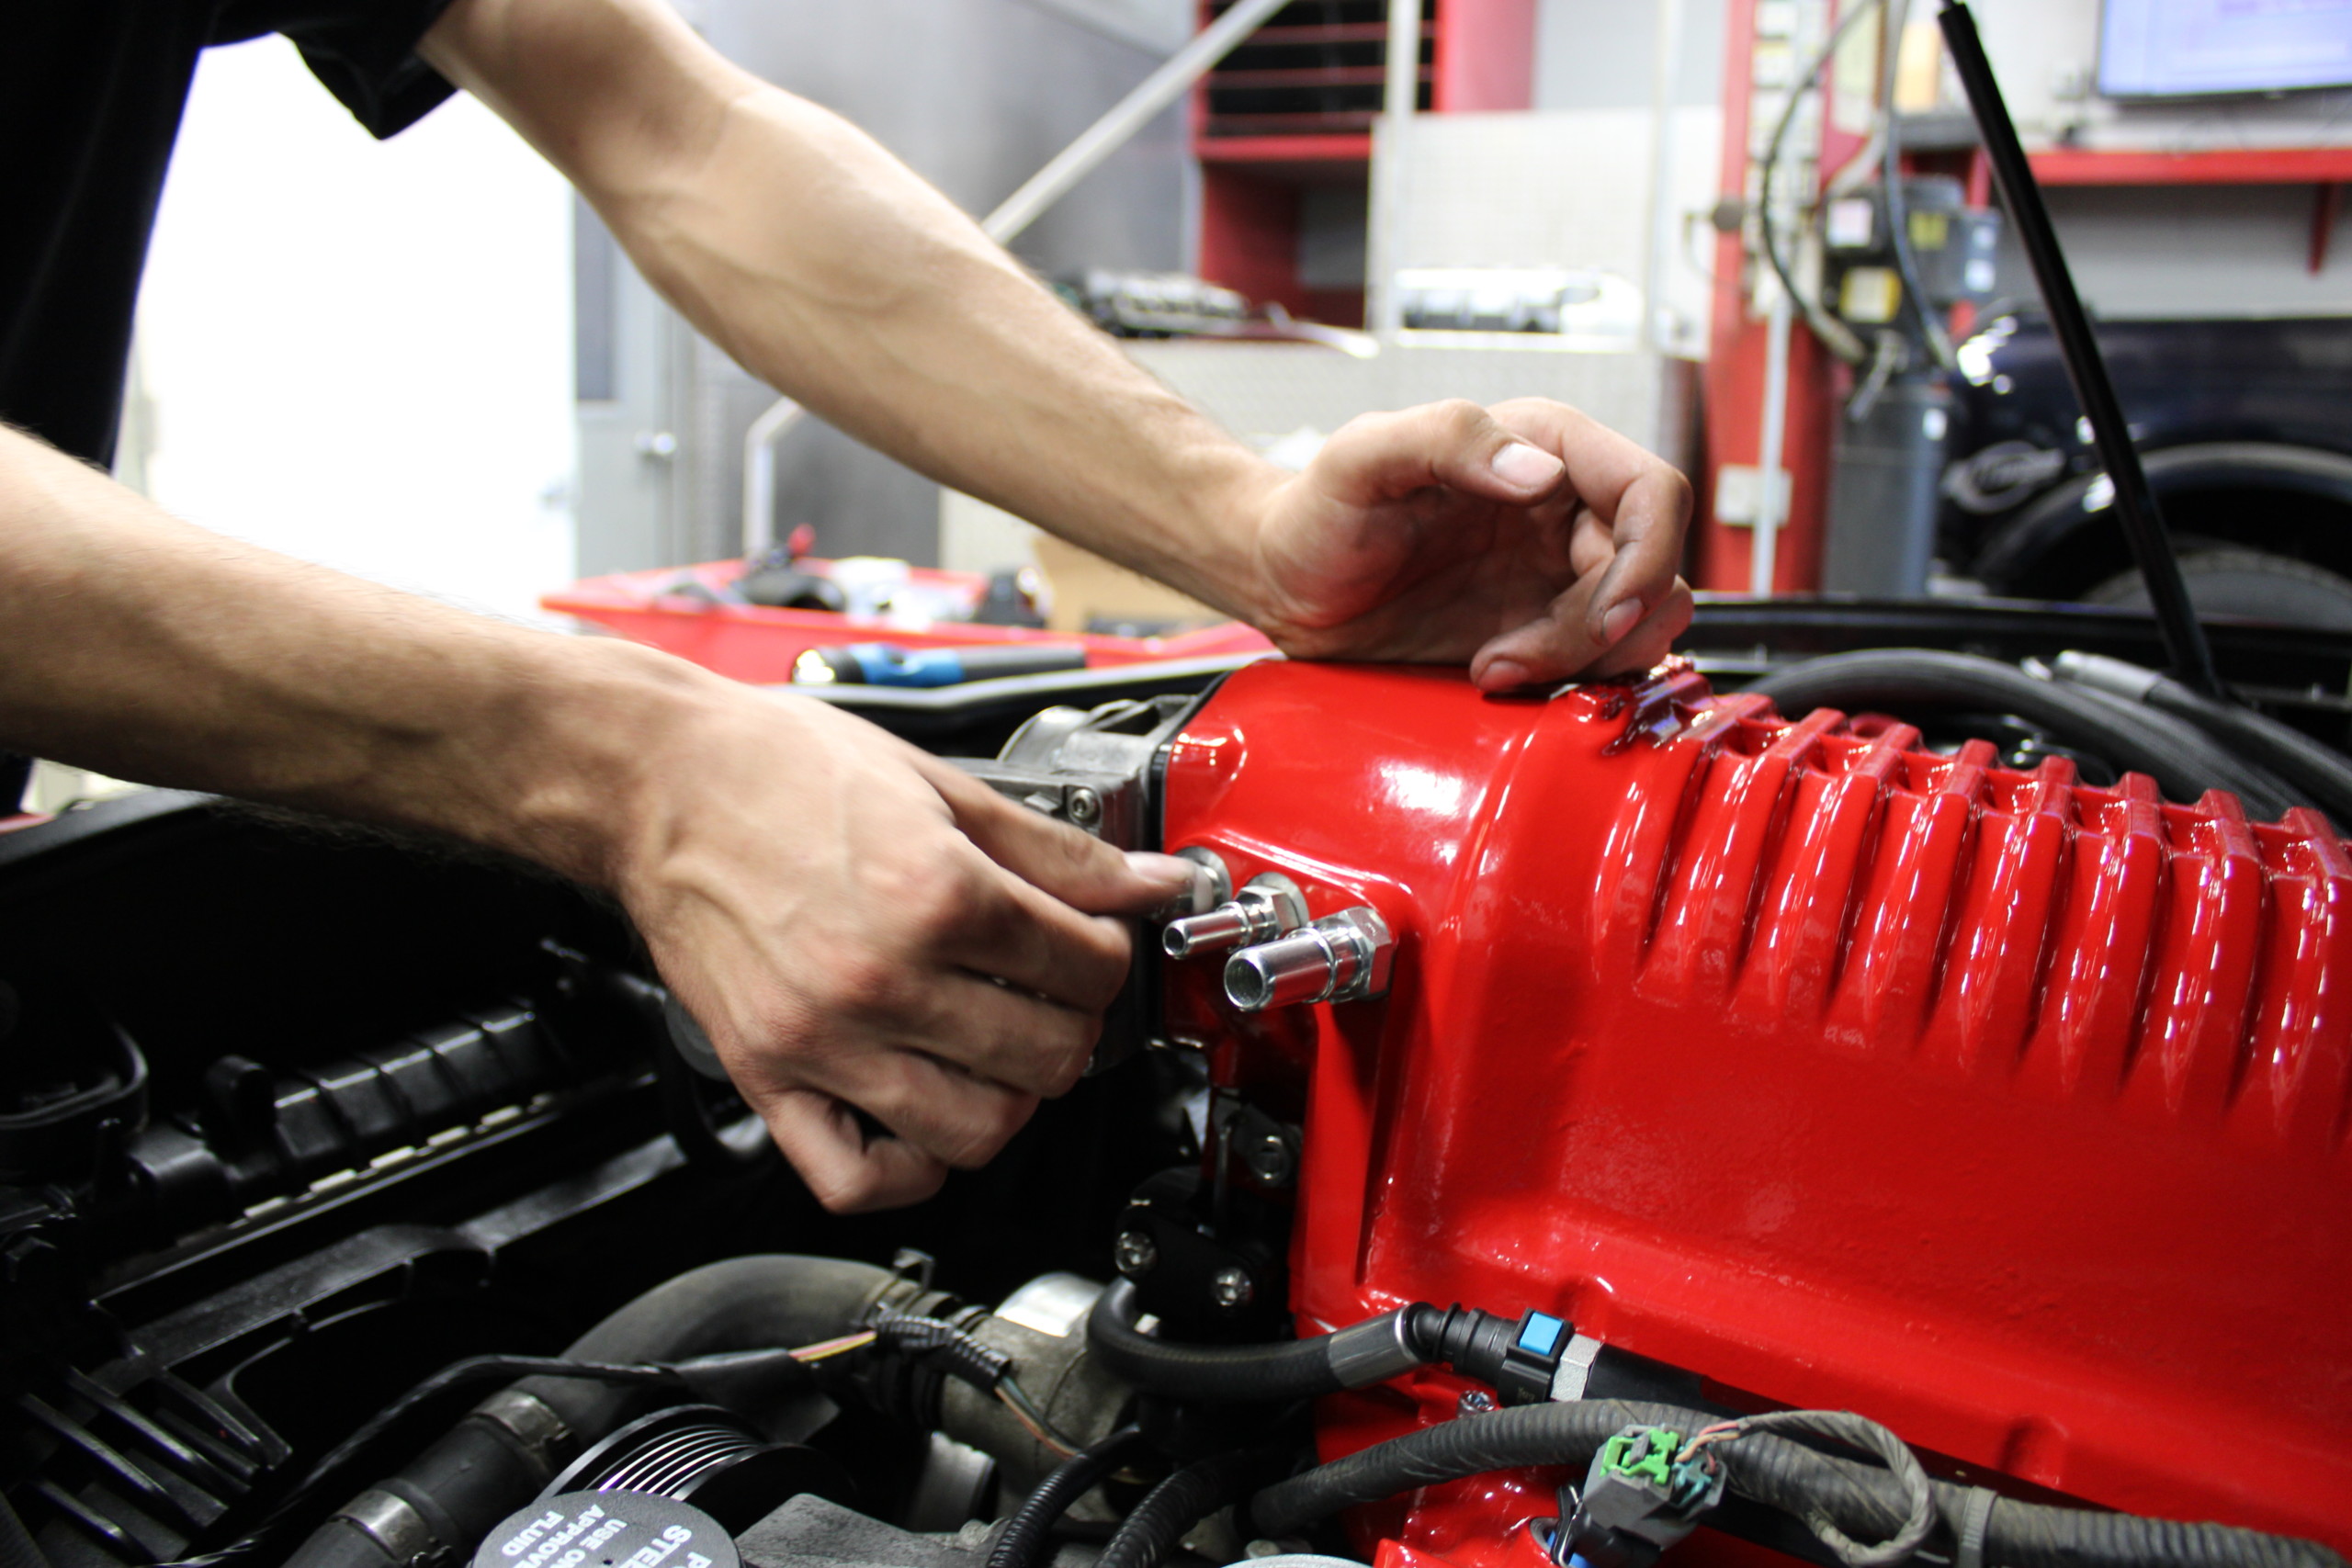
We wrapped up the blower by installing the shaft cover.
Once the supercharger was bolted on, we began connecting the brake vacuum check valve, purge hose, and throttle body. We also connected our fuel line and adjusted the vacuum actuator.
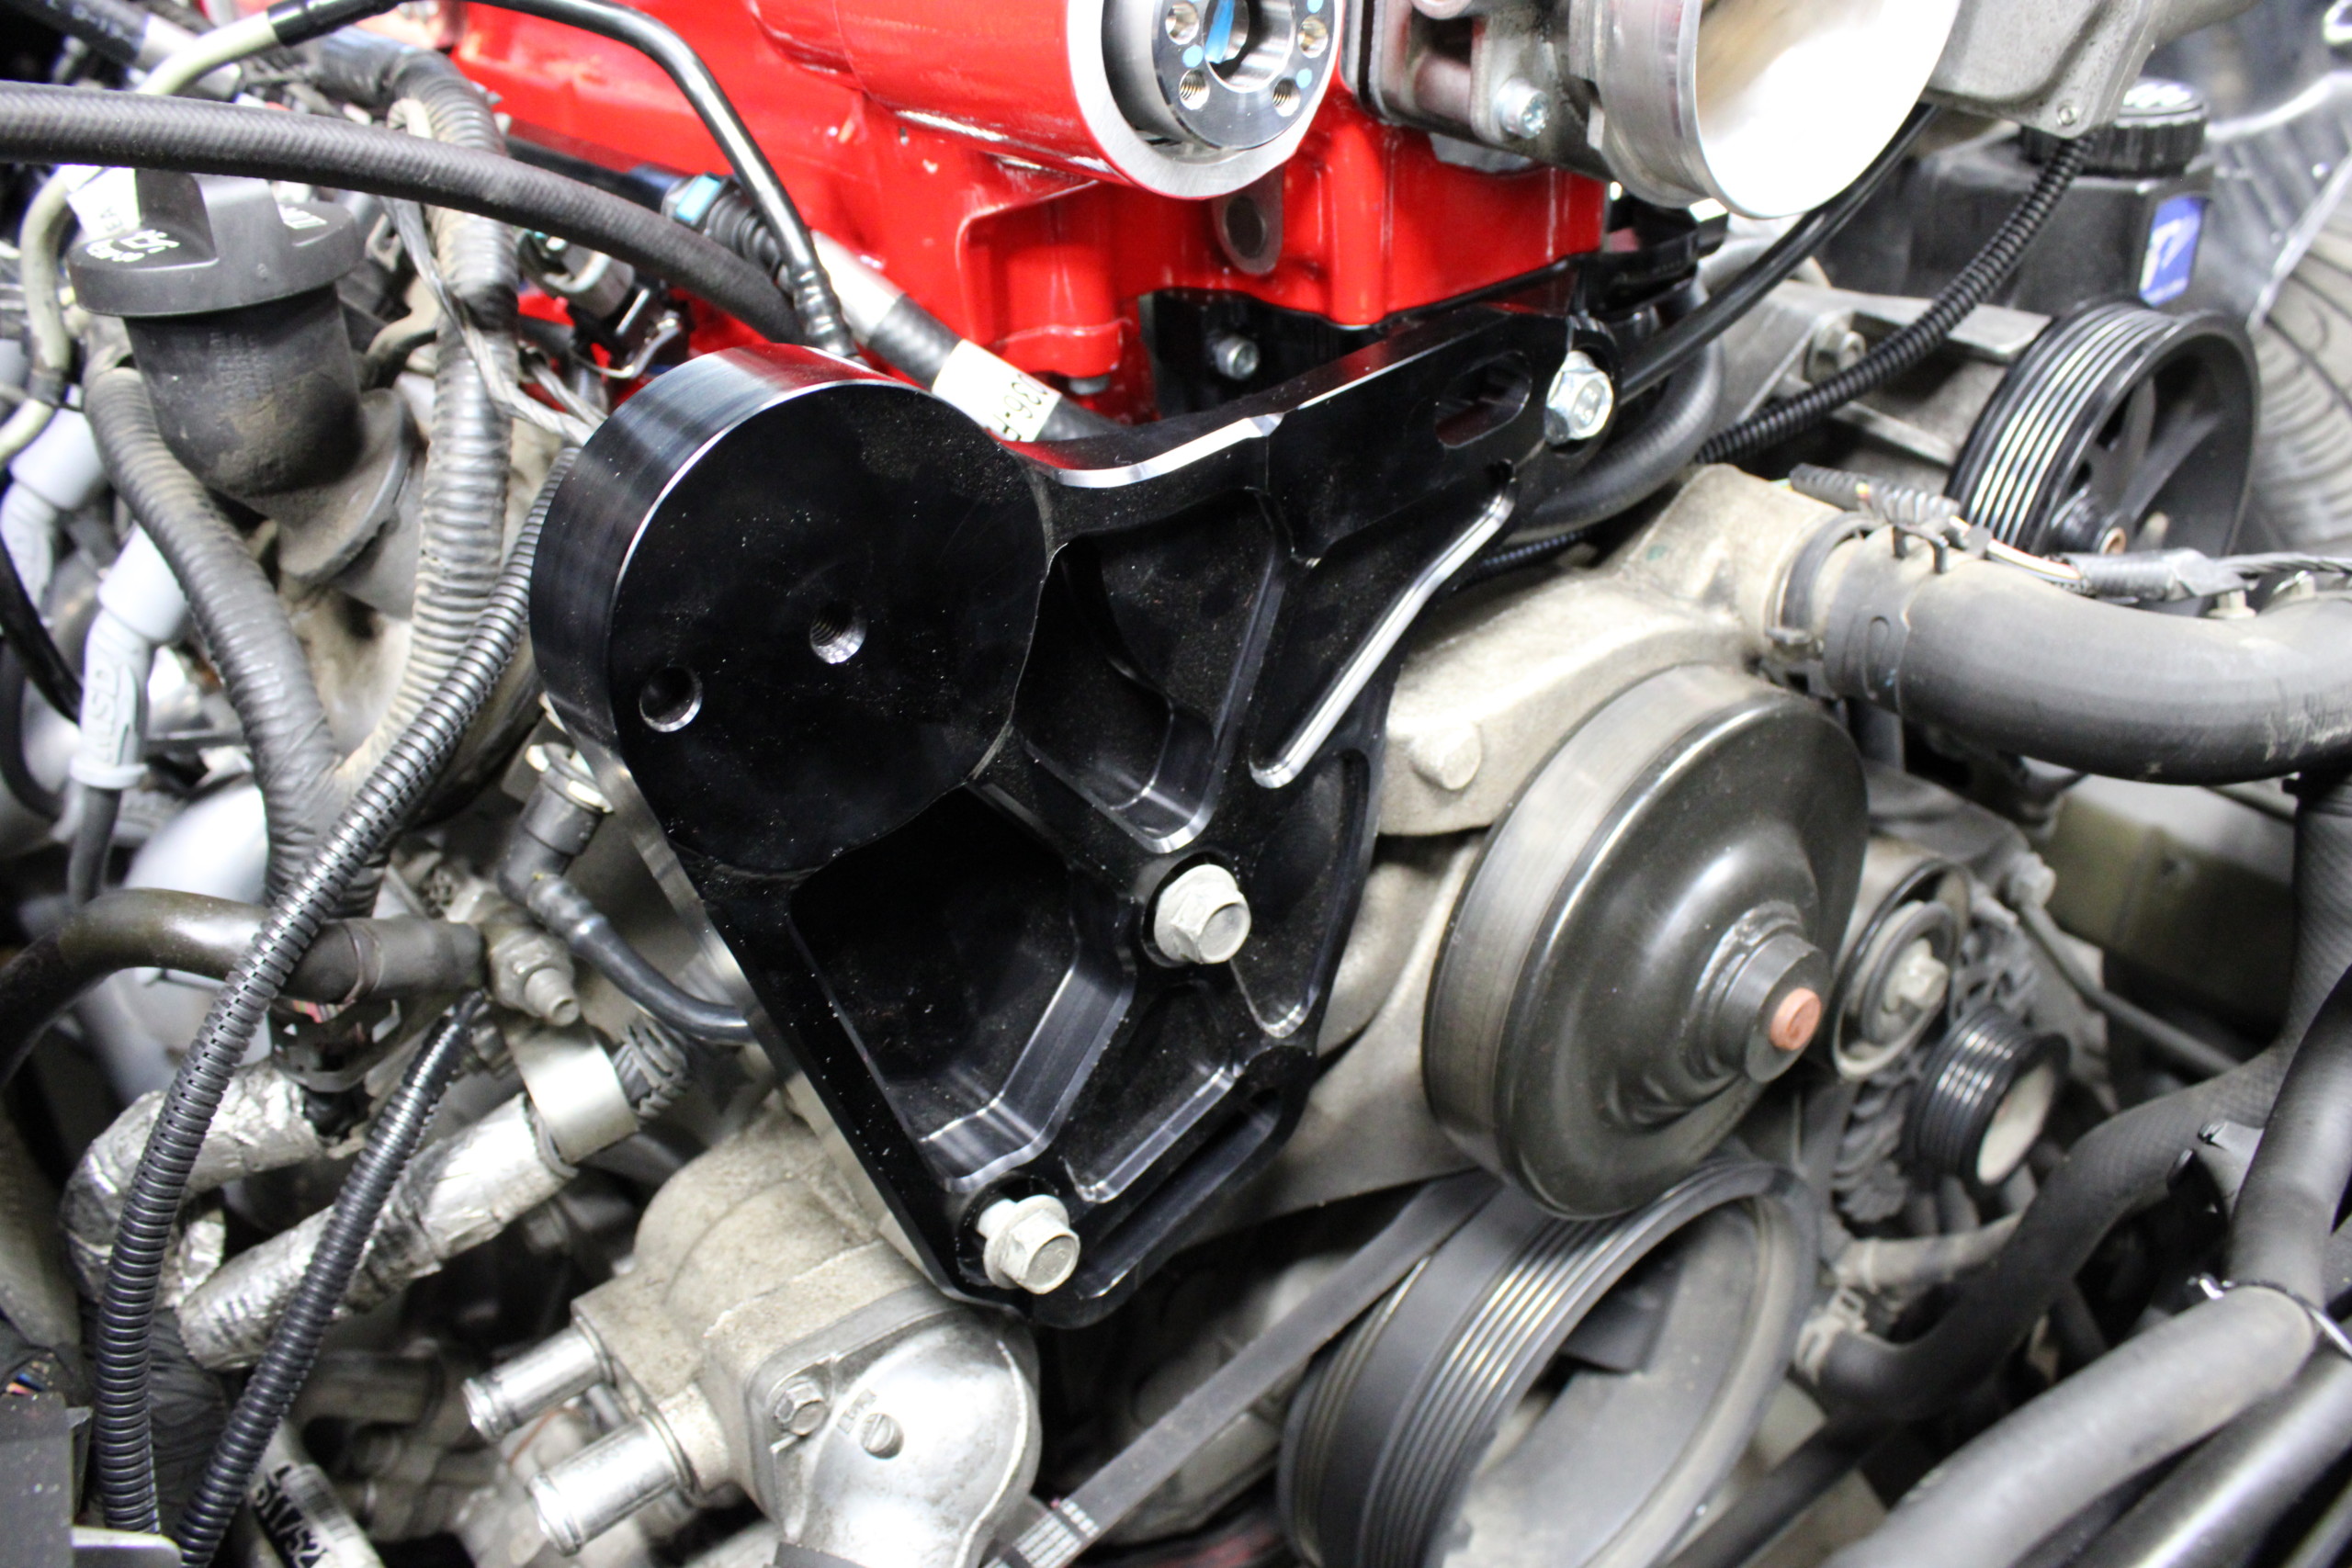
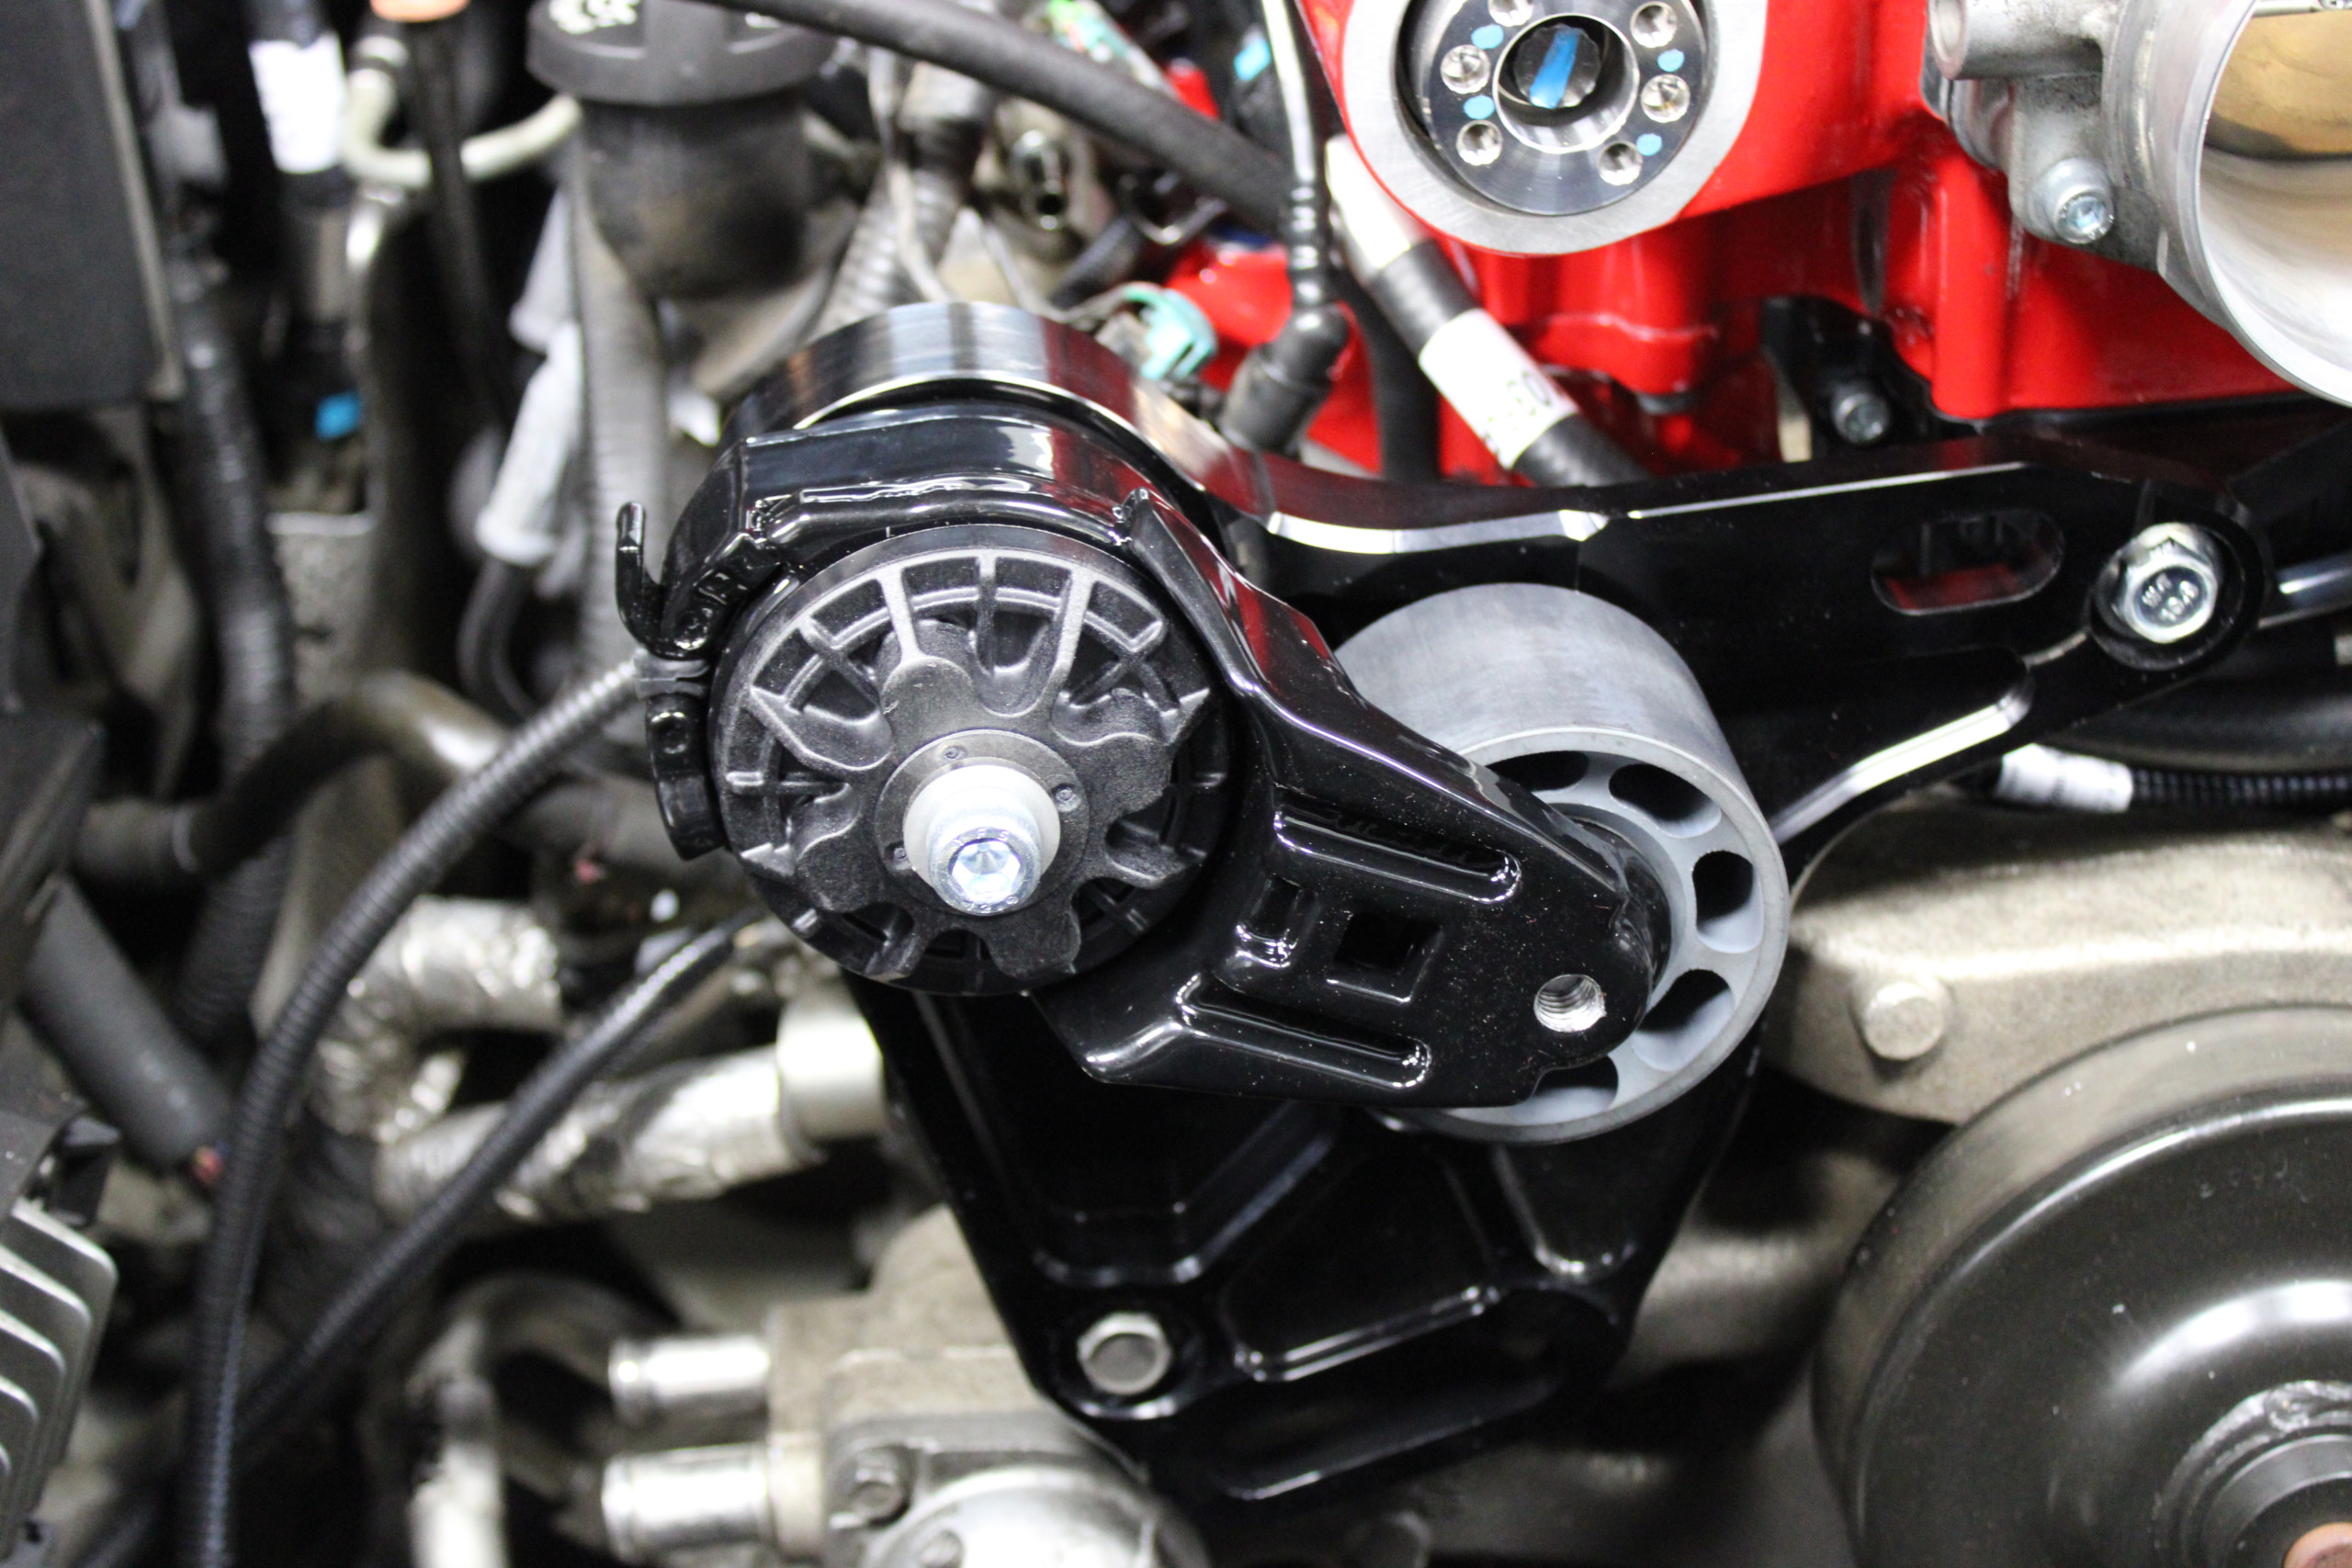
Idler pulley Plate
One of the key components of a supercharger kit that is often overlooked by those on the quest for major power is the belt. Which explains why the new idler pulley plate is so important. To prevent the blower from spitting out belts or shredding them, there has to be a proper amount of tension on it at all times, but still enough flex that they won’t snap under heavy load.
The idler pulley plate plays an integral role in the supercharger's operation, and the components, like the rest of the kit, are crafted with great care and precision.
So, one of the last steps of the install involved us bolting on the new idler pulley plate and pulleys.
Intercooler Reservoir
More than simply having a place to add or change the fluid, the intercooler reservoir serves to reduce intake air temperatures which will result in a horsepower increase.
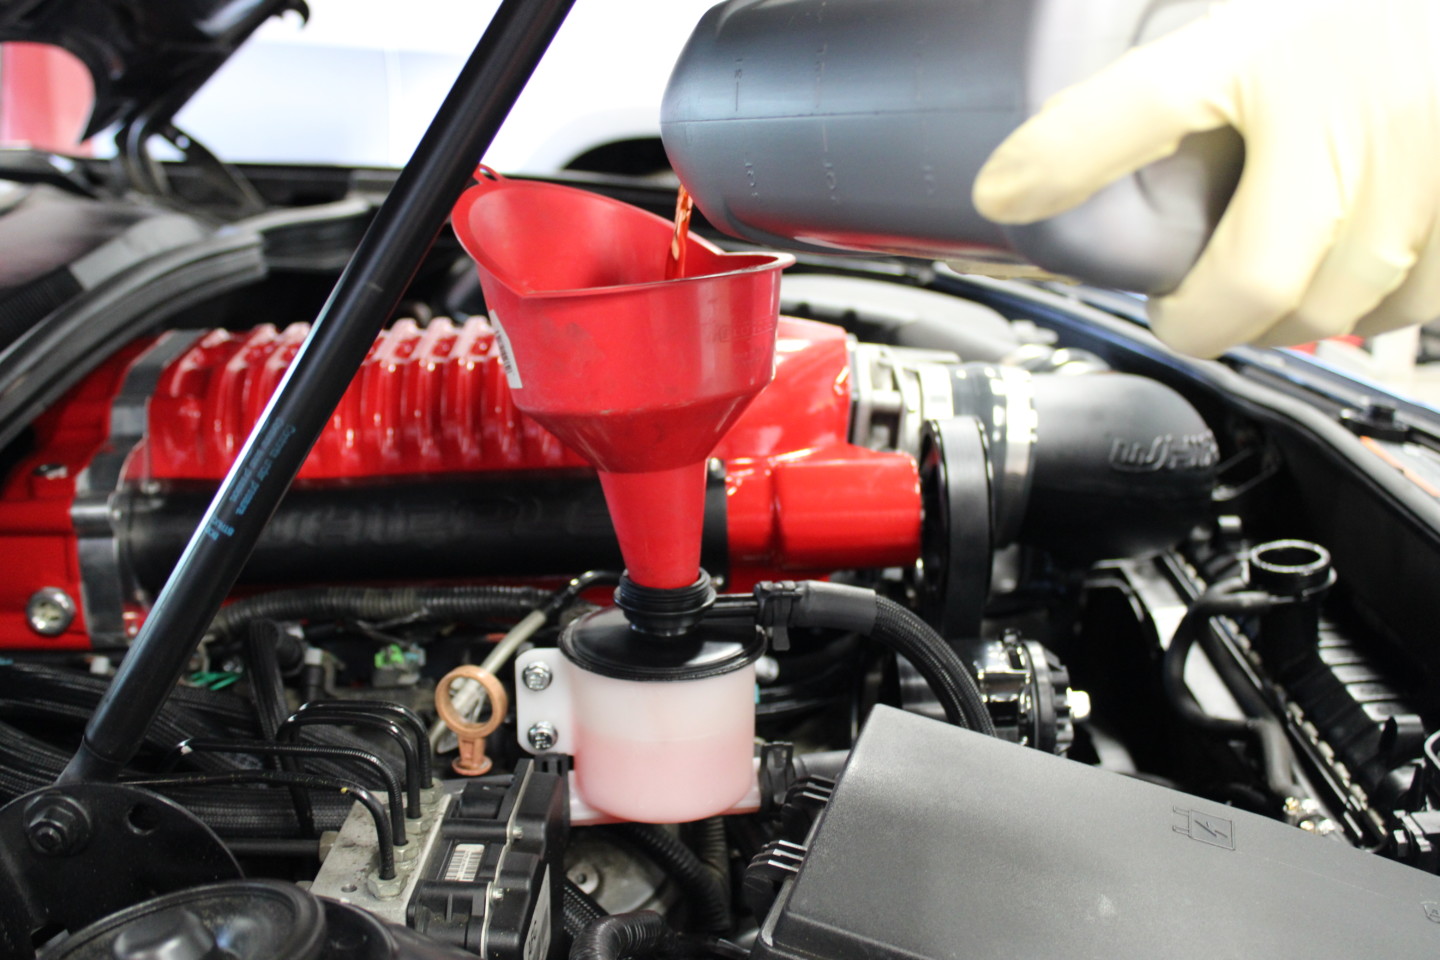
Having the reservoir mounted right next to the blower makes bleeding the cooling system easy and hassle-free.
Installing the intercooler reservoir was as simple as bolting on the supplied brackets, connecting the hoses, and, of course, filling it with fluid.
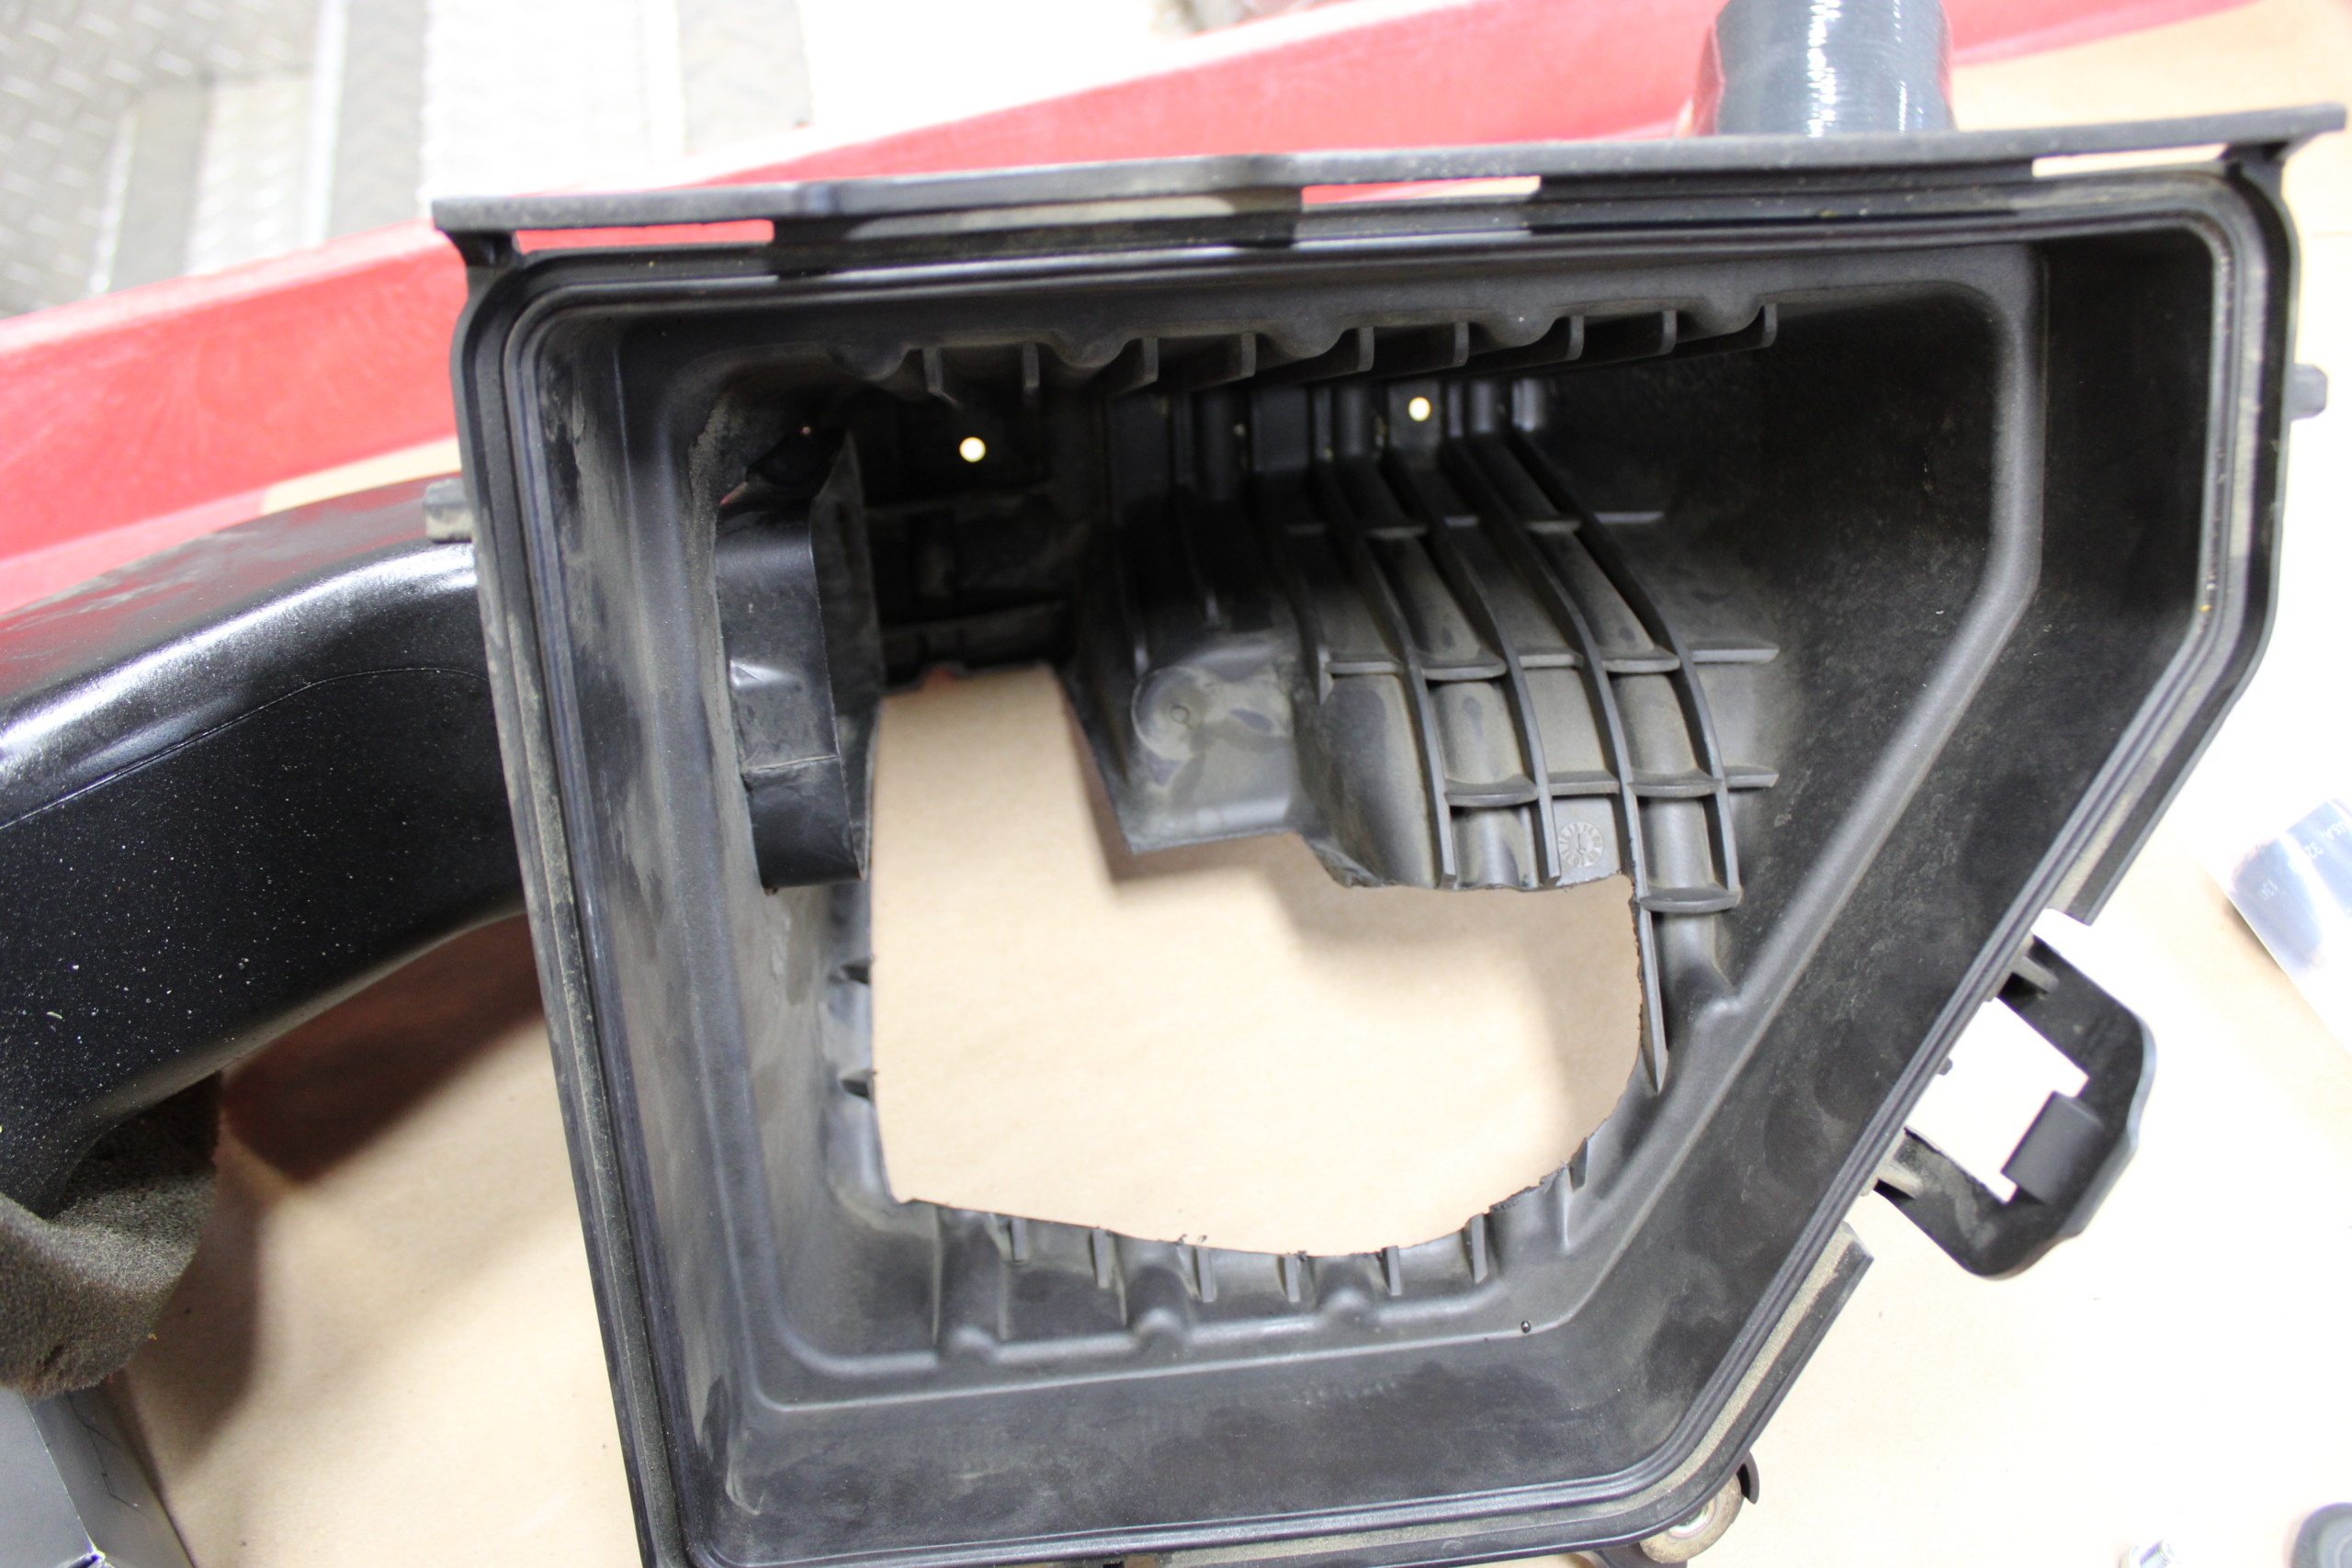
Factory Airbox Mod
The factory airbox mod gives the whole install a factory-fresh appearance while circumventing difficult tests which enables Whipple to make this kit 50-state legal.
As we mentioned previously, in order for Whipple to offer a 50-state smog-legal kit for our Camaro, it is designed to reuse the factory airbox. The instructions include a template to make the removal of plastic material for better airflow easier.
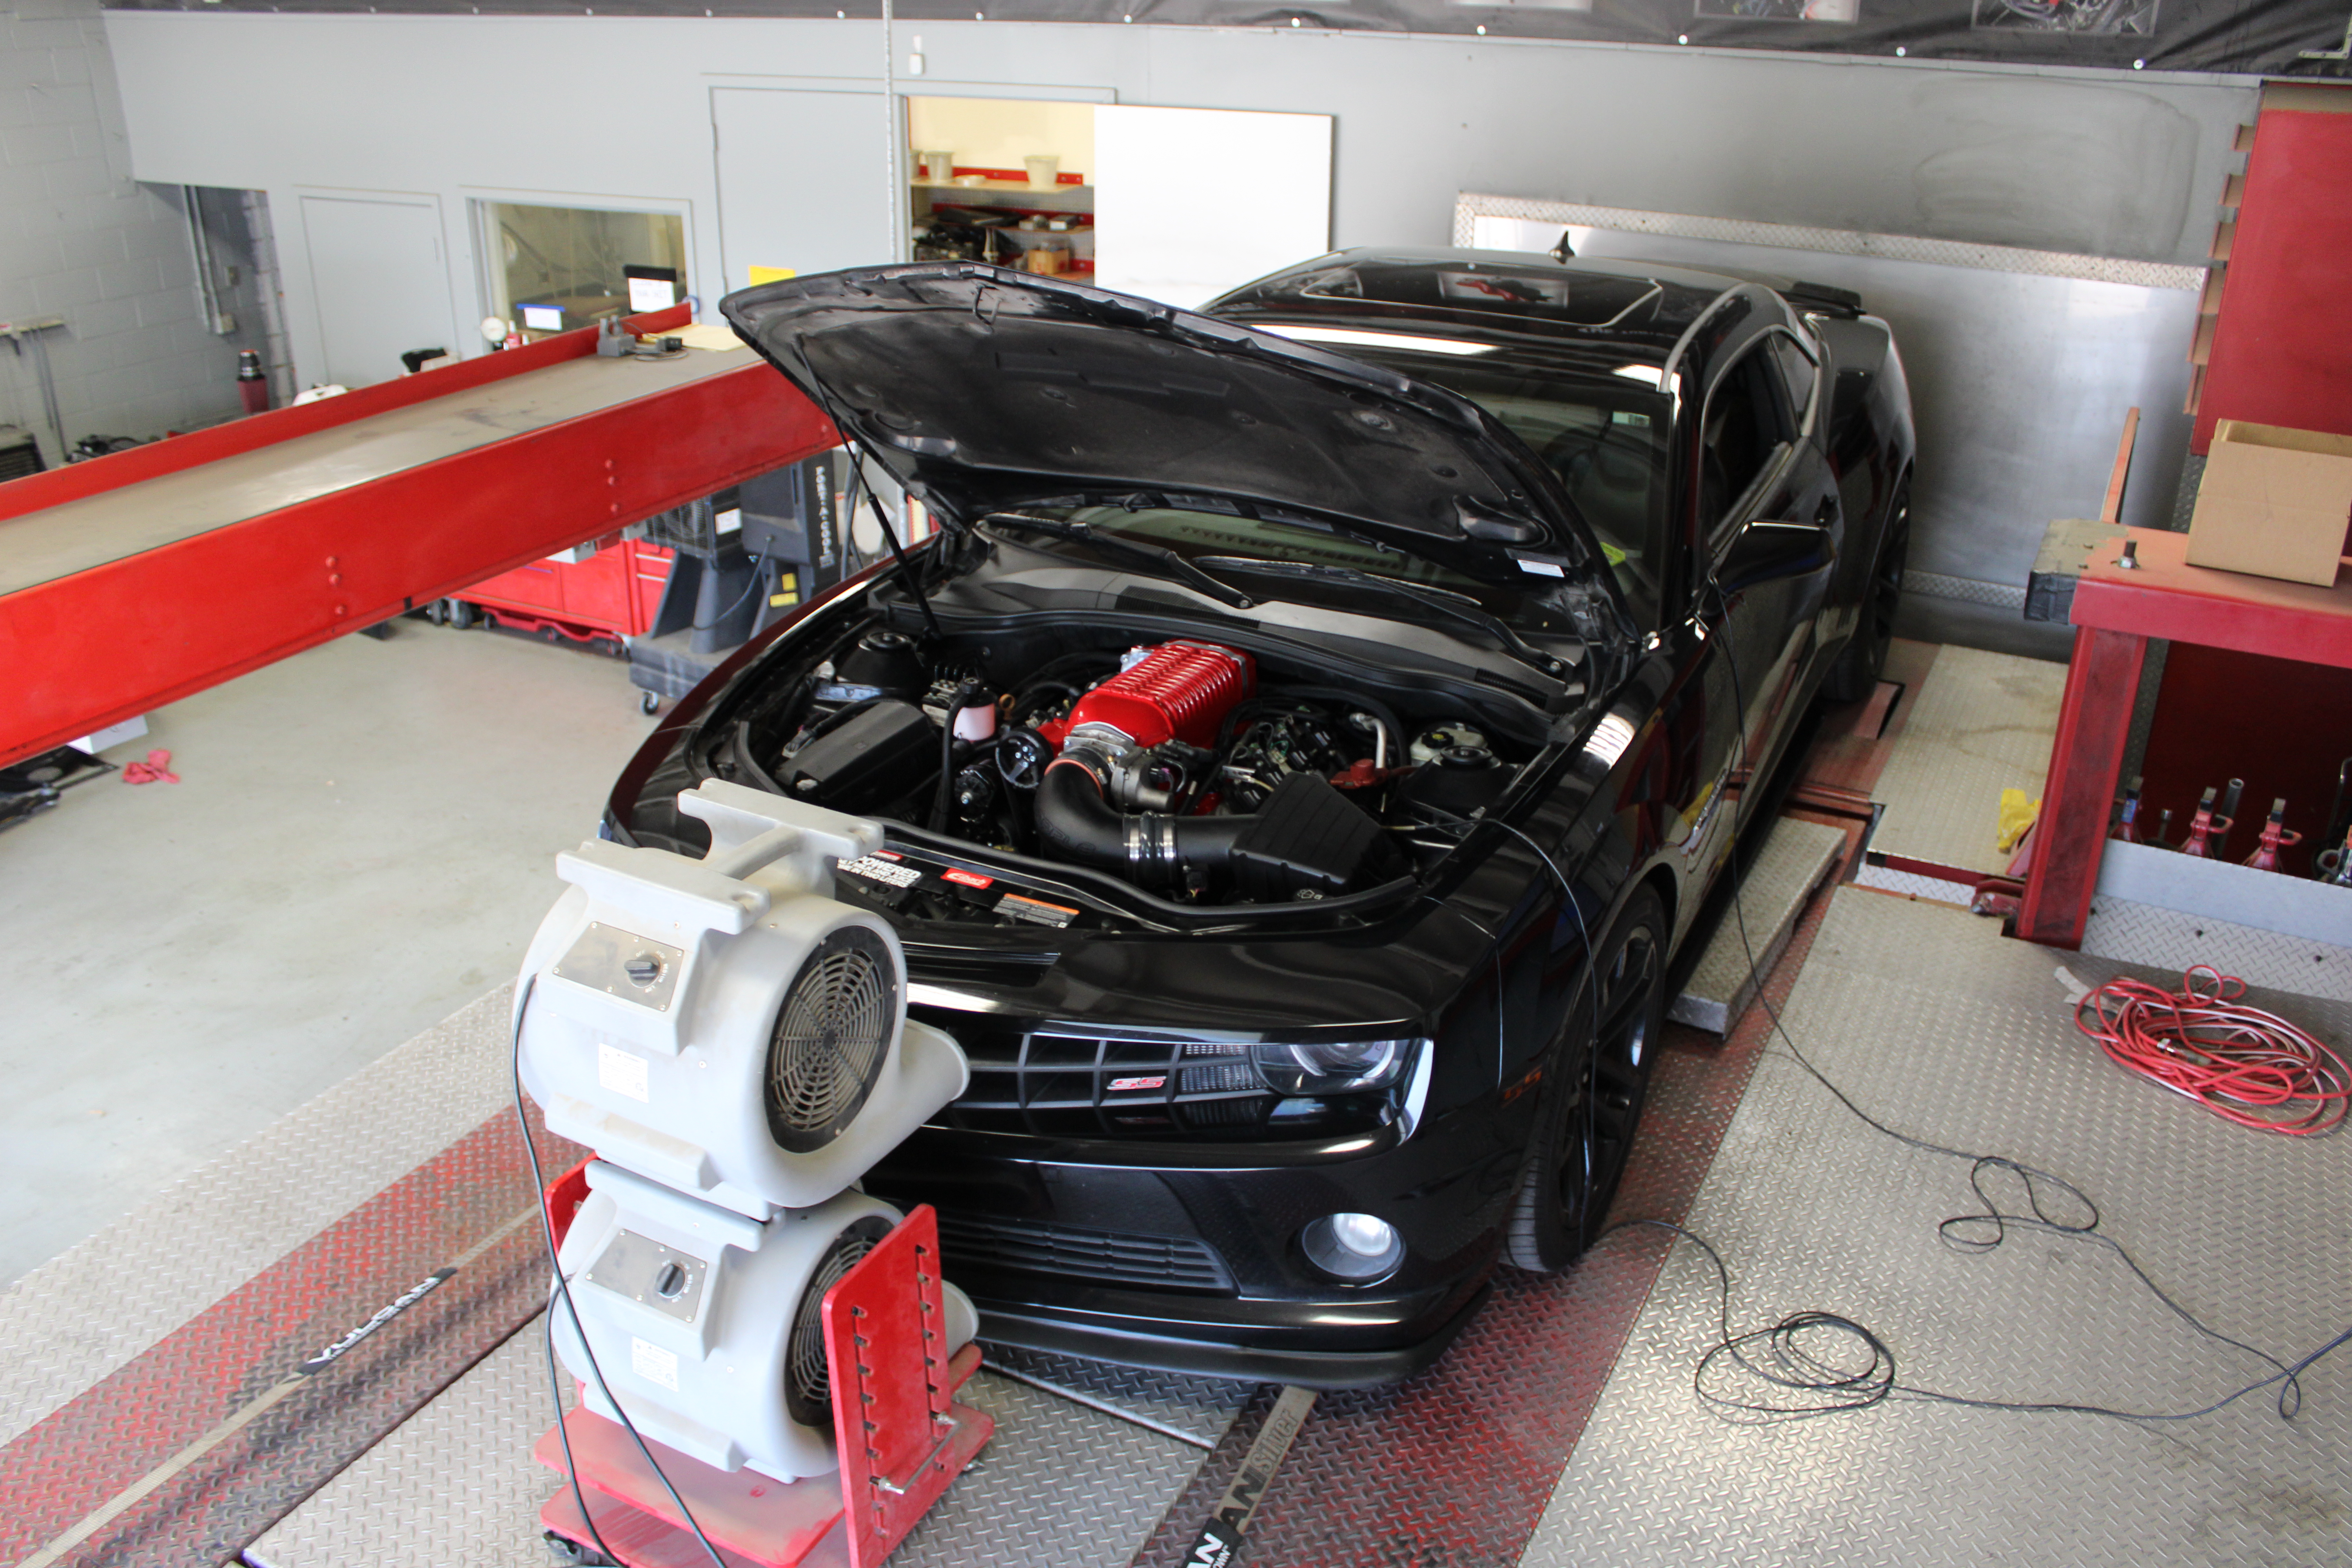
Dyno Tuning & Road Testing
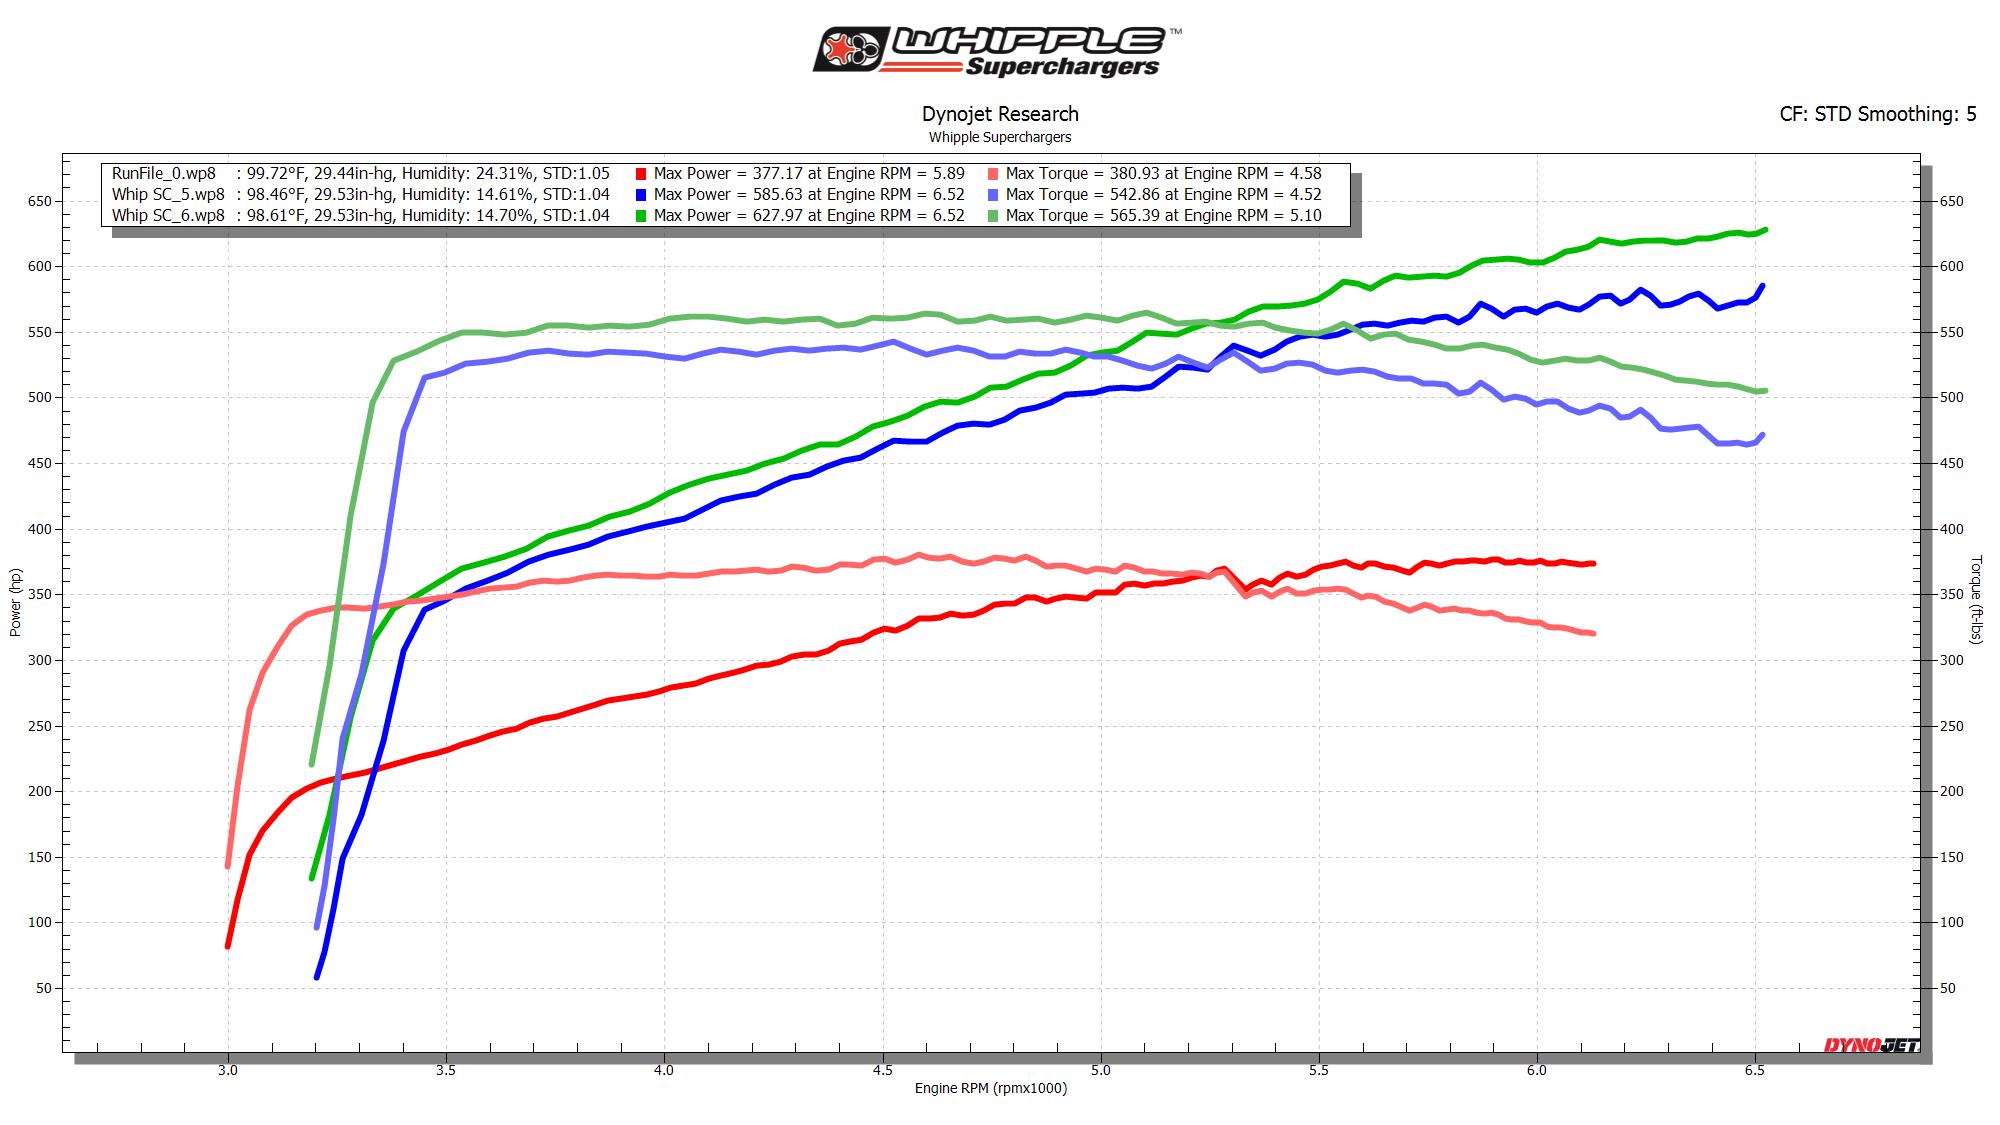
Before we turned one wrench on the project at Whipple, Dustin had us strap the Daily Camaro to the dyno for a baseline test, and even on the sweltering California day, it turned a respectable 377 horsepower and 380 max torque. Remember, until that point all we’d done to the car was bolt on a set of shorty headers, and install a canned tune from DiabloSport. Also, it’s important to note the car has quite a few miles on it – hence the Daily Camaro moniker.
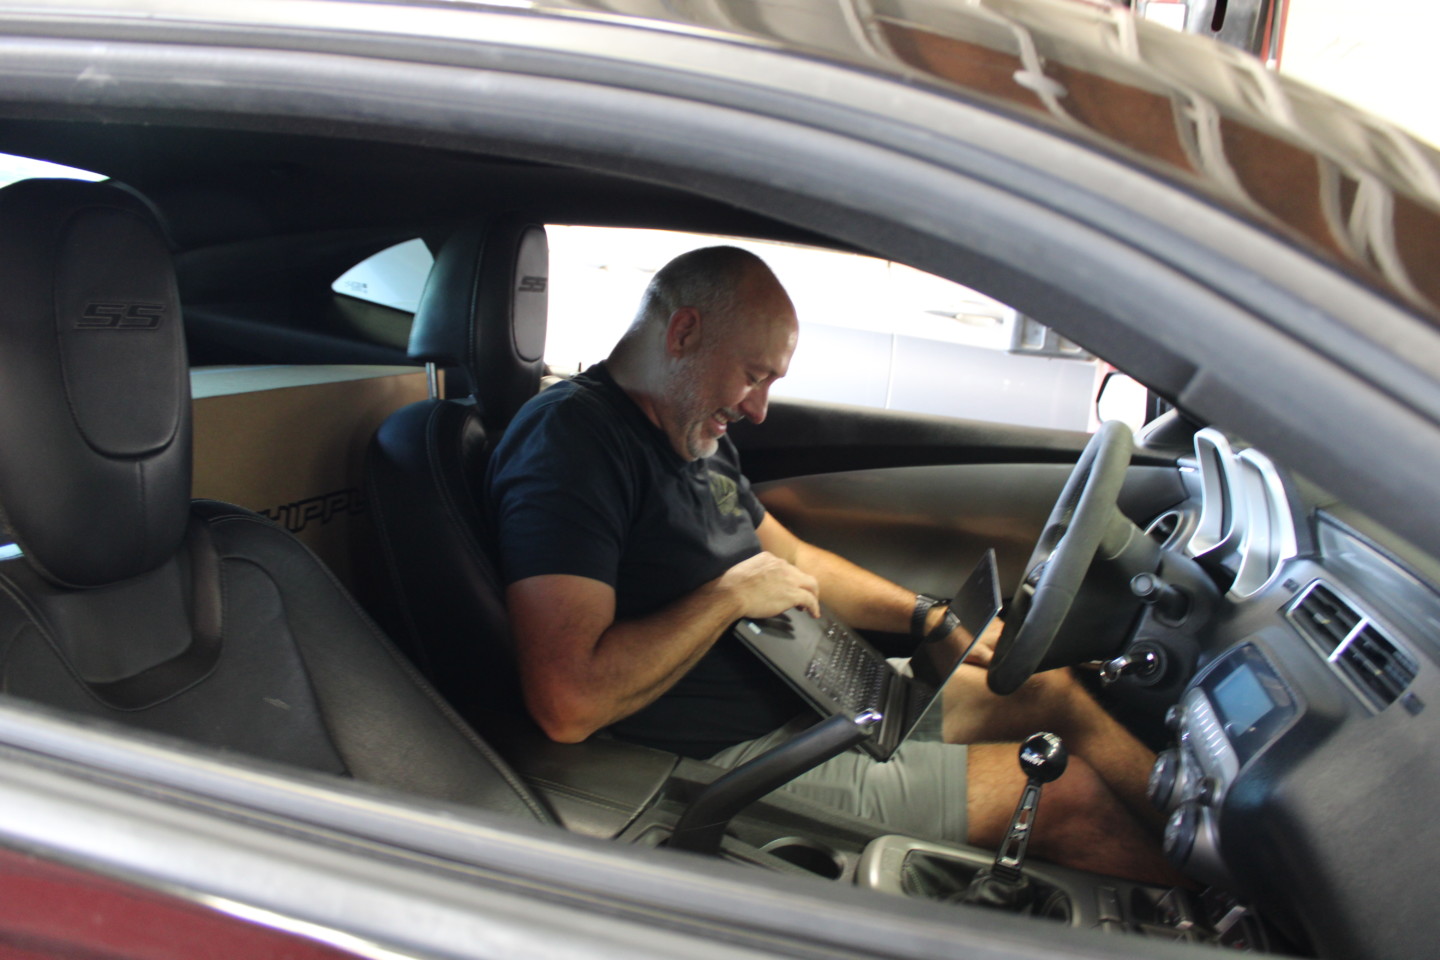
Dustin having a blast tuning the Daily Camaro.
After bolting on the new blower, installing the heat exchanger, handling the airbox mod, connecting all of the necessary sensors, and bolting our front bumper, fender liners, and wheels back on, we were ready to handle things on the Dyno once more to see how much power our new Whipple supercharger afforded us.
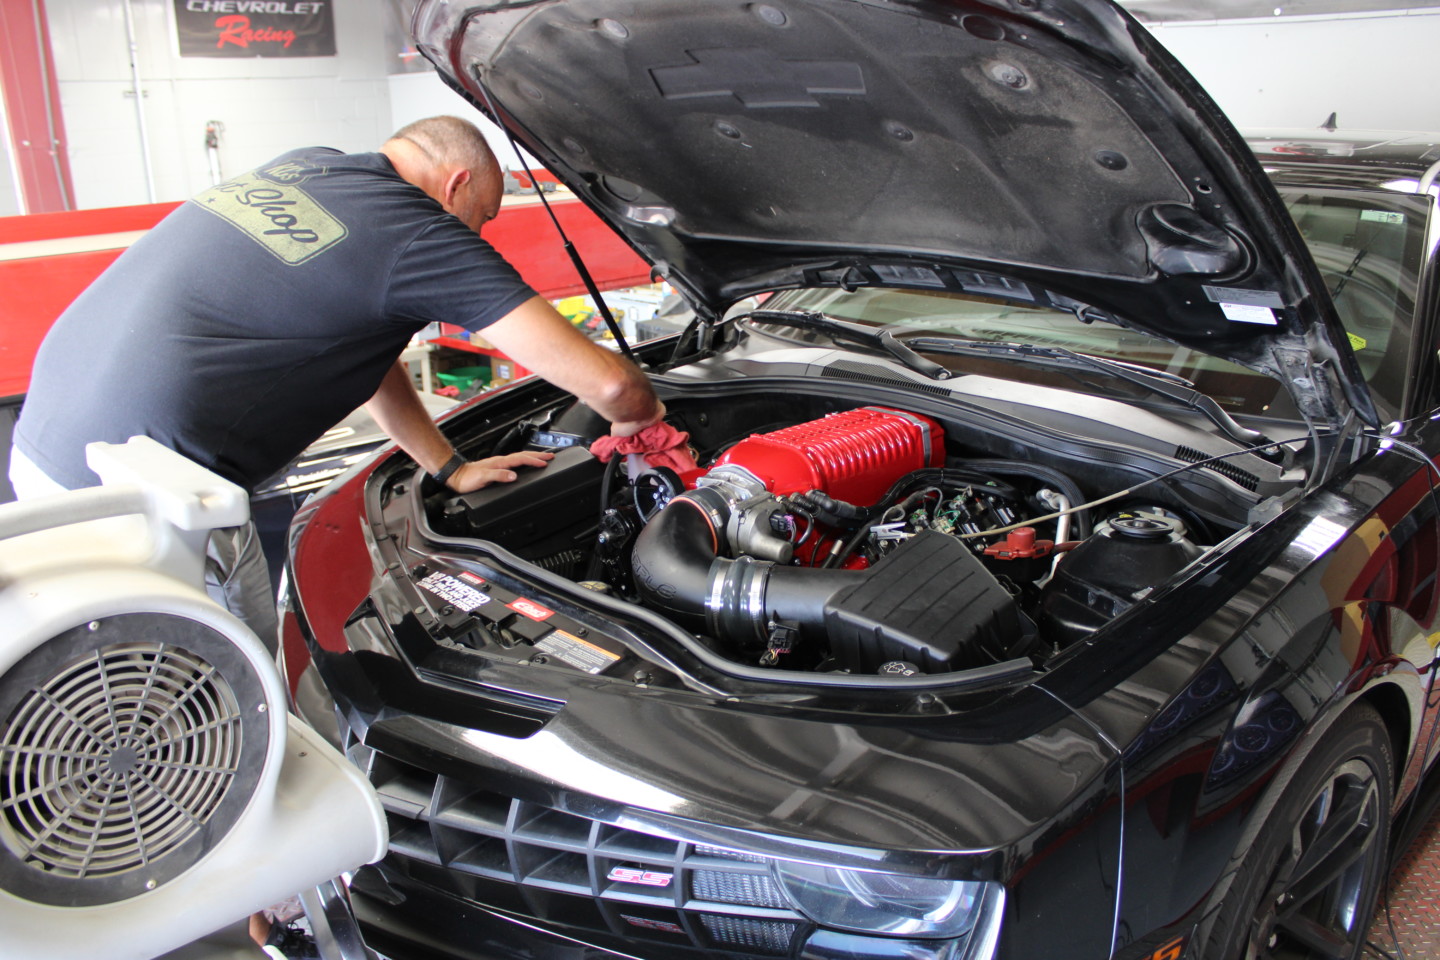
Dustin double-checking all of the coolant lines before we make some heavy dyno pulls.
We should note, Dustin is a straight-up magician when it comes to dyno tuning, so after he worked his wizardry on the laptop using the supplied HP Tuners software, we were absolutely blown-away (no pun intended) by the results!

After all was said and done, the Daily Camaro made 629hp to the rear tire with its new Whipple 2.9L supercharger. Impressive to be sure!
Dustin made a few initial dyno pulls – the first of which was immediately impressive (585hp and 542tq), but they just kept getting better and better. After pouring in some octane booster to account for the engine’s high mileage and mitigate any risk of detonation, we got to some max-effort tuning. Bumping our octane level up a few points gives us an indication of the results we can achieve using premium gas outside the state of California. The final pulls netted us a final result of 629 horsepower and 565 max torque to the rear wheel. That’s a gain of 250 wheel horsepower and 185 pound feet of twist!!!

The numbers really do speak for themselves! Remember, this is a mostly stock high-mileage 2010 Camaro SS with little more than a bolt-on blower.
Driving Impressions
Having spent the past few months driving the Daily Camaro around with practically double the amount of power it previously had, we can tell you a number of things. The first of which is, IT IS AWESOME! Seriously, to quote the great Ferris Bueller, “It is so choice. If you have the means, we highly recommend picking one up.”
The power is immediate and propels the Daily Camaro around town like a missile from one destination to the next. However, that power isn’t unwieldy at low speeds. In fact, it’s easy to forget all that power lurking under the hood on the occasional trip to the grocery store or gym.
It’s only when you crack the throttle open and really put the spurs to it that the Camaro becomes a different animal altogether. Thanks to the bright red Whipple Supercharger, passing in any gear on the highway makes it nearly impossible to not smile ear to ear.
Parting Thoughts
As we wrapped up our time at Whipple, we stood there with the hood popped and Dustin commented on why he feels they’ve been successful in a space that has some steep competition. They’re all vying for the attention of the horsepower hungry masses, but Dustin mentioned one of the things that he thinks makes them different,

“Look, everyone makes a good supercharger, it’s the packaging we pride ourselves on, and frankly, it’s something we feel we do better than everyone else. Obviously, that’s just our opinion, but we simply don’t cut any corners. We make sure the intercooler is the biggest and newest design for the highest amount of flow. The water fittings, the hoses, the barbs – everything is pre-cut and pre-made so it’s all plug and play. We do everything clean so we don’t have to grind, drill, or cut if we don’t have to. We really try to make it look semi-OEM, but a little sexy at the same time. We want to make sure it pops enough but also looks like it could have been there from the factory.”
If there’s one thing we learned during our time at Whipple, it is that they are constantly improving and unwilling to compromise.
Whipple doubles down on power and finds creative ways to make factory designs work around their products. They basically say, “screw space-saving accommodations, we’re going to find a way to stuff this blower under the hood of your ride,” and we like that.
Check out
Whipple.com to see everything the house of whine has to offer.